Why Day-One Setup Matters for Battery Health
The first day with a new portable power station is more important than it looks. How you charge, where you place it, and what you test on day one can influence both safety and long-term battery performance.
Modern portable power stations usually use lithium-based batteries. These are stable and efficient, but they still benefit from good habits: moderate temperatures, avoiding extremes of charge and discharge when possible, and not pushing the unit harder than it is designed to handle.
This guide focuses on what to do during the first setup so you build routines that protect your battery and help your power station perform reliably in real-world situations like short outages, camping trips, and remote work.
Unboxing and Initial Inspection
Before you ever plug in your power station, take a few minutes to inspect it. Early checks can catch shipping damage or issues that might affect safety or lifespan.
Check the Exterior for Damage
Look over the unit and accessories carefully:
- Housing: Check for cracks, dents, or loose panels.
- Ports and outlets: Ensure AC, DC, and USB ports are straight and firmly mounted, not bent or wobbly.
- Cooling vents and fans: Make sure vents are not blocked by packaging debris.
- Cables: Inspect power cords and adapters for cuts, kinks, or exposed wires.
If you see damage that looks structural or electrical, do not power on the unit. Contact the seller or manufacturer for guidance.
Find and Read the Essential Sections of the Manual
You do not need to memorize the entire manual, but you should find and understand:
- Battery type and basic limits: Such as maximum AC output power and recommended operating temperature range.
- Charging methods: How to charge from a wall outlet, vehicle outlet, and solar, plus any noted limits for each.
- Storage recommendations: Suggested charge level and environment for long-term storage.
- Warnings and prohibited uses: For example, what not to plug in and where not to place the unit.
These details inform how you treat the battery from day one and help avoid early misuse.
| What to check | Why it matters | Day-one notes |
|---|---|---|
| Physical damage or loose parts | Prevents unsafe operation and early failure | Stop and contact support if anything looks serious |
| Cables and adapters | Avoids overheating and poor connections | Use only undamaged, correctly rated cords |
| Battery charge level indicator | Helps decide whether to charge before use | Note the level before the first full charge |
| Vent and fan openings | Ensures proper cooling from the start | Keep at least a few inches of clearance |
| Operating environment | Protects battery from temperature extremes | Avoid very hot, very cold, or damp locations |
| Basic controls and display | Reduces misuse and confusion later | Identify power, AC, DC, and USB buttons |
| Included safety warnings | Clarifies prohibited uses | Pay attention to high-load and indoor use warnings |
Example values for illustration.
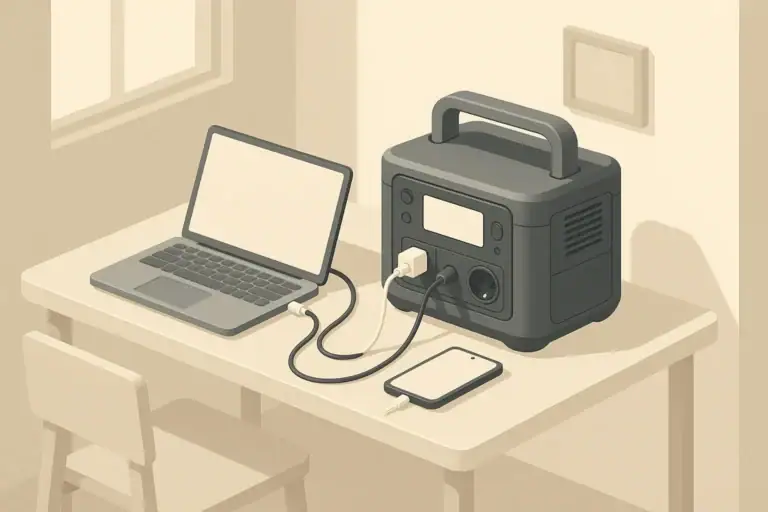
Choose a Safe Location for First Use
Where you place the power station from day one shapes how safely and efficiently it runs. Good placement helps cooling, keeps cords organized, and reduces trip hazards.
Prioritize Ventilation and Stability
On day one, set the unit in a location that can become its “home base” for most charging sessions:
- Flat, stable surface: A table, shelf, or floor that does not wobble.
- Vent clearance: Leave several inches of space around vents and the back or sides where air flows.
- No soft surfaces: Avoid pillows, thick fabric, or deep carpet that could block vents.
- Dry environment: Keep away from sinks, open windows during rain, and damp basements.
These habits help the battery avoid unnecessary heat, which is a major factor in long-term degradation.
Keep It Away From Heat and Cold
Temperature is central to battery health. For day one and beyond:
- Avoid hot zones: Do not set the power station next to radiators, stoves, space heaters, or in direct sun on a hot day.
- Limit cold exposure: In winter, avoid leaving it in an unheated garage or vehicle for long periods when not in use.
- Let it warm up naturally: If the unit has been in a very cold or very hot place, let it sit at room temperature for a while before charging or using at high loads.
A moderate indoor temperature during the first full charge helps set a good baseline for the battery and internal electronics.
First Charge: How to Treat the Battery on Day One
Your first charging session is a chance to get familiar with input options and to observe how the system behaves under normal conditions. For most lithium-based power stations, the internal battery management system controls the charge profile, so you do not have to micromanage it. Still, certain practices can support health and safety.
Check the Initial State of Charge
Most units arrive partially charged for safety and storage reasons. On day one:
- Note the percentage or bar level when you first power on the display.
- If the battery is very low, plan to charge before any heavy usage.
- If it is more than half full, you can briefly test a low-power device before charging fully.
Having a mental record of how it arrived can help if you later notice unusual self-discharge or gauge behavior.
Use a Standard Wall Outlet for the First Full Charge
Unless the manual advises otherwise, a household wall outlet is usually the most controlled way to complete your first charge:
- Plug the supplied AC adapter or cord directly into a properly installed outlet, not an overloaded power strip.
- Avoid long, thin extension cords that can overheat or drop voltage.
- Check that the outlet is in good condition and not warm or damaged.
Charging from a stable wall outlet helps the battery management system assess the pack and may improve the accuracy of the state-of-charge (SOC) indicator over the first few cycles.
Decide Whether to Charge to 100% on Day One
Battery research shows that living at 100% charge for long periods can slowly stress lithium batteries. However, topping off to full occasionally is often useful for calibrating the battery gauge and for emergency readiness.
On day one, both approaches are reasonable:
- If you expect an outage or trip soon: Charging fully to 100% is practical for maximum backup runtime.
- If you are just testing: You can charge to near full (for example, 80–90%) and unplug, then let the first full charge happen later before a planned heavy-use event.
The manual may state whether full charges are occasionally recommended for gauge accuracy. Over the long term, try not to leave the unit at 100% for many days in a row if it is not in active use.
Monitor for Heat and Noise During Charging
During the first charging session:
- Place your hand near (not on) the housing to feel for excessive heat.
- Listen for internal fans. Fan noise under charge is normal, especially at higher power. Sudden grinding or scraping sounds are not.
- Visually check the display periodically to ensure charging is progressing as expected.
A slightly warm housing can be normal, especially at higher charge speeds. Unusually hot surfaces, burning smells, or strange sounds are a reason to stop charging and contact support.
First Discharge: Testing Realistic Loads
Once you have completed an initial charge (or reached a healthy partial charge), test how the power station behaves with the types of devices you actually plan to run. This gives you a feel for runtime, inverter operation, and load limits, and it helps you avoid stressing the battery later through trial and error during an outage.
Start With Low-Power DC and USB Loads
Begin with small, steady loads:
- Charge a phone or tablet via USB.
- Run a small LED lamp on DC output if provided.
- Observe the wattage readout if the display shows it.
This helps you verify that ports work correctly and gives you a sense of how long the battery indicator takes to move under light use.
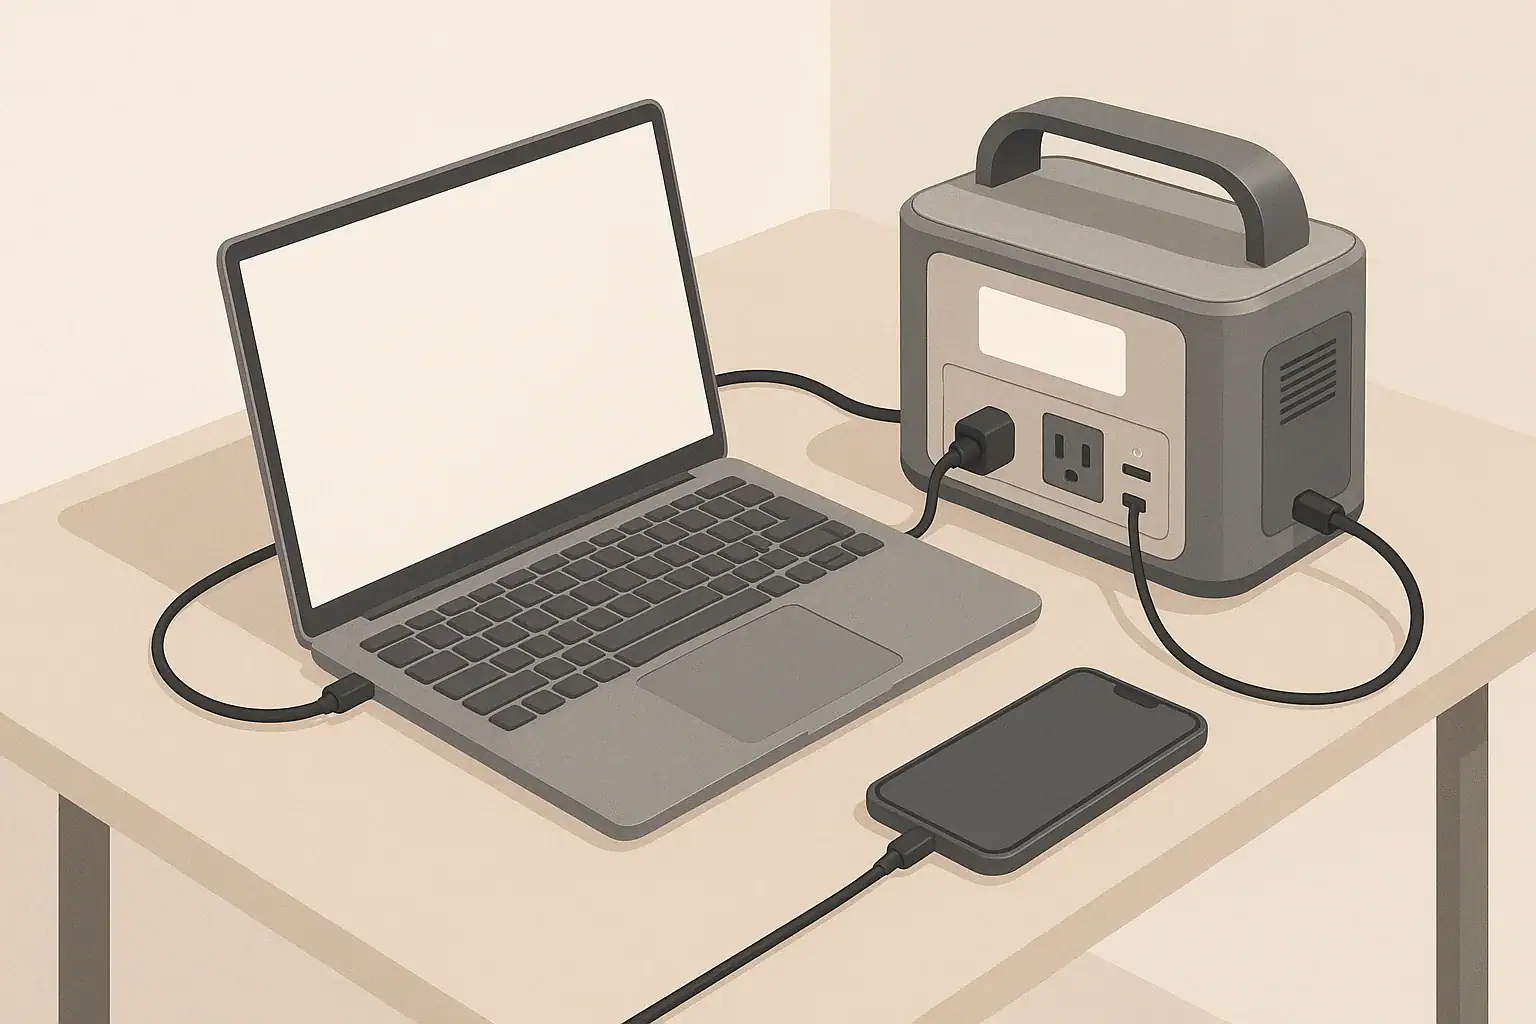
Then Test Moderate AC Loads
After verifying that low-power ports function, move to moderate AC loads such as:
- A laptop charger.
- A small desk fan.
- A small TV or monitor, if you plan to use one in outages.
During this test:
- Confirm that you have enabled AC output with the appropriate button.
- Watch for any overload warnings on the display.
- Notice how inverter noise and fan behavior change with load.
This is also a good time to check how fast the battery percentage drops at typical usage levels, which helps you later plan for outages or camping.
Avoid High-Surge Devices on Day One
Even if your power station is rated for high output, day one is not the best time to push it to its limits. High-surge devices such as microwaves, power tools, and some refrigerators can:
- Cause large current spikes.
- Trigger inverter protection circuits.
- Generate more heat inside the battery and electronics.
Get familiar with the system using moderate loads first. If you later plan to run a heavier appliance, confirm that its running watts and surge demands are within your power station’s ratings before trying it, and be cautious about how often and how long you operate such loads.
Learn and Set Basic Features That Affect Battery Life
Many portable power stations include features that can either help or harm long-term battery health depending on how they are used. Day one is a good time to explore these settings and decide what works best for your routine.
Understand Eco or Power-Saving Modes
Some models include an “eco” or auto-off function that turns off AC output after a period of very low or no load. This can help avoid:
- Wasting energy on inverter idle draw.
- Slowly draining the battery when nothing is plugged in.
From a battery-health perspective, reducing unnecessary idle time at low levels can help avoid deep discharges that happen simply because the unit was left on for days.
Familiarize Yourself With Pass-Through Charging Behavior
Pass-through charging means powering devices from the power station while it is also being charged. Some units support this; others discourage or limit it.
On day one:
- Check whether the manual allows pass-through charging and if there are any notes or limits.
- If allowed, test it briefly with a small load while plugged into the wall to see how the display behaves.
- Avoid combining maximum input charging with near-maximum output loads, which can create more heat and stress.
Moderate use of pass-through charging is often fine, but running the battery and electronics very hard on both input and output at the same time is less ideal for lifespan.
Explore Output Priorities and Port Types
Different ports place different demands on the battery and inverter:
- USB and DC outputs: Typically more efficient for charging electronics and small devices.
- AC outlets: Convenient but rely on the inverter, which introduces additional conversion losses and heat.
From a battery-health standpoint, using DC or USB ports for devices that accept them directly can reduce overall energy use and heat generation inside the unit. On day one, identify which of your common devices can use DC or USB rather than AC.
Plan Charging Methods and Times From the Start
Many owners only think about charging when the battery is low. Setting a charging strategy on day one helps you avoid deep discharges, rushed charges, and heavy loads in poor conditions, all of which can shorten battery life.
Decide Your Primary Charging Method
Most portable power stations can be charged via:
- Wall outlet (AC): Generally the fastest and most predictable.
- Vehicle outlet (DC): Useful in transit but usually slower and dependent on vehicle operation.
- Solar panels (DC via charge controller or dedicated input): Helpful off-grid but variable with weather.
On day one, think about your typical use cases—home backup, camping, RV use, or remote work—and decide which input will be your default. Then consider the others as backups rather than relying on them for last-minute recovery from deep discharge.
Estimate Charging Time Windows
Even without exact numbers, it helps to know roughly how long your unit takes to charge from low to high using each method. For example, you might note that:
- Wall charging typically completes in a few hours for a medium-size unit.
- Vehicle charging might take much longer and is better for topping up than full charges, depending on your driving patterns.
- Solar charging depends heavily on panel size, sunlight hours, and weather, and is rarely as fast as a wall outlet.
On day one, start a practice of plugging the unit in whenever it returns from a trip or after an outage, rather than letting it sit nearly empty. Avoid habitually running the battery down to very low percentages and then recharging under rushed, hot conditions.
Build a Simple Storage and Maintenance Routine
Battery health is affected not only by how you use the power station, but also by how you store and maintain it between uses. Setting expectations on day one helps you avoid slowly damaging the battery over months or years without realizing it.
Decide Where and How You Will Store the Unit
For most people, storage is split between short-term (days to weeks between uses) and long-term (months of inactivity). On day one, choose a location that works for both:
- Temperature-controlled area: A closet, interior room, or office space, away from direct sunlight, garages that overheat, or unheated sheds in winter.
- Accessible but protected: Easy to grab during an outage, but not in a spot where it will be kicked, knocked over, or have heavy items stacked on top.
- Cable management: Store charging cables nearby so you do not resort to random cords later.
Good storage location choices limit exposure to extreme temperature swings, physical damage, and forgotten deep discharges.
Set an Initial Charge Level for Storage
Battery makers often recommend storing lithium batteries at a partial charge level instead of full or very low. While exact percentages vary by guidance, a middle range is commonly suggested for longer-term storage.
On day one, develop a rule of thumb for yourself, such as:
- For short gaps between uses (days to a few weeks), keeping the unit mostly charged is convenient for emergencies.
- For longer storage (several weeks or more), consider storing at a moderate level and topping up closer to the time you expect to use it.
Check the manual for any model-specific recommendations, and follow those over general rules where they differ.
Note a Simple Maintenance Schedule
On day one, create a reminder to:
- Turn the unit on every month or two.
- Check the state of charge and top up as needed.
- Confirm ports, fans, and the display still operate normally.
This prevents slow, unnoticed self-discharge from taking the battery to very low levels during long periods of inactivity, which can stress the cells.
| Task | Interval idea | Why it matters | Quick note |
|---|---|---|---|
| Check state of charge during storage | Every 1–2 months | Prevents deep discharge over time | Top up if the level has dropped significantly |
| Operate basic loads briefly | Every few months | Keeps contacts and electronics exercised | Run a small lamp or charger for a short time |
| Inspect vents and fans | Every few months | Maintains cooling efficiency | Gently remove dust buildup around openings |
| Review cables and adapters | Twice a year | Avoids using damaged cords | Look for fraying or loose plugs |
| Clean housing surface | As needed | Prevents dust from entering vents | Use a dry or slightly damp cloth only |
| Update personal emergency plan | Yearly | Aligns battery readiness with your needs | Revisit which devices you plan to power |
Example values for illustration.
Safety Habits to Establish on Day One
Battery health and safety go together. Practices that avoid overheating, overloading, and physical damage protect both your investment and your home or campsite.
Use Cords and Loads Within Ratings
On day one, commit to:
- Plugging in only devices whose power draw fits within the unit’s continuous and surge ratings.
- Using extension cords that are in good condition and rated for the loads you plan to run.
- Avoiding daisy-chaining power strips or overloading multi-outlet adapters.
Sticking to rated limits will reduce stress on the battery, inverter, and wiring, particularly during long runtime events like outages.
Keep the Unit in Safe Operating Environments
Some basic practices to start from day one:
- Do not place the power station where it can be splashed, rained on, or buried in snow.
- Keep it away from flammable materials such as curtains or piles of paper, especially when running high loads.
- Avoid locations where children or pets can easily tip it over or block vents.
If you use the unit in a vehicle, secure it so it will not shift during driving, and ensure it has ventilation space even while the vehicle is parked.
Leave Electrical Panel Work to Professionals
Some users consider ways to power household circuits from a portable power station. Any connection to a home electrical panel, transfer switch, or fixed wiring should be handled and evaluated by a licensed electrician and must follow local codes.
Using your power station with individual appliances and devices through standard cords and approved accessories is generally safer and reduces the risk of backfeeding or improper wiring arrangements.
Record Key Information on Day One
Finally, use the first day to:
- Write down the model number and serial number in a safe place.
- Note purchase date and keep a digital copy of the manual.
- Record any observations from your first charge and discharge tests that seem unusual.
This basic documentation makes it easier to get support later and to notice if performance changes significantly over time.
By taking these steps on day one—thoughtful placement, careful first charge, realistic load testing, and simple maintenance planning—you put your portable power station on a path to safer operation and healthier long-term battery performance.
Frequently asked questions
Should I fully charge a new portable power station on day one?
It is acceptable to charge to 100% if you need maximum runtime for an upcoming trip or outage; otherwise charging to around 80–90% for initial testing is fine. The internal battery management system typically handles charging safely, so follow the manual for any model-specific guidance. Avoid leaving the unit at 100% for many days if it will not be used.
Can I test pass-through charging on day one?
Yes, you can briefly test pass-through charging, but first confirm the manual states it is supported and whether there are limits. During testing, avoid combining maximum input and near-maximum output, as that can increase heat and stress on the electronics. If the manual discourages pass-through, do not use it regularly.
What loads should I use for the first discharge test and for how long?
Start with low-power USB and DC loads for a few minutes to verify ports, then test moderate AC loads like a laptop charger or small fan for short periods to observe inverter and fan behavior. Avoid high-surge appliances such as microwaves or power tools on day one. Monitor for warning messages, rapid temperature rise, or unusual sounds while testing.
Where and at what charge level should I store the unit after initial setup?
Store the unit in a temperature-controlled, dry location away from direct sunlight and extreme heat or cold. For long-term storage, a moderate partial charge is usually recommended, while keeping it mostly charged is practical for short gaps; always follow any model-specific storage guidance in the manual. Check the state of charge every 1–2 months and top up as needed.
What warning signs during the first charge mean I should stop and seek help?
Stop charging and unplug the unit if you notice excessive surface heat, a burning smell, grinding or scraping fan noises, persistent error codes, or visible smoke. After moving the unit to a safe location, contact the seller or manufacturer support for instructions. Do not attempt internal repairs yourself.
Recommended next:
- Portable Power Station Buying Guide
- Common Mistakes When Buying a Portable Power Station
- Portable Power Station Terminology Explained
- Portable Power Station Basics: Outputs, Inputs, and What the Numbers Mean
- A Simple Buying Checklist: Features That Matter (and Those That Don’t)
- Choosing the Right Size for Apartment Backup: Practical Examples
- More in Beginners →
Related guides
Browse this topic →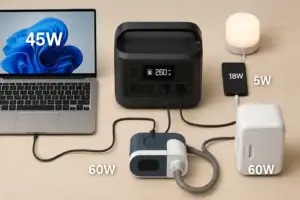

- Beginner-friendly sizing, runtime & specs
- Solar & charging (MPPT, fast charging, cables)
- Batteries (LiFePO4, cycles, care & storage)
- Safety, cold-weather performance, real-world tips
More in Beginners
See all →- Emergency Preparedness: Building a Home Backup Plan Around a Power Station
- Powering a 12V Fridge Efficiently: DC Options and Best Practices
- RV Basics: Using a Power Station for 12V Loads and House Power
- Camping Power Planning: A Simple Energy Budget for a Weekend
- Remote Work Power Kit: Keeping Laptop, Monitor, and Internet Running
Keep reading
About this site
Portable Energy Lab publishes practical, independent guides about portable power—clear sizing, safe use, and real-world expectations.
Affiliate disclosure
Some links on this site may be affiliate links. If you buy through these links, we may earn a small commission at no extra cost to you. This helps support our content. Learn more.