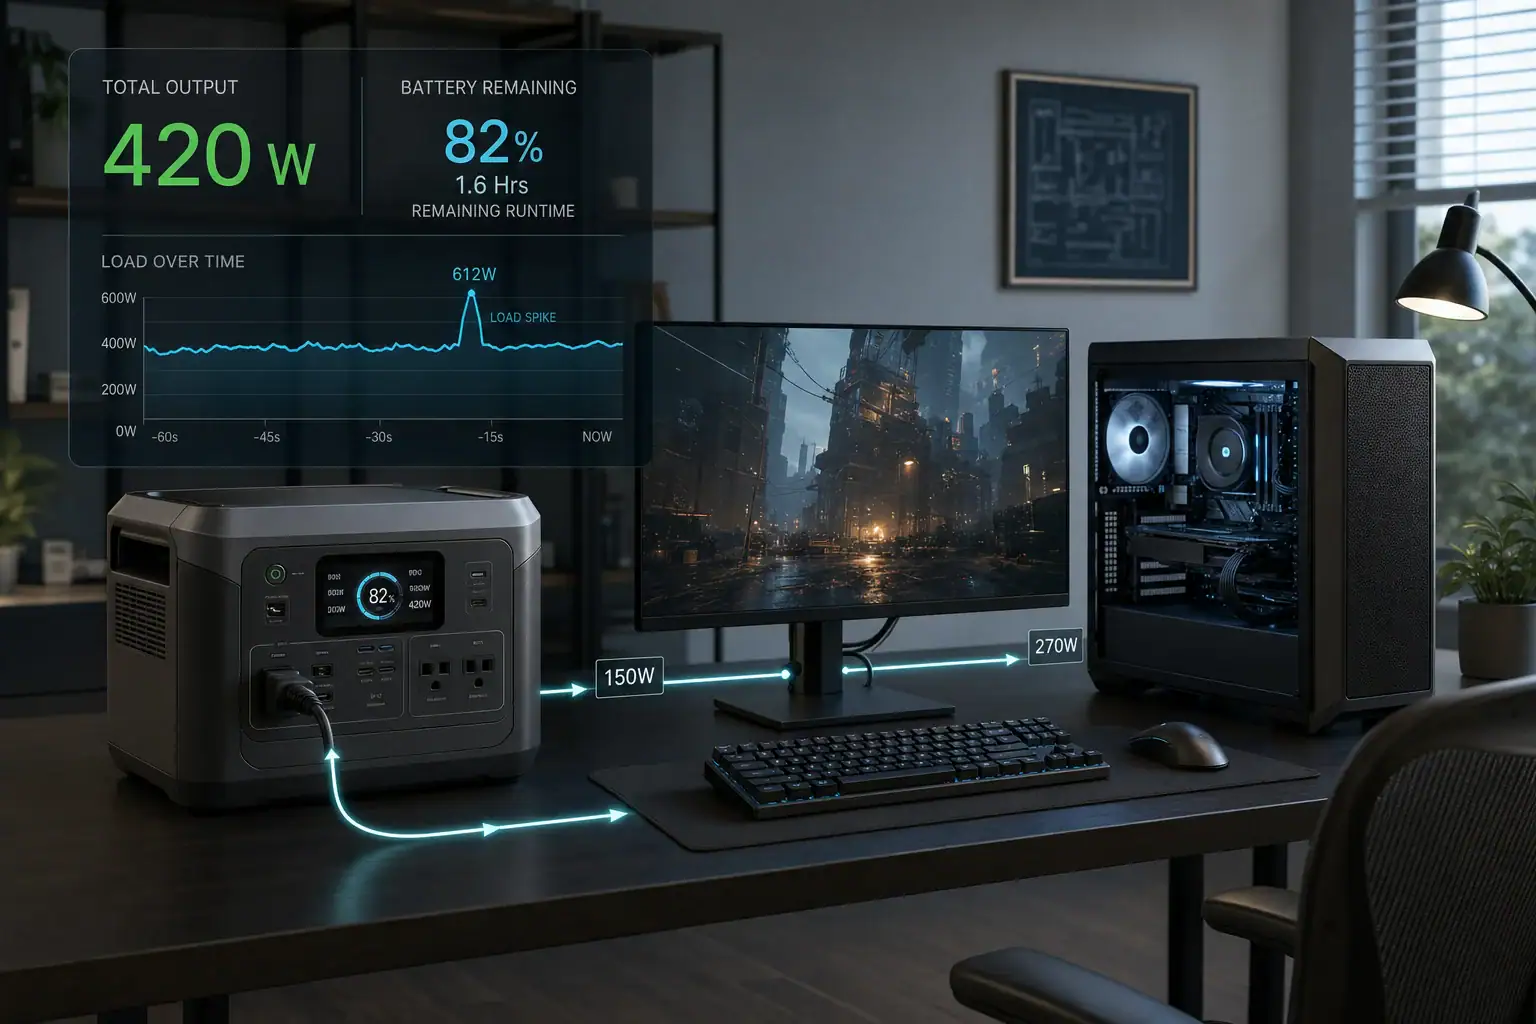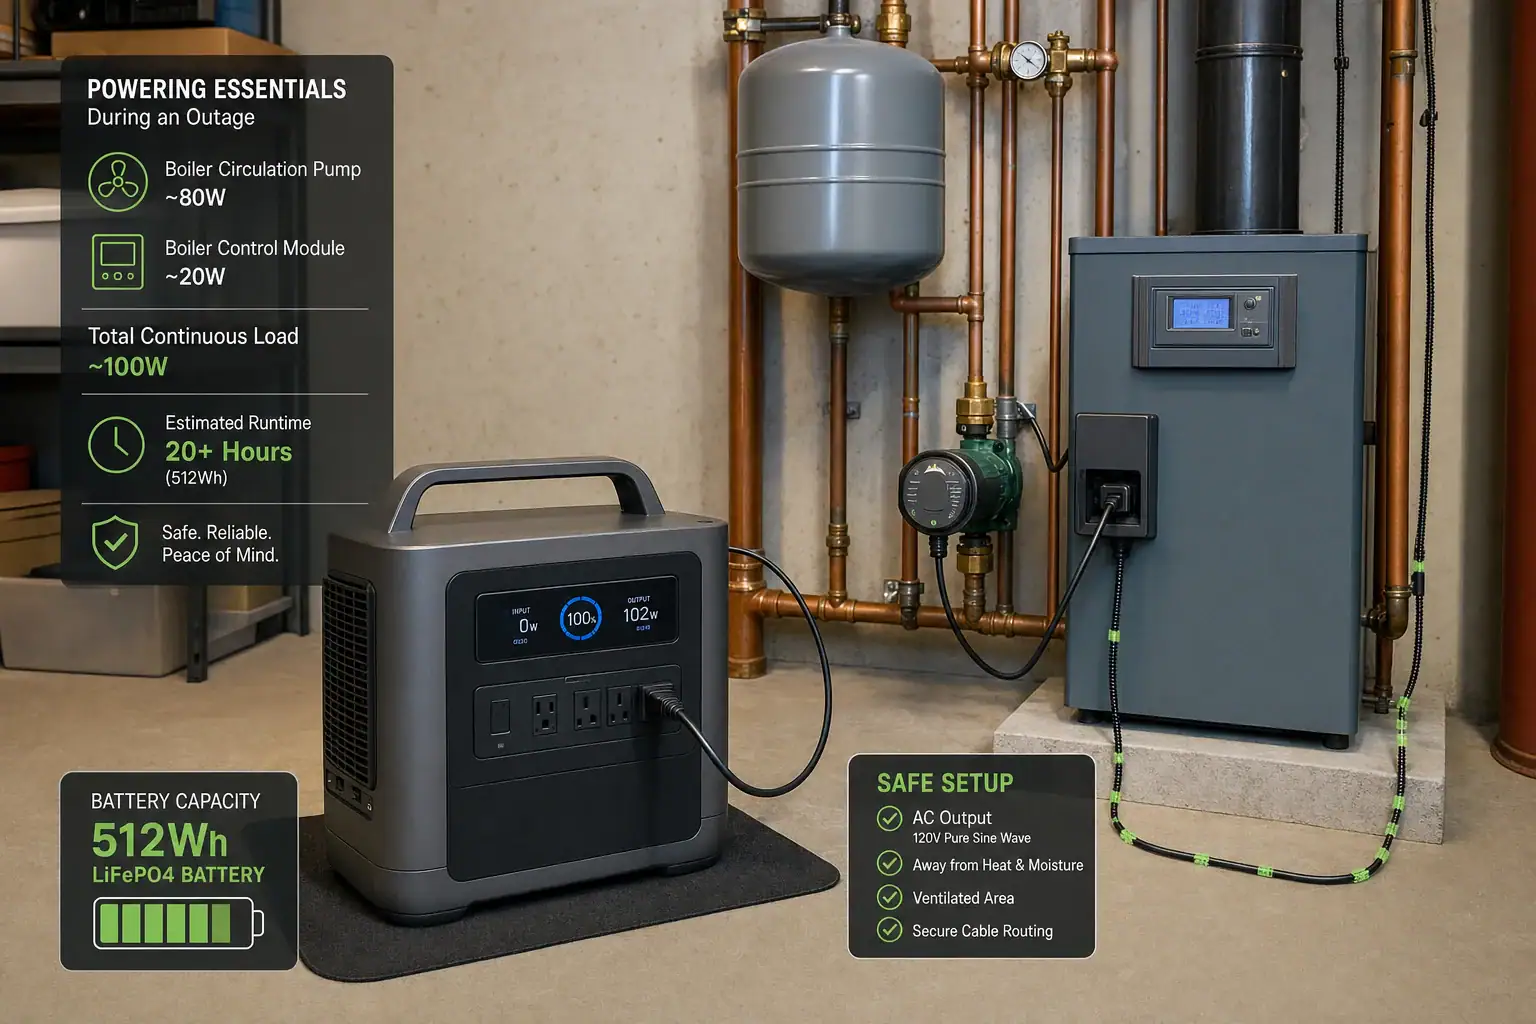
Why Does My Portable Power Station Show 0W Even When Something Is Plugged In?

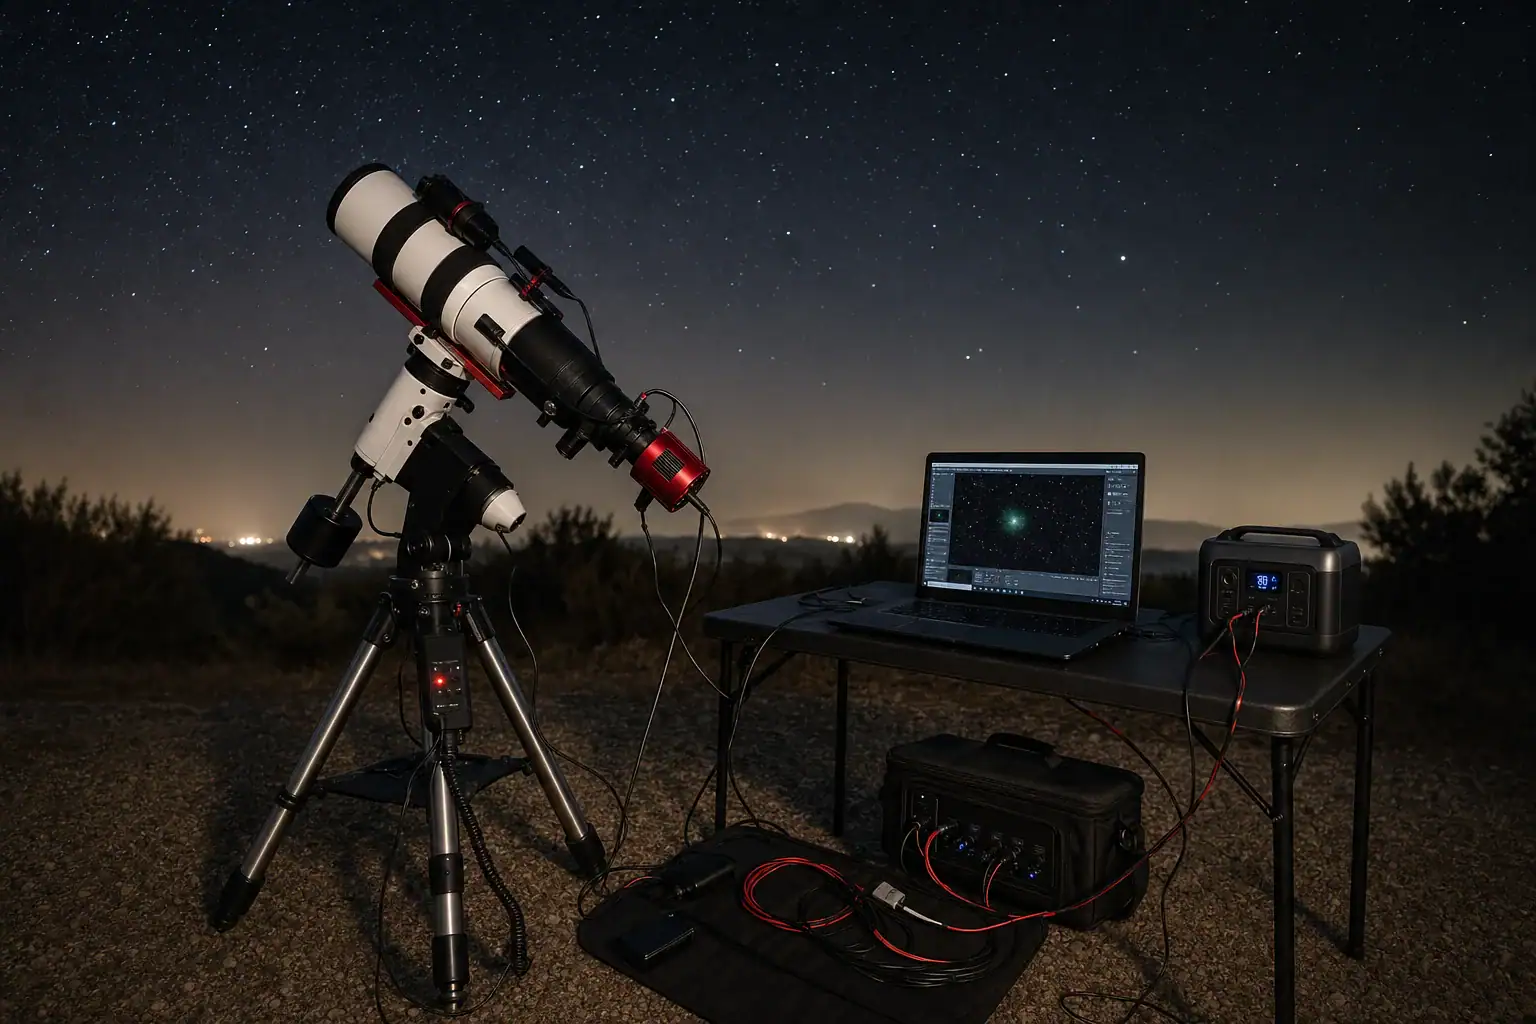
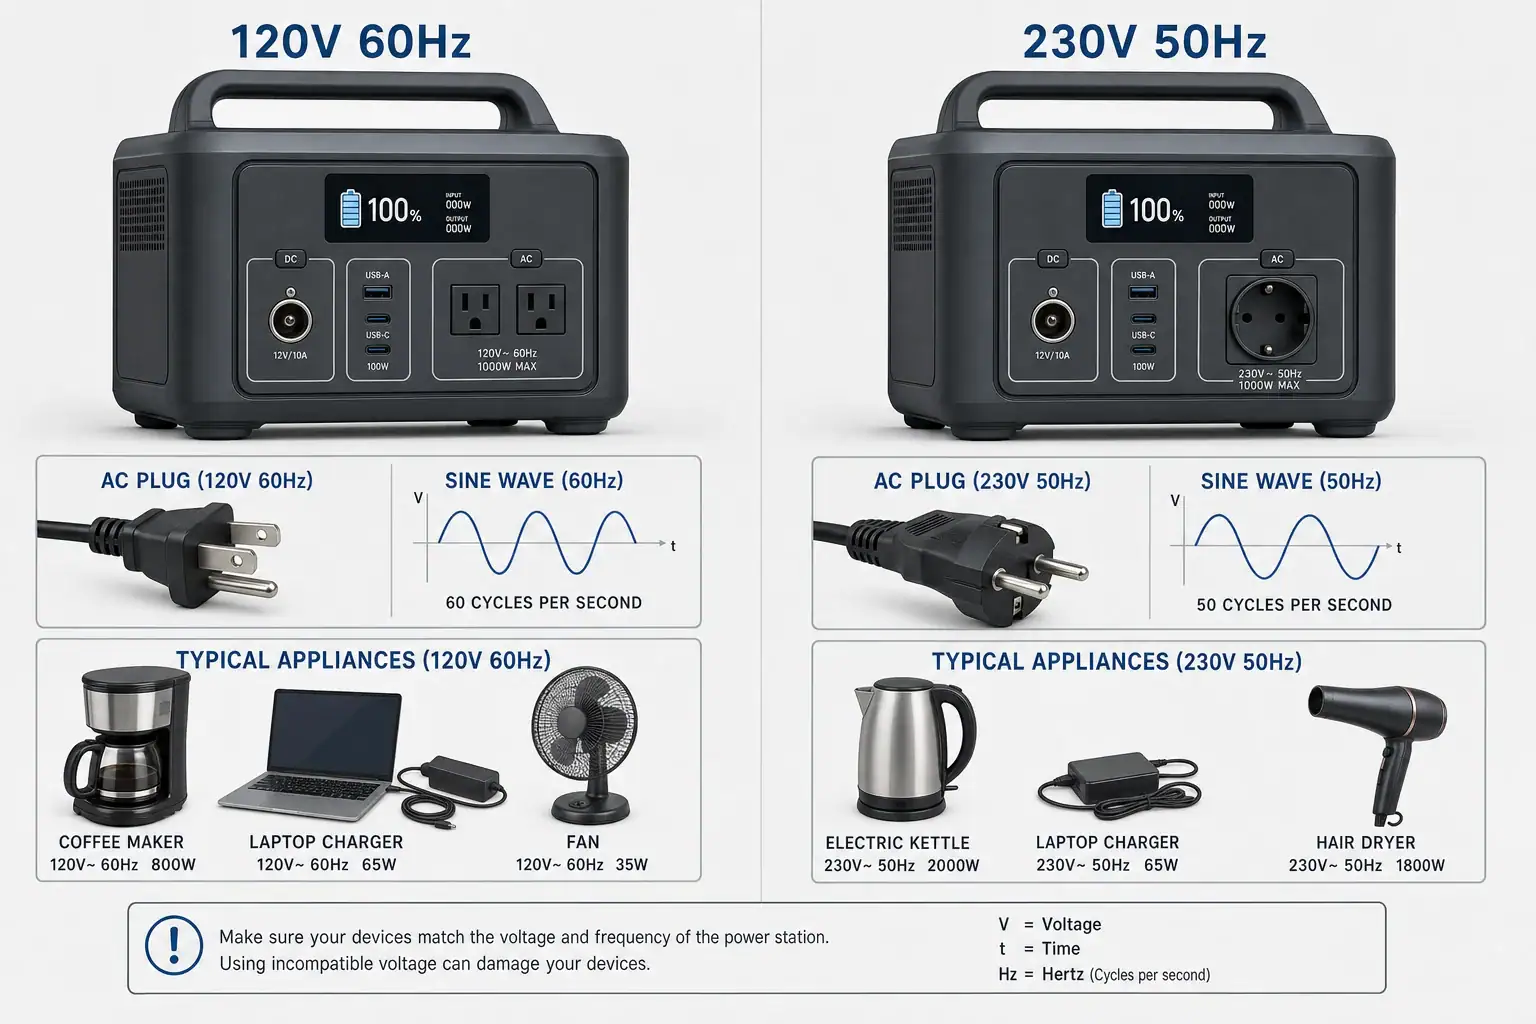
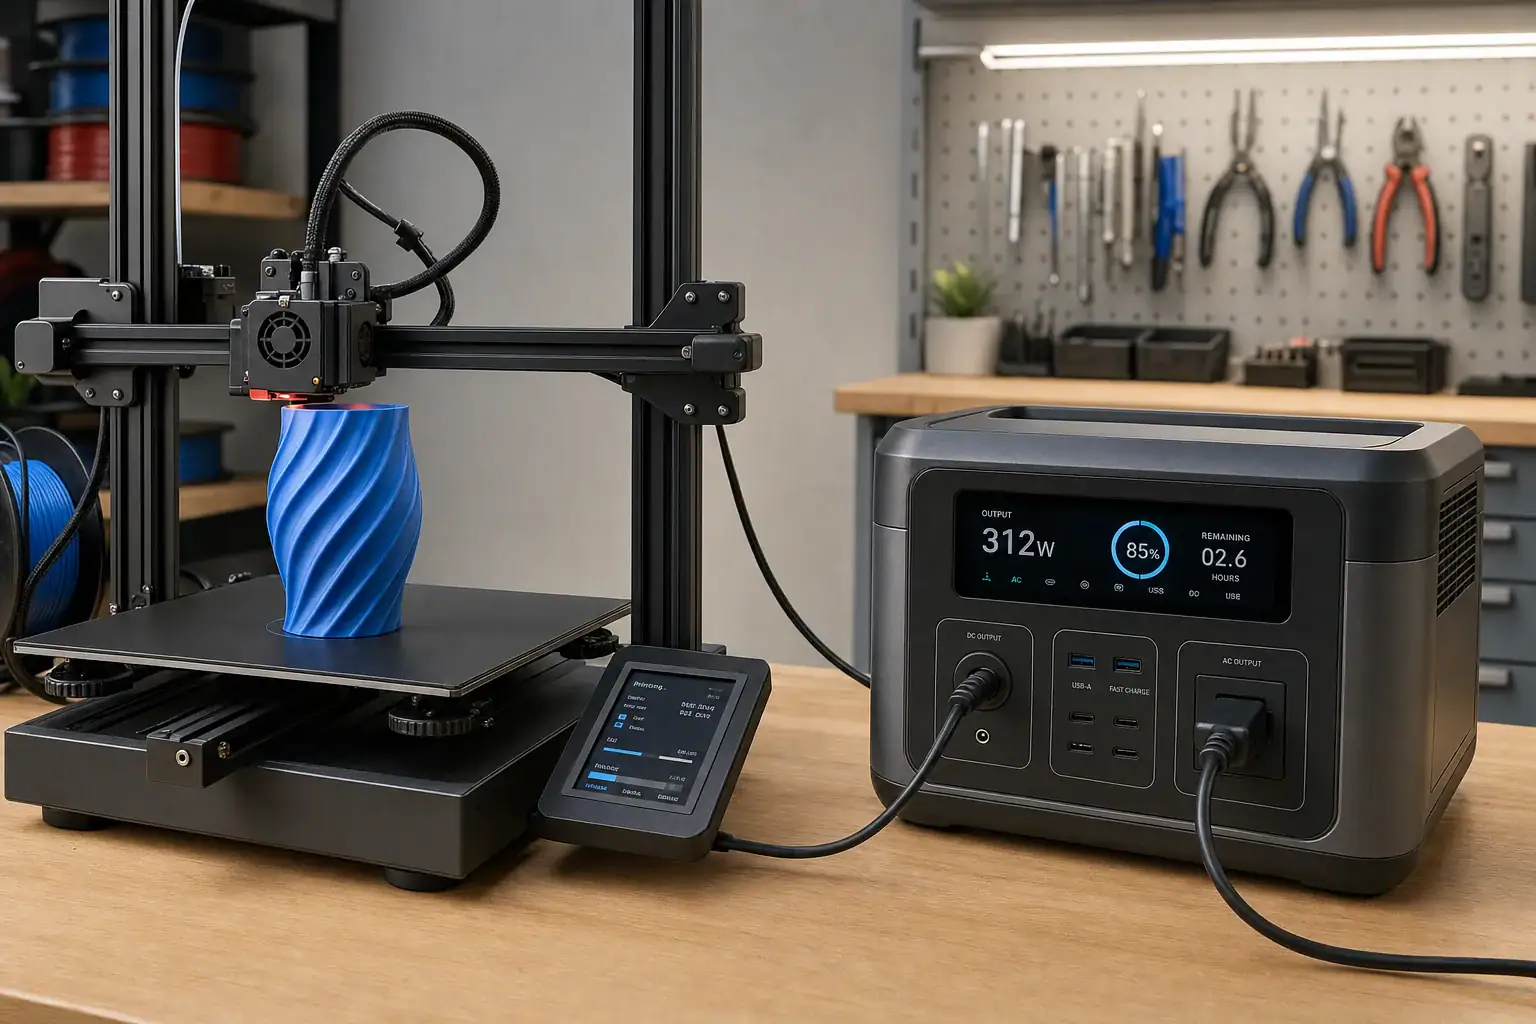
Portable power station showing 0W while a device is plugged in

The most common reasons a portable power station shows 0W are that the output is turned off, the connected device is not actively drawing power, or its consumption is below the display’s measurement threshold. A loose connection, automatic low-load cutoff, overloaded circuit, or incompatible charging protocol can produce the same symptom.

A 0W reading does not automatically mean the battery or outlet has failed. Some devices draw power intermittently, and many stations round small loads down to zero. The reading can also depend on whether you are checking AC output, USB output, DC output, surge watts, or total runtime information.

Start by confirming that the correct output group is enabled and that the connected appliance is operating. Then test the port with a simple, known-working load. If the display remains at 0W, warning icons, temperature, battery charge level, cable condition, and output limits can help distinguish normal behavior from a fault.

1. What a 0W Reading Means and Why It Matters

A 0W output reading means the power station is reporting no measurable power flowing from its battery to the connected load at that moment. It does not necessarily mean nothing is plugged in. A plug establishes a physical connection, but wattage appears only when the connected device requests and receives electrical power.

For example, a fully charged phone may stop drawing meaningful current even though its cable remains connected. A refrigerator may show 0W between compressor cycles. An AC charger with no device attached may consume so little standby power that the display rounds it down. These can all be normal conditions.

The reading matters because it affects troubleshooting and runtime planning. If a device should be operating continuously but the station still reports zero, the relevant output may be disabled or a protective shutdown may have occurred. If the load is simply too small to register, battery capacity may still decline slowly despite the 0W display.

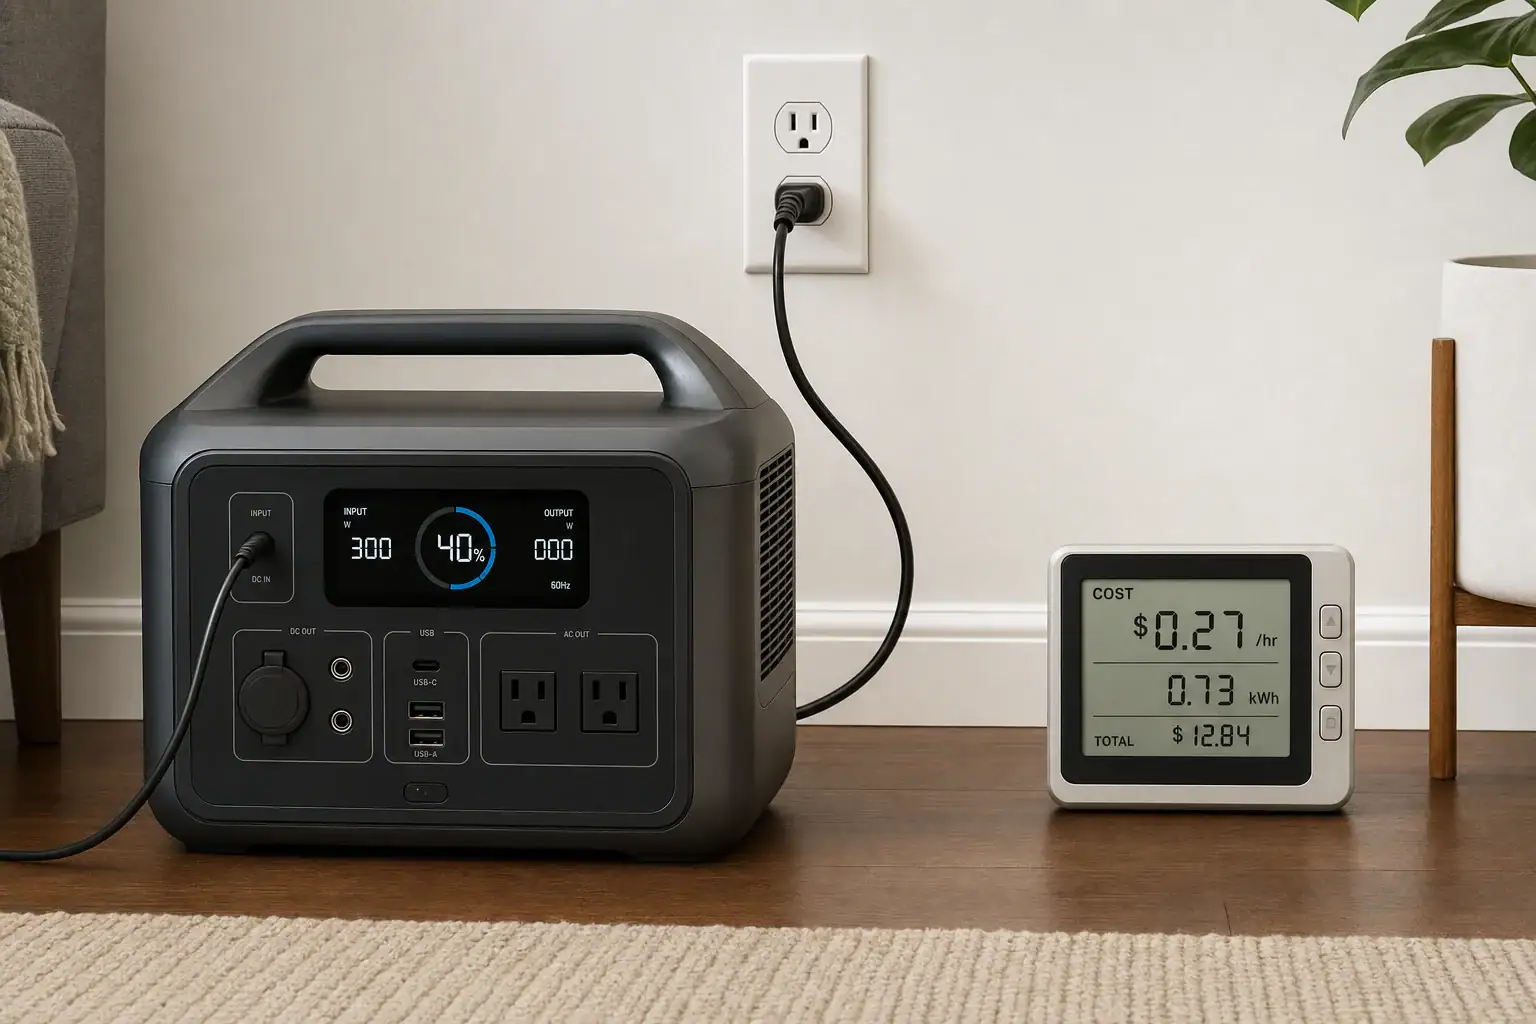
Also distinguish output watts from input watts. Output wattage represents electricity being supplied to appliances, while input wattage represents energy entering the station from a wall outlet, vehicle socket, or solar source. A station can report 0W output while it is charging normally, and it can report 0W input while powering a device.

2. How Power Measurement and Output Controls Work

Portable power stations typically divide their connections into output groups, such as AC receptacles, USB ports, and regulated DC sockets. Each group may have its own electronic switch. Plugging a device into an AC receptacle does not guarantee that the inverter is on; similarly, some DC or USB banks must be activated separately.

Internal sensors estimate voltage and current, then calculate wattage. Because these sensors have limited resolution, very small loads may appear as 0W. A station that updates in whole watts might display a 0.4-watt standby load as zero. Other models refresh only every few seconds, so brief changes may not appear immediately.

AC appliances can also cycle. Refrigerators, pumps, heated blankets, and thermostatically controlled equipment draw power only when their controls call for it. Their startup surge may be much higher than their running watts, but the display can return to zero when the active cycle ends.

Automatic energy-saving features add another variable. A low-load cutoff may disable an output when demand remains below a preset threshold for a specified time. This conserves battery energy and reduces inverter losses, but it can interrupt clocks, network equipment, medical accessories, or other low-wattage devices. USB charging may also depend on voltage negotiation, including a compatible USB Power Delivery profile, before meaningful power flows.

Common interpretations of a 0W display. Example values for illustration.
SituationPossible readingLikely explanation
Charged phone remains connected0W to 1WCharging has finished or entered maintenance mode
Refrigerator between cycles0WCompressor is temporarily off
Small AC adapter on standby0WConsumption is below display resolution
AC appliance with inverter disabled0WThe AC output group is off
Device exceeds an output limit0W after shutdownOverload protection has disconnected the output

3. Real-World Examples of 0W Readings

A phone or tablet is plugged into USB

A mobile device may draw no visible power if its battery is full, its screen is off, or its charge-management system has paused charging to control temperature. A damaged or charge-only-incompatible cable can also prevent proper communication. With USB-C equipment, the source and device must agree on a supported voltage and current profile. If negotiation fails, charging may be slow, intermittent, or absent.

A refrigerator or cooler is connected

Compressor-based appliances do not run continuously. The station may show substantial running watts during a cooling cycle and 0W after the target temperature is reached. Watch the display through a complete cycle before assuming there is a problem. If the output shuts down exactly when the compressor starts, startup surge rather than normal running consumption may be the issue.

A laptop charger is connected to AC

A laptop’s charging adapter may consume little or no measurable power when the laptop battery is full or the computer is asleep. If the AC indicator is enabled and the laptop reports that it is charging, a brief 0W display can reflect rounding or a slow refresh rate. If the laptop does not recognize external power, test the adapter and receptacle separately.

A low-power light or router turns off later

A small continuous load may initially operate and then stop because the station’s power-saving mode considers the demand too low. This pattern is an important cue: the port works at first, the display shows only a few watts or zero, and the output later disables itself. An adjustable low-load setting or an always-on output mode may be relevant if the station provides one.

4. Common Mistakes and Troubleshooting Cues

  1. Check the correct display value. Confirm that you are viewing output watts rather than input watts, remaining hours, battery percentage, or watts assigned to another port group.
  2. Enable the relevant output. Look for the AC, USB, or DC status indicator. A master power button may turn on the display without activating every output bank.
  3. Wake and operate the connected device. Turn on the appliance, lower a thermostat setting if appropriate, or connect a partially discharged phone. A plugged-in but idle device may legitimately draw nothing.
  4. Inspect the connection. Fully seat plugs at both ends and look for bent contacts, debris, looseness, frayed insulation, or unusual heat. Replace a suspect removable cable with a correctly rated, known-working one.
  5. Try a known-working moderate load. A basic lamp or similar device with steady consumption can reveal whether an AC output is functioning. Choose a load comfortably below the station’s continuous wattage rating.
  6. Check for protective warnings. An overload, short-circuit, low-battery, high-temperature, or low-temperature warning may explain why a port was disabled. Remove the load and follow the manufacturer’s normal reset guidance rather than repeatedly forcing the output on.
  7. Allow for display delay. Wait through several refresh cycles. Some meters take a few seconds to recognize a new load, and rapidly changing demand can make the number appear unstable.
  8. Consider low-load shutdown. If a device works briefly and then loses power, review the station’s energy-saving settings. Do not assume the battery is defective solely because an ultra-low-power device cannot keep the output awake.

A useful troubleshooting distinction is whether the connected device operates despite the 0W reading. If it works, measurement resolution, rounding, or intermittent demand is likely. If it does not work, focus on output activation, cable compatibility, battery state, protective shutdown, and the appliance’s own condition.

5. Safety Basics When Testing a 0W Output

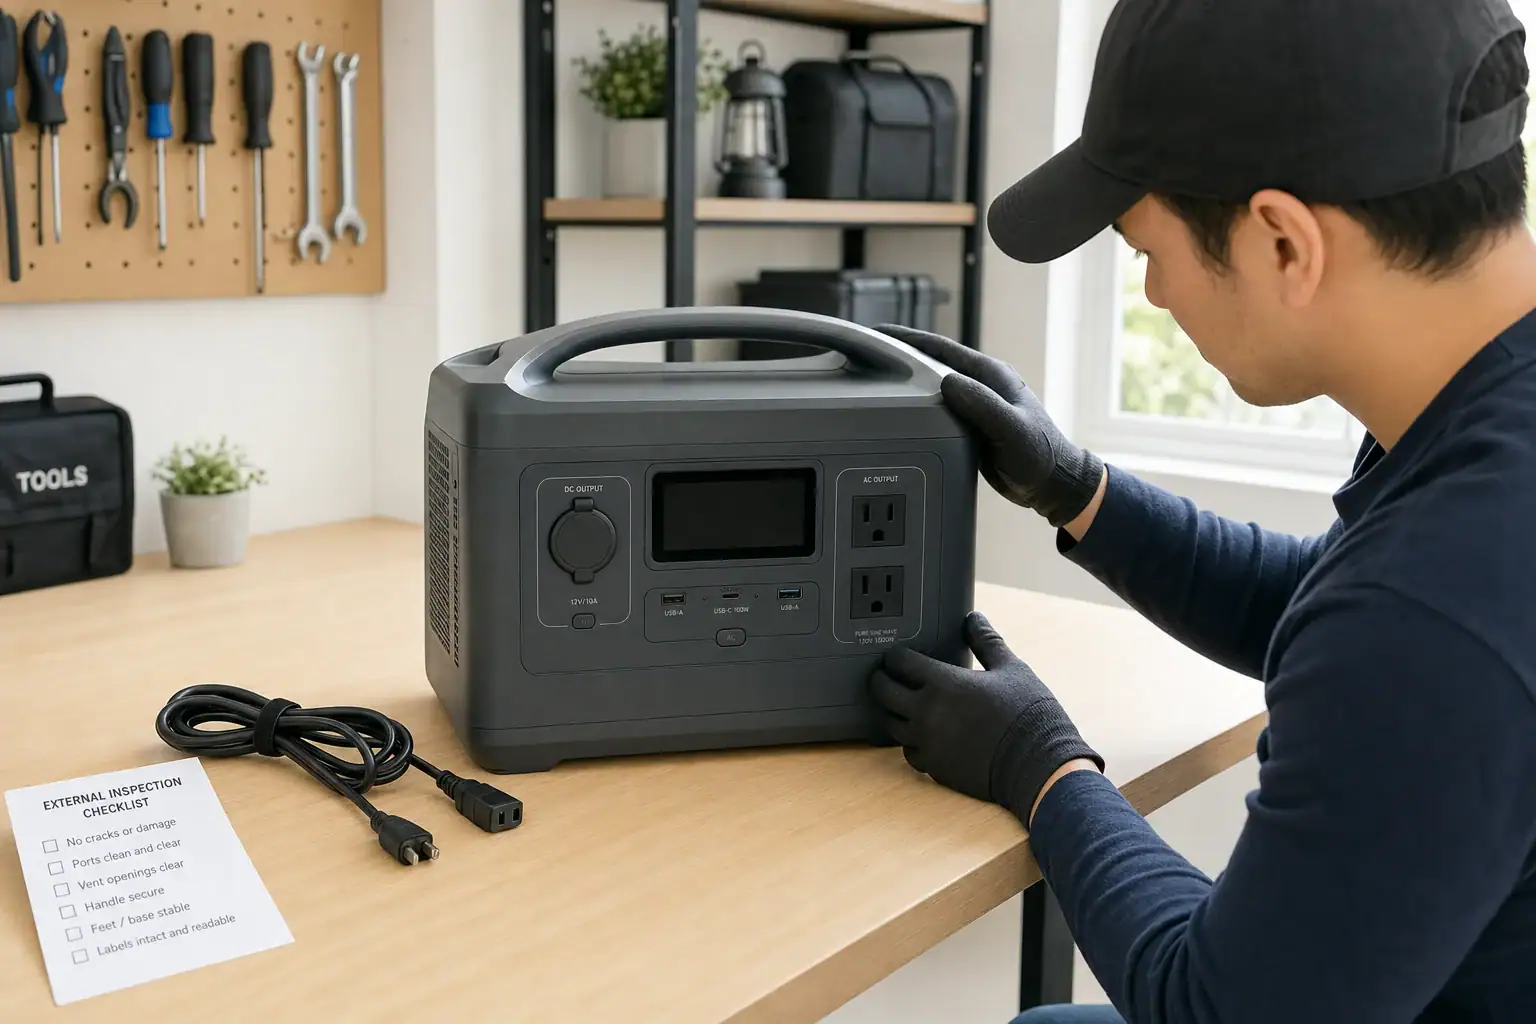
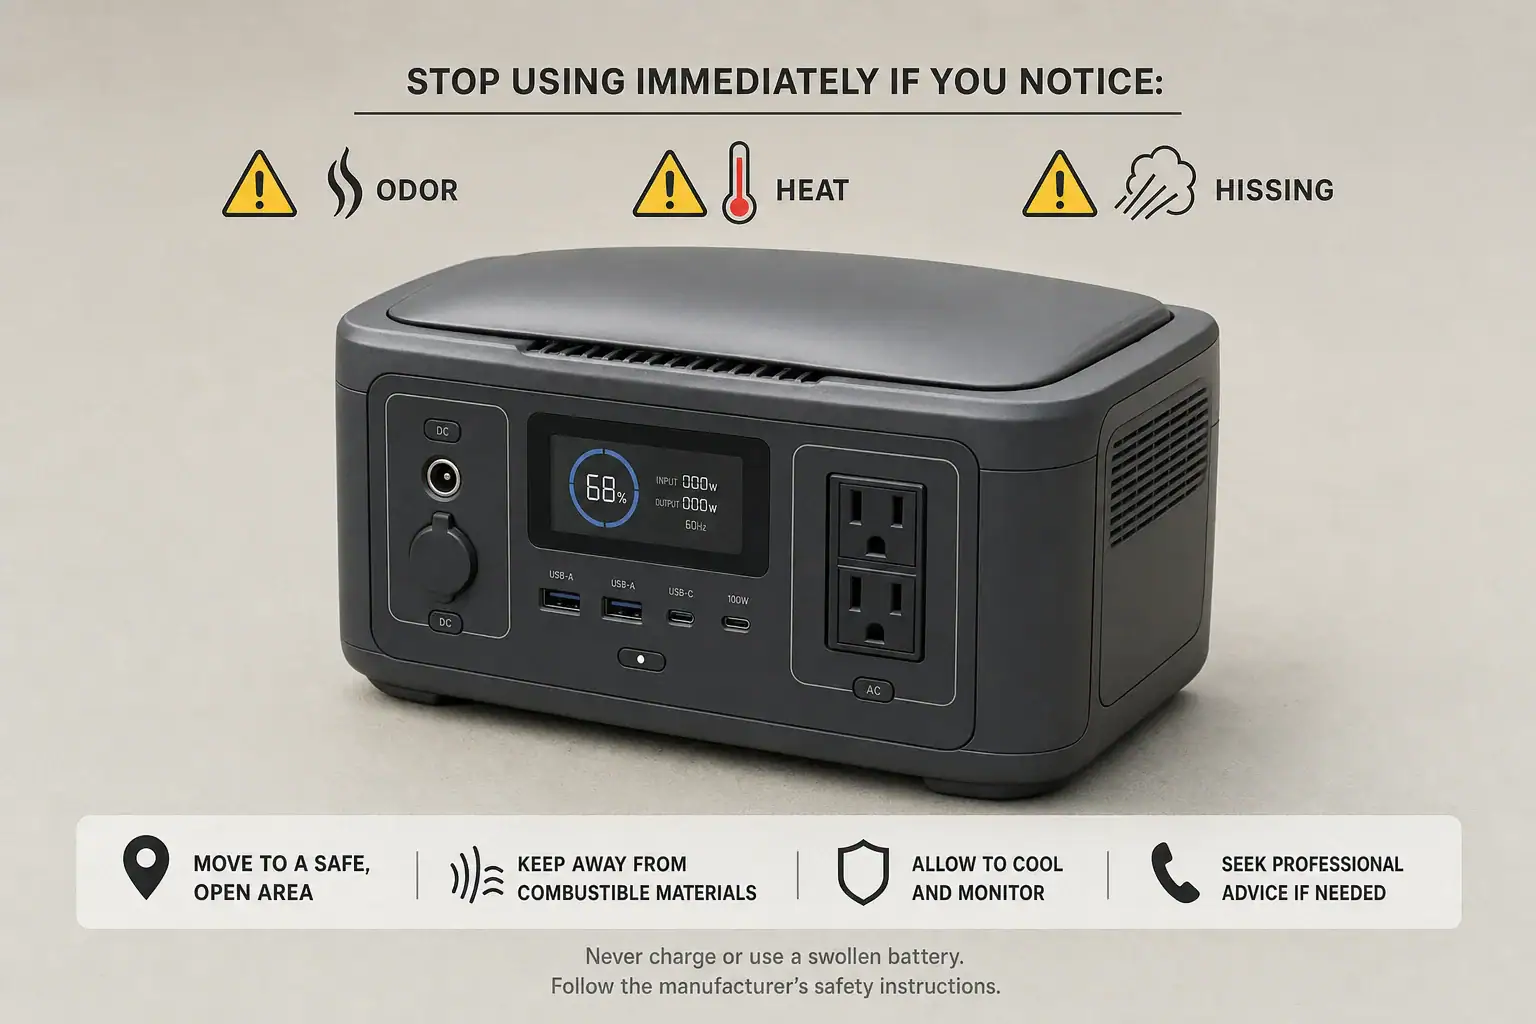
Use only intact cords, adapters, and connectors rated for the intended voltage and current. Stop testing if a plug is loose, scorched, melted, unusually warm, or producing an odor. Place the power station on a stable, dry surface with ventilation openings unobstructed.

Do not open the enclosure, modify the battery pack, bypass protective circuits, or insert tools into an outlet. A display problem does not make internal electrical work safe. If the unit has been dropped, exposed to water, swollen, or damaged, disconnect loads and arrange professional evaluation.

Confirm that appliance running watts and startup surge are within the appropriate output ratings. Repeated overload attempts can stress connectors and cause protective shutdowns. Motors, compressors, pumps, and heating appliances deserve particular attention because their real demand may differ substantially from a simple nameplate estimate.

Never connect a portable power station directly to household wiring through improvised cords or unapproved methods. Home backup connections require suitable equipment and evaluation by a qualified electrician. The station should also remain away from flammable materials and should not be operated in standing water or enclosed spaces that trap heat.

6. Maintenance and Storage That Help Prevent False 0W Readings

Keep ports clean and dry. Dust or debris can prevent a connector from seating fully, while corrosion can increase resistance and cause intermittent operation. Inspect ports visually and use only manufacturer-approved cleaning practices; do not scrape contacts with metal objects or apply liquids inside the unit.

Exercise the power station periodically during long storage. Confirm that the display, AC inverter, USB ports, and DC outputs operate with appropriate test loads. Recharge according to the storage interval and charge range specified for the unit. Leaving a battery completely depleted for an extended period can trigger a low-voltage state that delays or prevents normal output.

Store the station in a moderate, dry environment. Temperature extremes can reduce available power and activate battery protection. After moving a cold unit into a warm area, allow it to reach a suitable operating temperature and ensure condensation is not present before use.

Software-controlled models may occasionally require a normal restart or an available firmware update to correct display behavior. Use only supported procedures. Persistent 0W readings across multiple known-working loads and output types may indicate a failed sensor, inverter, port board, or display rather than a settings issue.

Illustrative maintenance checks for output reliability. Example values for illustration.
CheckExample interval or conditionPurpose
Inspect ports and cordsBefore use or monthlyFind debris, looseness, or heat damage
Test each output groupEvery 1 to 3 months in storageConfirm switching and metering operation
Review stored chargeEvery 2 to 3 monthsAvoid prolonged deep discharge
Check operating temperatureBefore heavy loadsReduce temperature-related shutdowns
Observe a steady test loadSeveral display refresh cyclesSeparate meter delay from output failure

Related guides: Portable Power Station Basics: Outputs, Inputs, and What the Numbers MeanWhy Does AC Output Stop Under Load? Common Causes and FixesPortable Power Station Error Codes: What Common Warnings Mean

7. Practical Takeaways and Specs to Look For

A 0W display is often normal when a device is fully charged, sleeping, cycling, or drawing less power than the meter can show. First verify that the appropriate output is enabled and that the appliance is actually requesting power. Then check connections, warnings, battery level, temperature, load limits, and power-saving settings.

If a known-working moderate load operates normally, the station’s display resolution or the original device’s low demand is the likely explanation. If several suitable loads fail on one output group, but other ports work, that output may require service. If all outputs remain inactive after normal checks, stop use and seek qualified support rather than opening or modifying the unit.

Specs to look for

  • Display resolution: Look for wattage reporting in increments of about 1W rather than 5W or 10W; finer resolution makes small loads easier to identify.
  • Low-load cutoff controls: Look for an adjustable threshold, commonly in the approximate 1W to 10W range, or an option to disable automatic shutdown; this matters for routers, clocks, and other light loads.
  • Continuous AC output: Choose a rating comfortably above the combined running watts of intended appliances, such as a 20% to 30% operating margin; this helps prevent overload shutdowns.
  • Surge output: Compare the short-duration surge rating with motor or compressor startup demand, which may be two to several times running wattage; adequate headroom supports reliable startup.
  • Separate output controls: Look for independent AC, USB, and DC switching with clear status indicators; this makes activation and troubleshooting more straightforward.
  • USB-C power profiles: Check for the voltage and wattage profiles required by your devices, such as 5V through 20V and outputs around 60W to 100W for many laptops; compatible negotiation supports normal charging.
  • DC voltage regulation: Look for a stable regulated output near the connected device’s requirement, often around 12V for compatible equipment; stable voltage reduces unexpected cutoffs.
  • Meter refresh rate and data: Look for updates every few seconds plus separate input and output readings; clear data helps distinguish display lag from a genuine loss of power.
  • Protection indicators: Look for identifiable overload, short-circuit, temperature, and low-battery alerts; specific warnings make a 0W condition easier to diagnose safely.

The most useful features are not simply higher wattage numbers. Accurate metering, clear output indicators, configurable energy-saving behavior, compatible charging profiles, and understandable protection alerts can make low-power operation more reliable and troubleshooting much faster.

Frequently asked questions

Why does my portable power station show 0W while my device is still working?

The device may be drawing less power than the display can measure or report, particularly if the meter rounds to whole watts. It may also draw power intermittently, such as when a refrigerator compressor is between cycles or a phone has nearly finished charging.

Why does a power station show 0W when a phone is plugged in?

A phone may stop or greatly reduce charging when its battery is full, its temperature is high, or its charge-management system pauses charging. A cable problem or an incompatible USB-C charging profile can also prevent the phone from requesting meaningful power.

Is it a mistake to turn on only the main power button?

Yes. On many units, the main button activates the display or system but does not switch on every AC, USB, and DC output group. Check the indicator for the specific port type being used before assuming the outlet has failed.

What portable power station specs help prevent confusing 0W readings?

Useful features include fine wattage-display resolution, separate input and output readings, and a fast meter refresh rate. Adjustable low-load cutoff settings, clear protection alerts, independent output controls, and compatible USB-C power profiles also make low-power use easier to diagnose.

Why does the output turn off after a few minutes with a small device connected?

The station may be using an energy-saving mode that automatically shuts down an output when demand stays below a minimum threshold. Review the low-load or eco-mode settings and, if available, use an always-on mode appropriate for the connected device.

Is it safe to keep testing a power station that shows 0W?

Testing with an intact, correctly rated, moderate load is generally appropriate when the unit has no warning signs. Stop using the station if you notice heat, damage, odor, swelling, water exposure, or repeated protective shutdowns, and do not open the enclosure or bypass safety circuits.

Portable Power Station vs Transfer Switch Setup: What Homeowners Should Understand

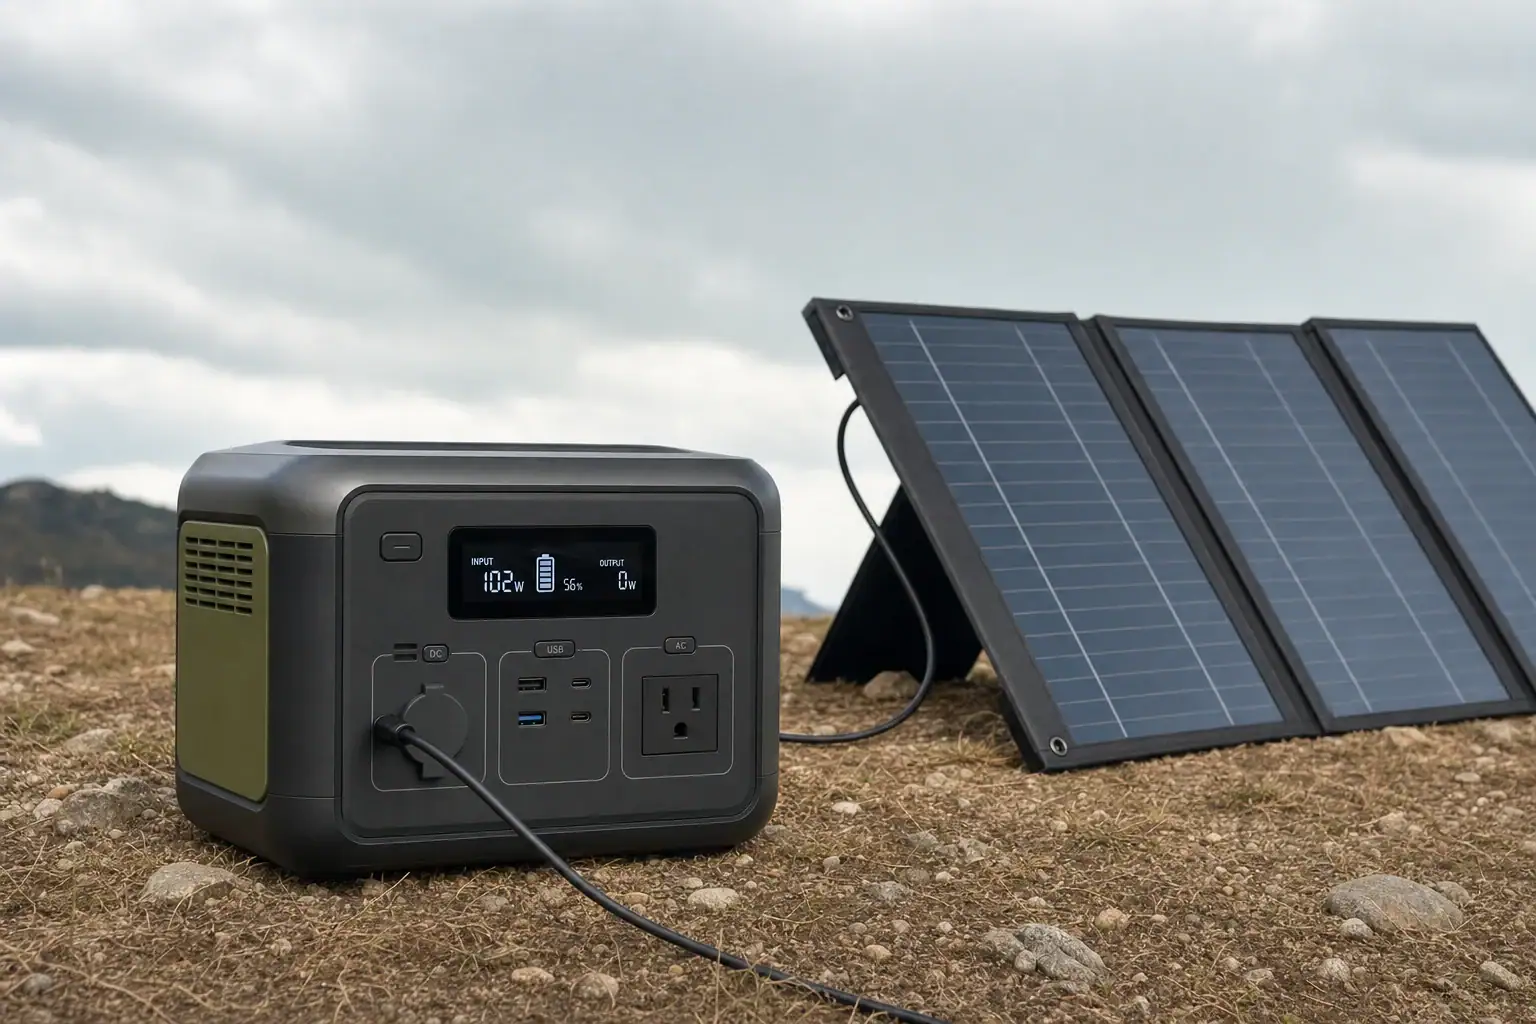
Portable power station compared with a home transfer switch setup

A portable power station can run appliances directly, while a transfer switch setup connects a compatible backup source to selected home circuits through permanently installed electrical equipment. The power station stores and produces electricity; the transfer switch controls whether designated circuits receive utility power or backup power.

The better arrangement depends on the loads you need to support, required runtime, battery capacity, surge watts, outlet configuration, and whether the system provides the correct 120/240-volt output. A portable unit used by itself is usually simpler and more flexible. A transfer switch can make home backup power more convenient, but it introduces compatibility, installation, grounding, and capacity considerations.

These options are not necessarily competitors. A suitably designed portable power station may serve as the energy source for a transfer switch system. However, many units are intended only for direct connection to appliances and should not be connected to home wiring.

1. What the Two Setups Mean and Why the Difference Matters

A portable power station combines a rechargeable battery, inverter, charging electronics, protection systems, and output ports in one enclosure. Appliances typically plug into its AC receptacles, USB ports, or DC outlets. This arrangement avoids interaction with the home’s fixed wiring and allows the unit to be moved between rooms, vehicles, or outdoor locations.

A transfer switch is not an energy source. It is electrical switching equipment that isolates selected household circuits from the utility supply before those circuits receive power from an alternate source. Depending on the installation, the alternate source may connect through an exterior or interior power inlet. Transfer equipment can be manual or automatic, although portable battery systems are commonly associated with manual operation.

The distinction matters because capacity alone does not establish compatibility. A large battery may still lack the voltage, connector, neutral configuration, or continuous output required by a transfer switch installation. Conversely, a properly designed transfer setup cannot supply more energy than the connected source stores or produces.

2. How Power, Capacity, Voltage, and Circuit Transfer Work

Power and energy describe different limits. Inverter output, measured in watts, determines how much equipment can operate at one time. Battery capacity, commonly stated in watt-hours, influences how long those loads can run. A 2,000-watt inverter does not mean the unit can deliver 2,000 watts for a specific number of hours; usable capacity and conversion losses also matter.

Motor-driven appliances create another requirement. Refrigerators, sump pumps, fans, and some heating equipment may draw several times their normal running power during startup. The source must support both continuous watts and short-duration surge watts without shutting down.

Voltage is equally important. Many portable stations provide only 120-volt AC output. Typical household transfer equipment may serve 120-volt circuits, 240-volt circuits, or both. A 120-volt source cannot operate true 240-volt loads merely because an adapter fits. Some higher-output battery systems provide split-phase 120/240-volt service, but the waveform, connector, current rating, and transfer equipment must all be compatible.

With direct use, each appliance connects to the station and is limited by the unit’s receptacles and total inverter rating. With a transfer switch, selected branch circuits remain usable through their normal wall outlets or hardwired connections. The homeowner must still manage loads so the combined demand stays within the source, inlet, cable, and transfer equipment ratings.

Example values for illustration.
CharacteristicDirect portable station useTransfer switch setup
Connection pointAppliances plug into the stationAlternate source supplies selected circuits
Typical setupMinimal fixed equipmentProfessional installation generally required
Load accessLimited to reachable cords and outletsNormal outlets or hardwired loads on transferred circuits
Voltage needsOften 120 voltsMay require 120/240-volt split-phase output
Main advantagePortability and simplicityConvenient circuit-level backup

3. Real-World Home Backup Examples

Short outage with essential plug-in loads

Consider a refrigerator averaging 100 to 200 watts while running, several LED lights, a modem, and phone charging. A portable station with adequate surge capability can operate these items directly. Extension cords may be necessary, but no transfer switch is needed. A battery around 1,000 to 2,000 watt-hours could provide several hours of support, depending on appliance cycling, inverter losses, and the actual combined load.

Sump pump and selected household circuits

A homeowner may want a sump pump, refrigerator circuit, lighting circuit, and communications equipment to remain available at their usual locations. A transfer switch can improve convenience because those selected circuits are energized without running separate cords through the house. The source still needs enough surge output for the pump and refrigerator, and repeated motor starts can reduce runtime substantially.

Loads that exceed a typical portable system

Central air conditioning, electric resistance heating, electric water heating, ranges, clothes dryers, and large well pumps can require substantial 240-volt power. Supporting even one may call for high continuous output, strong surge performance, and much more stored energy than basic portable units provide. Whole-home expectations should therefore be separated from essential-circuit backup.

Runtime estimates should use measured or realistic average consumption rather than appliance nameplate maximums alone. As a simplified example, 1,800 usable watt-hours divided by a 300-watt average load suggests about six hours. Actual results vary with temperature, battery reserve settings, inverter efficiency, appliance cycling, and battery age.

4. Common Mistakes and Troubleshooting Cues

  • Treating watt-hours as output power: A large battery capacity does not guarantee that the inverter can start a pump, refrigerator, or compressor. Check continuous and surge output separately.
  • Assuming every AC outlet supports the full rating: The total inverter rating may be shared among multiple receptacles, and an individual outlet may have a lower current limit.
  • Confusing 120 volts with 120/240 volts: A station with standard 120-volt receptacles generally cannot supply true 240-volt loads. Plug shape alone does not prove electrical compatibility.
  • Overloading transferred circuits: A transfer switch makes multiple circuits accessible, but it does not increase inverter output. If power stops when another appliance starts, combined load or surge demand may be the cause.
  • Ignoring neutral and grounding design: Portable sources may use a floating neutral or another configuration that interacts differently with transfer equipment and ground-fault protection. Unexpected fault indications or tripping require professional evaluation rather than improvised adapters.
  • Using unsuitable cords or connectors: Excessively long, undersized, damaged, or loosely connected cables can cause voltage drop and heat. Every component in the power path must have an appropriate voltage and current rating.
  • Expecting nameplate runtime: AC conversion losses, cold weather, high loads, and battery protection reserves reduce usable operating time.

If a system repeatedly shuts down, identify whether it occurs at appliance startup, after sustained high demand, during low battery conditions, or only when connected to transfer equipment. Those patterns can point toward surge overload, thermal protection, depleted capacity, or an installation compatibility issue. Electrical faults, unexplained tripping, or abnormal heating should be assessed by a qualified electrician.

5. High-Level Safety Basics for Both Arrangements

Never connect a portable power source to home wiring through a wall receptacle or improvised double-ended cord. That practice can energize wiring unexpectedly, defeat proper isolation, create fire and shock hazards, and endanger utility workers. Home-circuit backup requires listed transfer equipment or another approved transfer method installed for the intended application.

A qualified electrician should determine whether the transfer switch, inlet, overcurrent protection, conductor sizing, grounding arrangement, and neutral switching are compatible with the portable source. Local electrical and building requirements may also govern permits, installation, labeling, and inspection.

Keep the station dry, provide the ventilation clearance specified for it, and protect connectors from physical damage. Do not cover the unit during operation or place it near flammable materials. Although battery power stations produce no engine exhaust while operating, any fuel-burning charging equipment used nearby must remain outdoors and safely separated from openings.

Use load management rather than relying on protective shutdowns. Start large appliances one at a time, monitor output, and leave headroom below the continuous rating. Medical devices, life-safety equipment, and loads that cannot tolerate interruption require a backup plan specifically evaluated for their power quality, transfer time, and reliability needs.

6. Maintenance, Testing, and Storage

Recharge the battery according to its storage guidance and check its state of charge periodically. Long storage at a completely empty state can leave insufficient reserve for an outage, while temperature extremes can accelerate aging. A dry, moderate-temperature location is generally preferable.

Test the intended loads periodically under controlled conditions. Confirm that motor loads start, the displayed wattage remains within limits, and the estimated runtime matches current needs. Inspect external cords, plugs, inlets, and receptacles for looseness, discoloration, corrosion, cuts, or heat damage. Do not open the power station or modify its battery pack.

Transfer equipment should remain labeled so household members know which circuits are backed up and which large loads must stay off. Any stiff operation, unusual sound, overheating, visible damage, or persistent breaker tripping warrants professional service. Battery capacity also declines with time and cycles, so an older system may need earlier recharging or reduced loads.

Example values for illustration.
CheckPossible intervalWhat to confirm
Battery chargeEvery 1 to 3 monthsAdequate reserve and normal charging
Load testSeveral times per yearStartup performance and expected runtime
Cords and connectorsBefore each useNo damage, corrosion, looseness, or heat marks
Transfer equipmentPeriodicallyClear labels and normal operation
Backup planBefore storm seasonsPrioritized loads and charging options

Related guides: Using a Transfer Switch With a Portable Power Station: Safe AlternativesHow to Choose the Right Size Portable Power StationHow to Build a Load Priority List for a Portable Power Station During BlackoutsEmergency Preparedness: Building a Home Backup Plan Around a Power Station

7. Practical Takeaways and Specs to Compare

Direct appliance connection is usually the simplest choice when only a few accessible plug-in loads need power. A transfer switch becomes more useful when homeowners want selected fixed circuits, wall outlets, pumps, or lighting to operate normally during an outage. It must be treated as a professionally designed connection system, not as a way to expand the power station’s capabilities.

Begin by listing essential loads, their running watts, startup demand, voltage, and desired operating hours. Then compare that demand with the source’s output and usable energy. If a transfer setup is being considered, have an electrician verify the entire connection path and the source’s grounding, neutral, voltage, and waveform compatibility.

Specs to look for

  • Usable battery capacity: Look for roughly 1,000 to 3,000 watt-hours for modest essential-load backup, or more for longer outages; usable energy determines practical runtime.
  • Continuous AC output: Choose an output above the expected simultaneous load, with approximately 20% to 30% operating headroom; this reduces overload and heat-related shutdowns.
  • Surge output: Look for a short-duration rating that covers motor startup, sometimes two to three times running watts; pumps and compressors may otherwise fail to start.
  • Output voltage and phase: Confirm whether the system provides 120 volts only or true 120/240-volt split-phase power; this determines which household loads can operate.
  • AC connector and current rating: Verify a purpose-designed output connection with enough current for the intended inlet and transfer equipment; physical fit alone does not establish compatibility.
  • Recharge input: Compare AC and solar charging rates, such as 500 to 1,500 watts; faster recharging can restore useful capacity between outages.
  • Battery chemistry and cycle rating: Look for chemistry suited to frequent backup use and a cycle specification tied to remaining capacity; this helps estimate long-term durability.
  • Operating temperature range: Confirm charging and discharging ranges appropriate for the storage location; batteries may deliver less power or reject charging in extreme temperatures.
  • Monitoring and load controls: Useful displays show watts, remaining energy, estimated runtime, and fault conditions; clear data supports better load management.

The most appropriate setup is the one that safely supports clearly prioritized loads without exceeding its electrical or energy limits. Portability favors direct use, while circuit-level convenience favors a compatible transfer switch installation.

Frequently asked questions

Can a portable power station power a house through a transfer switch?

It can power selected home circuits only when the power station, inlet, cable, and transfer equipment are designed and rated to work together. The source must provide the required voltage, output capacity, connector type, and compatible neutral and grounding arrangement. Many portable power stations are intended for direct appliance use only.

What specs matter most when choosing a portable power station for home backup?

Compare usable battery capacity, continuous AC output, surge capability, output voltage, and the rating of each outlet or dedicated connection. Also consider recharge speed, operating temperature limits, and whether the system provides true 120/240-volt split-phase output if that is required. The selected source should support the expected simultaneous loads with operating headroom.

How long will a portable power station run a refrigerator during an outage?

Runtime depends on usable battery capacity, the refrigerator’s actual cycling load, startup demand, and inverter losses. A refrigerator may use far less power while cycling than its peak or nameplate rating suggests, but conditions such as ambient temperature and frequent door opening can increase consumption. Measuring average usage provides a more reliable estimate than using a single wattage figure.

Can a 120-volt portable power station run 240-volt appliances?

No. A standard 120-volt output cannot supply a true 240-volt appliance simply by using an adapter or a different plug. A compatible source must provide the appropriate 120/240-volt split-phase output, current capacity, and connection method for the intended equipment.

What is a common mistake when connecting backup power to home circuits?

A common mistake is assuming that a transfer switch increases the output or runtime of the portable power station. The connected circuits still share the source’s inverter and battery limits, so several loads starting at once can overload it. Another serious mistake is using improvised cords or connecting a source through a wall receptacle.

Is it safe to connect a portable power station to a transfer switch yourself?

Home-circuit backup should use listed transfer equipment or another approved transfer method that properly isolates utility power. Compatibility can involve voltage, overcurrent protection, conductor sizing, grounding, and neutral switching, so installation and source verification should be handled by a qualified electrician. Never backfeed home wiring through a receptacle or use a double-ended cord.

How to Keep a Backup Power Station Ready Without Overcharging It

Backup power station stored at a moderate charge level for emergency readiness

The best way to keep a backup power station ready without overcharging it is to store it at a moderate state of charge, recharge it on a schedule, and avoid leaving it full and plugged in unless its manufacturer specifically supports long-term standby charging.

Modern portable power stations use a battery management system, or BMS, to stop electrical overcharge under normal conditions. However, holding a lithium battery at a 100% charge level for weeks or months can still increase long-term battery wear, especially in warm storage. Charge limit settings, storage temperature, battery chemistry, standby mode, and self-discharge all affect readiness.

For most households, a practical approach is to keep the unit around 50% to 80% during routine storage, check it every one to three months, and top it up before severe weather or a planned outage. Exact targets vary, so the power station’s operating and storage instructions should take priority.

1. What Overcharging Means for a Backup Power Station

Electrical overcharging occurs when a battery continues receiving energy beyond its safe upper voltage. A functioning power station is designed to prevent this. Its BMS monitors cell voltage, current, and temperature, then reduces or stops charging when necessary. The external charger and internal charge controller also help regulate the process.

That protection does not mean a battery experiences no stress while sitting at 100%. A full lithium-ion battery remains at a relatively high cell voltage. Over time, high voltage and heat can accelerate chemical aging, reducing usable capacity and shortening runtime. This is better described as high-state-of-charge wear rather than uncontrolled overcharging.

Readiness and battery longevity therefore require a balance. Keeping a unit nearly empty may leave too little energy for an unexpected outage. Keeping it completely full in a hot room throughout the year may produce unnecessary wear. A moderate storage charge provides an energy reserve while reducing the time spent at maximum voltage.

Occasional charging to 100% is normal and useful before an expected outage, camping trip, or emergency. The greater concern is leaving the battery full for extended periods when immediate maximum capacity is not required.

2. How Charge Management and Battery Chemistry Work

Most backup power stations use either lithium iron phosphate, commonly called LFP or LiFePO4, or another lithium-ion chemistry such as nickel manganese cobalt. LFP batteries generally offer higher cycle-life ratings and good thermal stability, while other lithium-ion chemistries may provide lower weight for a given capacity. Both benefit from reasonable storage temperatures and avoiding unnecessary time at extreme charge levels.

The displayed percentage is an estimate calculated by the BMS rather than a direct measurement of stored watt-hours. It can drift after many partial cycles or long storage periods. Some models periodically benefit from a complete charge cycle for display calibration, but calibration should follow the manufacturer’s instructions and should not be performed more often than necessary.

Charge limits can make routine storage easier. If a unit allows a maximum charge level of 70%, 80%, or 90%, the user can select a lower ceiling for everyday standby use and temporarily raise it before a likely outage. Models without an adjustable limit can be unplugged manually when they reach the desired range.

Self-discharge also matters. Even when outputs are off, the battery and internal electronics gradually consume energy. Wi-Fi, Bluetooth, illuminated displays, DC outputs, and inverter standby can increase this loss. Turning off unneeded functions helps preserve the stored charge.

Charge conditionTypical useReadinessBattery-wear consideration
30% to 50%Longer storageLimited immediate runtimeModerate storage level, but may require charging before use
50% to 80%Routine emergency standbyUseful reserve for many loadsBalances readiness with reduced time at full charge
90% to 100%Outage expected soonMaximum or near-maximum runtimeBest used temporarily rather than for months of storage
Below 10%Nearly depletedPoor emergency readinessExtended storage at very low charge may be harmful
Example values for illustration.

3. Real-World Charging and Storage Examples

Routine household standby

A household stores a 1,000-watt-hour power station in a climate-controlled closet for occasional outages. Keeping it near 70% provides roughly 700 watt-hours before conversion losses and reserve limits are considered. The owner checks it every two months, confirms that all outputs are off, and restores the charge if it has fallen significantly.

Severe weather approaching

A storm is forecast within two days. The power station is increased from its routine 70% level to 100%, then disconnected once charging is complete. Charging to full in this situation is appropriate because the stored energy is likely to be used soon. After the risk passes, normal use can bring the battery back toward its routine storage range.

Power station used as an uninterruptible supply

Some units support pass-through power or an emergency power supply mode. In this setup, utility power feeds the connected equipment while the battery remains available for an outage. A model designed for this role may manage its battery differently from a unit intended only for occasional charging. Important specifications include transfer time, supported input power, output capacity, charge-limit controls, and whether long-term plugged-in operation is permitted.

Pass-through capability alone does not necessarily mean a power station should remain connected continuously. If the unit repeatedly drops a few percentage points and recharges, it may accumulate shallow cycles. The operating instructions should confirm the intended standby behavior.

4. Common Mistakes and Troubleshooting Cues

Leaving the inverter on during storage: The AC inverter can consume power even when no appliance is operating. If the charge level falls faster than expected, confirm that AC, DC, USB, wireless, and network functions are off.

Storing the battery completely full in heat: A garage, vehicle, attic, or sunlit room can reach damaging temperatures. High charge and high temperature together are especially unfavorable for lithium battery aging. Move the unit to a dry, ventilated indoor location within its stated storage range.

Allowing the battery to remain empty: A display reading of 0% does not necessarily mean every cell is at zero voltage, but the remaining protective reserve can decline during storage. Recharge a depleted unit promptly rather than leaving it unused for months.

Using an incompatible charger: A charger with the wrong voltage, connector, polarity, or power-delivery profile may fail to charge or could create a safety risk. Use an approved charging method that matches the specified input voltage, current, wattage, and connector type.

Assuming the percentage is perfectly accurate: If the display jumps, stalls, or reaches full unusually early, the estimate may need recalibration. First perform a normal restart and charge with the correct adapter at room temperature. If the behavior continues, follow the documented calibration procedure or request qualified service.

Ignoring abnormal behavior: Stop charging if the unit becomes unusually hot, produces an odor, swells, makes unexpected noises, shows repeated fault codes, or has damaged ports or cables. A power station that shuts down while charging may be responding to excess temperature, an unsuitable power source, or an internal fault.

5. Essential Charging and Battery Safety

Charge the power station on a stable, dry, nonflammable surface with ventilation around its cooling openings. Keep it away from direct sunlight, heaters, standing water, flammable materials, and areas accessible to small children or pets. Do not cover the unit while it is charging.

Inspect the charging cable, plug, adapter, and ports before use. Loose connections, bent contacts, frayed insulation, discoloration, or melted plastic require attention. Do not open the enclosure, replace internal cells, bypass the BMS, or modify charging hardware.

Temperature limits apply to both charging and storage. A cold battery may temporarily refuse to charge, while excessive heat can trigger shutdown or accelerate degradation. Allow a unit moved from a very cold or hot environment to return to an acceptable operating temperature before charging.

A portable power station should not be connected directly to household wiring through improvised cords or outlets. Any installation intended to power home circuits requires compatible transfer equipment and evaluation by a qualified electrician. Portable units should also be kept out of rain unless their stated ingress protection and operating instructions explicitly permit exposure.

6. A Practical Maintenance and Storage Schedule

Choose a cool, dry storage location that is easy to access during an outage. Avoid placing heavy objects on the power station, and protect its ports from dust and impact. Store charging cables with the unit so the correct accessories are available when needed.

For routine standby, inspect the battery every one to three months. Check the displayed charge, look for physical damage, and verify that the unit powers on without a warning. If the charge has fallen below the chosen reserve level, recharge it to the preferred storage range. Units with higher standby drain may need more frequent checks.

Before a predictable seasonal risk, charge the battery fully and briefly test essential loads without exceeding the continuous output rating. A short functional test can reveal a damaged cable, weak adapter, inaccurate display, or appliance with unexpectedly high startup watts. Afterward, switch off all outputs before returning the unit to storage.

Keep a simple record of check dates, charge percentages, faults, and noticeable runtime changes. A gradual decline is normal with age, but a large unexplained capacity loss may indicate calibration drift, unusual standby consumption, extreme storage conditions, or battery deterioration.

IntervalMaintenance actionWhat to verify
Monthly to quarterlyCheck state of chargeBattery remains within the chosen standby range
Every few monthsInspect ports and cablesNo damage, corrosion, looseness, or overheating marks
Before outage seasonCharge and test essential loadsNormal charging, output, fan operation, and display behavior
After each useCool, clean, and rechargeOutputs are off before storage
During long storageReview environmental conditionsArea remains dry, ventilated, and within the stated temperature range
Example values for illustration.

Related guides: Long-Term Storage Best Practices: Charge Level, Temperature, and ScheduleShould You Leave a Power Station Plugged In All the Time?How Often Should You Test a Backup Power Station?

7. Practical Takeaways and Specs to Look For

For everyday readiness, use a moderate charge target rather than automatically keeping the battery at 100%. Check it periodically, disable unnecessary outputs, and move to a full charge when an outage is likely. Avoid prolonged storage near empty, excessive heat, incompatible chargers, and continuous plugged-in operation unless the power station is designed for that use.

The most useful maintenance features are those that make charge control, monitoring, and safe storage easier. Capacity and output ratings still matter, but they should be considered alongside chemistry, standby consumption, operating temperature, and charging controls.

Specs to look for

  • Adjustable charge limit: Look for selectable ceilings such as 70%, 80%, or 90%; this reduces time spent at full charge during routine standby.
  • Battery chemistry: Compare LFP with other lithium-ion designs and review expected cycle life; chemistry influences weight, longevity, and storage behavior.
  • Cycle-life rating: Look for a stated number of cycles to a remaining capacity, such as 2,000 to 4,000 cycles to about 80%; consistent test terms make comparisons more meaningful.
  • Storage and charging temperature ranges: Look for clearly separated ranges for charging, use, and storage; this helps determine whether the intended location is suitable.
  • Standby power consumption: Look for low idle draw and the ability to disable AC, DC, wireless, and display functions; lower drain extends the time between maintenance checks.
  • Pass-through or standby mode: Look for explicit support for long-term plugged-in operation, a stated transfer time, and battery-preservation controls; these matter when protecting continuously connected equipment.
  • Input power and recharge time: Compare AC input wattage and estimated charging time, such as two to six hours; faster charging can restore emergency capacity when warning time is short.
  • Battery management protections: Look for monitoring of overvoltage, undervoltage, overcurrent, short circuits, and temperature; these protections help the unit respond to abnormal conditions.
  • Capacity and usable energy: Compare watt-hour ratings and any stated usable capacity; this determines expected runtime more directly than peak output alone.
  • Continuous and surge output: Match continuous watts and short-duration surge watts to essential appliances; adequate headroom helps prevent overload shutdown during startup.

A well-maintained backup power station does not have to remain full every day to be dependable. A planned storage level, periodic inspection, suitable temperature, and timely top-up before a likely outage can preserve both emergency readiness and long-term battery capacity.

Frequently asked questions

What charge level should I keep a backup power station at between outages?

For routine storage, many households keep a backup power station around 50% to 80% charge. This provides a useful reserve while reducing the time the battery spends at maximum voltage; the manufacturer’s stated storage guidance should take priority.

Can I leave a backup power station plugged in all the time?

It depends on whether the model is specifically designed and documented for continuous standby or pass-through operation. A battery management system normally prevents electrical overcharge, but long-term full charge and repeated recharge cycles may still contribute to battery wear.

How often should I check a stored power station?

Checking the unit every one to three months is a practical schedule for many power stations. Verify its charge level, turn off unneeded outputs, inspect cables and ports, and recharge if the battery has dropped below the chosen reserve level.

Is it bad to store a power station at 100% charge?

Charging to 100% before a forecast outage or planned use is generally appropriate. Storing a lithium battery at full charge for long periods, particularly in a warm location, can accelerate capacity loss over time.

What features matter most when choosing a power station for emergency standby?

Useful standby features include an adjustable charge limit, low idle power consumption, clear storage-temperature guidance, and documented support for long-term plugged-in use if needed. Battery chemistry, usable watt-hours, continuous output, surge output, and charging time also affect how well the unit can support essential loads.

What safety steps should I follow when charging and storing a power station?

Charge and store the unit on a stable, dry surface with clear ventilation and away from heat, sunlight, water, and flammable materials. Use approved charging equipment, do not cover or modify the unit, and stop using it if it shows swelling, unusual heat, odors, damage, or persistent fault warnings.

Shipping or Returning a Portable Power Station: Lithium Battery Packaging Basics

Portable power station secured with protective cushioning inside a shipping box

Shipping a portable power station usually requires approved carrier service, strong protective packaging, and accurate lithium battery documentation because most units contain batteries far larger than ordinary consumer shipping exceptions. Before mailing a unit or starting a warranty return, confirm its watt-hour rating, battery chemistry, physical condition, destination, and the carrier’s current acceptance rules.

Search terms such as lithium battery shipping, portable power station return, UN 38.3 test summary, watt-hour rating, and hazardous materials packaging describe different parts of the same issue. A prepaid return label does not automatically mean a package is correctly prepared or eligible for every transport method. Air, ground, domestic, and international shipments may follow different requirements.

The safest approach is to use the manufacturer’s return instructions and the carrier service named on the label. If the battery is swollen, leaking, unusually hot, punctured, recalled, or damaged in an accident, do not place it in ordinary parcel transportation. Contact the manufacturer, seller, carrier, or a qualified hazardous-materials shipping provider for case-specific direction.

1. What Lithium Battery Packaging Means and Why It Matters

A portable power station combines a rechargeable lithium battery, battery management electronics, charging hardware, and power outputs in one enclosure. Its stored energy is normally stated in watt-hours, or Wh. Even compact models may store several hundred watt-hours, while larger units can exceed 1,000 Wh. That capacity affects transportation classification, carrier acceptance, packaging, documentation, and whether air service is available.

Lithium batteries can release heat and flammable gases if crushed, short-circuited, overcharged, or internally damaged. Shipping rules are designed to reduce those risks and help transportation workers identify and handle regulated packages. Requirements may come from national transportation agencies, international air or maritime standards, and carrier-specific policies.

The shipping description is not determined by marketing terminology alone. Depending on its design and regulatory interpretation, a power station may be treated as a lithium-ion battery, a battery contained in equipment, or another regulated article. Many carriers apply stricter rules to power banks and power stations because supplying electrical energy is their main purpose. The shipper should use the classification provided in the manufacturer’s shipping documents rather than guessing from the enclosure.

2. Key Concepts Behind Classification, Packing, and Acceptance

Watt-hours: Battery energy is commonly calculated as nominal voltage multiplied by amp-hours. A label showing 25.6 volts and 40 amp-hours represents about 1,024 Wh. Use the rating printed on the product or technical documentation rather than calculating from AC output watts, which measure power rather than stored energy.

Battery test information: Lithium cells and batteries offered for transport generally need to be of a type that has passed applicable UN 38.3 design tests. A test summary identifies the tested battery type, manufacturer, laboratory, and test results. It does not prove that a damaged package is safe, and it is not a substitute for shipping papers when those are required.

State of charge: Some transport modes or classifications restrict battery state of charge. A manufacturer may instruct the owner to discharge a unit to a specified range before return, such as roughly 20% to 30%. Do not assume that one percentage applies to every shipment, and do not deliberately drain a malfunctioning battery that becomes hot or unstable.

Protection from movement and activation: The unit should be switched off, protected against accidental operation, and immobilized with nonconductive cushioning. Terminals, sockets, switches, and displays should not contact metal accessories or bear the weight of the package. Cables should be disconnected unless the approved return instructions state otherwise.

Example values for illustration.
InformationExampleWhy it matters
Stored energy512 WhHelps determine the applicable battery category and available carrier services.
Battery chemistryLithium iron phosphateIdentifies the lithium battery type, although chemistry alone does not remove shipping controls.
Package weight35 lbAffects box strength, handling, service eligibility, and shipment cost.
Return charge levelAbout 25%May match a specific manufacturer or transport instruction.
Transport test recordUN 38.3 test summary availableProvides evidence that the battery design completed required transport testing.

3. Illustrative Shipping and Return Scenarios

Routine return in the original packaging

A normally functioning 500 Wh unit is being returned because it does not meet the owner’s needs. The seller provides a ground-service label, packing instructions, and a required charge range. The owner uses the original fitted end caps, secures accessories in a separate compartment, and confirms that the power button cannot be pressed through the box. This is a lower-risk scenario because the battery has no signs of damage and the return channel was arranged in advance.

Warranty return without the original box

A 1,000 Wh station no longer charges, but it is cool, dry, and physically intact. A random single-wall carton with loose packing peanuts would not provide reliable restraint. The owner requests an approved replacement packaging kit or written packing specifications. A heavy-duty outer box, shaped nonconductive cushioning, protected controls, and adequate clearance around every side may be necessary. Whether one or two boxes are required depends on the authorized packaging design and package weight.

Damaged or swollen battery

A power station was dropped, and its case is distorted near the battery compartment. Even if the display still works, hidden cell damage may create a delayed fire risk. It should not be charged, discharged for shipping, or placed in a normal parcel box. The return provider must determine whether specialized damaged-battery transport, local collection, or another disposal route is appropriate.

International or air shipment

A traveler wants to send a high-capacity station overseas using an express air service. The unit’s capacity, classification, route, carrier approval, documentation, and destination-country rules may make ordinary consumer acceptance unavailable. Changing to a different label or declaring it as generic electronics does not solve the issue. A qualified dangerous-goods shipper may be required.

4. Common Packaging Mistakes and Troubleshooting Cues

  • Using an unauthorized service: A label for standard ground transportation cannot automatically be substituted with air, postal, expedited, or international service. Confirm the exact service before sealing the box.
  • Hiding the battery description: Describing the parcel only as a generator, camping accessory, or electronic device can produce an inaccurate declaration. Use the terminology supplied by the return provider.
  • Assuming the retail carton is sufficient: A display carton may have been shipped inside another certified outer package. Check whether all original inserts, overpacks, and closures are required.
  • Allowing movement: If the station shifts when the box is gently tilted, the cushioning is probably inadequate. Loose fill alone may settle around a dense product and leave it exposed to impacts.
  • Leaving accessories connected: Plugged-in cables can damage ports or create unintended electrical paths. Disconnect and isolate accessories unless instructions specifically require them to remain installed.
  • Covering warning signs: Odor, hissing, swelling, corrosion, fluid, a cracked case, abnormal heat, or repeated protection shutdowns are reasons to stop packing and seek specialized guidance.
  • Creating labels from memory: Battery marks, hazard labels, orientation marks, and shipping papers have precise uses. Apply only the materials and wording specified for the shipment.
  • Reusing a weakened box: Water damage, crushed corners, tears, old punctures, or softened cardboard reduce stacking and impact resistance. Dense power stations need packaging matched to their actual weight.

If a carrier counter refuses the parcel, do not remove battery markings or move the product to another carrier without checking eligibility. Ask the return provider to confirm the classification, service level, account authorization, and required documents in writing.

5. High-Level Safety Basics Before and During Packing

Inspect the station in a clear, dry area away from flames, heaters, combustible clutter, and direct sunlight. Do not open the enclosure, remove an internal battery, bypass the battery management system, tape over damaged casing, or attempt a repair to make the unit shippable. Internal work can expose high current, stored energy, and damaged cells.

Turn the unit off using its normal controls. Disconnect solar panels, AC chargers, vehicle cables, expansion batteries, and powered loads. Cover exposed external terminals with the protective caps designed for the product or follow the supplied nonconductive protection method. Never place loose screws, adapters, tools, or metal plugs where they can bridge terminals.

Use firm cushioning that does not conduct electricity and that resists compression under the unit’s weight. Protect corners, displays, handles, wheels, and control panels. Close the carton with the specified tape pattern and number of strips. Extremely heavy models may require team lifting, a pallet, or freight service rather than ordinary parcel handling.

If the station emits smoke, vapor, popping sounds, or rapidly increasing heat, move away and contact emergency services. Do not carry a venting battery through an occupied building or put water, ice, or improvised chemicals inside its enclosure. Emergency response should take priority over completing a return.

6. Storage and Maintenance While Waiting for Authorization

Keep a normal, undamaged power station in a cool, dry, ventilated location while waiting for a shipping label or packaging kit. Avoid freezing conditions, hot vehicles, damp basements, and prolonged direct sun. Maintain the charge level requested by the return provider; otherwise, use the manufacturer’s normal storage range rather than leaving the battery completely full or empty for weeks.

Do not repeatedly charge and discharge the unit merely to reach an assumed shipping percentage. Check the display occasionally for unexpected charge loss, error messages, temperature warnings, or activation. Leave ports dry and uncovered unless their original caps are intended for storage.

Retain the original carton, molded inserts, terminal covers, accessory bags, manuals, and any shipping overpack after purchase. Photograph the unit’s condition, serial label, battery specification label, packed cushioning, and sealed box before handoff. Keep the return authorization and carrier receipt until the return is accepted and resolved. These records can document that the correct unit and packaging were used.

Example values for illustration.
Storage or packing checkIllustrative targetReason
Waiting temperatureAbout 50°F to 77°FModerate conditions reduce heat stress and condensation risk.
Storage chargeRoughly 30% to 60%A middle range is often practical when no shipment-specific level has been assigned.
Clearance around productAbout 2 to 4 inchesAllows room for fitted cushioning, subject to the approved package design.
Condition checkBefore packing and before handoffHelps identify swelling, heat, leakage, or new physical damage.
Documentation retainedUntil the return closesSupports tracking, condition verification, and warranty processing.

Related guides: How to Calculate Watt-Hours From Amp-Hours (and Avoid Common Mistakes)Lithium-Ion vs LiFePO4 Batteries ExplainedLong-Term Storage Best Practices: Charge Level, Temperature, and SchedulePortable Power Station Warranty Terms: What to Check Before Buying

7. Practical Takeaways and Specs to Check Before Purchase

Start every shipment by identifying the battery’s condition, watt-hour rating, chemistry, destination, and approved carrier service. Obtain return instructions before packing, especially for a unit above typical small-battery capacities. Use the provided classification and documents, immobilize the product, prevent accidental activation, and keep accessories from contacting terminals or controls.

Do not ship a recalled, swollen, leaking, punctured, overheated, or crash-damaged power station through an ordinary parcel network. These conditions require direction from the manufacturer, carrier, local waste authority, or a hazardous-materials professional. Rules can vary by transport mode and destination, so current shipment-specific instructions take precedence over a generic checklist.

Specs to look for

  • Clearly marked watt-hour capacity: Look for a permanent label showing values such as 300 Wh, 700 Wh, or 1,200 Wh; this supports accurate classification and carrier screening.
  • Battery chemistry disclosure: Look for a specific chemistry such as lithium iron phosphate or nickel manganese cobalt rather than only “lithium”; it improves identification and maintenance planning.
  • UN 38.3 test summary availability: Look for documentation that can be obtained for the exact battery model; return providers or commercial shippers may need it.
  • Manageable packed weight: Compare net weight with an estimated packed weight, such as 45 lb becoming 52 lb with cushioning; this affects box strength and service eligibility.
  • Shipping-mode or low-charge feature: A controllable storage range around 20% to 50% can make it easier to follow return instructions without excessive cycling.
  • Recessed or lockable controls: Look for switches that cannot be pressed easily through packaging; this reduces accidental activation during handling.
  • Protected external terminals: Built-in covers or fitted caps for expansion ports and high-current connectors help prevent short circuits and contamination.
  • Reusable fitted packaging: Molded end caps, a strong outer carton, and separated accessory storage simplify future warranty returns and limit movement.
  • Documented return procedure: Look for clear instructions covering charge level, approved service, packaging, and damaged-unit escalation; this reduces uncertainty if service is needed.

Shipping convenience is rarely the main purchase criterion, but it becomes important when a 40- to 100-pound unit needs warranty service. Clear labeling, obtainable test documentation, durable controls, protected terminals, and reusable packaging can make a future return safer and easier to arrange.

Frequently asked questions

Can I ship a portable power station through a regular parcel service?

It depends on the unit’s watt-hour rating, condition, destination, transport method, and the carrier’s current rules. Use only the carrier service and shipping description authorized by the seller, manufacturer, or carrier for that specific shipment.

What information do I need before returning a portable power station?

Have the product’s watt-hour rating, battery chemistry, serial information, physical condition, destination, and return authorization available. The return provider may also specify the allowed charge level, packaging method, label placement, and required documents.

What specs and features matter when buying a power station that may need to be shipped later?

Look for a clearly marked watt-hour rating, stated battery chemistry, available UN 38.3 test documentation, protected terminals, and controls that resist accidental activation. Reusable fitted packaging and a documented return procedure can also make future warranty shipping easier to arrange.

What is a common mistake when packing a portable power station for return?

A common mistake is using a weak retail carton or loose fill that allows the heavy unit to shift during handling. Another is switching to a different shipping service than the one authorized on the return label, which can change the applicable acceptance requirements.

How can I safely prepare a portable power station for shipping?

For an undamaged unit, turn it off, disconnect external cables and accessories, protect exposed terminals as instructed, and use firm nonconductive cushioning that prevents movement. Follow the return provider’s directions for charge level, box type, closures, labels, and carrier handoff.

Can I ship a swollen, leaking, or damaged portable power station?

Do not place a swollen, leaking, punctured, overheated, recalled, or crash-damaged unit in ordinary parcel transportation. Contact the manufacturer, seller, carrier, local waste authority, or a qualified hazardous-materials provider for shipment, collection, or disposal guidance.

Childproofing a Portable Power Station at Home: Cables, Heat, Buttons, and Pets

Portable power station secured from children and pets with managed cables and clear ventilation space

Childproofing a portable power station means preventing access to its cables, outlets, buttons, hot surfaces, and battery while preserving the ventilation needed for safe operation. Place it in a stable, supervised area that children and pets cannot reach, secure loose cords, and disconnect outputs that are not being used.

The main concerns are cable management, outlet covers, control lock settings, charging safety, and ventilation clearance. A power station can attract attention through illuminated displays, sounds, movable port covers, and connected cords. Pets may also chew cables, shed hair near cooling vents, or knock over a poorly placed unit.

No setup is completely childproof. Physical separation, active supervision, and routine inspection are more reliable than depending on a button lock or plastic cover alone. Always follow the operating temperature, clearance, charging, and storage instructions supplied with the unit.

What Childproofing a Portable Power Station Means

Effective childproofing creates several layers between a child or pet and the power station. These layers include safe placement, restricted access, protected cords, disabled unused outputs, and adult supervision. The goal is not merely to stop buttons from being pressed. It is to reduce the likelihood of electric shock, burns, trips, damaged wiring, blocked airflow, and accidental shutdowns.

A portable power station contains a high-energy battery and power electronics even when it is quiet. Some ports may remain energized after the display dims, and a control lock may not disable every outlet. During charging or heavy use, the case, charger, plugs, and connected cables may become warm. Childproofing therefore needs to account for the unit’s complete operating area, including everything connected to it.

How Cables, Heat, Controls, and Access Interact

Childproofing works best as a system. Start with a stable location outside normal play and pet routes. Use a safety gate, ventilated enclosure designed for operating equipment, or another secure boundary that cannot fall onto the unit. Do not place a heavy power station on a high shelf where pulling a cable could bring it down.

  • Cables: Route cords along walls or through suitable cable guards, leaving enough slack to avoid strain at plugs.
  • Heat: Keep every vent open and maintain the clearance stated by the manufacturer. Never operate the unit beneath clothing, bedding, or pet blankets.
  • Buttons: Enable a control lock when available, but verify which buttons and outputs it actually locks.
  • Pets: Prevent chewing, scratching, spraying, and hair accumulation with physical separation and regular cleaning.

Output ports should be off when they are not needed. Port covers can discourage touching, but they must fit correctly and must not trap heat or interfere with plugs. Accessories not approved for the unit may loosen, break, or obstruct ventilation.

Common household access risks and possible controls. Example values for illustration.
Risk areaIllustrative cuePractical control
VentilationObject within 4 to 8 inchesRestore the clearance specified for the unit
Loose cordCable crosses a play routeReroute through a wall-edge cable guard
ButtonsDisplay activates when touchedUse a control lock and physical barrier
Pet hairHair visible near an intakePower down and clean the exterior safely

Real-World Childproofing Examples

Powering a router during an outage

Place the power station on a dry, stable floor area behind a secured safety gate rather than on a table. Route the router during an outage cable against the wall and keep the AC outlet section facing away from the barrier. Confirm that the gate does not press against the unit or reduce airflow.

Charging in a family room

Charging creates two cable runs: one from the wall to the power station and another if devices are charging from its outputs. Restrict access to the whole area, not only the battery. Avoid charging near toy bins, curtains, upholstered furniture, pet beds, or places where liquids are commonly carried.

Using power around a dog or cat

A pet may treat a warm unit as a resting place or a cable as a chew toy. Use a stable barrier with openings too small for the pet to reach through. Inspect cord insulation and plug strain relief before every use. A protective sleeve may reduce abrasion, but it does not make an energized cable safe to chew.

Common Mistakes and Troubleshooting Cues

  • Hiding the unit in a closed cabinet: A sealed space can retain heat. If the fan runs frequently, output drops, or a temperature warning appears, shut down loads and check airflow and ambient temperature.
  • Relying only on a button lock: Some locks affect settings but leave outlets active. Test the feature without a child present and turn off unused AC, USB, and DC output groups.
  • Using a high shelf: A child or pet pulling a cord can topple the unit. Choose a low, stable location protected by a barrier instead.
  • Covering bright displays: Fabric or tape placed over the unit may block vents or hide warnings. Use built-in display timeout or brightness controls when available.
  • Ignoring damaged cords: Stop using a cable if it has exposed conductors, crushed insulation, bent contacts, unusual heat, or a loose plug. Replace it with a correctly rated cable.

Repeated alarms, unusual odors, swelling, smoke, liquid leakage, crackling sounds, or excessive heat are not childproofing problems to work around. Move children and pets away, stop using the equipment if this can be done safely, and follow the manufacturer’s emergency guidance. Do not open the case or attempt battery repairs.

High-Level Safety Basics for Home Use

  1. Keep the area dry: Do not place the unit where spills, pet bowls, wet footwear, or plumbing leaks could reach it.
  2. Match loads to ratings: Check continuous watts and surge watts before connecting an appliance. Overloading may trigger shutdowns and create unnecessary heat.
  3. Use suitable cords: Extension cords and power strips should be appropriately rated, intact, and fully visible for inspection.
  4. Separate it from heat and flame: Keep the power station away from stoves, radiators, direct summer sun, and ignition sources.
  5. Maintain supervision: Do not leave young children alone with operating electrical equipment, even when barriers and locks are present.

A portable power station must never be connected to household wiring through an improvised cord or used to backfeed a receptacle. Any planned connection to home circuits requires approved equipment and evaluation by a qualified electrician. If a fuel-powered generator charges the station, operate the generator outdoors at a safe distance from the home; the power station itself does not eliminate generator exhaust hazards.

Maintenance and Storage Around Children and Pets

Inspect the case, ports, plugs, and cables before use. Remove exterior dust or pet hair only with the unit shut down and disconnected, following its cleaning instructions. Do not insert tools into vents or apply liquids, sprays, or pet deterrents to the case or wiring unless the manufacturer specifically permits them.

For storage, turn outputs off and keep the unit in a dry, temperature-controlled, secured location. Avoid a locked car, damp basement floor, or hot attic. Maintain the recommended storage charge and recharge interval because prolonged storage at an unsuitable charge level can reduce battery performance.

  • Confirm that latches, gates, cable guards, and outlet covers still fit securely.
  • Check for pet tooth marks, pinching, fraying, discoloration, or looseness at connectors.
  • Review placement as children become taller, stronger, and able to open previous barriers.
Illustrative inspection schedule for a household setup. Example values for illustration.
TimingInspectionReason
Before each useCords, plugs, ports, and placementFind immediate access or damage risks
Weekly during regular useVents, barriers, and pet hairPreserve airflow and separation
Every 1 to 3 months in storageCharge level and storage conditionsSupport battery readiness and longevity

Practical Takeaways and Specs to Look For

Use multiple protections rather than treating any single feature as childproof. Create a secure perimeter, keep the unit stable and dry, route cords away from traffic, preserve ventilation, and disable outputs that are not needed. Recheck the arrangement whenever a new appliance is connected or furniture is moved.


Related guides: Indoor Use Safety: Ventilation, Heat, and Fire-Prevention BasicsExtension Cords and Power Strips: Safe Practices With Portable Power StationsUL 2743 Certification Explained for Portable Power StationsWhere to Store a Portable Power Station at Home: Heat, Humidity, and AccessPortable Power Station Fire Safety Checklist for Apartments

Specs to look for

  • Control lock: Look for a clearly documented lock requiring a deliberate action, such as a 2- to 5-second press; it reduces accidental setting changes but should not replace a barrier.
  • Independent output controls: Look for separate AC, USB, and DC switches; they let unused port groups remain de-energized.
  • Automatic output timeout: Look for adjustable shutdown or standby settings; these can reduce the time unused outlets remain active.
  • Thermal protection: Look for published high- and low-temperature shutdown behavior plus clear ventilation guidance; these features help the unit respond to unsafe operating temperatures.
  • Continuous and surge output: Compare appliance starting watts with both ratings, such as a 1,000-watt continuous load and a higher brief surge; adequate headroom reduces overload shutdowns and heat.
  • Cable and connector quality: Look for firmly fitting plugs, robust strain relief, and cables rated for the expected current; secure connections are less likely to loosen or overheat.
  • Size, weight, and handles: Check whether the unit can sit securely in the intended protected area; a 25- to 50-pound unit needs a stable surface and should not be placed where it can fall.
  • Safety certification and protections: Look for evaluation by a recognized testing laboratory and documented overcurrent, short-circuit, overvoltage, and temperature protection; these provide important safeguards without making the product childproof.

Before buying or relocating a power station, measure the protected area with its cables connected and required ventilation clearance included. A suitable setup must remain inaccessible to children and pets without enclosing the unit so tightly that heat cannot escape.

Frequently asked questions

Is it safe to use a portable power station around children?

It can be used more safely when children cannot reach the unit, its outlets, or its connected cords. Keep it dry, stable, ventilated, and supervised, and turn off output groups that are not in use. A lock feature or outlet cover should support, not replace, physical separation.

Can I put a portable power station in a cabinet to keep children away?

A closed or poorly ventilated cabinet is a common mistake because it can trap heat and obstruct cooling vents. Use a secure barrier or a ventilated equipment enclosure that preserves the manufacturer-required clearance instead. The barrier should not touch the unit, cables, or vents.

What features matter most when choosing a child-safe portable power station setup?

Useful features include separate controls for AC, USB, and DC outputs, a documented control lock, adjustable display or standby settings, and clear thermal protection information. Also consider the unit’s size, weight, cable quality, and ventilation requirements for the intended location. These features improve control of access and operation but do not make a power station fully childproof on their own.

How do I stop pets from chewing portable power station cables?

Keep cables behind a stable barrier and route them along walls or through suitable cable guards so pets cannot easily reach them. Inspect cables and strain relief before each use, and stop using any cord with tooth marks, fraying, crushed insulation, or looseness. Protective sleeves may reduce abrasion but do not make an energized cable safe for a pet to chew.

Should unused outlets on a portable power station be turned off?

Yes, turn off unused AC, USB, and DC output groups when the unit allows separate control. This reduces unnecessary access to energized ports and can limit accidental activation by a child or pet. Check the manual because a display turning off does not always mean every output is de-energized.

What should I do if a portable power station gets unusually hot or smells strange?

Move children and pets away and stop using the equipment if it is safe to do so. Follow the manufacturer’s emergency instructions for unusual heat, alarms, odors, swelling, smoke, leakage, or crackling sounds. Do not open the case, cover the unit, or attempt battery repairs.

Can You Take a Portable Power Station on a Plane? Battery Limits and Safer Travel Planning

Portable power station being prepared for airline carry-on screening

You can take some small portable power stations on a plane, but most larger models exceed passenger lithium battery limits and cannot travel in carry-on or checked baggage. Eligibility depends mainly on battery capacity in watt-hours, whether airline approval is required, and how the battery terminals are protected.

For many passenger flights, lithium-ion batteries rated at no more than 100 Wh can usually travel in carry-on baggage. Batteries from 101 to 160 Wh may be accepted only with airline approval, often with quantity restrictions. Units above 160 Wh are generally prohibited from ordinary passenger baggage. Carry-on rules, checked baggage restrictions, battery labels, and local aviation requirements can all affect the final decision.

Because a portable power station is commonly treated like a power bank or spare lithium battery, its AC output watts and surge watts do not determine whether it can fly. Check the watt-hour rating before booking, confirm the operating airline’s policy, and leave time to choose another power source if the unit is too large.

What the airline battery limit means and why it matters

Air travel restrictions focus on the amount of energy stored in a lithium battery. That capacity is stated in watt-hours, abbreviated Wh. It is different from the inverter’s continuous output rating, such as 300 W, and from its surge rating. A 300-watt power station could contain a battery below 100 Wh, while another unit with the same output could store several hundred watt-hours.

Portable power stations are often treated as spare batteries because their primary purpose is to provide stored electrical energy. Spare lithium batteries and power banks generally belong in carry-on baggage, where smoke, heat, or damage can be noticed more quickly. Placing a power station in checked baggage does not make an oversized battery acceptable.

Rules vary by country, airline, route, aircraft, and battery chemistry. A commonly used passenger framework allows lithium-ion batteries up to 100 Wh in carry-on baggage without advance airline approval. Batteries above 100 Wh but not exceeding 160 Wh may require approval, and airlines commonly limit passengers to two spare batteries in that range. Batteries over 160 Wh are generally handled as regulated cargo rather than normal passenger baggage.

These thresholds are not a guarantee of acceptance. An airline may apply a stricter policy, and security personnel may reject a damaged, recalled, poorly labeled, or suspicious device. Codeshare trips also require checking the policy of each operating carrier rather than relying only on the company that sold the ticket.

How watt-hours and airline classifications work

The most reliable number is the Wh rating printed on the power station’s compliance label, battery label, manual, or specification sheet. If only voltage and amp-hours are shown, watt-hours can be estimated with the formula Wh = nominal volts × amp-hours. A battery labeled 12.8 V and 8 Ah, for example, stores about 102.4 Wh.

Use nominal battery voltage rather than AC outlet voltage. Multiplying capacity by 120 V AC produces an incorrect result because 120 V describes inverter output, not the internal battery. Likewise, milliamp-hours must be converted to amp-hours by dividing by 1,000 before completing the calculation.

Some marketing materials list capacity in milliamp-hours at a cell voltage, while the case lists a different nominal pack voltage. Calculations based on inconsistent values may be misleading. For airport screening, a clear manufacturer-applied Wh marking is preferable to a passenger’s handwritten conversion.

Battery chemistry does not usually remove the need to check stored energy. Many power stations use lithium iron phosphate cells, while others use different lithium-ion chemistries. Lithium iron phosphate may offer favorable cycle life and thermal characteristics, but it is still a lithium-ion battery for typical passenger baggage classification.

Battery exampleCalculated capacityTypical planning implication
12 V × 7 Ah84 WhOften within the basic carry-on threshold, subject to airline review
12.8 V × 8 Ah102.4 WhMay require advance airline approval
12.8 V × 10 Ah128 WhMay fit the approval range and quantity restrictions
25.6 V × 10 Ah256 WhGenerally too large for ordinary passenger baggage
Illustrative watt-hour calculations for travel planning. Example values for illustration.

Real-world portable power station travel examples

A compact 88 Wh unit

A traveler has a clearly labeled 88 Wh power station with protected ports and no visible damage. Its capacity falls below the commonly used 100 Wh threshold. It may be permitted in carry-on baggage, but the traveler should still verify airline rules because size, device type, route, or local requirements may create additional restrictions.

A 144 Wh unit on a multicarrier itinerary

A 144 Wh power station falls within the commonly recognized 101–160 Wh approval range. The passenger should obtain approval from every operating airline before departure and keep the confirmation accessible. Acceptance by the first airline does not automatically bind a connecting carrier, and approval does not override security screening.

A 300 Wh camping power station

A 300 Wh model is above the usual passenger baggage ceiling. Removing it from checked baggage and carrying it into the cabin does not solve the problem. Practical alternatives include renting a compliant power source at the destination, shipping it through a qualified dangerous-goods service, or using fixed electrical service where available.

A unit with no readable capacity label

Even a physically small power station can be delayed or refused if screening staff cannot confirm its battery rating. A specification saved on a phone may help explain the device, but it may not replace a legible label on the product. Travelers should resolve missing or contradictory capacity information before reaching the airport.

Common mistakes and troubleshooting cues before departure

Checking output watts instead of battery watt-hours is the most frequent mistake. Output ratings describe what the inverter can power. Aviation limits are primarily concerned with stored battery energy, so locate the Wh value rather than relying on continuous or surge watts.

Assuming checked baggage has a higher allowance is another common error. Power banks and spare lithium batteries are generally restricted to carry-on baggage. A gate-checked bag should have the power station removed before the bag enters the aircraft hold.

Confusing airline approval with automatic permission can create problems at check-in. Approval generally means the airline has agreed to consider a battery in the 101–160 Wh range. The device must still meet packing, condition, quantity, security, and jurisdictional requirements.

Relying on a rounded marketing number may also cause uncertainty. If a listing says approximately 100 Wh but the product label says 102 Wh, plan around the labeled value. A rating just above 100 Wh may move the unit into an approval category.

Warning signs that require a different travel plan include swelling, cracked housing, chemical odor, unusual heat, damaged ports, liquid exposure, loose internal parts, or an active safety recall. Do not attempt to discharge, open, repair, or relabel a questionable battery to make it acceptable for flight.

If the airline’s written policy is unclear, provide the exact chemistry, Wh rating, model identifier, dimensions, and intended packing method when requesting guidance. Ask whether approval must be documented and whether each operating carrier must provide it.

High-level safety basics for flying with stored energy

Carry the power station in a way that prevents crushing, impact, and unintended activation. A fitted case or padded section of a carry-on can protect the housing, but the unit should remain accessible if security personnel request inspection. Do not pack heavy objects where they can press switches or damage the display.

Protect exposed terminals and ports from contact with coins, keys, cables, or other conductive objects. Use fitted port covers when available and keep loose accessories separate. The power station should be switched off rather than left in standby, and wireless charging surfaces should not be able to activate accidentally.

Do not use or charge a power station during flight unless the operating airline explicitly permits it. Cabin outlets may have low power limits, and charging policies can differ from rules for transporting the battery. Never connect a power station to an aircraft outlet in an attempt to run high-load appliances.

If a unit becomes hot, emits an odor, swells, smokes, leaks, or makes unusual sounds, stop using it and notify airline personnel immediately. Do not hide the device, place it in a confined bin without reporting it, or handle a smoking battery unnecessarily. Follow crew instructions.

Shipping an oversized unit is not the same as mailing an ordinary consumer item. Large lithium batteries may require regulated packaging, documentation, labeling, and a carrier authorized to handle dangerous goods. A qualified shipping provider should determine whether a particular battery can be transported.

Storage and maintenance before and after air travel

Inspect the housing, display, switches, ports, and charging cable well before departure. Confirm that the battery holds charge normally without overheating or producing unexpected errors. A device that behaves abnormally at home should not be taken onto an aircraft.

Follow the manufacturer’s storage guidance for state of charge. A moderate charge level is often suitable for storage, but travelers should not deliberately drain a unit to zero in the belief that capacity limits no longer apply. Aviation classification is based on the battery’s rated capacity, not its current charge percentage.

Keep the power station in a dry, temperature-controlled location before the trip. Avoid leaving it in a hot vehicle, exposed to direct sun, or in freezing conditions for extended periods. Allow a cold unit to return to room temperature before charging so condensation and low-temperature charging do not create avoidable risks.

After travel, check for impact damage and confirm that ports remain clean and secure. For long-term storage, review the unit periodically and recharge it according to its documentation. Excessive self-discharge, swelling, persistent error codes, or unusual heat are reasons to stop using the battery and consult an authorized service provider.

Travel stageCondition to verifySafer planning response
Several days before departureReadable Wh label and normal operationConfirm airline policy and request approval if applicable
While packingPower off, protected ports, undamaged casePlace accessibly in padded carry-on storage
At the gateCarry-on may be checkedRemove the power station before surrendering the bag
After arrivalNo impact, swelling, heat, or charging errorsStop use and seek qualified support if damage is suspected
Preflight and postflight condition checks. Example values for illustration.

Related guides: Portable Power Station Watt-Hours ExplainedPortable Power Station vs Power BankPortable Power Station Buying Guide

Practical takeaways and specs to look for

Start with the battery’s printed watt-hour rating. A unit at or below 100 Wh is generally the easiest category for passenger travel, while a unit from 101 to 160 Wh may require advance approval and may be subject to quantity limits. A power station above 160 Wh will usually require a non-passenger alternative.

Confirm requirements directly with every operating airline shortly before travel because policies and enforcement practices can change. Keep approval records and product information available, but do not assume documentation guarantees acceptance. If the trip depends on portable electricity for medical or accessibility equipment, contact the airline’s assistance team early because separate procedures may apply.

Specs to look for

  • Battery capacity: Look for a clearly printed rating such as 80–99 Wh when routine air travel is important; capacity determines the main passenger battery category.
  • Nominal voltage and amp-hours: Look for both values, such as 12.8 V and 7 Ah, so the Wh rating can be cross-checked when needed.
  • Battery chemistry: Look for an identified chemistry such as lithium iron phosphate or another lithium-ion type; clear identification helps with airline questions and safe handling.
  • Compliance labeling: Look for durable, legible labels showing Wh, voltage, model information, and relevant test markings; unclear labels can delay screening.
  • Physical power switch: Look for a recessed or guarded control that resists accidental activation while packed.
  • Port protection: Look for fitted covers or a case that shields USB, DC, and AC interfaces from metal objects and impact.
  • Battery management protections: Look for overcurrent, overvoltage, short-circuit, and temperature protection; these controls reduce foreseeable electrical hazards.
  • Operating and storage temperature ranges: Look for published ranges, such as charging above freezing and storage below extreme vehicle temperatures; this supports safer handling before and after travel.
  • Size and weight: Look for dimensions that fit securely in an accessible carry-on compartment; battery permission does not override the airline’s baggage limits.

For frequent flyers, a clearly labeled sub-100 Wh unit is usually simpler to plan around than a larger power station. Travelers who need substantially more runtime should arrange destination power, rental equipment, or compliant dangerous-goods shipping rather than risk confiscation or a missed flight.

Frequently asked questions

Can you take a portable power station on a plane in carry-on luggage?

Some portable power stations may be allowed in carry-on luggage if their lithium battery capacity is within the airline’s permitted watt-hour limit. Units at or below 100 Wh are commonly the simplest category, while 101–160 Wh models may require prior airline approval. Check the policy of every operating airline before travel.

Can a portable power station go in checked baggage?

Portable power stations and other spare lithium batteries generally should not be packed in checked baggage. They are typically required to remain in carry-on baggage when permitted because cabin crew can respond more quickly to a battery incident. If a carry-on bag must be gate-checked, remove the power station first.

What specs and features matter when choosing a portable power station for flying?

The most important specification is the battery’s clearly printed watt-hour rating, not the AC output or surge-watt rating. A legible label showing Wh, voltage, model information, and battery chemistry can help during airline inquiries and security screening. A protected power switch, covered ports, and an undamaged case also support safer packing.

Is it a mistake to use the power station’s watt output to determine whether it can fly?

Yes. The inverter output rating indicates how much power a device can supply, while airline battery restrictions focus mainly on stored energy measured in watt-hours. A low-output unit can still exceed the battery limit, and a higher-output unit may have a battery that falls within it.

Do airlines allow portable power stations between 100 Wh and 160 Wh?

Many airlines may allow lithium batteries above 100 Wh and up to 160 Wh only with advance approval, often subject to quantity limits. Approval practices vary by airline, route, and country, so obtain confirmation before departure. Security screening personnel may still inspect or decline a device that is damaged, poorly labeled, or otherwise unsuitable.

How should a portable power station be packed safely for a flight?

Switch the unit off, protect its ports and terminals from metal objects, and place it in an accessible padded area of carry-on baggage. Do not travel with a unit that is swollen, leaking, hot, cracked, recalled, or behaving abnormally. If the device shows signs of overheating or damage during travel, notify airline personnel immediately.

Portable Power Station for a Pop-Up Camper: Lights, Fans, Fridge, and Recharge Plan

Portable power station running lights, a fan, and a fridge in a pop-up camper

A portable power station for a pop-up camper should usually provide enough battery capacity for overnight lights, fans, device charging, and refrigerator operation while leaving a reserve for unexpected demand. The correct size depends on watt-hours, running watts, surge watts, appliance duty cycle, and the number of hours between charging opportunities.

For many campers, a mid-capacity unit can handle basic 12-volt loads, but refrigerators and furnace blowers can raise daily energy use substantially. A reliable plan starts by measuring each load rather than sizing from appliance labels alone. It also accounts for inverter loss, cold weather, battery reserve, and solar input limit.

Recharge planning is equally important. Solar panels may cover daytime consumption in good weather, while vehicle or shore-power charging can restore energy faster and more predictably. The goal is not simply to buy the largest battery available, but to balance runtime, output capability, recharge speed, weight, and camping habits.

1. What a Pop-Up Camper Power Station Needs to Do

A portable power station combines a rechargeable battery, charge controller, DC outputs, USB ports, and usually an AC inverter. In a pop-up camper, it can serve as a self-contained source for small appliances without running a generator or permanently changing the camper’s electrical system.

Capacity is stated in watt-hours, or Wh. A 1,000 Wh battery theoretically stores enough energy to supply 100 watts for 10 hours. Actual usable energy is lower because the inverter, wiring, electronics, temperature, and battery management system consume or limit some of that energy. Planning around roughly 80% to 90% of rated capacity is often more realistic, especially when AC outlets are used.

Output is stated in watts. Continuous output indicates what the station can sustain, while surge output describes its brief ability to start motors and compressors. Capacity determines approximate runtime; output determines whether a device can start and operate at all. A station can have ample energy capacity yet still be unable to start a refrigerator with a high compressor surge.

This distinction matters because camper loads vary. LED lights draw little power, roof or clip-on fans draw a moderate amount, and refrigerators range from efficient 12-volt compressor models to AC units with significant startup demand. Furnace blowers, heated blankets, coffee makers, and cooking appliances can change the calculation quickly.

2. Calculate Lights, Fans, Fridge, and Daily Energy Use

Estimate daily consumption by multiplying each device’s watts by its hours of operation. For cycling appliances, multiply by the approximate percentage of time they actually run. Add the results to obtain watt-hours per day.

For example, four 3-watt LED lights used for five hours consume 60 Wh. A 20-watt fan used for eight hours consumes 160 Wh. A 45-watt compressor fridge that runs 40% of the day consumes about 432 Wh: 45 watts multiplied by 24 hours and then by 0.40. Device charging might add another 50 to 100 Wh.

Fridge type requires special attention. An efficient 12-volt compressor refrigerator usually cycles on and off, with consumption affected by outdoor temperature, thermostat setting, ventilation, food temperature, and how often the door opens. An AC mini fridge also cycles but requires the inverter to remain active, adding conversion and idle losses.

A three-way absorption refrigerator behaves differently. Its 12-volt heating element may draw continuously and can consume far more battery energy than expected. The 12-volt mode is often associated with travel use when a suitable charging source is available, not long periods of stationary battery operation. Propane operation must follow the refrigerator and camper manufacturers’ ventilation and safety instructions.

After totaling daily consumption, add a reserve of about 15% to 30%. A camper estimated to use 800 Wh per day may therefore call for roughly 1,000 to 1,300 Wh of rated capacity for one day between dependable recharges. More reserve is useful in cold weather, under cloudy skies, or when the fridge is essential.

Illustrative daily energy budget. Example values for illustration.
LoadAssumed useDaily energy
Four LED lights12 W for 5 hours60 Wh
Ventilation fan20 W for 8 hours160 Wh
12 V compressor fridge45 W at 40% duty cycle432 Wh
Phones and small electronicsMixed charging80 Wh
Conversion and reserve allowanceApproximately 20%146 Wh
Estimated totalOne day878 Wh

3. Real-World Pop-Up Camper Power Examples

Basic overnight setup

A simple setup with LED lights, two phone charges, and a small fan may consume 200 to 350 Wh overnight. A power station in the 500 to 700 Wh range can often cover this use with a reasonable reserve. If charging is available every day, extra capacity may not be necessary.

Lights, fan, and compressor fridge

A camper running LED lights, a ventilation fan, electronics, and a compact 12-volt compressor fridge may use 700 to 1,000 Wh per day. A station rated around 1,000 to 1,500 Wh provides a more practical buffer, although hot weather or frequent fridge access can push consumption higher.

Cool-weather camping with a furnace blower

A propane furnace still needs electricity for its blower and controls. A blower drawing 35 watts for six total hours consumes 210 Wh. Added to a 750 Wh base load, this brings the day close to 1,000 Wh before reserve and conversion losses. Longer winter nights and reduced battery performance can increase the required capacity.

Short high-wattage appliance use

A 1,000-watt coffee maker used for six minutes consumes about 100 Wh, which is manageable from an energy perspective. However, the inverter must support at least its operating wattage. Electric kettles, heaters, hair dryers, and cooking appliances can draw 1,200 to 1,800 watts or more, placing much greater demands on output and battery capacity. Heating with propane or another approved camper heat source is generally more energy-efficient than using a battery-powered resistance heater.

These examples are planning estimates, not guarantees. A plug-in energy meter can measure AC appliances, while a suitable DC power meter can help assess 12-volt loads. Measuring the refrigerator over a full day gives more useful information than observing its draw for only a few minutes.

4. Common Sizing Mistakes and Troubleshooting Cues

Confusing watts with watt-hours: Watts describe power at a moment in time; watt-hours describe energy used over time. A 60-watt fridge does not automatically require a 60 Wh battery. If it averages 30 watts across 24 hours, it uses about 720 Wh per day.

Ignoring compressor surge: If the fridge clicks, attempts to start, and then stops, the inverter may lack sufficient surge capability. An overloaded station may also display an error or shut off its AC output. Verify both continuous and surge ratings, and avoid adding other heavy loads during compressor startup.

Leaving the inverter on unnecessarily: An active AC inverter can consume energy even when the appliance is not running. Direct 12-volt operation may reduce conversion loss when the fridge and power station use compatible, manufacturer-approved connections.

Assuming rated capacity is fully usable: A battery marked 1,000 Wh will not normally deliver all 1,000 Wh at the outlet. Low temperatures, inverter losses, high discharge rates, and protective shutdown thresholds reduce delivered energy.

Expecting rated solar output all day: A 200-watt panel rarely produces 200 watts from sunrise to sunset. Shade, clouds, heat, panel angle, cable loss, and the station’s solar input limit affect collection. If the station accepts only 150 watts, adding more panel wattage may help in weak sun but will not make the input exceed that limit.

Overlooking refrigerator ventilation: Poor airflow around a compressor fridge increases runtime. A warm fridge loaded with room-temperature food also uses much more energy initially. Pre-cooling food and the refrigerator from a dependable power source can reduce the first day’s battery demand.

If runtime is unexpectedly short, check actual appliance energy use, ambient temperature, inverter idle draw, fridge duty cycle, and whether the station began fully charged. A sudden shutdown under a heavy load points more often to an output or surge issue than to insufficient total capacity.

5. Portable Power Station Safety Basics

Keep the power station dry, stable, and protected from direct rain, condensation, and standing water. Do not place it against bedding, tent fabric, or other materials that block cooling vents. Avoid sealed compartments where heat can accumulate.

Use cables and adapters approved for the station and the connected appliance. Damaged connectors, loose DC plugs, undersized extension cords, or coiled cords carrying high current can overheat. Stop using any component that becomes unusually hot, smells burned, sparks, swells, or shows physical damage.

Do not backfeed a camper receptacle or household circuit through a homemade cable. Connecting a station to a camper’s built-in electrical system may involve grounding, converter, polarity, and transfer considerations. Use an inlet or connection method specifically designed for the purpose, and consult a qualified electrician or RV technician when compatibility is uncertain.

A power station does not make combustion appliances safe indoors. Fuel-burning heaters, stoves, and generators create carbon monoxide and require their own approved placement, ventilation, and detection practices. A generator should remain outdoors at the distance and orientation specified by its manufacturer.

Follow the power station’s permitted charging temperature range. Many lithium batteries restrict charging below freezing even when discharge remains possible. Internal battery management may provide protection, but it should not replace appropriate storage and operating conditions.

6. Recharge Planning, Maintenance, and Storage

A sustainable recharge plan compares daily energy use with energy restored. If the camper consumes 800 Wh per day, the charging methods should reliably return about that amount, plus conversion losses. Solar alone may work in sunny, open campsites, but a second option is valuable during shade or poor weather.

Solar production can be estimated with peak-sun hours. A 200-watt array receiving four effective peak-sun hours has a theoretical yield of 800 Wh. After controller, temperature, cable, and orientation losses, perhaps 550 to 700 Wh may reach the battery. This may offset much of a modest daily load without guaranteeing a full recharge.

AC wall or campground shore-power charging is generally the fastest predictable method if the station supports high input. Vehicle charging through a standard 12-volt accessory outlet is typically slower. Higher-power alternator-based charging equipment must be designed for the vehicle, power station, wiring, and circuit protection; professional installation may be appropriate.

For routine care, keep vents clean, inspect cables, update settings only as directed by the manufacturer, and periodically verify that all outputs function. Avoid storing the station completely depleted. For long-term storage, use the state-of-charge range and inspection interval specified by its manufacturer, commonly a partial charge with periodic checks. Store it in a dry, moderate-temperature location away from direct sunlight and ignition sources.

Before a trip, fully test the planned load combination. Run the fridge, fan, lights, and chargers together long enough to observe peak output and hourly energy use. This trial reveals problems while shore power is still available.

Illustrative recharge comparison. Example values for illustration.
Recharge methodTypical input exampleApproximate energy in 4 hoursMain limitation
Folding solar array100 to 200 W variable250 to 700 WhWeather, shade, and panel angle
Standard vehicle outlet80 to 120 W320 to 480 WhSlow charging and outlet limits
Higher-power vehicle charging300 to 600 W1,200 to 2,400 WhRequires compatible equipment and installation
AC wall or shore power500 to 1,200 W2,000 to 4,800 WhRequires access to an AC source

Related guides: Camping Power Planning: A Simple Energy Budget for a WeekendRV Basics: Using a Power Station for 12V Loads and “House Power”Charging From a Car: What’s Safe, What’s Slow, and What Can BreakPortable Solar Panels vs Fixed Panels: Which Is Better for a Power Station?

7. Practical Takeaways and Specs to Look For

Start with a 24-hour energy budget for the actual camper equipment. Add at least 15% to 30% for losses and reserve, then multiply by the number of days expected between dependable recharges. Confirm that continuous and surge output can support every planned load combination.

For light-only camping, several hundred watt-hours may be sufficient. A setup that includes a compressor fridge commonly benefits from about 1,000 Wh or more, depending on climate and recharge access. Furnace use, long stays, medical equipment, or heavy AC appliances justify additional capacity and backup charging options.

Specs to look for

  • Battery capacity: Look for roughly 500 to 700 Wh for basic overnight loads or 1,000 to 1,500 Wh for a fridge-based daily setup; capacity largely determines runtime.
  • Continuous AC output: A range around 1,000 to 1,800 watts supports many small camper appliances; it must exceed the combined running load.
  • Surge output: Look for a short-duration rating comfortably above refrigerator or motor startup demand, often 1.5 to 3 times running watts; this helps prevent startup shutdowns.
  • 12-volt regulated output: Confirm compatible voltage, connector type, and current capacity, such as 10 to 15 amps where appropriate; direct DC operation can reduce inverter losses.
  • Solar input range: Check maximum watts, voltage window, current limit, and connector compatibility; an input around 200 to 500 watts can make daytime recovery more practical.
  • AC recharge rate: Inputs around 500 to 1,200 watts can restore a mid-size battery within a useful campground window; faster charging reduces downtime when outlets are available.
  • Vehicle charging capability: Compare standard 12-volt charging with supported higher-power options; this matters when driving is the most dependable recharge opportunity.
  • Battery cycle life: Look for a stated capacity-retention benchmark after roughly 2,000 or more cycles if the station will see frequent use; longer cycle life improves service longevity.
  • Cold-temperature protection: Charging cutoff or battery warming features help protect cells in freezing conditions; this is important for early- and late-season camping.
  • Weight and portability: Units around 25 to 45 pounds are easier for many campers to move than larger systems; capacity is only useful if the station can be transported and positioned safely.

The best choice is the one that covers measured daily consumption, starts the largest appliance, and can be recharged under realistic campsite conditions. A written power budget and a pre-trip test provide a more dependable result than relying on battery capacity alone.

Frequently asked questions

What size portable power station do I need for a pop-up camper?

For lights, phone charging, and a small fan, a 500 to 700 Wh unit may be enough for a typical overnight stay. A camper using a 12-volt compressor fridge often needs roughly 1,000 to 1,500 Wh for a day of use, depending on weather, appliance duty cycle, and recharge access. Build in a 15% to 30% energy reserve rather than planning to use the full rated capacity.

Can a portable power station run a refrigerator in a pop-up camper?

Yes, provided the station has enough usable watt-hours for the refrigerator’s daily consumption and enough continuous and surge output for startup. Efficient 12-volt compressor refrigerators are generally more battery-friendly than AC models because they avoid inverter losses. A three-way absorption refrigerator on 12-volt electric mode can use substantial power and may not be suitable for extended battery-only operation.

What portable power station specs matter most for camping?

Prioritize usable battery capacity in watt-hours, continuous AC output, motor-starting surge output, and compatible 12-volt DC ports. Also compare solar input limits, AC recharge speed, vehicle-charging options, cold-temperature charging protection, and unit weight. The best specifications depend on the actual loads and how reliably the station can be recharged between camping days.

What is the most common mistake when sizing a camper power station?

A common mistake is confusing watts with watt-hours or relying only on an appliance’s label. A refrigerator may draw a certain wattage while running but cycle on and off throughout the day, so its total daily energy use can be much higher or lower than a short observation suggests. Measuring loads over realistic use periods provides a more dependable estimate.

How long does solar take to recharge a portable power station at camp?

Recharge time depends on panel output, available sunlight, panel angle, temperature, shading, and the station’s maximum solar input. A 200-watt solar array can theoretically collect 800 Wh in four peak-sun hours, but real delivered energy is often lower because of system and weather losses. Solar is most reliable when paired with a backup option such as shore power or vehicle charging.

Is it safe to use a portable power station inside a pop-up camper?

It can be safe when the station is kept dry, stable, ventilated, and used with undamaged, correctly rated cables and approved adapters. Do not block cooling vents, use homemade backfeed cords, or connect it to built-in camper wiring unless the connection method is designed for that purpose. Keep fuel-burning appliances and generators separate from the power station and follow their carbon monoxide and ventilation requirements.

Portable Power Station for a Shed or Outbuilding: Lights, Chargers, and Security

Portable power station running shed lights, chargers, and a security camera

A portable power station can safely run shed lights, device chargers, and low-power security equipment when its battery capacity and output match the loads. The main specifications are watt-hours, continuous watts, surge watts, inverter efficiency, and expected runtime.

For many sheds and detached outbuildings, a battery generator is simpler than installing permanent electrical service, especially when power is needed only occasionally. It can support LED lighting, USB charging, cordless-tool chargers, cameras, routers, and selected small tools without the noise or exhaust of a fuel-powered generator.

The correct size depends on how many watts each device uses and how long it must operate. Security systems create a continuous load, while lights and chargers are usually intermittent. Temperature, inverter idle draw, battery reserve, and solar input can also change real-world results. A power station should be treated as a portable energy source, not as a substitute for compliant permanent wiring.

What a Portable Power Station Does in a Shed

A portable power station combines a rechargeable battery, charge controller, output ports, and usually an AC inverter in one enclosure. It stores energy from a wall outlet, vehicle socket, or compatible solar panels and then supplies power without combustion.

In a shed, workshop, barn, or detached garage, it can provide temporary or semi-regular power where utility wiring is unavailable. Common loads include LED lamps, phones, tablets, radios, cordless-tool batteries, Wi-Fi or cellular equipment, and security cameras. Larger models may operate selected power tools, but their output and starting-surge requirements must be checked carefully.

This matters because capacity and output describe different limits. Battery capacity, measured in watt-hours, affects how long equipment can run. Output, measured in watts, determines which equipment can start and operate. A station with substantial capacity can still shut down if a tool exceeds the inverter rating. Conversely, a high-output unit may have a short runtime if its battery is small.

A portable station is most practical for isolated loads plugged directly into its outlets. It should not be connected to a building circuit, receptacle, electrical panel, transfer device, or improvised backfeed cable. Permanent shed wiring should be designed and installed by a qualified electrician.

Capacity, Output, and Runtime Explained

Start by listing every device, its running wattage, and its daily operating time. Energy use is calculated as watts multiplied by hours. A 10-watt light used for five hours consumes about 50 watt-hours. Two such lights would consume about 100 watt-hours over the same period.

Advertised battery capacity is not the same as energy delivered to a device. The inverter and internal electronics consume power, and battery management systems preserve some capacity. For rough planning, divide required energy by an assumed efficiency of about 0.80 to 0.90. A 200-watt-hour load might therefore require roughly 225 to 250 watt-hours of rated capacity. Adding a 15% to 25% reserve helps account for cold weather, aging, and unexpected use.

Continuous output must exceed the total wattage of devices operating at once. Surge output covers short starting peaks from motors, compressors, and some power supplies. LED lights and USB chargers usually have modest peaks, while saws, pumps, and shop vacuums may briefly demand much more than their listed running wattage.

AC output also has an idle load because the inverter consumes energy whenever it is active. For a small security camera or router, direct USB or regulated DC output can sometimes provide longer runtime. However, the voltage, connector, polarity, and current requirement must match the device exactly.

Typical shed loadExample running powerExample daily useApproximate energy
Two LED lights16 watts total4 hours64 watt-hours
Phone charging10 watts average2 hours20 watt-hours
Security camera8 watts24 hours192 watt-hours
Wireless router10 watts24 hours240 watt-hours
Tool-battery charger120 watts1 hour120 watt-hours
Typical loads vary by equipment and operating mode. Example values for illustration.

Real-World Shed Power Examples

Basic lighting and phone charging

Suppose two LED lamps draw 16 watts together and operate for four hours. They use 64 watt-hours. A phone charger averaging 10 watts for two hours adds 20 watt-hours, bringing the load to 84 watt-hours. After conversion losses and a reasonable reserve, approximately 120 to 150 watt-hours of rated battery capacity could cover one typical session. More capacity would provide flexibility for longer evenings or additional devices.

Camera and network connection

An 8-watt camera and 10-watt router create an 18-watt continuous load. Over 24 hours, they consume about 432 watt-hours before losses. Depending on conversion efficiency and inverter idle draw, actual battery demand could approach 500 watt-hours per day. A nominal 1,000-watt-hour station may therefore provide less than two full days if no charging source is available.

Continuous security use also requires a recharge plan. Solar production varies with season, shade, panel angle, and weather. A panel’s rated output is rarely sustained all day, so daily solar harvest matters more than the panel’s peak wattage. Critical security equipment should not rely on optimistic solar estimates alone.

Charging tools and operating equipment

A cordless-tool charger drawing 120 watts for one hour uses about 120 watt-hours, plus conversion losses. Running the charger alongside lights and security equipment increases both total output and daily energy use. A corded saw or shop vacuum may require 700 to 1,500 running watts and a higher starting surge. Both ratings must fit within the station’s limits, and the resulting runtime may be brief even with a large battery.

Common Sizing Mistakes and Troubleshooting Cues

One common mistake is adding device wattages without considering operating time. Wattage determines output demand, but watt-hours determine runtime. Another is assuming every watt-hour printed on the enclosure will reach the load. Conversion losses, cold batteries, inverter overhead, and automatic shutdown thresholds reduce usable energy.

  • The station shuts off when a tool starts: The startup surge may exceed the inverter limit, even if the listed running wattage appears acceptable.
  • Runtime is much shorter than calculated: Check for hidden loads, inverter idle consumption, cold conditions, high charger losses, or devices drawing more than their labels suggest.
  • A camera or router turns off overnight: Continuous consumption may be higher than expected, or an energy-saving feature may disable the output when the detected load is low.
  • A tool battery charges slowly: The charger may be receiving reduced AC output, or a USB-C device may not support the available Power Delivery profile.
  • Solar charging underperforms: Shade, poor orientation, heat, clouds, cable loss, or an input voltage and current mismatch may be limiting collection.
  • The unit will not charge in winter: Battery protection may block charging below its allowed temperature range. Warm the complete unit naturally in a dry location rather than applying concentrated heat.

A plug-in power meter can help measure AC loads when used according to its instructions and within its rating. For security equipment, observe consumption over a full day because night vision, infrared lighting, wireless transmission, and recording activity can change demand.

Safety Basics for Sheds and Outbuildings

Keep the power station dry, stable, and protected from direct sunlight, roof leaks, condensation, metal dust, and flammable materials. Maintain the ventilation clearances specified for the unit. Although a battery power station produces no combustion exhaust during use, its electronics and battery can generate heat.

Use intact cords rated for the connected load and environment. Avoid daisy-chained power strips and tightly coiled extension cords carrying substantial current. Damp locations may require ground-fault protection and weather-resistant equipment. A portable power station’s outlets do not automatically make every connected setup suitable for outdoor or wet use.

Do not open the enclosure, alter the battery, bypass protection systems, or improvise adapters. Stop using a unit that is swollen, cracked, unusually hot, wet, leaking, or producing an abnormal odor. Isolate it from combustible materials if this can be done safely, and follow local guidance for damaged lithium batteries.

Never use a male-to-male cord or connect the station to a shed receptacle to energize building wiring. If fixed lighting, permanently mounted receptacles, grounding work, or connection to utility-supplied circuits is needed, consult a qualified electrician.

Maintenance and Storage in an Unconditioned Shed

Sheds often experience greater temperature swings, humidity, dust, and pest activity than a home. These conditions can accelerate battery aging or contaminate cooling vents. A dry, moderate-temperature storage location is preferable, particularly during freezing winters or very hot summers.

For extended storage, follow the manufacturer’s specified state of charge. A midrange charge level, often around 40% to 60%, is commonly used for lithium battery storage, but designs vary. Check the display every few months and recharge if the level has fallen substantially. Leaving the battery empty for months can allow self-discharge to reach a protective shutdown state.

Charging temperature is especially important. Some battery chemistries can discharge below freezing but should not be charged there unless the system includes suitable low-temperature protection or heating. Move the station to a permitted temperature range and allow time for the battery itself to acclimate before charging.

Periodically inspect ports, plugs, cables, cooling openings, and the case. Remove surface dust without opening the enclosure. Test important security loads under realistic conditions so a failed cable, changed setting, or reduced battery capacity is discovered before an outage.

Maintenance itemPractical intervalWhat to check
Charge levelEvery 2 to 3 months in storageUnexpected self-discharge or very low capacity
Case and portsBefore each useDamage, moisture, debris, or discoloration
CablesBefore each useLoose plugs, cracked insulation, or heat damage
Runtime testSeveral times per yearWhether essential loads operate for the expected period
Storage environmentSeasonallyExcessive heat, freezing conditions, condensation, or pests
Intervals should be adjusted for usage and environmental conditions. Example values for illustration.

Related guides: Backup Power for Security Cameras and Wi-Fi: Sizing a 24/7 SetupSurge Watts vs Running Watts: How to Size a Portable Power StationPortable Power Station for Power Tools: Drills, Saws, and Battery ChargersLong-Term Storage Best Practices: Charge Level, Temperature, and Schedule

Practical Takeaways and Buying Specifications

For occasional lighting and charging, a modest-capacity station may be sufficient. Always-on cameras and networking equipment need considerably more energy because they run through the night and during periods when solar charging may be unavailable. Power tools are primarily an output challenge, although repeated use can also drain the battery quickly.

Calculate watt-hours for a complete day, account for conversion losses, and add reserve capacity. Then confirm that continuous and surge output can support every device that may run simultaneously. For critical security, consider how long the system must operate without sun or access to grid charging.

Specs to look for

  • Battery capacity: Look for roughly 300 to 500 watt-hours for light intermittent use or 800 to 1,500 watt-hours for longer security runtime; capacity determines how long loads can operate.
  • Continuous AC output: Choose a rating above the combined simultaneous load, such as 300 to 600 watts for chargers and lights or 1,000 watts or more for selected tools; this prevents overload shutdowns.
  • Surge output: Look for short-duration capacity around 1.5 to 2 times expected motor startup demand; this helps tools, pumps, and other inductive loads start reliably.
  • Low-load behavior and inverter draw: Check whether AC outlets remain active with loads below about 10 watts and how much power the inverter consumes; this is important for cameras and routers.
  • USB and regulated DC outputs: Look for suitable USB-C PD profiles, such as 45 to 100 watts, and correctly regulated DC ports; direct outputs can reduce conversion losses.
  • Battery chemistry and cycle rating: Compare expected retained capacity after approximately 1,000 to 3,000 cycles and review temperature behavior; this affects service life and suitability for regular use.
  • Recharge input: Look for enough AC or solar input to replace a normal day’s use, such as 200 to 400 watts for medium systems; faster replenishment reduces downtime.
  • Solar compatibility: Confirm the accepted voltage range, current limit, connector type, and maximum input wattage; mismatched panels may charge slowly or not at all.
  • Operating temperature range: Check separate charging and discharging ranges and look for low-temperature charge protection; an unconditioned shed may exceed safe battery limits.
  • Pass-through and transfer behavior: For security loads, check whether charging and output can operate together and whether a transfer delay could reboot equipment; not every power station functions as an uninterruptible power supply.

The best fit is not necessarily the unit with the largest battery. It is the one whose usable capacity, output limits, ports, charging options, low-load behavior, and temperature protections match the shed’s actual loads and operating schedule.

Frequently asked questions

What size portable power station do I need for shed lights and charging?

Calculate the watt-hours used by each device by multiplying its wattage by the hours it will run, then add the results. For occasional LED lights and phone charging, a smaller unit may be adequate, but adding 15% to 25% reserve capacity helps account for conversion losses and unexpected use.

How long will a portable power station run a security camera in a shed?

Runtime depends on the camera’s actual average wattage, whether it uses infrared night vision, and the power station’s usable battery capacity. An 8-watt camera uses about 192 watt-hours over 24 hours before inverter losses, so a higher-capacity unit is generally needed for multi-day operation.

What specs and features matter most for a portable power station for a shed?

Compare usable battery capacity in watt-hours, continuous AC output, surge output, recharge input, and the ports required by the equipment. For cameras and routers, also check low-load shutdown behavior, inverter idle consumption, pass-through operation, and the allowed charging and discharging temperatures.

What is the most common mistake when sizing a shed power station?

A common mistake is looking only at wattage and not at how long each device runs. Wattage determines whether the station can support the load at one time, while watt-hours determine runtime; conversion losses and a capacity reserve also need to be included.

Can a portable power station safely power a shed?

It can safely power individual devices plugged directly into its outlets when the loads, cords, environment, and manufacturer instructions are suitable. Keep the unit dry and ventilated, use undamaged appropriately rated cables, and do not connect it to fixed shed wiring or a receptacle.

Can I run power tools from a portable power station in a shed?

Some tools can run from a sufficiently powerful station, but both the tool’s running watts and startup surge must stay within the inverter ratings. High-draw tools such as saws, pumps, and shop vacuums can drain the battery quickly even when the station can start them.

Portable Power Station for a Boat: 12V Loads, Salt Air, and Safer Storage

Portable power station secured in a dry, ventilated storage area on a boat

A portable power station can run many boat electronics safely when its 12V output, capacity, and environmental protection match the load. The key checks are the 12V amperage limit, surge watts, connector type, estimated runtime, and whether the unit can be kept away from spray and salt deposits.

Portable stations are useful for lights, device charging, small coolers, communications equipment, and occasional AC appliances. However, most are not marine electrical systems, starter batteries, or permanently installed replacements for a properly fused house bank. Their advertised watt-hours also do not equal the energy that reaches a connected appliance.

For dependable use, calculate each load before departure, leave operating margin, secure the station against movement, and store it in a dry, ventilated location. A pure sine wave inverter may help sensitive AC equipment, while a regulated DC output can improve consistency for compatible 12V loads.

What a Portable Power Station Means for Boat Use

A portable power station combines a rechargeable battery, charging electronics, DC outputs, and an AC inverter in one movable enclosure. On a boat, it can serve as a temporary or supplemental energy source without running an engine or generator.

Its role should be defined carefully. It may be suitable for comfort loads and backup charging, but it should not automatically become the sole source for bilge pumping, navigation lights, distress communications, or other safety-critical equipment. Those systems are normally better served by a dedicated marine electrical installation with appropriate batteries, fusing, conductors, and redundancy.

The marine environment also changes the risk profile. Salt aerosol can settle on ports and circuit surfaces, moisture can enter through open covers, and boat motion can turn an unsecured battery into a heavy projectile. A station that performs well on land still needs protected placement and inspection aboard a boat.

How 12V Loads, Watts, and Runtime Work

A nominal 12V outlet has a maximum current rating. Multiply voltage by amperage to estimate its power ceiling: a 12V, 10A port can provide roughly 120 watts under ideal conditions. A load rated at 15A should not be connected merely because the plug fits. The station may shut down, cycle repeatedly, or overheat a poorly matched connector.

Check whether the DC output is regulated. Some outputs remain near their stated voltage as the battery discharges, while others vary. Voltage-sensitive electronics and compressor coolers may work more consistently from a regulated output, provided their startup demand remains below the port limit.

Runtime can be estimated by multiplying appliance watts by operating hours and comparing the result with usable watt-hours. For example, a 40-watt load running continuously for five hours requires about 200 watt-hours. Conversion losses, standby consumption, temperature, and compressor cycling affect the result, so a 15% to 30% reserve is practical.

AC operation adds inverter loss. When an appliance can accept either compatible DC power or AC power, the DC connection will often provide longer runtime. AC appliances with motors may also have startup surge watts several times higher than their normal running watts.

Illustrative loadTypical drawEnergy for stated useMain check
LED cabin lights12 watts48 Wh for 4 hoursDC voltage and connector
Compressor cooler45 watts while running180 Wh for 4 running hoursStartup current
Phone charging15 watts30 Wh for 2 hoursUSB charging profile
Small AC fan35 watts210 Wh for 6 hoursInverter overhead
Illustrative boat loads and energy use. Example values for illustration.

Real-World Boat Power Examples

Day trip with lighting and device charging

Suppose two LED lights draw a combined 12 watts for four hours, and phones require 60 watt-hours total. The planned demand is about 108 watt-hours. After allowing for losses and reserve capacity, a station with roughly 150 to 200 usable watt-hours could cover this limited plan. The output ports must still support the lights’ voltage and the devices’ charging requirements.

Overnight use with a compressor cooler

A cooler rated at 45 watts may not draw that amount continuously. If its compressor runs half the time over 12 hours, the estimated energy use is 270 watt-hours. Warm weather, frequent lid opening, poor ventilation, and recently loaded food can increase runtime. Adding lights and electronics may bring the overnight budget closer to 400 watt-hours before reserve.

Occasional AC appliance

A 300-watt appliance used for 15 minutes consumes about 75 watt-hours before inverter losses. Although that energy total is modest, the inverter must support both its running wattage and startup surge. Heating appliances can consume capacity especially quickly and may exceed the station’s continuous AC rating.

These calculations are planning tools rather than guarantees. Equipment labels, measured consumption, ambient temperature, battery condition, and duty cycle provide a more reliable estimate than using generic averages alone.

Common Mistakes and Troubleshooting Cues

  • Using watt-hours as an output rating: Watt-hours describe stored energy, while watts and amps describe how much power an outlet can deliver. A large battery can still have a low-current 12V port.
  • Ignoring startup demand: A cooler or pump may run at a modest wattage but briefly require much more current when its motor starts. Repeated shutdowns at startup often indicate an overloaded output or excessive voltage drop.
  • Powering everything through AC: Converting battery power to AC and then back to low-voltage DC wastes energy. Compatible direct DC or USB connections may extend runtime.
  • Using undersized or damaged cables: Long, thin cables increase resistance and voltage drop. Warm plugs, intermittent operation, discoloration, or a burning odor are cues to disconnect the load.
  • Confusing a socket shape with compatibility: Matching connectors do not prove that voltage, polarity, current, or charging protocol is correct. Verify all four before connection.
  • Blocking ventilation: Tight lockers, bedding, and gear can trap heat around the battery or inverter. Thermal shutdown under a load may indicate inadequate airflow or excessive ambient temperature.
  • Assuming weather resistance: A covered port does not necessarily make the enclosure resistant to salt spray, rain, or submersion. Check the stated ingress-protection rating and its conditions.

If a station repeatedly trips with a load that appears compatible, disconnect it and inspect the appliance rating, cable condition, port limit, state of charge, and temperature. Persistent faults, swelling, unusual heat, liquid exposure, or damaged terminals call for professional evaluation rather than continued testing.

High-Level Safety Basics on a Boat

Place the station above the normal bilge area and away from direct spray, fuel systems, hot engine components, cooking equipment, and emergency exits. Secure it with a restraint that can handle pitching, rolling, and sudden stops without covering vents or crushing the enclosure.

Keep ports dry before connecting equipment. Saltwater is conductive and highly corrosive; energizing a damp connector can cause short circuits, heat, or lasting damage. Do not handle wet electrical equipment while standing in water.

Use intact, appropriately rated cables and avoid loose adapter chains. Any DC branch connected to a boat’s installed wiring requires suitable overcurrent protection and marine-grade design. Permanent integration, shore-power interaction, grounding questions, or connections to critical systems should be reviewed by a qualified marine electrician.

Do not open the enclosure, modify the battery, bypass protective shutdowns, or use the station to crank an engine unless it is specifically designed for that purpose. Follow manufacturer guidance for charging temperature and compatible charging sources. Keep a suitable fire response plan aboard and know how to isolate power without putting people at risk.

Salt-Air Maintenance and Safer Storage

Salt contamination is often gradual. Store the unit inside a dry cabin or protected locker with ventilation rather than on an exposed deck. A sealed tote may block spray during transport, but the station should not operate or charge inside an airtight container because heat can accumulate.

After use, disconnect loads and inspect the case, ports, plugs, and cables for moisture, white or green deposits, rust, pitting, cracked insulation, or heat damage. With the unit switched off and disconnected, wipe exterior salt residue using the cleaning method specified by its manufacturer. Do not spray cleaner into ports or use abrasive tools on contacts.

For long-term storage, many battery systems are best kept partially charged rather than completely full or empty. A range around 40% to 60% is common, but the product’s instructions take priority. Store in a cool, dry location, avoid freezing or extreme heat, and check the charge periodically because internal electronics can consume a small amount of energy.

Allow a cold battery to reach an approved charging temperature before charging. Many lithium batteries restrict charging near or below 32°F, although exact limits vary by chemistry and internal heating features.

IntervalSuggested checkReason
Before each tripCharge, ports, cables, and restraintFind faults before departure
After salt exposureDryness and exterior residueReduce corrosion risk
During storageCharge level every 1 to 3 monthsAvoid deep discharge
Before reuseCase condition and normal operationIdentify storage damage
Illustrative inspection and storage schedule. Example values for illustration.

Related guides: Portable Power Station for Electric Coolers: 12V vs AC Runtime PlanningWater, Humidity, and IP Ratings: What “Splash Resistant” Really MeansLong-Term Storage Best Practices: Charge Level, Temperature, and ScheduleSurge Watts vs Running Watts: How to Size a Portable Power Station

Practical Takeaways and Specs to Look For

Start with a written energy budget. List each appliance’s running watts, startup demand, hours of use, and required connection. Add the watt-hours, account for conversion losses, and retain reserve capacity for changing conditions. Separate optional comfort loads from equipment needed for navigation, communication, dewatering, or emergency response.

A useful boat power station is not simply the model with the largest capacity. Port limits, regulated output, environmental protection, charging behavior, physical restraint points, and replacement cable availability can matter just as much. Favor clearly documented specifications over assumptions based on connector appearance.

Specs to look for

  • Battery capacity: Look for enough watt-hours to cover the calculated load plus roughly 20% to 30% reserve; this reduces unexpected early shutdowns.
  • Usable energy: Look for tested or documented delivered watt-hours rather than capacity alone; conversion losses determine real runtime.
  • 12V output rating: Look for a regulated output with a continuous limit such as 10A or 15A that exceeds the connected load; this helps prevent overload trips.
  • AC inverter rating: Look for continuous watts above the combined AC load and surge capacity suited to motors; adequate headroom supports reliable startup.
  • Waveform: Look for a pure sine wave inverter when operating sensitive electronics, chargers, or motor-driven devices; cleaner output improves compatibility.
  • Ingress protection: Look for a clearly stated IP rating and read what it covers; resistance to splashes does not mean the unit can tolerate saltwater immersion.
  • Operating temperature: Look for separate charging and discharging ranges that match the expected climate; lithium charging is often more restricted in cold conditions.
  • Charging input: Look for charging wattage and input-voltage ranges compatible with the intended shore, vehicle, or solar source; faster input can shorten recovery time.
  • Physical design: Look for covered ports, stable handles, accessible controls, ventilation clearance, and secure restraint options; these features support safer placement aboard.

Before departure, test the actual load combination in a controlled, dry setting. Confirm that cables remain cool, the station does not cycle off, and estimated runtime is adequate. Keep critical marine systems independent unless a qualified professional has designed an appropriate integration.

Frequently asked questions

What size portable power station do I need for a boat?

Estimate the watt-hours required by each device by multiplying its power draw by expected operating time, then add the totals. Choose capacity with an additional reserve for conversion losses, temperature changes, and longer-than-expected use.

What specs matter most in a portable power station for a boat?

Check usable battery capacity, 12V port voltage and continuous amp rating, AC inverter continuous and surge ratings, and available connector types. Also consider a stated ingress-protection rating, charging-temperature limits, ventilation needs, and practical ways to secure the unit against boat movement.

Can a portable power station run a 12V compressor cooler on a boat?

It can if the cooler’s voltage, polarity, running current, and startup demand are within the station’s DC output limits. A regulated 12V output may improve compatibility, but runtime still depends on ambient temperature, compressor duty cycle, and usable battery capacity.

Is it safe to use a portable power station in salt air?

It can be used more safely when kept dry, out of direct spray, and away from fuel, heat sources, and emergency exits. Secure the station, keep connectors dry, inspect for salt deposits or corrosion, and do not operate or charge it in an airtight container.

What is a common mistake when using a portable power station on a boat?

A common mistake is assuming that a matching 12V socket or plug means the equipment is electrically compatible. Verify voltage, polarity, current demand, and connector suitability, and account for motor startup surge rather than relying only on running watts.

Can a portable power station replace a boat battery?

It may provide supplemental power for noncritical loads, but it is not automatically a replacement for a properly installed marine house bank or starter battery. Critical systems such as navigation, dewatering, and emergency communications should remain on appropriately designed, fused, and redundant marine electrical systems.

Portable Power Station for a Small Jobsite: Tool Battery Chargers and Work Lights

Portable power station running tool battery chargers and LED work lights at a small jobsite

A portable power station for a small jobsite can reliably run cordless tool battery chargers and LED work lights when its continuous output, watt-hour capacity, and outlet configuration match the equipment. For most small crews, the important numbers are charger input watts, lighting watts, total runtime, inverter capacity, and any brief surge watts.

Do not size the station only from the voltage printed on a tool battery. A charger draws AC power, converts it to DC, and loses some energy as heat, so wall-side consumption is higher than the energy ultimately stored in the battery. At the same time, efficient LED work lights usually create a modest load but may operate for many hours. A useful estimate therefore combines every device that may run at once, adds reasonable headroom, and compares the resulting load with both the station’s output rating and usable battery capacity.

This approach helps determine whether a compact unit is sufficient or whether the job requires more inverter power, more watt-hours, or a planned recharge during the workday.

What a Small-Jobsite Portable Power Station Needs to Do

A portable power station combines a rechargeable battery, an inverter, charging electronics, outlets, and protective controls in one enclosure. On a small jobsite, its most practical role is often supporting cordless-tool chargers, task lights, inspection lights, phones, radios, and other relatively low-power equipment where utility power is unavailable or inconvenient.

The station is not automatically a substitute for a jobsite generator. High-draw tools such as large saws, demolition hammers, air compressors, heaters, welders, and dust extractors can demand far more continuous or startup power than a compact battery station can provide. Even when a tool’s running wattage appears acceptable, its startup current may overload the inverter.

For chargers and LED lights, sizing matters for two separate reasons. The inverter must supply enough watts at any moment, while the battery must store enough watt-hours to support the load for the required time. A unit can have adequate inverter output but insufficient runtime, or substantial battery capacity but an inverter too small for several simultaneous fast chargers.

How Watts, Watt-Hours, Chargers, and Inverters Work Together

Watts measure demand. Add the input wattage of every charger, light, and accessory expected to operate simultaneously. Use the charger’s input label or technical documentation when available. If only volts and amps are listed, multiplying them provides a rough upper-bound estimate, although actual AC consumption may differ because of power factor and charger behavior.

Watt-hours measure stored energy. A 1,000-watt-hour battery theoretically contains enough energy to deliver 100 watts for 10 hours. Real runtime is shorter because the inverter, wiring, battery management system, and chargers consume energy. Temperature, battery age, standby draw, and high output levels also affect usable capacity.

A practical planning formula is: runtime in hours equals usable watt-hours divided by total load watts. For initial estimates, assuming roughly 80% to 90% of the listed capacity is available to AC loads provides more realistic results than using the full nameplate figure. Actual usable energy varies by design and operating conditions.

Tool batteries add another conversion step. For example, a battery labeled 18 volts and 5 amp-hours contains about 90 watt-hours nominally. Recharging it may require roughly 105 to 125 watt-hours from the power station after charger losses, with the exact amount depending on battery condition, charger efficiency, temperature, and how fully discharged the pack is.

Continuous output is the inverter power that can be sustained. Surge output is a short-duration allowance for startup peaks. Electronic chargers typically have lower startup demands than large motors, but multiple chargers switched on together can still create a brief peak. Keeping 20% to 30% continuous-output headroom reduces nuisance shutdowns and leaves room for an extra light or accessory.

LoadIllustrative drawPlanning consideration
Standard tool battery charger80–150 wattsSeveral chargers can create a meaningful combined load
High-rate tool battery charger180–350 wattsMay run cooling fans and draw heavily during the main charge phase
Compact LED task light20–50 wattsLow draw, but long operating hours add substantial energy use
Large LED work light60–150 wattsCheck whether brightness settings change consumption
Phone or small device charger10–30 wattsUsually minor individually but should remain in the load total
Example values for illustration. Actual consumption should be verified from each device’s input rating or with a suitable power meter.

Small-Jobsite Sizing Examples

Two chargers and two work lights

Consider two chargers drawing 120 watts each and two LED lights drawing 50 watts each. The simultaneous load is 340 watts. Adding 25% headroom produces a target continuous inverter rating of about 425 watts or more. Choosing a higher rating may be useful if another charger, radio, or inspection light is likely to be added.

If all four devices run together for four hours, the simple energy calculation is 340 watts multiplied by four hours, or 1,360 watt-hours. Allowing for conversion losses suggests looking beyond 1,500 watt-hours if the full load truly remains constant. In practice, tool chargers usually reduce their draw or stop after packs are full, so measured daily consumption may be lower.

Charging several tool batteries during one shift

Suppose six nominal 90-watt-hour tool batteries need a full recharge. Their combined stored energy is approximately 540 watt-hours. If the charging process requires 20% more energy because of conversion losses, the power station may supply about 650 watt-hours. Add a 40-watt work light operating for six hours, which uses another 240 watt-hours. The estimated requirement becomes about 890 watt-hours before accounting for the station’s own losses and a reserve margin.

Overnight lighting with occasional charging

Three 30-watt lights running for eight hours use 720 watt-hours. Two battery charging sessions that each consume 120 watt-hours add 240 watt-hours, producing a total near 960 watt-hours. In this case, lighting duration drives capacity more than peak output. A modest inverter may handle the load, but adequate battery storage is essential.

These examples are planning tools rather than guarantees. Charger draw changes throughout a charge cycle, lights may have multiple brightness levels, and cold conditions can reduce available battery energy.

Common Sizing Mistakes and Troubleshooting Cues

Using tool battery watt-hours as the only estimate

The energy printed on the removable battery does not include losses in the power station’s inverter or the tool charger. If runtime falls short despite apparently correct arithmetic, conversion losses, partially degraded batteries, or background loads may explain the difference.

Confusing inverter watts with battery watt-hours

A 1,000-watt inverter rating describes output power, not operating duration. A station with a strong inverter and a small battery may run several chargers at once but only briefly. Compare both specifications independently.

Adding equipment after startup

A station may run normally with one charger and then shut down when a second fast charger or work light is connected. This behavior often indicates an overload, a brief startup peak, a low battery state, or thermal protection. Disconnect nonessential loads, allow the unit to cool if indicated, and compare the combined input ratings with the continuous-output limit.

Ignoring outlet and circuit limits

The total inverter rating may not be available through every individual outlet or port. A station can also have enough total watts but too few properly spaced receptacles for bulky charger plugs. Avoid assuming that a power strip increases available power; it only increases the number of connection points.

Expecting identical cold-weather runtime

Low temperatures can reduce battery output and charging performance. If a station shuts down early in cold conditions, move it to a dry operating environment within its specified temperature range rather than applying direct heat. Do not cover cooling vents.

Overlooking idle consumption

An energized AC inverter consumes power even when chargers have finished. If packs charge overnight and the inverter remains on for hours afterward, standby draw can noticeably reduce remaining capacity. Use built-in scheduling or automatic shutdown features when available and appropriate.

Jobsite Safety Basics

Keep the power station dry, stable, and protected from falling materials, metal dust, standing water, and vehicle traffic. It should have open space around its vents and should not be operated inside a closed box, tightly covered enclosure, or other area that traps heat. Follow the operating temperature and environmental limits stated by the equipment manufacturer.

Inspect charger cords, plugs, extension cords, and receptacles before use. Remove damaged components from service rather than taping over exposed conductors or forcing loose plugs to fit. Extension cords should be rated for the environment and expected current. Long, undersized cords create voltage drop and heat.

A pure sine wave inverter is generally the safer compatibility choice for electronic battery chargers, sensitive controls, and LED drivers. Some equipment may buzz, run hotter, behave unpredictably, or refuse to operate on a lower-quality waveform.

Do not connect a portable power station to jobsite building wiring, a panel, or a receptacle intended to backfeed a circuit. Any connection to premises wiring requires appropriate listed equipment and a qualified electrician. Never modify chargers, open battery packs, bypass grounding features, defeat protective controls, or improvise adapters.

Allow hot tool batteries to cool before charging. Stop using a battery that is swollen, cracked, leaking, unusually hot, or producing an abnormal odor. Follow applicable site rules for fire protection, egress, trip hazards, and charging locations.

Maintenance, Charging, and Storage Between Jobs

Recharge the station according to its instructions and avoid leaving it fully depleted for extended periods. If it will be stored, use the recommended storage charge range and check it periodically because internal electronics can slowly consume energy. Many lithium-based units are commonly stored at a partial state of charge, but the correct target and inspection interval depend on the battery chemistry and control system.

Store the unit in a dry, temperate location away from direct sunlight, combustible debris, corrosive materials, and extreme heat or cold. A vehicle or unconditioned trailer can exceed suitable storage temperatures. Before the next job, inspect the case, ports, cord, display, and vents, then confirm that the unit accepts a charge and powers a small test load.

Keep ventilation openings clear using only the cleaning methods allowed by the manufacturer. Construction dust can restrict cooling and contribute to thermal shutdowns. Do not use compressed air if it could force conductive dust or moisture deeper into the enclosure, and never open the case for cleaning.

Battery capacity gradually declines with age and charge cycles. Recording starting charge, loads, operating hours, and ending charge on several typical workdays can reveal the station’s real usable capacity. If runtime declines sharply, eliminate environmental and load-related causes before arranging professional inspection or replacement.

Maintenance itemExample intervalPurpose
Inspect case, ports, and cablesBefore each jobIdentify impact damage, contamination, or loose connections
Clear external ventsAfter dusty workSupport normal cooling and reduce thermal shutdown risk
Check stored chargeEvery 2–3 monthsPrevent prolonged deep discharge during storage
Run a controlled load checkEvery few monthsTrack practical capacity and confirm normal inverter operation
Example values for illustration. Maintenance timing should follow the station’s documentation and actual jobsite conditions.

Related guides: Portable Power Station for Power Tools: Drills, Saws, and Battery ChargersHow to Choose the Right Size Portable Power StationExtension Cords and Power Strips: Safe Practices With Portable Power StationsHow to Maintain a Portable Power Station

Practical Takeaways and Specs to Look For

Start by listing every charger and light, its input wattage, and the hours it will operate. Add simultaneous watts to size the inverter, then multiply watts by operating time to estimate watt-hours. Include conversion losses and reserve capacity rather than planning to drain the station completely every day.

For a charger-and-light setup, battery capacity often determines usefulness over a full shift, while continuous inverter output determines how many devices can run together. The best fit is not necessarily the station with the highest single number; it is the one whose output, usable energy, ports, charging speed, construction, and operating limits match the work pattern.

Specs to look for

  • Continuous AC output: Look for a rating at least 20% to 30% above the expected simultaneous load, such as 500 watts for a planned 350- to 400-watt load, to reduce overload shutdowns.
  • Battery capacity: Compare watt-hours with daily energy demand; roughly 1,000 to 2,000 watt-hours can suit many charger-and-light combinations, while longer shifts or more batteries require more.
  • Usable AC energy: Look for tested or documented AC output rather than relying only on nominal capacity, because inverter and system losses affect runtime.
  • Pure sine wave inverter: Choose a clearly identified pure sine wave output for broader compatibility with electronic tool chargers and LED lighting drivers.
  • AC outlet count and layout: Confirm that two to four chargers can fit without blocking adjacent receptacles and that the combined outlet load remains within the inverter rating.
  • Recharge input: A higher supported charging rate, such as 500 to 1,000 watts on a larger station, can make between-shift recovery practical when an appropriate source is available.
  • Cycle-life information: Look for capacity-retention data stated at a specific number of cycles, such as 80% remaining after several thousand cycles, to compare expected long-term service.
  • Operating temperature range: Verify that charging and discharging limits fit the site’s seasonal conditions, since charging restrictions are often tighter than discharge limits.
  • Weight and handling: Compare total weight, handle design, and wheel options; capacities around 1,000 to 2,000 watt-hours may become difficult for one person to move safely.
  • Protection and monitoring: Look for overload, short-circuit, overtemperature, and low-temperature charging protection, plus a display showing watts in, watts out, charge percentage, and estimated runtime.

A final check should compare the planned load with the power station’s documentation and the ratings on every connected device. When actual demand is uncertain, measuring representative chargers and lights during a normal work cycle provides a more reliable basis for sizing than relying on assumptions.

Frequently asked questions

What size portable power station do I need for tool battery chargers and work lights?

Add the input watts of chargers and lights that will run at the same time, then choose continuous AC output with about 20% to 30% headroom. Estimate battery capacity separately by multiplying the expected load by operating hours and allowing for inverter and charging losses.

How long will a portable power station run LED work lights?

Runtime depends on usable battery watt-hours and the lights’ actual wattage. For example, a 1,000-watt-hour station delivering about 850 usable watt-hours could run a combined 100-watt lighting load for roughly 8.5 hours under favorable conditions.

What specs and features matter most for a small-jobsite power station?

Key considerations include continuous AC output, usable AC energy, pure sine wave output, outlet count and spacing, recharge speed, and temperature limits. Overload and thermal protection, clear input/output monitoring, and a durable, well-ventilated enclosure are also useful for jobsite use.

Can a portable power station charge multiple cordless tool batteries at once?

Yes, if the combined charger input wattage remains below the station’s continuous output rating and applicable outlet limits. Multiple fast chargers can create a substantial simultaneous load, so checking charger labels and retaining output headroom helps avoid shutdowns.

What is the most common mistake when sizing a power station for a jobsite?

A common mistake is treating the watt-hours printed on tool batteries as the exact energy the power station must supply. Charger losses, inverter losses, standby consumption, and battery condition mean the station generally needs to provide more energy than the batteries’ nominal stored capacity.

Is it safe to use a portable power station on a construction jobsite?

It can be used safely when it is kept dry, stable, ventilated, and within the manufacturer’s operating limits. Inspect cords and plugs, avoid damaged equipment and improvised adapters, and never connect the station to building wiring or backfeed a receptacle.