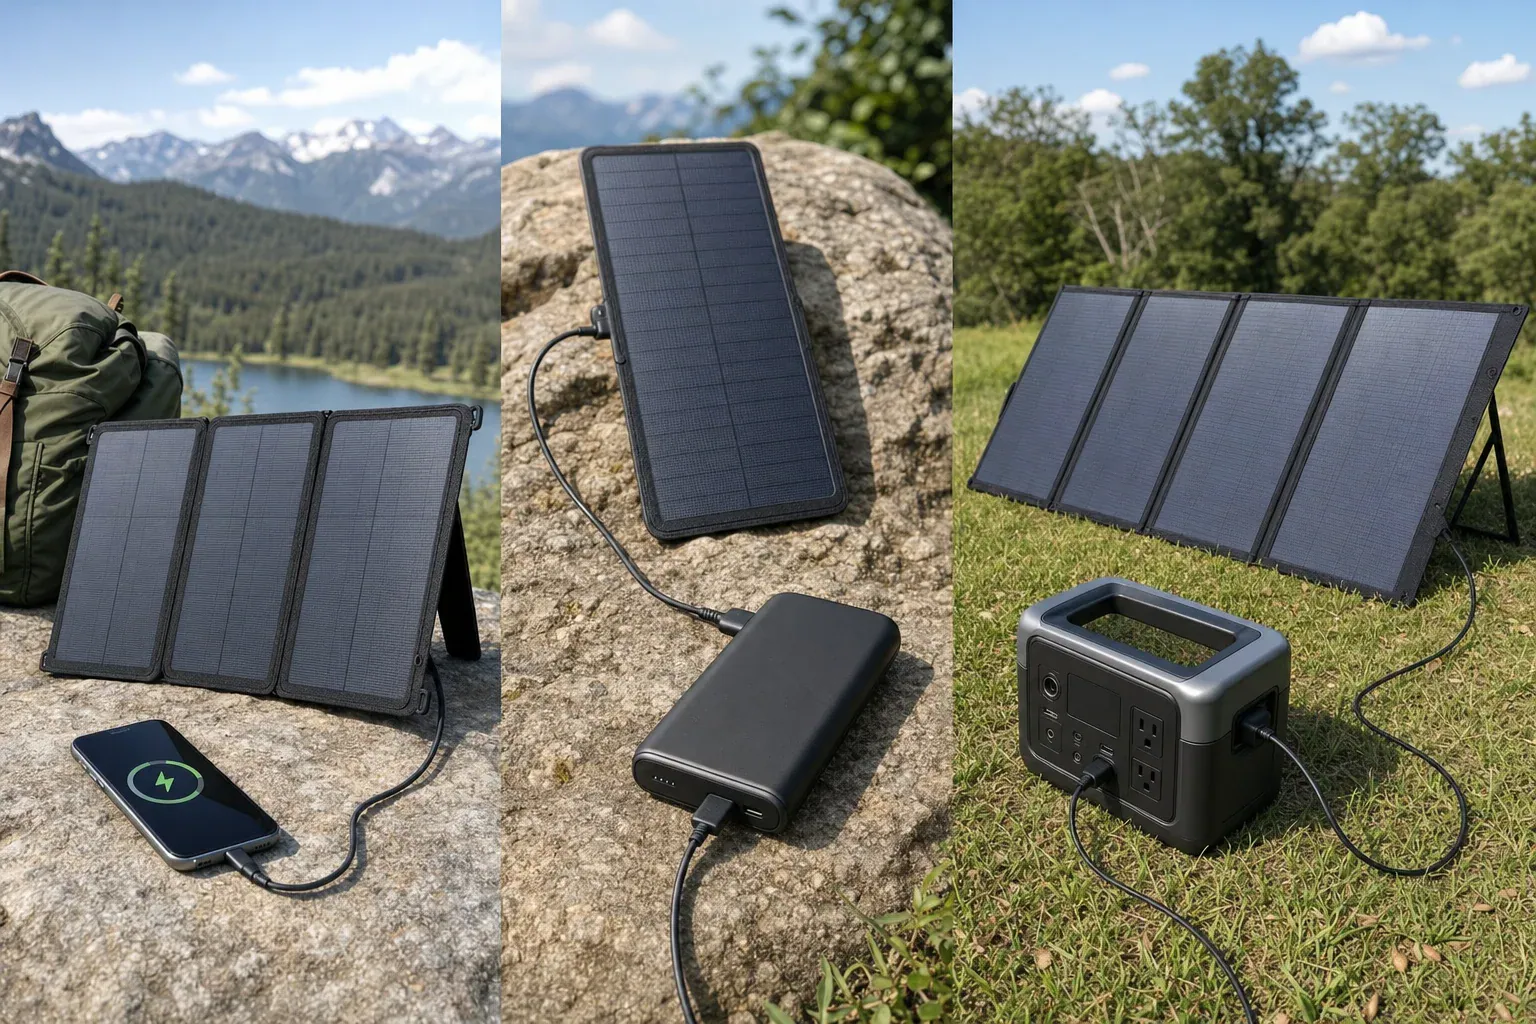
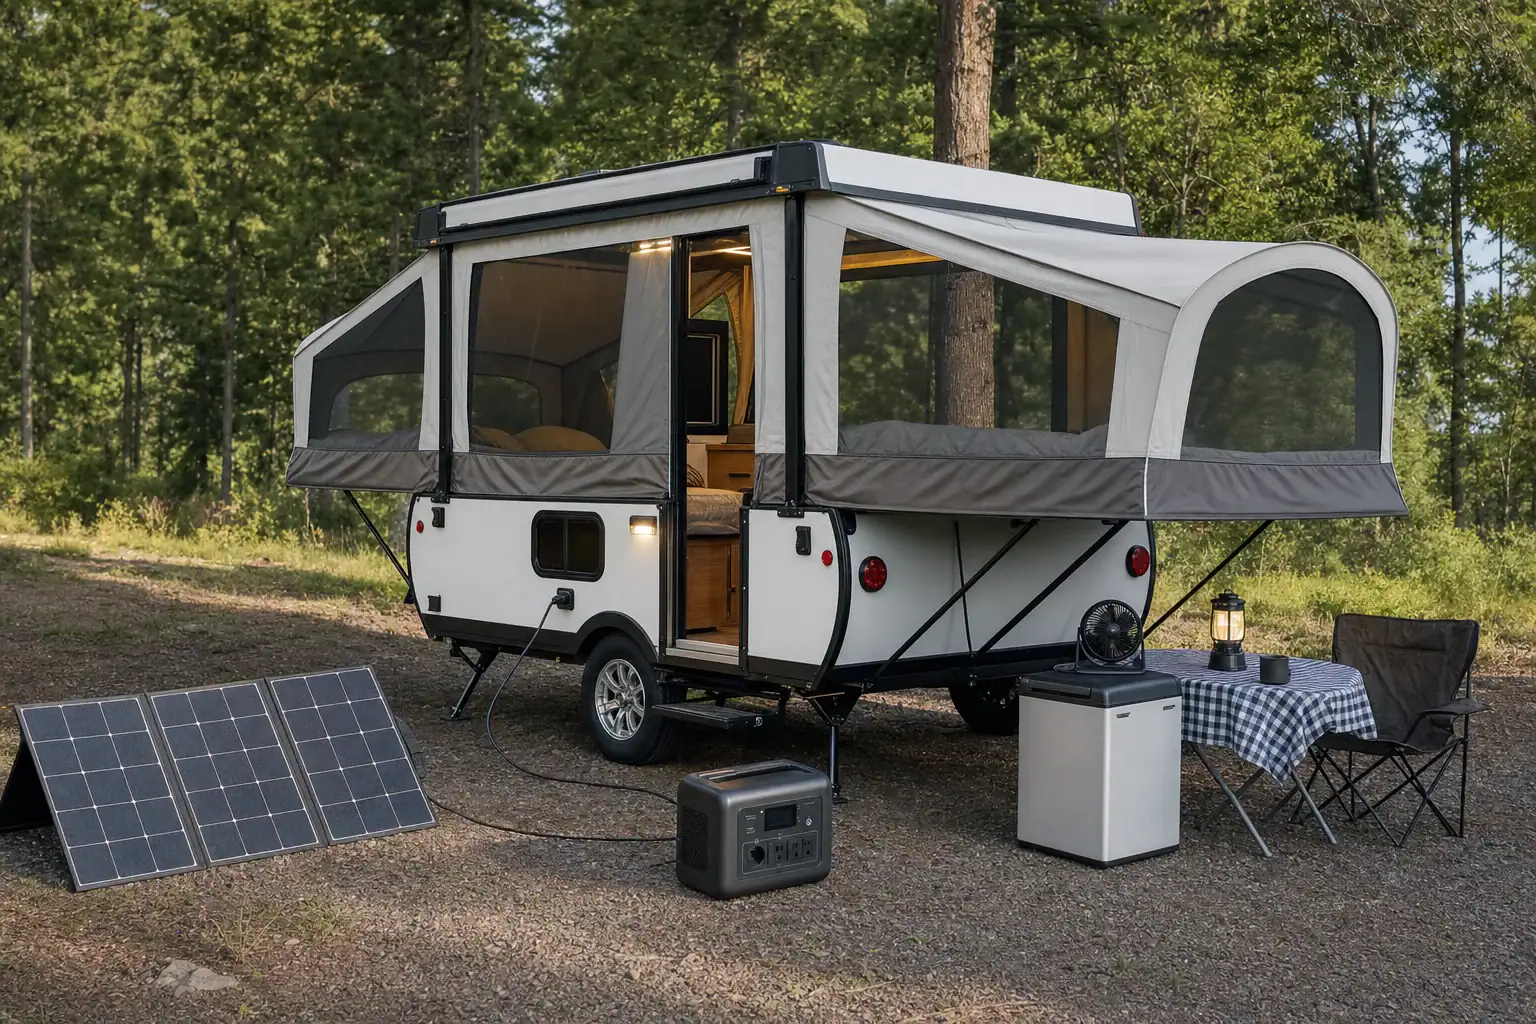
Quick answer: Choose portable solar chargers from the device backward. Use a regulated USB panel for a phone or USB power bank, and a panel approved for a power station’s DC solar input for larger stored-energy needs. Add battery storage when charging must continue after sunset or through changing sunlight.
How to choose portable solar chargers by device
Start with the input specifications printed on the device or in its manual—not with the panel’s headline wattage. Then match the interface, supported voltage, charging protocol and applicable watt limits. Finally, decide whether you need to store solar energy for later use.
Device
Appropriate charger type
What to match
Storage decision
Phone or small USB device
Regulated USB-A or USB-C solar panel
Connector, supported USB protocol, voltage profiles, port watts and cable capability
Add a power bank when sunlight is variable or charging is needed later.
USB power bank
Regulated USB panel matching the bank’s input
Input connector, supported protocol, voltage profiles and maximum input watts
The power bank provides storage. Check its manual before using pass-through charging.
Phone where one-piece portability is the priority
Integrated solar power bank
Solar-panel rating, battery input and output ratings, connector and charging protocol
Storage is built in, but the panel and battery specifications still require separate checks.
Portable power station
Compatible DC solar panel or manufacturer-approved array
Input voltage window, maximum open-circuit voltage, current limit, watt limit, connector and polarity
The station supplies storage and can provide its supported USB, DC or AC outputs.
If a manual does not state the relevant electrical limits, mark the proposed pairing as unknown. A plug-shaped adapter does not establish electrical compatibility.
Match USB specifications, not just the connector
A USB-C socket does not automatically mean USB Power Delivery (PD) or a particular charging speed. The USB Implementers Forum explains that USB PD lets connected equipment request supported power. Check both manuals to identify the actual voltage profiles and maximum power supported by the panel, cable and device.
Connector: Confirm USB-A, USB-C, or the proprietary connector required by the device.
Protocol: Check whether both products support USB PD or another protocol needed for a device’s higher charging rate.
Voltage: Use a regulated USB output with a fixed or negotiated profile accepted by the device.
Power: Compare the panel port’s stated output with the device’s stated input limit. A compliant USB device draws or negotiates a supported level; its current rating does not need to exactly equal the source rating.
Cable: Confirm that the cable supports the necessary connector, protocol and power level. An adapter cannot add a charging protocol that the equipment does not support.
Do not connect a phone directly to an unregulated bare-panel output unless the phone manufacturer or an approved charge-controller manufacturer specifically supports that interface.
Calculate the port limit, not only panel watts
Electrical power is calculated as:
watts = volts × amps
For a model-specific example, Goal Zero lists a Nomad 20 solar panel with a 20 W panel rating and a USB output rated at 5 V and up to 2.1 A. The stated USB-port ceiling is:
5 V × 2.1 A = 10.5 W
Under that stated limit, a device connected to that USB port cannot receive 20 W through the USB port. This calculation applies only to the cited version of that product; other panels can have different output-port ratings.
Panel nameplate watts are also not a guarantee of continuous outdoor output. The National Renewable Energy Laboratory describes photovoltaic standard test conditions as 1,000 W/m² irradiance, a 25°C cell temperature and air mass 1.5 in its PV rating reference. Sun angle, shading and operating conditions can change available output.
Match a panel to a portable power station safely
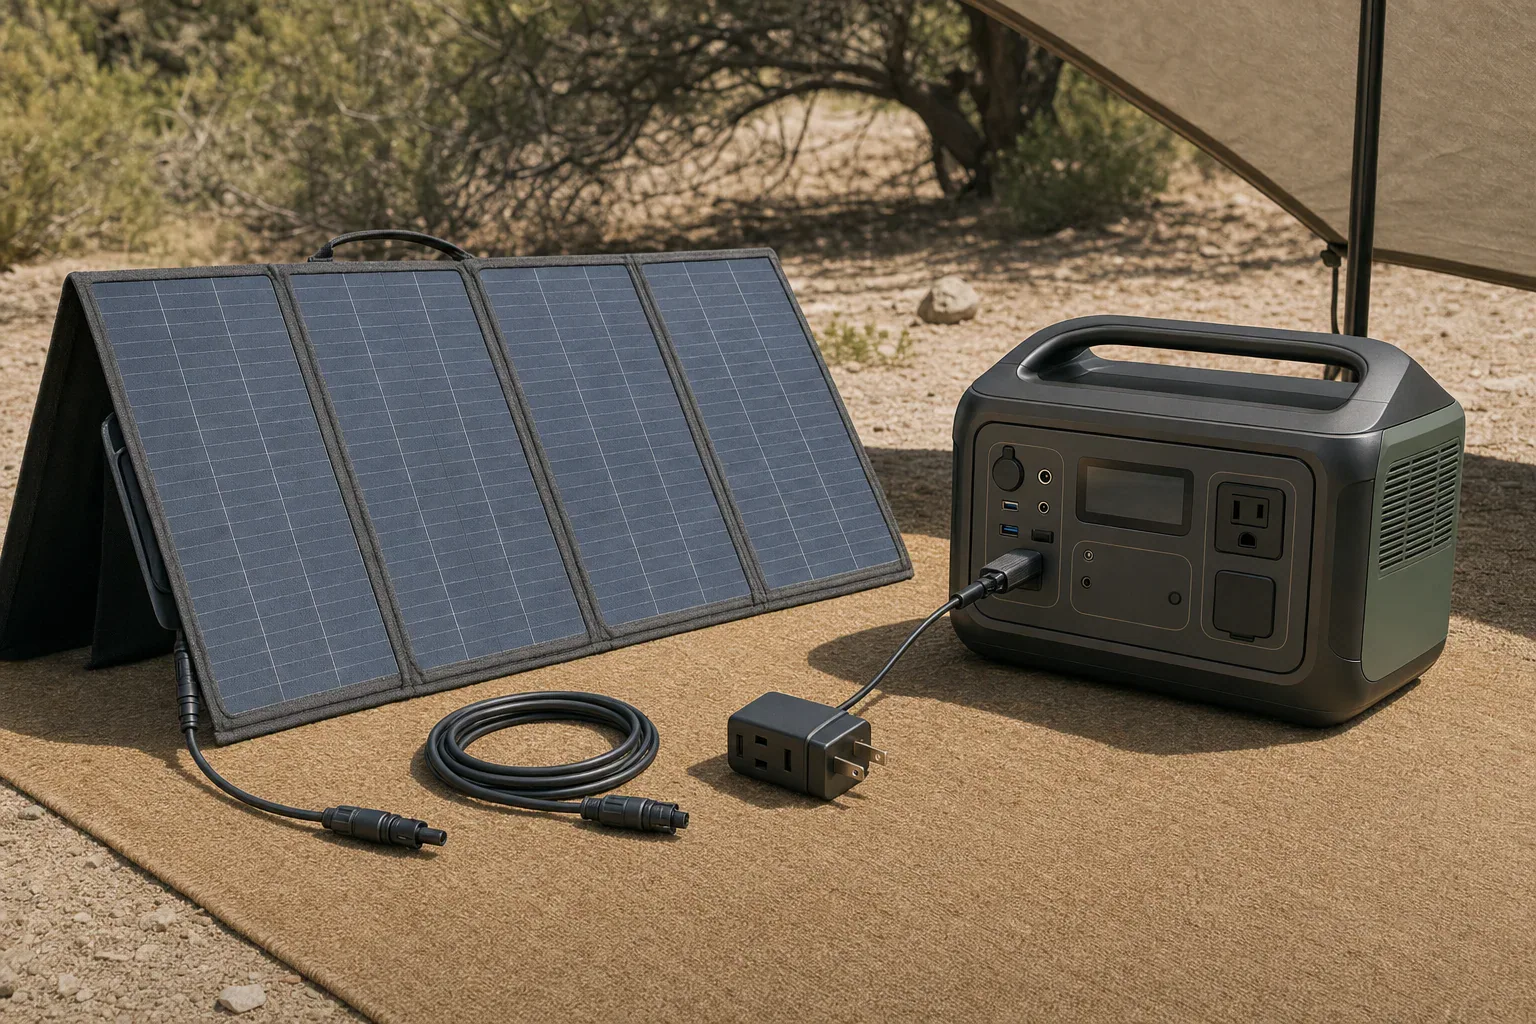
A matching DC plug alone is not enough. Before connecting a panel to a power station, use both manuals to check each item below:
Connector and polarity: Use the specified connector and confirm polarity.
Input-voltage window: Verify that the proposed panel or approved array operates within the station’s published solar-input range.
Open-circuit voltage: Compare the panel or array open-circuit voltage with the station’s stated maximum using the conditions and calculation method required by the manuals.
Current and power limits: Follow the station manufacturer’s published input limits and array instructions.
Configuration: Use only wiring and adapters approved or documented as compatible by the applicable manufacturers.
As an illustration of the labels to compare, the EcoFlow DELTA 2 manual lists an 11–60 V DC solar-input range, 15 A maximum current and 500 W maximum power. The cited EcoFlow 110 W panel manual lists 23.5 V open-circuit voltage, 6.1 A short-circuit current and an XT60i connector. Those are model-specific figures, not universal specifications or approval for another panel, adapter or array.
When battery storage belongs between panel and device
Use a separate power bank or portable power station when you need energy after sunset, expect intermittent sunlight, or prefer to charge the device from a battery’s regulated output. A phone can charge directly from an appropriate regulated USB panel in suitable sun, but direct charging does not create a reserve for later.
A power bank already stores energy, but do not assume it can charge from solar while powering another device. Pass-through behavior and operating limits are model-specific; follow the power bank manual.
Watts, watt-hours and time
Watts (W) measure a rate of power. Watt-hours (Wh) measure energy stored or used over time. They are different units.
Illustrative arithmetic only: if a 100 Wh battery received a constant 10 W with no losses, then:
100 Wh ÷ 10 W = 10 hours
This is not a field charging-time promise. Solar production varies, and charging equipment, cables, battery charging and voltage conversion all affect the result. When a device accepts USB or regulated DC, use that supported output rather than converting battery DC to AC and back again. For an AC appliance, check the power station’s continuous output and model-specific surge capability.
Portable solar charger checklist
Device input connector, accepted voltage profiles and maximum input watts
Required USB charging protocol, if any
Cable connector, protocol support and power capability
Panel nameplate rating and the rating of its actual USB or DC output port
Power-bank input rating and documented pass-through policy
Power-station input-voltage window, open-circuit-voltage limit, current limit and watt limit
DC connector type and polarity
Manufacturer instructions for the proposed panel, adapter and array configuration
Operating-temperature and weather-exposure instructions
Certification information for the exact model, where applicable
Final safety checks
Safety claims apply to specific products, not to a product category. UL identifies UL 2056 for standalone power banks and separately discusses UL 2743 for portable power packs and UL 61730-1/-2 for photovoltaic-module safety qualification. Verify any certification claim against the exact model and certification record rather than relying on marketing language.
Keep batteries within their documented environmental limits, keep electrical connections dry unless the manufacturer states otherwise, and do not assume a panel, connector or power station is weatherproof. Never open a battery, bypass its protection circuitry, backfeed a wall outlet or improvise home electrical connections. For medical equipment, obtain device-specific guidance from the equipment manufacturer and an appropriate professional before relying on portable solar power.
Quick answer: A solar generator with panels included is complete only when the exact panel model is approved for the station’s solar-input voltage, current, and watt limits, and the selected bundle includes the required charging cable and adapter. Confirm package contents and warranties in manufacturer documents, not only a retailer title or product photo.
Audit a solar generator with panels included before ordering
“Panels included” does not necessarily mean every part needed for solar charging is in the cart. A product page may combine station-only, one-panel, and multi-panel variants; the panel may also need a specific cable or input adapter. Treat the bundle as a set of separately verifiable components rather than relying on its title.
Exact power-station model: Record the complete model name and, where relevant, revision. Product-family names alone can hide different solar-input ports or limits.
Exact panel model and quantity: Confirm the panel model number and count. Similar-looking panels can have different electrical ratings, leads, or connectors.
Panel electrical ratings: Find rated power, open-circuit voltage (Voc), operating voltage (Vmp), short-circuit current (Isc), and operating current (Imp).
Station solar-input limits: Check the allowed voltage range, maximum voltage, current limit, watt limit, port count, and any per-port restrictions.
Cable and connector path: Identify the connector at the panel, both ends of each cable, the station input, and the polarity shown in the official connection instructions.
Selected variant’s package contents: Check the option actually selected in the cart. Do not assume contents shown for another variation apply to yours.
Warranty scope: Read coverage for the station, panel, cable, and adapters separately. Terms can differ among components and sales channels.
Use this bundle-audit table
Compare the seller listing against the manufacturer’s manual, specifications, package list, connection diagram, and warranty policy. Save copies or screenshots with the order record, because product pages and variants can change.
Item
What to verify
Best document to check
Action if unclear
Power station
Exact model, solar-input voltage range, maximum voltage, current and watt limits, input-port count
Official manual, specification page, or input label
Do not approve the bundle until the exact model and limits are known.
Solar panel
Model, quantity, rated watts, Voc, Vmp, Isc, and Imp
Panel label, manual, or official specifications
Compare every published value with the station documentation.
Solar charging cable
Connector at both ends and supported connection configuration
Package list and official connection diagram
Obtain the manufacturer-specified cable if it is not included.
Adapter
Input/output connector types and polarity
Official connection guide or adapter specifications
Use only an approved adapter; do not choose one by plug shape alone.
Multi-panel hardware
Any required adapters or connectors for the intended number of panels
Station manual or manufacturer expansion guide
Buy the specified hardware before expanding the array.
Extension cable
Whether included, connector compatibility, and electrical rating
Package list and cable specifications
Add an approved cable if the supplied lead cannot reach the planned panel location.
Delivery
Number of cartons and whether panels ship separately
Order details, package list, and seller confirmation
Document missing cartons promptly rather than assuming an accessory was omitted.
Warranty
Term, eligible seller, registration rules, proof-of-purchase requirements, and exclusions
Official warranty policy and exact product page
Request written clarification when documents conflict.
Does the included panel fit the station’s input limits?
A matching connector is not proof of electrical compatibility. Check voltage, current, and power independently for the exact models. If the manufacturer does not document a pairing or configuration, do not infer approval from a retailer listing.
Voltage: check operating range and maximum input
Compare the panel’s published operating voltage with the station’s stated solar-input range. Also check the panel’s Voc against the station’s maximum permitted input voltage using the manufacturer’s approved configuration. Solar-panel nameplate values are commonly stated under standard test conditions, and real outdoor conditions can differ. Follow the manufacturer’s documented arrangement rather than creating an undocumented series or parallel configuration.
Current: do not assume how a station handles excess available current
Compare the panel’s Imp and Isc with the station’s current specifications and connection instructions. Manufacturers may describe current limits differently. If the documentation does not state whether a proposed pairing is accepted, prohibited, or input-limited, the result is unknown until the manufacturer confirms it in writing.
Wattage: nameplate power is not a charging promise
Panel watts describe rated power under specified test conditions. A station’s solar-input watt limit describes its designed input limit. A panel rated at or above that limit does not establish that the station will capture every available watt, and panel wattage alone cannot determine a guaranteed recharge time.
Illustrative documented pairing: Jackery Explorer 1000 v2 and SolarSaga 200W
This example shows how to read published figures for a manufacturer-documented pairing. It is not a wiring rule or approval for other stations, panels, adapters, or configurations.
Jackery lists the Explorer 1000 v2 solar-input range as 16–60V, with a 10.5A and 200W maximum per port. It lists totals of 21A and 400W when both ports are used, identifies the input as DC8020, and says one or two panels use included cables while a four-panel configuration requires two SolarSaga adapters. Jackery’s Explorer 1000 v2 basic information
Jackery publishes the SolarSaga 200W panel at 200W ±5%, 22V Voc ±5%, 18V Vmp ±5%, 12.5A Isc ±5%, and 11.5A Imp ±5% under its stated standard test conditions. Its separate package list names a three-meter multifunction cable and a DC8020-to-DC7909 adapter. Jackery’s SolarSaga 200W specifications
Illustrative tolerance calculation: using the published positive or negative tolerance as an arithmetic assumption:
Voc: 22V × 1.05 = 23.1V.
Vmp: 18V × 0.95 = 17.1V.
Imp: 11.5A × 1.05 = 12.075A.
Rated power: 200W × 1.05 = 210W.
The calculated voltage figures fall within the station’s published 16–60V range. The panel’s stated current and possible power tolerance, however, exceed the listed per-port figures. Because Jackery sells and documents this pairing, it is manufacturer-supported; the specifications alone do not show how much current or power the station will accept in every condition. They therefore do not support a promise of 200W or more of real charging input.
For the US “Explorer 1000 v2 + SolarSaga 200W” option, Jackery’s package list names one station, one AC charging cable, one panel, and one multifunctional solar charging cable. Its station-only option does not include the panel or solar cable. That distinction is why the selected variant—not the shared product page—must be audited. Jackery Solar Generator 1000 v2 package options
Trace every cable and connector from panel to station
Map the complete charging path before purchase: panel output, permanently attached lead if present, detachable charging or extension cable, any adapter, and the station input. Product photos are not enough because visually similar connectors can have different dimensions or polarity.
Solar charging cable: Without the correct cable, an included panel may not connect to the station.
Input adapter: A cable may fit the panel but end in the wrong plug for the station.
Multi-panel adapter: This may be needed only when adding panels, not for the initial included panel.
Extension cable: It may be necessary to put the panel in sunlight while keeping the station in a suitable dry location.
Support or mounting hardware: Do not assume it is included unless it appears in the exact package list.
Use only connection methods specified for the exact products involved. Do not reverse polarity, splice unfamiliar cables, or assume a third-party adapter is appropriate because its plug fits.
Keep capacity, output, and solar input separate
Watts (W) measure a rate of power; watt-hours (Wh) measure stored or consumed energy. A 1,000Wh station and a 200W panel cannot be divided to create a guaranteed five-hour solar recharge claim. Sunlight, panel orientation, temperature, conversion behavior, battery-management behavior, and the station’s charging profile all affect actual results.
The station’s AC output rating is also separate from solar compatibility. Continuous and surge output ratings help determine whether the station can run an appliance; they do not tell you whether a solar panel is approved for its input.
Confirm warranty coverage for each bundle component
Check the official policy and the exact product page for the relevant SKU and seller. Confirm when coverage begins, whether registration changes the term, what proof of purchase is required, and whether panels and accessories have terms separate from the power station.
Official pages can conflict. Jackery’s cited warranty policy lists certain station families at 3+2 years and lists SolarSaga 200W, 100W, and 80W products at 2+1 years, while its SolarSaga 200W product page advertises a 3+2-year warranty. Obtain written confirmation for the exact panel SKU and sales channel instead of assuming the more favorable term applies. Jackery warranty policy
Buy when the precise station and panel models are identified, the manufacturer documents the pairing, the selected package list includes every required cable and adapter, and warranty terms are clear.
Wait for clarification when a listing omits electrical ratings, uses conflicting model names, relies on connector photos, promises accessories absent from the official package list, or leaves warranty coverage and input-limit behavior unresolved. Keep the listing, official documents, and the seller’s written response with the order record.
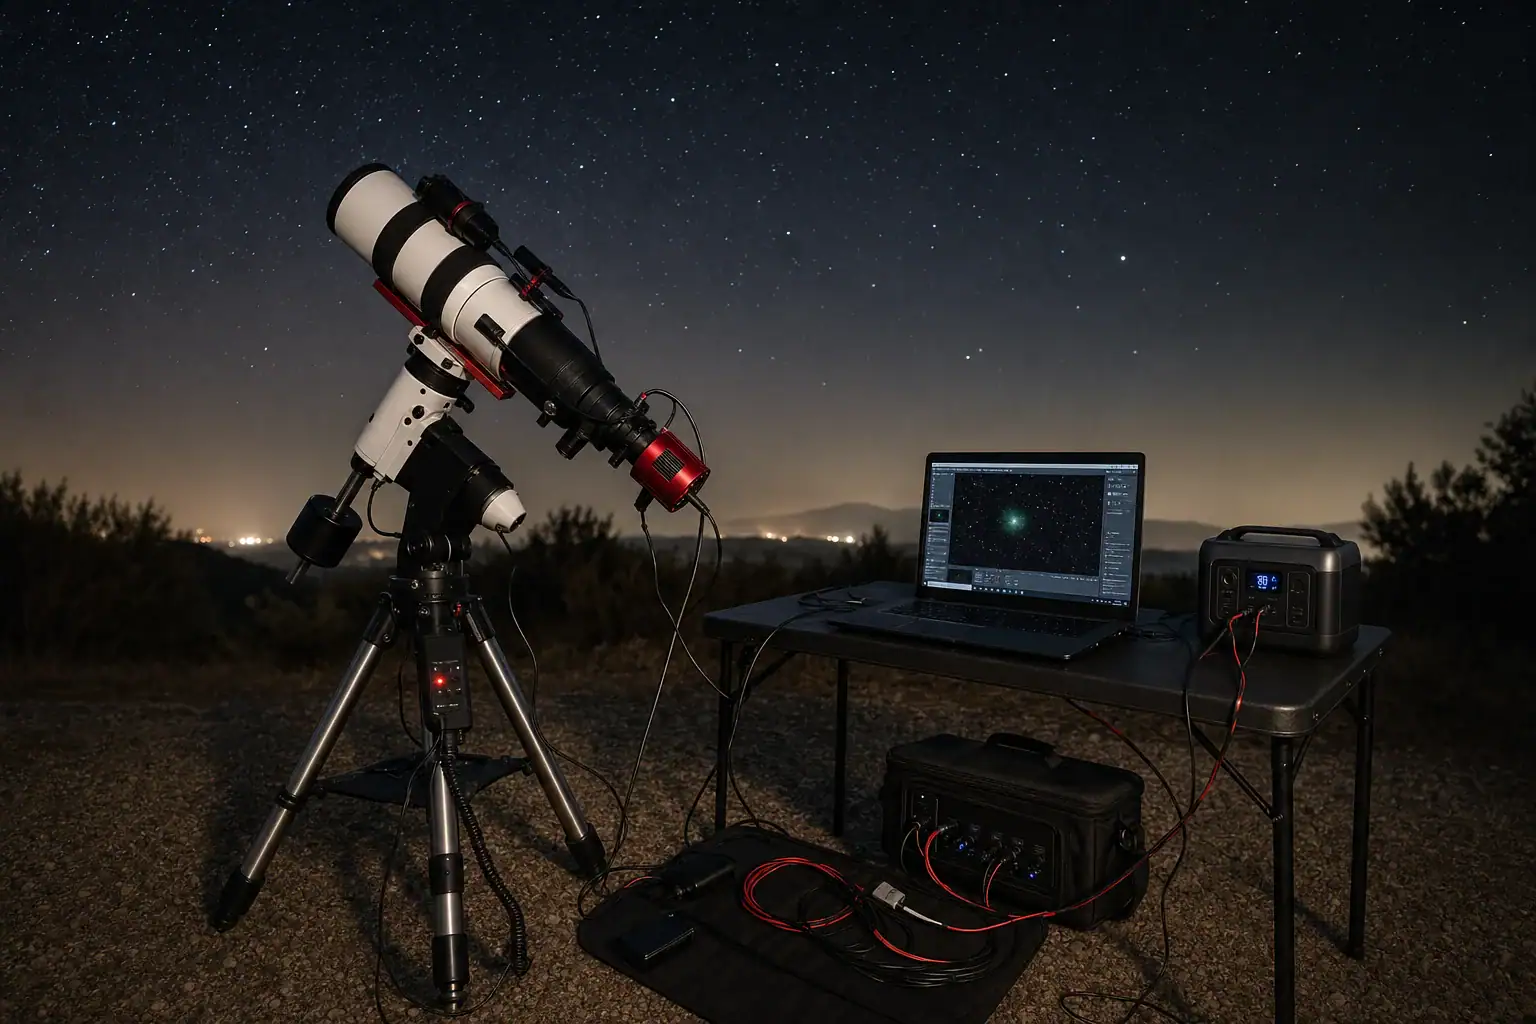
A portable power station for a telescope and astrophotography should provide stable voltage, enough watt-hours for the full observing session, and compatible outputs for every device. A typical setup may include a tracking mount, cooled astronomy camera, guide camera, electronic focuser, mini computer or laptop, powered USB hub, and one or more dew heaters. Although most of these loads are modest, they can run continuously for many hours.
Correct sizing depends on total power draw, expected runtime, inverter efficiency, DC output limits, and cold-weather performance. Dew heater wattage and camera cooling can vary throughout the night, so adding every nameplate rating is not always realistic, but relying only on average consumption can leave too little reserve. The best approach is to estimate energy use in watt-hours, confirm connector and voltage compatibility, and include capacity for colder temperatures, longer sessions, and unexpected equipment demands.
1. What a Portable Power Station Does for an Astronomy Setup
A portable power station is a rechargeable battery system that combines energy storage, protected output circuits, charging electronics, and often an AC inverter. In astronomy, it replaces or supplements vehicle power, small field batteries, and extension cords. Its purpose is not simply to deliver high peak wattage; it must supply clean, dependable power over a long period without interrupting tracking, camera cooling, or computer operation.
Mounts and cameras can be sensitive to low voltage. A mount may appear to work normally while tracking but experience a voltage drop during a fast slew. A cooled camera may draw substantially more power when its thermoelectric cooler is working hard. Dew heaters can become the largest continuous load when several straps are operated at high settings.
Capacity is normally stated in watt-hours, abbreviated Wh. Watt-hours measure stored energy, while watts describe the rate at which equipment consumes energy. A 500 Wh power station does not necessarily deliver all 500 Wh to connected devices. Conversion losses, internal reserve settings, cable losses, temperature, and inverter use reduce available energy.
2. How Loads, Outputs, and Runtime Work Together
Begin by listing every device, its operating voltage, and its approximate power draw. If a label provides volts and amps, estimate watts by multiplying volts by amps. For example, a device using 12 volts at 2 amps draws about 24 watts. For variable loads, use a realistic average and retain additional reserve for brief peaks.
Estimated runtime can be calculated by multiplying rated capacity by an assumed usable-energy factor, then dividing by the average load. A 600 Wh unit with an assumed 85 percent usable delivery provides about 510 Wh. At a 45-watt average load, the theoretical runtime is approximately 11.3 hours. Real conditions may shorten that result.
Direct DC power is usually more efficient than converting battery power to AC and then back to DC through each device’s adapter. However, direct DC should be used only when voltage, connector size, polarity, and output-current limits are confirmed. Many astronomy accessories use nominal 12-volt input, but that does not mean every connector or voltage range is interchangeable.
AC outlets are useful for laptops, proprietary chargers, and equipment without a compatible DC option. The inverter must remain on while AC devices operate, creating its own idle consumption. This overhead matters most when the connected load is small or the session lasts all night.
Equipment
Possible operating range
Power behavior
Tracking mount
5–15 W tracking; 20–50 W slewing
Low average load with short peaks
Cooled astronomy camera
10–35 W
Higher draw during initial cooling or warm weather
Guide camera and focuser
2–8 W combined
Usually intermittent or low continuous demand
Dew heaters
5–25 W per strap
Varies with strap size and controller setting
Mini computer
8–30 W
Changes with processor activity and accessories
Laptop
25–90 W
Depends on charging state, screen, and workload
Typical astronomy equipment loads. Example values for illustration.
3. Real-World Astrophotography Runtime Examples
Consider a lightweight imaging system with a mount averaging 8 watts, an uncooled camera and guide system using 6 watts, a mini computer drawing 12 watts, and a dew heater averaging 10 watts. The combined average is about 36 watts. For an eight-hour session, the equipment needs roughly 288 Wh before conversion losses and reserve are included. A practical capacity target would be higher than this calculated minimum.
A cooled deep-sky setup may average 10 watts for the mount, 25 watts for the main camera, 5 watts for guiding and focusing, 18 watts for a computer, and 25 watts for two controlled dew heaters. That is an average of about 83 watts. Over ten hours, energy consumption reaches approximately 830 Wh before accounting for losses, temperature, or spare capacity. In this situation, rated inverter wattage is unlikely to be the limiting factor; battery capacity is more important.
A laptop can materially change the calculation. If the astronomy equipment averages 55 watts and a laptop adds 45 watts, the total becomes 100 watts. A nominal 1,000 Wh unit delivering an assumed 850 Wh could run that load for about 8.5 hours under favorable conditions. Charging the laptop before leaving home, reducing screen brightness, or using an efficient compatible DC or USB-C connection can extend field runtime.
Dew conditions are difficult to predict. On a dry night, controlled heater straps may cycle at low output. In humid conditions, larger straps may operate much harder. Estimate both a normal case and a demanding case. A power station that barely covers the normal estimate offers little protection against heavy dew, colder weather, or an unexpectedly long imaging sequence.
4. Common Sizing Mistakes and Troubleshooting Cues
Confusing watts with watt-hours: An output rated for hundreds of watts may easily start the equipment but still have insufficient energy for an overnight session. Output wattage indicates how much load can be supported at once; watt-hours indicate how long that load may run.
Using only maximum nameplate current: Adding maximum current ratings can exaggerate average consumption, but ignoring those ratings can miss startup and slew peaks. Use measured or realistic average draw for runtime, then confirm that each output can handle the maximum expected current.
Assuming every 12-volt port is the same: Some outputs are regulated near 12 volts, while others vary with battery state. If a mount resets during slewing or a camera disconnects when cooling increases, check for output-current limits, voltage sag, loose connectors, undersized cables, or shared-port limits.
Ignoring inverter overhead: Shorter-than-expected runtime may result from powering several low-voltage devices through AC adapters. The inverter’s idle draw and each adapter’s conversion losses consume additional energy.
Overlooking automatic shutoff: Some power stations turn off an output when the load is very low. This can affect a mount used alone or accessories that cycle off for long periods. Look for configurable timeout behavior or an output designed to remain active.
Testing only indoors: A system that works at room temperature may deliver less runtime in the cold. Before a critical trip, test the complete setup for several hours and watch the power station’s remaining capacity, output watts, and any device warnings.
5. Electrical and Field Safety Basics
Keep the power station dry, ventilated, and protected from direct dew, frost, dust, and tripping hazards. Do not seal it in an airtight container while it is operating or charging. Place it on a stable surface where connectors cannot be pulled sideways by moving telescope cables.
Confirm voltage, polarity, connector dimensions, and current requirements before using any DC cable. Similar-looking barrel connectors may have different dimensions or polarity. Use fused, purpose-appropriate cables and avoid damaged adapters, loose splitters, and long undersized conductors that can create heat or voltage drop.
Do not exceed the rating of an individual port or a group of ports that share a combined limit. The total output rating of the power station does not guarantee that one DC connector can provide all of that power. Stop using equipment that develops unusual heat, odor, swelling, noise, or repeated fault messages.
Recharge with compatible equipment and follow the manufacturer’s temperature and ventilation guidance. Do not open the power station, modify its battery, defeat protective circuits, or improvise connections to household electrical systems. Any permanent electrical installation should be evaluated by a qualified electrician.
6. Maintenance, Charging, and Storage Between Sessions
Recharge after field use rather than storing the unit nearly empty. For long-term storage, use the charge level and inspection interval specified for the battery system; many units are best stored partially charged rather than continuously held at zero or 100 percent. Check the state of charge every few months because standby electronics can slowly consume energy.
Store the power station in a dry, moderate-temperature location away from direct sunlight and combustible clutter. Allow a cold unit to return to an appropriate charging temperature before recharging. Condensation can form when equipment is moved from a cold field into a warm room, so keep ports dry and wait if moisture is present.
Inspect cables, barrel connectors, USB leads, and adapters before each trip. Label cables with voltage, polarity, and destination to reduce setup errors in the dark. Periodically run a realistic load test and compare delivered runtime with earlier results. A gradual decline may indicate normal aging, while a sudden change can point to a cable, adapter, temperature, or output-setting problem.
Maintenance item
Practical check
Before a trip
Charge fully as needed and test all required outputs
After field use
Dry surfaces, inspect ports, and recharge appropriately
During storage
Check charge periodically and avoid temperature extremes
Seasonally
Perform a load test and inspect every cable and adapter
Basic care schedule. Example values for illustration.
Size the system around energy consumption rather than headline output wattage. Calculate an expected watt-hour requirement, include all-night loads such as computers and dew heaters, and retain roughly 20 to 30 percent reserve when practical. More reserve may be appropriate for freezing conditions, remote locations, or multi-night use without reliable recharging.
Whenever possible, measure the complete setup during a representative session. A plug-in meter can help with AC loads, while suitable inline meters can measure compatible DC equipment. Compare the observed average and peak demand with the limits of each intended output, not just the power station’s overall rating.
Specs to look for
Battery capacity: Look for roughly 300–500 Wh for modest systems or 700–1,500 Wh for cooled cameras, computers, and multiple heaters; capacity determines overnight runtime.
Usable energy: Look for test data or displays that support realistic planning at about 80–90 percent of rated capacity; conversion losses reduce delivered watt-hours.
Regulated DC output: Look for stable voltage near the equipment’s required range and enough current for combined loads; stable output helps prevent mount resets and camera disconnects.
Individual port current: Look for at least the maximum current required by the connected device, such as 5–10 amps on a shared 12-volt circuit; overall wattage alone does not define port capability.
AC inverter output: Look for continuous wattage comfortably above the combined AC load, often 200–500 watts for astronomy equipment; margin accommodates adapters and laptop charging peaks.
Low inverter idle draw: Look for efficient low-load operation or the ability to disable unused AC outputs; idle consumption can noticeably shorten an overnight session.
USB-C Power Delivery: Look for compatible profiles such as 60–100 watts when powering a laptop or mini computer; direct USB-C operation may avoid an extra conversion stage.
Cold-weather operating range: Look for discharge specifications that cover expected observing temperatures and protected charging behavior near freezing; cold reduces available capacity and can restrict charging.
Output controls and display: Look for separate AC, DC, and USB controls plus real-time watts and estimated runtime; clear monitoring makes unexpected consumption easier to diagnose.
The most suitable power station is one that supports every required voltage and connector, handles brief peak loads, and provides enough usable energy for the longest likely session. A conservative estimate, verified with a full-system test, is more dependable than choosing solely by advertised wattage.
Frequently asked questions
How many watt-hours do I need to run a telescope setup all night?
Calculate the average wattage of every device and multiply it by the planned session length in hours. Then allow for conversion losses and a reserve of roughly 20 to 30 percent, with more margin for cold weather, heavy dew, or uncertain loads. A modest setup may need several hundred watt-hours, while a cooled camera, computer, and multiple dew heaters can require substantially more.
Can I power a telescope mount directly from a portable power station?
Yes, if the station provides an output with the correct voltage, polarity, connector type, and current capacity for the mount. Check whether the DC output is regulated and whether its individual or shared-port limit can support slewing peaks. Use an appropriate cable rather than assuming that all 12-volt connectors are compatible.
What power station specs matter most for astrophotography?
Usable battery capacity in watt-hours, regulated DC output, individual port current limits, compatible connectors, and cold-weather performance are key considerations. Also check AC inverter efficiency and idle draw if adapters or a laptop must run from AC. A display showing real-time watts and estimated runtime can make field monitoring easier.
What is the most common mistake when choosing a power station for astrophotography?
A common mistake is choosing based on the station’s maximum watt output instead of its watt-hour capacity. A unit may have enough peak output to run the equipment but not enough stored energy for an overnight session. Another frequent issue is overlooking inverter losses when several low-voltage devices are powered through AC adapters.
Will dew heaters drain a portable power station quickly?
They can, especially when several straps operate at high settings in humid or cold conditions. Their actual energy use depends on strap size, controller settings, and how often they cycle. Include a normal and high-demand dew-heater estimate when planning battery capacity.
Is it safe to use a portable power station outside for astronomy?
It can be safe when the unit is kept dry, ventilated, and on a stable surface away from dew, standing water, and trip hazards. Confirm cable voltage, polarity, and current ratings before connecting equipment, and do not exceed individual-port limits. Avoid damaged cables, improvised wiring, and charging or operating the station outside its specified temperature conditions.
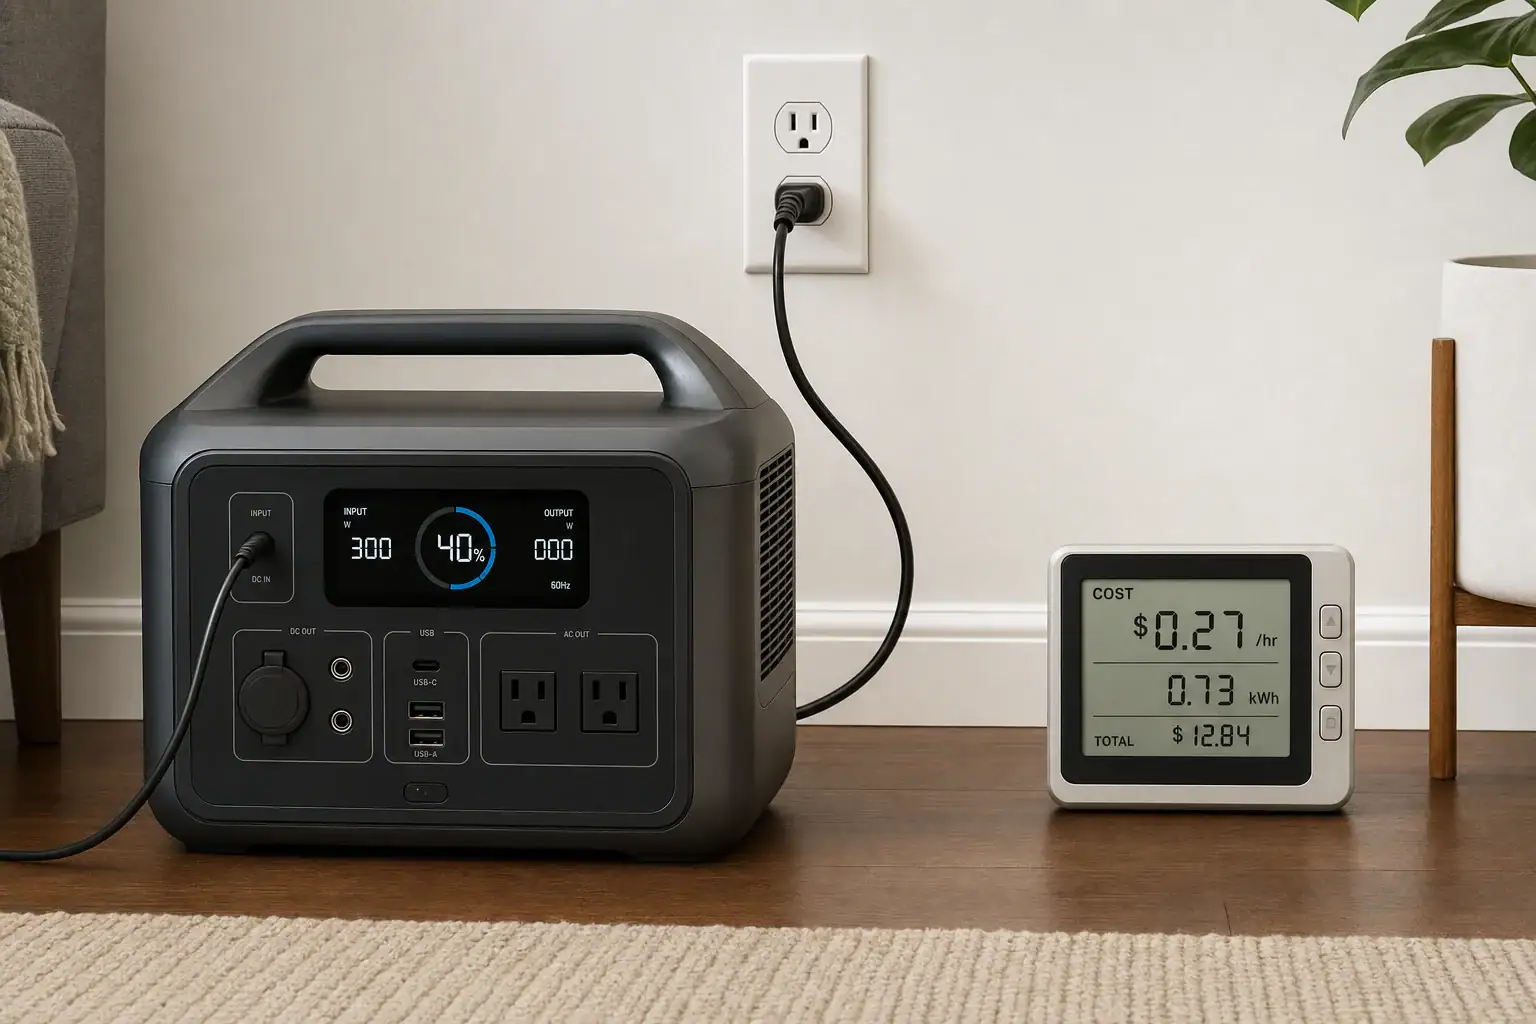
Charging a portable power station from the wall usually costs only a few cents to less than a dollar, depending on battery capacity, starting charge level, charging efficiency, and your electricity rate. For example, fully charging a 1,000-watt-hour unit may draw roughly 1.1 to 1.3 kilowatt-hours from the outlet. At an electricity price of $0.17 per kilowatt-hour, that would cost about $0.19 to $0.22.
The exact amount cannot be determined from battery capacity alone. Conversion losses in the AC charger, battery management system, and internal electronics increase wall consumption. Your local utility rate may also vary by season, time of use, or total household consumption. To calculate wall charging cost accurately, you need the power station’s watt-hour capacity, the percentage being replenished, expected charging efficiency, and the price paid per kilowatt-hour.
Understanding these factors helps compare charging modes, estimate operating expenses, and distinguish battery capacity from AC input watts or charging speed.
1. What Wall-Charging Cost Means and Why It Matters
The cost to charge a portable power station is the price of the electrical energy drawn from the wall outlet during a charging session. Utilities normally bill residential electricity in kilowatt-hours, abbreviated kWh. One kilowatt-hour equals 1,000 watt-hours of energy.
A power station rated at 1,000 Wh has a nominal capacity of 1 kWh, but a full recharge generally draws more than 1 kWh from the wall. Energy is lost as heat while AC electricity is converted to the voltage required by the battery. The battery management system, cooling fan, display, and other internal components may consume additional power.
This distinction matters when estimating long-term operating cost. A person charging occasionally for emergencies may spend very little over a year. Frequent users who recharge a large-capacity unit every day will have higher annual costs, although the cost of each individual cycle can still be modest.
Charging cost is separate from charging speed. A higher AC input limit can reduce the time required to recharge, but it does not necessarily reduce the total energy consumed. Fast charging may sometimes produce more heat, while a slower mode may run fans less aggressively. The actual difference depends on the charging system.
2. How to Calculate the Cost of a Wall Charge
The simplest estimate starts with the amount of battery capacity that needs to be replaced. Multiply the rated capacity by the missing charge percentage, account for efficiency losses, convert watt-hours to kilowatt-hours, and then multiply by the electricity rate.
Estimated cost = capacity in Wh × charge fraction ÷ efficiency ÷ 1,000 × electricity rate per kWh
For example, consider a 1,000 Wh power station being charged from 20% to 100%. The missing charge fraction is 0.80. If overall charging efficiency is estimated at 85%, the wall energy calculation is 1,000 × 0.80 ÷ 0.85 ÷ 1,000, or about 0.94 kWh. At $0.17 per kWh, the estimated cost is approximately $0.16.
Efficiency commonly varies with charger design, battery temperature, charging rate, and standby consumption. An assumed range of about 80% to 90% is useful for rough calculations when measured data is unavailable. For the most accurate result, use a plug-in energy meter to record the total kWh drawn during an entire charging session, then multiply that reading by the applicable utility rate.
Calculation input
Example
Effect on cost
Battery capacity
1,000 Wh
Larger capacities require more energy for a comparable percentage increase.
Starting charge
20%
A lower starting level means more capacity must be replaced.
Ending charge
100%
Stopping below full reduces energy used during that session.
Charging efficiency
85%
Lower efficiency increases the energy drawn from the outlet.
Electricity rate
$0.17 per kWh
A higher utility price directly increases charging cost.
Inputs used to estimate a wall-charging session. Example values for illustration.
3. Real-World Charging Cost Examples
The following examples use simplified assumptions rather than guaranteed consumption figures. Actual results can differ because nominal battery capacity may not equal usable capacity, and charging losses change throughout the charge cycle.
Small 300 Wh power station
A 300 Wh unit charged from empty to full at 85% efficiency would draw about 353 Wh, or 0.353 kWh, from the wall. At $0.17 per kWh, the estimated cost would be about $0.06. If it were charged from 50% to 100%, the cost would be roughly half that amount.
Mid-size 1,024 Wh power station
A full recharge of a 1,024 Wh battery at 85% efficiency would require approximately 1.20 kWh from the outlet. At $0.17 per kWh, the session would cost about $0.20. Recharging it once a week under similar conditions would cost roughly $10 to $11 per year.
Large 2,000 Wh power station
If a 2,000 Wh unit is charged from 25% to 100%, it needs to store approximately 1,500 Wh. At 88% efficiency, wall consumption would be about 1.70 kWh. At $0.17 per kWh, the estimated cost would be about $0.29.
Daily charging
Frequency makes a greater difference to annual cost than a small change in efficiency. If a charging session consumes 1.2 kWh every day, annual wall consumption would be about 438 kWh. At $0.17 per kWh, that equals approximately $74.46 per year. The same unit charged only twice a month would cost far less annually.
Time-of-use electricity plans can also affect the result. A utility may charge less overnight and more during peak afternoon or evening hours. When available and permitted by the manufacturer’s operating guidance, scheduling a charge during a lower-rate period can reduce cost without changing the amount of energy stored.
4. Common Calculation Mistakes and Troubleshooting Cues
One common mistake is treating watt-hours and watts as interchangeable. Watt-hours measure energy capacity, while watts measure the rate of power flow. A 1,000 Wh battery does not automatically consume 1,000 watts while charging. Its AC input might be 200 watts, 500 watts, or more, depending on the charger and selected charging mode.
Another mistake is multiplying the maximum input wattage by the entire advertised charging time. Charging power is rarely constant from start to finish. Many battery systems accept high power early in the cycle and reduce input near full charge to control heat and cell voltage. A 500-watt input rating therefore does not mean the unit draws exactly 500 watts for every minute of a two-hour session.
If measured wall consumption seems unusually high, check whether devices were running from the power station while it was charging. Pass-through operation can make the outlet supply both the battery and connected loads. Displays, wireless modules, heaters, or cooling fans can also add small amounts of consumption.
An unexpectedly long charge may indicate a low input setting, a shared circuit with voltage drop, excessive battery temperature, or charging near freezing conditions. It may also result from the normal taper near 100%. Check the displayed input watts and confirm that the correct charging mode and supplied cable are being used.
If the percentage rises quickly but falls soon after unplugging, the state-of-charge estimate may need time to recalibrate according to the manufacturer’s normal operating guidance. Persistent errors, abnormal heat, odors, repeated shutdowns, or a failure to accept a charge call for professional support rather than disassembly or modification.
5. Wall-Charging Safety Basics
Use a properly grounded wall outlet that is in good condition and appropriate for the charger’s current draw. Avoid loose receptacles, damaged cords, scorched plugs, or adapters that do not fit securely. High-input charging modes can place a meaningful continuous load on a household circuit, especially when heaters, appliances, or other high-wattage devices share that circuit.
Place the power station on a stable, dry surface with clear space around its ventilation openings. Do not cover it while charging or place it near combustible materials. Charging naturally creates some heat, but excessive heat, swelling, smoke, unusual sounds, or a strong chemical odor are warning signs. Disconnect the unit if it is safe to do so and move away from the area.
Extension cords can add resistance and voltage drop. If one must be used, it should be appropriately rated for the charger’s input and fully uncoiled. A damaged, undersized, or loosely connected cord can overheat. Do not use wall charging in wet conditions unless every component is specifically designed for that environment.
A portable power station should not be connected directly to home wiring, an electrical panel, a transfer switch, or an interlock without equipment designed for that purpose and installation by a qualified electrician. Never open the enclosure, modify the battery pack, or bypass temperature, current, or charging protections.
6. Maintenance and Storage Factors That Affect Charging Cost
Battery condition can influence how efficiently energy is stored. As a battery ages, its usable capacity generally declines. An older unit may reach 100% after accepting less energy than when new, but it will also provide less runtime. A lower charging bill in that situation does not necessarily indicate improved efficiency.
Temperature also matters. Charging in very hot or cold conditions can trigger reduced input power, longer charging times, or protective shutdowns. Store and charge the unit within its stated temperature range, preferably in a dry, ventilated indoor location. Allow a unit moved from a cold environment to reach a suitable temperature before charging.
For long-term storage, follow the specified storage charge range and inspection interval. Many battery systems are better stored partially charged rather than left at 0% or held at 100% for months. Periodic top-ups use little electricity, but they help prevent excessive self-discharge and preserve readiness.
Turn off unnecessary outputs, wireless functions, and displays during storage. Even small standby loads can gradually drain the battery and require more frequent recharging. Record the charge percentage at the start and end of a storage period if unexplained losses are suspected.
Storage or use pattern
Illustrative wall energy
Cost at $0.17 per kWh
Monthly 10% top-up of a 1,000 Wh unit at 85% efficiency
0.118 kWh
About $0.02
Quarterly 20% top-up of a 1,000 Wh unit at 85% efficiency
0.235 kWh
About $0.04
Full recharge of a 500 Wh unit at 85% efficiency
0.588 kWh
About $0.10
Full recharge of a 2,000 Wh unit at 85% efficiency
2.353 kWh
About $0.40
Illustrative energy costs for storage and charging patterns. Example values for illustration.
7. Practical Takeaways and Specs to Look For
For a quick estimate, convert the capacity to kilowatt-hours, multiply by the portion being replenished, divide by estimated efficiency, and multiply by the local electricity rate. A plug-in energy meter provides a better answer because it captures conversion losses, charging taper, cooling, and standby consumption. Use the rate shown on your utility bill, including relevant energy charges, rather than relying on a national average.
Cost should be evaluated alongside recharge time, usable capacity, cycle life, and charging controls. A low per-charge cost does not by itself indicate that a power station will meet a particular runtime or backup-power need.
Specs to look for
Battery capacity: Look for a watt-hour rating such as 300 Wh, 1,000 Wh, or 2,000 Wh; capacity is the main factor determining energy required for a full recharge.
Usable capacity: Look for tested or documented usable energy below the nominal rating; it gives a more realistic basis for runtime and recharge calculations.
Maximum AC input: Values may range from about 100 watts on compact units to more than 1,000 watts on larger models; higher input can shorten recharge time when the circuit supports it.
Adjustable charging rate: Look for quiet, standard, and fast settings; selectable input can reduce fan noise or circuit load when maximum speed is unnecessary.
Full recharge time: Compare stated times under clearly defined conditions, such as 0% to 100% using AC power; this helps set realistic expectations for charging availability.
Battery chemistry and cycle rating: Look for a cycle estimate tied to a remaining-capacity percentage, such as 2,000 cycles to 80%; this helps evaluate long-term durability rather than one-time charging cost.
Operating and charging temperature range: Look for a range suitable for the expected environment; temperature restrictions can affect charging speed, safety, and availability.
Standby consumption and automatic shutoff: Look for low idle draw and configurable shutdown timers; these features reduce unnecessary battery drain and repeat charging.
Input energy display: Look for real-time input watts, estimated time remaining, and clear charge percentage; these readings make it easier to identify slow charging or unexpected consumption.
Charging efficiency information: If available, look for measured wall-to-battery efficiency in the approximate 80% to 90% range; higher efficiency can modestly reduce energy use and heat.
In most households, a single wall charge is inexpensive. The most reliable estimate comes from measuring actual kWh at the outlet and multiplying that figure by the electricity price that applies at the time of charging.
Frequently asked questions
How much does it cost to charge a portable power station from the wall?
The cost depends on the amount of energy replaced, charging losses, and the electricity rate on your utility bill. As a rough example, a 1,000 Wh unit may draw about 1.1 to 1.3 kWh for a full charge, which costs about $0.19 to $0.22 at $0.17 per kWh. A plug-in energy meter provides the most accurate result for a specific unit.
Does charging a portable power station overnight cost less?
It can cost less if your utility uses time-of-use pricing and offers lower overnight rates. The station uses approximately the same amount of energy, but each kWh may be billed at a lower price. Check your utility plan to confirm whether off-peak rates apply.
What specifications matter most when comparing portable power station charging costs?
Battery capacity in watt-hours, documented usable capacity, and wall-to-battery charging efficiency are the main specifications for estimating energy use. Adjustable AC charging modes and standby consumption can also affect real-world usage. Maximum AC input primarily affects charging time rather than the basic energy needed for a recharge.
Is it a mistake to calculate charging cost using the maximum input wattage?
Yes. Maximum input wattage is a power rate, while charging cost is based on total energy consumed in kWh. Input power commonly changes during the session and tapers as the battery approaches full charge, so a meter reading is more reliable than multiplying a peak wattage by the advertised charge time.
Is it safe to leave a portable power station charging from a wall outlet?
Follow the manufacturer’s charging instructions and use an undamaged, properly grounded outlet and charging cable. Charge on a dry, stable surface with ventilation clear of obstructions and away from combustible materials. Stop charging and seek support if there is excessive heat, swelling, smoke, unusual odor, or repeated shutdowns.
Why does a power station use more electricity from the wall than its battery capacity?
Some electricity is lost during AC-to-DC conversion and battery charging, mainly as heat. Internal systems such as cooling fans, displays, and battery management electronics may also use power. Therefore, a station with a 1 kWh battery can require more than 1 kWh from the outlet for a full recharge.
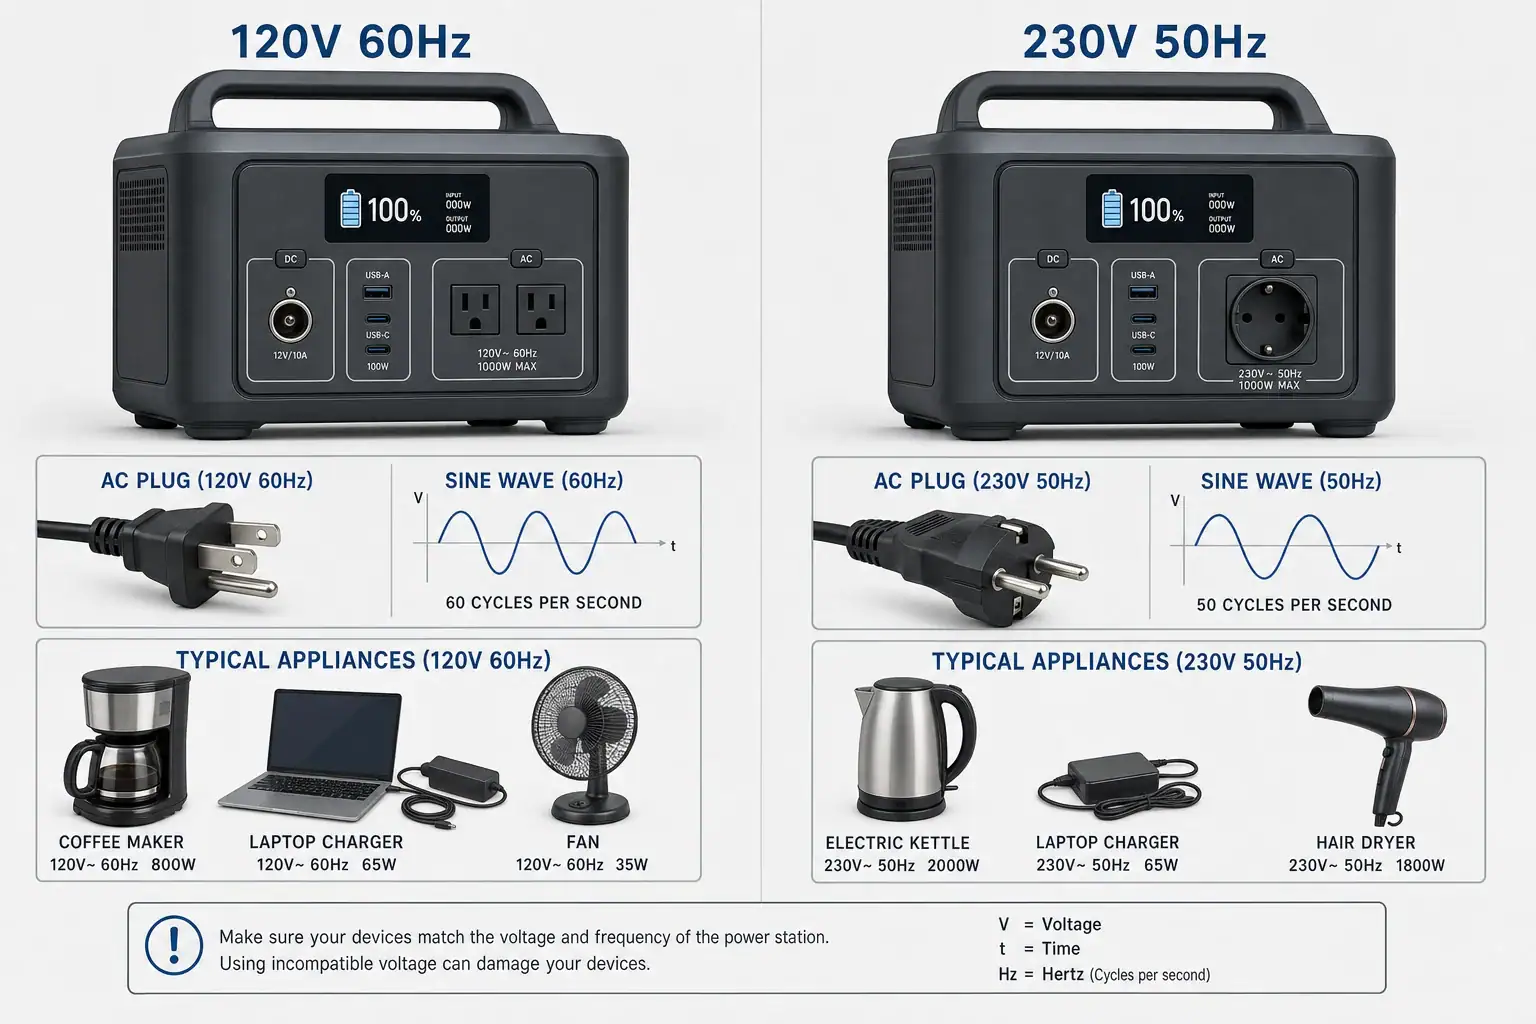
A 120V appliance generally needs a 120V portable power station, while a 230V appliance generally needs a 230V model unless the appliance label explicitly supports both voltage ranges. Plug shape alone does not establish compatibility, and a simple travel adapter does not convert voltage or frequency.
The main specifications to compare are AC output voltage, plug type, 50Hz vs 60Hz frequency, continuous watts, surge watts, and pure sine wave output. You should also check whether the device has a fixed-voltage input or a universal input such as 100–240V, 50/60Hz. These details determine whether an appliance will start, operate correctly, and remain within its intended electrical range.
Regional naming can be confusing. Labels such as 110V, 115V, and 120V usually describe the same general voltage class, while 220V, 230V, and 240V commonly describe another. However, those terms are not permission to ignore the actual equipment label. Always match the stated operating range and required frequency before connecting a load.
What 120V and 230V Mean and Why the Difference Matters
The voltage rating describes the nominal AC voltage produced by the power station’s inverter. A 120V unit is primarily intended for appliances from regions that use roughly 100–120V service, while a 230V unit serves equipment designed for approximately 220–240V. North American household receptacles commonly supply about 120V at 60Hz. Many countries in Europe, Africa, Asia, and Oceania commonly use about 230V at 50Hz, although regional exceptions exist.
Voltage matters because electrical equipment is designed around a specific input range. Supplying a fixed 120V device with 230V can cause immediate damage, overheating, or fire. Supplying a fixed 230V device with 120V may prevent it from starting, make a motor stall, or cause a heating appliance to produce much less heat. Protection circuits may shut down, but they should not be treated as a substitute for correct matching.
The power station’s battery capacity does not determine its AC voltage. Two stations can each store 1,000 watt-hours yet provide different outlet voltages, frequencies, power limits, and receptacles. Capacity mainly influences runtime; the inverter specifications determine whether the load is electrically compatible.
How Voltage, Plugs, Frequency, and Wattage Work Together
Four separate checks are necessary: voltage, frequency, plug configuration, and power demand. First, the appliance voltage range must include the station’s output. Second, its frequency rating must accept the selected 50Hz or 60Hz output. Third, the plug must physically and electrically match the receptacle. Fourth, running and starting demand must remain within the inverter’s limits.
Voltage ranges and universal inputs
Many laptop chargers, phone chargers, camera chargers, and other switch-mode power supplies are labeled 100–240V, 50/60Hz. Such a label generally means the charger can accept either voltage system without a voltage converter, provided the plug connection is suitable. An appliance labeled only 120V 60Hz or 230V 50Hz is not universal.
Plug shape is not voltage conversion
A passive plug adapter only changes the physical connection. It does not turn 230V into 120V, change 50Hz into 60Hz, increase wattage, or create a different grounding arrangement. Universal-style receptacles can accept multiple plug shapes, but their output still has one specified voltage.
Frequency and motor behavior
Frequency is the number of AC cycles per second. Resistive loads such as basic heaters are often less sensitive to frequency, but motors, pumps, compressors, clocks, turntables, and timing circuits may depend on it. A motor intended only for 60Hz can run hotter or at a different speed on 50Hz. Pure sine wave output improves waveform quality, but it does not make the wrong frequency compatible.
Running watts and starting watts
Continuous output covers sustained demand. Surge output covers brief startup demand from compressors, pumps, and motors. A refrigerator drawing 150 running watts might require several times that amount for a fraction of a second. Both values must fit the power station’s ratings, even when voltage and frequency match.
Characteristic
120V-class output
230V-class output
Compatibility question
Common nominal labels
110V, 115V, 120V
220V, 230V, 240V
Does the appliance input range include the actual output?
Common frequency
Often 60Hz
Often 50Hz
Is the appliance rated for 50Hz, 60Hz, or both?
Typical current at 1,200W
About 10A
About 5.2A
Are the outlet and inverter rated for the required current?
Plug connection
Regional 120V receptacle
Regional 230V receptacle
Is the plug correct without defeating grounding?
Universal-input charger
Often compatible
Often compatible
Does its label state 100–240V, 50/60Hz?
Example values for illustration. Actual output tolerances and regional standards vary.
Real-World Compatibility Examples
Universal laptop charger
Consider a 65W laptop charger labeled 100–240V, 50/60Hz. It can generally operate from either a 120V 60Hz station or a 230V 50Hz station. The remaining issue is the plug connection. A properly rated adapter or compatible detachable cord may solve the physical mismatch, but the charger’s full label should still be checked.
Fixed-voltage coffee maker
A 1,000W coffee maker labeled 120V 60Hz should not be connected to 230V. On a suitable 120V station, the inverter must provide at least the coffee maker’s sustained load with reasonable headroom. If the station has a 1,000W continuous limit, another simultaneous load could trigger an overload even though the voltage matches.
Refrigerator or portable freezer
A compressor appliance may list modest running consumption but require a much higher startup surge. A 120V 60Hz refrigerator needs matching output unless its label states a broader range. A station with 500W continuous output may still fail to start a 150W refrigerator if its short surge capability is insufficient or too brief.
230V motorized appliance on 120V
A fixed 230V pump connected to 120V may not start and could remain stalled. A plug adapter cannot correct this. A properly sized voltage conversion device may address voltage in some cases, but it does not necessarily correct frequency, startup current, grounding, or protection compatibility. Motor applications require particular caution.
Dual-frequency device with fixed voltage
An appliance marked 230V 50/60Hz accepts either frequency but still requires approximately 230V. Conversely, a label reading 100–240V 50Hz accepts a wide voltage range but does not automatically approve 60Hz. Every part of the rating must match.
Common Mistakes and Troubleshooting Cues
A frequent mistake is selecting a station by plug appearance. A receptacle may physically accept a plug while supplying the wrong voltage. Another is assuming that all electronics are universal input. Chargers often are, but heaters, kitchen appliances, power tools, medical equipment, and motor loads frequently are not.
The appliance does not turn on: Check whether AC output is enabled, then compare voltage and frequency labels. Also verify that the station is not in overload, low-battery, or temperature protection.
The station shuts off during startup: The appliance may have a surge demand above the inverter’s peak rating, even if its running watts appear acceptable.
A motor hums, slows, or becomes unusually warm: Disconnect it. The voltage, frequency, waveform, or surge capability may be unsuitable.
A clock or turntable runs at the wrong speed: Its timing may depend on AC frequency, making 50Hz and 60Hz operation meaningfully different.
A charger works abroad but another appliance does not: The charger may support 100–240V and 50/60Hz, while the other appliance has a fixed input.
An overload occurs below the advertised wattage: Other outlets may share the same inverter limit, the load may have a high inrush current, or the inverter may be reducing output because of heat.
When diagnosing a mismatch, read the appliance nameplate rather than relying on its country of purchase. The useful line normally lists input voltage, frequency, watts, or amps. If watts are not shown, an approximate resistive-load calculation is volts multiplied by amps, but motors and electronic loads can have additional startup and power-factor considerations.
Safety Basics for AC Output Compatibility
Never connect a fixed 120V appliance to 230V or assume protection circuitry will prevent damage. Do not alter plugs, remove grounding pins, bypass protective devices, or use damaged adapters. Extension cords and adapters should be rated for the voltage, current, environment, and grounding needs of the connected equipment.
Portable power station grounding and neutral arrangements can differ from household utility power. Some stations use a floating neutral, and some appliances, protective devices, or vehicle charging equipment may reject that arrangement. Do not create improvised neutral-ground bonds. Consult the station instructions, the appliance manufacturer, or a qualified electrician when grounding behavior matters.
Keep the station dry, ventilated, and away from combustible materials. Do not operate it in an enclosed space if it is being charged by a fuel-powered generator located nearby; fuel-powered equipment must remain outdoors and safely separated because of carbon monoxide risk. Observe outlet current limits as well as the station’s total wattage limit.
Connecting a portable station to building wiring involves additional shock, fire, and backfeed hazards. Use only an approved installation designed for the application and evaluated by a qualified electrician. A household receptacle should never be used as an improvised inlet.
Maintenance and Storage for Reliable AC Compatibility
Voltage compatibility does not usually change during storage, but settings and connection accessories can. If a station allows 50Hz or 60Hz selection, confirm the setting after firmware changes, resets, long storage, or travel. Do not change frequency while a sensitive appliance is operating.
Inspect AC receptacles, detachable cords, and plug adapters for looseness, discoloration, bent contacts, cracking, or heat damage. Replace damaged accessories rather than trying to repair or reshape energized parts. Keep labels legible so output voltage and frequency can be identified without guesswork.
Store the battery within the temperature and state-of-charge range given by its documentation. For many lithium-based systems, moderate temperatures and a partial charge are preferable to prolonged storage completely full or empty. Recharge periodically if standby consumption causes the level to fall. Before relying on the station for backup power, test it with a known compatible load and verify that the intended adapters and cords are present.
Check
Example interval
What to verify
Why it matters
Output setting
Before each use or after a reset
Correct 120V or 230V mode and 50Hz or 60Hz setting
Prevents accidental mismatches
Plug and cord inspection
Before travel or backup use
No cracks, loose pins, discoloration, or heat damage
Reduces shock and overheating risk
Battery level
Every 2–4 months in storage
Charge remains within the recommended storage range
Preserves readiness and battery health
Compatible-load test
Every 3–6 months
AC output remains stable under a modest known load
Finds problems before an outage
Example values for illustration. Follow the storage and inspection guidance supplied with the equipment.
Start with the appliance nameplate. Match voltage first, frequency second, plug and grounding configuration third, and wattage requirements fourth. A universal-input label can make travel easier, but it must explicitly include both the station’s voltage and frequency. Treat plug adapters as mechanical interfaces only.
Allow capacity and output headroom for real-world operation. Battery watt-hours influence runtime, while continuous and surge watts determine whether the inverter can support the load. Because inverter conversion and internal consumption use energy, runtime will be shorter than a simple battery-capacity division suggests.
Specs to look for
AC output voltage: Look for a fixed 120V or 230V output, or a clearly documented selectable design; it must match the appliance’s stated input range.
Output frequency: Look for 50Hz, 60Hz, or selectable 50/60Hz operation; this matters for motors, clocks, compressors, and frequency-sensitive electronics.
Continuous AC output: Choose a rating above the combined sustained load, such as 1,200W for an expected 900W load; headroom reduces nuisance overloads and heat stress.
Surge output: Look for a peak rating and its duration, such as 2,000W for one to several seconds; motors and compressors can draw several times their running power at startup.
Waveform: Look for pure sine wave AC with clearly stated voltage regulation; a clean waveform is preferable for sensitive electronics, audio equipment, and motor loads.
Receptacle and plug type: Confirm that outlets match the intended region and preserve required grounding; physical fit should not depend on unsafe or overloaded adapters.
Battery capacity: Compare usable watt-hours, with examples ranging from roughly 300Wh for light electronics to 2,000Wh or more for longer backup loads; capacity primarily determines runtime.
Per-outlet and total current limits: Check both ratings, such as 10A per outlet and a separate shared inverter maximum; one outlet may reach its limit before total advertised watts are used.
Protection and status information: Look for overload, overtemperature, short-circuit, and low-voltage protection plus readable fault indicators; clear warnings make compatibility problems easier to identify.
The safest purchasing approach is to list every intended appliance and record its voltage, frequency, running watts, and likely startup demand. Compare those requirements with the station’s full AC specifications rather than relying on capacity, plug appearance, or a single headline wattage figure.
Frequently asked questions
Can I use a 120V appliance with a 230V portable power station?
Only if the appliance label states that its input range includes 230V, such as 100–240V. A fixed-voltage 120V appliance should not be connected to a 230V outlet because it can be damaged. A plug adapter changes physical fit only and does not reduce voltage.
Can a travel plug adapter make a 230V power station safe for 120V devices?
No. A basic travel adapter does not convert voltage, frequency, or available power. It can allow an incompatible appliance plug to fit a receptacle, so the appliance nameplate must be checked before connecting it.
What specs should I compare before buying a portable power station for international use?
Compare the AC output voltage and frequency with every appliance you plan to run, then check continuous watts, surge watts, outlet current limits, plug type, and grounding requirements. A selectable 50Hz/60Hz setting may be useful, but it does not make a fixed-voltage appliance compatible. Also verify whether the unit provides pure sine wave output for sensitive electronics or motor loads.
Do 50Hz and 60Hz matter for portable power stations?
Yes, especially for motors, compressors, clocks, turntables, and equipment with frequency-sensitive timing. Many chargers labeled 50/60Hz can use either frequency, but a device marked for only one frequency may operate incorrectly or overheat on the other. Check the complete input rating rather than voltage alone.
Why does a power station overload when the appliance uses fewer running watts than its rating?
Some appliances draw a brief startup surge that is much higher than their listed running power. Compressors, pumps, and motor-driven tools are common examples. The station’s surge rating, surge duration, shared outlet limits, battery level, and temperature can all affect whether the load starts successfully.
What are the basic safety rules when using a portable power station abroad?
Use only appliances whose voltage and frequency ratings match the station output, and keep grounding intact. Do not modify plugs, defeat safety pins, or use damaged cords or adapters. Keep the station dry and ventilated, and use a qualified electrician for any connection to building wiring.
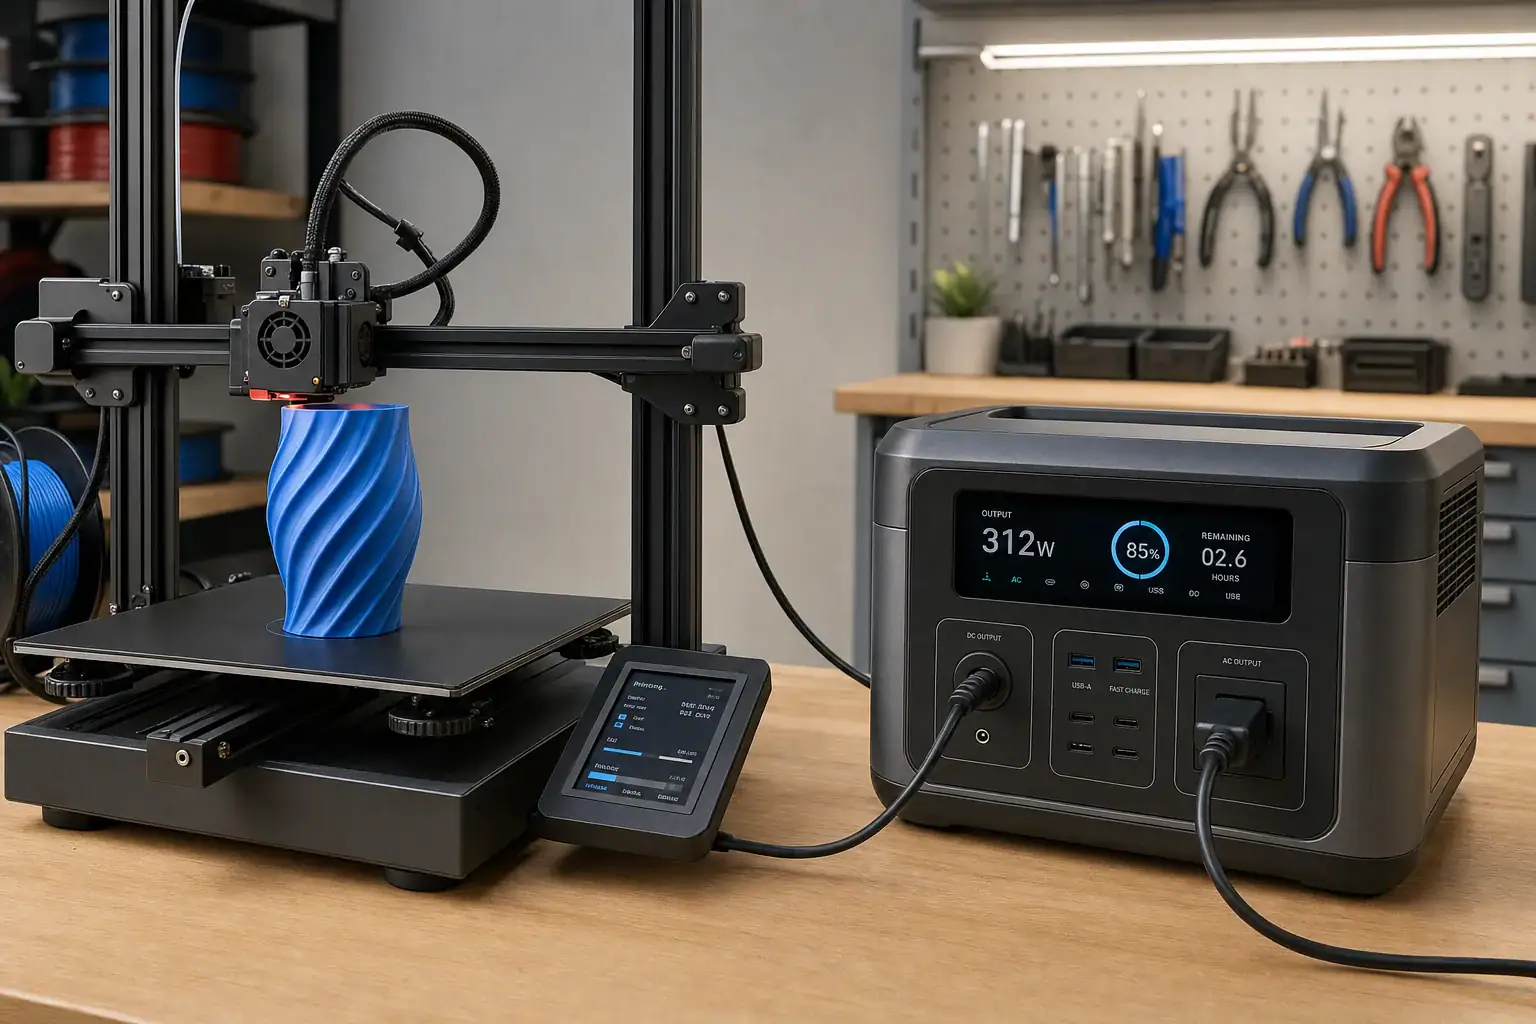
Yes, a portable power station can run most desktop 3D printers if its AC inverter can handle the printer’s peak heat-up demand and its battery has enough capacity for the full print. The important numbers are surge watts, continuous output, watt-hours, inverter efficiency, and expected runtime.
A 3D printer rarely draws one fixed amount of power. Consumption is usually highest while the nozzle and heated bed warm at the same time, then falls and cycles as the printer maintains temperature. A small printer may need relatively little energy, while a large heated bed, enclosed chamber, or high-temperature material can increase demand substantially.
For reliable operation, compare measured wall power with the power station’s ratings rather than relying only on the printer power supply label. Allow headroom for brief input current, heater cycling, cold-room operation, and battery aging. The power station should also provide regulated pure sine wave AC power and enough usable energy to finish without reaching low-battery shutdown.
Can a Portable Power Station Run a 3D Printer?
A portable power station can run a 3D printer when two separate requirements are met: the inverter must support the printer’s highest power demand, and the battery must store enough usable energy for the planned print duration. Passing only one requirement is not sufficient. A high-capacity battery with an undersized inverter may shut down during heat-up, while a powerful inverter attached to a small battery may start the printer but stop before the model is complete.
The printer’s power supply rating is not necessarily its normal wall consumption. A label showing 350 watts, for example, generally indicates the power supply’s maximum output capability rather than a constant 350-watt load. Actual demand depends on bed size, nozzle temperature, bed temperature, chamber heating, electronics, fans, motors, ambient conditions, and heater control behavior.
This distinction matters because a power interruption can ruin a long print. Some printers offer power-loss recovery, but recovery is not guaranteed to preserve layer alignment, bed adhesion, nozzle condition, or surface quality. Proper sizing is therefore more reliable than planning to restart after an avoidable shutdown.
How Heat-Up Demand, Inverter Output, and Runtime Work
The highest sustained demand often occurs during initial heating. The bed and hot end may operate near full power together until they reach their targets. This is commonly described as a heat-up surge, although it may last much longer than the split-second motor surge associated with some appliances. The printer’s AC power supply can also produce a very brief inrush current when switched on.
Compare the measured peak with the power station’s continuous AC output, not only its advertised surge rating. Surge ratings may apply for only a short interval, whereas printer heat-up can last several minutes. A practical target is continuous output at least 20% to 30% above the highest observed wall draw. More headroom may be appropriate for high-temperature printing or a cold workspace.
Runtime depends on usable battery energy rather than inverter watts. A basic estimate is:
Runtime in hours = battery watt-hours × usable fraction × inverter efficiency ÷ average printer watts
For example, a 1,000-watt-hour battery with a 90% usable fraction and 88% AC efficiency provides about 792 watt-hours to the printer. At a 120-watt average load, the estimated runtime is about 6.6 hours. Real results vary because battery temperature, inverter standby consumption, display power, heater cycling, and conversion losses change during use.
Operating phase
Illustrative power range
What affects it
Printer startup
Brief inrush above normal draw
Power supply design and inverter response
Bed and nozzle heat-up
180–450 watts
Bed area, heater size, target temperature, and room temperature
Typical printing
60–180 watts average
Heater cycling, material, fans, motors, and enclosure losses
High-temperature printing
150–500 watts average
Hot bed, chamber heater, larger build volume, and long heat cycles
Example values for illustration. Actual power should be measured for the specific printer and settings.
Real-World 3D Printer Runtime Examples
Consider a compact printer that peaks at 220 watts during heat-up and averages 80 watts during printing. A power station providing 500 usable watt-hours after losses could run it for approximately 6.25 hours. A six-hour job would be possible on paper, but the margin would be very small. A safer plan would reserve at least 15% to 25% for changing conditions and estimate around five hours of dependable runtime.
A medium printer might peak at 400 watts and average 140 watts. With 900 usable watt-hours available after battery and inverter losses, estimated runtime would be about 6.4 hours. The inverter should still have a continuous rating comfortably above the 400-watt heat-up load. A 300-watt inverter would remain unsuitable even though the battery contains enough energy for several hours.
A large enclosed printer with a chamber heater could peak near 900 watts and average 350 watts. A system delivering 1,600 usable watt-hours would provide roughly 4.6 hours. In this case, chamber preheating, repeated bed heating, and high ambient heat around the power station can materially change the result.
For a more accurate estimate, connect the printer to a plug-in power meter during a comparable utility-powered print. Record the highest wattage during startup and heat-up, then measure total watt-hours over one or more hours of stable printing. Use the actual filament, temperatures, enclosure settings, and room conditions expected during battery operation.
Common Sizing Mistakes and Troubleshooting Cues
A common mistake is sizing from the printer’s average draw while ignoring simultaneous bed and nozzle heating. If the power station shuts off during warm-up but runs smaller loads normally, an inverter overload or brief inrush limit is a likely cause. Confirm the printer’s measured peak and compare it with both the continuous and short-duration output specifications.
Another error is treating the battery’s labeled watt-hours as fully deliverable AC energy. Conversion losses and low-battery protection reduce usable capacity. If runtime is consistently shorter than a simple watt-hour calculation predicts, account for inverter efficiency, the power station’s own consumption, cold battery conditions, and battery age.
Unexpected shutdowns after printing begins can also result from heater cycles. The bed may return to full output when a door opens, room temperature falls, or a large part increases heat loss. An enclosed power station can overheat and reduce output or shut down, especially if printer and battery ventilation compete in a small cabinet.
Shutdown during initial heat-up: Check peak watts, inverter overload indications, and whether the bed and nozzle heat simultaneously.
Printer restarts but the station stays on: Look for a loose AC plug, intermittent extension cord, voltage drop, or an incompatible power-saving mode.
Runtime is much shorter than expected: Measure average watts and total energy instead of using the power supply’s label alone.
Output stops at a moderate battery percentage: Consider cold temperature, battery protection behavior, calibration error, or a high load near the end of discharge.
Visible print defects without shutdown: Verify stable power, but also inspect normal printer causes such as bed adhesion, extrusion, motion, and temperature control.
Safety Basics for Battery-Powered 3D Printing
Place the power station on a stable, dry, nonflammable surface with all ventilation openings clear. Do not set it inside a sealed printer enclosure or near the heated bed, chamber exhaust, loose filament, solvents, or other combustible material. Follow the operating temperature ranges provided for both devices.
Use an undamaged printer power cord rated for the load. Avoid lightweight extension cords, coiled cable reels, overloaded power strips, and loose adapters. A long or undersized cord can develop voltage drop and heat even when the displayed wattage appears acceptable. Stop using any plug, outlet, or cord that becomes unusually warm, discolored, or damaged.
Pure sine wave AC output is the conservative choice for a printer’s switch-mode power supply and control electronics. Electrical noise is not the only consideration; the inverter must also maintain stable voltage during heater switching. Keep smoke detection appropriate for the workspace, and do not leave a printing setup unattended merely because it is battery-powered.
Do not open the power station, alter its battery pack, bypass protection circuits, or modify the printer to exceed electrical ratings. A portable unit should not be connected to household wiring through improvised backfeeding. Any integration with building circuits requires properly approved equipment and evaluation by a qualified electrician.
Maintenance and Storage for Reliable Print Power
Before a long print, inspect the AC receptacle, plug, cable, vents, and display for damage or warning indicators. Confirm the battery state of charge early enough to recharge without rushing. If practical, perform a short heat-up test using the intended bed and nozzle temperatures, then verify that the peak remains comfortably below the continuous output rating.
Battery capacity gradually declines with age and use, so a runtime test that worked when the unit was new may become optimistic. Periodically run a controlled printer load and compare delivered runtime with earlier results. A substantial unexplained decline may indicate battery aging, unusually cold conditions, or a change in printer power consumption.
For storage, keep the unit dry and within its recommended temperature and state-of-charge range. Avoid leaving it fully depleted for extended periods. Recharge checks may be needed during long storage because control electronics can consume a small amount of energy even when AC output is off. Clean exterior vents without opening the housing, and keep firmware or calibration procedures consistent with the manufacturer’s instructions.
Maintenance item
Practical interval
Reason
Inspect cords, plugs, and vents
Before each long print
Reduces connection and overheating risks
Verify heat-up peak
After printer or temperature changes
Confirms adequate inverter headroom
Check stored battery charge
Every 1–3 months
Helps prevent extended deep discharge
Repeat a controlled runtime test
Every 6–12 months
Tracks capacity loss and estimate accuracy
Review operating temperature
Seasonally
Cold and heat can reduce performance or trigger protection
Example values for illustration. Follow the storage and maintenance guidance supplied with the equipment.
Start with measurements: peak wall watts during heat-up, average watts during a representative print, and total job duration. Choose continuous inverter output based on the peak, then choose battery capacity based on the average load and desired runtime. Include a reserve rather than planning to use every advertised watt-hour.
If the print must finish during an outage, consider the full operating sequence. Heating, bed leveling, chamber conditioning, printing, pauses, and post-print heater operation all consume energy. Accessories such as lights, cameras, computers, filament dryers, ventilation fans, and network equipment must be added to both the power and energy calculations when connected to the same station.
Specs to look for
Continuous AC output: Look for a rating roughly 20% to 30% above the printer’s measured heat-up peak so heater cycling does not operate the inverter at its limit.
Short-duration surge output: Look for clearly stated surge capacity above the continuous rating to accommodate brief power-supply inrush, while remembering that it cannot replace adequate continuous output.
Battery capacity: Choose watt-hours based on average printer watts multiplied by print hours, then add approximately 20% to 35% for losses and reserve.
Usable energy information: Look for tested or clearly explained AC-delivered capacity because labeled battery watt-hours do not account for every conversion and protection loss.
Pure sine wave inverter: Select regulated pure sine wave AC output to provide a conventional supply waveform for printer electronics and switch-mode power supplies.
AC output voltage and frequency: Confirm that output matches the printer power supply, commonly around 120 volts and 60 hertz in the United States.
Display and energy monitoring: Look for real-time watts, estimated remaining time, battery percentage, and ideally cumulative watt-hours to improve runtime planning.
Thermal and overload protection: Look for temperature, short-circuit, overcurrent, and low-battery protections with clear fault indicators for easier troubleshooting.
Low-load or power-saving controls: Confirm that automatic AC shutoff can be disabled or will not mistake heater-off intervals for an inactive load.
Recharge capability: Compare recharge time and input wattage with the interval between prints, especially when repeated off-grid jobs are expected.
A properly sized portable power station can support clean, stable 3D printing for hours. The most dependable setup is one based on measured peak and average consumption, adequate inverter headroom, realistic AC-delivered battery capacity, suitable ventilation, and a reserve large enough to finish the print under less-than-ideal conditions.
Frequently asked questions
How large of a portable power station do I need for a 3D printer?
Size the inverter from the printer’s measured peak wall draw during startup and heat-up, then size the battery from average printing watts and the expected job length. As a general margin, choose continuous AC output at least 20% to 30% above the measured peak and retain battery reserve for changing conditions.
What power station specs matter most for running a 3D printer?
The key specifications are continuous AC output, short-duration surge capability, battery watt-hours, and estimated usable AC-delivered energy. A regulated pure sine wave inverter, suitable output voltage and frequency, clear overload protection, and controls that do not shut off AC output during low-load intervals are also useful.
How long can a portable power station run a 3D printer?
Runtime depends primarily on usable battery watt-hours divided by the printer’s average wattage, after allowing for inverter losses and reserve capacity. Because heaters cycle during a print, measuring watt-hours over a representative job provides a more reliable estimate than using the power supply label.
Is it a mistake to choose a power station based only on average printer wattage?
Yes. Average draw may be far below the combined load of the heated bed and nozzle during warm-up, and an undersized inverter can shut down even when the battery has ample capacity. Check the highest measured wall draw against the station’s continuous AC rating, not just its brief surge rating.
Can a 3D printer damage a portable power station?
A properly matched printer should not damage a power station when both devices are used within their ratings. However, repeated overloads, blocked ventilation, excessive heat, damaged cords, or inappropriate adapters can trigger protection systems and may create electrical or overheating risks.
Is it safe to run a 3D printer from a portable power station indoors?
It can be safe when the power station is placed on a dry, stable, nonflammable surface with its vents unobstructed and away from the printer’s heated areas and enclosure exhaust. Use intact, correctly rated cords, follow both manufacturers’ temperature guidance, maintain appropriate smoke detection, and avoid leaving the setup unattended.
Yes, a portable power station can charge most electric wheelchairs and mobility scooters when its AC output supports the original charger and it has enough usable battery capacity.
The safest general method is to plug the mobility device’s approved charger into the power station’s AC outlet rather than connecting the station directly to the wheelchair battery. The important specifications are continuous watts, pure sine wave output, watt-hours, charger input power, and conversion efficiency. These determine whether charging will start, whether it will continue without an overload, and how much battery range can be restored.
A small station may handle the charger’s wattage but still lack the capacity for a full charge. A larger unit may provide several top-ups or one complete recharge, depending on the wheelchair battery size and its state of charge. Checking both power and energy requirements before relying on the setup is especially important when mobility equipment is medically necessary.
What charging from a portable power station means
Charging an electric wheelchair or mobility scooter from a portable power station usually means using the same charger that would normally plug into a household wall outlet. The charger connects to the power station’s AC receptacle, while its normal charging connector attaches to the mobility device.
This matters because the original or otherwise manufacturer-approved charger manages the battery’s required voltage, current, and charging stages. The power station simply replaces the wall outlet. It does not replace the mobility charger or directly control charging of the wheelchair battery.
A portable power station can be useful during an outage, while traveling, at an event, or in a location where a convenient outlet is unavailable. It can also provide a partial charge that extends practical range. However, it should not be treated as an unlimited power source. Its battery must store enough energy for the intended recharge, and its inverter must operate the charger reliably.
The device battery chemistry also matters. Many mobility products use sealed lead-acid batteries, while others use lithium-ion packs with dedicated battery management systems. Always use a charger specifically approved for the battery and mobility device. Similar-looking connectors do not prove that voltage, polarity, or charging behavior is compatible.
How charger watts and power station capacity work together
Two different ratings determine compatibility: watts and watt-hours. Watts describe how much power the charger needs at a given moment. Watt-hours describe how much energy the power station can supply over time.
Check the charger’s input label rather than relying only on its DC output rating. A label may list AC input in watts or in volts and amps. For a rough maximum estimate, multiply input volts by input amps. Actual draw may be lower and can change during the charging cycle. A plug-in energy meter can provide a more realistic measurement when used according to its instructions.
The power station’s continuous AC output should exceed the charger’s highest normal draw. Allowing roughly 25% to 50% headroom can reduce nuisance overloads and accommodate short startup behavior. A pure sine wave inverter is generally the most broadly compatible choice for chargers containing sensitive electronic controls.
Capacity requires a separate calculation. A station rated at 1,000 watt-hours does not normally deliver all 1,000 watt-hours through its AC outlet. The inverter, charger, cables, and battery all introduce losses. For planning, assuming that approximately 75% to 85% of the station’s rated capacity reaches the mobility battery is more realistic than assuming perfect efficiency.
A practical estimate is to multiply charger draw by charging time, then divide by expected AC efficiency. For example, a charger averaging 150 watts for four hours uses about 600 watt-hours at the outlet. At 85% power station efficiency, that session may consume about 706 watt-hours from the station’s rated energy reserve.
Example values for illustration. Actual consumption varies by charger, battery condition, and charging stage.
Charger load
Charging time
Energy at AC outlet
Estimated station energy at 85% efficiency
80 watts
3 hours
240 watt-hours
282 watt-hours
120 watts
5 hours
600 watt-hours
706 watt-hours
180 watts
6 hours
1,080 watt-hours
1,271 watt-hours
Real-world charging examples
Consider a compact mobility scooter with a nominal 24-volt, 12-amp-hour battery system. Its nominal stored energy is approximately 288 watt-hours. Replacing half of that energy means restoring about 144 watt-hours to the battery. After inverter and charger losses, the power station might need to provide roughly 180 to 220 watt-hours. Battery age, temperature, and the charger’s final absorption stage can change the result.
A larger power wheelchair might use a nominal 24-volt, 35-amp-hour battery system, equivalent to about 840 watt-hours. A nearly complete recharge could require approximately 950 to 1,150 watt-hours from a power station after losses. A station with a nominal 1,000-watt-hour capacity may therefore be insufficient for a true empty-to-full charge even though it can run the charger without an overload.
For a short top-up, charger measurements are often more useful than nominal battery capacity. If a charger draws an average of 130 watts for two hours, it delivers about 260 watt-hours from the AC outlet. At 80% overall AC-output efficiency, the session consumes approximately 325 watt-hours of power station capacity.
Battery labels describe nominal energy, not guaranteed driving range. Terrain, rider weight, tire pressure, speed, temperature, battery age, and motor efficiency all affect how far the restored charge will move the device. It is better to describe a portable station as providing a measured amount of recharge rather than promising a specific number of miles.
Common mistakes and troubleshooting cues
The charger does not turn on
Confirm that the power station’s AC output has been activated. Some units do not energize their receptacles automatically. Check the remaining charge, AC status indicator, timer settings, and any power-saving mode that may shut down low loads. Also verify that the charger works from a normal outlet before assuming the station is at fault.
The power station reports an overload
An overload indicates that the charger is drawing more than the inverter permits or that another connected device has pushed the combined load over the limit. Disconnect unrelated loads and compare the charger’s input rating with the station’s continuous AC rating. Surge watts alone do not compensate for an inadequate continuous rating.
Charging stops before the mobility battery is full
The station may have reached its low-battery cutoff even if its display previously showed some capacity. Conversion losses, cold conditions, battery aging, or an optimistic runtime estimate can cause an early stop. Automatic AC shutoff settings can also interrupt charging when the charger reduces its draw near the end of the cycle.
The charger hums, becomes unusually hot, or shows an error
Stop the session if behavior differs significantly from normal wall charging. Possible causes include incompatible inverter output, poor ventilation, a damaged cable, excessive ambient heat, or a charger fault. Do not continue by bypassing protective features. Have the charger or mobility device evaluated by a qualified service professional if the problem repeats.
The estimated capacity does not match actual results
Common calculation errors include confusing watts with watt-hours, using the charger’s output rating instead of measured AC input, and ignoring conversion losses. Battery capacity also declines with age. Testing a routine charge under controlled conditions is more reliable than depending entirely on label values during an emergency.
Safety basics for mobility-device charging
Use the original charger or another charger explicitly approved for the exact mobility device and battery type. Do not connect an unregulated DC output directly to the battery, improvise adapters, reverse polarity, open battery packs, or bypass fuses and battery management protections.
Place the power station and charger on stable, dry, nonflammable surfaces with ventilation around them. Keep cables away from wheels, footrests, doorways, pets, and areas where they can become trip hazards. Do not cover the charger or station, and do not charge near standing water, combustible materials, or excessive heat.
Inspect plugs, charging ports, and cables for looseness, scorching, corrosion, or damaged insulation. Stop using equipment that smells burnt, makes abnormal noises, becomes excessively hot, or repeatedly trips protection. Follow the mobility device instructions concerning whether charging is permitted while the user is seated or while the device is switched on.
Do not exceed the power station’s environmental limits, especially for temperature and moisture. Charging lithium-based equipment below its permitted temperature can cause damage, while high temperatures accelerate degradation in both lithium and lead-acid batteries.
When mobility is essential for health or evacuation, maintain a backup plan. A portable power station can fail, become depleted, or take longer than expected to recharge. Professional guidance is appropriate if charging equipment, household wiring, or outlets show signs of damage. Do not attempt to connect a portable station to home electrical wiring without properly designed equipment and a qualified electrician.
Maintenance, testing, and storage
Test the complete setup before it is needed. Begin with a well-charged power station, record its starting percentage, and observe a normal mobility-device charging session. Note the charger’s approximate watts, total charging time, ending station percentage, heat, noise, and any automatic shutoff behavior. This creates a practical baseline for future planning.
Recharge the portable station after use and follow its specified storage range. Many battery power stations should not remain completely empty for long periods. For extended storage, a moderate state of charge is often preferable, but the correct level and inspection interval depend on the battery chemistry and product instructions.
Keep mobility batteries on their prescribed charging schedule. Sealed lead-acid batteries can deteriorate when repeatedly left discharged, while lithium batteries rely on their approved charging system and internal protections. A portable station does not change those maintenance requirements.
Store all components in a clean, dry, temperature-controlled location. Periodically inspect cords and connectors, confirm that the station holds charge, and repeat a short functional test. If the station has been stored through very hot or cold conditions, allow it to return to an approved operating temperature before charging or discharging it.
Example values for illustration. Use the maintenance intervals supplied with each device.
Check
Possible interval
Reason
Power station charge level
Every 1 to 3 months in storage
Reduces the chance of finding it deeply discharged
Cables and connectors
Before each charging session
Identifies damage, heat marks, or loose connections
Start by confirming the mobility charger’s AC input requirement, then select a station with sufficient continuous output and energy capacity. For dependable planning, include inverter losses and reserve capacity rather than sizing the station to an exact calculated minimum. A full recharge for a large wheelchair can require substantially more stored energy than a short scooter top-up.
Use the approved mobility charger, keep the equipment ventilated, and test the setup in advance. If the wheelchair or scooter is essential to daily mobility, plan for delayed charging, degraded batteries, and the possibility that the station cannot be recharged during a prolonged outage.
Specs to look for
Continuous AC output: Look for a rating at least 25% to 50% above the charger’s measured or labeled input, such as 300 watts for a charger drawing 200 watts, to provide operating headroom.
Battery capacity: Compare rated watt-hours with the expected charging session; roughly 500 to 1,500 watt-hours may cover anything from a partial scooter charge to a larger wheelchair recharge, depending on the battery.
Usable AC energy: Plan around approximately 75% to 85% of rated capacity through the inverter because conversion and standby losses reduce delivered energy.
Inverter waveform: Look for pure sine wave AC output because it offers broad compatibility with electronically controlled mobility chargers.
AC outlet compatibility: Confirm that the receptacle accepts the charger’s plug securely and provides the voltage and frequency listed on the charger.
Overload and thermal protection: Look for automatic shutdown for overload, overheating, and short circuits to reduce equipment stress when a fault occurs.
Low-load timeout controls: Prefer adjustable or clearly documented AC shutoff behavior so the station does not turn off when charger draw falls near the end of charging.
Recharge options: Consider AC, vehicle, or solar input ratings appropriate to the intended use; faster input can matter when the station must be replenished between mobility-device charging sessions.
Display and power monitoring: Look for remaining watt-hours, input and output watts, or estimated runtime because these readings make it easier to confirm charger demand and remaining reserve.
The best practical match is not necessarily the station with the highest advertised surge rating. It is the one with adequate continuous AC power, enough usable watt-hours, a compatible waveform, reliable protection, and a tested ability to complete the required charging session.
Frequently asked questions
Can I charge an electric wheelchair with a portable power station?
Yes, charging an electric wheelchair from a portable power station is usually possible when the station can run the approved AC charger and has sufficient usable watt-hours. Plug the charger into the station’s AC outlet, then connect it to the wheelchair as you normally would. The available recharge may be partial or complete depending on battery size, charger draw, and power losses.
What size portable power station do I need for a mobility scooter?
The required size depends on both the charger’s AC wattage and the energy needed for the intended charge. Choose a unit whose continuous AC output exceeds the charger load, preferably with 25% to 50% headroom, and account for inverter losses when comparing watt-hours. A measured charging test is the most reliable way to confirm whether it can provide a full recharge or only a top-up.
What portable power station specs matter most for wheelchair charging?
Key features include sufficient continuous AC output, adequate battery capacity in watt-hours, pure sine wave AC output, and overload and thermal protection. A display showing output watts and remaining energy can help monitor the session. Adjustable or documented low-load shutdown behavior is also useful because some chargers draw less power near the end of charging.
Is it safe to connect a portable power station directly to a wheelchair battery?
No. A portable power station should generally power the mobility device’s original or manufacturer-approved charger rather than connect directly to the battery. Direct DC connections, improvised adapters, and incorrect voltage or polarity can damage equipment or defeat battery protections.
Why does my power station turn off before the wheelchair is fully charged?
The station may have reached its low-battery cutoff, or its AC outlet may be set to switch off at low loads. Conversion losses, cold temperatures, battery aging, and inaccurate runtime estimates can also reduce the expected charging time. Check the station’s settings and test the setup under normal conditions before depending on it in an emergency.
What is the most common mistake when using a power station to charge mobility equipment?
A common mistake is checking only the power station’s watt rating and overlooking its usable watt-hour capacity. A station may run the charger without overloading but still not store enough energy to finish the desired recharge. Another frequent error is using the charger’s DC output label instead of its AC input requirement for planning.
A portable power station can run a gaming PC if its inverter supports the computer’s sustained power draw, brief load spikes, and required runtime without exceeding its output limits. The most important numbers are continuous watts, surge watts, battery capacity in watt-hours, inverter efficiency, and UPS transfer time.
Do not size the station from the wattage printed on the PC power supply alone. A 750-watt or 1,000-watt power supply describes how much the unit can provide, not how much the computer continuously consumes. Actual demand changes with the processor, graphics card, frame rate, game, monitor, and connected accessories.
For reliable backup power, measure the complete setup at the wall and leave headroom above the highest observed load. Also determine whether the station’s EPS or UPS mode can switch quickly enough to prevent a reboot during an outage.
1. What It Means to Power a Gaming PC With a Portable Station
A portable power station combines a rechargeable battery, battery management system, charger, and AC inverter in one enclosure. When a gaming PC is connected to its AC outlet, the inverter converts stored direct-current energy into the alternating current expected by the computer’s power supply.
Successful operation depends on both power and energy. Power, measured in watts, determines whether the station can operate the PC at a given moment. Energy, measured in watt-hours, determines approximately how long it can do so. A station may have enough inverter output to start a high-performance computer but too little battery capacity for a useful gaming session. Conversely, a large battery with a low-output inverter may shut down when the graphics card boosts.
This distinction matters because gaming is a variable workload. Menu screens, uncapped frame rates, shader compilation, streaming, and sudden changes in scene complexity can produce substantially different wall-power readings.
2. How Runtime, Continuous Load, and Spikes Work
The best starting point is a plug-in power meter that measures the entire setup under realistic conditions. Include the desktop, monitor, speakers, networking equipment, external drives, and any other devices that must remain powered. Record idle demand, typical gaming demand, and the highest short-duration reading you can observe.
Estimated runtime in hours = battery watt-hours × usable fraction × inverter efficiency ÷ average load in watts. For a rough estimate, a combined usable fraction and conversion efficiency of about 0.75 to 0.90 may be reasonable, depending on the station, load, battery state, temperature, and automatic shutdown thresholds. Manufacturer capacity is normally a nominal figure, so dividing watt-hours directly by watts tends to overstate runtime.
Continuous output is the wattage the inverter can sustain. Surge or peak output is a temporary limit intended for short increases, not a rating for continuous operation. Gaming PCs usually have less dramatic startup surges than refrigerators or power tools, but a graphics card and processor can still create rapid transient demand. The station must tolerate these events without voltage collapse, overload protection, or an inverter reset.
For practical sizing, keeping normal gaming demand near or below roughly 60% to 80% of the station’s continuous rating provides useful headroom. More margin may be appropriate for a heavily overclocked system, a high-power graphics card, or several peripherals.
Measurement
What it indicates
Illustrative value
Idle load
Demand during light desktop use
90 W
Average gaming load
Main value used for runtime
420 W
Brief observed peak
Headroom needed for changing workloads
560 W
Station continuous output
Maximum sustained AC load
800 W
Example values for illustration.
3. Real-World Gaming PC Runtime Examples
Midrange PC and one monitor
Consider a desktop and monitor averaging 300 watts while gaming. A 600-watt-hour station with an assumed 85% delivered-energy factor would provide about 510 usable watt-hours. Dividing 510 by 300 gives an estimated runtime of 1.7 hours. Actual operation could be shorter if the game draws more power, the cooling fans run faster, or the battery is cold or aged.
High-performance PC with accessories
A more demanding system might average 600 watts after including a large monitor, speakers, network hardware, and streaming equipment. A 1,200-watt-hour battery at the same assumed 85% delivered-energy factor provides about 1,020 usable watt-hours, or roughly 1.7 hours at that load. Its inverter should also have comfortable margin above 600 watts for transient demand.
Backup for saving and shutting down
Runtime requirements change if the goal is only to bridge brief outages or shut down safely. A setup drawing 450 watts for 15 minutes uses about 113 watt-hours at the AC output. Allowing for conversion losses and reserve, a station with several hundred watt-hours may be adequate for that limited purpose even if it cannot support hours of gaming.
These calculations should be treated as planning estimates rather than guarantees. Battery displays often predict remaining time from recent demand, so their estimates can fluctuate as a game moves between menus, cutscenes, and graphics-intensive scenes.
4. Common Sizing Mistakes and Troubleshooting Cues
Using the PC power supply rating as actual consumption: Measure wall draw instead. A power supply’s rated wattage is a capacity ceiling, not a constant load.
Ignoring the monitor and peripherals: Multiple displays, powered speakers, networking equipment, and external storage reduce runtime and add to inverter load.
Choosing by watt-hours alone: Battery capacity does not confirm that the inverter can support the computer’s continuous or peak demand.
Assuming surge watts are continuously available: A station may advertise a much higher short-term peak while still shutting down if sustained load exceeds its continuous rating.
Expecting the full labeled capacity: Inverter losses, reserve capacity, temperature, and battery aging reduce energy delivered at the AC outlets.
Assuming every backup mode is a true UPS: Some stations interrupt output for several milliseconds while transferring from wall power to battery. A sensitive PC may restart even though less sensitive devices remain on.
If the station shuts off only during demanding games, watch for an overload warning and compare the highest wall reading with the continuous rating. If it operates normally on battery but the PC reboots when utility power fails, transfer time or output behavior is a more likely cause than insufficient battery capacity. Random shutdowns at a low indicated load can also point to heat, a loose connection, a damaged cable, or an incompatible power strip.
5. UPS Operation and Electrical Safety Basics
A portable station with pass-through charging may accept utility power while supplying connected equipment, but that does not automatically make it equivalent to a dedicated uninterruptible power supply. Check the stated transfer time, maximum pass-through load, charging behavior, and whether backup mode remains active at the desired battery limit. Some computer power supplies can ride through a short interruption; others may reboot during the same event.
Use the station in a dry, ventilated location with clearance around its cooling openings. Avoid covering it, placing it against a heat source, or operating it where liquids can spill. Connect the PC within the station’s rated AC output and avoid daisy-chaining power strips or extension cords. Stop using equipment that has damaged plugs, unusual odors, swelling, excessive heat, or repeated electrical faults.
Portable stations should not be connected to home wiring through improvised backfeeding methods. Any integration with building circuits, transfer equipment, or grounding arrangements should be evaluated and installed by a qualified electrician according to local requirements.
6. Battery Care, Testing, and Storage
Test the setup before relying on it. With important files closed, run a representative game or benchmark and confirm that the station remains stable through load changes. Separately test its backup transfer behavior according to the manufacturer’s safe operating guidance. A successful light-load test does not prove that the system will remain stable at full gaming demand.
For storage, keep the station in a cool, dry area and follow its specified storage charge range. A moderate state of charge, often around 40% to 60%, is commonly suitable for extended storage unless the instructions state otherwise. Check and recharge it periodically because control electronics can slowly consume energy. Avoid leaving the battery fully depleted, and inspect cables, vents, and connectors before reuse.
Check
Suggested interval
Reason
Battery charge
Every few months in storage
Prevents excessive self-discharge
Gaming load test
Before planned backup use
Confirms output stability
Transfer test
After setup changes
Reveals reboot sensitivity
Vent and cable inspection
Before each extended session
Identifies blockage or damage
Example values for illustration.
7. Practical Takeaways and Buying Specifications
Measure the complete gaming setup, size the inverter with headroom, and calculate runtime from realistic usable energy rather than labeled capacity alone. If uninterrupted operation matters, verify backup transfer performance with the specific PC instead of assuming that any pass-through feature will prevent a reboot.
Continuous AC output: Look for a rating roughly 25% to 60% above measured sustained gaming demand; this provides headroom for workload changes and reduces overload risk.
Surge or peak output: Look for a clearly stated short-duration rating above observed peaks, such as 1.5 times the typical load; this helps the inverter tolerate brief transients.
Battery capacity: Compare options in watt-hours, such as 500 Wh, 1,000 Wh, or more; greater capacity extends runtime but usually increases size, weight, and recharge time.
Usable AC energy or efficiency: Look for test data or specifications that clarify conversion losses; delivered AC energy may be roughly 75% to 90% of nominal capacity.
Transfer time: For backup use, look for a documented value, often under about 10 to 20 milliseconds in faster EPS modes; shorter switching reduces the chance of a PC reboot but does not guarantee compatibility.
Pass-through load limit: Confirm that the station can power the full setup while charging; this limit may differ from ordinary inverter output.
AC output waveform: Look for a pure sine wave output; it is generally the appropriate choice for modern active-power-factor-correction computer power supplies.
Recharge power: Compare charging input in watts and estimated full-charge time; faster charging improves readiness between outages but may create more fan noise and heat.
Battery cycle life and warranty terms: Look for capacity-retention information at a stated cycle count, such as 80% capacity after several thousand cycles; this helps estimate long-term usefulness.
The right capacity ultimately depends on whether the goal is a safe shutdown, short outage coverage, or hours of continued gaming. Measured load, required runtime, transient headroom, and transfer compatibility are more useful than a single advertised wattage.
Frequently asked questions
Can a portable power station run a gaming PC?
Yes, provided its continuous AC output exceeds the measured load of the complete setup and it has enough battery capacity for the desired runtime. Include the monitor and essential peripherals, and allow headroom for short power spikes during demanding workloads.
What specs matter most in a portable power station for a gaming PC?
Key specifications include continuous AC output, short-term surge capability, battery capacity in watt-hours, and pure sine wave AC output. For outage protection, also check the documented transfer time and pass-through load limit, then test compatibility with the specific computer.
How long will a portable power station power a gaming PC?
Runtime depends on average wall-power draw and usable delivered battery energy, not just the battery’s labeled watt-hours. Divide estimated usable watt-hours by the setup’s average load in watts; inverter losses, temperature, battery condition, and changing game loads can reduce the result.
Is using my PC power supply wattage to size a power station a mistake?
Yes. The wattage printed on a computer power supply is its maximum output capability, not a measurement of the computer’s normal electricity use. Measure the whole setup at the wall during realistic gaming and use the highest observed demand when selecting inverter headroom.
Will a portable power station keep a gaming PC on during a power outage?
It may, but only if its backup or EPS transfer time is fast enough for that PC’s power supply to ride through the interruption. Pass-through charging alone does not guarantee uninterrupted operation, so a controlled transfer test is the most reliable way to check.
Is it safe to use a portable power station with a gaming PC indoors?
It can be safe when the station is used within its rated output limits in a dry, well-ventilated location. Keep vents clear, inspect cords and plugs for damage, avoid improvised connections to household wiring, and follow the manufacturer’s operating instructions.
A portable power station for a pop-up camper should usually provide enough battery capacity for overnight lights, fans, device charging, and refrigerator operation while leaving a reserve for unexpected demand. The correct size depends on watt-hours, running watts, surge watts, appliance duty cycle, and the number of hours between charging opportunities.
For many campers, a mid-capacity unit can handle basic 12-volt loads, but refrigerators and furnace blowers can raise daily energy use substantially. A reliable plan starts by measuring each load rather than sizing from appliance labels alone. It also accounts for inverter loss, cold weather, battery reserve, and solar input limit.
Recharge planning is equally important. Solar panels may cover daytime consumption in good weather, while vehicle or shore-power charging can restore energy faster and more predictably. The goal is not simply to buy the largest battery available, but to balance runtime, output capability, recharge speed, weight, and camping habits.
1. What a Pop-Up Camper Power Station Needs to Do
A portable power station combines a rechargeable battery, charge controller, DC outputs, USB ports, and usually an AC inverter. In a pop-up camper, it can serve as a self-contained source for small appliances without running a generator or permanently changing the camper’s electrical system.
Capacity is stated in watt-hours, or Wh. A 1,000 Wh battery theoretically stores enough energy to supply 100 watts for 10 hours. Actual usable energy is lower because the inverter, wiring, electronics, temperature, and battery management system consume or limit some of that energy. Planning around roughly 80% to 90% of rated capacity is often more realistic, especially when AC outlets are used.
Output is stated in watts. Continuous output indicates what the station can sustain, while surge output describes its brief ability to start motors and compressors. Capacity determines approximate runtime; output determines whether a device can start and operate at all. A station can have ample energy capacity yet still be unable to start a refrigerator with a high compressor surge.
This distinction matters because camper loads vary. LED lights draw little power, roof or clip-on fans draw a moderate amount, and refrigerators range from efficient 12-volt compressor models to AC units with significant startup demand. Furnace blowers, heated blankets, coffee makers, and cooking appliances can change the calculation quickly.
2. Calculate Lights, Fans, Fridge, and Daily Energy Use
Estimate daily consumption by multiplying each device’s watts by its hours of operation. For cycling appliances, multiply by the approximate percentage of time they actually run. Add the results to obtain watt-hours per day.
For example, four 3-watt LED lights used for five hours consume 60 Wh. A 20-watt fan used for eight hours consumes 160 Wh. A 45-watt compressor fridge that runs 40% of the day consumes about 432 Wh: 45 watts multiplied by 24 hours and then by 0.40. Device charging might add another 50 to 100 Wh.
Fridge type requires special attention. An efficient 12-volt compressor refrigerator usually cycles on and off, with consumption affected by outdoor temperature, thermostat setting, ventilation, food temperature, and how often the door opens. An AC mini fridge also cycles but requires the inverter to remain active, adding conversion and idle losses.
A three-way absorption refrigerator behaves differently. Its 12-volt heating element may draw continuously and can consume far more battery energy than expected. The 12-volt mode is often associated with travel use when a suitable charging source is available, not long periods of stationary battery operation. Propane operation must follow the refrigerator and camper manufacturers’ ventilation and safety instructions.
After totaling daily consumption, add a reserve of about 15% to 30%. A camper estimated to use 800 Wh per day may therefore call for roughly 1,000 to 1,300 Wh of rated capacity for one day between dependable recharges. More reserve is useful in cold weather, under cloudy skies, or when the fridge is essential.
Illustrative daily energy budget. Example values for illustration.
Load
Assumed use
Daily energy
Four LED lights
12 W for 5 hours
60 Wh
Ventilation fan
20 W for 8 hours
160 Wh
12 V compressor fridge
45 W at 40% duty cycle
432 Wh
Phones and small electronics
Mixed charging
80 Wh
Conversion and reserve allowance
Approximately 20%
146 Wh
Estimated total
One day
878 Wh
3. Real-World Pop-Up Camper Power Examples
Basic overnight setup
A simple setup with LED lights, two phone charges, and a small fan may consume 200 to 350 Wh overnight. A power station in the 500 to 700 Wh range can often cover this use with a reasonable reserve. If charging is available every day, extra capacity may not be necessary.
Lights, fan, and compressor fridge
A camper running LED lights, a ventilation fan, electronics, and a compact 12-volt compressor fridge may use 700 to 1,000 Wh per day. A station rated around 1,000 to 1,500 Wh provides a more practical buffer, although hot weather or frequent fridge access can push consumption higher.
Cool-weather camping with a furnace blower
A propane furnace still needs electricity for its blower and controls. A blower drawing 35 watts for six total hours consumes 210 Wh. Added to a 750 Wh base load, this brings the day close to 1,000 Wh before reserve and conversion losses. Longer winter nights and reduced battery performance can increase the required capacity.
Short high-wattage appliance use
A 1,000-watt coffee maker used for six minutes consumes about 100 Wh, which is manageable from an energy perspective. However, the inverter must support at least its operating wattage. Electric kettles, heaters, hair dryers, and cooking appliances can draw 1,200 to 1,800 watts or more, placing much greater demands on output and battery capacity. Heating with propane or another approved camper heat source is generally more energy-efficient than using a battery-powered resistance heater.
These examples are planning estimates, not guarantees. A plug-in energy meter can measure AC appliances, while a suitable DC power meter can help assess 12-volt loads. Measuring the refrigerator over a full day gives more useful information than observing its draw for only a few minutes.
4. Common Sizing Mistakes and Troubleshooting Cues
Confusing watts with watt-hours: Watts describe power at a moment in time; watt-hours describe energy used over time. A 60-watt fridge does not automatically require a 60 Wh battery. If it averages 30 watts across 24 hours, it uses about 720 Wh per day.
Ignoring compressor surge: If the fridge clicks, attempts to start, and then stops, the inverter may lack sufficient surge capability. An overloaded station may also display an error or shut off its AC output. Verify both continuous and surge ratings, and avoid adding other heavy loads during compressor startup.
Leaving the inverter on unnecessarily: An active AC inverter can consume energy even when the appliance is not running. Direct 12-volt operation may reduce conversion loss when the fridge and power station use compatible, manufacturer-approved connections.
Assuming rated capacity is fully usable: A battery marked 1,000 Wh will not normally deliver all 1,000 Wh at the outlet. Low temperatures, inverter losses, high discharge rates, and protective shutdown thresholds reduce delivered energy.
Expecting rated solar output all day: A 200-watt panel rarely produces 200 watts from sunrise to sunset. Shade, clouds, heat, panel angle, cable loss, and the station’s solar input limit affect collection. If the station accepts only 150 watts, adding more panel wattage may help in weak sun but will not make the input exceed that limit.
Overlooking refrigerator ventilation: Poor airflow around a compressor fridge increases runtime. A warm fridge loaded with room-temperature food also uses much more energy initially. Pre-cooling food and the refrigerator from a dependable power source can reduce the first day’s battery demand.
If runtime is unexpectedly short, check actual appliance energy use, ambient temperature, inverter idle draw, fridge duty cycle, and whether the station began fully charged. A sudden shutdown under a heavy load points more often to an output or surge issue than to insufficient total capacity.
5. Portable Power Station Safety Basics
Keep the power station dry, stable, and protected from direct rain, condensation, and standing water. Do not place it against bedding, tent fabric, or other materials that block cooling vents. Avoid sealed compartments where heat can accumulate.
Use cables and adapters approved for the station and the connected appliance. Damaged connectors, loose DC plugs, undersized extension cords, or coiled cords carrying high current can overheat. Stop using any component that becomes unusually hot, smells burned, sparks, swells, or shows physical damage.
Do not backfeed a camper receptacle or household circuit through a homemade cable. Connecting a station to a camper’s built-in electrical system may involve grounding, converter, polarity, and transfer considerations. Use an inlet or connection method specifically designed for the purpose, and consult a qualified electrician or RV technician when compatibility is uncertain.
A power station does not make combustion appliances safe indoors. Fuel-burning heaters, stoves, and generators create carbon monoxide and require their own approved placement, ventilation, and detection practices. A generator should remain outdoors at the distance and orientation specified by its manufacturer.
Follow the power station’s permitted charging temperature range. Many lithium batteries restrict charging below freezing even when discharge remains possible. Internal battery management may provide protection, but it should not replace appropriate storage and operating conditions.
6. Recharge Planning, Maintenance, and Storage
A sustainable recharge plan compares daily energy use with energy restored. If the camper consumes 800 Wh per day, the charging methods should reliably return about that amount, plus conversion losses. Solar alone may work in sunny, open campsites, but a second option is valuable during shade or poor weather.
Solar production can be estimated with peak-sun hours. A 200-watt array receiving four effective peak-sun hours has a theoretical yield of 800 Wh. After controller, temperature, cable, and orientation losses, perhaps 550 to 700 Wh may reach the battery. This may offset much of a modest daily load without guaranteeing a full recharge.
AC wall or campground shore-power charging is generally the fastest predictable method if the station supports high input. Vehicle charging through a standard 12-volt accessory outlet is typically slower. Higher-power alternator-based charging equipment must be designed for the vehicle, power station, wiring, and circuit protection; professional installation may be appropriate.
For routine care, keep vents clean, inspect cables, update settings only as directed by the manufacturer, and periodically verify that all outputs function. Avoid storing the station completely depleted. For long-term storage, use the state-of-charge range and inspection interval specified by its manufacturer, commonly a partial charge with periodic checks. Store it in a dry, moderate-temperature location away from direct sunlight and ignition sources.
Before a trip, fully test the planned load combination. Run the fridge, fan, lights, and chargers together long enough to observe peak output and hourly energy use. This trial reveals problems while shore power is still available.
Illustrative recharge comparison. Example values for illustration.
Start with a 24-hour energy budget for the actual camper equipment. Add at least 15% to 30% for losses and reserve, then multiply by the number of days expected between dependable recharges. Confirm that continuous and surge output can support every planned load combination.
For light-only camping, several hundred watt-hours may be sufficient. A setup that includes a compressor fridge commonly benefits from about 1,000 Wh or more, depending on climate and recharge access. Furnace use, long stays, medical equipment, or heavy AC appliances justify additional capacity and backup charging options.
Specs to look for
Battery capacity: Look for roughly 500 to 700 Wh for basic overnight loads or 1,000 to 1,500 Wh for a fridge-based daily setup; capacity largely determines runtime.
Continuous AC output: A range around 1,000 to 1,800 watts supports many small camper appliances; it must exceed the combined running load.
Surge output: Look for a short-duration rating comfortably above refrigerator or motor startup demand, often 1.5 to 3 times running watts; this helps prevent startup shutdowns.
12-volt regulated output: Confirm compatible voltage, connector type, and current capacity, such as 10 to 15 amps where appropriate; direct DC operation can reduce inverter losses.
Solar input range: Check maximum watts, voltage window, current limit, and connector compatibility; an input around 200 to 500 watts can make daytime recovery more practical.
AC recharge rate: Inputs around 500 to 1,200 watts can restore a mid-size battery within a useful campground window; faster charging reduces downtime when outlets are available.
Vehicle charging capability: Compare standard 12-volt charging with supported higher-power options; this matters when driving is the most dependable recharge opportunity.
Battery cycle life: Look for a stated capacity-retention benchmark after roughly 2,000 or more cycles if the station will see frequent use; longer cycle life improves service longevity.
Cold-temperature protection: Charging cutoff or battery warming features help protect cells in freezing conditions; this is important for early- and late-season camping.
Weight and portability: Units around 25 to 45 pounds are easier for many campers to move than larger systems; capacity is only useful if the station can be transported and positioned safely.
The best choice is the one that covers measured daily consumption, starts the largest appliance, and can be recharged under realistic campsite conditions. A written power budget and a pre-trip test provide a more dependable result than relying on battery capacity alone.
Frequently asked questions
What size portable power station do I need for a pop-up camper?
For lights, phone charging, and a small fan, a 500 to 700 Wh unit may be enough for a typical overnight stay. A camper using a 12-volt compressor fridge often needs roughly 1,000 to 1,500 Wh for a day of use, depending on weather, appliance duty cycle, and recharge access. Build in a 15% to 30% energy reserve rather than planning to use the full rated capacity.
Can a portable power station run a refrigerator in a pop-up camper?
Yes, provided the station has enough usable watt-hours for the refrigerator’s daily consumption and enough continuous and surge output for startup. Efficient 12-volt compressor refrigerators are generally more battery-friendly than AC models because they avoid inverter losses. A three-way absorption refrigerator on 12-volt electric mode can use substantial power and may not be suitable for extended battery-only operation.
What portable power station specs matter most for camping?
Prioritize usable battery capacity in watt-hours, continuous AC output, motor-starting surge output, and compatible 12-volt DC ports. Also compare solar input limits, AC recharge speed, vehicle-charging options, cold-temperature charging protection, and unit weight. The best specifications depend on the actual loads and how reliably the station can be recharged between camping days.
What is the most common mistake when sizing a camper power station?
A common mistake is confusing watts with watt-hours or relying only on an appliance’s label. A refrigerator may draw a certain wattage while running but cycle on and off throughout the day, so its total daily energy use can be much higher or lower than a short observation suggests. Measuring loads over realistic use periods provides a more dependable estimate.
How long does solar take to recharge a portable power station at camp?
Recharge time depends on panel output, available sunlight, panel angle, temperature, shading, and the station’s maximum solar input. A 200-watt solar array can theoretically collect 800 Wh in four peak-sun hours, but real delivered energy is often lower because of system and weather losses. Solar is most reliable when paired with a backup option such as shore power or vehicle charging.
Is it safe to use a portable power station inside a pop-up camper?
It can be safe when the station is kept dry, stable, ventilated, and used with undamaged, correctly rated cables and approved adapters. Do not block cooling vents, use homemade backfeed cords, or connect it to built-in camper wiring unless the connection method is designed for that purpose. Keep fuel-burning appliances and generators separate from the power station and follow their carbon monoxide and ventilation requirements.
A portable power station can safely run shed lights, device chargers, and low-power security equipment when its battery capacity and output match the loads. The main specifications are watt-hours, continuous watts, surge watts, inverter efficiency, and expected runtime.
For many sheds and detached outbuildings, a battery generator is simpler than installing permanent electrical service, especially when power is needed only occasionally. It can support LED lighting, USB charging, cordless-tool chargers, cameras, routers, and selected small tools without the noise or exhaust of a fuel-powered generator.
The correct size depends on how many watts each device uses and how long it must operate. Security systems create a continuous load, while lights and chargers are usually intermittent. Temperature, inverter idle draw, battery reserve, and solar input can also change real-world results. A power station should be treated as a portable energy source, not as a substitute for compliant permanent wiring.
What a Portable Power Station Does in a Shed
A portable power station combines a rechargeable battery, charge controller, output ports, and usually an AC inverter in one enclosure. It stores energy from a wall outlet, vehicle socket, or compatible solar panels and then supplies power without combustion.
In a shed, workshop, barn, or detached garage, it can provide temporary or semi-regular power where utility wiring is unavailable. Common loads include LED lamps, phones, tablets, radios, cordless-tool batteries, Wi-Fi or cellular equipment, and security cameras. Larger models may operate selected power tools, but their output and starting-surge requirements must be checked carefully.
This matters because capacity and output describe different limits. Battery capacity, measured in watt-hours, affects how long equipment can run. Output, measured in watts, determines which equipment can start and operate. A station with substantial capacity can still shut down if a tool exceeds the inverter rating. Conversely, a high-output unit may have a short runtime if its battery is small.
A portable station is most practical for isolated loads plugged directly into its outlets. It should not be connected to a building circuit, receptacle, electrical panel, transfer device, or improvised backfeed cable. Permanent shed wiring should be designed and installed by a qualified electrician.
Capacity, Output, and Runtime Explained
Start by listing every device, its running wattage, and its daily operating time. Energy use is calculated as watts multiplied by hours. A 10-watt light used for five hours consumes about 50 watt-hours. Two such lights would consume about 100 watt-hours over the same period.
Advertised battery capacity is not the same as energy delivered to a device. The inverter and internal electronics consume power, and battery management systems preserve some capacity. For rough planning, divide required energy by an assumed efficiency of about 0.80 to 0.90. A 200-watt-hour load might therefore require roughly 225 to 250 watt-hours of rated capacity. Adding a 15% to 25% reserve helps account for cold weather, aging, and unexpected use.
Continuous output must exceed the total wattage of devices operating at once. Surge output covers short starting peaks from motors, compressors, and some power supplies. LED lights and USB chargers usually have modest peaks, while saws, pumps, and shop vacuums may briefly demand much more than their listed running wattage.
AC output also has an idle load because the inverter consumes energy whenever it is active. For a small security camera or router, direct USB or regulated DC output can sometimes provide longer runtime. However, the voltage, connector, polarity, and current requirement must match the device exactly.
Typical shed load
Example running power
Example daily use
Approximate energy
Two LED lights
16 watts total
4 hours
64 watt-hours
Phone charging
10 watts average
2 hours
20 watt-hours
Security camera
8 watts
24 hours
192 watt-hours
Wireless router
10 watts
24 hours
240 watt-hours
Tool-battery charger
120 watts
1 hour
120 watt-hours
Typical loads vary by equipment and operating mode. Example values for illustration.
Real-World Shed Power Examples
Basic lighting and phone charging
Suppose two LED lamps draw 16 watts together and operate for four hours. They use 64 watt-hours. A phone charger averaging 10 watts for two hours adds 20 watt-hours, bringing the load to 84 watt-hours. After conversion losses and a reasonable reserve, approximately 120 to 150 watt-hours of rated battery capacity could cover one typical session. More capacity would provide flexibility for longer evenings or additional devices.
Camera and network connection
An 8-watt camera and 10-watt router create an 18-watt continuous load. Over 24 hours, they consume about 432 watt-hours before losses. Depending on conversion efficiency and inverter idle draw, actual battery demand could approach 500 watt-hours per day. A nominal 1,000-watt-hour station may therefore provide less than two full days if no charging source is available.
Continuous security use also requires a recharge plan. Solar production varies with season, shade, panel angle, and weather. A panel’s rated output is rarely sustained all day, so daily solar harvest matters more than the panel’s peak wattage. Critical security equipment should not rely on optimistic solar estimates alone.
Charging tools and operating equipment
A cordless-tool charger drawing 120 watts for one hour uses about 120 watt-hours, plus conversion losses. Running the charger alongside lights and security equipment increases both total output and daily energy use. A corded saw or shop vacuum may require 700 to 1,500 running watts and a higher starting surge. Both ratings must fit within the station’s limits, and the resulting runtime may be brief even with a large battery.
Common Sizing Mistakes and Troubleshooting Cues
One common mistake is adding device wattages without considering operating time. Wattage determines output demand, but watt-hours determine runtime. Another is assuming every watt-hour printed on the enclosure will reach the load. Conversion losses, cold batteries, inverter overhead, and automatic shutdown thresholds reduce usable energy.
The station shuts off when a tool starts: The startup surge may exceed the inverter limit, even if the listed running wattage appears acceptable.
Runtime is much shorter than calculated: Check for hidden loads, inverter idle consumption, cold conditions, high charger losses, or devices drawing more than their labels suggest.
A camera or router turns off overnight: Continuous consumption may be higher than expected, or an energy-saving feature may disable the output when the detected load is low.
A tool battery charges slowly: The charger may be receiving reduced AC output, or a USB-C device may not support the available Power Delivery profile.
Solar charging underperforms: Shade, poor orientation, heat, clouds, cable loss, or an input voltage and current mismatch may be limiting collection.
The unit will not charge in winter: Battery protection may block charging below its allowed temperature range. Warm the complete unit naturally in a dry location rather than applying concentrated heat.
A plug-in power meter can help measure AC loads when used according to its instructions and within its rating. For security equipment, observe consumption over a full day because night vision, infrared lighting, wireless transmission, and recording activity can change demand.
Safety Basics for Sheds and Outbuildings
Keep the power station dry, stable, and protected from direct sunlight, roof leaks, condensation, metal dust, and flammable materials. Maintain the ventilation clearances specified for the unit. Although a battery power station produces no combustion exhaust during use, its electronics and battery can generate heat.
Use intact cords rated for the connected load and environment. Avoid daisy-chained power strips and tightly coiled extension cords carrying substantial current. Damp locations may require ground-fault protection and weather-resistant equipment. A portable power station’s outlets do not automatically make every connected setup suitable for outdoor or wet use.
Do not open the enclosure, alter the battery, bypass protection systems, or improvise adapters. Stop using a unit that is swollen, cracked, unusually hot, wet, leaking, or producing an abnormal odor. Isolate it from combustible materials if this can be done safely, and follow local guidance for damaged lithium batteries.
Never use a male-to-male cord or connect the station to a shed receptacle to energize building wiring. If fixed lighting, permanently mounted receptacles, grounding work, or connection to utility-supplied circuits is needed, consult a qualified electrician.
Maintenance and Storage in an Unconditioned Shed
Sheds often experience greater temperature swings, humidity, dust, and pest activity than a home. These conditions can accelerate battery aging or contaminate cooling vents. A dry, moderate-temperature storage location is preferable, particularly during freezing winters or very hot summers.
For extended storage, follow the manufacturer’s specified state of charge. A midrange charge level, often around 40% to 60%, is commonly used for lithium battery storage, but designs vary. Check the display every few months and recharge if the level has fallen substantially. Leaving the battery empty for months can allow self-discharge to reach a protective shutdown state.
Charging temperature is especially important. Some battery chemistries can discharge below freezing but should not be charged there unless the system includes suitable low-temperature protection or heating. Move the station to a permitted temperature range and allow time for the battery itself to acclimate before charging.
Periodically inspect ports, plugs, cables, cooling openings, and the case. Remove surface dust without opening the enclosure. Test important security loads under realistic conditions so a failed cable, changed setting, or reduced battery capacity is discovered before an outage.
Maintenance item
Practical interval
What to check
Charge level
Every 2 to 3 months in storage
Unexpected self-discharge or very low capacity
Case and ports
Before each use
Damage, moisture, debris, or discoloration
Cables
Before each use
Loose plugs, cracked insulation, or heat damage
Runtime test
Several times per year
Whether essential loads operate for the expected period
Storage environment
Seasonally
Excessive heat, freezing conditions, condensation, or pests
Intervals should be adjusted for usage and environmental conditions. Example values for illustration.
For occasional lighting and charging, a modest-capacity station may be sufficient. Always-on cameras and networking equipment need considerably more energy because they run through the night and during periods when solar charging may be unavailable. Power tools are primarily an output challenge, although repeated use can also drain the battery quickly.
Calculate watt-hours for a complete day, account for conversion losses, and add reserve capacity. Then confirm that continuous and surge output can support every device that may run simultaneously. For critical security, consider how long the system must operate without sun or access to grid charging.
Specs to look for
Battery capacity: Look for roughly 300 to 500 watt-hours for light intermittent use or 800 to 1,500 watt-hours for longer security runtime; capacity determines how long loads can operate.
Continuous AC output: Choose a rating above the combined simultaneous load, such as 300 to 600 watts for chargers and lights or 1,000 watts or more for selected tools; this prevents overload shutdowns.
Surge output: Look for short-duration capacity around 1.5 to 2 times expected motor startup demand; this helps tools, pumps, and other inductive loads start reliably.
Low-load behavior and inverter draw: Check whether AC outlets remain active with loads below about 10 watts and how much power the inverter consumes; this is important for cameras and routers.
USB and regulated DC outputs: Look for suitable USB-C PD profiles, such as 45 to 100 watts, and correctly regulated DC ports; direct outputs can reduce conversion losses.
Battery chemistry and cycle rating: Compare expected retained capacity after approximately 1,000 to 3,000 cycles and review temperature behavior; this affects service life and suitability for regular use.
Recharge input: Look for enough AC or solar input to replace a normal day’s use, such as 200 to 400 watts for medium systems; faster replenishment reduces downtime.
Solar compatibility: Confirm the accepted voltage range, current limit, connector type, and maximum input wattage; mismatched panels may charge slowly or not at all.
Operating temperature range: Check separate charging and discharging ranges and look for low-temperature charge protection; an unconditioned shed may exceed safe battery limits.
Pass-through and transfer behavior: For security loads, check whether charging and output can operate together and whether a transfer delay could reboot equipment; not every power station functions as an uninterruptible power supply.
The best fit is not necessarily the unit with the largest battery. It is the one whose usable capacity, output limits, ports, charging options, low-load behavior, and temperature protections match the shed’s actual loads and operating schedule.
Frequently asked questions
What size portable power station do I need for shed lights and charging?
Calculate the watt-hours used by each device by multiplying its wattage by the hours it will run, then add the results. For occasional LED lights and phone charging, a smaller unit may be adequate, but adding 15% to 25% reserve capacity helps account for conversion losses and unexpected use.
How long will a portable power station run a security camera in a shed?
Runtime depends on the camera’s actual average wattage, whether it uses infrared night vision, and the power station’s usable battery capacity. An 8-watt camera uses about 192 watt-hours over 24 hours before inverter losses, so a higher-capacity unit is generally needed for multi-day operation.
What specs and features matter most for a portable power station for a shed?
Compare usable battery capacity in watt-hours, continuous AC output, surge output, recharge input, and the ports required by the equipment. For cameras and routers, also check low-load shutdown behavior, inverter idle consumption, pass-through operation, and the allowed charging and discharging temperatures.
What is the most common mistake when sizing a shed power station?
A common mistake is looking only at wattage and not at how long each device runs. Wattage determines whether the station can support the load at one time, while watt-hours determine runtime; conversion losses and a capacity reserve also need to be included.
Can a portable power station safely power a shed?
It can safely power individual devices plugged directly into its outlets when the loads, cords, environment, and manufacturer instructions are suitable. Keep the unit dry and ventilated, use undamaged appropriately rated cables, and do not connect it to fixed shed wiring or a receptacle.
Can I run power tools from a portable power station in a shed?
Some tools can run from a sufficiently powerful station, but both the tool’s running watts and startup surge must stay within the inverter ratings. High-draw tools such as saws, pumps, and shop vacuums can drain the battery quickly even when the station can start them.