Shading and Angle: How Placement Changes Solar Charging Speed

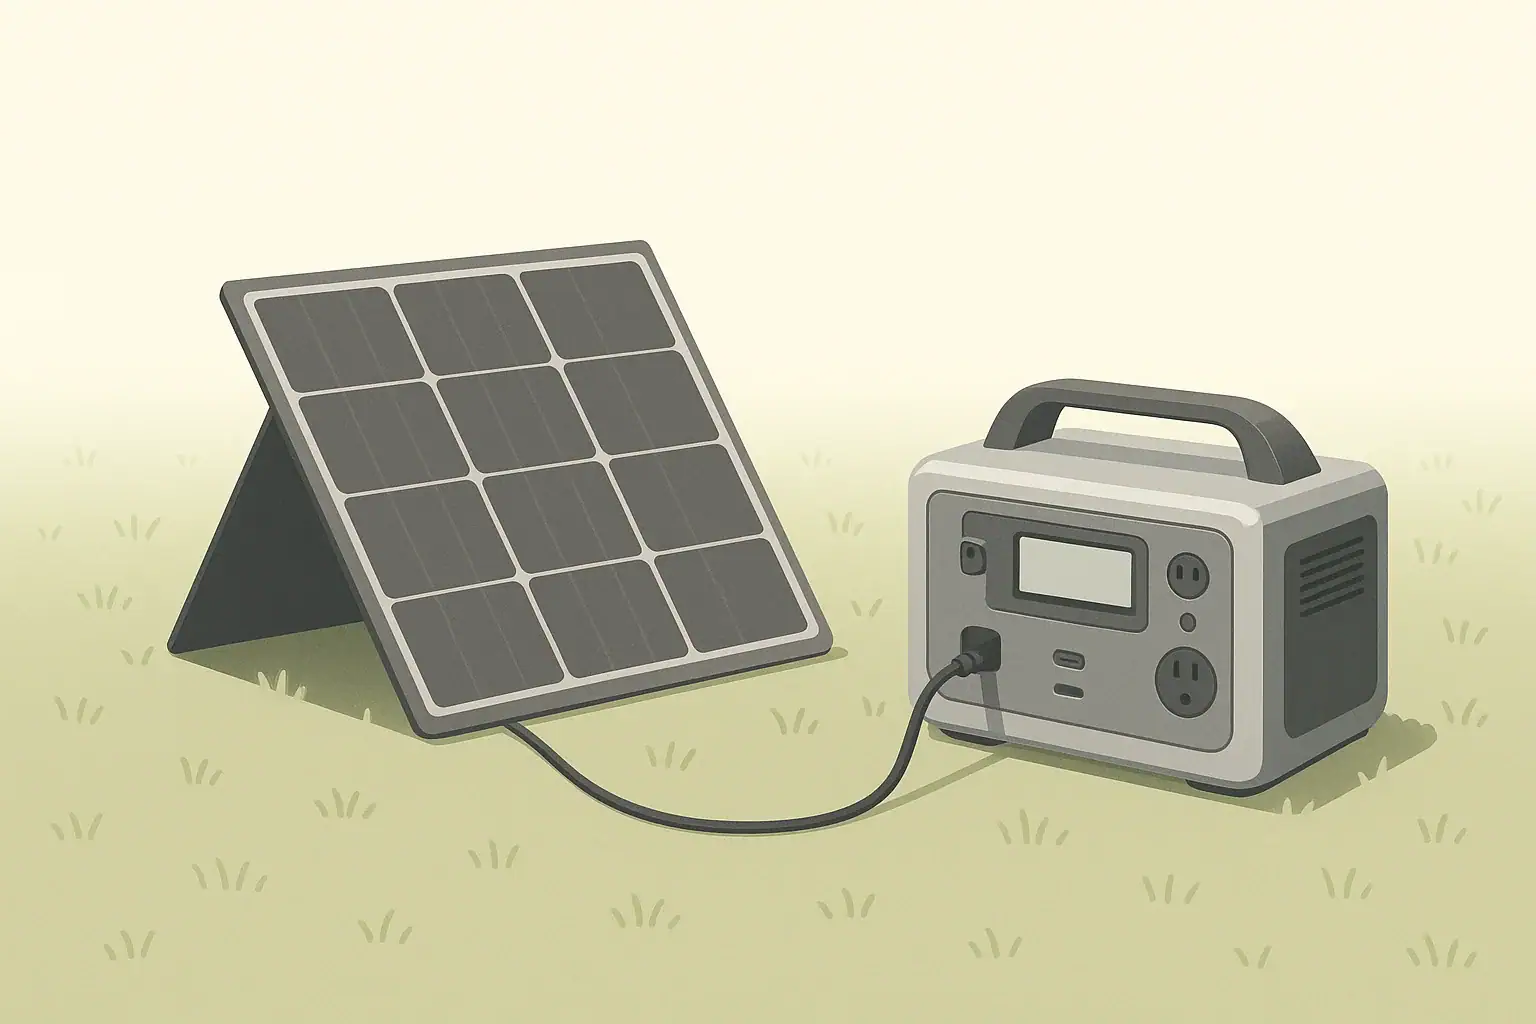
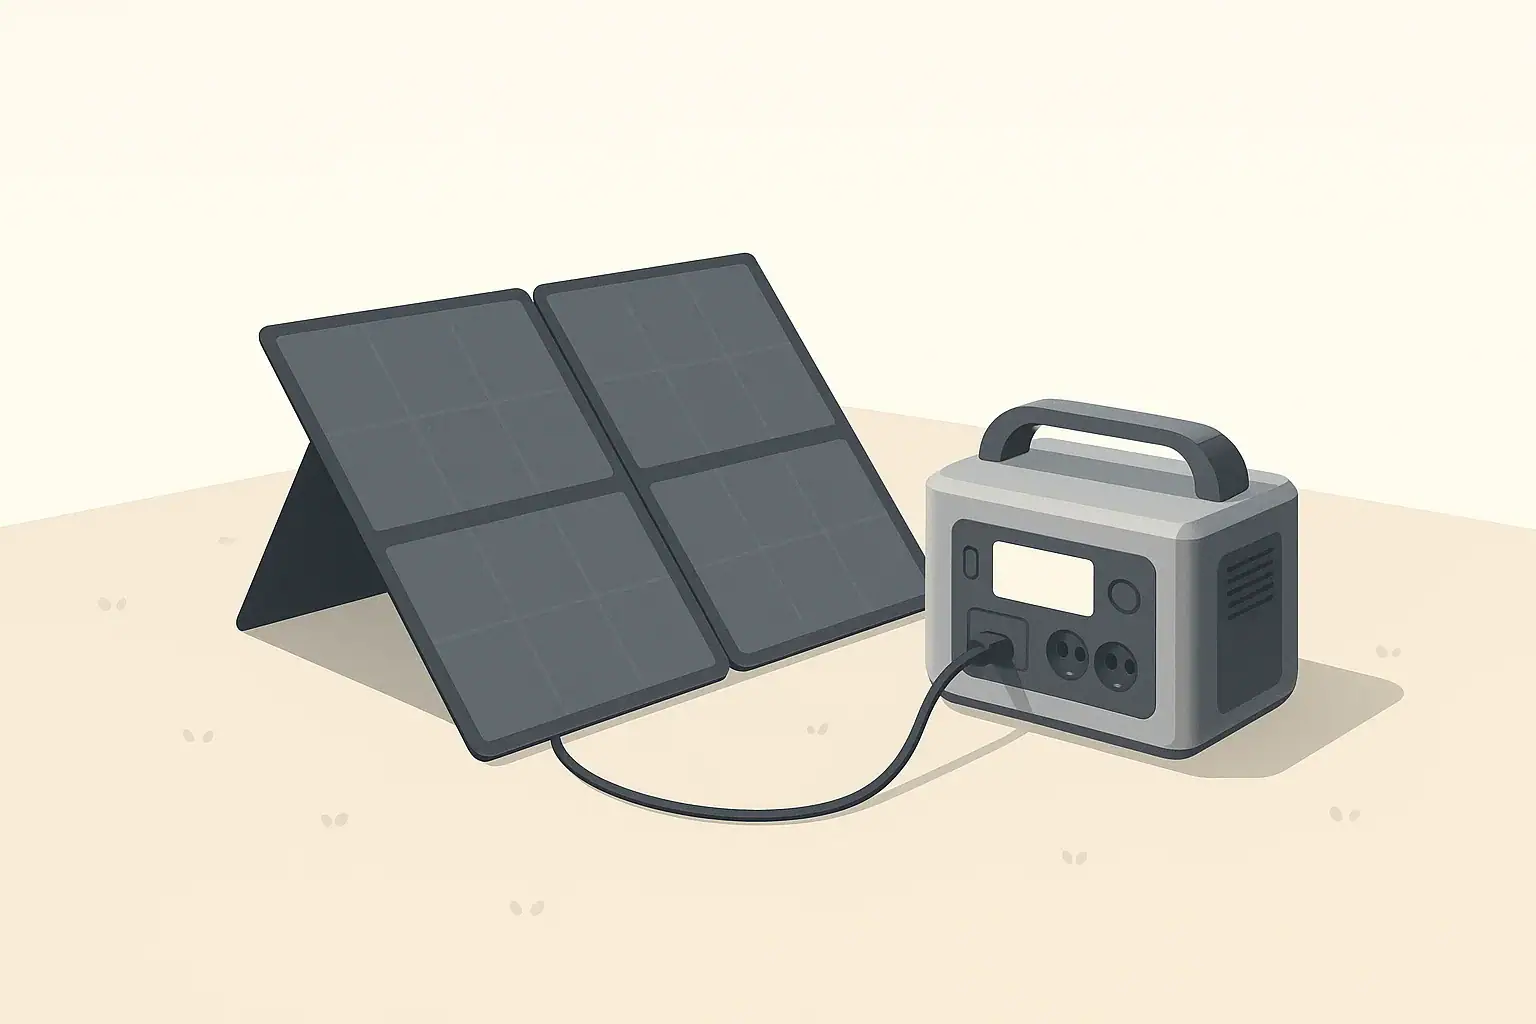
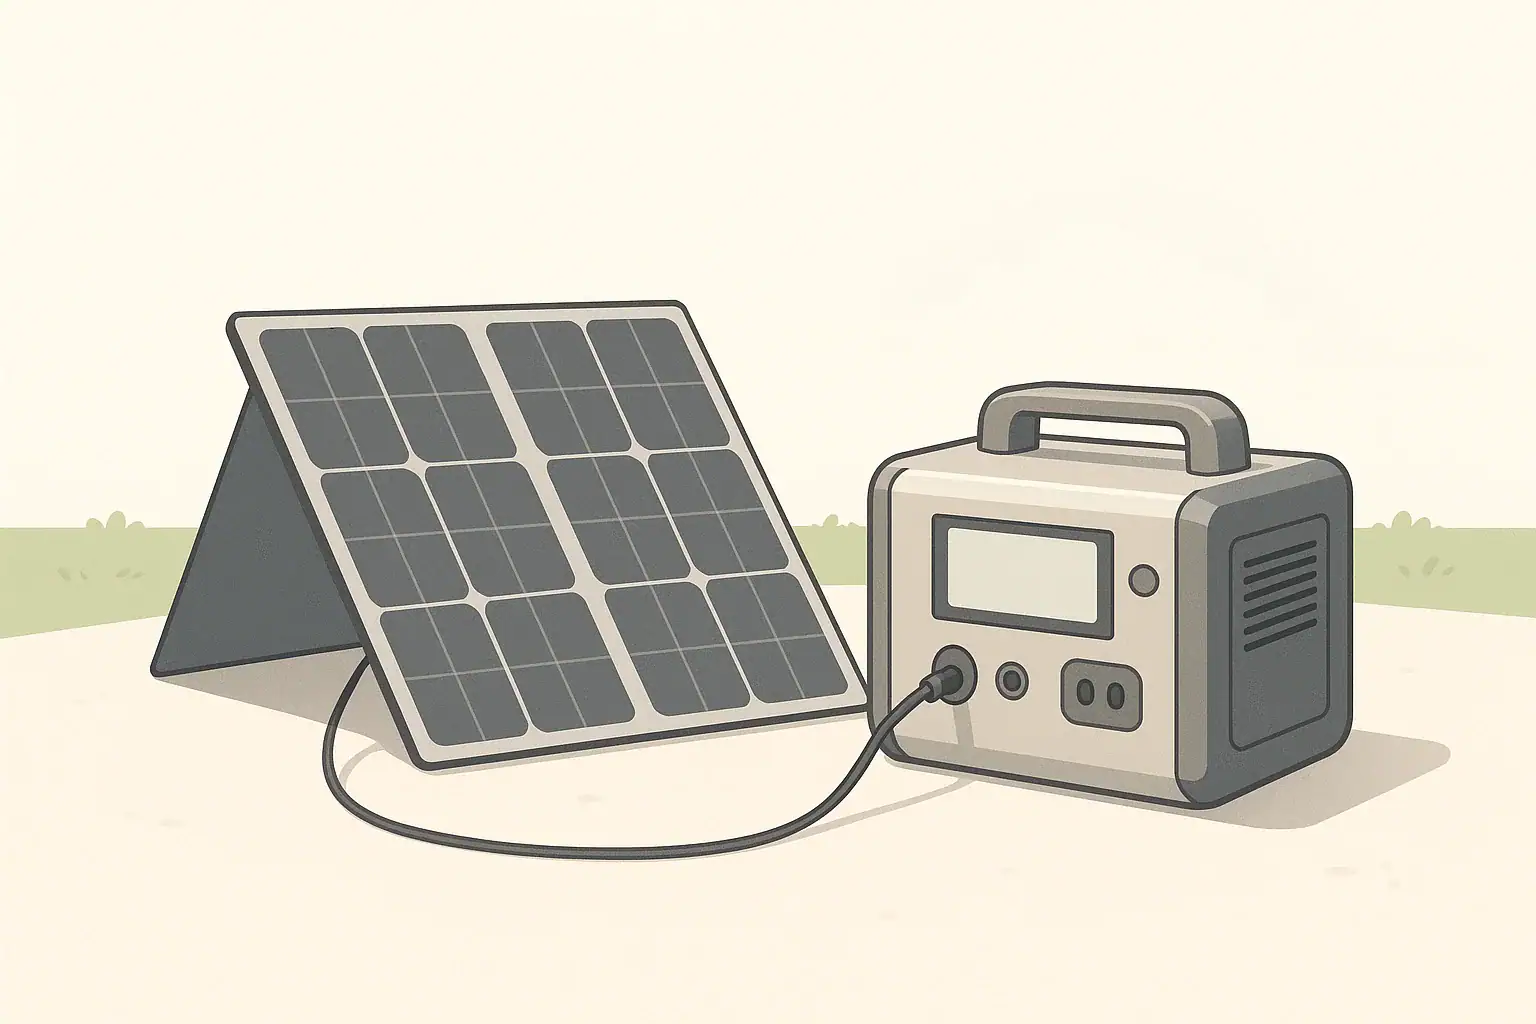
portable power station connected to solar panel outdoors

Solar panel shading and angle can easily cut your real charging speed by half or more, even with a good portable panel and power station. The way you place the panel in the sun usually matters more than the model you bought. A well-positioned panel in full sun, aimed roughly at the sun, often delivers two to three times more energy per day than the same panel left flat and partly shaded.

This guide explains how shading, tilt, and direction affect portable solar performance, and how to set up your panel so you get closer to its rated output. You will see simple rules of thumb, realistic examples, and quick checklists you can use for camping, RVs, off-grid work, or backup power at home.

The goal is not perfect math, but practical placement habits that turn limited daylight into the most watt-hours possible for your portable power station.

Why Placement Matters for Solar Charging Speed

Placement describes where and how you position a portable solar panel: whether it is shaded, how it is tilted, and which direction it faces. For small and medium panels used with portable power stations, placement is often the difference between a full battery by evening and a half-charged one.

Three main placement factors control solar charging speed in real use:

  • Shading – even small moving shadows can slash output.
  • Angle (tilt) – how steeply the panel is leaned relative to the sun.
  • Direction – which way the panel faces across the sky.

Because portable setups usually rely on just one or a few panels, every watt counts. A 100-watt panel will rarely deliver 100 watts in the field, but good placement can keep you closer to 60–80 watts at midday instead of 20–30 watts. Over a full day, that difference can mean hundreds of watt-hours of extra energy for lights, laptops, small fridges, and communication gear.

How Shading, Angle, and Direction Actually Affect Output

To manage expectations and plan charging time, it helps to understand what is happening inside the panel and how the sun’s path changes the light hitting it.

Why small shadows cause big power losses

A typical portable solar panel is made of many small solar cells wired together. When one cell in a series string is shaded, it can limit the current for that entire string, much like a kink in a hose limits water flow. Many panels include bypass diodes to route around shaded sections, but they cannot fully remove the loss.

In practice, this means:

  • A narrow shadow from a branch across one part of the panel can drop output far below half of the clear-sun value.
  • Shadows that move quickly, such as from trees or railings, cause the charging power on your power station screen to jump up and down.
  • Consistent full sun for a shorter time usually beats long hours of partial shade.

Why angle and direction change charging speed

Solar panels are most efficient when sunlight hits them close to perpendicular. As the sun moves across the sky, the angle between the sun’s rays and the panel changes, which changes how much light the panel can use.

  • Direction (azimuth): In most of the United States, the sun is generally to the south at midday. Pointing the panel roughly south provides the best all-day compromise.
  • Tilt angle: In summer, the sun is high, so a shallower tilt (panel closer to flat) works better. In winter, the sun is lower, so a steeper tilt (panel more upright) helps.

Shading, angle, and direction work together. A perfectly tilted panel in the wrong direction or under a small shadow can still perform poorly. For portable use, it is usually best to fix shade problems first, then improve tilt and direction as time allows.

Effective sun hours versus panel rating

The watt rating printed on a panel is measured in controlled test conditions: cool panel, direct overhead sun, and no shading. Real conditions are rarely that ideal. A more useful concept for planning is “effective sun hours” per day, which bundles all the variations into a single number you can use for rough estimates.

For many locations with decent weather, you might get the equivalent of 3–5 hours of strong sun per day on a well-placed panel. If your 100-watt panel averages about 60 watts during those strong hours, it might produce around 180–300 watt-hours per day. Poor placement, frequent shading, or very low winter sun can cut that in half.

Real-World Placement Examples and Daily Output

Seeing how placement changes real charging speed makes it easier to decide where to set your panel and how much effort to put into repositioning it.

Example: 100 W panel in different placements

The table below shows approximate daytime energy a 100-watt portable panel might collect in various placement scenarios. These are rough, illustrative numbers, not guarantees.

Example daily energy from a 100 W portable panel in different placements
Example values for illustration.
Placement scenario Conditions summary Approx. midday power Approx. daily energy
Ideal field placement Full sun, aimed south, tilted toward sun, no shade 60–80 W 250–350 Wh
Good but not perfect Full sun, reasonable tilt, small direction error 40–60 W 180–280 Wh
Flat on ground or roof Full sun, no tilt, some heat buildup 30–50 W 140–220 Wh
Light partial shade Thin tree branches or railing shadows part of day 15–40 W 80–180 Wh
Heavy shade or overcast Dense clouds or frequent solid shadows 5–20 W 30–100 Wh

If your power station has a 500 watt-hour battery, that same 100-watt panel might refill half or more of the battery in a day with ideal placement, or only a small fraction with poor placement. Scaling up to larger panels works similarly: better placement multiplies the value of every watt you carry.

Example: adjusting angle during the day

Consider a camping trip in late spring with a clear sky and a 200-watt folding panel:

  • No adjustment: Panel leaned at a medium angle facing roughly south all day might average around 90–120 watts during strong sun, for perhaps 400–600 watt-hours.
  • Two or three adjustments: Quickly re-aiming the panel mid-morning, midday, and mid-afternoon can keep it closer to 120–150 watts in strong sun, raising daily energy into the 600–800 watt-hour range.

Those extra watt-hours could cover a small 12-volt fridge plus phone and laptop charging instead of only the basics.

Scenario-based placement tips

  • Open-field camping: Place the panel several feet away from tents or vehicles, tilted toward the southern sky. Mark the spot and plan one or two quick repositionings as shadows move.
  • Forest or wooded sites: Look for small openings such as parking clearings or trail edges. You may need to place the panel away from the tent and run a cable back, while keeping cables visible and out of walkways.
  • RV or van parking: Roof-mounted panels are often fixed, so focus on parking where the roof sees as much open sky as possible. A portable ground panel can be aimed more precisely to supplement the roof array when parked.
  • Balcony or patio use: Railings and nearby walls can cast sharp, moving shadows. Elevate the panel slightly above the railing if possible and angle it so the entire surface stays clear of shadows during the strongest sun hours.

Common Placement Mistakes and How to Troubleshoot Them

Many portable solar problems are caused by placement rather than defective hardware. Recognizing the patterns on your power station’s display can help you fix issues quickly.

Visual and power-output clues

Use these simple checks when your solar charging speed seems low:

  • Is the panel truly in full sun? Look for thin lines of shade from branches, ropes, antennas, or railings across any part of the panel.
  • Is the power reading stable? Rapid jumps up and down often mean moving shade or intermittent cable connections.
  • Is the panel hot to the touch? Very hot panels lose efficiency; you may notice lower watts around midday on dark surfaces.
  • Is the power station limiting input? If the display shows the same wattage regardless of stronger sun, you may already be at the input limit.

Common mistakes that slow solar charging

Frequent placement and setup mistakes with portable solar
Example values for illustration.
Mistake Typical symptom Likely impact on output Quick fix
Panel partly shaded by tree or railing Power reading swings or stays far below expected Loss of 30–80% or more Move panel a few feet into clear, open sun
Panel laid flat on hot roof or ground Power lower at midday than in cooler morning Loss of 10–25% from heat and angle Tilt panel up to allow airflow and better angle
Panel facing wrong direction Good power only briefly, then sharp drop Loss of 20–50% over the day Rotate panel roughly toward the southern sky
Dirty or dusty panel surface Output slowly declines over days or weeks Loss of 5–15% depending on buildup Wipe gently with a soft, clean cloth
Very long, thin extension cable Panel voltage and power lower than expected Loss of 5–20% from voltage drop Use shorter or thicker cable where possible
Power station input already maxed out Watts stay capped even in perfect sun Extra panel capacity not used Check input rating; add more panels only if useful

Simple step-by-step troubleshooting routine

  1. Check shade: Walk around the panel and look for any shadow lines. Move the panel until the surface is completely sunlit.
  2. Check angle and direction: Tilt the panel so it faces the sun as directly as practical, then rotate it so its front points toward the brightest part of the sky.
  3. Check cables and connectors: Make sure connectors are fully seated, not bent, and not under tension. Avoid tight door gaps or sharp bends.
  4. Check panel surface: If visibly dusty, gently wipe it clean.
  5. Check power station limits: Compare the displayed solar input to the station’s solar input rating. If they match, you are likely at the limit.

Working through these steps in order will solve most “slow charging” complaints without needing tools or measurements.

Safety Basics for Portable Solar and Power Stations

Maximizing solar charging speed should never come at the cost of safety. Good placement also means protecting people, equipment, and surroundings.

Safe placement of the power station

Place the portable power station where it can stay dry, cool, and stable:

  • Set it on a flat, solid surface away from puddles and wet ground.
  • Keep vents clear on all sides so internal fans can move air freely.
  • Shelter it from direct rain, snow, and blowing dust.
  • Avoid placing it where people are likely to trip over cables or bump into it.

Do not open the power station or attempt to access internal batteries. Use only the external ports and follow the manufacturer’s instructions for maximum loads and charging methods.

Safe routing and handling of solar cables

Cables connect the panel to the power station and can introduce safety issues if routed carelessly:

  • Route cables along edges or behind objects instead of across walkways.
  • Avoid pinching cables under heavy doors, windows, or sharp metal edges.
  • Do not drive vehicles over cables or run them where wheels or chairs roll frequently.
  • Inspect connectors for moisture, dirt, or damage before use and after transport.

Weather and wind considerations

Portable panels are light and can act like sails in gusty wind:

  • Use built-in kickstands correctly and add weight at the base if wind is expected.
  • Avoid placing panels near edges where a fall could damage the panel or injure someone below.
  • In severe weather, fold and store the panel rather than trying to keep it deployed.

For home backup use, do not attempt to wire a portable power station directly into a household electrical panel unless a qualified electrician installs appropriate transfer equipment. Instead, power devices directly from the power station’s outlets and ports.

Maintenance and Long-Term Use for Reliable Output

Good maintenance keeps your portable solar panel and power station performing closer to their original ratings over many seasons. Shading and angle are daily concerns, while maintenance habits protect performance over the long term.

Keeping panels clean and clear

Dust, pollen, salt spray, and fingerprints gradually reduce light reaching the cells. On small panels, even a modest buildup can take away a noticeable share of output.

  • Wipe the panel periodically with a soft, non-abrasive cloth.
  • If needed, lightly dampen the cloth with clean water and avoid harsh cleaners.
  • Remove bird droppings or sticky residue as soon as practical to avoid staining.

Protecting panels in transport and storage

Portable panels are designed to fold and travel, but they still contain fragile cells and wiring. Cracks and impact damage can quietly reduce output.

  • Fold panels fully before transport and use protective sleeves or cases if provided.
  • Avoid stacking heavy gear directly on top of the folded panel.
  • Store panels in a dry place away from sharp objects and extreme temperatures.

Maintaining cables and connectors

Over time, repeated bending and exposure can wear cables and connectors, causing hidden resistance or intermittent connections that look like shading problems.

  • Coil cables loosely without tight kinks and secure them so they do not snag.
  • Inspect plug ends for corrosion, bent pins, or cracked housings.
  • Replace damaged cables promptly rather than fighting unreliable charging.

Storing the power station

For long-term reliability, store the power station according to its manual, typically:

  • In a cool, dry location away from direct sun and heat sources.
  • At a partial state of charge instead of completely full or empty if unused for months.
  • With periodic top-ups according to the manufacturer’s guidance to keep the battery healthy.

Practical Takeaways and Specs to Look For

Putting everything together, you can treat shading and angle as tools you actively manage rather than background conditions you accept. A few minutes of careful placement each day can be worth carrying an extra panel.

For everyday use with portable power stations, remember these core habits:

  • Place panels where they see full, unobstructed sun for as many hours as possible.
  • Face panels roughly toward the southern sky (in the U.S.) and tilt them toward the sun.
  • Check for moving shadows every hour or so when practical, especially near trees or structures.
  • Keep panels clean, cool, and well ventilated, and route cables safely.
  • Plan based on realistic daily energy, not just the nameplate watt rating.

Specs to look for when choosing portable solar for better placement flexibility

Certain panel and system features make it easier to avoid shading and optimize angle, even if you are not an expert in solar design. When comparing portable panels for a power station, consider:

  • Panel wattage and size: Higher wattage within a manageable size lets you collect more energy when placement is good.
  • Adjustable kickstands or frames: Multiple tilt positions help you aim the panel toward the sun without extra hardware.
  • Durable, foldable design: Sturdy hinges and handles make it easier to move the panel to better sun throughout the day.
  • Cable length and connector options: A reasonable cable length lets you place the panel in sun while keeping the power station in shade and protected.
  • Weather resistance: Panels with good environmental sealing tolerate outdoor placement and light rain better.
  • Clear watt and voltage labeling: Easy-to-read specs help you match panels to your power station’s solar input rating without guesswork.

By combining thoughtful placement with suitable hardware, you can get more usable energy each day from the same amount of portable solar capacity, making your power station a more reliable partner for camping, travel, work, and backup power.

Frequently asked questions

Which specs and features matter most when choosing a portable solar panel for flexible placement?

Prioritize wattage relative to the panel size you can carry, adjustable kickstands or mounting options for aiming, and a durable foldable design for easy repositioning. Also check reasonable cable length, weather resistance, and clear voltage/watt labeling so the panel matches your power station’s input.

What is a common placement mistake that causes a big drop in charging speed?

Partial or moving shade across even a small part of the panel is the most common mistake and can reduce output dramatically. If you see power readings that swing or stay far below expectations, move the panel a few feet to a fully sunlit spot first.

What basic safety precautions should I follow when using portable solar panels and a power station?

Keep the power station dry, on a flat stable surface, and with vents clear; route cables to avoid trip hazards and pinching; and secure panels against wind. Do not open internal battery compartments and follow the manufacturer’s limits for inputs and outputs.

How often should I adjust my panel angle during the day to get noticeably more energy?

One or two quick re-aimings (morning and early afternoon) often deliver most of the practical benefit for portable setups, while continuous tracking offers diminishing returns for the effort. On trips where you can comfortably reposition, three adjustments (mid-morning, noon, mid-afternoon) can increase daily output meaningfully.

Can dirt, bird droppings, or heat really reduce output and by how much?

Yes. Moderate dust or grime typically cuts a few percent up to around 10–15% on small panels, while heavy soiling and bird droppings can cause larger losses. High panel temperatures at midday can also reduce efficiency, often in the 10–25% range compared with cooler conditions.

Will long or thin extension cables affect charging speed?

Long thin cables can cause voltage drop and lower the power reaching your power station, sometimes by a few percent up to around 20% in extreme cases. Use the shortest practical run and thicker-gauge cable if you need longer distances to minimize losses.

Overpaneling Explained: Safely Using Bigger Solar Panels Than the Input Limit

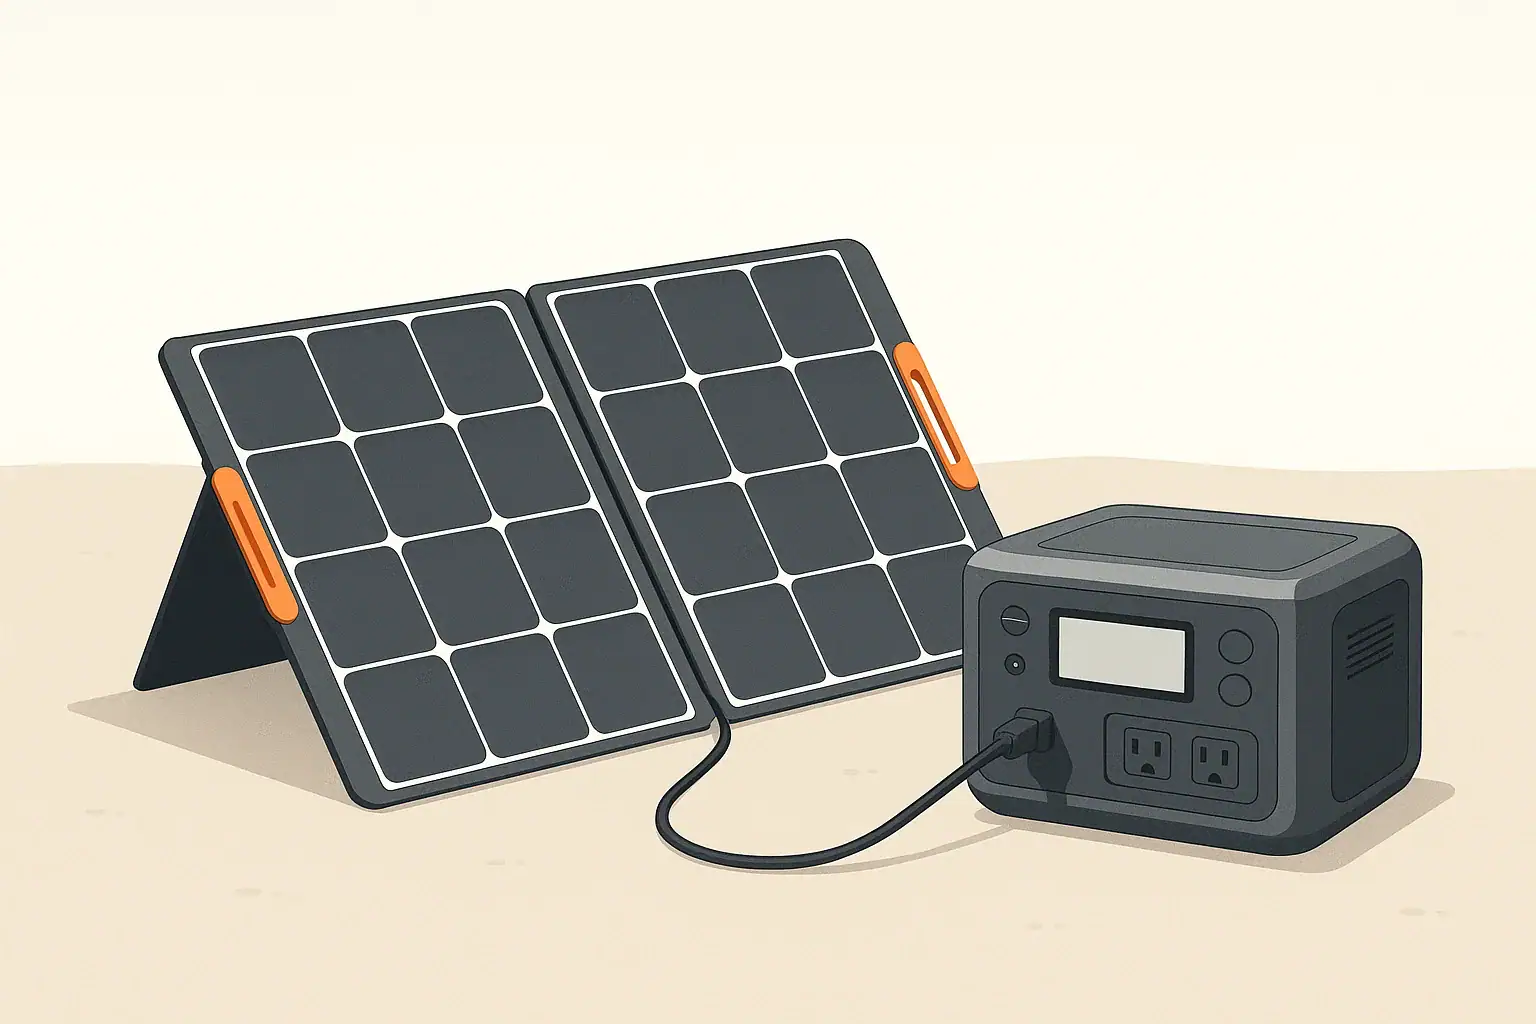
portable power station connected to solar panel outdoors

You can often connect more solar panel watts than your portable power station’s solar input rating, as long as you stay under its maximum voltage and current limits. In that case, the charge controller usually just caps charging at its rated watts and ignores the extra potential power. The risk comes when voltage or current go beyond what the input electronics and connectors are designed to handle.

This practice is called overpaneling or oversizing a solar array. It is common in rooftop solar and can also make sense with portable power stations, solar generators, and off-grid setups. Done carefully, it can improve charging speed in real-world conditions with clouds, shade, and short winter days.

This guide explains how overpaneling works, how to read solar input and panel specs, where people get into trouble, and how to stay within safe limits. You will see practical examples, simple calculations, and checklists you can use before buying or rewiring panels.

What Overpaneling Means and Why It Matters

Overpaneling means connecting solar panels whose combined rated wattage is higher than the portable power station’s published maximum solar input in watts. For example, using 450 watts of panels on an input rated for 300 watts.

Three key points define whether that is acceptable:

  • Voltage (V) from the panels must stay at or below the station’s maximum input voltage.
  • Current (A) must stay within the input and connector amp ratings.
  • Power (W) above the limit is usually clipped by the charge controller if voltage and current are safe.

In practice, overpaneling matters because real solar output is almost always below the nameplate rating. Clouds, high temperatures, imperfect tilt, and partial shade can easily cut panel output by 30–60%. Modestly oversizing the array can help you still reach the power station’s maximum charge rate for more hours each day.

However, portable power stations have fixed internal wiring, connectors, and charge controllers. Unlike a custom-built solar system, you cannot upgrade those components. Understanding the limits is the difference between a faster-charging setup and a damaged input port.

Key Concepts: How Solar Input Limits and Overpaneling Work

Solar inputs on portable power stations are usually defined by three related ratings: maximum voltage, maximum current, and maximum solar power.

Voltage limits (V)

The voltage limit is the most critical number. It is often printed as something like “12–30 V DC” or “10–50 V max.” If the panels’ open-circuit voltage (Voc) ever exceeds this maximum, the input electronics can be permanently damaged.

  • Panels in series add voltage; current stays roughly the same.
  • Panels in parallel keep the same voltage; current adds.
  • Cold weather can increase Voc above the label value, sometimes by 10–20%.

Because of that cold-weather bump, you should design series strings so the coldest-expected Voc stays comfortably below the input’s maximum voltage.

Current limits (A)

The current limit may be specified directly (for example, “max 10 A”) or implied by the connector type. If the array can deliver more current than the controller or connector can handle, a good MPPT controller will usually limit current internally—but the external connectors and cables may still be stressed.

  • Parallel wiring adds current; high current can overheat small connectors.
  • Long cable runs with thin wire increase voltage drop and heat.
  • Fuses or breakers should be sized for the array’s short-circuit current (Isc).

Power limits (W)

The watt limit is what most product pages highlight: “max 100 W solar input,” “max 300 W,” and so on. Power is calculated as:

Power (W) = Voltage (V) × Current (A)

Modern MPPT charge controllers generally handle extra potential wattage by clipping the output at their rated maximum. As long as voltage and current are within safe limits, connecting somewhat more panel watts usually just means the station charges at full speed more often.

Solar Input Ratings and Overpaneling Planning Guide Example values for illustration.
Input spec to check What it controls How it affects overpaneling Practical design tip
Max input voltage (Vmax) Highest safe panel voltage Hard limit; exceeding can damage electronics Sum Voc of series panels and keep at least 10–20% below Vmax in cold climates
Recommended voltage range MPPT/PWM operating window Too low or too high reduces efficiency Aim for total Vmp inside this range for best charging
Max input current (Amax) Connector and controller current Parallel strings can exceed this even if watts look modest Add panel Imp values in parallel and stay under Amax with a safety margin
Max solar input power (Wmax) Highest charge rate in watts Extra watts above this are clipped Overpaneling 20–50% above Wmax is usually enough in real-world conditions
Controller type (MPPT vs PWM) How power is harvested MPPT benefits more from modest overpaneling For PWM, match panel voltage closely to battery; oversizing watts gives smaller gains
Connector rating Safe current and voltage at plug Can be lower than controller ratings Use cables and adapters with equal or higher ratings than the station’s connector

MPPT vs PWM behavior when overpaneled

MPPT controllers track the panel’s maximum power point and convert excess voltage into current. When overpaneled within V and A limits, they simply stop increasing current once Wmax is reached. This makes them well suited to modest overpaneling.

PWM controllers act more like a switch. They work best when panel voltage is close to battery voltage. Extra panel watts above the input rating often provide little benefit, because the controller cannot efficiently convert higher voltage into more current.

Real-World Overpaneling Examples and Use Cases

Numbers become much clearer with concrete scenarios. The following examples are simplified but show how to think through panel configurations against solar input limits.

Example 1: Modest overpaneling that stays within limits

Assume a portable power station with:

  • Solar input: 12–40 V
  • Max current: 10 A
  • Max power: 300 W

You have two 200 W panels, each rated approximately:

  • Voc: 22 V
  • Vmp: 18 V
  • Imp: 11.1 A

Two panels in series give Voc about 44 V, which already exceeds the 40 V limit in mild weather and even more in the cold. That series configuration is unsafe for this input.

Two panels in parallel keep Voc at 22 V but double Imp to about 22.2 A, far above the 10 A limit and likely above connector ratings. That is also not acceptable.

In this case, a single 200 W panel is within all limits and slightly over the watt rating would not be possible without changing panel size or using a different power station. The “overpaneling” idea is limited by both voltage and current constraints.

Example 2: Slight oversize on watts only

Now consider a station with:

  • Solar input: 12–60 V
  • Max current: 15 A
  • Max power: 400 W

You have three 160 W panels:

  • Voc: 21 V
  • Vmp: 18 V
  • Imp: 8.9 A

Two panels in series: Voc ≈ 42 V (safe below 60 V), Vmp ≈ 36 V, Imp ≈ 8.9 A. That string is about 320 W at STC, which is within both voltage and current limits and below Wmax.

Adding a second identical series string in parallel (four panels total) would be about 640 W of panels, Voc ≈ 42 V, Imp ≈ 17.8 A. That exceeds the 15 A limit, so it is not acceptable.

However, using three panels in a 2S+1 configuration is sometimes possible with careful design, for example:

  • One string of two panels in series (about 320 W)
  • One separate single panel used only when connected alone

In practice, many users in this situation choose two panels in series (320 W), which is a modest 20% oversize on a 400 W max input. Under real conditions, that pair may only produce 250–320 W, allowing the station to charge near its maximum on good days without stressing limits.

Example 3: Using overpaneling to reach daily energy targets

Suppose you want around 1.2 kWh of solar energy per day for remote work and a small fridge. You typically get about 4 hours of effective sun. Ignoring losses for a moment:

  • 300 W of panels × 4 hours ≈ 1.2 kWh
  • Because of clouds, angle, and heat, you might only get 60–70% of that.

To compensate, you might size the array at 400 W on an input limited to 300 W, assuming voltage and current remain in spec. On clear days, the power station will clip at 300 W, but on hazy or partly cloudy days, that extra panel capacity helps you still reach close to your daily energy goal.

Daily Energy Planning With Modest Overpaneling Example values for illustration.
Total panel watts Effective sun hours Approx. daily energy (kWh) after 30% losses Typical use case fit
200 W 4 h 0.6 kWh Phones, tablets, light laptop use, LED lights
300 W 4 h 0.84 kWh Single laptop plus router and small fan
400 W (on 300 W input) 4 h 1.12 kWh Modest overpaneling to support laptop + compact fridge
500 W (on 300–400 W input) 3–4 h 1.05–1.4 kWh More margin in cloudy or winter conditions

Common Overpaneling Mistakes and Troubleshooting Cues

Most overpaneling problems come from misunderstanding one of the limits or from wiring choices. Recognizing early warning signs can prevent damage.

Typical mistakes people make

  • Exceeding maximum voltage with series strings. Adding “one more panel” in series without recalculating total Voc, especially in cold climates.
  • Ignoring connector current ratings. Running high-current parallel arrays through small barrel or proprietary connectors not designed for that load.
  • Mixing very different panels. Combining panels with different voltages or currents, which can drag the whole array down and create unpredictable behavior.
  • Using long, thin extension cables. Causing large voltage drops so the station never reaches its rated input power, even with many panels.
  • Expecting STC watts in real conditions. Assuming that a 400 W array will always deliver 400 W and oversizing far beyond what is useful.

Troubleshooting: symptoms to watch for

  • Station will not accept solar input. Could be reversed polarity, open-circuit voltage above the maximum, or incompatible connector wiring.
  • Solar watts stuck far below expected. May indicate shading, poor angle, high cable losses, or that the controller is clipping due to hitting its watt limit.
  • Connectors or cables feel hot to the touch. Suggests excessive current, undersized wire, or poor-quality connections.
  • Intermittent charging or shutdowns. Can be caused by overcurrent protection, loose plugs, or thermal protection inside the power station.
Common Overpaneling Issues and Practical Fixes Example values for illustration.
Observed issue Likely cause Quick checks Practical fix
No solar charging Voltage out of range or polarity reversed Measure Voc at the connector; confirm positive/negative orientation Rewire series/parallel to fit voltage window; correct polarity
Charging stops on cold mornings Series Voc exceeds max input when cold Compare measured cold Voc to input Vmax Reduce panels in series or switch to parallel strings
Cables or plugs are hot Too much current for connector or wire gauge Check panel Imp × number of parallel strings Use thicker cable, fewer parallel strings, or a different connector path
Power lower than expected Voltage drop, shade, or controller clipping Compare panel-side voltage to input voltage at the station Shorten cable runs, improve panel angle, or accept clipping if at Wmax
Inconsistent readings Loose or corroded connections Inspect and gently wiggle connectors while monitoring watts Clean contacts, replace damaged adapters, secure strain relief

High-Level Safety Basics When Overpaneling

Overpaneling is only worth doing if it remains safe. The following principles apply whether you are using a small camping power station or a larger unit for RV or backup power.

Electrical and fire safety

  • Treat maximum input voltage as an absolute ceiling. Design your array with a margin for cold-weather Voc increase.
  • Respect continuous current ratings. Do not size arrays so that expected current is right at the connector’s maximum; allow headroom.
  • Use appropriate wire gauge. Higher current and longer runs require thicker cable to limit voltage drop and heat buildup.
  • Keep cables uncoiled under load. Coiled cable can trap heat and act like an inductor; lay it out straight when charging.

Protection and disconnects

  • Use fuses or breakers sized for the array. These should be chosen based on short-circuit current (Isc) and cable ratings.
  • Have a clear way to disconnect panels. A simple inline connector or switch makes it easy to safely disconnect during storms or when moving equipment.
  • Keep connections weather aware. Use junctions and adapters intended for outdoor use to reduce the chance of moisture-related faults.

Battery and device protection

  • Rely on the built-in battery management system. Within specified limits, it will regulate charge rate to protect the cells.
  • Avoid blocking cooling vents. Overpaneling can keep the device at higher charge rates longer; ensure airflow is not obstructed.
  • Monitor behavior after changes. When you change panel configuration, check the display, temperature, and connectors during the first few charge cycles.

Long-Term Use, Maintenance, and Storage With Overpaneled Systems

Once your array and wiring are set up correctly, most of the work is simple maintenance and good operating habits. Overpaneling does not usually require extra steps beyond what a well-designed solar setup needs, but it can keep the system operating near its limits more often.

Panel care and placement

  • Keep panel surfaces clean. Dust, pollen, and bird droppings can significantly reduce output. Gently clean with water and a soft cloth when needed.
  • Check for shading throughout the day. A small amount of shade on one panel in a series string can cut power dramatically.
  • Secure portable panels against wind. Overpaneling often means more surface area; use straps or weights so gusts do not flip panels.

Cable and connector inspections

  • Inspect connectors regularly. Look for discoloration, melted plastic, or loose pins—all signs of overheating.
  • Check strain relief. Heavy cables should not hang directly from small connectors; support them to prevent stress and fatigue.
  • Test voltage and polarity after rewiring. Any time you change series/parallel layout, verify Voc and polarity before plugging into the station.

Storage practices

  • Store the power station partially charged. Many lithium-based systems prefer storage around 30–60% charge if they will sit for months.
  • Keep panels and cables dry when stored. Moisture trapped in connectors can corrode contacts over time.
  • Label panel strings. Simple tags indicating “String 1: 2 in series” and so on make future troubleshooting and reconfiguration easier.

Practical Takeaways and Specs to Look For

Overpaneling can be a useful tool to get more reliable solar charging from a portable power station, especially in less-than-ideal sun. The key is to oversize wattage only within the hard limits of voltage, current, and connector ratings.

Quick practical rules

  • Never exceed the station’s maximum input voltage; design series wiring with a cold-weather safety margin.
  • Keep total array current within both the controller’s amp rating and the connector’s rating.
  • For MPPT-equipped units, consider modest overpaneling in the 20–50% range above the watt limit if allowed by the manufacturer.
  • Prioritize simple, robust wiring over squeezing in every possible watt.
  • Monitor new setups during the first few uses for temperature, stability, and consistent charging behavior.

Specs to look for when planning overpaneling

  • On the portable power station:
    • Solar input voltage range (minimum and maximum)
    • Maximum solar input power in watts
    • Maximum input current in amps
    • Type of solar charge controller (MPPT or PWM)
    • Connector type and its rated current and voltage
  • On each solar panel:
    • Rated power (Pmax)
    • Open-circuit voltage (Voc)
    • Voltage at max power (Vmp)
    • Current at max power (Imp)
    • Short-circuit current (Isc)
  • For the overall array:
    • Total Voc for each series string (including cold-weather margin)
    • Total Imp for all parallel strings
    • Estimated total panel watts versus the station’s Wmax
    • Wire gauge and length for each cable run
    • Fuse or breaker ratings relative to Isc and cable limits

If you walk through those specs before buying or rewiring panels, you can decide whether overpaneling makes sense for your setup, avoid the most common pitfalls, and get the most from your portable solar input limits.

Frequently asked questions

Which specifications and features matter most when planning to overpanel a portable power station?

Focus first on the station’s maximum input voltage, maximum input current, and maximum solar input power. Also check the controller type (MPPT vs PWM), connector ratings, and planned cable gauge and length because they determine safe current flow and voltage drop.

What common wiring mistake should I avoid when oversizing a solar array?

A frequent error is adding panels in series or parallel without recalculating total Voc or total Imp, which can push voltage or current beyond limits—especially in cold weather for Voc. Always measure or calculate combined Voc and Imp and include safety margins for temperature and cable losses.

Is overpaneling safe for my portable power station?

Overpaneling can be safe if the array stays within the station’s maximum voltage and current ratings and uses properly rated connectors and cables; the controller will usually clip excess watts. Exceeding the maximum input voltage is the primary safety risk and can permanently damage input electronics, so design with a margin for cold Voc.

How much can I reasonably oversize panel watts above the station’s watt limit?

For MPPT-equipped stations, modest oversizing of roughly 20–50% above the rated watt limit is commonly used to improve real-world charging, provided voltage and current remain within limits. The exact safe amount depends on Voc, Imp, connector ratings, and whether the controller and wiring can safely handle the increased potential.

Can mixing different panel models cause problems when overpaneling?

Yes; combining panels with different Vmp, Voc, or Imp can reduce overall output and create mismatch losses, and may produce unpredictable currents when strings are paralleled. To avoid issues, match panels electrically or use separate MPPT inputs or properly configured strings with blocking diodes where appropriate.

What are early warning signs that my overpaneled system might be unsafe?

Watch for hot connectors or cables, thermal shutdowns, no solar charging despite sun, or unusual smells or discoloration at junctions. These symptoms suggest excessive current, poor connections, or voltage out-of-range conditions and should prompt immediate inspection and corrective action.

Solar Panel Series vs Parallel: Best Way to Charge a Power Station

portable power station charging from solar panels outdoors

For most small portable power stations, parallel wiring is usually safer and more forgiving, while larger units often benefit from series or series-parallel wiring if their specs allow it. The best choice depends on your power station’s maximum solar voltage, current, and watt limits, plus how many panels you use and how shaded your setup is.

This guide explains solar panel series vs parallel wiring in plain language, focusing on portable power stations, solar generators, and small off-grid setups. You will see how each wiring method changes voltage and current, how to match panel strings to your power station input, and how shade, cable length, and temperature affect real charging speed.

By the end, you will be able to look at a panel label and a power station spec sheet and quickly decide whether series, parallel, or a mix of both makes the most sense for your camping, RV, or backup power system.

What Series and Parallel Mean for Portable Power Stations

When you combine solar panels to charge a portable power station, you can wire them in series, parallel, or a combination of both. These wiring choices change the voltage (V) and current (A) that reach the solar input, even if the total wattage (W) of the array stays similar in ideal sun.

Understanding this matters because every power station has hard limits, such as:

  • Maximum solar input voltage (V)
  • Maximum solar input current (A), sometimes
  • Maximum solar input power (W)

If your series voltage goes too high, you can trip protections or damage the input. If your parallel current goes too high, you can overheat cables or connectors. Getting series vs parallel right helps you:

  • Charge as fast as the power station allows, without exceeding limits
  • Handle shade and mixed conditions more predictably
  • Use reasonable cable sizes and lengths
  • Maintain safety margins in hot and cold weather

For portable systems used at home, in vehicles, or at campsites, this is usually less about squeezing out every last watt and more about staying within safe operating windows while keeping the setup simple to use.

How Series and Parallel Wiring Work

direct current (DC) is produced by solar panels. When you connect multiple panels, you can decide whether to add their voltages (series) or their currents (parallel). The basic rules are simple, but the implications for a power station are important.

Series wiring: higher voltage, same current

In a series connection, you connect the positive lead of one panel to the negative lead of the next, forming a chain. The remaining free positive and negative leads go to the power station’s solar input.

  • Voltage adds (Vtotal ≈ V1 + V2 + …)
  • Current stays roughly the same as one panel
  • Power ≈ Vtotal × I (same total watts as parallel in ideal sun)

Example: two similar 100 W panels, each with about 20 V and 5 A under load:

  • Series: ~40 V and ~5 A → ~200 W potential in good sun

This higher voltage can be helpful when:

  • Your power station allows a higher input voltage window
  • You need longer cable runs and want to reduce voltage drop
  • You are building a larger roof-mounted or semi-permanent array

The trade-off is that you must pay close attention to the maximum voltage rating of the power station, including cold-weather voltage increases.

Parallel wiring: same voltage, higher current

In a parallel connection, all panel positives are tied together, and all panel negatives are tied together. The combined positive and negative then go to the solar input.

  • Voltage stays roughly the same as one panel
  • Current adds (Itotal ≈ I1 + I2 + …)
  • Power ≈ V × Itotal (again, similar watts in ideal sun)

Using the same example panels:

  • Parallel: ~20 V and ~10 A → ~200 W potential in good sun

Parallel wiring tends to be more compatible with smaller power stations because the voltage stays low. However, the higher current means:

  • Cables and connectors must be rated for more amps
  • Voltage drop over long cables becomes more noticeable
  • Heat in undersized wiring can become a safety issue
Table 1. Series vs parallel for portable power stations – Example values for illustration.
Factor Series wiring Parallel wiring
Resulting voltage Adds with each panel; can approach input voltage limit Similar to a single panel; usually easier to keep within limits
Resulting current Similar to one panel; often easier on connectors Adds with each panel; can approach cable and connector ratings
Performance in partial shade One weak panel can drag down the whole string Each panel contributes more independently; shade impact is localized
Long cable runs Higher voltage reduces percentage loss from voltage drop Lower voltage is more affected by resistance in long cables
Risk focus More risk of exceeding max voltage, especially in cold weather More risk of overcurrent and cable heating
Typical use Larger or mid-sized stations with higher voltage input ratings Small to mid-sized stations with modest voltage limits

Real-World Examples and Simple Calculations

Once you understand the basics, the next step is to run quick checks using the panel labels and your power station manual. These simple examples show how series vs parallel changes what the device sees.

Example 1: Two 100 W panels and a small power station

Assume each 100 W panel is labeled approximately:

  • VOC (open-circuit voltage): 22 V
  • Vmp (voltage at max power): 18 V
  • Imp (current at max power): 5.5 A

Your small power station lists:

  • Max solar input voltage: 24 V
  • Max solar input power: 150 W

Series wiring of two panels:

  • String VOC ≈ 22 V + 22 V = 44 V → exceeds 24 V limit
  • Not safe for this device, even if it might appear to work briefly

Parallel wiring of two panels:

  • VOC stays ≈ 22 V → within the 24 V limit
  • Imp ≈ 5.5 A + 5.5 A = 11 A
  • Panel array could deliver ~18 V × 11 A ≈ 200 W, but the power station will cap at 150 W

In this case, parallel is clearly the better and safer choice.

Example 2: Four 100 W panels and a mid-sized power station

Now assume the same panels, but your power station lists:

  • Max solar input voltage: 60 V
  • Max solar input current: 15 A
  • Max solar input power: 400 W

Option A – All four in parallel:

  • VOC ≈ 22 V
  • Imp ≈ 4 × 5.5 A = 22 A → exceeds 15 A limit

Option B – Two in series, then those two strings in parallel (series-parallel):

  • Each series pair: VOC ≈ 44 V, Imp ≈ 5.5 A
  • Two series strings in parallel: VOC ≈ 44 V, Imp ≈ 11 A
  • Array power at max: ~18 V × 2 × 5.5 A × 2 ≈ 400 W

This series-parallel arrangement keeps both voltage and current within limits while allowing the power station to use close to its full 400 W solar capacity.

Estimating charge time

A quick way to estimate solar charge time in good sun is:

  • Charge time (hours) ≈ Battery capacity (Wh) ÷ Usable solar input (W)

For example, a 1000 Wh power station with about 300 W of real-world solar input might charge in roughly 3–4 hours of strong sun, after accounting for losses and conditions.

Table 2. Example setups and likely wiring choice – Example values for illustration.
Use case Typical gear Likely wiring Reasoning
Small backup at home 1–2 portable panels, small power station Parallel Low voltage limits; buildings and trees cause partial shade
Remote work setup 2–4 rigid panels, mid-sized station Series or series-parallel Higher voltage input, longer cable runs from yard to indoors
Weekend camping 1–2 folding panels, compact station Parallel Panels often moved and partly shaded; simple plug-and-play
RV or van roof array 4+ roof-mounted panels, larger station Series-parallel Balance voltage and current within controller limits

Common Mistakes and Troubleshooting Cues

Most problems people see when combining solar panels for a power station come from wiring choices that do not match the device’s specs or from conditions like shade and temperature. Recognizing the symptoms helps you correct them quickly.

Mistake 1: Exceeding maximum input voltage

What it looks like:

  • Power station refuses to start solar charging
  • Display shows an error code or “over-voltage” message
  • Charging works on warm days but fails on cold, bright mornings

Likely cause: Too many panels in series, pushing VOC near or above the rated maximum, especially in cold weather when voltage rises.

Fix:

  • Reduce the number of panels in series
  • Switch to parallel or series-parallel to stay within the voltage window
  • Leave extra voltage headroom instead of designing right at the limit

Mistake 2: Exceeding current limits or using undersized wiring

What it looks like:

  • Cables feel warm or hot to the touch during peak sun
  • Connectors look discolored or show signs of melting
  • Power station input occasionally cuts out under strong sun

Likely cause: Too many panels in parallel or thin extension cables that cannot handle the combined current.

Fix:

  • Check the power station’s maximum input current rating
  • Reduce the number of parallel panels or move to series-parallel
  • Use thicker, outdoor-rated solar cable sized for the expected amps

Mistake 3: Mismatched panels in series

What it looks like:

  • Array output is noticeably lower than expected
  • One panel is consistently cooler or warmer than the others

Likely cause: Combining panels with very different wattages or current ratings in the same series string. The lowest-performing panel limits the string current.

Fix:

  • Use panels of similar voltage and current ratings in each series string
  • If you must mix panels, do so in parallel where the impact is smaller

Mistake 4: Underestimating shade and panel placement

What it looks like:

  • Solar input drops sharply when a tree, antenna, or roof rack casts a shadow
  • Series strings lose most of their output when only one panel is shaded

Likely cause: Series wiring in a location with frequent partial shading, or panels placed at different angles.

Fix:

  • Favor parallel wiring where shading is unavoidable
  • Reposition portable panels to keep them in consistent sun
  • On roofs, plan string layouts to avoid regular shade from vents or racks

Quick troubleshooting checklist

  • Verify polarity on all connectors (positive to positive, negative to negative)
  • Check panel labels and recalculate string voltage and current
  • Test each panel alone to confirm it is producing power
  • Inspect all cables and connectors for damage, corrosion, or overheating

Safety Basics for Series and Parallel Solar Wiring

Portable power stations include built-in protections, but they cannot compensate for wiring that ignores basic electrical limits. A few habits go a long way toward safe, reliable operation.

Respect every component rating

  • Panels: Do not exceed their rated series fuse or connect them in ways the manufacturer does not support.
  • Cables: Use wire gauge that matches or exceeds the maximum expected current.
  • Connectors and adapters: Choose parts rated for outdoor DC use and the current of your array.
  • Power station input: Never exceed the published voltage or wattage limits.

Think about voltage and shock risk

As you add more panels in series, the open-circuit voltage can climb well above typical low-voltage DC thresholds. While still lower than household AC, higher DC voltage can increase shock risk and arc potential if connectors are mishandled.

  • Avoid touching bare conductors when panels are in sun
  • Make and break connections with panels covered or out of direct sunlight when possible
  • Do not work on wet connectors or cables

Use fuses or disconnects where appropriate

Many simple plug-in setups rely only on the power station’s internal protections. For larger or semi-permanent arrays, adding basic external protection is common practice:

  • Inline fuses sized for the string current
  • DC disconnect switches to isolate the array before rewiring

If you are unsure how to size or place these components, consulting a qualified electrician or solar professional is recommended, especially for RVs and long-term off-grid systems.

Keep the power station protected from weather and heat

  • Operate the power station in a dry, shaded location
  • Avoid enclosing it in tight compartments without ventilation
  • Keep air vents clear during both charging and discharging

Long-Term Use, Maintenance, and Storage

Series vs parallel wiring is only part of keeping your solar and power station setup working well over time. Basic care of panels, cables, and the power station itself helps maintain performance.

Panel care

  • Cleaning: Gently remove dust, pollen, and debris with water and a soft cloth or sponge. Avoid abrasive cleaners.
  • Inspection: Check for cracks, delamination, or damaged junction boxes that could affect output or safety.
  • Mounting: For roof-mounted panels, periodically verify that brackets and fasteners remain tight.

Cable and connector maintenance

  • Inspect cables for cuts, flattened sections, or exposed conductors
  • Keep connectors dry and off the ground where possible
  • Replace any connector that shows signs of overheating or corrosion

Power station storage

  • Store the unit in a cool, dry place when not in use
  • Follow the manufacturer’s guidance for long-term battery storage state-of-charge
  • Top up the battery periodically if the unit sits unused for months

Seasonal adjustments

  • In winter, expect higher panel voltage and lower overall output hours
  • In summer, check that cables and connectors are not overheating during long sunny days
  • Adjust panel tilt or placement seasonally if practical to improve production

Practical Takeaways and Specs to Look For

Choosing between solar panel series vs parallel wiring for a portable power station is mostly about matching your panels to the device’s input window and your environment.

  • Smaller power stations with low voltage limits usually favor parallel wiring.
  • Mid-sized and larger units with higher voltage inputs often work best with series or series-parallel.
  • Shady or cluttered locations tend to favor parallel; open, sunny spaces can benefit from series.
  • Long cable runs are easier to manage with higher voltage (series), as long as you stay within limits.

Specs to look for before deciding on series or parallel

  • From the power station:
    • Maximum solar input voltage (V) and any stated minimum voltage
    • Maximum solar input current (A), if listed
    • Maximum solar input power (W)
    • Recommended input voltage range for best MPPT performance, if specified
    • Supported connector types and any included adapters
  • From each solar panel:
    • VOC (open-circuit voltage)
    • Vmp (voltage at maximum power)
    • Imp (current at maximum power)
    • Recommended maximum series fuse rating
  • For your wiring plan:
    • Series string VOC: VOC × number of panels in series, with cold-weather headroom
    • Total array current: sum of Imp for parallel strings
    • Cable gauge sized for the highest current path
    • Expected shade patterns and whether panels can be placed together in full sun

If you can quickly answer these points from your labels and manual, you have everything you need to choose series, parallel, or a mix of both in a way that charges efficiently while staying safely inside the limits of your portable power station.

Frequently asked questions

Which power station and panel specifications matter most when deciding between series and parallel wiring?

Check the power station’s maximum solar input voltage, maximum input current (if listed), and maximum input power. From the panels, note V_OC, V_mp, and I_mp so you can calculate string V_OC and array current and ensure you stay within the station’s limits.

What common wiring mistake causes cable overheating?

Using too many panels in parallel without matching the cable gauge to the higher combined current often causes overheating. The fix is to either reduce parallel strings, reconfigure to series-parallel, or use thicker, outdoor-rated wiring sized for the expected amps.

Is wiring solar panels in series or parallel safer from a general safety perspective?

Neither is inherently safer; each has distinct hazards: series raises voltage which can increase shock and over-voltage risk for the power station, while parallel increases current which can overheat cables and connectors. Choose the method that keeps both voltage and current inside component ratings and use proper fusing and disconnects where appropriate.

How does partial shading affect a series string compared with a parallel array?

In a series string one shaded panel can reduce the current for the entire string, significantly lowering output. In parallel arrays shading tends to affect only the shaded panel’s contribution, making parallel more tolerant of mixed shade conditions.

Will rewiring panels to series always increase charging speed?

Not always — higher series voltage can reduce voltage drop and be beneficial for long runs or higher-voltage inputs, but if it exceeds the power station’s voltage limit it won’t work. Charging speed depends on staying within the station’s voltage, current, and wattage limits and on real-world conditions like sun, temperature, and MPPT efficiency.

Should I add fuses or a DC disconnect for a portable solar setup?

For small, short-term portable setups the power station’s internal protections are often sufficient, but fuses and a disconnect are recommended for larger or semi-permanent arrays. Inline fuses sized to the expected string current and a DC disconnect help isolate the array for safe maintenance and provide an extra layer of protection.

Portable Power Stations and Renewable Energy: How to Size, Charge, and Use Them Effectively

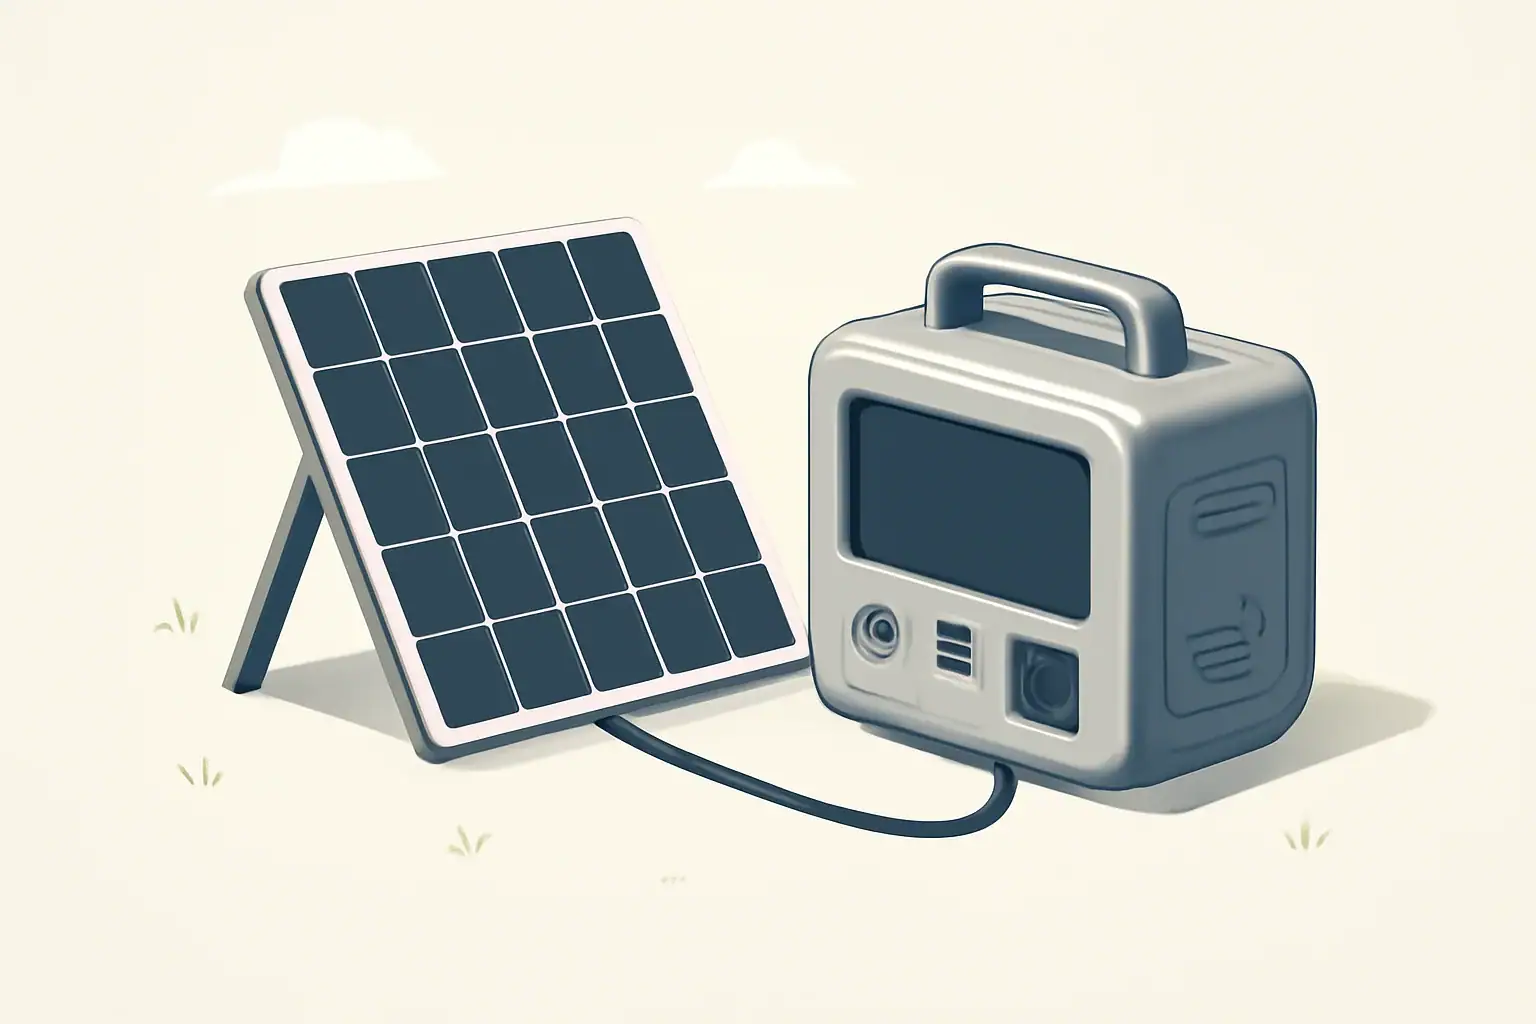
Isometric illustration of power station with solar panel

Portable power stations work well with renewable energy when the battery size, inverter, and charging inputs are correctly matched to your solar, wind, or vehicle setup. Used this way, they can provide reliable off‑grid power for camping, emergency backup, and remote work without depending on fuel or a wired grid.

This guide explains how portable power stations integrate with renewable sources, how to size a system for real-world use, and what to watch for so you do not damage batteries or overload components. You will see concrete examples, simple calculations, and checklists you can copy into your own planning notes.

Whether you are building a small solar generator for weekend trips or adding a portable station to a home backup system, the goal is the same: convert intermittent renewable energy into stable, usable electricity for your devices and appliances.

What a Portable Power Station Is and Why It Matters for Renewable Energy

A portable power station is a self-contained battery system with built-in electronics that stores energy and delivers it through AC outlets, DC ports, and USB outputs. When paired with renewable inputs like solar panels or small wind turbines, it becomes a compact off-grid power system.

Compared with loose batteries and separate inverters or charge controllers, portable stations offer:

  • Simpler setup: One box handles storage, conversion, and protection.
  • Predictable capacity: Battery size is clearly labeled in watt-hours (Wh).
  • Multiple charging options: Wall AC, vehicle DC, and renewable inputs on a single unit.
  • Built-in safety: A battery management system (BMS) limits overcharge, deep discharge, and overheating.

For renewable energy, this matters because solar and wind are variable. A portable power station acts as a buffer: it absorbs energy whenever the sun or wind is available and releases it later at a steady voltage and frequency your devices can use. This makes renewable power practical for everyday tasks like running a laptop, a small fridge, or communications gear. For a broader view, see how small renewable systems and portable storage fit into the grid.

Key Concepts: How Portable Power Stations Work with Renewable Sources

When you connect a renewable source to a portable power station, you are creating a small energy system with three main parts: generation, storage, and loads. Understanding how these pieces interact helps you size and operate the system correctly.

Core components inside a portable power station

  • Battery pack: Stores energy, usually rated in watt-hours (Wh). This determines how long you can power your devices.
  • Battery management system (BMS): Monitors cell voltage, current, and temperature to prevent damage.
  • Inverter: Converts DC battery power into AC power for household-style outlets.
  • DC-DC converters: Provide regulated DC outputs (for 12 V sockets and USB ports).
  • Charge controller: Manages solar or other DC input to safely and efficiently charge the battery.

Energy flow: from panel or turbine to your devices

A typical renewable setup follows this path:

  • Solar panel or small turbine produces variable DC power depending on sun or wind.
  • The charge controller inside (or connected to) the power station adjusts voltage and current to match the battery’s needs.
  • The battery stores energy until you plug in a device.
  • The inverter and DC outputs deliver stable AC or DC power to your loads.

Battery chemistry and renewable integration

  • Lithium-ion (NMC and similar): High energy density and relatively light. Well suited for portable use, but more sensitive to high temperatures and repeated deep discharges.
  • LiFePO4 (lithium iron phosphate): Lower energy density and slightly heavier for the same Wh, but very long cycle life and good tolerance for frequent charge/discharge cycles common with solar.
  • Lead-acid (AGM, gel): Heavier and lower usable capacity per rated Wh because deep discharges shorten life. More common in older or budget systems.

For renewable-heavy use (daily solar charging, frequent cycling), LiFePO4 is often preferred for its longevity, while lighter lithium-ion can be attractive when weight and compact size matter more than maximum cycle life.

Matching solar input to the station

Every portable power station specifies a maximum solar input in watts, voltage, and current. Staying within these limits is critical:

  • Voltage (V): Exceeding the maximum PV voltage can damage the charge controller.
  • Current (A): Exceeding the input current limit can trigger protection or reduce efficiency.
  • Power (W): The station will only use up to its rated solar wattage, even if your panel array is larger.

Basic sizing method

To size a portable power station for renewable use, you need to balance three numbers: daily energy consumption, usable battery capacity, and renewable generation potential. The table below shows a simple planning process.

Step What to calculate Example value
1. List devices Note each device’s power (W) and hours of use per day. Laptop 60 W × 4 h, fridge 80 W (duty cycle), lights 10 W × 5 h
2. Daily energy (Wh) Multiply watts × hours and add everything. Laptop 240 Wh + fridge 400 Wh + lights 50 Wh ≈ 690 Wh
3. Add losses Multiply by 1.2–1.4 for inverter and system losses. 690 Wh × 1.3 ≈ 900 Wh
4. Choose battery size Pick a station with usable capacity ≥ step 3. 1,000 Wh station gives margin above 900 Wh need
5. Size solar Daily Wh ÷ peak sun hours ÷ efficiency. 900 Wh ÷ 5 h ÷ 0.8 ≈ 225 W of panels
Basic sizing workflow for a portable power station with solar input. Example values for illustration.

Real-World Examples of Portable Power Stations with Renewable Energy

Abstract numbers are easier to understand when tied to real scenarios. Below are three common setups and how a portable power station and renewables work together in each case.

Example 1: Weekend camping with solar

Use case: A small group on a two-night camping trip wants to power phones, a tablet, LED lights, and a small 12 V cooler.

  • Loads: 4 phones (charging 10 W each for 2 h), 1 tablet (20 W for 3 h), LED strip lights (10 W for 5 h), 12 V cooler averaging 40 W for 8 h/day.
  • Daily energy: Phones 80 Wh + tablet 60 Wh + lights 50 Wh + cooler 320 Wh ≈ 510 Wh.
  • Battery size: With a 1.3 factor, 510 Wh × 1.3 ≈ 660 Wh. A station around 700–1,000 Wh gives comfortable margin.
  • Solar input: In an area with roughly 5 peak sun hours, 660 Wh ÷ 5 ÷ 0.8 ≈ 165 W. A 160–200 W folding solar panel is practical.

Result: The group can run the cooler, charge devices, and fully recharge the station each day in good sun. If a cloudy day occurs, they still have enough stored energy for one night.

Example 2: Home outage backup with rooftop solar

Use case: A household wants to keep essential loads running during short grid outages, using an existing small solar array and a portable station as a flexible battery.

  • Loads: Wi-Fi router (10 W), laptop (60 W for 4 h), LED room lights (30 W for 4 h), small fridge averaging 80 W for 8 h.
  • Daily energy: Router 240 Wh + laptop 240 Wh + lights 120 Wh + fridge 640 Wh ≈ 1,240 Wh.
  • Battery size: 1,240 Wh × 1.3 ≈ 1,612 Wh. A 1,600–2,000 Wh station is appropriate.
  • Solar input: With 4 peak sun hours and 80% efficiency, 1,612 Wh ÷ 4 ÷ 0.8 ≈ 504 W. A 500 W solar input (from rooftop or portable panels) can refill the station daily.

Result: During a daytime outage, solar keeps the station topped up. Overnight, stored energy runs essentials. For longer outages, careful load management (shorter laptop use, fewer lights) extends runtime.

Example 3: Remote work site with mixed charging

Use case: A small field crew runs measurement instruments, a laptop, and battery chargers at a site without grid power for several days.

  • Loads: Laptop 60 W for 6 h, instruments 50 W for 8 h, battery charger 40 W for 2 h, LED work light 20 W for 6 h.
  • Daily energy: Laptop 360 Wh + instruments 400 Wh + charger 80 Wh + light 120 Wh ≈ 960 Wh.
  • Battery size: 960 Wh × 1.3 ≈ 1,248 Wh. A 1,200–1,500 Wh station works.
  • Charging: 200–300 W of solar for daytime, plus vehicle DC charging while driving between sites.

Result: Even if clouds reduce solar output, vehicle charging can top up the station during transit, keeping equipment powered without a fuel generator.

Common Mistakes and Troubleshooting When Using Renewables

Many problems with portable power stations and renewable energy come from a few predictable mistakes. Recognizing them early helps you troubleshoot quickly and avoid permanent damage.

Frequent mistakes to avoid

Mistake Typical symptom What to check or change
Overestimating solar output Battery never reaches full charge; devices shut off at night. Use realistic sun hours (often 3–5), and consider panel orientation and shading. Increase panel wattage or reduce loads.
Exceeding PV voltage limit Station refuses to accept solar input or shows error codes. Re-wire panels from series to parallel or reduce panel count so open-circuit voltage stays within the station’s PV limit.
Ignoring inverter surge ratings Station shuts down when starting a fridge, pump, or power tool. Check appliance startup (surge) watts; choose a station with sufficient surge capacity or avoid that load.
Running batteries to 0% regularly Noticeably reduced runtime after a few months of heavy use. Aim to keep discharge above 10–20% when possible, especially for non-LiFePO4 chemistries.
Using thin or long DC cables Panels show good sun but charging is slow; cables feel warm. Use appropriately sized cables for current and distance to reduce voltage drop and heating.
Common issues when pairing portable power stations with solar and how to correct them. Example values for illustration.

Troubleshooting slow or no solar charging

  • Check panel orientation: Point panels directly at the sun and tilt them according to your latitude and season.
  • Inspect for shading: Even small shadows from branches or roof rails can drastically cut output.
  • Verify connections: Confirm all connectors are fully seated and polarity is correct.
  • Measure open-circuit voltage: If you have a meter, compare panel voltage in sun to its rated value; a large difference may indicate damage.
  • Confirm input settings: Some stations have multiple DC inputs or modes. Ensure the correct input is selected and enabled.

Troubleshooting fast battery drain

  • Identify hidden loads: Check for devices left plugged in (routers, chargers, small heaters) that run continuously.
  • Monitor inverter use: AC inverters are less efficient at low loads. If possible, power small devices from DC or USB instead of AC.
  • Watch for cold temperatures: Cold batteries deliver less usable capacity. Expect reduced runtime in freezing conditions.
  • Compare actual vs. planned use: Log your daily Wh usage for a day or two to see if it matches your earlier estimates.

When to reduce load vs. increase generation

If you frequently hit low battery before the end of the day, you can either reduce consumption or add more solar (or other charging). Often, a mix works best: switch some devices to DC, shorten run times on high-power loads, and increase panel wattage if your station can accept it.

Safety Basics with Batteries, Solar, and Inverters

Portable power stations are designed to be user friendly, but they still store and move substantial energy. Following basic safety practices protects both your equipment and the people around it.

Electrical and thermal safety

  • Avoid overloading outputs: Stay within the continuous and surge watt ratings of the inverter and DC outputs.
  • Provide ventilation: Do not cover vents or operate the station in tightly enclosed spaces where heat cannot escape.
  • Keep away from flammable materials: Place the station on a stable, nonflammable surface, especially under high loads or while fast charging.
  • Use appropriate extension cords: For AC loads, use cords rated for the current and length required to minimize heating.

Safe use with external generators and vehicles

  • Never run fuel generators indoors: Only use them outside and away from windows and doors to avoid carbon monoxide buildup.
  • Protect against backfeed: Do not connect a portable station directly into household wiring unless a proper transfer mechanism and qualified installation are in place.
  • Vehicle charging: Ensure cables are routed to avoid pinch points, sharp edges, and hot engine components.

Environmental and handling considerations

  • Moisture protection: Keep the station and connections dry. If you must operate in damp conditions, protect the unit under a shelter with adequate ventilation.
  • Transport: Handle the station carefully, avoid dropping it, and follow any transport restrictions for large lithium batteries, especially for air travel.
  • End-of-life: When the battery reaches the end of its useful life, use appropriate recycling or disposal channels according to local regulations.

Maintenance and Long-Term Use with Renewable Charging

Regular maintenance extends the life of both your portable power station and your renewable charging equipment. Most tasks are simple and can be done with basic tools.

Battery care over time

  • Avoid extreme states of charge: For frequent cycling, operating mostly between about 20% and 80% can reduce wear, especially on non-LiFePO4 chemistries.
  • Limit heat exposure: Do not leave the station in hot vehicles or in direct sun for long periods.
  • Exercise the battery: If stored for months, run a partial discharge and recharge cycle a few times per year to keep cells balanced.

Solar panel and wiring upkeep

  • Clean panel surfaces: Dust, pollen, and bird droppings can noticeably reduce output. Clean gently with water and a soft cloth when cool.
  • Inspect connectors: Look for corrosion, bent pins, or loose locking mechanisms.
  • Check cable strain relief: Ensure cables are not hanging by their connectors or under constant tension.

Storage best practices

  • State of charge for storage: Many lithium-based stations prefer storage around 30–60% charge rather than full or empty.
  • Temperature: Store in a cool, dry place away from direct sunlight and freezing conditions.
  • Periodic checks: Every few months, verify charge level and top up if it has dropped significantly due to self-discharge.

Simple maintenance schedule

  • Before each trip or season: Test the station with typical loads, confirm solar input works, and inspect cables.
  • Every 3–6 months: Clean panels, check for firmware updates if available, and run a controlled discharge/recharge cycle.
  • Annually: Review your energy needs; if your usage has grown, consider whether your current station and solar setup still match your requirements.

Practical Takeaways and Specs to Look For

Bringing everything together, a good portable power and renewable setup starts with realistic expectations about energy use and solar or wind availability, then matches equipment to those needs.

Key takeaways

  • Size your station by daily watt-hours, not just by peak watts or marketing labels.
  • Plan for real-world solar output using conservative sun-hour estimates and some margin.
  • Respect input voltage and current limits to protect the built-in charge controller.
  • Use DC outputs where possible to minimize conversion losses from the inverter.
  • Prioritize battery chemistries and capacities that fit how often and how deeply you will cycle the system.

Specs to look for when choosing a portable power station for renewables

  • Battery capacity (Wh): Compare to your calculated daily energy needs with at least 20–30% headroom.
  • Battery chemistry: LiFePO4 for frequent cycling and longevity; other lithium chemistries when weight and compact size are more important.
  • AC inverter rating: Continuous watts at least equal to your largest expected load, with surge capacity for motors and compressors.
  • Solar input rating: Maximum watts, voltage, and current that match the panels you plan to use.
  • Charge controller type: MPPT generally harvests more energy from solar than simpler control methods, especially in variable conditions.
  • DC output options: 12 V sockets, regulated DC outputs, and multiple USB ports for efficient low-voltage use.
  • Display and monitoring: Clear readouts for input watts, output watts, and state of charge to help manage energy use.
  • Cycle life rating: Number of cycles to a given remaining capacity (for example, 80%) to estimate long-term durability.
  • Operating temperature range: Suitability for your climate, especially if you plan to use the station in hot vehicles or cold environments.
  • Physical form factor: Weight, handle design, and overall size, particularly if you will move the station frequently.

By focusing on these specifications and applying the simple sizing and troubleshooting steps in this guide, you can build a portable renewable power system that is reliable, efficient, and well matched to how you actually use electricity off the grid.

Source, buffer, and load-shifting roles

In a small renewable setup, portable storage can serve three different roles: a direct source for selected devices, a buffer between intermittent generation and the load, or a way to move limited energy from one time of day to another. The useful role depends on battery capacity, inverter output, charging rate, and the amount of renewable energy actually available.

A portable station remains a plug-in appliance unless the manufacturer documents another approved configuration. Do not backfeed a household outlet or improvise a grid connection. Systems intended to interact with household wiring require compatible transfer equipment and qualified installation.

Frequently asked questions

What specs and features matter most when selecting a portable power station for renewable charging?

Prioritize usable battery capacity (Wh), inverter continuous and surge ratings, and the station’s maximum solar input (watts, voltage, current). Also consider charge controller type (MPPT vs. PWM), battery chemistry and cycle life, available DC outputs, and monitoring features to manage real-world energy flows.

How can I avoid overestimating the solar output for daily charging?

Use conservative peak-sun-hour estimates for your location, account for panel orientation, seasonal variation, and shading, and include system losses in your calculations. Plan a margin of extra panel capacity or reduce loads to avoid shortfalls on cloudy days.

Are portable power stations safe to use indoors or in enclosed spaces?

Portable battery stations are generally safer indoors than fuel generators because they do not emit exhaust, but they still produce heat and must be ventilated. Avoid covering vents, keep units away from flammable materials, and follow manufacturer guidance on operating temperature and placement.

How do I size a portable power station for my daily energy needs with solar panels?

Estimate your total daily watt-hours for all loads, multiply by a factor for inverter and system losses (typically 1.2–1.4), and choose a station with usable capacity at or above that number. Size solar wattage by dividing required daily Wh by peak sun hours and panel-to-battery efficiency to determine needed panel power.

Can I charge a portable power station from solar panels and a vehicle at the same time?

Some stations support multiple simultaneous inputs, but you must check the combined input limits and the BMS behavior. Using both sources can speed charging if the total does not exceed the station’s rated voltage, current, or overall power input limits.

What routine maintenance helps extend the life of a power station used with renewables?

Store the battery at a moderate state of charge (often 30–60%), avoid exposing it to extreme temperatures, clean and inspect solar panels and connectors regularly, and perform occasional controlled discharge/recharge cycles. Also check for firmware updates and address any connector corrosion or cable strain issues promptly.