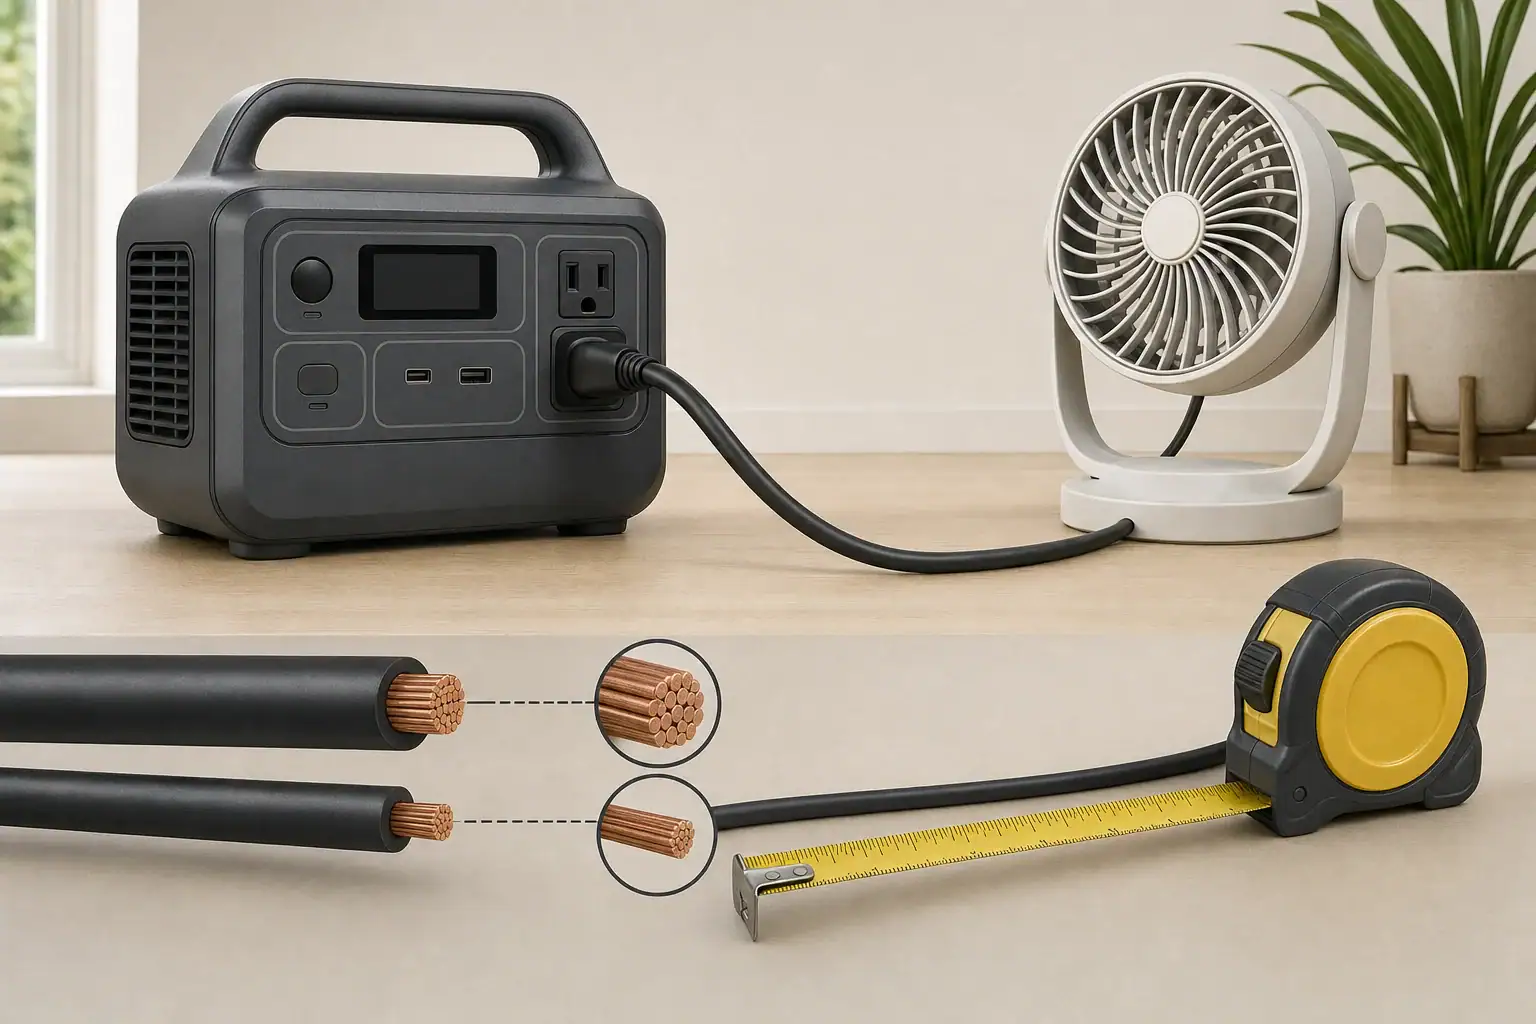
Quick answer: For AC extension cord voltage drop with portable power stations, use the appliance nameplate amps first. Choose the shortest listed cord whose printed rating covers the load, then check gauge and length with a voltage-drop calculation. Lower AWG numbers generally mean larger conductors and less calculated drop.
AC extension cord voltage drop: gauge, length, and load
An extension cord has to meet three separate limits: the appliance demand, the cord’s printed rating, and the portable power station’s AC-output limits. Wire gauge and length affect voltage drop, but a favorable calculation does not make an underrated cord or power station suitable.
For a 120 V setup, use the table below as a conservative planning check based on a 3% calculated voltage-drop target. It assumes copper conductors at a 20°C reference temperature and the stated current flowing continuously. It is not an ampacity table, a legal limit, or a guarantee that every appliance will operate correctly.
Approximate maximum one-way cord length at a 3% calculated voltage-drop target
Assumed load
16 AWG
14 AWG
12 AWG
10 AWG
600 W / 5 A
90 ft
143 ft
226 ft
360 ft
1,200 W / 10 A
45 ft
71 ft
113 ft
180 ft
1,500 W / 12.5 A
36 ft
57 ft
91 ft
144 ft
1,800 W / 15 A
30 ft
48 ft
75 ft
120 ft
How to use the table: Select a practical cord shorter than the listed length, then confirm its printed current or wattage rating covers the appliance. Also confirm the station’s continuous AC-output rating, any receptacle-specific limit, and its total output shared with other connected loads.
The calculation uses copper resistance values of approximately 4.02, 2.52, 1.59, and 0.9988 ohms per 1,000 feet for 16, 14, 12, and 10 AWG respectively at 20°C, from the NIST Copper Wire Tables. Actual cord assemblies can differ because conductor temperature, stranding, plugs, receptacles, and contact condition add variables.
Find the appliance current before choosing a cord
Use the appliance nameplate input amperage when it is available. Read the appliance manual as well, particularly if it gives extension-cord instructions or identifies a startup requirement.
For single-phase AC, the relationship is:
watts = volts × amps × power factor
Dividing watts by 120 V is therefore a useful estimate only for a load with power factor near 1. For example, a hypothetical 1,200 W resistance load at 120 V draws about 10 A. Motors and electronic power supplies can have a power factor below 1, so their real watts alone may not reveal current. The DOE Electrical Science handbook explains the relationship among true power, apparent power, and power factor.
If power factor or starting current is unknown, do not invent a multiplier. Use the appliance nameplate and manual. A motor may draw more current while starting, but the amount and duration depend on the specific appliance.
Calculate AC extension cord voltage drop
For a two-conductor 120 V load circuit, an idealized calculation is:
voltage drop = 2 × one-way length (ft) × current (A) × resistance (ohms per 1,000 ft) ÷ 1,000
The factor of two accounts for the outgoing and return conductors. Convert the result to a percentage with:
drop percentage = voltage drop ÷ supply voltage × 100
Illustrative calculation: 1,200 W resistance load on a 50-foot cord
Assumptions: 120 V station output, power factor near 1, 10 A load current, a 50-foot one-way cord length, and the NIST 20°C reference resistance. This is a calculation, not a measurement of a particular cord or station.
16 AWG:2 × 50 ft × 10 A × 4.02 ohms/1,000 ft ÷ 1,000 = 4.02 V. That is about 4.02 ÷ 120 × 100 = 3.35%.
12 AWG:2 × 50 ft × 10 A × 1.59 ohms/1,000 ft ÷ 1,000 = 1.59 V. That is about 1.59 ÷ 120 × 100 = 1.33%.
Under these assumptions, the 12 AWG cord has less calculated drop than the 16 AWG cord. Neither result establishes the cord’s allowable current rating; the cord’s own printed marking remains controlling.
Check the appliance, cord, and power station separately
Appliance: Check nameplate amps, operating voltage, and manufacturer instructions. Do not assume that a station can start a motorized appliance just because its listed running watts fit.
Cord: Check the printed current or wattage rating, conductor gauge, jacket marking, and indoor or outdoor designation. Select a listed cord appropriate for the environment and inspect it before use.
Power station: Check the exact model’s continuous AC-output rating, total shared-output limit, surge specification, receptacle limits, and displayed warnings or fault indicators.
The DOE Electrical Safety handbook identifies conductor gauge, cord length, intended use, inspection, environmental markings, and NRTL listing as relevant cord-selection considerations.
Power-station specifications are model-specific. For example, the EcoFlow DELTA user manual lists AC specifications and protection functions for that model only. Do not transfer those values to another station. A station’s surge rating also does not authorize operation above its continuous rating.
When a shorter or heavier cord may help
A cord may be worth investigating when an appliance runs directly from the station but not through the cord, a motor struggles to start, lights dim markedly under load, or a shutdown appears only with the extension cord connected. These signs do not prove voltage drop: overload, startup demand, temperature protection, a low battery, appliance protection, or a damaged connection can also be involved.
Use a controlled direct-versus-cord check
Disconnect other AC loads. Note the station battery level and any displayed fault indication.
If the appliance manufacturer permits it, connect the appliance directly to the station and observe whether it operates normally.
Repeat with the extension cord, without changing the appliance or station settings.
If the issue occurs only with the cord, inspect its printed rating, length, gauge, plugs, and receptacle fit. A shorter appropriately rated cord or a lower-AWG listed cord can reduce calculated drop.
Stop using the cord if insulation is damaged or if there are bent contacts, discoloration, an abnormal odor, arcing, or an unusually hot plug or connector.
Do not repeatedly reset an overload or protection fault without identifying the cause. Follow the appliance and station manuals for model-specific warnings and service guidance.
Watts, watt-hours, and runtime
Watts (W) describe instantaneous load and help determine whether the station and cord can support an appliance. Watt-hours (Wh) describe stored energy and are used for runtime planning.
A simple Wh ÷ W result is an idealized estimate, not a promised AC runtime. Inverter operation and cord resistance consume some energy, and results vary with the station, load, cord, connections, and operating conditions.
This article covers cords connected to a power station’s AC receptacle. Solar-extension cables are DC equipment with different voltage, current, connector, polarity, and compatibility requirements; select them only according to the solar source and power-station manuals.
Bottom line
Start with nameplate amps, verify the printed ratings of the appliance, cord, and power station separately, and calculate drop for the intended one-way cord length. When two cords meet all applicable ratings, the shorter cord or the one with the lower AWG number will generally have less calculated voltage drop.
The most common reasons a portable power station will not turn on after storage are a deeply discharged battery, an activated low-voltage cutoff, sleep mode, an unsuitable temperature, or a charging problem. The battery management system may intentionally keep the unit off until it detects a valid charging input and the cells recover to a safe voltage.
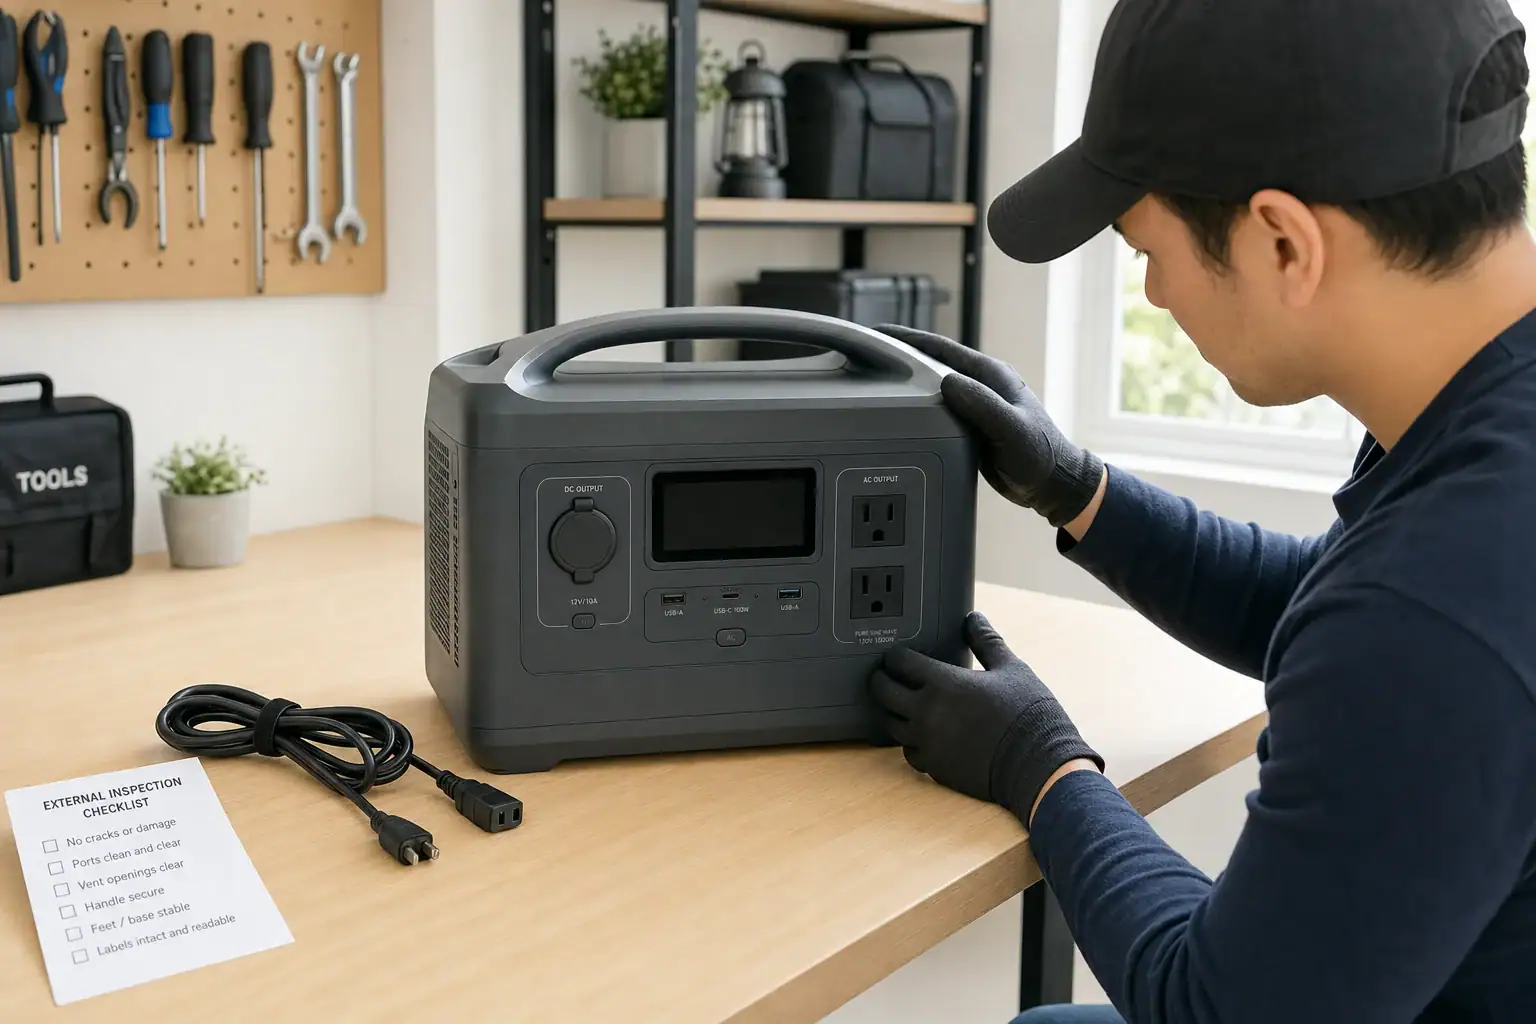
Start with an external inspection, bring the unit to a moderate indoor temperature, and connect the correct charger directly to a working wall outlet. Allow time for charging before testing the main power control, display, USB ports, and AC output separately. A blank screen does not always mean the battery has failed.
Do not open the enclosure, bypass protection circuits, or repeatedly force the unit to start. If it shows swelling, leakage, impact damage, unusual heat, odor, or persistent fault codes, stop using it and seek qualified service.
1. What an After-Storage No-Power Condition Means
A portable power station that appears dead after storage may have no display, no indicator lights, no response from its power button, or no output even though the screen works. These symptoms are related but do not always have the same cause.
Rechargeable cells gradually lose energy while sitting unused. The display, wireless features, control electronics, and battery management system can also consume a small amount of standby power. If the battery reaches its low-voltage threshold, internal protection may disconnect the outputs. This prevents further discharge that could damage the cells.
Why this matters is that a protected battery and a failed battery can look similar from the outside. Safe troubleshooting focuses first on temperature, charging equipment, controls, and visible condition. It does not require opening the power station or accessing the battery pack.
2. How Storage, Charging, and Battery Protection Interact
Most portable power stations contain a battery pack, a battery management system, charging electronics, an inverter for AC power, and separate DC or USB output circuits. The battery management system monitors factors such as cell voltage, current, and temperature. It may block charging or discharging when readings fall outside the unit’s operating range.
During long storage, self-discharge and standby loads can gradually lower the state of charge. A battery stored nearly empty is more likely to reach its protective cutoff than one stored at a moderate charge. Very hot storage can accelerate aging, while very cold conditions may temporarily prevent charging.
Recovery normally begins when the charging port receives the expected voltage and current from a compatible source. Some units need several minutes before the screen responds. A severely depleted unit may require substantially longer before it can power an output. The main power control and individual AC or DC output controls may also need to be activated separately.
A charger can fit physically but still provide the wrong voltage, polarity, connector behavior, or USB-C PD profile. Solar input may also be too weak or unstable for initial recovery. A compatible wall charger is generally the clearest test because it removes sunlight and panel positioning as variables.
Observed symptom
Possible explanation
Safe first check
No display or lights
Deep discharge, sleep state, or no charging input
Use the specified wall charger and wait
Charging icon appears, then stops
Temperature protection or charger mismatch
Move indoors and verify charger specifications
Display works but AC does not
AC output is off, overloaded, or protected
Disconnect loads and activate AC output
Unit shuts off immediately
Battery remains too low or a fault is present
Recharge without connected loads
Example values for illustration.
3. Illustrative After-Storage Scenarios
A unit stored nearly empty
Suppose a power station was put away at 8% charge and left for six months. Standby consumption and self-discharge could bring it to the low-voltage cutoff. When first connected, its screen may remain blank for 10 to 30 minutes while the charging circuit supplies a small recovery current. Leaving it connected to a verified charger is more useful than repeatedly pressing the power button.
A cold power station brought in from a garage
A unit stored below freezing may refuse to charge because charging cold lithium-based cells can be unsafe. Moving it to a dry indoor location and allowing the entire enclosure to reach room temperature may resolve the issue. External heating, heat guns, radiators, and heated blankets should not be used.
A working display with no appliance power
If the display turns on but a connected appliance does not, the battery itself may not be the problem. The AC inverter may be switched off, or the appliance may demand more startup surge watts than the inverter can supply. Testing the station with no load, then with one small compatible load, helps distinguish an output setting from a complete no-power condition.
4. Safe Troubleshooting Steps and Common Mistakes
Inspect the exterior. Check for swelling, cracks, corrosion, liquid, burned areas, damaged ports, or a chemical odor. Do not charge a visibly damaged unit.
Stabilize the temperature. Place the power station in a dry, ventilated indoor area at a moderate temperature. Allow several hours after exposure to significant heat or cold.
Disconnect every load. Remove appliances, USB devices, solar panels, and vehicle charging cables. An attached load can consume the limited recovery current or trigger overload protection.
Verify the outlet and charger. Test the wall outlet with another simple device. Use charging equipment that matches the power station’s required input voltage, current, connector, and protocol.
Connect charging power and wait. Watch for a charging icon, input-watt reading, indicator light, fan movement, or other normal response. Follow the manual’s expected recovery and charging time rather than repeatedly reconnecting the cable.
Try the specified power-button action. Some controls require a brief press, while others require holding the button for several seconds. Use only the documented reset procedure, if one exists.
Test outputs separately. After the battery has gained charge, turn on the station without a load. Then activate one output group and connect one low-power device.
Common mistakes include trying to wake the unit only from a weak solar panel, using a random adapter because the plug fits, testing it while a high-surge appliance remains attached, or assuming that an inactive AC outlet means the entire battery is dead. Repeated button pressing usually does not correct an input, temperature, or battery-protection problem.
5. Battery and Electrical Safety Basics
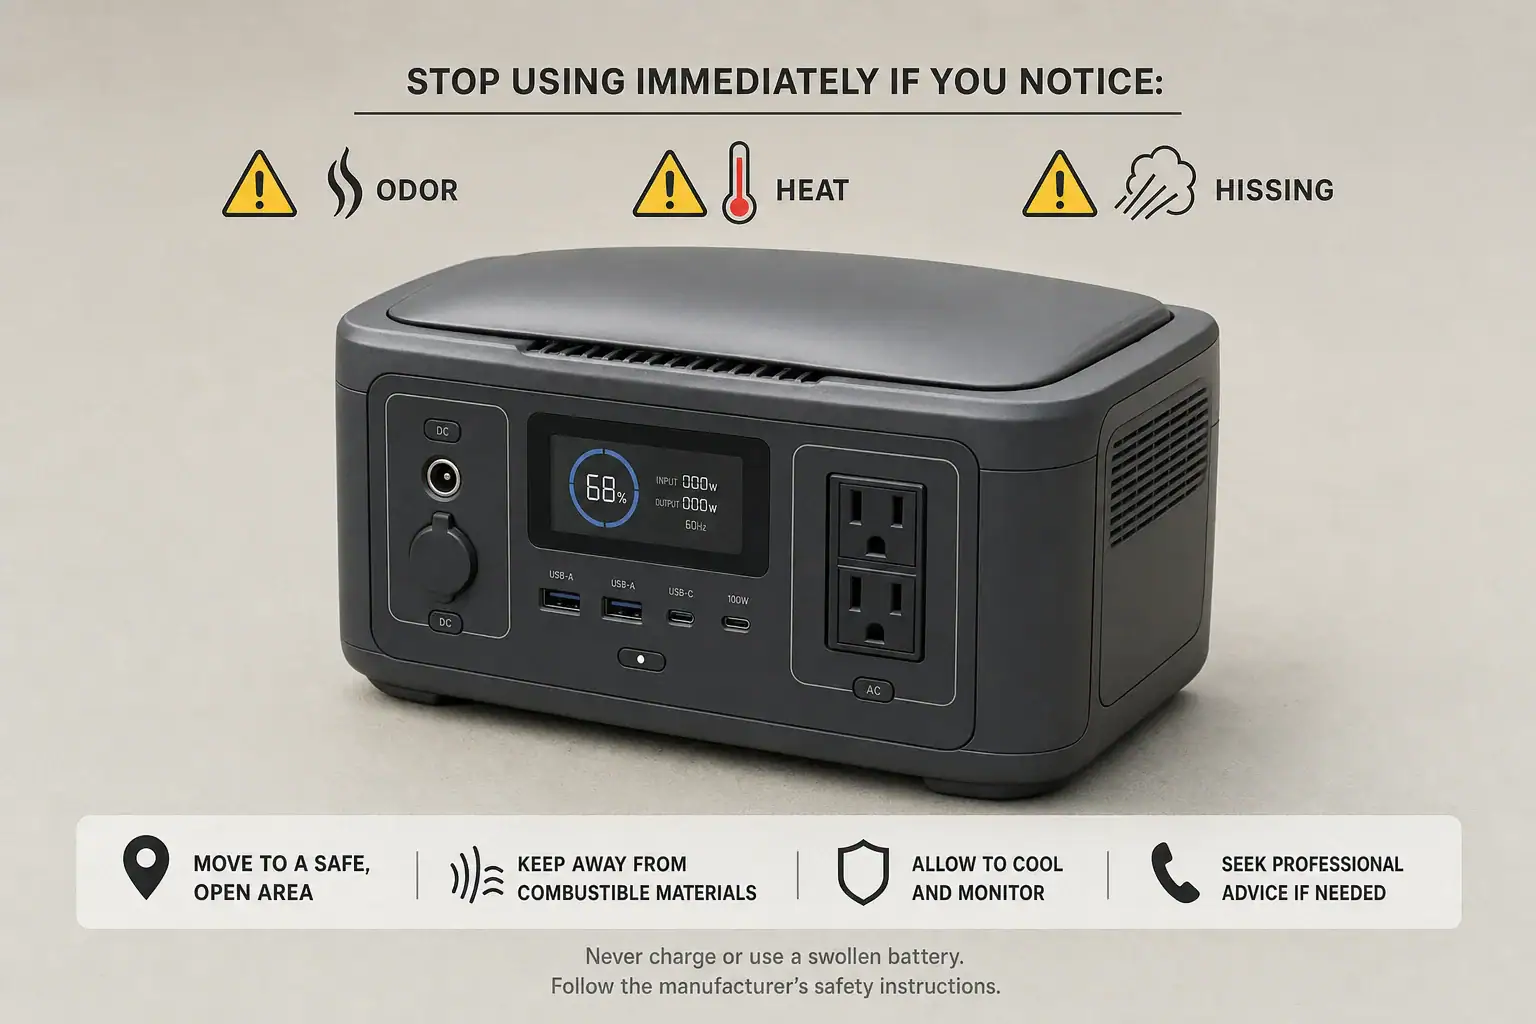
Stop troubleshooting if the enclosure is swollen, unusually hot, hissing, leaking, smoking, or producing a sharp or sweet chemical odor. Move away from the immediate area and follow local emergency guidance when there is smoke, fire, or a rapidly heating battery. Do not handle leaking material with bare hands.
Charge the power station on a stable, dry, nonflammable surface with open airflow around it. Keep vents uncovered and keep the unit away from water, fuels, direct sunlight, and heaters. Do not leave a questionable or previously damaged battery charging unattended.
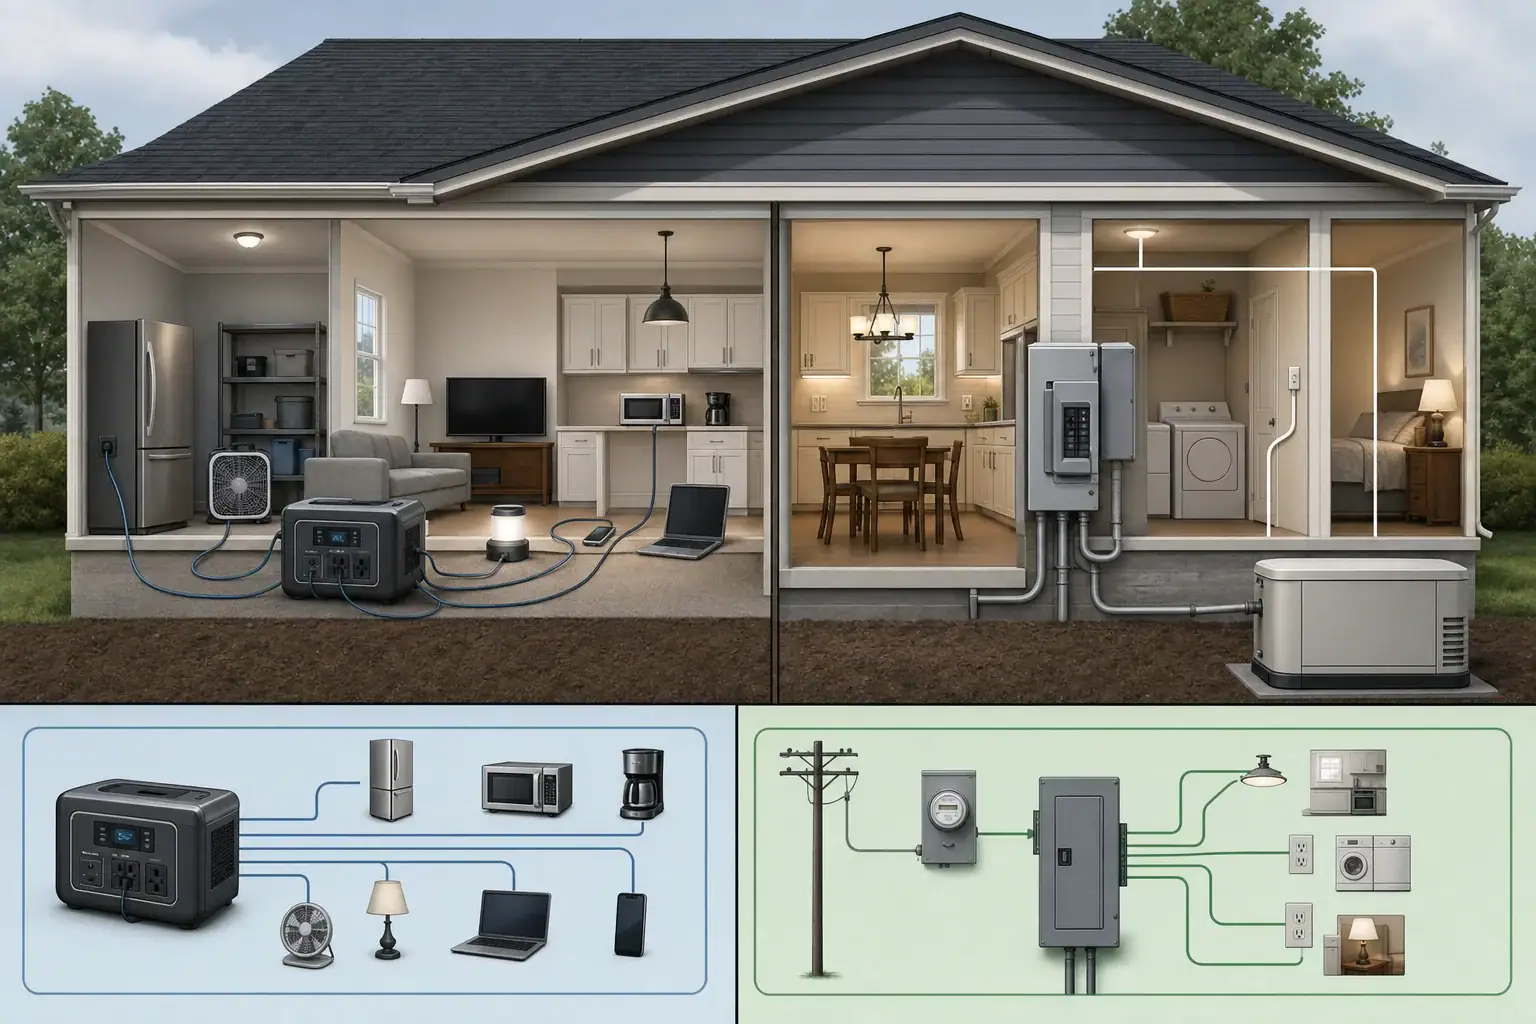
Never open the enclosure, probe internal terminals, replace internal cells, bypass a fuse or battery management system, or use improvised wiring to force a charge. These actions can create shock, short-circuit, and fire hazards. Also, do not connect a portable power station directly to home wiring, an electrical panel, or a wall receptacle. Any home backup connection requires suitable listed equipment and a qualified electrician.
Professional evaluation is appropriate when a verified compatible charger produces no response after the documented charging period, the same fault code repeatedly returns, the case is damaged, or the power station becomes abnormally hot with no load.
6. Storage and Maintenance That Reduce Future Problems
Store a portable power station with a moderate charge rather than completely full or nearly empty unless its instructions specify otherwise. For many designs, roughly 40% to 70% is a practical storage target. The exact recommendation varies with battery chemistry and control software.
Power the unit on periodically and check its displayed charge. A check every three to six months is a reasonable starting point, but units with active wireless functions or greater standby consumption may need attention sooner. Recharge when the level approaches the lower end of the recommended storage range.
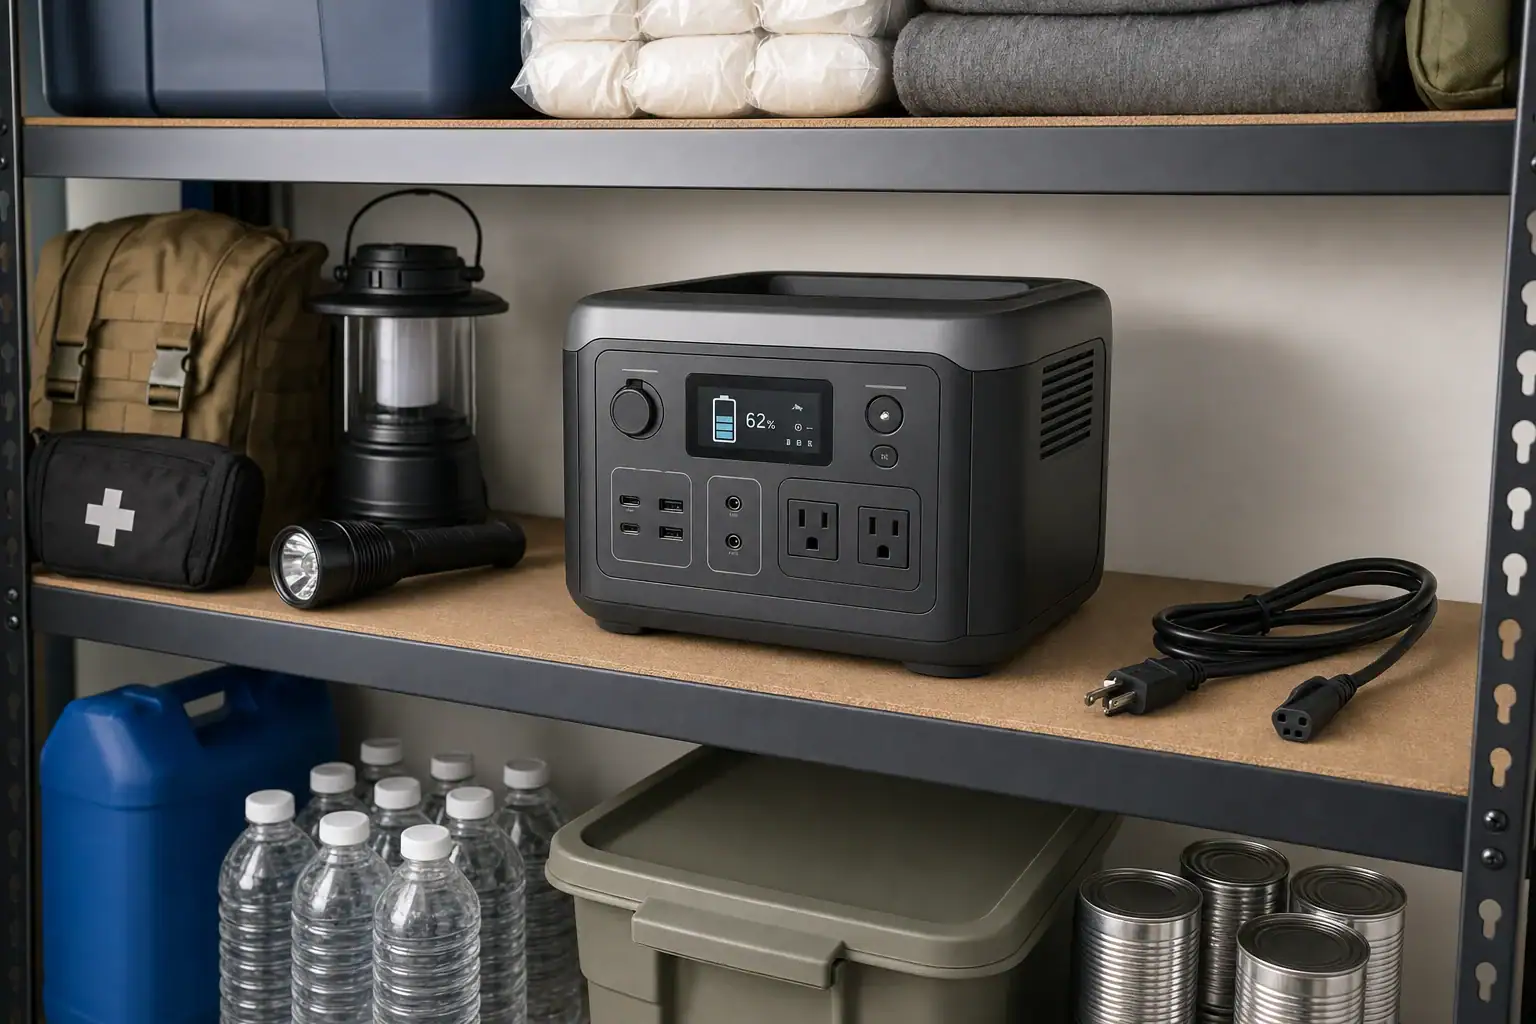
Turn off AC, DC, USB, wireless connectivity, and always-on display features before storage when those controls are available. Store the charger with the station so the correct input equipment is easy to identify later. Protect ports from dust without sealing the whole unit in a way that traps moisture.
Choose a cool, dry location with stable temperatures. Avoid vehicle interiors, unconditioned sheds, damp basements, and areas where the unit could freeze or overheat. Before returning it to storage, inspect cables and record the date and approximate state of charge.
When a portable power station will not turn on after storage, begin with condition, temperature, charger compatibility, and adequate charging time. Test it without attached loads, follow its documented control sequence, and treat fault indicators as protective information rather than obstacles to bypass. A unit that remains unresponsive after these checks may have an aged battery, failed charger, damaged input circuit, or internal fault requiring qualified service.
Storage-friendly design features can make future diagnosis easier. Clear input readings, accessible charging options, understandable fault messages, and low standby consumption are often more useful than capacity alone.
Specs to look for
Battery chemistry and cycle life: Look for a stated chemistry and an example rating such as 2,000 to 4,000 cycles to 80% capacity; this helps estimate long-term durability.
Recommended storage charge: Look for a documented range, often around 40% to 70%; clear guidance reduces deep-discharge risk.
Standby consumption: Look for automatic shutdown or a standby draw stated in watts; lower draw helps preserve charge during storage.
AC charging input: Look for enough input power to recharge in roughly 1.5 to 6 hours; faster recovery can simplify periodic maintenance.
USB-C PD input: Look for clearly listed profiles such as 60, 100, or 140 watts; protocol details prevent charger compatibility confusion.
Operating and charging temperatures: Look for separate published ranges; charging limits are often narrower and explain cold-weather lockouts.
Display diagnostics: Look for battery percentage, input watts, output watts, temperature warnings, and fault codes; these readings make no-power issues easier to identify.
Protection features: Look for low-voltage, overtemperature, overload, and short-circuit protection; these controls reduce damage when conditions are unsafe.
Warranty and serviceability: Look for several years of coverage, documented support procedures, and replaceable external charging cables; these matter if recovery checks fail.
If the station recovers, charge it to the level recommended for immediate use or storage and monitor its behavior during the next few cycles. Rapid self-discharge, unexpected shutdowns, or recurring fault codes can indicate declining battery health even when the unit temporarily turns on.
Frequently asked questions
Why is my portable power station not turning on after being stored?
A portable power station may be deeply discharged, in sleep mode, outside its safe temperature range, or not receiving a compatible charging input. Its battery management system may disable operation at a low battery voltage to protect the cells. Connect the specified charger to a verified wall outlet and allow the unit time to recover before testing it again.
How long should I charge a portable power station before trying to turn it on?
The required time depends on the battery level, charger output, and the unit’s recovery behavior. A deeply discharged station may show no display for several minutes and can need much longer before it has enough charge to run outputs. Follow the documented charging period for the model and avoid repeatedly disconnecting and reconnecting the charger.
Can cold weather stop a portable power station from charging or starting?
Yes, low temperatures can temporarily prevent charging and may affect startup behavior. Bring the unit into a dry, moderate-temperature indoor space and allow the entire enclosure to return to room temperature naturally. Do not use direct external heat, such as a heater, heat gun, or heating blanket, to warm it.
What is a common mistake when a portable power station will not turn on after storage?
A common mistake is using an adapter simply because its plug fits the charging port. The charger may still have an incompatible voltage, current, polarity, or USB-C power-delivery profile. Another frequent error is testing the station while a high-power appliance remains connected and triggers overload protection.
What specs and features matter most for preventing storage-related power issues?
Useful features include low standby consumption, automatic shutdown controls, clear battery and input-watt readings, fault-code diagnostics, and published charging-temperature limits. Look for documented storage-charge guidance and compatible charging-input specifications as well. These details make it easier to maintain the battery and identify whether a no-power condition is caused by storage, charging, or an output setting.
When is it unsafe to troubleshoot a portable power station?
Stop using the unit if it is swollen, leaking, smoking, hissing, unusually hot, visibly damaged, or producing a chemical odor. Do not open the enclosure, bypass protective circuits, or attempt to force a charge with improvised wiring. Seek qualified service, and follow local emergency guidance if there is smoke, fire, or rapid heating.
If a portable power station battery swells, smells, or hisses, stop using and charging it immediately, keep people away, and contact emergency services if it is hot, smoking, or actively venting.
A swollen battery, unusual chemical smell, or hissing battery can indicate internal cell damage, battery venting, or the early stages of thermal runaway. These are not normal operating conditions and should not be addressed by opening the enclosure, pressing a bulge flat, or attempting another charge cycle.
If the unit is cool and stable, disconnect external cables only when that can be done without touching a deformed, hot, leaking, or smoking area. Do not approach or move a unit that is rapidly heating, making loud venting sounds, or producing smoke. Leave the area, avoid inhaling fumes, and call emergency services. A damaged power station generally requires professional evaluation and disposal rather than continued use.
1. What Swelling, Odor, and Hissing Mean
Portable power stations typically contain lithium-ion battery cells, monitoring electronics, an inverter, and charging hardware inside one enclosure. A change in the enclosure’s shape or an unexpected sound or odor can mean that one or more cells are producing heat or gas because of internal damage or decomposition.
Swelling occurs when gas accumulates inside a cell or battery assembly. The outer case may bow, seams may separate, buttons may become misaligned, or a flat surface may no longer sit level. Even a small new bulge is significant because a healthy enclosure should not be pushed outward by the battery.
Unusual odor may be described as sweet, solvent-like, metallic, fruity, sharp, or similar to nail-polish remover. Odor descriptions are subjective, so any new chemical smell coming from the unit should be treated as abnormal. Do not lean over the power station or sniff vents to identify it.
Hissing, popping, or crackling can indicate gas escaping through a cell vent, internal arcing, or rapidly progressing failure. A normal cooling fan produces steady airflow or a smooth mechanical sound; it should not sound like pressurized gas, frying, or repeated pops.
These warning signs matter because a damaged cell can move from a stable condition to intense heating with little notice. The battery management system may disconnect electrical current, but it cannot reverse physical cell damage or guarantee that a compromised cell will remain cool.
2. How Battery Failure Can Progress
Battery cells store energy through controlled chemical reactions. Crushing, puncture, manufacturing defects, severe heat, internal contamination, overcharging, or aging can damage the thin separator between internal layers. If that separator fails, an internal short circuit may generate heat faster than the pack can release it.
Early signs can include an unexplained state-of-charge change, localized warmth, reduced runtime, charging interruptions, error messages, or a new odor. Gas generation may then cause swelling or venting. In a serious event, rising temperature can accelerate chemical reactions and affect neighboring cells. This self-heating chain reaction is called thermal runaway.
The built-in battery management system normally monitors cell voltage, current, and temperature. It can stop charging or shut down output when readings leave its programmed range. Fuses, thermal sensors, flame-resistant barriers, and spacing can add protection. However, no electronic protection can make a physically damaged pack safe to recharge.
The immediate response depends on what the unit is doing. A cool, silent unit with slight deformation still needs to be retired from service. A hot, hissing, leaking, or smoking unit is an active emergency. In that situation, distance and evacuation are more important than saving the equipment or unplugging every cable.
Observed condition
Possible meaning
Appropriate response
Slight new bulge; unit is cool and silent
Gas generation or internal mechanical damage
Do not charge or use; isolate access and arrange professional disposal
New chemical odor without visible smoke
Electrolyte vapor or another overheated component
Move away, ventilate from a safe location, and avoid further operation
Hissing, popping, rapid heating, or smoke
Active venting or possible thermal runaway
Evacuate, call emergency services, and do not approach
Fan noise only during a heavy load
Potentially normal cooling operation
Remove the load if concerned and check whether the sound stops without other warning signs
Example values for illustration.
3. Real-World Warning Sign Examples
A case that no longer sits flat
A power station stored for several months may rock on a level floor or show a widening seam. It may still turn on and report a normal charge percentage. That display does not prove the cells are healthy. The correct response is to leave it off, prevent accidental use, and arrange guidance from the manufacturer, seller, or a qualified battery recycling facility.
An odor noticed during charging
A new solvent-like smell may appear near the unit while it is connected to AC or solar charging. If it is safe to do so without approaching heat, smoke, deformation, or leaking material, power can be disconnected at the remote source or wall outlet. People should then leave the immediate area. Charging must not be restarted to see whether the smell returns.
Hissing after an impact
A unit dropped from a vehicle or shelf may look mostly intact but begin hissing or growing warm. Internal cells can be damaged without obvious external cracks. Do not pick it up, place it in a vehicle, or carry it through a building. Keep others away, evacuate if the sound continues or smoke appears, and contact emergency services.
Heat after a high-power load
Warm exhaust air and fan noise can be normal when an inverter supplies a demanding appliance. Warning cues include one unusually hot spot, a case that remains hot after shutdown, acrid odor, swelling, crackling, or smoke. If those cues are absent, the issue may be ordinary cooling or an overload shutdown. If any are present, treat the unit as damaged rather than testing it with a smaller appliance.
4. Common Mistakes and Troubleshooting Cues
A frequent mistake is assuming that the battery management system makes every failure harmless. Protection circuits reduce risk, but they do not repair crushed separators, contaminated cells, electrolyte leaks, or damage caused by extreme temperatures.
Restarting or recharging the unit: Additional current can increase heat in a compromised cell. Do not perform a test charge after swelling, venting, leakage, or a chemical odor.
Opening the enclosure: This can expose energized conductors, damaged cells, and irritating or flammable material. Internal inspection and pack replacement are not appropriate user troubleshooting steps.
Pressing, puncturing, or clamping a bulge: Mechanical pressure can rupture a cell or trigger an internal short circuit.
Putting an active unit in a sealed container: A venting battery can release heat and gas. Confinement may allow pressure and flammable vapor to accumulate.
Transporting it in a passenger vehicle: A damaged battery can worsen in transit and expose occupants to heat or fumes. Ask the appropriate waste or emergency authority how it should be handled.
Confusing fan noise with hissing: A fan usually has a consistent whir and may change speed with load. Venting may sound sharp, irregular, or pressurized and may accompany odor, heat, or deformation.
Using the display as proof of safety: A normal voltage or battery percentage does not reveal every internal defect.
Troubleshooting should be limited to observation from a safe distance and review of the operating history. Note whether the unit was recently dropped, exposed to water, left in a hot vehicle, charged below freezing, overloaded, or stored at full charge in heat. Do not recreate the event to confirm the cause.
5. High-Level Safety Response
Stop using the power station as soon as any credible warning sign appears. Tell nearby people not to touch it, keep children and pets away, and avoid breathing fumes. If the unit is connected to a source or appliance, disconnect it only when the connection can be reached safely without moving over or beside the battery.
For smoke, flames, rapid heating, loud hissing, repeated popping, or visible vapor, leave the area and call emergency services. Close a door behind you when practical, but do not delay evacuation to move the unit, retrieve belongings, or fight the fire. Battery fires can reignite after appearing to stop, so professional assessment is important.
If the unit is cool, silent, and not leaking, place access controls around it and seek handling instructions from a qualified battery recycler, hazardous-waste program, or the product’s support provider. Moving even a stable-looking damaged battery carries risk. Do not place it in household trash, curbside recycling, or a general battery collection box without approval.
A person exposed to smoke, vapor, or leaking material should move to fresh air and seek medical or poison-control guidance. Avoid touching residue. If contact occurs, follow local medical advice and the safety information supplied with the product. Electrical work involving building circuits, transfer equipment, or damaged outlets should be handled by a qualified electrician.
6. Maintenance and Storage That Reduce Risk
Prevention starts with temperature control and physical protection. Store the power station in a dry, ventilated place away from direct sun, heaters, combustible clutter, and locations where it can fall or be struck. Do not leave it in a parked vehicle, attic, or other area that can become extremely hot.
Follow the specified charging temperature range. Many lithium-based batteries should not accept a charge below freezing, even though they may be able to power a load at somewhat lower temperatures. A model with low-temperature charge cutoff provides an important automatic safeguard, but the user should still allow a cold unit to warm gradually and remain dry before charging.
For long storage, a partial state of charge is generally preferable to leaving the battery empty or at 100 percent for months. An illustrative target is about 40 to 60 percent, checked every three to six months, unless the product instructions specify otherwise. Use the supplied or electrically compatible charging equipment and keep vents unobstructed.
Inspect the case, seams, ports, and cable ends before use. Retire the unit after serious impact, water intrusion, unexplained overheating, or recurring protection errors until it has been professionally evaluated. Record purchase details and operating history so age, cycles, and prior incidents can be considered if a problem develops.
Storage factor
Illustrative practice
Reason
State of charge
About 40% to 60% for extended storage
Reduces prolonged stress from very high or very low charge
Inspection interval
Every 3 to 6 months
Helps identify discharge, case changes, corrosion, or odor early
Room conditions
Roughly 50°F to 77°F when practical
Moderate temperatures generally slow battery aging
Clearance
Several inches around cooling vents during operation
Swelling, chemical odor, or hissing should end normal use of a portable power station. Do not rely on a reset, successful startup, or normal charge display as evidence that the pack is safe. Avoid opening, puncturing, compressing, or repeatedly testing it. For an active event, prioritize distance, evacuation, and emergency assistance. For a stable but damaged unit, obtain approved disposal or professional evaluation instructions.
When comparing a future portable power station, capacity and inverter output are not the only relevant measurements. Battery chemistry, protective controls, temperature monitoring, enclosure design, warranty terms, and clear end-of-life support can affect both practical safety and long-term ownership.
Specs to look for
Battery chemistry: Look for clearly identified cell chemistry, such as lithium iron phosphate or another documented lithium-ion type; this helps evaluate cycle life, thermal characteristics, weight, and expected use.
Battery management system: Look for stated overvoltage, undervoltage, overcurrent, short-circuit, and overtemperature protection; multiple monitored conditions provide broader automatic shutdown coverage.
Temperature sensors: Look for pack and charging temperature monitoring rather than a single general enclosure sensor; broader sensing can identify abnormal heat sooner.
Low-temperature charge cutoff: Look for automatic charging suspension near 32°F, with an operating range clearly listed; charging cold lithium cells can cause lasting internal damage.
Operating temperature range: Look for separate charging, discharging, and storage ranges, such as charging around 32°F to 104°F; separate limits make safe seasonal use easier to plan.
Cycle-life rating: Look for a stated capacity threshold after a defined number of cycles, such as 2,000 to 3,000 cycles to about 80 percent capacity; this is more informative than a cycle number alone.
Safety testing documentation: Look for named battery, transport, and electrical safety test standards supported by accessible documentation; specific test identification is more useful than a general claim of certification.
Enclosure and ventilation design: Look for protected vents, stable feet, impact-resistant construction, and clear airflow requirements; sound mechanical design helps manage heat and accidental contact.
Warranty and disposal support: Look for several years of battery coverage plus written procedures for damaged-unit handling and recycling; clear support matters when a battery cannot be shipped or discarded normally.
No specification eliminates all battery risk. Safe placement, temperature-aware charging, periodic inspection, appropriate loads, and immediate retirement after serious warning signs remain essential throughout the power station’s service life.
Frequently asked questions
Is portable power station battery swelling dangerous?
Yes. Portable power station battery swelling indicates abnormal gas generation or internal damage and should be treated as a potential safety hazard. Stop using and charging the unit, and seek disposal or evaluation guidance from an approved battery-handling provider.
What should I do if my portable power station is hissing or smells like chemicals?
Move people away from the unit and avoid inhaling fumes. If it is hot, smoking, actively venting, or making loud hissing or popping sounds, evacuate and contact emergency services rather than attempting to move or inspect it.
Can I charge a swollen portable power station battery one more time to test it?
No. Test charging is a common mistake because additional current can increase heating in a damaged cell. A normal display reading or a successful startup does not confirm that the battery is safe.
Can a swollen power station battery be repaired?
A consumer should not attempt to repair, open, compress, or replace cells in a swollen power station battery. The unit generally requires professional evaluation, manufacturer guidance, or approved hazardous-waste and battery-recycling handling.
How do I safely dispose of a damaged portable power station?
Contact the manufacturer, a qualified battery recycler, or a local hazardous-waste program for instructions before transporting the unit. Do not place a damaged power station in household trash, curbside recycling, or an unattended battery collection box unless the receiving program specifically approves it.
What safety features should I look for in a portable power station?
Look for documented battery chemistry, a battery management system with overcurrent and overtemperature protection, pack and charging temperature sensors, and low-temperature charge cutoff. Clear operating limits, named safety-testing documentation, durable enclosure design, and written damaged-battery disposal support are also important features.
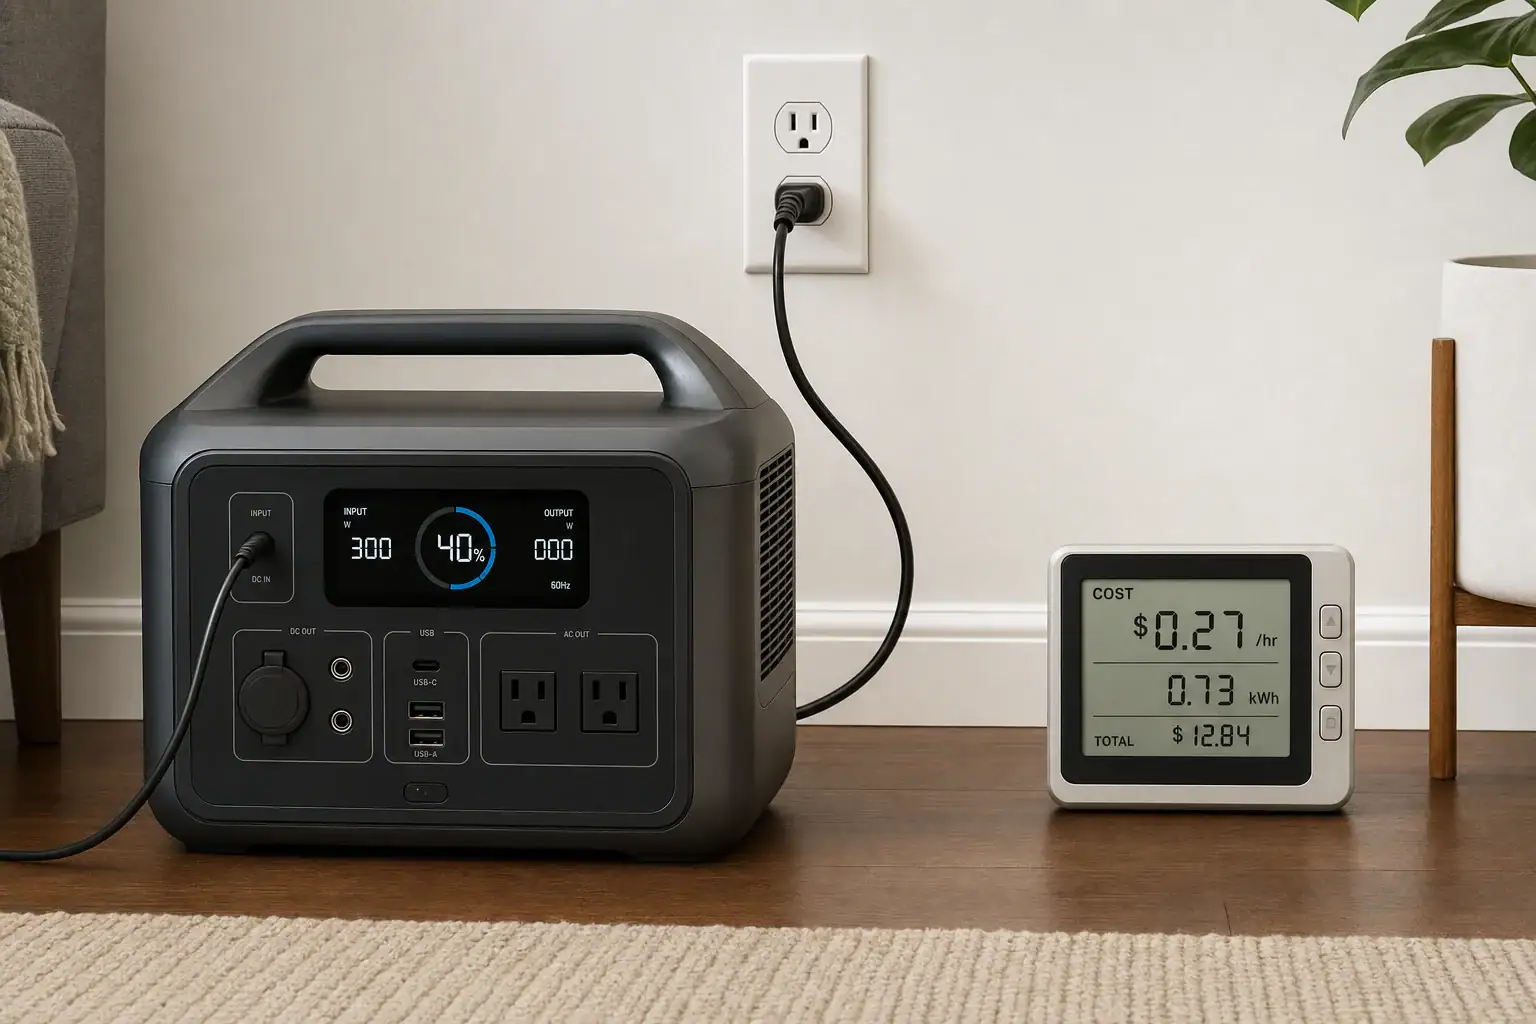
Charging a portable power station from the wall usually costs only a few cents to less than a dollar, depending on battery capacity, starting charge level, charging efficiency, and your electricity rate. For example, fully charging a 1,000-watt-hour unit may draw roughly 1.1 to 1.3 kilowatt-hours from the outlet. At an electricity price of $0.17 per kilowatt-hour, that would cost about $0.19 to $0.22.
The exact amount cannot be determined from battery capacity alone. Conversion losses in the AC charger, battery management system, and internal electronics increase wall consumption. Your local utility rate may also vary by season, time of use, or total household consumption. To calculate wall charging cost accurately, you need the power station’s watt-hour capacity, the percentage being replenished, expected charging efficiency, and the price paid per kilowatt-hour.
Understanding these factors helps compare charging modes, estimate operating expenses, and distinguish battery capacity from AC input watts or charging speed.
1. What Wall-Charging Cost Means and Why It Matters
The cost to charge a portable power station is the price of the electrical energy drawn from the wall outlet during a charging session. Utilities normally bill residential electricity in kilowatt-hours, abbreviated kWh. One kilowatt-hour equals 1,000 watt-hours of energy.
A power station rated at 1,000 Wh has a nominal capacity of 1 kWh, but a full recharge generally draws more than 1 kWh from the wall. Energy is lost as heat while AC electricity is converted to the voltage required by the battery. The battery management system, cooling fan, display, and other internal components may consume additional power.
This distinction matters when estimating long-term operating cost. A person charging occasionally for emergencies may spend very little over a year. Frequent users who recharge a large-capacity unit every day will have higher annual costs, although the cost of each individual cycle can still be modest.
Charging cost is separate from charging speed. A higher AC input limit can reduce the time required to recharge, but it does not necessarily reduce the total energy consumed. Fast charging may sometimes produce more heat, while a slower mode may run fans less aggressively. The actual difference depends on the charging system.
2. How to Calculate the Cost of a Wall Charge
The simplest estimate starts with the amount of battery capacity that needs to be replaced. Multiply the rated capacity by the missing charge percentage, account for efficiency losses, convert watt-hours to kilowatt-hours, and then multiply by the electricity rate.
Estimated cost = capacity in Wh × charge fraction ÷ efficiency ÷ 1,000 × electricity rate per kWh
For example, consider a 1,000 Wh power station being charged from 20% to 100%. The missing charge fraction is 0.80. If overall charging efficiency is estimated at 85%, the wall energy calculation is 1,000 × 0.80 ÷ 0.85 ÷ 1,000, or about 0.94 kWh. At $0.17 per kWh, the estimated cost is approximately $0.16.
Efficiency commonly varies with charger design, battery temperature, charging rate, and standby consumption. An assumed range of about 80% to 90% is useful for rough calculations when measured data is unavailable. For the most accurate result, use a plug-in energy meter to record the total kWh drawn during an entire charging session, then multiply that reading by the applicable utility rate.
Calculation input
Example
Effect on cost
Battery capacity
1,000 Wh
Larger capacities require more energy for a comparable percentage increase.
Starting charge
20%
A lower starting level means more capacity must be replaced.
Ending charge
100%
Stopping below full reduces energy used during that session.
Charging efficiency
85%
Lower efficiency increases the energy drawn from the outlet.
Electricity rate
$0.17 per kWh
A higher utility price directly increases charging cost.
Inputs used to estimate a wall-charging session. Example values for illustration.
3. Real-World Charging Cost Examples
The following examples use simplified assumptions rather than guaranteed consumption figures. Actual results can differ because nominal battery capacity may not equal usable capacity, and charging losses change throughout the charge cycle.
Small 300 Wh power station
A 300 Wh unit charged from empty to full at 85% efficiency would draw about 353 Wh, or 0.353 kWh, from the wall. At $0.17 per kWh, the estimated cost would be about $0.06. If it were charged from 50% to 100%, the cost would be roughly half that amount.
Mid-size 1,024 Wh power station
A full recharge of a 1,024 Wh battery at 85% efficiency would require approximately 1.20 kWh from the outlet. At $0.17 per kWh, the session would cost about $0.20. Recharging it once a week under similar conditions would cost roughly $10 to $11 per year.
Large 2,000 Wh power station
If a 2,000 Wh unit is charged from 25% to 100%, it needs to store approximately 1,500 Wh. At 88% efficiency, wall consumption would be about 1.70 kWh. At $0.17 per kWh, the estimated cost would be about $0.29.
Daily charging
Frequency makes a greater difference to annual cost than a small change in efficiency. If a charging session consumes 1.2 kWh every day, annual wall consumption would be about 438 kWh. At $0.17 per kWh, that equals approximately $74.46 per year. The same unit charged only twice a month would cost far less annually.
Time-of-use electricity plans can also affect the result. A utility may charge less overnight and more during peak afternoon or evening hours. When available and permitted by the manufacturer’s operating guidance, scheduling a charge during a lower-rate period can reduce cost without changing the amount of energy stored.
4. Common Calculation Mistakes and Troubleshooting Cues
One common mistake is treating watt-hours and watts as interchangeable. Watt-hours measure energy capacity, while watts measure the rate of power flow. A 1,000 Wh battery does not automatically consume 1,000 watts while charging. Its AC input might be 200 watts, 500 watts, or more, depending on the charger and selected charging mode.
Another mistake is multiplying the maximum input wattage by the entire advertised charging time. Charging power is rarely constant from start to finish. Many battery systems accept high power early in the cycle and reduce input near full charge to control heat and cell voltage. A 500-watt input rating therefore does not mean the unit draws exactly 500 watts for every minute of a two-hour session.
If measured wall consumption seems unusually high, check whether devices were running from the power station while it was charging. Pass-through operation can make the outlet supply both the battery and connected loads. Displays, wireless modules, heaters, or cooling fans can also add small amounts of consumption.
An unexpectedly long charge may indicate a low input setting, a shared circuit with voltage drop, excessive battery temperature, or charging near freezing conditions. It may also result from the normal taper near 100%. Check the displayed input watts and confirm that the correct charging mode and supplied cable are being used.
If the percentage rises quickly but falls soon after unplugging, the state-of-charge estimate may need time to recalibrate according to the manufacturer’s normal operating guidance. Persistent errors, abnormal heat, odors, repeated shutdowns, or a failure to accept a charge call for professional support rather than disassembly or modification.
5. Wall-Charging Safety Basics
Use a properly grounded wall outlet that is in good condition and appropriate for the charger’s current draw. Avoid loose receptacles, damaged cords, scorched plugs, or adapters that do not fit securely. High-input charging modes can place a meaningful continuous load on a household circuit, especially when heaters, appliances, or other high-wattage devices share that circuit.
Place the power station on a stable, dry surface with clear space around its ventilation openings. Do not cover it while charging or place it near combustible materials. Charging naturally creates some heat, but excessive heat, swelling, smoke, unusual sounds, or a strong chemical odor are warning signs. Disconnect the unit if it is safe to do so and move away from the area.
Extension cords can add resistance and voltage drop. If one must be used, it should be appropriately rated for the charger’s input and fully uncoiled. A damaged, undersized, or loosely connected cord can overheat. Do not use wall charging in wet conditions unless every component is specifically designed for that environment.
A portable power station should not be connected directly to home wiring, an electrical panel, a transfer switch, or an interlock without equipment designed for that purpose and installation by a qualified electrician. Never open the enclosure, modify the battery pack, or bypass temperature, current, or charging protections.
6. Maintenance and Storage Factors That Affect Charging Cost
Battery condition can influence how efficiently energy is stored. As a battery ages, its usable capacity generally declines. An older unit may reach 100% after accepting less energy than when new, but it will also provide less runtime. A lower charging bill in that situation does not necessarily indicate improved efficiency.
Temperature also matters. Charging in very hot or cold conditions can trigger reduced input power, longer charging times, or protective shutdowns. Store and charge the unit within its stated temperature range, preferably in a dry, ventilated indoor location. Allow a unit moved from a cold environment to reach a suitable temperature before charging.
For long-term storage, follow the specified storage charge range and inspection interval. Many battery systems are better stored partially charged rather than left at 0% or held at 100% for months. Periodic top-ups use little electricity, but they help prevent excessive self-discharge and preserve readiness.
Turn off unnecessary outputs, wireless functions, and displays during storage. Even small standby loads can gradually drain the battery and require more frequent recharging. Record the charge percentage at the start and end of a storage period if unexplained losses are suspected.
Storage or use pattern
Illustrative wall energy
Cost at $0.17 per kWh
Monthly 10% top-up of a 1,000 Wh unit at 85% efficiency
0.118 kWh
About $0.02
Quarterly 20% top-up of a 1,000 Wh unit at 85% efficiency
0.235 kWh
About $0.04
Full recharge of a 500 Wh unit at 85% efficiency
0.588 kWh
About $0.10
Full recharge of a 2,000 Wh unit at 85% efficiency
2.353 kWh
About $0.40
Illustrative energy costs for storage and charging patterns. Example values for illustration.
7. Practical Takeaways and Specs to Look For
For a quick estimate, convert the capacity to kilowatt-hours, multiply by the portion being replenished, divide by estimated efficiency, and multiply by the local electricity rate. A plug-in energy meter provides a better answer because it captures conversion losses, charging taper, cooling, and standby consumption. Use the rate shown on your utility bill, including relevant energy charges, rather than relying on a national average.
Cost should be evaluated alongside recharge time, usable capacity, cycle life, and charging controls. A low per-charge cost does not by itself indicate that a power station will meet a particular runtime or backup-power need.
Specs to look for
Battery capacity: Look for a watt-hour rating such as 300 Wh, 1,000 Wh, or 2,000 Wh; capacity is the main factor determining energy required for a full recharge.
Usable capacity: Look for tested or documented usable energy below the nominal rating; it gives a more realistic basis for runtime and recharge calculations.
Maximum AC input: Values may range from about 100 watts on compact units to more than 1,000 watts on larger models; higher input can shorten recharge time when the circuit supports it.
Adjustable charging rate: Look for quiet, standard, and fast settings; selectable input can reduce fan noise or circuit load when maximum speed is unnecessary.
Full recharge time: Compare stated times under clearly defined conditions, such as 0% to 100% using AC power; this helps set realistic expectations for charging availability.
Battery chemistry and cycle rating: Look for a cycle estimate tied to a remaining-capacity percentage, such as 2,000 cycles to 80%; this helps evaluate long-term durability rather than one-time charging cost.
Operating and charging temperature range: Look for a range suitable for the expected environment; temperature restrictions can affect charging speed, safety, and availability.
Standby consumption and automatic shutoff: Look for low idle draw and configurable shutdown timers; these features reduce unnecessary battery drain and repeat charging.
Input energy display: Look for real-time input watts, estimated time remaining, and clear charge percentage; these readings make it easier to identify slow charging or unexpected consumption.
Charging efficiency information: If available, look for measured wall-to-battery efficiency in the approximate 80% to 90% range; higher efficiency can modestly reduce energy use and heat.
In most households, a single wall charge is inexpensive. The most reliable estimate comes from measuring actual kWh at the outlet and multiplying that figure by the electricity price that applies at the time of charging.
Frequently asked questions
How much does it cost to charge a portable power station from the wall?
The cost depends on the amount of energy replaced, charging losses, and the electricity rate on your utility bill. As a rough example, a 1,000 Wh unit may draw about 1.1 to 1.3 kWh for a full charge, which costs about $0.19 to $0.22 at $0.17 per kWh. A plug-in energy meter provides the most accurate result for a specific unit.
Does charging a portable power station overnight cost less?
It can cost less if your utility uses time-of-use pricing and offers lower overnight rates. The station uses approximately the same amount of energy, but each kWh may be billed at a lower price. Check your utility plan to confirm whether off-peak rates apply.
What specifications matter most when comparing portable power station charging costs?
Battery capacity in watt-hours, documented usable capacity, and wall-to-battery charging efficiency are the main specifications for estimating energy use. Adjustable AC charging modes and standby consumption can also affect real-world usage. Maximum AC input primarily affects charging time rather than the basic energy needed for a recharge.
Is it a mistake to calculate charging cost using the maximum input wattage?
Yes. Maximum input wattage is a power rate, while charging cost is based on total energy consumed in kWh. Input power commonly changes during the session and tapers as the battery approaches full charge, so a meter reading is more reliable than multiplying a peak wattage by the advertised charge time.
Is it safe to leave a portable power station charging from a wall outlet?
Follow the manufacturer’s charging instructions and use an undamaged, properly grounded outlet and charging cable. Charge on a dry, stable surface with ventilation clear of obstructions and away from combustible materials. Stop charging and seek support if there is excessive heat, swelling, smoke, unusual odor, or repeated shutdowns.
Why does a power station use more electricity from the wall than its battery capacity?
Some electricity is lost during AC-to-DC conversion and battery charging, mainly as heat. Internal systems such as cooling fans, displays, and battery management electronics may also use power. Therefore, a station with a 1 kWh battery can require more than 1 kWh from the outlet for a full recharge.
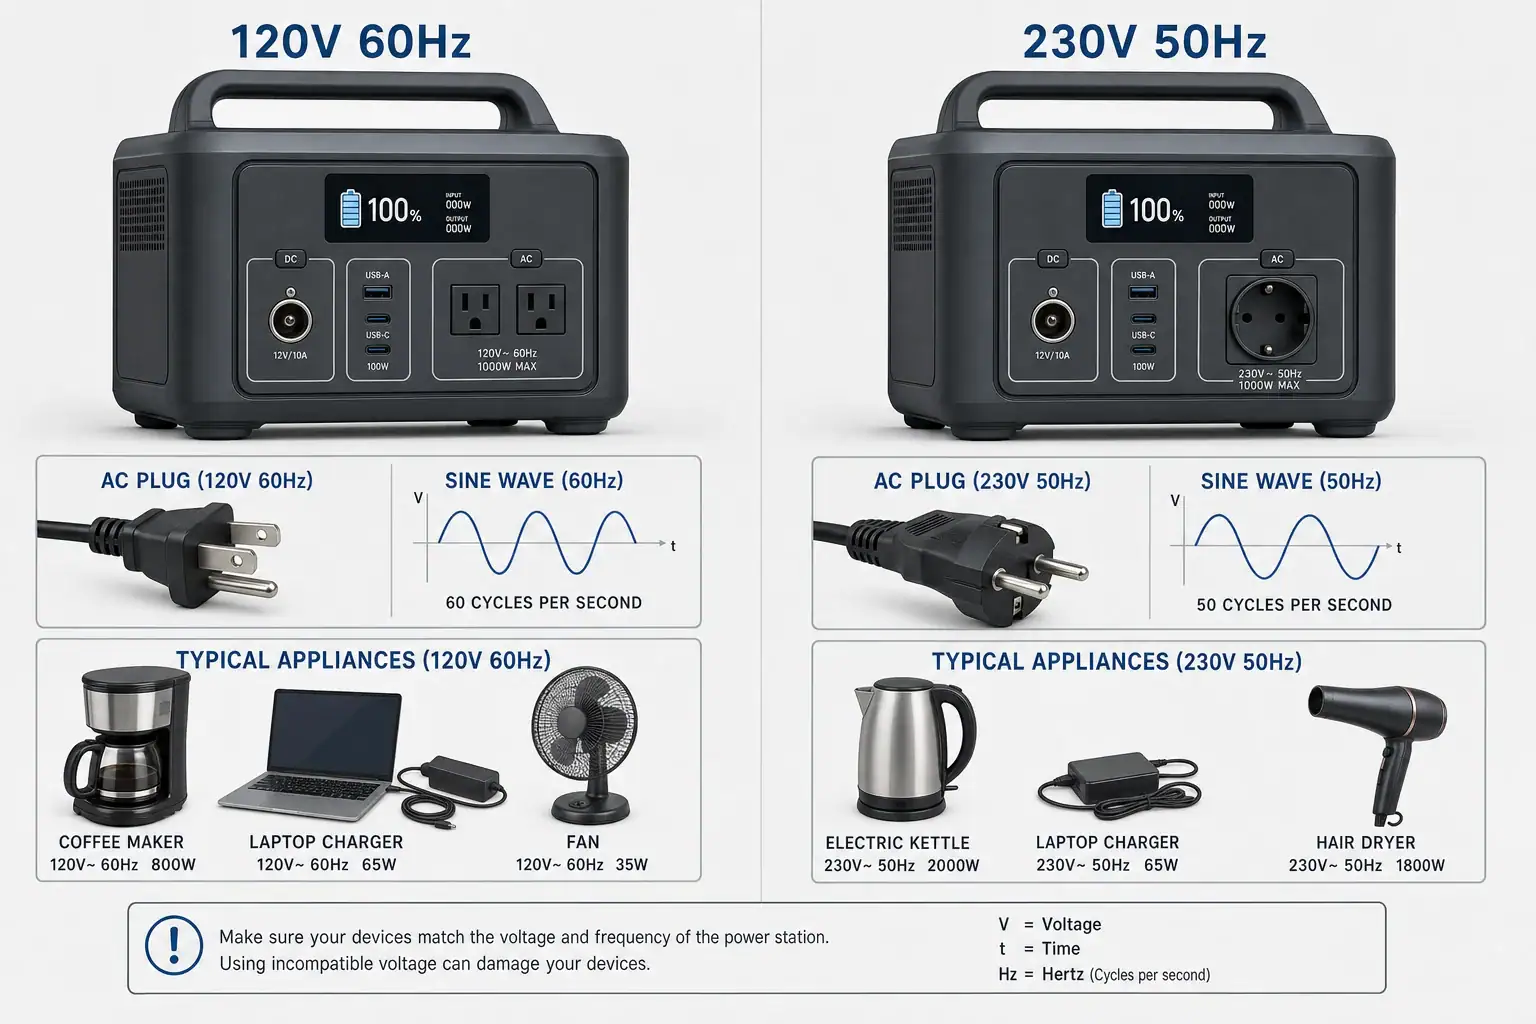
A 120V appliance generally needs a 120V portable power station, while a 230V appliance generally needs a 230V model unless the appliance label explicitly supports both voltage ranges. Plug shape alone does not establish compatibility, and a simple travel adapter does not convert voltage or frequency.
The main specifications to compare are AC output voltage, plug type, 50Hz vs 60Hz frequency, continuous watts, surge watts, and pure sine wave output. You should also check whether the device has a fixed-voltage input or a universal input such as 100–240V, 50/60Hz. These details determine whether an appliance will start, operate correctly, and remain within its intended electrical range.
Regional naming can be confusing. Labels such as 110V, 115V, and 120V usually describe the same general voltage class, while 220V, 230V, and 240V commonly describe another. However, those terms are not permission to ignore the actual equipment label. Always match the stated operating range and required frequency before connecting a load.
What 120V and 230V Mean and Why the Difference Matters
The voltage rating describes the nominal AC voltage produced by the power station’s inverter. A 120V unit is primarily intended for appliances from regions that use roughly 100–120V service, while a 230V unit serves equipment designed for approximately 220–240V. North American household receptacles commonly supply about 120V at 60Hz. Many countries in Europe, Africa, Asia, and Oceania commonly use about 230V at 50Hz, although regional exceptions exist.
Voltage matters because electrical equipment is designed around a specific input range. Supplying a fixed 120V device with 230V can cause immediate damage, overheating, or fire. Supplying a fixed 230V device with 120V may prevent it from starting, make a motor stall, or cause a heating appliance to produce much less heat. Protection circuits may shut down, but they should not be treated as a substitute for correct matching.
The power station’s battery capacity does not determine its AC voltage. Two stations can each store 1,000 watt-hours yet provide different outlet voltages, frequencies, power limits, and receptacles. Capacity mainly influences runtime; the inverter specifications determine whether the load is electrically compatible.
How Voltage, Plugs, Frequency, and Wattage Work Together
Four separate checks are necessary: voltage, frequency, plug configuration, and power demand. First, the appliance voltage range must include the station’s output. Second, its frequency rating must accept the selected 50Hz or 60Hz output. Third, the plug must physically and electrically match the receptacle. Fourth, running and starting demand must remain within the inverter’s limits.
Voltage ranges and universal inputs
Many laptop chargers, phone chargers, camera chargers, and other switch-mode power supplies are labeled 100–240V, 50/60Hz. Such a label generally means the charger can accept either voltage system without a voltage converter, provided the plug connection is suitable. An appliance labeled only 120V 60Hz or 230V 50Hz is not universal.
Plug shape is not voltage conversion
A passive plug adapter only changes the physical connection. It does not turn 230V into 120V, change 50Hz into 60Hz, increase wattage, or create a different grounding arrangement. Universal-style receptacles can accept multiple plug shapes, but their output still has one specified voltage.
Frequency and motor behavior
Frequency is the number of AC cycles per second. Resistive loads such as basic heaters are often less sensitive to frequency, but motors, pumps, compressors, clocks, turntables, and timing circuits may depend on it. A motor intended only for 60Hz can run hotter or at a different speed on 50Hz. Pure sine wave output improves waveform quality, but it does not make the wrong frequency compatible.
Running watts and starting watts
Continuous output covers sustained demand. Surge output covers brief startup demand from compressors, pumps, and motors. A refrigerator drawing 150 running watts might require several times that amount for a fraction of a second. Both values must fit the power station’s ratings, even when voltage and frequency match.
Characteristic
120V-class output
230V-class output
Compatibility question
Common nominal labels
110V, 115V, 120V
220V, 230V, 240V
Does the appliance input range include the actual output?
Common frequency
Often 60Hz
Often 50Hz
Is the appliance rated for 50Hz, 60Hz, or both?
Typical current at 1,200W
About 10A
About 5.2A
Are the outlet and inverter rated for the required current?
Plug connection
Regional 120V receptacle
Regional 230V receptacle
Is the plug correct without defeating grounding?
Universal-input charger
Often compatible
Often compatible
Does its label state 100–240V, 50/60Hz?
Example values for illustration. Actual output tolerances and regional standards vary.
Real-World Compatibility Examples
Universal laptop charger
Consider a 65W laptop charger labeled 100–240V, 50/60Hz. It can generally operate from either a 120V 60Hz station or a 230V 50Hz station. The remaining issue is the plug connection. A properly rated adapter or compatible detachable cord may solve the physical mismatch, but the charger’s full label should still be checked.
Fixed-voltage coffee maker
A 1,000W coffee maker labeled 120V 60Hz should not be connected to 230V. On a suitable 120V station, the inverter must provide at least the coffee maker’s sustained load with reasonable headroom. If the station has a 1,000W continuous limit, another simultaneous load could trigger an overload even though the voltage matches.
Refrigerator or portable freezer
A compressor appliance may list modest running consumption but require a much higher startup surge. A 120V 60Hz refrigerator needs matching output unless its label states a broader range. A station with 500W continuous output may still fail to start a 150W refrigerator if its short surge capability is insufficient or too brief.
230V motorized appliance on 120V
A fixed 230V pump connected to 120V may not start and could remain stalled. A plug adapter cannot correct this. A properly sized voltage conversion device may address voltage in some cases, but it does not necessarily correct frequency, startup current, grounding, or protection compatibility. Motor applications require particular caution.
Dual-frequency device with fixed voltage
An appliance marked 230V 50/60Hz accepts either frequency but still requires approximately 230V. Conversely, a label reading 100–240V 50Hz accepts a wide voltage range but does not automatically approve 60Hz. Every part of the rating must match.
Common Mistakes and Troubleshooting Cues
A frequent mistake is selecting a station by plug appearance. A receptacle may physically accept a plug while supplying the wrong voltage. Another is assuming that all electronics are universal input. Chargers often are, but heaters, kitchen appliances, power tools, medical equipment, and motor loads frequently are not.
The appliance does not turn on: Check whether AC output is enabled, then compare voltage and frequency labels. Also verify that the station is not in overload, low-battery, or temperature protection.
The station shuts off during startup: The appliance may have a surge demand above the inverter’s peak rating, even if its running watts appear acceptable.
A motor hums, slows, or becomes unusually warm: Disconnect it. The voltage, frequency, waveform, or surge capability may be unsuitable.
A clock or turntable runs at the wrong speed: Its timing may depend on AC frequency, making 50Hz and 60Hz operation meaningfully different.
A charger works abroad but another appliance does not: The charger may support 100–240V and 50/60Hz, while the other appliance has a fixed input.
An overload occurs below the advertised wattage: Other outlets may share the same inverter limit, the load may have a high inrush current, or the inverter may be reducing output because of heat.
When diagnosing a mismatch, read the appliance nameplate rather than relying on its country of purchase. The useful line normally lists input voltage, frequency, watts, or amps. If watts are not shown, an approximate resistive-load calculation is volts multiplied by amps, but motors and electronic loads can have additional startup and power-factor considerations.
Safety Basics for AC Output Compatibility
Never connect a fixed 120V appliance to 230V or assume protection circuitry will prevent damage. Do not alter plugs, remove grounding pins, bypass protective devices, or use damaged adapters. Extension cords and adapters should be rated for the voltage, current, environment, and grounding needs of the connected equipment.
Portable power station grounding and neutral arrangements can differ from household utility power. Some stations use a floating neutral, and some appliances, protective devices, or vehicle charging equipment may reject that arrangement. Do not create improvised neutral-ground bonds. Consult the station instructions, the appliance manufacturer, or a qualified electrician when grounding behavior matters.
Keep the station dry, ventilated, and away from combustible materials. Do not operate it in an enclosed space if it is being charged by a fuel-powered generator located nearby; fuel-powered equipment must remain outdoors and safely separated because of carbon monoxide risk. Observe outlet current limits as well as the station’s total wattage limit.
Connecting a portable station to building wiring involves additional shock, fire, and backfeed hazards. Use only an approved installation designed for the application and evaluated by a qualified electrician. A household receptacle should never be used as an improvised inlet.
Maintenance and Storage for Reliable AC Compatibility
Voltage compatibility does not usually change during storage, but settings and connection accessories can. If a station allows 50Hz or 60Hz selection, confirm the setting after firmware changes, resets, long storage, or travel. Do not change frequency while a sensitive appliance is operating.
Inspect AC receptacles, detachable cords, and plug adapters for looseness, discoloration, bent contacts, cracking, or heat damage. Replace damaged accessories rather than trying to repair or reshape energized parts. Keep labels legible so output voltage and frequency can be identified without guesswork.
Store the battery within the temperature and state-of-charge range given by its documentation. For many lithium-based systems, moderate temperatures and a partial charge are preferable to prolonged storage completely full or empty. Recharge periodically if standby consumption causes the level to fall. Before relying on the station for backup power, test it with a known compatible load and verify that the intended adapters and cords are present.
Check
Example interval
What to verify
Why it matters
Output setting
Before each use or after a reset
Correct 120V or 230V mode and 50Hz or 60Hz setting
Prevents accidental mismatches
Plug and cord inspection
Before travel or backup use
No cracks, loose pins, discoloration, or heat damage
Reduces shock and overheating risk
Battery level
Every 2–4 months in storage
Charge remains within the recommended storage range
Preserves readiness and battery health
Compatible-load test
Every 3–6 months
AC output remains stable under a modest known load
Finds problems before an outage
Example values for illustration. Follow the storage and inspection guidance supplied with the equipment.
Start with the appliance nameplate. Match voltage first, frequency second, plug and grounding configuration third, and wattage requirements fourth. A universal-input label can make travel easier, but it must explicitly include both the station’s voltage and frequency. Treat plug adapters as mechanical interfaces only.
Allow capacity and output headroom for real-world operation. Battery watt-hours influence runtime, while continuous and surge watts determine whether the inverter can support the load. Because inverter conversion and internal consumption use energy, runtime will be shorter than a simple battery-capacity division suggests.
Specs to look for
AC output voltage: Look for a fixed 120V or 230V output, or a clearly documented selectable design; it must match the appliance’s stated input range.
Output frequency: Look for 50Hz, 60Hz, or selectable 50/60Hz operation; this matters for motors, clocks, compressors, and frequency-sensitive electronics.
Continuous AC output: Choose a rating above the combined sustained load, such as 1,200W for an expected 900W load; headroom reduces nuisance overloads and heat stress.
Surge output: Look for a peak rating and its duration, such as 2,000W for one to several seconds; motors and compressors can draw several times their running power at startup.
Waveform: Look for pure sine wave AC with clearly stated voltage regulation; a clean waveform is preferable for sensitive electronics, audio equipment, and motor loads.
Receptacle and plug type: Confirm that outlets match the intended region and preserve required grounding; physical fit should not depend on unsafe or overloaded adapters.
Battery capacity: Compare usable watt-hours, with examples ranging from roughly 300Wh for light electronics to 2,000Wh or more for longer backup loads; capacity primarily determines runtime.
Per-outlet and total current limits: Check both ratings, such as 10A per outlet and a separate shared inverter maximum; one outlet may reach its limit before total advertised watts are used.
Protection and status information: Look for overload, overtemperature, short-circuit, and low-voltage protection plus readable fault indicators; clear warnings make compatibility problems easier to identify.
The safest purchasing approach is to list every intended appliance and record its voltage, frequency, running watts, and likely startup demand. Compare those requirements with the station’s full AC specifications rather than relying on capacity, plug appearance, or a single headline wattage figure.
Frequently asked questions
Can I use a 120V appliance with a 230V portable power station?
Only if the appliance label states that its input range includes 230V, such as 100–240V. A fixed-voltage 120V appliance should not be connected to a 230V outlet because it can be damaged. A plug adapter changes physical fit only and does not reduce voltage.
Can a travel plug adapter make a 230V power station safe for 120V devices?
No. A basic travel adapter does not convert voltage, frequency, or available power. It can allow an incompatible appliance plug to fit a receptacle, so the appliance nameplate must be checked before connecting it.
What specs should I compare before buying a portable power station for international use?
Compare the AC output voltage and frequency with every appliance you plan to run, then check continuous watts, surge watts, outlet current limits, plug type, and grounding requirements. A selectable 50Hz/60Hz setting may be useful, but it does not make a fixed-voltage appliance compatible. Also verify whether the unit provides pure sine wave output for sensitive electronics or motor loads.
Do 50Hz and 60Hz matter for portable power stations?
Yes, especially for motors, compressors, clocks, turntables, and equipment with frequency-sensitive timing. Many chargers labeled 50/60Hz can use either frequency, but a device marked for only one frequency may operate incorrectly or overheat on the other. Check the complete input rating rather than voltage alone.
Why does a power station overload when the appliance uses fewer running watts than its rating?
Some appliances draw a brief startup surge that is much higher than their listed running power. Compressors, pumps, and motor-driven tools are common examples. The station’s surge rating, surge duration, shared outlet limits, battery level, and temperature can all affect whether the load starts successfully.
What are the basic safety rules when using a portable power station abroad?
Use only appliances whose voltage and frequency ratings match the station output, and keep grounding intact. Do not modify plugs, defeat safety pins, or use damaged cords or adapters. Keep the station dry and ventilated, and use a qualified electrician for any connection to building wiring.
Solar charging on cloudy days usually produces about 10% to 60% of a panel’s rated output, although bright broken clouds can occasionally allow higher short-term production. Thick overcast, rain, shade, season, and panel angle can push solar input toward the low end of that range.
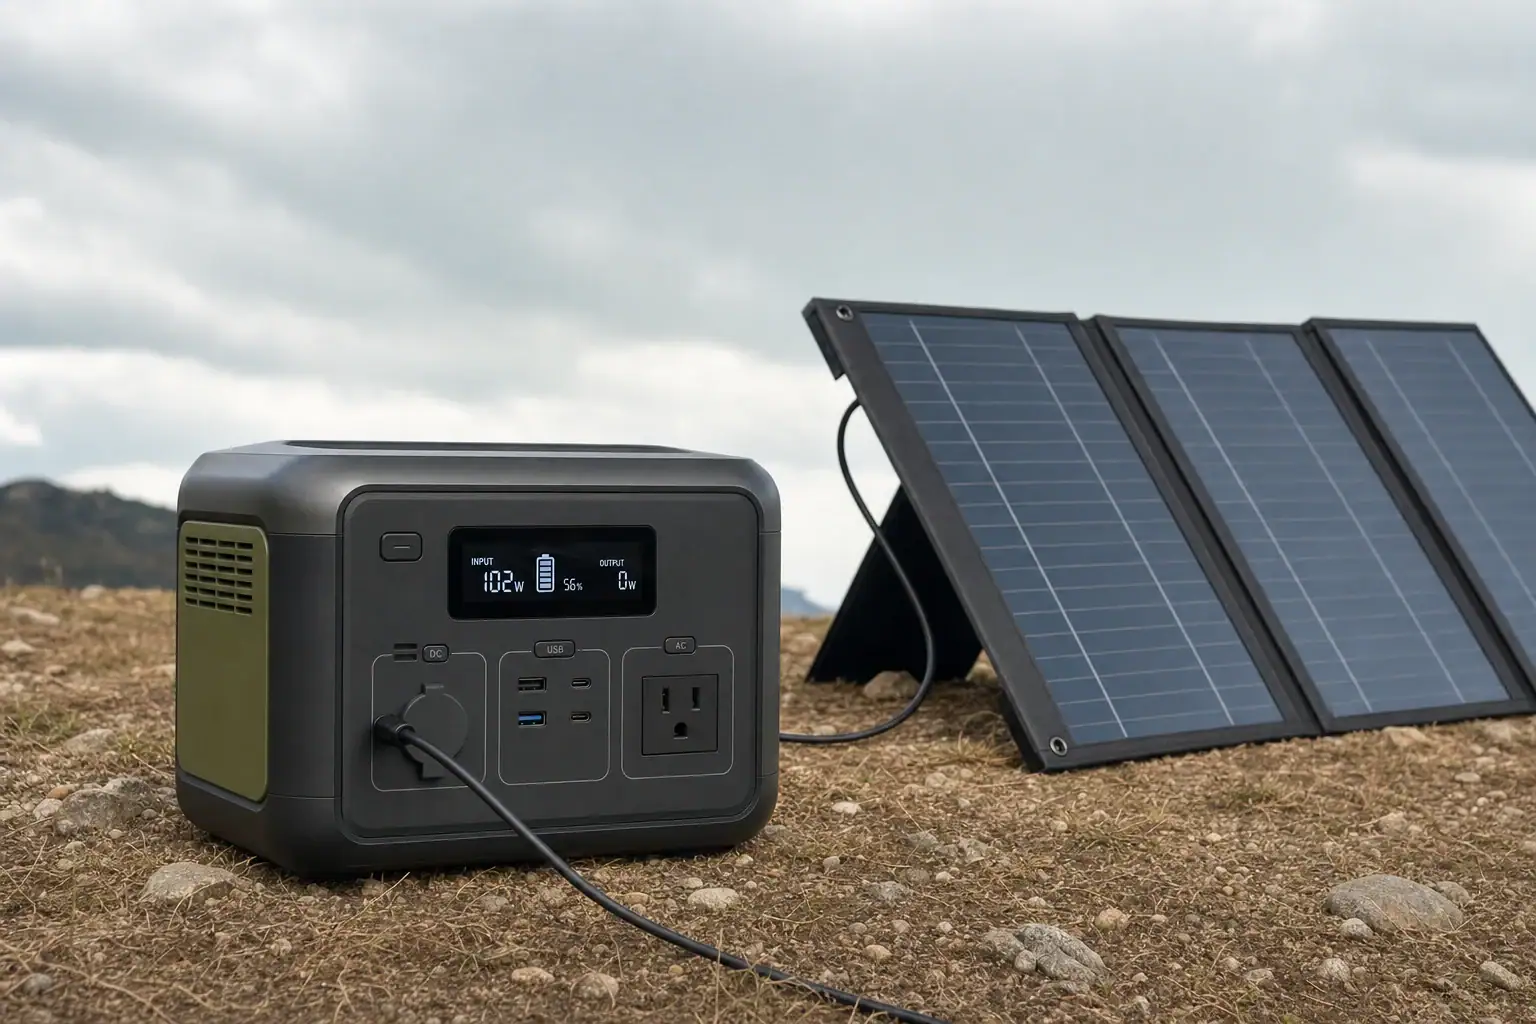
A panel’s rated watts are measured under standardized laboratory conditions, not typical cloudy weather. Actual charging speed depends on solar irradiance, panel temperature, charge-controller efficiency, the power station’s solar input limit, and whether the incoming voltage remains above its minimum operating threshold.
Because cloud cover changes from minute to minute, the display may show unstable input watts or repeatedly start and stop charging. That behavior is not automatically a fault. Understanding rated output, usable watt-hours, MPPT behavior, and charging losses makes it easier to estimate runtime, identify a genuine problem, and choose compatible equipment.
1. What Cloudy-Day Solar Output Means and Why It Matters
Cloudy-day output is the electrical power a solar panel delivers while direct sunlight is partly or completely blocked by clouds. Panels can still generate electricity from diffuse light scattered through the atmosphere, but the available energy is lower than it is under clear midday sun.
Output is normally shown in watts. A 200-watt panel producing 40 watts is operating at 20% of its nameplate rating at that moment. This percentage can change rapidly as cloud thickness, shadows, and sun position change. The power station may display less than the panel produces because energy is also lost in wiring, connectors, voltage conversion, and battery charging.
The distinction between watts and watt-hours is important. Watts describe instantaneous charging power, while watt-hours measure accumulated energy. Receiving 40 watts for five hours would theoretically provide 200 watt-hours, but the battery will store somewhat less after conversion losses. For trip planning or backup use, daily watt-hours are usually more useful than the highest wattage briefly shown on the screen.
2. How Clouds, Panels, and Charge Controllers Affect Charging
Solar panels respond to irradiance, the amount of solar energy reaching their surface. Under full test conditions, irradiance is commonly modeled at about 1,000 watts per square meter. A uniformly gray sky may provide only a small fraction of that amount. Thin or broken clouds allow more light through, and reflections from cloud edges can briefly increase irradiance.
A practical estimate is panel rating multiplied by the available-light fraction and then by system efficiency. For example, a 200-watt panel receiving roughly 25% of full-sun irradiance might produce 50 watts before losses. At 80% overall transfer efficiency, the power station could receive about 40 watts. This is only an estimate because panels do not respond perfectly linearly in every low-light condition.
The charge controller also matters. An MPPT controller adjusts its operating point to extract useful power as voltage and current change. However, it cannot create energy that the panel is not producing. If panel voltage falls below the controller’s startup or operating threshold, charging may pause even though a meter can still detect some open-circuit voltage.
Finally, input is capped by the power station. A station rated for 200 watts of solar input will not normally accept 300 watts simply because the connected array can produce it. Voltage, current, and wattage must all remain within the station’s specified input range.
Sky condition
Approximate panel output
Possible output from a 200 W panel
Typical behavior
Bright, thin clouds
50%–80%
100–160 W
Fairly steady with moderate variation
Broken clouds
30%–70%
60–140 W
Frequent peaks and drops
Uniform overcast
10%–30%
20–60 W
Low but potentially stable input
Dark storm clouds or rain
5%–15%
10–30 W
Charging may cycle or stop
Example values for illustration. Actual output varies with irradiance, temperature, orientation, equipment, and local conditions.
3. Real-World Cloudy-Day Charging Examples
Consider a 100-watt panel connected to a compatible portable power station. Under light overcast, it might deliver 35 to 55 watts around midday. If that level continued for four hours, the station could receive 140 to 220 watt-hours before charging losses. Morning and afternoon output would generally be lower because the sun is closer to the horizon.
With a 200-watt panel under heavy overcast, the display might fluctuate between 15 and 45 watts. An average of 30 watts over six hours equals 180 watt-hours of incoming energy. If approximately 85% reaches the battery, stored energy would be around 153 watt-hours. That may support small electronics, but it would not fully replenish a large battery.
A 400-watt array under variable broken clouds could alternate between 80 and 300 watts. Short peaks are less important than the average over the day. If the station has a 200-watt solar input limit, production above 200 watts will be clipped or otherwise limited. The larger array may still help during cloudy periods because more panel area captures more diffuse light, provided every electrical specification remains compatible.
Battery state of charge can also affect the displayed input. Many stations reduce charging power as the battery approaches full capacity or when battery temperature is outside its preferred range. A falling input reading at 95% state of charge may therefore reflect normal battery management rather than worsening weather.
To estimate refill time, divide the energy needed by expected average input and account for losses. Replacing 500 watt-hours at an average displayed input of 50 watts could take roughly 10 to 12 hours of active charging. Since a cloudy day may provide only a limited number of useful daylight hours, the refill may require more than one day.
4. Common Mistakes and Troubleshooting Cues
Expecting the Nameplate Rating
The most common mistake is treating rated panel wattage as guaranteed real-world output. Nameplate ratings assume controlled light, temperature, and measurement conditions. Clouds, low sun angles, haze, dirt, partial shade, and long cables all reduce delivered power.
Ignoring Partial Shade
A small shadow can cause a disproportionate loss, especially when it crosses electrically active sections of a panel. Check for branches, roof lines, vehicle shadows, poles, and even the shadow of the person positioning the panel. Diffuse cloudy light does not eliminate the effects of nearby shade.
Using a Poor Panel Angle
On overcast days, precise aiming is less influential than under direct sun, but orientation still matters. Keep the panel broadly facing the brightest part of the sky and avoid laying it where water, vegetation, or surrounding objects block light. Repositioning it once or twice during the day may improve total energy collection.
Overlooking Input Compatibility
If charging never starts, compare the panel or array’s open-circuit voltage, operating voltage, current, and connector configuration with the power station’s accepted solar input range. A panel can have an appropriate wattage while still supplying voltage that is too low for startup or too high for safe connection.
Mistaking Normal Fluctuation for Failure
Rapidly changing clouds can make the input display jump every few seconds. Diagnose performance using a longer average, not a single reading. If output remains unexpectedly low in clear midday sun, inspect for dirt, damaged cables, loose connectors, excessive heat, or a station that is nearly full. Test one variable at a time with compatible equipment, and consult qualified service support if faults persist.
5. Solar Charging Safety Basics
Keep all panel, adapter, and power station voltage and current values within the manufacturer-specified input ranges. Never assume that matching connectors guarantee electrical compatibility. Exceeding the maximum open-circuit voltage can damage equipment even when clouds are reducing current and wattage.
Place the power station in a dry, ventilated location. A solar panel may be weather-resistant while the battery unit or connector junctions are not. Prevent water from entering ports, keep connectors off wet ground, and stop using cables that show exposed conductors, deformation, corrosion, or heat damage.
Do not open the power station, alter battery packs, bypass protective circuits, or improvise connections. Avoid covering the station while charging because internal electronics and batteries produce heat. If solar equipment will be integrated with building wiring or a permanent electrical system, use a qualified electrician rather than attempting panel, transfer-switch, or interlock work without appropriate expertise.
6. Maintenance and Storage for Reliable Low-Light Output
Cloudy conditions leave less solar energy available, so small preventable losses become more noticeable. Keep the panel surface clean using the care method specified for its materials. Dust, pollen, salt film, bird droppings, and dried rain spots can reduce output. Avoid abrasive tools or harsh chemicals that could scratch coatings.
Inspect cables and connectors periodically for looseness, bent contacts, moisture, discoloration, or cracked insulation. Coil cables without tight bends, and do not place heavy objects on folding panels during storage. Repeated stress near connector ends can create resistance that lowers charging performance or causes heat.
Store the power station in a cool, dry place within its recommended temperature range. For extended storage, leave the battery at the state of charge suggested in its documentation and check it periodically. Long periods at completely empty or fully charged levels may accelerate battery aging, depending on cell chemistry and battery management.
Before relying on the system for a trip or outage, perform a test charge in daylight. Record panel size, sky conditions, input watts, and energy collected over several hours. A simple baseline makes it easier to recognize gradual degradation or an unexpected compatibility problem.
Item
Suggested check
Why it matters on cloudy days
Panel surface
Before use and after dirty weather
Low light leaves less margin for dirt-related losses
Cables and connectors
Before each trip or monthly use cycle
Resistance and loose contacts can reduce usable input
Battery state of charge
Every 1–3 months in storage
Helps prevent unexpected depletion
Test charging session
Before critical use
Confirms compatibility and establishes normal output
Example values for illustration. Follow the maintenance and storage guidance provided for the specific equipment.
For planning purposes, assume that a cloudy day may deliver 10% to 60% of rated panel power, with heavy overcast often near the lower end. Estimate energy from the average input over useful daylight hours rather than from a brief peak. More panel area can improve low-light collection, but only when the array remains within the station’s voltage, current, and wattage limits.
If charging is slow, first consider cloud density, time of day, panel angle, nearby shade, dirt, cable condition, battery temperature, and state of charge. Consistently poor output under clear midday conditions is a stronger troubleshooting signal than low or unstable output during changing weather.
Specs to look for
Maximum solar input wattage: Look for a limit such as 200–800 watts that fits the intended panel area; a higher limit can accept more available power when clouds briefly clear.
Solar input voltage range: Look for a documented range such as 12–60 volts; the array’s operating voltage must fit this window for reliable charging.
Maximum open-circuit voltage: Confirm that the panel or array remains safely below this value, including in cold weather; exceeding it can damage the input stage.
Maximum input current: Compare a value such as 10–20 amps with the array’s current; this determines how much current the controller can use without clipping.
MPPT charge controller: Look for integrated maximum power point tracking; it can improve energy harvesting as cloud cover changes, although it cannot compensate for unavailable sunlight.
Low-voltage startup threshold: Look for a threshold that is comfortably below the panel’s normal operating voltage; this helps reduce start-stop behavior in weak light.
Battery capacity: Compare usable capacity in watt-hours, such as 500–2,000 watt-hours, with expected cloudy-day generation; larger batteries take longer to refill at low input.
Input and battery monitoring: Look for displays that report input watts, accumulated watt-hours, battery percentage, and estimated charging time; these readings make performance easier to evaluate.
Operating temperature range: Choose a range suitable for the expected climate; charging may slow or stop when battery temperature falls outside safe limits.
The best cloudy-day setup is not necessarily the one with the largest advertised wattage. It is a compatible system with enough panel area, a suitable voltage range, effective charge control, realistic battery capacity, and clear monitoring. Planning around average daily energy rather than ideal peak output provides a more dependable estimate of what a portable power station can actually receive.
Frequently asked questions
How much solar power can a portable power station get on a cloudy day?
Solar charging on cloudy days commonly provides about 10% to 60% of a panel’s rated output, depending on cloud thickness and other conditions. Uniform heavy overcast may fall near the low end, while bright or broken clouds can produce higher and more variable readings. The useful result is the average watt-hours collected over the day, not a brief peak.
Can a portable power station charge when the sky is completely overcast?
Yes, a compatible solar setup can often continue charging under complete overcast because panels use diffuse daylight as well as direct sun. Charging may be slow, and it can stop if the panel voltage falls below the power station’s minimum operating threshold. Output also depends on panel orientation, cleanliness, temperature, and nearby shade.
Why does solar input keep rising and falling when clouds pass overhead?
Moving clouds change the amount of light reaching the panel, so input watts can rise and fall quickly. An MPPT controller continuously adjusts to the available conditions, which can make these changes visible on the display. Frequent fluctuations are usually normal unless output remains abnormally low in clear daylight or charging repeatedly fails with known-compatible equipment.
What solar panel and power station specs matter most in cloudy weather?
Check the station’s accepted solar input voltage range, maximum open-circuit voltage, maximum current, and maximum input wattage before connecting panels. An MPPT charge controller, a low enough startup-voltage threshold, and clear input monitoring can help make low-light performance easier to manage. More panel area may improve diffuse-light collection, but the complete array must remain within every electrical limit.
Is it a mistake to expect a solar panel to reach its rated wattage on cloudy days?
Yes. Rated wattage is measured under standardized test conditions and is not a guaranteed real-world result. Cloud cover, low sun angle, dirt, cable losses, heat, and partial shade can all reduce the power delivered to the station.
Is it safe to charge a portable power station with solar panels in cloudy or rainy weather?
Cloudy weather itself does not make solar charging unsafe when the panel, cables, adapters, and power station are used within their specified limits. Keep the power station and connectors dry unless they are specifically rated for wet exposure, and place the battery unit in a ventilated location. Do not use damaged cables or improvised connections, and verify voltage compatibility before connecting an array.
Yes, a portable power station can charge some electric cars, but the result is usually a few miles of emergency range rather than a full battery. Success depends on the station’s battery capacity, continuous inverter wattage, AC output, the vehicle’s Level 1 charging requirements, and electrical grounding compatibility.
A typical portable setup sends AC power through the car’s portable charging cable, also called an EV charging cord or EVSE. Energy is lost in the power station inverter, cable, onboard charger, and vehicle systems, so the advertised watt-hours do not all reach the traction battery. A large unit may provide enough runtime to reach a nearby outlet or charging location, while a small unit may fail to start charging at all.
The practical questions are whether the charging equipment will accept the power source, whether the station can sustain the required load, and how much usable range remains after charging efficiency losses.
1. What Charging an Electric Car From a Portable Power Station Means
A portable power station stores direct-current energy in an internal battery and uses an inverter to supply household-style alternating current. To charge an electric car, the vehicle’s portable Level 1 EVSE is normally plugged into that AC outlet. The EVSE communicates with the car and authorizes its onboard charger to draw power.
This arrangement is different from directly connecting an external battery to the vehicle’s high-voltage traction pack. A consumer power station generally cannot provide DC fast charging, and it should never be connected directly to an electric vehicle battery. The vehicle’s normal charge port and compatible charging equipment must remain in the power path.
The distinction matters because power stations are limited by both energy and power. Energy capacity, measured in watt-hours or kilowatt-hours, determines how long charging can continue. Inverter power, measured in watts, determines whether the station can operate the charging load in the first place. A unit can have substantial battery capacity but still be unable to supply the continuous wattage requested by the car.
Portable charging is therefore best viewed as a limited backup option. It may add enough range to move the car to a conventional charger, but it is generally less practical than roadside charging assistance, towing, or charging from a properly installed circuit.
2. How Power, Capacity, and Charging Losses Determine Range
Continuous power must support the charging load
Basic 120-volt Level 1 charging often draws about 8 to 12 amps, depending on the vehicle and charging equipment. At 120 volts, that represents approximately 960 to 1,440 watts. The power station should have a continuous AC rating above the actual draw, not merely a short-duration surge rating. A charging session can last for hours, making continuous thermal performance more important than momentary surge capacity.
Some vehicles let the driver select a lower charging current. Reducing the current may allow charging from a lower-powered station, although it also increases charging time and the proportion of energy consumed by vehicle electronics. Current should only be changed through normal vehicle or charging-equipment controls.
Usable energy is lower than advertised capacity
A station rated at 2,000 watt-hours does not normally deliver the full 2,000 watt-hours through its AC outlets. Battery reserve settings, inverter conversion, heat, and low-voltage shutdown reduce usable AC energy. The vehicle’s onboard charger and battery conditioning systems create further losses.
A reasonable planning estimate is that roughly 70% to 80% of the station’s advertised capacity may ultimately reach the vehicle battery under favorable conditions. Cold temperatures, battery heating, cabin systems, low charging power, or an inefficient inverter can reduce that percentage.
Estimating miles gained
Multiply the power station’s rated kilowatt-hours by the expected net efficiency, then divide by the vehicle’s energy use in kilowatt-hours per mile. For example, a 2-kilowatt-hour station at 75% net efficiency could add about 1.5 kilowatt-hours to the car. If the vehicle consumes 0.28 kilowatt-hours per mile, the theoretical gain is approximately 5.4 miles.
Rated station capacity
Energy reaching car at 75%
Range at 250 Wh per mile
Range at 330 Wh per mile
1 kWh
0.75 kWh
3.0 miles
2.3 miles
2 kWh
1.50 kWh
6.0 miles
4.5 miles
3 kWh
2.25 kWh
9.0 miles
6.8 miles
5 kWh
3.75 kWh
15.0 miles
11.4 miles
Example values for illustration.
3. Real-World Electric Car Charging Examples
Small power station with a standard charging cord
Consider a 1-kilowatt-hour station with a 1,000-watt continuous inverter. If the car’s charging cord requests 1,440 watts, the inverter will probably overload and shut off. Even if the car can be set to an 8-amp draw of about 960 watts, the load leaves almost no operating margin. Heat, voltage drop, or brief fluctuations could still trigger shutdown.
If charging does operate, the station may run for less than an hour and add approximately two to three miles under favorable conditions. Vehicle battery heating or other overhead could make the gain smaller.
Medium station with reduced-current charging
A 2-kilowatt-hour station with an inverter comfortably above the charging load is more workable. At a 960-watt draw, it might operate for roughly 1.5 to 1.8 hours after accounting for inverter losses and reserve capacity. The vehicle could gain around four to six miles, depending on efficiency and driving conditions.
This can be meaningful when a public charger or safe parking location is nearby. It is less useful when the nearest charging option is many miles away or requires highway driving, where energy consumption is often higher.
Large expandable system
A system with 4 to 5 kilowatt-hours of storage could potentially add about 9 to 16 miles. However, systems of this size are heavy, expensive, and time-consuming to recharge. Carrying one routinely may also reduce vehicle efficiency because of the added weight and cargo space used.
Displayed range should not be treated as guaranteed distance. Speed, hills, wind, temperature, tire pressure, climate control, and traffic affect how far the added energy will take the car. Retaining a safety margin is more prudent than planning to arrive with the battery at zero.
4. Common Reasons Charging Fails and What the Symptoms Mean
The power station shuts off immediately
An immediate shutdown often indicates inverter overload, a protective fault, or an unsupported grounding arrangement. Compare the charging load with the station’s continuous AC output rather than its peak or surge figure. Also confirm that other AC devices are not sharing the inverter capacity.
The EVSE shows a fault light
Electric vehicle charging equipment performs safety checks before allowing current to flow. Some portable power stations use a floating-neutral AC design that may not satisfy the EVSE’s grounding test. The EVSE may display a fault even though the station operates ordinary appliances normally.
Do not defeat the ground check or use improvised bonding devices. Compatibility should be confirmed through the instructions for the power station, vehicle, and EVSE. If the grounding requirements are unclear, consult the equipment manufacturers or a qualified electrician.
Charging starts and then stops
Intermittent shutdowns can result from overheating, depleted capacity, voltage instability, an overly high current setting, or automatic power-saving behavior. Check the station’s display for overload, temperature, low-battery, or output warnings. Place the unit where its vents remain unobstructed and where the operating temperature stays within its specified range.
The vehicle gains less range than expected
Low apparent gains are often caused by conversion losses or energy used for battery temperature control. The car may also round its displayed state of charge or recalculate projected range based on recent driving. Compare energy added in kilowatt-hours when that information is available rather than relying only on the estimated-mile display.
The outlet or plug becomes warm
A slightly warm plug can occur under a sustained load, but increasing heat, discoloration, odor, crackling, or a loose connection indicates a problem. Stop charging and have damaged or questionable equipment inspected. Extension cords add resistance and should be avoided unless the charging-equipment instructions explicitly permit a properly rated cord.
5. Safety Basics for Portable EV Charging
Use only intact, listed charging equipment that is compatible with the vehicle. The portable power station must remain dry, stable, and adequately ventilated. Keep connectors out of standing water and protect the equipment from rain, snow, direct spray, traffic, and trip hazards. Weather resistance does not make an open AC connection safe to submerge or expose carelessly.
Inspect the AC outlet, EVSE plug, cable, and vehicle connector before use. Stop if there are bent contacts, damaged insulation, loose connections, unusual heat, smoke, odor, repeated fault messages, or visible battery swelling. Do not open the power station, modify its battery, bypass protection circuits, or attempt to connect it directly to the vehicle’s high-voltage system.
Charging is a sustained high-power load. Avoid covering the station or placing it in a sealed compartment where heat can accumulate. Follow the operating-temperature limits for both the power station and the vehicle. Very cold conditions may cause the car to spend much of the supplied energy warming its battery, while high temperatures can cause either device to reduce power or stop.
Portable power stations must not be connected to building wiring through improvised cords or unapproved inlet arrangements. Any connection involving a home electrical panel, transfer equipment, or permanent EV charging circuit should be designed and installed by a qualified electrician under applicable electrical requirements.
6. Storage and Maintenance for an Emergency Charging Setup
A backup power station is only useful if it is charged and functioning when needed. Check its state of charge periodically and recharge it according to its battery chemistry and manufacturer guidance. For long-term storage, many units favor a partial charge rather than remaining at 0% or 100% for months, but the specified storage level takes priority.
Store the station in a dry, temperature-controlled location away from direct sunlight and combustible clutter. Extreme heat accelerates battery aging, while deep cold can temporarily reduce capacity and charging performance. Avoid leaving a large battery system in a hot parked vehicle for extended periods.
Periodically inspect the EVSE, adapters supplied for normal use, and power cables. A short functional test with a safe, supported load can reveal a depleted battery or failed outlet before an emergency. If testing with the car, monitor the first part of the session for faults and verify that the expected charging wattage remains below the continuous inverter rating.
Battery aging gradually reduces usable capacity. Cycle count, calendar age, high temperatures, and frequent deep discharge all influence that decline. Range calculations made when the station was new may therefore become optimistic after years of use.
A portable power station can charge an electric car when its AC output, grounding design, and available energy are compatible with the vehicle’s charging equipment. The practical gain is commonly only a few miles per kilowatt-hour of rated station capacity. For planning, assume that approximately 70% to 80% of rated energy may reach the traction battery, then allow an additional driving reserve.
This approach is most reasonable for slow emergency charging in a safe location. It is not a substitute for routine home charging or public charging, and it may not work with every EVSE. Before relying on it, verify compatibility under controlled conditions and learn what the station’s fault indicators mean.
Specs to look for
Rated battery capacity: Look for capacity stated in watt-hours or kilowatt-hours, such as 2,000 to 5,000 Wh; higher capacity provides more potential miles before losses.
Usable AC capacity: Look for documented AC discharge efficiency or usable-energy information around 80% to 90%; this supports a more realistic range estimate.
Continuous AC output: Look for at least 1,500 to 2,000 watts when supporting a typical 120-volt charging load; adequate margin helps prevent overload shutdowns.
Output voltage and frequency: Look for stable 120-volt, 60-hertz output for charging equipment designed for North American household power; incorrect output may cause faults or prevent charging.
Pure sine wave inverter: Look for clearly specified pure sine wave AC; clean output is generally better suited to sensitive charging electronics.
Grounding configuration: Look for explicit information about EVSE compatibility, neutral-ground behavior, and protective grounding; this matters because charging equipment performs electrical safety checks.
Adjustable vehicle charging current: Look for normal vehicle or EVSE settings such as 8, 10, or 12 amps; a lower supported current can reduce the load on the inverter.
Thermal and overload protection: Look for temperature monitoring, overload shutdown, short-circuit protection, and visible fault messages; EV charging places a long-duration load on the station.
Weight and recharge time: Compare systems that may weigh tens to more than 100 pounds and require several hours to recharge; portability and recovery time affect emergency usefulness.
Use calculated range only as a planning estimate. Weather, vehicle efficiency, battery temperature, terrain, and the condition of the power station can materially change the final result.
Frequently asked questions
Can a portable power station charge an electric car in an emergency?
Yes, if the station’s AC output and grounding arrangement are compatible with the vehicle’s portable charging equipment. In most cases, it provides only limited emergency range, often a few miles rather than a substantial recharge. It is most useful for reaching a nearby charging location or safer stopping point.
How many miles can a portable power station add to an EV?
The answer depends on the station’s usable energy, charging losses, and the vehicle’s energy consumption. As a rough estimate, a 1 kWh station may provide roughly 2 to 3 miles for a less-efficient vehicle or about 3 to 4 miles for an efficient vehicle under favorable conditions. Cold weather, hills, high speeds, and battery conditioning can reduce the usable range.
What specs matter most when choosing a portable power station for EV charging?
Key specifications include battery capacity in watt-hours or kilowatt-hours, continuous AC inverter output, stable output voltage and frequency, and documented compatibility with EV charging equipment. A pure sine wave inverter, thermal protection, and enough continuous wattage margin are also important. Verify grounding or neutral configuration compatibility before depending on the setup.
Can an EV charge from a 1,000-watt portable power station?
It may work only if the vehicle or EVSE can be set to a sufficiently low charging current, such as about 8 amps at 120 volts. That load is approximately 960 watts, which leaves very little margin on a 1,000-watt inverter. Some stations may still shut down because of heat, voltage drop, or protective limits.
Is it safe to use an extension cord to charge an EV from a power station?
Using an extension cord is a common mistake because it can add resistance, heat, and connection points during a sustained high-power load. Avoid one unless the EVSE instructions specifically allow it and the cord is properly rated for the application. Never use damaged, undersized, coiled, or loosely connected cords.
Is charging an electric car from a portable power station safe?
It can be safe when compatible, listed equipment is used according to the manufacturer instructions in a dry, ventilated location. Do not bypass grounding checks, modify connectors, connect the station directly to the vehicle battery, or use damaged equipment. Stop the session if plugs become increasingly hot or if either device reports a fault.
The most common reasons a portable power station shows 0W are that the output is turned off, the connected device is not actively drawing power, or its consumption is below the display’s measurement threshold. A loose connection, automatic low-load cutoff, overloaded circuit, or incompatible charging protocol can produce the same symptom.
A 0W reading does not automatically mean the battery or outlet has failed. Some devices draw power intermittently, and many stations round small loads down to zero. The reading can also depend on whether you are checking AC output, USB output, DC output, surge watts, or total runtime information.
Start by confirming that the correct output group is enabled and that the connected appliance is operating. Then test the port with a simple, known-working load. If the display remains at 0W, warning icons, temperature, battery charge level, cable condition, and output limits can help distinguish normal behavior from a fault.
1. What a 0W Reading Means and Why It Matters
A 0W output reading means the power station is reporting no measurable power flowing from its battery to the connected load at that moment. It does not necessarily mean nothing is plugged in. A plug establishes a physical connection, but wattage appears only when the connected device requests and receives electrical power.
For example, a fully charged phone may stop drawing meaningful current even though its cable remains connected. A refrigerator may show 0W between compressor cycles. An AC charger with no device attached may consume so little standby power that the display rounds it down. These can all be normal conditions.
The reading matters because it affects troubleshooting and runtime planning. If a device should be operating continuously but the station still reports zero, the relevant output may be disabled or a protective shutdown may have occurred. If the load is simply too small to register, battery capacity may still decline slowly despite the 0W display.
Also distinguish output watts from input watts. Output wattage represents electricity being supplied to appliances, while input wattage represents energy entering the station from a wall outlet, vehicle socket, or solar source. A station can report 0W output while it is charging normally, and it can report 0W input while powering a device.
2. How Power Measurement and Output Controls Work
Portable power stations typically divide their connections into output groups, such as AC receptacles, USB ports, and regulated DC sockets. Each group may have its own electronic switch. Plugging a device into an AC receptacle does not guarantee that the inverter is on; similarly, some DC or USB banks must be activated separately.
Internal sensors estimate voltage and current, then calculate wattage. Because these sensors have limited resolution, very small loads may appear as 0W. A station that updates in whole watts might display a 0.4-watt standby load as zero. Other models refresh only every few seconds, so brief changes may not appear immediately.
AC appliances can also cycle. Refrigerators, pumps, heated blankets, and thermostatically controlled equipment draw power only when their controls call for it. Their startup surge may be much higher than their running watts, but the display can return to zero when the active cycle ends.
Automatic energy-saving features add another variable. A low-load cutoff may disable an output when demand remains below a preset threshold for a specified time. This conserves battery energy and reduces inverter losses, but it can interrupt clocks, network equipment, medical accessories, or other low-wattage devices. USB charging may also depend on voltage negotiation, including a compatible USB Power Delivery profile, before meaningful power flows.
Common interpretations of a 0W display. Example values for illustration.
Situation
Possible reading
Likely explanation
Charged phone remains connected
0W to 1W
Charging has finished or entered maintenance mode
Refrigerator between cycles
0W
Compressor is temporarily off
Small AC adapter on standby
0W
Consumption is below display resolution
AC appliance with inverter disabled
0W
The AC output group is off
Device exceeds an output limit
0W after shutdown
Overload protection has disconnected the output
3. Real-World Examples of 0W Readings
A phone or tablet is plugged into USB
A mobile device may draw no visible power if its battery is full, its screen is off, or its charge-management system has paused charging to control temperature. A damaged or charge-only-incompatible cable can also prevent proper communication. With USB-C equipment, the source and device must agree on a supported voltage and current profile. If negotiation fails, charging may be slow, intermittent, or absent.
A refrigerator or cooler is connected
Compressor-based appliances do not run continuously. The station may show substantial running watts during a cooling cycle and 0W after the target temperature is reached. Watch the display through a complete cycle before assuming there is a problem. If the output shuts down exactly when the compressor starts, startup surge rather than normal running consumption may be the issue.
A laptop charger is connected to AC
A laptop’s charging adapter may consume little or no measurable power when the laptop battery is full or the computer is asleep. If the AC indicator is enabled and the laptop reports that it is charging, a brief 0W display can reflect rounding or a slow refresh rate. If the laptop does not recognize external power, test the adapter and receptacle separately.
A low-power light or router turns off later
A small continuous load may initially operate and then stop because the station’s power-saving mode considers the demand too low. This pattern is an important cue: the port works at first, the display shows only a few watts or zero, and the output later disables itself. An adjustable low-load setting or an always-on output mode may be relevant if the station provides one.
4. Common Mistakes and Troubleshooting Cues
Check the correct display value. Confirm that you are viewing output watts rather than input watts, remaining hours, battery percentage, or watts assigned to another port group.
Enable the relevant output. Look for the AC, USB, or DC status indicator. A master power button may turn on the display without activating every output bank.
Wake and operate the connected device. Turn on the appliance, lower a thermostat setting if appropriate, or connect a partially discharged phone. A plugged-in but idle device may legitimately draw nothing.
Inspect the connection. Fully seat plugs at both ends and look for bent contacts, debris, looseness, frayed insulation, or unusual heat. Replace a suspect removable cable with a correctly rated, known-working one.
Try a known-working moderate load. A basic lamp or similar device with steady consumption can reveal whether an AC output is functioning. Choose a load comfortably below the station’s continuous wattage rating.
Check for protective warnings. An overload, short-circuit, low-battery, high-temperature, or low-temperature warning may explain why a port was disabled. Remove the load and follow the manufacturer’s normal reset guidance rather than repeatedly forcing the output on.
Allow for display delay. Wait through several refresh cycles. Some meters take a few seconds to recognize a new load, and rapidly changing demand can make the number appear unstable.
Consider low-load shutdown. If a device works briefly and then loses power, review the station’s energy-saving settings. Do not assume the battery is defective solely because an ultra-low-power device cannot keep the output awake.
A useful troubleshooting distinction is whether the connected device operates despite the 0W reading. If it works, measurement resolution, rounding, or intermittent demand is likely. If it does not work, focus on output activation, cable compatibility, battery state, protective shutdown, and the appliance’s own condition.
5. Safety Basics When Testing a 0W Output
Use only intact cords, adapters, and connectors rated for the intended voltage and current. Stop testing if a plug is loose, scorched, melted, unusually warm, or producing an odor. Place the power station on a stable, dry surface with ventilation openings unobstructed.
Do not open the enclosure, modify the battery pack, bypass protective circuits, or insert tools into an outlet. A display problem does not make internal electrical work safe. If the unit has been dropped, exposed to water, swollen, or damaged, disconnect loads and arrange professional evaluation.
Confirm that appliance running watts and startup surge are within the appropriate output ratings. Repeated overload attempts can stress connectors and cause protective shutdowns. Motors, compressors, pumps, and heating appliances deserve particular attention because their real demand may differ substantially from a simple nameplate estimate.
Never connect a portable power station directly to household wiring through improvised cords or unapproved methods. Home backup connections require suitable equipment and evaluation by a qualified electrician. The station should also remain away from flammable materials and should not be operated in standing water or enclosed spaces that trap heat.
6. Maintenance and Storage That Help Prevent False 0W Readings
Keep ports clean and dry. Dust or debris can prevent a connector from seating fully, while corrosion can increase resistance and cause intermittent operation. Inspect ports visually and use only manufacturer-approved cleaning practices; do not scrape contacts with metal objects or apply liquids inside the unit.
Exercise the power station periodically during long storage. Confirm that the display, AC inverter, USB ports, and DC outputs operate with appropriate test loads. Recharge according to the storage interval and charge range specified for the unit. Leaving a battery completely depleted for an extended period can trigger a low-voltage state that delays or prevents normal output.
Store the station in a moderate, dry environment. Temperature extremes can reduce available power and activate battery protection. After moving a cold unit into a warm area, allow it to reach a suitable operating temperature and ensure condensation is not present before use.
Software-controlled models may occasionally require a normal restart or an available firmware update to correct display behavior. Use only supported procedures. Persistent 0W readings across multiple known-working loads and output types may indicate a failed sensor, inverter, port board, or display rather than a settings issue.
Illustrative maintenance checks for output reliability. Example values for illustration.
A 0W display is often normal when a device is fully charged, sleeping, cycling, or drawing less power than the meter can show. First verify that the appropriate output is enabled and that the appliance is actually requesting power. Then check connections, warnings, battery level, temperature, load limits, and power-saving settings.
If a known-working moderate load operates normally, the station’s display resolution or the original device’s low demand is the likely explanation. If several suitable loads fail on one output group, but other ports work, that output may require service. If all outputs remain inactive after normal checks, stop use and seek qualified support rather than opening or modifying the unit.
Specs to look for
Display resolution: Look for wattage reporting in increments of about 1W rather than 5W or 10W; finer resolution makes small loads easier to identify.
Low-load cutoff controls: Look for an adjustable threshold, commonly in the approximate 1W to 10W range, or an option to disable automatic shutdown; this matters for routers, clocks, and other light loads.
Continuous AC output: Choose a rating comfortably above the combined running watts of intended appliances, such as a 20% to 30% operating margin; this helps prevent overload shutdowns.
Surge output: Compare the short-duration surge rating with motor or compressor startup demand, which may be two to several times running wattage; adequate headroom supports reliable startup.
Separate output controls: Look for independent AC, USB, and DC switching with clear status indicators; this makes activation and troubleshooting more straightforward.
USB-C power profiles: Check for the voltage and wattage profiles required by your devices, such as 5V through 20V and outputs around 60W to 100W for many laptops; compatible negotiation supports normal charging.
DC voltage regulation: Look for a stable regulated output near the connected device’s requirement, often around 12V for compatible equipment; stable voltage reduces unexpected cutoffs.
Meter refresh rate and data: Look for updates every few seconds plus separate input and output readings; clear data helps distinguish display lag from a genuine loss of power.
Protection indicators: Look for identifiable overload, short-circuit, temperature, and low-battery alerts; specific warnings make a 0W condition easier to diagnose safely.
The most useful features are not simply higher wattage numbers. Accurate metering, clear output indicators, configurable energy-saving behavior, compatible charging profiles, and understandable protection alerts can make low-power operation more reliable and troubleshooting much faster.
Frequently asked questions
Why does my portable power station show 0W while my device is still working?
The device may be drawing less power than the display can measure or report, particularly if the meter rounds to whole watts. It may also draw power intermittently, such as when a refrigerator compressor is between cycles or a phone has nearly finished charging.
Why does a power station show 0W when a phone is plugged in?
A phone may stop or greatly reduce charging when its battery is full, its temperature is high, or its charge-management system pauses charging. A cable problem or an incompatible USB-C charging profile can also prevent the phone from requesting meaningful power.
Is it a mistake to turn on only the main power button?
Yes. On many units, the main button activates the display or system but does not switch on every AC, USB, and DC output group. Check the indicator for the specific port type being used before assuming the outlet has failed.
What portable power station specs help prevent confusing 0W readings?
Useful features include fine wattage-display resolution, separate input and output readings, and a fast meter refresh rate. Adjustable low-load cutoff settings, clear protection alerts, independent output controls, and compatible USB-C power profiles also make low-power use easier to diagnose.
Why does the output turn off after a few minutes with a small device connected?
The station may be using an energy-saving mode that automatically shuts down an output when demand stays below a minimum threshold. Review the low-load or eco-mode settings and, if available, use an always-on mode appropriate for the connected device.
Is it safe to keep testing a power station that shows 0W?
Testing with an intact, correctly rated, moderate load is generally appropriate when the unit has no warning signs. Stop using the station if you notice heat, damage, odor, swelling, water exposure, or repeated protective shutdowns, and do not open the enclosure or bypass safety circuits.
A portable power station can run appliances directly, while a transfer switch setup connects a compatible backup source to selected home circuits through permanently installed electrical equipment. The power station stores and produces electricity; the transfer switch controls whether designated circuits receive utility power or backup power.
The better arrangement depends on the loads you need to support, required runtime, battery capacity, surge watts, outlet configuration, and whether the system provides the correct 120/240-volt output. A portable unit used by itself is usually simpler and more flexible. A transfer switch can make home backup power more convenient, but it introduces compatibility, installation, grounding, and capacity considerations.
These options are not necessarily competitors. A suitably designed portable power station may serve as the energy source for a transfer switch system. However, many units are intended only for direct connection to appliances and should not be connected to home wiring.
1. What the Two Setups Mean and Why the Difference Matters
A portable power station combines a rechargeable battery, inverter, charging electronics, protection systems, and output ports in one enclosure. Appliances typically plug into its AC receptacles, USB ports, or DC outlets. This arrangement avoids interaction with the home’s fixed wiring and allows the unit to be moved between rooms, vehicles, or outdoor locations.
A transfer switch is not an energy source. It is electrical switching equipment that isolates selected household circuits from the utility supply before those circuits receive power from an alternate source. Depending on the installation, the alternate source may connect through an exterior or interior power inlet. Transfer equipment can be manual or automatic, although portable battery systems are commonly associated with manual operation.
The distinction matters because capacity alone does not establish compatibility. A large battery may still lack the voltage, connector, neutral configuration, or continuous output required by a transfer switch installation. Conversely, a properly designed transfer setup cannot supply more energy than the connected source stores or produces.
2. How Power, Capacity, Voltage, and Circuit Transfer Work
Power and energy describe different limits. Inverter output, measured in watts, determines how much equipment can operate at one time. Battery capacity, commonly stated in watt-hours, influences how long those loads can run. A 2,000-watt inverter does not mean the unit can deliver 2,000 watts for a specific number of hours; usable capacity and conversion losses also matter.
Motor-driven appliances create another requirement. Refrigerators, sump pumps, fans, and some heating equipment may draw several times their normal running power during startup. The source must support both continuous watts and short-duration surge watts without shutting down.
Voltage is equally important. Many portable stations provide only 120-volt AC output. Typical household transfer equipment may serve 120-volt circuits, 240-volt circuits, or both. A 120-volt source cannot operate true 240-volt loads merely because an adapter fits. Some higher-output battery systems provide split-phase 120/240-volt service, but the waveform, connector, current rating, and transfer equipment must all be compatible.
With direct use, each appliance connects to the station and is limited by the unit’s receptacles and total inverter rating. With a transfer switch, selected branch circuits remain usable through their normal wall outlets or hardwired connections. The homeowner must still manage loads so the combined demand stays within the source, inlet, cable, and transfer equipment ratings.
Example values for illustration.
Characteristic
Direct portable station use
Transfer switch setup
Connection point
Appliances plug into the station
Alternate source supplies selected circuits
Typical setup
Minimal fixed equipment
Professional installation generally required
Load access
Limited to reachable cords and outlets
Normal outlets or hardwired loads on transferred circuits
Voltage needs
Often 120 volts
May require 120/240-volt split-phase output
Main advantage
Portability and simplicity
Convenient circuit-level backup
3. Real-World Home Backup Examples
Short outage with essential plug-in loads
Consider a refrigerator averaging 100 to 200 watts while running, several LED lights, a modem, and phone charging. A portable station with adequate surge capability can operate these items directly. Extension cords may be necessary, but no transfer switch is needed. A battery around 1,000 to 2,000 watt-hours could provide several hours of support, depending on appliance cycling, inverter losses, and the actual combined load.
Sump pump and selected household circuits
A homeowner may want a sump pump, refrigerator circuit, lighting circuit, and communications equipment to remain available at their usual locations. A transfer switch can improve convenience because those selected circuits are energized without running separate cords through the house. The source still needs enough surge output for the pump and refrigerator, and repeated motor starts can reduce runtime substantially.
Loads that exceed a typical portable system
Central air conditioning, electric resistance heating, electric water heating, ranges, clothes dryers, and large well pumps can require substantial 240-volt power. Supporting even one may call for high continuous output, strong surge performance, and much more stored energy than basic portable units provide. Whole-home expectations should therefore be separated from essential-circuit backup.
Runtime estimates should use measured or realistic average consumption rather than appliance nameplate maximums alone. As a simplified example, 1,800 usable watt-hours divided by a 300-watt average load suggests about six hours. Actual results vary with temperature, battery reserve settings, inverter efficiency, appliance cycling, and battery age.
4. Common Mistakes and Troubleshooting Cues
Treating watt-hours as output power: A large battery capacity does not guarantee that the inverter can start a pump, refrigerator, or compressor. Check continuous and surge output separately.
Assuming every AC outlet supports the full rating: The total inverter rating may be shared among multiple receptacles, and an individual outlet may have a lower current limit.
Confusing 120 volts with 120/240 volts: A station with standard 120-volt receptacles generally cannot supply true 240-volt loads. Plug shape alone does not prove electrical compatibility.
Overloading transferred circuits: A transfer switch makes multiple circuits accessible, but it does not increase inverter output. If power stops when another appliance starts, combined load or surge demand may be the cause.
Ignoring neutral and grounding design: Portable sources may use a floating neutral or another configuration that interacts differently with transfer equipment and ground-fault protection. Unexpected fault indications or tripping require professional evaluation rather than improvised adapters.
Using unsuitable cords or connectors: Excessively long, undersized, damaged, or loosely connected cables can cause voltage drop and heat. Every component in the power path must have an appropriate voltage and current rating.
Expecting nameplate runtime: AC conversion losses, cold weather, high loads, and battery protection reserves reduce usable operating time.
If a system repeatedly shuts down, identify whether it occurs at appliance startup, after sustained high demand, during low battery conditions, or only when connected to transfer equipment. Those patterns can point toward surge overload, thermal protection, depleted capacity, or an installation compatibility issue. Electrical faults, unexplained tripping, or abnormal heating should be assessed by a qualified electrician.
5. High-Level Safety Basics for Both Arrangements
Never connect a portable power source to home wiring through a wall receptacle or improvised double-ended cord. That practice can energize wiring unexpectedly, defeat proper isolation, create fire and shock hazards, and endanger utility workers. Home-circuit backup requires listed transfer equipment or another approved transfer method installed for the intended application.
A qualified electrician should determine whether the transfer switch, inlet, overcurrent protection, conductor sizing, grounding arrangement, and neutral switching are compatible with the portable source. Local electrical and building requirements may also govern permits, installation, labeling, and inspection.
Keep the station dry, provide the ventilation clearance specified for it, and protect connectors from physical damage. Do not cover the unit during operation or place it near flammable materials. Although battery power stations produce no engine exhaust while operating, any fuel-burning charging equipment used nearby must remain outdoors and safely separated from openings.
Use load management rather than relying on protective shutdowns. Start large appliances one at a time, monitor output, and leave headroom below the continuous rating. Medical devices, life-safety equipment, and loads that cannot tolerate interruption require a backup plan specifically evaluated for their power quality, transfer time, and reliability needs.
6. Maintenance, Testing, and Storage
Recharge the battery according to its storage guidance and check its state of charge periodically. Long storage at a completely empty state can leave insufficient reserve for an outage, while temperature extremes can accelerate aging. A dry, moderate-temperature location is generally preferable.
Test the intended loads periodically under controlled conditions. Confirm that motor loads start, the displayed wattage remains within limits, and the estimated runtime matches current needs. Inspect external cords, plugs, inlets, and receptacles for looseness, discoloration, corrosion, cuts, or heat damage. Do not open the power station or modify its battery pack.
Transfer equipment should remain labeled so household members know which circuits are backed up and which large loads must stay off. Any stiff operation, unusual sound, overheating, visible damage, or persistent breaker tripping warrants professional service. Battery capacity also declines with time and cycles, so an older system may need earlier recharging or reduced loads.
Direct appliance connection is usually the simplest choice when only a few accessible plug-in loads need power. A transfer switch becomes more useful when homeowners want selected fixed circuits, wall outlets, pumps, or lighting to operate normally during an outage. It must be treated as a professionally designed connection system, not as a way to expand the power station’s capabilities.
Begin by listing essential loads, their running watts, startup demand, voltage, and desired operating hours. Then compare that demand with the source’s output and usable energy. If a transfer setup is being considered, have an electrician verify the entire connection path and the source’s grounding, neutral, voltage, and waveform compatibility.
Specs to look for
Usable battery capacity: Look for roughly 1,000 to 3,000 watt-hours for modest essential-load backup, or more for longer outages; usable energy determines practical runtime.
Continuous AC output: Choose an output above the expected simultaneous load, with approximately 20% to 30% operating headroom; this reduces overload and heat-related shutdowns.
Surge output: Look for a short-duration rating that covers motor startup, sometimes two to three times running watts; pumps and compressors may otherwise fail to start.
Output voltage and phase: Confirm whether the system provides 120 volts only or true 120/240-volt split-phase power; this determines which household loads can operate.
AC connector and current rating: Verify a purpose-designed output connection with enough current for the intended inlet and transfer equipment; physical fit alone does not establish compatibility.
Recharge input: Compare AC and solar charging rates, such as 500 to 1,500 watts; faster recharging can restore useful capacity between outages.
Battery chemistry and cycle rating: Look for chemistry suited to frequent backup use and a cycle specification tied to remaining capacity; this helps estimate long-term durability.
Operating temperature range: Confirm charging and discharging ranges appropriate for the storage location; batteries may deliver less power or reject charging in extreme temperatures.
Monitoring and load controls: Useful displays show watts, remaining energy, estimated runtime, and fault conditions; clear data supports better load management.
The most appropriate setup is the one that safely supports clearly prioritized loads without exceeding its electrical or energy limits. Portability favors direct use, while circuit-level convenience favors a compatible transfer switch installation.
Frequently asked questions
Can a portable power station power a house through a transfer switch?
It can power selected home circuits only when the power station, inlet, cable, and transfer equipment are designed and rated to work together. The source must provide the required voltage, output capacity, connector type, and compatible neutral and grounding arrangement. Many portable power stations are intended for direct appliance use only.
What specs matter most when choosing a portable power station for home backup?
Compare usable battery capacity, continuous AC output, surge capability, output voltage, and the rating of each outlet or dedicated connection. Also consider recharge speed, operating temperature limits, and whether the system provides true 120/240-volt split-phase output if that is required. The selected source should support the expected simultaneous loads with operating headroom.
How long will a portable power station run a refrigerator during an outage?
Runtime depends on usable battery capacity, the refrigerator’s actual cycling load, startup demand, and inverter losses. A refrigerator may use far less power while cycling than its peak or nameplate rating suggests, but conditions such as ambient temperature and frequent door opening can increase consumption. Measuring average usage provides a more reliable estimate than using a single wattage figure.
Can a 120-volt portable power station run 240-volt appliances?
No. A standard 120-volt output cannot supply a true 240-volt appliance simply by using an adapter or a different plug. A compatible source must provide the appropriate 120/240-volt split-phase output, current capacity, and connection method for the intended equipment.
What is a common mistake when connecting backup power to home circuits?
A common mistake is assuming that a transfer switch increases the output or runtime of the portable power station. The connected circuits still share the source’s inverter and battery limits, so several loads starting at once can overload it. Another serious mistake is using improvised cords or connecting a source through a wall receptacle.
Is it safe to connect a portable power station to a transfer switch yourself?
Home-circuit backup should use listed transfer equipment or another approved transfer method that properly isolates utility power. Compatibility can involve voltage, overcurrent protection, conductor sizing, grounding, and neutral switching, so installation and source verification should be handled by a qualified electrician. Never backfeed home wiring through a receptacle or use a double-ended cord.
The best way to keep a backup power station ready without overcharging it is to store it at a moderate state of charge, recharge it on a schedule, and avoid leaving it full and plugged in unless its manufacturer specifically supports long-term standby charging.
Modern portable power stations use a battery management system, or BMS, to stop electrical overcharge under normal conditions. However, holding a lithium battery at a 100% charge level for weeks or months can still increase long-term battery wear, especially in warm storage. Charge limit settings, storage temperature, battery chemistry, standby mode, and self-discharge all affect readiness.
For most households, a practical approach is to keep the unit around 50% to 80% during routine storage, check it every one to three months, and top it up before severe weather or a planned outage. Exact targets vary, so the power station’s operating and storage instructions should take priority.
1. What Overcharging Means for a Backup Power Station
Electrical overcharging occurs when a battery continues receiving energy beyond its safe upper voltage. A functioning power station is designed to prevent this. Its BMS monitors cell voltage, current, and temperature, then reduces or stops charging when necessary. The external charger and internal charge controller also help regulate the process.
That protection does not mean a battery experiences no stress while sitting at 100%. A full lithium-ion battery remains at a relatively high cell voltage. Over time, high voltage and heat can accelerate chemical aging, reducing usable capacity and shortening runtime. This is better described as high-state-of-charge wear rather than uncontrolled overcharging.
Readiness and battery longevity therefore require a balance. Keeping a unit nearly empty may leave too little energy for an unexpected outage. Keeping it completely full in a hot room throughout the year may produce unnecessary wear. A moderate storage charge provides an energy reserve while reducing the time spent at maximum voltage.
Occasional charging to 100% is normal and useful before an expected outage, camping trip, or emergency. The greater concern is leaving the battery full for extended periods when immediate maximum capacity is not required.
2. How Charge Management and Battery Chemistry Work
Most backup power stations use either lithium iron phosphate, commonly called LFP or LiFePO4, or another lithium-ion chemistry such as nickel manganese cobalt. LFP batteries generally offer higher cycle-life ratings and good thermal stability, while other lithium-ion chemistries may provide lower weight for a given capacity. Both benefit from reasonable storage temperatures and avoiding unnecessary time at extreme charge levels.
The displayed percentage is an estimate calculated by the BMS rather than a direct measurement of stored watt-hours. It can drift after many partial cycles or long storage periods. Some models periodically benefit from a complete charge cycle for display calibration, but calibration should follow the manufacturer’s instructions and should not be performed more often than necessary.
Charge limits can make routine storage easier. If a unit allows a maximum charge level of 70%, 80%, or 90%, the user can select a lower ceiling for everyday standby use and temporarily raise it before a likely outage. Models without an adjustable limit can be unplugged manually when they reach the desired range.
Self-discharge also matters. Even when outputs are off, the battery and internal electronics gradually consume energy. Wi-Fi, Bluetooth, illuminated displays, DC outputs, and inverter standby can increase this loss. Turning off unneeded functions helps preserve the stored charge.
Charge condition
Typical use
Readiness
Battery-wear consideration
30% to 50%
Longer storage
Limited immediate runtime
Moderate storage level, but may require charging before use
50% to 80%
Routine emergency standby
Useful reserve for many loads
Balances readiness with reduced time at full charge
90% to 100%
Outage expected soon
Maximum or near-maximum runtime
Best used temporarily rather than for months of storage
Below 10%
Nearly depleted
Poor emergency readiness
Extended storage at very low charge may be harmful
Example values for illustration.
3. Real-World Charging and Storage Examples
Routine household standby
A household stores a 1,000-watt-hour power station in a climate-controlled closet for occasional outages. Keeping it near 70% provides roughly 700 watt-hours before conversion losses and reserve limits are considered. The owner checks it every two months, confirms that all outputs are off, and restores the charge if it has fallen significantly.
Severe weather approaching
A storm is forecast within two days. The power station is increased from its routine 70% level to 100%, then disconnected once charging is complete. Charging to full in this situation is appropriate because the stored energy is likely to be used soon. After the risk passes, normal use can bring the battery back toward its routine storage range.
Power station used as an uninterruptible supply
Some units support pass-through power or an emergency power supply mode. In this setup, utility power feeds the connected equipment while the battery remains available for an outage. A model designed for this role may manage its battery differently from a unit intended only for occasional charging. Important specifications include transfer time, supported input power, output capacity, charge-limit controls, and whether long-term plugged-in operation is permitted.
Pass-through capability alone does not necessarily mean a power station should remain connected continuously. If the unit repeatedly drops a few percentage points and recharges, it may accumulate shallow cycles. The operating instructions should confirm the intended standby behavior.
4. Common Mistakes and Troubleshooting Cues
Leaving the inverter on during storage: The AC inverter can consume power even when no appliance is operating. If the charge level falls faster than expected, confirm that AC, DC, USB, wireless, and network functions are off.
Storing the battery completely full in heat: A garage, vehicle, attic, or sunlit room can reach damaging temperatures. High charge and high temperature together are especially unfavorable for lithium battery aging. Move the unit to a dry, ventilated indoor location within its stated storage range.
Allowing the battery to remain empty: A display reading of 0% does not necessarily mean every cell is at zero voltage, but the remaining protective reserve can decline during storage. Recharge a depleted unit promptly rather than leaving it unused for months.
Using an incompatible charger: A charger with the wrong voltage, connector, polarity, or power-delivery profile may fail to charge or could create a safety risk. Use an approved charging method that matches the specified input voltage, current, wattage, and connector type.
Assuming the percentage is perfectly accurate: If the display jumps, stalls, or reaches full unusually early, the estimate may need recalibration. First perform a normal restart and charge with the correct adapter at room temperature. If the behavior continues, follow the documented calibration procedure or request qualified service.
Ignoring abnormal behavior: Stop charging if the unit becomes unusually hot, produces an odor, swells, makes unexpected noises, shows repeated fault codes, or has damaged ports or cables. A power station that shuts down while charging may be responding to excess temperature, an unsuitable power source, or an internal fault.
5. Essential Charging and Battery Safety
Charge the power station on a stable, dry, nonflammable surface with ventilation around its cooling openings. Keep it away from direct sunlight, heaters, standing water, flammable materials, and areas accessible to small children or pets. Do not cover the unit while it is charging.
Inspect the charging cable, plug, adapter, and ports before use. Loose connections, bent contacts, frayed insulation, discoloration, or melted plastic require attention. Do not open the enclosure, replace internal cells, bypass the BMS, or modify charging hardware.
Temperature limits apply to both charging and storage. A cold battery may temporarily refuse to charge, while excessive heat can trigger shutdown or accelerate degradation. Allow a unit moved from a very cold or hot environment to return to an acceptable operating temperature before charging.
A portable power station should not be connected directly to household wiring through improvised cords or outlets. Any installation intended to power home circuits requires compatible transfer equipment and evaluation by a qualified electrician. Portable units should also be kept out of rain unless their stated ingress protection and operating instructions explicitly permit exposure.
6. A Practical Maintenance and Storage Schedule
Choose a cool, dry storage location that is easy to access during an outage. Avoid placing heavy objects on the power station, and protect its ports from dust and impact. Store charging cables with the unit so the correct accessories are available when needed.
For routine standby, inspect the battery every one to three months. Check the displayed charge, look for physical damage, and verify that the unit powers on without a warning. If the charge has fallen below the chosen reserve level, recharge it to the preferred storage range. Units with higher standby drain may need more frequent checks.
Before a predictable seasonal risk, charge the battery fully and briefly test essential loads without exceeding the continuous output rating. A short functional test can reveal a damaged cable, weak adapter, inaccurate display, or appliance with unexpectedly high startup watts. Afterward, switch off all outputs before returning the unit to storage.
Keep a simple record of check dates, charge percentages, faults, and noticeable runtime changes. A gradual decline is normal with age, but a large unexplained capacity loss may indicate calibration drift, unusual standby consumption, extreme storage conditions, or battery deterioration.
Interval
Maintenance action
What to verify
Monthly to quarterly
Check state of charge
Battery remains within the chosen standby range
Every few months
Inspect ports and cables
No damage, corrosion, looseness, or overheating marks
Before outage season
Charge and test essential loads
Normal charging, output, fan operation, and display behavior
After each use
Cool, clean, and recharge
Outputs are off before storage
During long storage
Review environmental conditions
Area remains dry, ventilated, and within the stated temperature range
For everyday readiness, use a moderate charge target rather than automatically keeping the battery at 100%. Check it periodically, disable unnecessary outputs, and move to a full charge when an outage is likely. Avoid prolonged storage near empty, excessive heat, incompatible chargers, and continuous plugged-in operation unless the power station is designed for that use.
The most useful maintenance features are those that make charge control, monitoring, and safe storage easier. Capacity and output ratings still matter, but they should be considered alongside chemistry, standby consumption, operating temperature, and charging controls.
Specs to look for
Adjustable charge limit: Look for selectable ceilings such as 70%, 80%, or 90%; this reduces time spent at full charge during routine standby.
Battery chemistry: Compare LFP with other lithium-ion designs and review expected cycle life; chemistry influences weight, longevity, and storage behavior.
Cycle-life rating: Look for a stated number of cycles to a remaining capacity, such as 2,000 to 4,000 cycles to about 80%; consistent test terms make comparisons more meaningful.
Storage and charging temperature ranges: Look for clearly separated ranges for charging, use, and storage; this helps determine whether the intended location is suitable.
Standby power consumption: Look for low idle draw and the ability to disable AC, DC, wireless, and display functions; lower drain extends the time between maintenance checks.
Pass-through or standby mode: Look for explicit support for long-term plugged-in operation, a stated transfer time, and battery-preservation controls; these matter when protecting continuously connected equipment.
Input power and recharge time: Compare AC input wattage and estimated charging time, such as two to six hours; faster charging can restore emergency capacity when warning time is short.
Battery management protections: Look for monitoring of overvoltage, undervoltage, overcurrent, short circuits, and temperature; these protections help the unit respond to abnormal conditions.
Capacity and usable energy: Compare watt-hour ratings and any stated usable capacity; this determines expected runtime more directly than peak output alone.
Continuous and surge output: Match continuous watts and short-duration surge watts to essential appliances; adequate headroom helps prevent overload shutdown during startup.
A well-maintained backup power station does not have to remain full every day to be dependable. A planned storage level, periodic inspection, suitable temperature, and timely top-up before a likely outage can preserve both emergency readiness and long-term battery capacity.
Frequently asked questions
What charge level should I keep a backup power station at between outages?
For routine storage, many households keep a backup power station around 50% to 80% charge. This provides a useful reserve while reducing the time the battery spends at maximum voltage; the manufacturer’s stated storage guidance should take priority.
Can I leave a backup power station plugged in all the time?
It depends on whether the model is specifically designed and documented for continuous standby or pass-through operation. A battery management system normally prevents electrical overcharge, but long-term full charge and repeated recharge cycles may still contribute to battery wear.
How often should I check a stored power station?
Checking the unit every one to three months is a practical schedule for many power stations. Verify its charge level, turn off unneeded outputs, inspect cables and ports, and recharge if the battery has dropped below the chosen reserve level.
Is it bad to store a power station at 100% charge?
Charging to 100% before a forecast outage or planned use is generally appropriate. Storing a lithium battery at full charge for long periods, particularly in a warm location, can accelerate capacity loss over time.
What features matter most when choosing a power station for emergency standby?
Useful standby features include an adjustable charge limit, low idle power consumption, clear storage-temperature guidance, and documented support for long-term plugged-in use if needed. Battery chemistry, usable watt-hours, continuous output, surge output, and charging time also affect how well the unit can support essential loads.
What safety steps should I follow when charging and storing a power station?
Charge and store the unit on a stable, dry surface with clear ventilation and away from heat, sunlight, water, and flammable materials. Use approved charging equipment, do not cover or modify the unit, and stop using it if it shows swelling, unusual heat, odors, damage, or persistent fault warnings.