
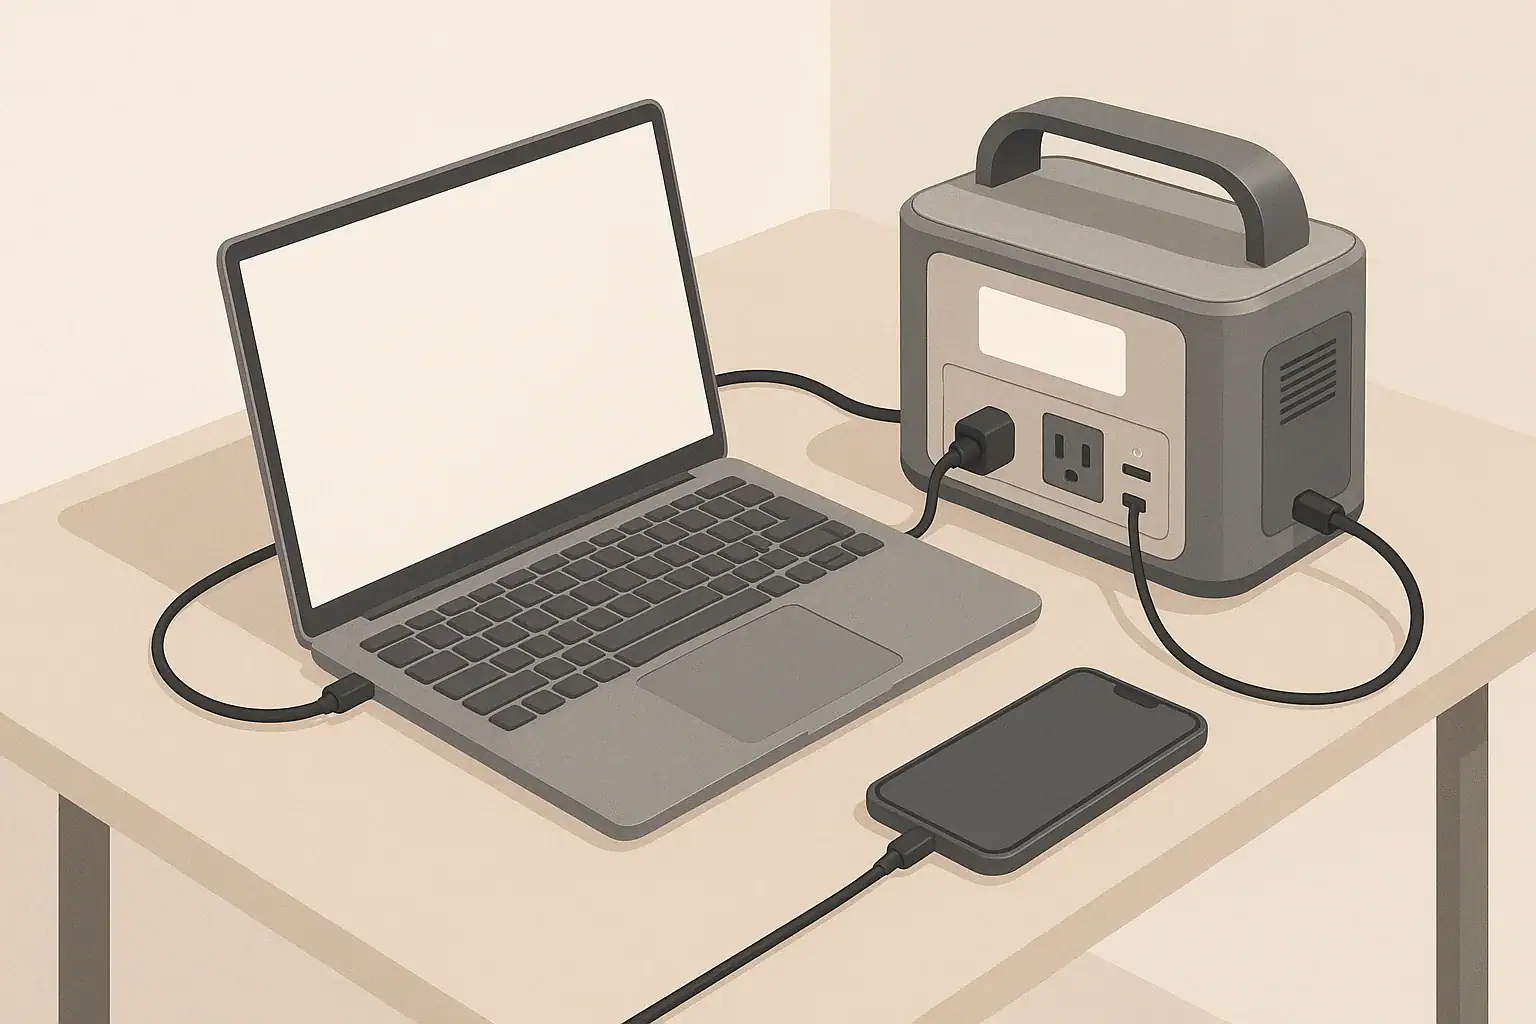
The most important things to do on day one with a new portable power station are: inspect it for damage, give it a controlled first charge, test realistic loads, and avoid heat, overloading, and deep discharges. These steps set up good habits that protect battery health from the start.
Whether you call it a portable power station, solar generator, or battery power pack, the first-time setup has a bigger impact than it seems. A careful first charge and discharge cycle helps the internal battery management system learn, keeps temperatures under control, and shows you how the unit behaves before you rely on it in a power outage or camping trip.
This guide walks through day-one setup in a practical, step-by-step way: what to check right after unboxing, how to charge and test safely, what early warning signs to watch for, and how to build a simple routine that supports long-term battery life.
Why Day-One Setup Matters for Battery Health
Portable power stations use lithium-based batteries that can last for many years if treated well from the start. Day one is when you decide where the unit lives, how it will usually be charged, and how hard you push it during early tests. All of that influences battery stress, heat, and long-term capacity loss.
Good first-time setup is less about “conditioning” the battery and more about avoiding early damage or misuse. The internal battery management system controls charging and discharging, but it cannot fix problems caused by physical damage, blocked vents, extreme temperatures, or constantly running the battery to empty.
On day one, focus on four goals:
- Confirm the unit is safe to use (no damage, no wiring issues).
- Charge it in a stable, cool environment using a reliable power source.
- Test the same types of devices you plan to run in real life.
- Set simple habits for storage, charging level, and safety.
Doing this once, carefully, gives you a baseline for how the power station should behave so you can spot changes later.
Key Concepts for First-Time Portable Power Station Setup
Understanding a few key ideas makes day-one decisions easier and less confusing, especially when you are looking at specs and status screens for the first time.
Battery type and cycle life
Most portable power stations use one of two lithium chemistries:
- Lithium-ion (NMC or similar): Higher energy density, often more compact, typically rated for a moderate number of full cycles.
- Lithium iron phosphate (LiFePO4): Generally longer cycle life and more tolerant of frequent use, but often larger and heavier.
Regardless of chemistry, each full cycle (from full to empty and back) slightly reduces capacity. Avoiding unnecessary deep discharges and high heat slows this process.
State of charge and depth of discharge
Two important terms you will see in manuals and on displays:
- State of charge (SoC): How full the battery is, usually shown as a percentage.
- Depth of discharge (DoD): How much of the battery capacity you use before recharging.
Repeatedly going from nearly 100% to almost 0% stresses the battery more than shallower cycles, such as using 30–60% of capacity before recharging.
Continuous power vs. surge power
The power station’s inverter has two main ratings:
- Continuous power (watts): What it can deliver steadily.
- Surge power (watts): Short bursts for starting motors or compressors.
On day one, plan to stay well below the continuous rating and avoid devices with heavy startup surges. This reduces the chance of overload alarms and keeps internal temperatures lower.
First-day decision helper
Use the following table as a quick reference while you unbox, place, and charge the unit for the first time.
| Decision | Better choice on day one | Why it helps battery health |
|---|---|---|
| First charging source | Stable household wall outlet | Provides consistent voltage and avoids extra heat from improvised cords or adapters. |
| Initial charge target | About 80–100%, then unplug | Ensures readiness while avoiding sitting at 100% for weeks. |
| First discharge depth | Use 20–50% of capacity | Tests behavior without stressing the battery with a deep discharge. |
| Test loads | Phones, laptops, small fans, LED lights | Keeps inverter load moderate and heat manageable. |
| Placement | Cool, dry, ventilated, off the floor if possible | Prevents overheating and moisture exposure. |
| Storage after day one | Moderate charge in a temperature-controlled room | Reduces slow capacity loss during inactivity. |
Real-World Day-One Setup Examples
Every household uses a portable power station differently. These scenarios show how to apply the same day-one principles in different situations while protecting battery health.
Example 1: Small apartment backup for brief outages
Imagine a compact unit meant to run a modem, router, a few lights, and charge phones during short power cuts.
- Unboxing: Check the housing, outlets, and included cables. Make sure nothing rattles when gently moved.
- Placement: Put the unit on a low shelf near the router, with several inches of clearance around vents.
- First charge: Plug directly into a wall outlet and charge to around 90–100% while monitoring for unusual heat or smells.
- First discharge test: Run the router and a small LED lamp for an hour. Watch the wattage and percentage drop. Note how long it would last in a real outage.
- After testing: Recharge to a high level, then unplug and store in the same spot, ready for the next outage.
Example 2: Camping and outdoor use
For camping, the unit might power string lights, phones, a small fan, and a portable cooler.
- Unboxing: Confirm that all DC and USB ports work by charging a phone and running a small light.
- Placement: Choose an indoor “home base” for charging that is cool and dry. For trips, plan a shaded, raised surface at the campsite.
- First charge: Fully charge from the wall before your first trip so you know you are starting with a full battery.
- First discharge test: At home, simulate a camping evening: run lights and a fan for several hours. Note how much charge remains at the end.
- Adjust expectations: If you see faster-than-expected drain, plan to reduce loads or add a charging method (such as vehicle or solar) on future trips.
Example 3: Remote work and equipment backup
Some users rely on a power station to keep a laptop, monitor, and networking gear running during work hours.
- Unboxing: Inspect the AC outlets and verify that the AC power button and display indicators work correctly.
- Placement: Place it under or beside a desk where vents are not blocked by walls or fabric.
- First charge: Charge from the wall in a room at a comfortable indoor temperature, avoiding direct sunlight from windows.
- First discharge test: Work for 1–2 hours with your normal setup plugged into the power station. Watch the wattage and remaining time estimates.
- Refinement: If the battery drains faster than needed for your typical outage duration, plan to unplug nonessential devices during real events.
Day-one behavior patterns to notice
During any of these examples, pay attention to:
- How quickly the percentage drops under realistic loads.
- When cooling fans turn on and how loud they are.
- Whether the display readings (watts, remaining time) seem stable or jumpy.
These observations give you a reference point for later troubleshooting if something changes.
Common Day-One Mistakes and Early Troubleshooting
Many battery and performance problems start with habits formed on the first day. Recognizing common mistakes helps you avoid them and spot issues early while the unit is still new.
Common first-time setup mistakes
- Blocking vents: Placing the power station on a bed, carpet, or inside a tight cabinet where air cannot flow freely.
- Using damaged or thin extension cords: Long, undersized cords can overheat and reduce charging efficiency.
- Immediately testing high-surge devices: Plugging in microwaves, large power tools, or large refrigerators on day one without verifying ratings.
- Leaving at 0% for days: Fully draining the battery during tests and forgetting to recharge promptly.
- Storing in a hot garage or car: Exposing the battery to repeated high temperatures between uses.
Early warning signs to watch for
Day one is the best time to notice anything unusual. Use this table to match symptoms with likely causes and first steps.
| What you notice | Possible cause | What to try next |
|---|---|---|
| Housing feels very hot during first charge | Blocked vents, high ambient temperature, or high-speed charging in a confined space | Move to a cooler, open area, ensure several inches of clearance, and pause charging to cool down. |
| Fan runs constantly at low loads | Warm room, dust in vents, or inverter staying on unnecessarily | Improve ventilation, lower ambient temperature, and turn off AC output when not needed. |
| Battery percentage drops faster than expected | Higher actual load than assumed or inverter losses from using AC instead of DC/USB | Check wattage readout, unplug nonessential devices, and use DC/USB ports where possible. |
| Unit shuts off when you plug in a device | Device start-up surge exceeds inverter surge rating or total load is too high | Test smaller devices first, confirm the appliance watt rating, and stay below continuous and surge limits. |
| No response from display or outputs | Shipping damage, internal fault, or not enough initial charge | Try charging from a known-good wall outlet for a while; if still unresponsive, stop and seek professional support. |
Simple troubleshooting steps on day one
- Reset the basics: Turn the unit off, unplug all loads, and let it rest for a few minutes before trying again.
- Test ports one by one: If one outlet seems unreliable, try a different port with the same low-power device.
- Reduce variables: For strange behavior, disconnect everything and test with a single, simple load like a phone charger.
- Observe patterns: Note whether issues appear only at high loads, only during charging, or only in certain locations (such as a specific outlet).
High-Level Safety Basics for Day-One and Beyond
Safe operation and good battery health usually go together. Most serious issues involve heat, overloading, or incorrect connections. Establishing safety habits on day one reduces those risks.
Electrical safety and load limits
- Always check the power draw (watts) of any appliance before plugging it into the power station.
- Keep total load comfortably below the continuous rating, especially during long runtimes.
- Avoid daisy-chaining power strips or multi-outlet adapters into a single socket.
- Use only cords in good condition, with no frayed insulation or bent prongs.
Location and environment
- Operate the unit on a stable, flat surface where it cannot easily be knocked over.
- Keep it away from water sources, open windows during storms, and areas where it could be splashed.
- Maintain clear space around all vents; do not drape clothing or blankets over the unit.
- In vehicles, secure the power station so it cannot slide or tip while driving.
Children, pets, and unattended use
- Place the unit where children cannot play with buttons, cords, or outlets.
- Do not leave high-wattage loads running unattended for long periods, especially near flammable materials.
- Teach other household members basic rules: where the unit is, what it can safely power, and what to avoid.
When to stop using the unit
Stop using and move the unit to a safe area if you notice:
- Strong burning or chemical smells.
- Smoke, visible sparks, or melted plastic.
- Severe deformation of the housing or bulging surfaces.
Do not attempt to open or repair the unit yourself. Internal battery packs store significant energy and require proper handling.
Maintenance and Storage Habits That Start on Day One
Even if you only use the power station occasionally, what you do between uses has a major impact on battery life. Day one is the right time to decide where it will live and how often you will check it.
Choosing a long-term storage location
- Temperature: Aim for a temperature-controlled space, such as a closet or interior room, instead of an attic, shed, or hot garage.
- Accessibility: Store it where you can reach it quickly during an outage without moving heavy items.
- Protection: Avoid stacking heavy objects on top of the unit or its cables.
Charge level for storage
For many lithium batteries, a middle state of charge is gentler than full or empty during long storage periods.
- For short breaks (days to a couple of weeks), keeping the unit mostly charged is convenient.
- For longer storage (several weeks or more), storing at a moderate charge level and topping up closer to use can reduce long-term stress.
Whatever rule you choose, avoid leaving the battery at 0% or near 0% for more than a short time.
Simple recurring checks
- Every month or two, power the unit on, check the charge level, and top up if it has dropped significantly.
- Run a small load briefly to confirm ports and the display still work as expected.
- Inspect vents and fans for dust buildup and gently clean the exterior with a dry or slightly damp cloth.
- Look over cables for cracks, kinks, or loose connectors.
These quick checks take only a few minutes and help catch problems early, before you depend on the power station during an emergency.
Practical Takeaways and Specs to Look For
By the end of day one, you should know three things: that your portable power station is physically sound, how it behaves under typical loads, and how you plan to store and charge it. With that baseline, you can focus on using it confidently instead of worrying about hidden battery damage.
Key day-one actions to remember
- Inspect the unit and cables for any signs of damage before turning it on.
- Choose a cool, ventilated “home base” location and avoid blocking vents.
- Use a stable wall outlet for the first full or near-full charge and monitor for unusual heat or smells.
- Test realistic loads such as phones, laptops, and small fans before trying anything with a heavy surge.
- Decide on a simple storage and maintenance routine, including charge level and check-in frequency.
Specs to look for (and note) on day one
Even if you already own the power station, taking a few minutes to record key specifications on day one helps you use it within its limits and protect the battery.
- Battery capacity (watt-hours): Tells you how much total energy is available. Compare this to the wattage of your most important devices to estimate runtime.
- Continuous and surge power (watts): Defines what the inverter can safely supply. Keep combined loads below the continuous rating and be cautious with devices that have high startup surges.
- Recommended operating temperature range: Guides where you should and should not use or store the unit.
- Supported charging methods and limits: Note maximum input wattage for wall, vehicle, and any DC or solar inputs so you do not exceed them.
- Cycle life rating: Gives a rough idea of how many full charge–discharge cycles the battery is designed to handle before noticeable capacity loss.
- Idle consumption or eco mode behavior: Helps you avoid slow, unnoticed battery drain when outputs are left on with no load.
- Recommended storage charge level and interval checks: If the manual provides specific guidance, follow it over general rules.
Writing these details down with your purchase date and serial number gives you a compact reference for future planning and troubleshooting. Combined with careful day-one setup, it helps you get the most reliable performance and longest possible battery life from your portable power station.
Frequently asked questions
Which specifications and features should I note during my first-time portable power station setup?
Record the battery capacity (Wh), continuous and surge power ratings, supported charging inputs and their maximum wattages, recommended operating temperature range, and the stated cycle life. Also note idle consumption behavior and the types of available ports (AC, DC, USB) so you can plan realistic runtimes and charging options.
What is a common first-day mistake and how can I avoid it?
One common mistake is blocking ventilation by placing the unit on soft surfaces or inside tight spaces, which causes overheating. Avoid this by putting the station on a flat, stable surface with several inches of clearance around vents and by monitoring for unusual heat during initial charging and testing.
What high-level precautions should I take when setting up and using a new portable power station?
Check appliance wattage before plugging in, keep total loads below the continuous rating, operate the unit in a cool, dry, and ventilated area, and avoid water exposure. If you detect burning smells, smoke, or severe heat, stop use immediately and seek professional support rather than attempting internal repairs.
How often should I check and top up the battery when the unit is stored long-term?
Power the unit on and check the charge level every one to two months, topping up to a moderate state of charge if it has dropped significantly. Follow any specific storage charge recommendations in the manual for best results.
Do I need to run a full charge–discharge cycle on day one to condition the battery?
No, modern lithium-based power stations use battery management systems that handle conditioning; a full cycle is not required. Instead, perform a controlled initial charge to a high level and a shallow discharge (for example 20–50%) to test behavior and verify ports and displays.
How can I tell on day one if there is an internal fault or charging issue?
Signs include no response from the display or outputs, failure to charge from a known-good wall outlet, excessive heat, or error indicators on the unit. Try a different known-good outlet and cable, perform a basic reset (power off and unplug), and if problems persist contact the manufacturer or retailer for support.
Related guides
Browse this topic →
- Beginner-friendly sizing, runtime & specs
- Solar & charging (MPPT, fast charging, cables)
- Batteries (LiFePO4, cycles, care & storage)
- Safety, cold-weather performance, real-world tips
More in Beginners
See all →- Charging an Electric Wheelchair or Mobility Scooter From a Portable Power Station
- Portable Power Station for a Gaming PC: Runtime, Load Spikes, and UPS Considerations
- Portable Power Station for a Pop-Up Camper: Lights, Fans, Fridge, and Recharge Plan
- Portable Power Station for a Shed or Outbuilding: Lights, Chargers, and Security
- Portable Power Station for a Boat: 12V Loads, Salt Air, and Safer Storage
Keep reading
About this site
Portable Energy Lab publishes practical, independent guides about portable power—clear sizing, safe use, and real-world expectations.
Affiliate disclosure
Some links on this site may be affiliate links. If you buy through these links, we may earn a small commission at no extra cost to you. This helps support our content. Read our affiliate disclosure.