
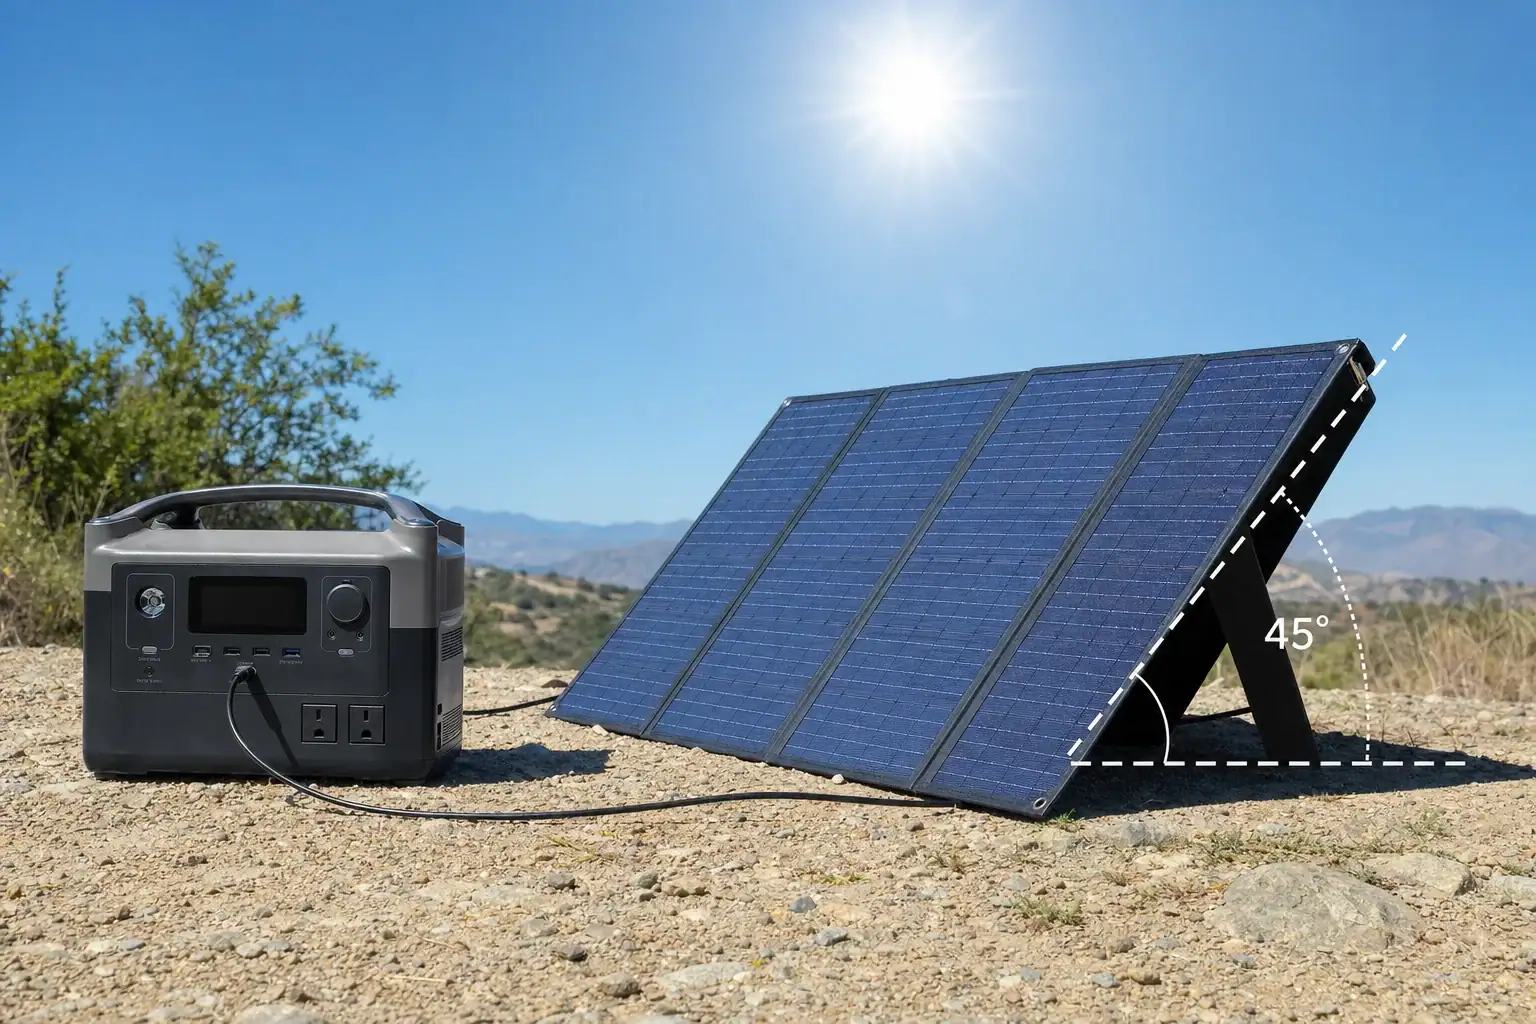
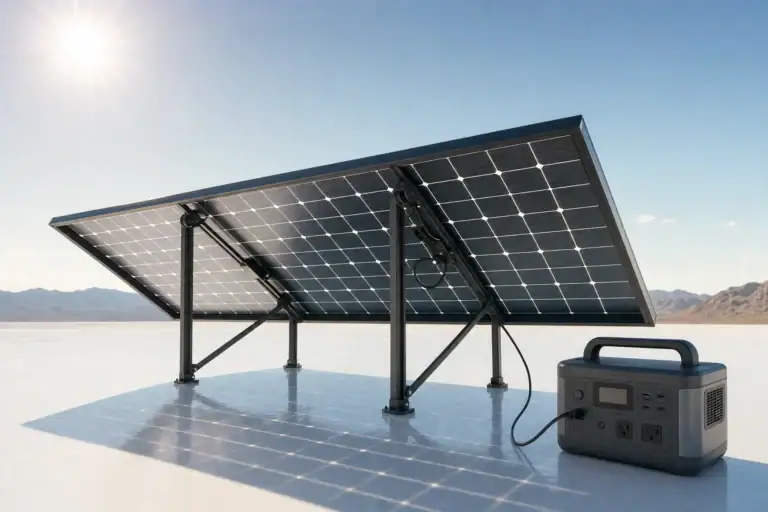
The best solar panel angle for a portable power station is the angle that points the panel face as directly at the sun as possible. For a stationary setup around midday, a tilt close to your geographic latitude is a useful starting point, but adjusting it for the season and time of day can produce more energy.
Correct solar panel tilt reduces reflection and increases the sunlight reaching the cells. That can raise input wattage, shorten charging time, and help the system remain within its productive MPPT range. Direction, shade, panel temperature, peak sun hours, and the power station’s solar charging input also affect the result.
You do not need precision instruments to find a productive angle. Start with a seasonal estimate, aim the panel toward the sun, and compare the displayed solar watts after each small adjustment. The highest stable reading is usually more useful than a generic angle copied from a chart.
1. What the best solar panel angle means and why it matters
Solar panel angle, or tilt, is measured between the panel surface and level ground. A panel lying flat has a tilt of 0 degrees, while a vertical panel has a tilt of 90 degrees. Orientation, also called azimuth, describes the compass direction the panel faces. Both influence charging performance.
A panel collects the most direct sunlight when its face is perpendicular to the sun’s rays. If the sun is high, the panel generally needs a shallower tilt. When the sun is low in the morning, afternoon, or winter, a steeper angle is more effective. The ideal position therefore changes continuously rather than remaining fixed all day.
Angle matters because sunlight arriving at a sharp angle spreads across more surface area and more of it may be reflected. A poorly aimed panel can still generate power, especially under bright or partly cloudy conditions, but its output will usually be lower. Portable panels make adjustment practical, so a few deliberate changes during the day can increase total watt-hours without adding panel capacity.
2. How sun position, latitude, season, and charging limits work together
Latitude provides a practical baseline for a panel that will stay in one position for several hours. As a general starting point, use a tilt roughly equal to local latitude for balanced year-round exposure. Subtract about 10 to 15 degrees during summer, when the sun travels higher, and add about 10 to 15 degrees during winter, when it remains lower. These are starting estimates rather than universal settings.
Direction is equally important. In the Northern Hemisphere, a fixed panel generally faces toward true south; in the Southern Hemisphere, it generally faces true north. Around solar noon, this orientation captures the strongest part of the day’s sunlight. A portable panel used earlier or later can instead be rotated toward the sun. True direction may differ from a magnetic compass reading depending on location.
Electrical limits can hide the benefit of better alignment. A panel may be capable of 200 watts while the power station accepts only 150 watts through its solar input. Once the input limit is reached, changing the angle may not increase the displayed wattage. The panel array must also remain within the station’s accepted input voltage, current, and total power ranges. Angle adjustment cannot correct an incompatible connection.
Clouds and haze increase diffuse light, which arrives from many directions. Precise aiming matters less under heavy overcast, although a moderately tilted, unobstructed panel may still outperform one facing away from the brightest part of the sky.
| Latitude | Summer starting tilt | Year-round starting tilt | Winter starting tilt |
|---|---|---|---|
| 20° | 5°–10° | 20° | 30°–35° |
| 30° | 15°–20° | 30° | 40°–45° |
| 40° | 25°–30° | 40° | 50°–55° |
| 50° | 35°–40° | 50° | 60°–65° |
3. Real-world angle examples for portable solar charging
Midday summer charging
Consider a portable panel used at 40 degrees latitude on a clear summer day. A 25- to 30-degree tilt facing the equator is a sensible starting position near midday. If the power station shows 118 watts, change the tilt by about 5 degrees, wait for the reading to stabilize, and compare. If output rises to 126 watts, continue in that direction once more. If it falls, return to the better position.
Low winter sun
At the same location in winter, a 50- to 55-degree tilt may better face the lower sun. A shallow summer setting could lose substantial direct exposure even when the sky looks bright. Snow-covered ground may reflect additional light, but snow or frost on the cells blocks production and should not be treated as a substitute for correct alignment.
Morning-to-afternoon adjustment
For a full charging day, begin with the panel aimed toward the morning sun. Near midday, rotate it toward the equator-facing direction and adjust the tilt for the higher sun. In the afternoon, turn it westward and use a steeper tilt as the sun descends. Two or three adjustments are often enough; constant tracking is rarely necessary for a portable setup.
Using the shadow method
If no angle tool is available, use the panel’s shadow as a visual guide. When the panel points more directly at the sun, its shadow generally appears compact and falls mostly behind it rather than stretching strongly to one side. Fine-tune using the power station’s input display because shadows alone cannot account for clouds, cell temperature, or charging limits.
4. Common angle mistakes and troubleshooting slow solar charging
- Adjusting tilt but not direction: A correctly tilted panel facing away from the sun can perform poorly. Rotate the panel first, then fine-tune its tilt.
- Leaving the panel flat all day: Flat placement can work when the sun is nearly overhead, but it is usually less productive in the morning, afternoon, and cooler seasons.
- Chasing rapidly changing readings: Passing clouds and MPPT adjustments can make input fluctuate. Wait roughly 30 to 60 seconds after moving the panel before comparing stable readings.
- Ignoring partial shade: A narrow shadow from a branch, cable, handle, railing, or panel stand can reduce output disproportionately. Inspect the full cell surface as the sun moves.
- Expecting nameplate output: Rated wattage is measured under standardized laboratory conditions. Heat, haze, atmospheric angle, wiring loss, and charging electronics usually make real output lower.
- Overlooking battery state: Some power stations reduce charging power as the battery approaches full charge or when the battery is unusually hot or cold. A falling input reading is not always an angle problem.
- Exceeding the solar input ceiling: If the displayed power repeatedly stops at the same value in strong sun, the station may have reached its wattage or current limit.
- Using incompatible electrical specifications: Verify connector compatibility and the array’s voltage, current, and power against the power station’s accepted range. Do not assume that a physically fitting plug is electrically compatible.
For troubleshooting, establish a clean baseline: use an unshaded panel, place it in open sunlight, aim it directly, and check that all approved connections are fully seated. Compare input at similar times on clear days. If output remains abnormally low, inspect accessible cables and connectors for visible damage and consult the equipment documentation rather than opening or modifying either device.
5. Safety basics when positioning portable solar panels
Set the panel on stable ground or a support designed for its size and weight. Secure it against wind, especially at steep angles where it can act like a sail. Do not place rocks or sharp objects directly on the cells, and keep walkways and emergency access clear.
Avoid damaged, pinched, or tightly coiled cables. Keep connectors clean, dry, and off wet ground unless the equipment is specifically designed for those conditions. Never connect or disconnect damaged electrical contacts, and do not exceed the power station’s accepted open-circuit voltage. Electrical voltage can remain present whenever the panel is illuminated.
Panels can become hot in direct sun. Use their frame, stand, or designated handles when adjusting them, and avoid touching hot cell surfaces. Stop using equipment that smells unusual, shows melting or swelling, sparks, or displays repeated fault warnings. Do not open the power station, modify the panel, bypass protection devices, or connect the system to household wiring. Consult a qualified electrician for any installation involving a building electrical system.
6. Maintaining accurate positioning and storing the equipment
Clean cells produce more dependable angle comparisons. Dust, pollen, bird droppings, salt residue, and water spots can create localized shading. Follow the panel’s cleaning instructions, use a soft nonabrasive material, and let the equipment cool before cleaning. Avoid harsh chemicals and high-pressure spray unless expressly permitted by the manufacturer.
Inspect the stand, hinges, fasteners, cable strain reliefs, and connector surfaces periodically. A loose stand may allow the tilt to drift, while a worn hinge may collapse in wind. Marking a few commonly used tilt positions on an adjustable stand can make seasonal setup faster, but the final input reading should still guide fine adjustments.
Before storage, disconnect the equipment as directed, remove moisture and dirt, and fold or pack the panel without sharply bending cells or cables. Store it in a dry, temperature-controlled location away from heavy objects and direct sunlight. Protect connectors with their supplied caps where available. Follow the power station’s instructions for storage charge level and periodic battery checks.
| Check | Suggested timing | Why it matters |
|---|---|---|
| Remove visible surface debris | Before each charging session | Reduces localized shading |
| Inspect stand and hinges | Every few uses | Helps the panel hold its selected tilt |
| Inspect accessible cables and connectors | Before use and after transport | Identifies visible wear or contamination |
| Review seasonal tilt | Every 2–3 months | Accounts for changes in solar elevation |
| Dry and pack equipment | After use | Limits corrosion and transport damage |
Related guides: Solar Panel Series vs Parallel: Which Is Better for Charging a Power Station? • How to Read Solar Panel Specs for Power Stations: Voc, Vmp, Imp, and Why It Matters • Shading and Angle: How Placement Changes Solar Charging Speed • Solar Safety Basics: Cables, Heat, and Preventing Connector Melt
7. Practical takeaways and specs to compare
Start with a panel tilt near local latitude, make it shallower in summer and steeper in winter, and face it toward the sun. Then use the power station’s live input reading to find the best position for the actual conditions. Adjust in small increments and allow the reading to stabilize. If watts do not improve, check orientation, shade, temperature, battery state, and electrical limits before assuming the angle is wrong.
For all-day charging, repositioning the panel two or three times can capture more energy than leaving it fixed. However, total watt-hours matter more than the single highest watt reading. A brief midday peak does not compensate for several hours of poor morning and afternoon alignment.
Specs to look for
- Adjustable tilt range: Look for a stand covering roughly 15 to 60 degrees or more; a broad range supports summer, winter, and low-sun positioning.
- Stand stability: Look for rigid, independently adjustable supports and secure contact with the ground; stable hardware prevents angle drift and wind-related falls.
- Solar input wattage: Compare limits such as 200, 400, or 800 watts with the intended array; adequate capacity prevents the station from clipping useful panel output.
- MPPT voltage range: Confirm that the panel or array operating voltage fits within the accepted range, such as 12 to 60 volts; proper matching allows efficient power tracking.
- Maximum input voltage: Check that array open-circuit voltage remains safely below the stated ceiling in cold weather; exceeding this value can damage equipment.
- Input current limit: Compare array current with limits such as 10, 15, or 20 amps; excess available current may be clipped even when wattage capacity appears sufficient.
- Live input display: Look for real-time watts and, ideally, accumulated watt-hours; these measurements make angle comparisons and daily performance easier to evaluate.
- Cable length and gauge: Choose enough length for unshaded placement with conductors sized for the expected current; undersized or unnecessarily long cables increase voltage loss.
- Environmental protection: Look for clearly stated resistance to dust, splashes, and outdoor exposure; suitable protection matters when adjusting equipment around damp ground or changing weather.
No single tilt guarantees maximum output in every location or season. The most reliable approach combines a latitude-based starting angle, direct observation of the sun, and the power station’s measured input. That method accounts for local weather, terrain, shade, panel design, and charging limits without relying on guesswork.
Frequently asked questions
What is the best solar panel angle for a portable power station?
The best solar panel angle for a portable power station is the position that keeps the panel face as close to perpendicular to the sun’s rays as practical. Start near your local latitude for a fixed setup, then use a shallower tilt in summer and a steeper tilt in winter. Check the station’s stable solar-input reading after small adjustments to identify the most productive position.
Should a portable solar panel face south or north?
In the Northern Hemisphere, a panel left in one position around midday generally faces true south. In the Southern Hemisphere, it generally faces true north. For portable use in the morning or afternoon, rotating the panel toward the sun can improve charging compared with leaving it fixed in the midday direction.
How often should I adjust a solar panel during the day?
For many portable charging sessions, two or three adjustments are sufficient: one in the morning, one near midday, and one in the afternoon. The benefit depends on sky conditions, available time, and whether the power station has already reached its solar-input limit. Compare total watt-hours over the day rather than focusing only on the highest momentary watt reading.
What is a common mistake that reduces portable solar charging output?
A common mistake is changing the panel’s tilt without first turning the panel toward the sun. Even a well-tilted panel can produce less power if its direction is wrong or part of the cell surface is shaded. After repositioning, wait for the input reading to stabilize before deciding whether the change helped.
What solar panel and power station specs matter most for charging performance?
Check the power station’s accepted solar-input voltage range, maximum open-circuit voltage, input-current limit, and maximum input wattage before connecting a panel or array. An adjustable and stable stand, an appropriate cable length and gauge, and a live watt display also make it easier to improve real-world charging. A physically matching connector does not by itself confirm electrical compatibility.
Is it safe to leave a portable solar panel outside while charging?
It can be safe when the panel is supported on stable ground, secured against wind, and used within the environmental conditions specified by its manufacturer. Keep cables and connectors dry and undamaged, avoid placing the equipment in walkways, and do not exceed the power station’s input limits. Disconnect and stop using the equipment if there are signs of damage, overheating, sparking, melting, or repeated fault warnings.
Related guides
Browse this topic →
- Beginner-friendly sizing, runtime & specs
- Solar & charging (MPPT, fast charging, cables)
- Batteries (LiFePO4, cycles, care & storage)
- Safety, cold-weather performance, real-world tips
More in Solar
See all →- How to Clean Portable Solar Panels Without Damage
- Solar Charging on Cloudy Days: What Output Can a Portable Power Station Expect?
- How Many Portable Solar Panels Do You Need for a 1,000Wh Power Station?
- Solar Adapter Polarity Mistakes: How to Avoid Reverse-Polarity Charging Problems
- Portable Solar Panel Waterproof Ratings: What Rain, Dew, and Splash Resistance Mean
Keep reading
About this site
Portable Energy Lab publishes practical, independent guides about portable power—clear sizing, safe use, and real-world expectations.
Affiliate disclosure
Some links on this site may be affiliate links. If you buy through these links, we may earn a small commission at no extra cost to you. This helps support our content. Read our affiliate disclosure.