
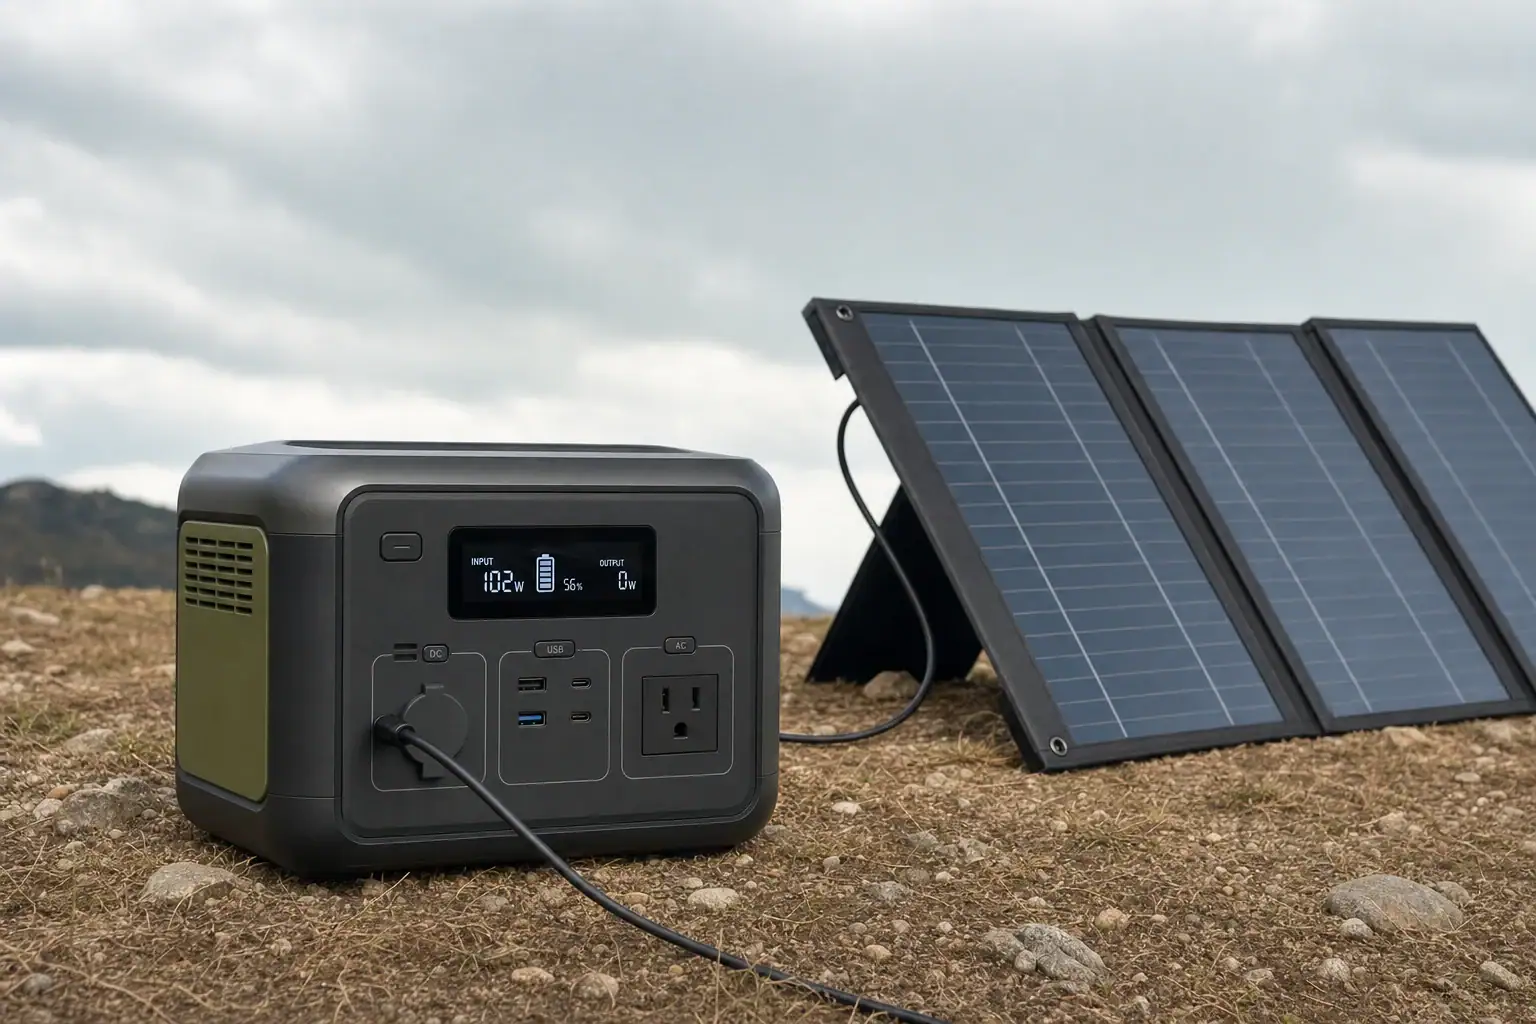
Solar charging on cloudy days usually produces about 10% to 60% of a panel’s rated output, although bright broken clouds can occasionally allow higher short-term production. Thick overcast, rain, shade, season, and panel angle can push solar input toward the low end of that range.
A panel’s rated watts are measured under standardized laboratory conditions, not typical cloudy weather. Actual charging speed depends on solar irradiance, panel temperature, charge-controller efficiency, the power station’s solar input limit, and whether the incoming voltage remains above its minimum operating threshold.
Because cloud cover changes from minute to minute, the display may show unstable input watts or repeatedly start and stop charging. That behavior is not automatically a fault. Understanding rated output, usable watt-hours, MPPT behavior, and charging losses makes it easier to estimate runtime, identify a genuine problem, and choose compatible equipment.
1. What Cloudy-Day Solar Output Means and Why It Matters
Cloudy-day output is the electrical power a solar panel delivers while direct sunlight is partly or completely blocked by clouds. Panels can still generate electricity from diffuse light scattered through the atmosphere, but the available energy is lower than it is under clear midday sun.
Output is normally shown in watts. A 200-watt panel producing 40 watts is operating at 20% of its nameplate rating at that moment. This percentage can change rapidly as cloud thickness, shadows, and sun position change. The power station may display less than the panel produces because energy is also lost in wiring, connectors, voltage conversion, and battery charging.
The distinction between watts and watt-hours is important. Watts describe instantaneous charging power, while watt-hours measure accumulated energy. Receiving 40 watts for five hours would theoretically provide 200 watt-hours, but the battery will store somewhat less after conversion losses. For trip planning or backup use, daily watt-hours are usually more useful than the highest wattage briefly shown on the screen.
2. How Clouds, Panels, and Charge Controllers Affect Charging
Solar panels respond to irradiance, the amount of solar energy reaching their surface. Under full test conditions, irradiance is commonly modeled at about 1,000 watts per square meter. A uniformly gray sky may provide only a small fraction of that amount. Thin or broken clouds allow more light through, and reflections from cloud edges can briefly increase irradiance.
A practical estimate is panel rating multiplied by the available-light fraction and then by system efficiency. For example, a 200-watt panel receiving roughly 25% of full-sun irradiance might produce 50 watts before losses. At 80% overall transfer efficiency, the power station could receive about 40 watts. This is only an estimate because panels do not respond perfectly linearly in every low-light condition.
The charge controller also matters. An MPPT controller adjusts its operating point to extract useful power as voltage and current change. However, it cannot create energy that the panel is not producing. If panel voltage falls below the controller’s startup or operating threshold, charging may pause even though a meter can still detect some open-circuit voltage.
Finally, input is capped by the power station. A station rated for 200 watts of solar input will not normally accept 300 watts simply because the connected array can produce it. Voltage, current, and wattage must all remain within the station’s specified input range.
| Sky condition | Approximate panel output | Possible output from a 200 W panel | Typical behavior |
|---|---|---|---|
| Bright, thin clouds | 50%–80% | 100–160 W | Fairly steady with moderate variation |
| Broken clouds | 30%–70% | 60–140 W | Frequent peaks and drops |
| Uniform overcast | 10%–30% | 20–60 W | Low but potentially stable input |
| Dark storm clouds or rain | 5%–15% | 10–30 W | Charging may cycle or stop |
3. Real-World Cloudy-Day Charging Examples
Consider a 100-watt panel connected to a compatible portable power station. Under light overcast, it might deliver 35 to 55 watts around midday. If that level continued for four hours, the station could receive 140 to 220 watt-hours before charging losses. Morning and afternoon output would generally be lower because the sun is closer to the horizon.
With a 200-watt panel under heavy overcast, the display might fluctuate between 15 and 45 watts. An average of 30 watts over six hours equals 180 watt-hours of incoming energy. If approximately 85% reaches the battery, stored energy would be around 153 watt-hours. That may support small electronics, but it would not fully replenish a large battery.
A 400-watt array under variable broken clouds could alternate between 80 and 300 watts. Short peaks are less important than the average over the day. If the station has a 200-watt solar input limit, production above 200 watts will be clipped or otherwise limited. The larger array may still help during cloudy periods because more panel area captures more diffuse light, provided every electrical specification remains compatible.
Battery state of charge can also affect the displayed input. Many stations reduce charging power as the battery approaches full capacity or when battery temperature is outside its preferred range. A falling input reading at 95% state of charge may therefore reflect normal battery management rather than worsening weather.
To estimate refill time, divide the energy needed by expected average input and account for losses. Replacing 500 watt-hours at an average displayed input of 50 watts could take roughly 10 to 12 hours of active charging. Since a cloudy day may provide only a limited number of useful daylight hours, the refill may require more than one day.
4. Common Mistakes and Troubleshooting Cues
Expecting the Nameplate Rating
The most common mistake is treating rated panel wattage as guaranteed real-world output. Nameplate ratings assume controlled light, temperature, and measurement conditions. Clouds, low sun angles, haze, dirt, partial shade, and long cables all reduce delivered power.
Ignoring Partial Shade
A small shadow can cause a disproportionate loss, especially when it crosses electrically active sections of a panel. Check for branches, roof lines, vehicle shadows, poles, and even the shadow of the person positioning the panel. Diffuse cloudy light does not eliminate the effects of nearby shade.
Using a Poor Panel Angle
On overcast days, precise aiming is less influential than under direct sun, but orientation still matters. Keep the panel broadly facing the brightest part of the sky and avoid laying it where water, vegetation, or surrounding objects block light. Repositioning it once or twice during the day may improve total energy collection.
Overlooking Input Compatibility
If charging never starts, compare the panel or array’s open-circuit voltage, operating voltage, current, and connector configuration with the power station’s accepted solar input range. A panel can have an appropriate wattage while still supplying voltage that is too low for startup or too high for safe connection.
Mistaking Normal Fluctuation for Failure
Rapidly changing clouds can make the input display jump every few seconds. Diagnose performance using a longer average, not a single reading. If output remains unexpectedly low in clear midday sun, inspect for dirt, damaged cables, loose connectors, excessive heat, or a station that is nearly full. Test one variable at a time with compatible equipment, and consult qualified service support if faults persist.
5. Solar Charging Safety Basics
Keep all panel, adapter, and power station voltage and current values within the manufacturer-specified input ranges. Never assume that matching connectors guarantee electrical compatibility. Exceeding the maximum open-circuit voltage can damage equipment even when clouds are reducing current and wattage.
Place the power station in a dry, ventilated location. A solar panel may be weather-resistant while the battery unit or connector junctions are not. Prevent water from entering ports, keep connectors off wet ground, and stop using cables that show exposed conductors, deformation, corrosion, or heat damage.
Do not open the power station, alter battery packs, bypass protective circuits, or improvise connections. Avoid covering the station while charging because internal electronics and batteries produce heat. If solar equipment will be integrated with building wiring or a permanent electrical system, use a qualified electrician rather than attempting panel, transfer-switch, or interlock work without appropriate expertise.
6. Maintenance and Storage for Reliable Low-Light Output
Cloudy conditions leave less solar energy available, so small preventable losses become more noticeable. Keep the panel surface clean using the care method specified for its materials. Dust, pollen, salt film, bird droppings, and dried rain spots can reduce output. Avoid abrasive tools or harsh chemicals that could scratch coatings.
Inspect cables and connectors periodically for looseness, bent contacts, moisture, discoloration, or cracked insulation. Coil cables without tight bends, and do not place heavy objects on folding panels during storage. Repeated stress near connector ends can create resistance that lowers charging performance or causes heat.
Store the power station in a cool, dry place within its recommended temperature range. For extended storage, leave the battery at the state of charge suggested in its documentation and check it periodically. Long periods at completely empty or fully charged levels may accelerate battery aging, depending on cell chemistry and battery management.
Before relying on the system for a trip or outage, perform a test charge in daylight. Record panel size, sky conditions, input watts, and energy collected over several hours. A simple baseline makes it easier to recognize gradual degradation or an unexpected compatibility problem.
| Item | Suggested check | Why it matters on cloudy days |
|---|---|---|
| Panel surface | Before use and after dirty weather | Low light leaves less margin for dirt-related losses |
| Cables and connectors | Before each trip or monthly use cycle | Resistance and loose contacts can reduce usable input |
| Battery state of charge | Every 1–3 months in storage | Helps prevent unexpected depletion |
| Test charging session | Before critical use | Confirms compatibility and establishes normal output |
Related guides: How to Read Solar Panel Specs for Power Stations: Voc, Vmp, Imp, and Why It Matters • Solar Panel Series vs Parallel: Which Is Better for Charging a Power Station? • Solar Safety Basics: Cables, Heat, and Preventing Connector Melt • How Many Solar Watts Do You Need to Fully Recharge in One Day?
7. Practical Takeaways and Specs to Compare
For planning purposes, assume that a cloudy day may deliver 10% to 60% of rated panel power, with heavy overcast often near the lower end. Estimate energy from the average input over useful daylight hours rather than from a brief peak. More panel area can improve low-light collection, but only when the array remains within the station’s voltage, current, and wattage limits.
If charging is slow, first consider cloud density, time of day, panel angle, nearby shade, dirt, cable condition, battery temperature, and state of charge. Consistently poor output under clear midday conditions is a stronger troubleshooting signal than low or unstable output during changing weather.
Specs to look for
- Maximum solar input wattage: Look for a limit such as 200–800 watts that fits the intended panel area; a higher limit can accept more available power when clouds briefly clear.
- Solar input voltage range: Look for a documented range such as 12–60 volts; the array’s operating voltage must fit this window for reliable charging.
- Maximum open-circuit voltage: Confirm that the panel or array remains safely below this value, including in cold weather; exceeding it can damage the input stage.
- Maximum input current: Compare a value such as 10–20 amps with the array’s current; this determines how much current the controller can use without clipping.
- MPPT charge controller: Look for integrated maximum power point tracking; it can improve energy harvesting as cloud cover changes, although it cannot compensate for unavailable sunlight.
- Low-voltage startup threshold: Look for a threshold that is comfortably below the panel’s normal operating voltage; this helps reduce start-stop behavior in weak light.
- Battery capacity: Compare usable capacity in watt-hours, such as 500–2,000 watt-hours, with expected cloudy-day generation; larger batteries take longer to refill at low input.
- Input and battery monitoring: Look for displays that report input watts, accumulated watt-hours, battery percentage, and estimated charging time; these readings make performance easier to evaluate.
- Operating temperature range: Choose a range suitable for the expected climate; charging may slow or stop when battery temperature falls outside safe limits.
The best cloudy-day setup is not necessarily the one with the largest advertised wattage. It is a compatible system with enough panel area, a suitable voltage range, effective charge control, realistic battery capacity, and clear monitoring. Planning around average daily energy rather than ideal peak output provides a more dependable estimate of what a portable power station can actually receive.
Frequently asked questions
How much solar power can a portable power station get on a cloudy day?
Solar charging on cloudy days commonly provides about 10% to 60% of a panel’s rated output, depending on cloud thickness and other conditions. Uniform heavy overcast may fall near the low end, while bright or broken clouds can produce higher and more variable readings. The useful result is the average watt-hours collected over the day, not a brief peak.
Can a portable power station charge when the sky is completely overcast?
Yes, a compatible solar setup can often continue charging under complete overcast because panels use diffuse daylight as well as direct sun. Charging may be slow, and it can stop if the panel voltage falls below the power station’s minimum operating threshold. Output also depends on panel orientation, cleanliness, temperature, and nearby shade.
Why does solar input keep rising and falling when clouds pass overhead?
Moving clouds change the amount of light reaching the panel, so input watts can rise and fall quickly. An MPPT controller continuously adjusts to the available conditions, which can make these changes visible on the display. Frequent fluctuations are usually normal unless output remains abnormally low in clear daylight or charging repeatedly fails with known-compatible equipment.
What solar panel and power station specs matter most in cloudy weather?
Check the station’s accepted solar input voltage range, maximum open-circuit voltage, maximum current, and maximum input wattage before connecting panels. An MPPT charge controller, a low enough startup-voltage threshold, and clear input monitoring can help make low-light performance easier to manage. More panel area may improve diffuse-light collection, but the complete array must remain within every electrical limit.
Is it a mistake to expect a solar panel to reach its rated wattage on cloudy days?
Yes. Rated wattage is measured under standardized test conditions and is not a guaranteed real-world result. Cloud cover, low sun angle, dirt, cable losses, heat, and partial shade can all reduce the power delivered to the station.
Is it safe to charge a portable power station with solar panels in cloudy or rainy weather?
Cloudy weather itself does not make solar charging unsafe when the panel, cables, adapters, and power station are used within their specified limits. Keep the power station and connectors dry unless they are specifically rated for wet exposure, and place the battery unit in a ventilated location. Do not use damaged cables or improvised connections, and verify voltage compatibility before connecting an array.
Related guides
Browse this topic →
- Beginner-friendly sizing, runtime & specs
- Solar & charging (MPPT, fast charging, cables)
- Batteries (LiFePO4, cycles, care & storage)
- Safety, cold-weather performance, real-world tips
More in Solar
See all →- How to Clean Portable Solar Panels Without Damage
- How Many Portable Solar Panels Do You Need for a 1,000Wh Power Station?
- Solar Adapter Polarity Mistakes: How to Avoid Reverse-Polarity Charging Problems
- Portable Solar Panel Waterproof Ratings: What Rain, Dew, and Splash Resistance Mean
- Can You Charge a Portable Power Station Through a Window With Solar Panels?
Keep reading
About this site
Portable Energy Lab publishes practical, independent guides about portable power—clear sizing, safe use, and real-world expectations.
Affiliate disclosure
Some links on this site may be affiliate links. If you buy through these links, we may earn a small commission at no extra cost to you. This helps support our content. Read our affiliate disclosure.