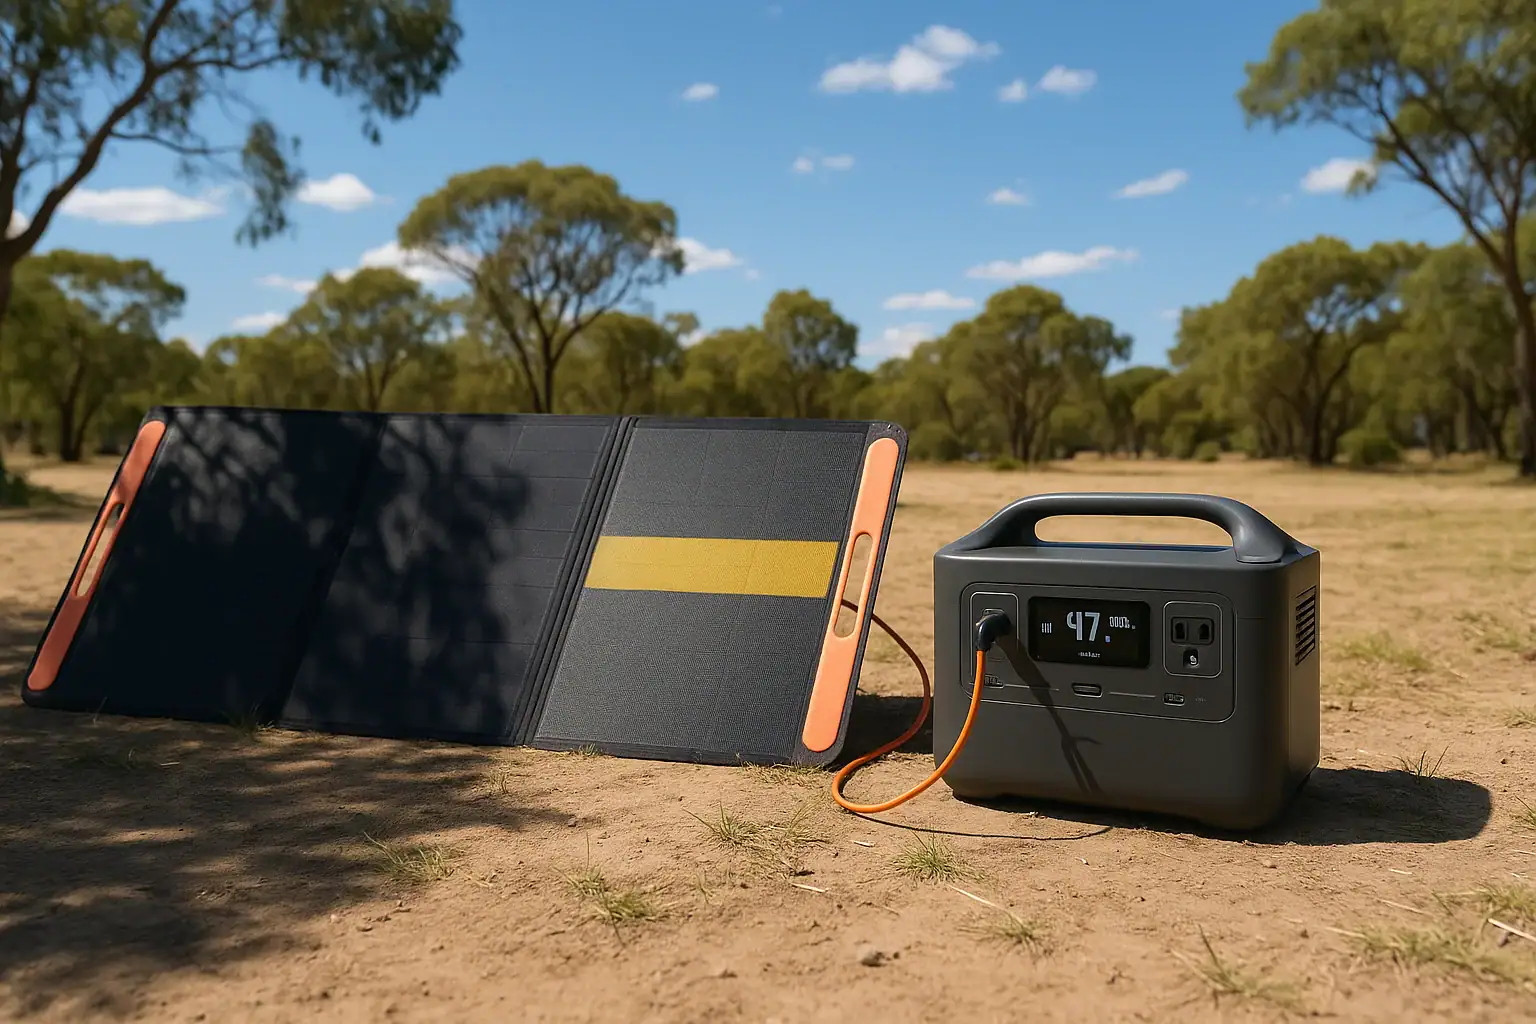
Solar charging often collapses in shade because even small shadows can choke the current flow through a solar panel string and drop the watt input to your portable power station. Partial shading, low irradiance, and the panel’s internal wiring all combine to slash real charging watts compared with the rated output.
Whether you call it solar drop-off, low PV input, unstable DC charging, or poor solar runtime, the cause is usually the same: shaded cells and mismatched voltage. This affects how fast your portable power station refills, how long you can run devices, and whether the unit will even start charging at all. Understanding how shade interacts with panel specs like series vs. parallel wiring, bypass diodes, and MPPT input limits helps you fix most issues without replacing gear.
This guide explains why power collapses under clouds and trees, how solar charging works with portable power stations, and practical ways to get stable wattage even when you cannot avoid some shade.
Why Shade Destroys Solar Charging Power for Portable Stations
For portable power stations, shade matters because solar panels behave more like strings of Christmas lights than independent tiles. When one section is shaded, current through that entire section drops, and your power station sees much less usable wattage at its DC or PV input port.
Solar panels are made of many small cells wired mainly in series. Current through a series string is limited by the weakest (most shaded) cell group. Even if 90% of the panel is in full sun, the remaining 10% in shade can throttle the whole string. This is why users often see their solar input plunge from, say, 180 W down to 20–40 W the moment a tree branch shadow crosses the panel.
Portable power stations add another layer: the built-in charge controller. If the voltage coming from your solar array drops below the minimum PV input range, the controller may shut off charging completely or hunt around, causing the input watts to flicker or collapse to zero. Shade is often the trigger that pushes the system below those thresholds.
Understanding this behavior is essential for realistic expectations about charging time, runtime, and system sizing when you rely on solar in campsites, RVs, cabins, or emergency backup situations.
How Solar Charging Works and Why Shade Causes Power Collapse
Solar charging for portable power stations is a chain: sunlight hits the panel, the panel produces DC power, and the power station’s solar or DC input converts that into battery charge. Shade interferes with every step, especially the panel’s voltage-current relationship and the charge controller’s operating window.
1. Solar cell basics
Each solar cell generates a small voltage when light hits it. Cells are wired in series to increase voltage, and in parallel to increase current. Most portable panels have several series strings, sometimes with bypass diodes that allow current to “skip” around shaded sections.
In series, current is limited by the weakest cell group. When shade hits a few cells, those cells produce much less current and can even act like resistors. Without bypass diodes, this drags down the entire string.
2. I-V curve and maximum power point
Every panel has an I-V (current-voltage) curve and a single maximum power point (MPP) in full sun. In shade, the curve changes, often creating multiple local peaks. A good MPPT (maximum power point tracking) controller tries to find the best point, but under partial shading the curve can be distorted, making tracking less efficient and causing unstable watt readings.
3. Role of the power station’s charge controller
Portable power stations use either PWM or MPPT controllers on their solar/DC input:
- PWM controllers are simpler and cheaper but require panel voltage closely matched to battery voltage. Shade quickly reduces effective current, and any extra panel voltage is mostly wasted.
- MPPT controllers adjust to the panel’s operating point, converting higher panel voltage into more charging amps. They cope better with non-ideal conditions, but still need minimum input voltage and power to work.
If shade pulls your array voltage below the controller’s minimum PV input (for example, below 12–18 V for some small systems or below a higher threshold for larger ones), the controller may stop charging entirely.
4. Series vs. parallel panel wiring
How panels are combined heavily influences shade behavior:
- Series wiring increases voltage. Great for long cable runs and MPPT efficiency, but a single shaded panel can limit current for the entire string.
- Parallel wiring keeps voltage similar to a single panel but increases current. Shade on one panel affects mainly that panel; the others continue to contribute near full power.
Portable setups often use folding panels internally wired in series, which is why a narrow strip of shade can drop the whole panel’s output dramatically.
5. Temperature and low sun angle
Even without hard shade, low sun angle, haze, or overcast conditions reduce irradiance. That pushes the panel away from its rated operating point, lowering both voltage and current. The result is much lower watt input to your power station than the nameplate rating suggests.
| Condition | Panel rated power | Typical real output | What the power station sees |
|---|---|---|---|
| Full sun, good angle | 200 W | 150–180 W | Stable, near-max input |
| Light overcast | 200 W | 50–100 W | Reduced but steady input |
| Partial shade on 25% of cells | 200 W | 10–70 W | Fluctuating or low input |
| Heavy shade on one panel in series | 2 × 200 W | 0–40 W | May drop below charge threshold |
Real-World Shade Scenarios and Their Impact on Portable Power
In practice, users encounter shade in many forms, from tree branches to nearby buildings. Each scenario affects solar charging performance differently.
1. Tree branches and moving shadows at a campsite
Imagine a 200 W folding panel feeding a mid-sized portable power station. In full sun at midday, you might see 140–170 W input. As the sun moves, a thin tree branch casts a line of shade across the middle of the panel. Despite most of the surface still being bright, the input can collapse to 20–50 W or even bounce between 0 and 60 W as the controller struggles to lock onto a stable operating point.
Because the shading moves, the wattage display on the power station may constantly fluctuate, making it hard to estimate charge time or runtime for your devices.
2. Balcony or backyard with partial building shade
In urban settings, panels may get full sun only for a few hours, then partial shade from railings, walls, or neighboring structures. If two panels are wired in series and one spends half the day partially shaded, the combined output during those hours can be a fraction of what you expect. Even when the visible shade seems minor, the internal cell strings might be affected in ways that drastically reduce current.
3. RV roof with vents and rails casting shadows
Roof-mounted panels on vans or RVs are often interrupted by vents, antennae, or roof racks. Small, hard shadows that track across the same cell strings can repeatedly force bypass diodes to engage and disengage. This leads to step-like drops in power and a jittery input reading on the power station, especially if the panels are in series.
4. Winter low-angle sun and nearby trees
In winter, the sun stays low. Even without leaves, tree trunks and branches can cast long shadows. The panels also operate colder, which can increase voltage but does not compensate for the reduced irradiance and partial shading. Users often report that their “200 W” solar kit barely manages 40–80 W on a clear winter afternoon with intermittent tree shade.
5. Window or behind-glass setups
Some users place folding panels behind glass or under a skylight. The glass reduces intensity and may reflect part of the spectrum. Any frame shadows or window dividers further fragment the light. The result is a seemingly bright panel that, in practice, delivers very low amps to the power station, causing extremely slow charging or frequent drops below the minimum input threshold.
Common Shading Mistakes and How to Troubleshoot Low Solar Input
When solar input collapses, many people assume the panel or power station is defective. Often, the real issue is shade or suboptimal setup. Recognizing common mistakes helps you troubleshoot quickly.
1. Ignoring small, sharp shadows
Thin shadows from branches, wires, or railings can cut through key cell strings. Because you see mostly sunlit surface, it is easy to underestimate their impact. If your watt input suddenly drops, look for narrow shadows across the panel’s short dimension where cell strings run.
Troubleshooting cue: If moving the panel a few inches or rotating it slightly restores most of the power, the culprit was a small shadow on a critical area.
2. Series-connecting panels in a shady location
Series wiring is efficient in full sun but unforgiving in shade. One panel in dappled light can drag the whole string down.
Troubleshooting cue: If you disconnect the shaded panel and the remaining panel suddenly delivers more stable watts, consider using parallel wiring (within your power station’s voltage and current limits) or repositioning the shaded panel.
3. Overestimating rated watts vs. real watts
Panel ratings assume ideal test conditions. In real life, angle, temperature, and shade usually cut output by 25–50% even before major shadows appear.
Troubleshooting cue: If your 200 W panel only gives 80–120 W in good sun and 20–60 W with light shade, that is often normal, not a failure.
4. Not matching panel voltage to power station input
If the combined panel voltage in shade falls below the minimum PV input of your power station, the controller may not start charging at all.
Troubleshooting cue: Check the power station’s solar/DC input voltage range and ensure your panel configuration (series or parallel) keeps voltage safely within that range even in less-than-ideal light.
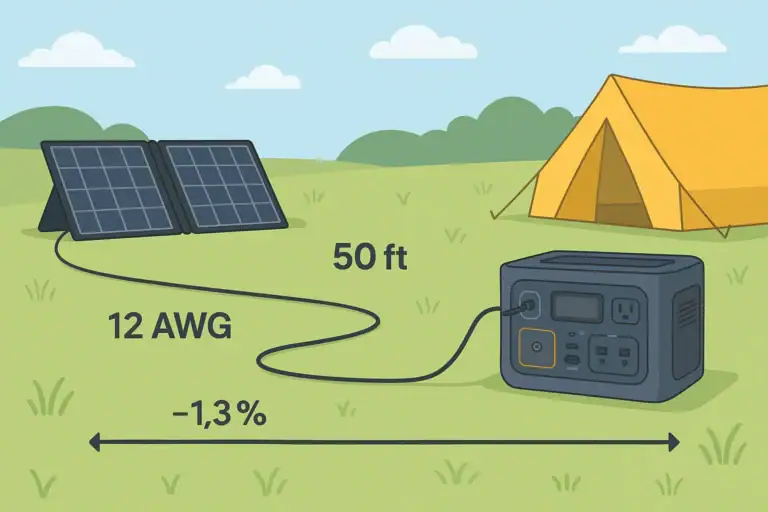
5. Using long, thin cables
Long runs of undersized cable add voltage drop, especially at higher currents. In marginal light, that extra drop can push the input below the controller’s threshold.
Troubleshooting cue: If moving the power station closer to the panels or using thicker, shorter cables improves input watts, cable loss was part of the problem.
6. Relying on auto-tracking when conditions are marginal
Some power stations periodically scan for the maximum power point. Under constantly changing shade, this can make the input reading appear unstable.
Troubleshooting cue: Watch the input for several minutes rather than a few seconds. If the average power seems reasonable over time, the system is likely working as designed.
Safety Basics When Dealing With Shaded Solar Panels and Portable Stations
While shade mostly affects performance rather than safety, there are still important precautions when setting up and adjusting solar panels around a portable power station.
1. Avoid hot spots from severe partial shading
When a small area of a panel is heavily shaded while the rest is in strong sun, the shaded cells can become hot spots. Modern panels use bypass diodes to reduce this risk, but it is still wise to avoid situations where a dark, concentrated shadow sits on one corner for hours.
2. Handle connectors with care
Always make and break solar connections with dry hands and stable footing. Disconnect panels from the power station before rearranging wiring (such as switching between series and parallel, if your system allows it). Avoid yanking on cables or forcing mismatched connectors.
3. Respect voltage limits
Do not exceed the maximum PV or DC input voltage listed for your portable power station. Series-connecting too many panels, especially in cold weather when open-circuit voltage rises, can damage the input circuitry. If in doubt, configure for a lower voltage rather than pushing limits.
4. Keep panels stable and secure
To chase sun and avoid shade, users sometimes prop panels at odd angles or on unstable surfaces. High winds or accidental bumps can cause panels to fall, crack, or damage cables and connectors. Use stable stands or mounts and secure panels against gusts when possible.
5. Avoid DIY internal modifications
Do not open the power station or solar panels to modify wiring, bypass protections, or add unapproved components. Internal work on battery packs or high-voltage sections should be left to qualified technicians. For integrating solar into building wiring, consult a licensed electrician instead of back-feeding through outlets or improvising connections.
6. Protect against water and heat
Portable panels may be weather-resistant, but power stations usually are not. Keep the unit dry and shaded from direct sun to avoid overheating. Do not place the power station under the panel where any condensation or rain runoff may drip onto it.
| Risk area | Typical issue | Safe practice |
|---|---|---|
| Panel positioning | Panels tipping over in wind | Use stable stands, anchor when possible |
| Electrical limits | Exceeding max PV voltage | Stay within rated input range |
| Connections | Arcing from loose plugs | Fully seat connectors, keep dry |
| Environment | Overheating power station | Operate in shade with good airflow |
Related guides: How to Read Solar Panel Specs for Power Stations • Shading and Angle: How Placement Changes Solar Charging Speed • How Many Solar Watts Do You Need to Fully Recharge in One Day?
Maintaining Solar Performance in Shady Environments
Even if you cannot avoid shade entirely, you can maintain more consistent solar performance with good habits and simple adjustments.
1. Optimize panel placement and angle
Reposition panels a few times per day to follow the moving sun and avoid emerging shadows from trees or buildings. A moderate tilt toward the sun generally performs better than panels lying flat, especially in winter or at higher latitudes.
2. Use modular panel layouts
Instead of one large panel, several smaller panels give you flexibility. You can place some in the best sun and accept that others will be partially shaded. When wired appropriately, this can preserve more total wattage than having one large panel half in shade.
3. Keep panels clean
Dirt, pollen, bird droppings, and dust act like a permanent light filter. In combination with shade, they further reduce output. Wipe panels gently with a soft cloth and clean water as needed. Avoid abrasive materials that can scratch the surface.
4. Monitor input over time, not just instant snapshots
Solar input naturally fluctuates with passing clouds and moving shadows. Instead of fixating on a single watt reading, check how much energy (watt-hours) your power station reports over a full day. This gives a better sense of whether your system is meeting your needs.
5. Plan energy use around solar availability
Whenever possible, schedule high-draw tasks (like charging laptops or running small appliances) during periods of strong sun. This allows the solar input to support the load while still recharging the battery, instead of draining the battery alone during shaded hours.
6. Store gear properly when not in use
When storing panels, keep them dry, cool, and protected from physical damage. For the power station, follow the manufacturer’s storage charge level recommendations (often around 30–60%) and recharge periodically if stored long term. Proper storage maintains both panel efficiency and battery health, which together determine how forgiving your system will be in less-than-ideal solar conditions.
Practical Takeaways and Key Specs to Look For in Shady Solar Setups
Shade will always reduce solar performance, but it does not have to ruin your portable power setup. The most effective strategies are to minimize sharp, partial shadows, choose flexible panel configurations, and pair them with a power station whose solar input specs match your conditions.
In practice, this means:
- Placing panels where they see the longest uninterrupted sun path.
- Avoiding series connections in heavily shaded locations unless necessary for voltage.
- Using MPPT-equipped power stations when you rely heavily on solar.
- Monitoring real-world watt-hours instead of focusing only on panel ratings.
Specs to look for
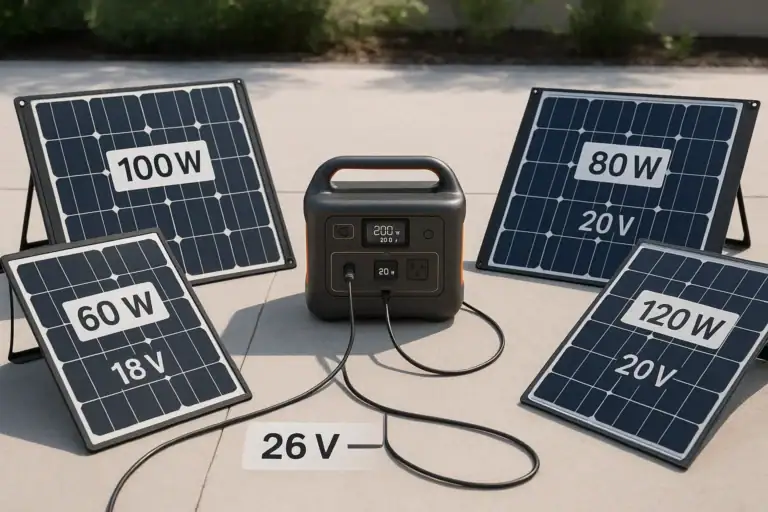
- Solar input wattage rating – Look for a solar input rating that is at least 1.3–2× your typical panel array (for example, 300–600 W input for a 200–300 W panel setup). This ensures the power station can accept full power in good sun and gives headroom if you upgrade panels.
- MPPT vs. PWM charge controller – Prefer an MPPT-based solar input, especially if you expect partial shade or longer cable runs. MPPT can recover 10–30% more energy in non-ideal conditions compared with basic PWM control.
- PV input voltage range – Check that the minimum and maximum PV voltage work with your planned series or parallel panel configuration (for example, 12–60 V or 12–100 V). A wider range makes it easier to keep charging even when shade lowers panel voltage.
- Maximum solar input current – Ensure the maximum input amps support your panel array in parallel (for example, 10–20 A). If current limits are too low, the power station will clip power on bright days, wasting potential energy.
- Display and monitoring features – Look for a clear watt input readout and, ideally, accumulated watt-hours from solar. This makes troubleshooting shade issues and optimizing panel placement much easier.
- Supported connector types and adapters – Check that the solar input supports common DC connectors and that safe adapters are readily available. This simplifies using multiple panels or reconfiguring between series and parallel without improvised wiring.
- Operating temperature range – A wider operating range (for example, 14–104°F or better) helps the power station function reliably in hot sun and cool mornings when panel voltage can spike. Stable operation reduces unexpected shutdowns during marginal conditions.
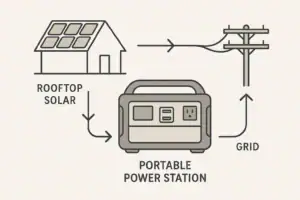
- Battery capacity vs. expected solar harvest – Match battery size (in watt-hours) to realistic daily solar input in your climate. For example, a 500–1000 Wh station with 200–300 W of panels can often refill over a sunny day, even with some shade, while much larger batteries may remain undercharged.
By aligning these specs with how and where you use solar, you can keep your portable power station charging reliably, even when shade is part of the picture.
Frequently asked questions
What solar input specs and features matter most for reliable charging when panels are partially shaded?
Prioritize an MPPT charge controller, a wide PV input voltage range, and sufficient maximum input current (amps) and wattage to accept your array. Bypass diodes on panels and clear monitoring (watt and watt-hour readouts) also help diagnose and recover energy under partial shade. These features together improve efficiency and tolerance to non-ideal light.
How can I tell whether a small shadow is causing the charging collapse or if my equipment is faulty?
Move or rotate the panel a few inches and watch the input watts; if power returns, a narrow shadow or panel orientation caused the drop. Also test the panel in known full sun and inspect cables and connectors for damage; persistent low output in full sun suggests hardware issues rather than shading.
Are there safety concerns when using solar panels in partial shade?
Partial shade can create hot spots on cells, so avoid leaving concentrated dark shadows on small panel areas for long periods. In addition, follow electrical safety: keep connectors dry, respect PV voltage limits, and avoid DIY internal modifications to panels or power stations.
Will wiring panels in parallel help if one of my panels is frequently shaded?
Yes, parallel wiring limits the impact of one shaded panel because each panel contributes current independently at the same voltage. However, ensure your power station can accept the higher current and use appropriate connectors and cable sizing to avoid losses or exceeding input limits.
How much charging performance should I expect in light shade or overcast conditions?
Light overcast typically reduces real output to around 25–50% of rated power, while small partial shadows can cut output much more dramatically depending on which cell strings are affected. Measure daily watt-hours rather than relying on nameplate ratings to set realistic expectations.
What common setup mistakes cause low solar input even when panels appear sunlit?
Frequent mistakes include series-connecting panels in a shaded location, using long undersized cables, not matching panel voltage to the controller’s input range, and neglecting small sharp shadows or dirt. Checking wiring configuration, cable size, and cleaning or repositioning panels typically resolves most of these issues.
Recommended next:
- Are Portable Power Stations the Future of Backup Power?
- Portable Power Stations and Renewable Energy
- Solar Panel Series vs Parallel: Which Is Better for Charging a Power Station?
- How Many Solar Watts Do You Need to Fully Recharge in One Day?
- Overpaneling Explained: Can You Connect Bigger Solar Panels Than the Input Limit?
- Shading and Angle: How Placement Changes Solar Charging Speed
- More in Solar →
Related guides
Browse this topic →

- Beginner-friendly sizing, runtime & specs
- Solar & charging (MPPT, fast charging, cables)
- Batteries (LiFePO4, cycles, care & storage)
- Safety, cold-weather performance, real-world tips
More in Solar
See all →- Can You Mix Different Solar Panels on One Power Station? A Safe Matching Checklist
- How to Read Solar Panel Specs for Power Stations: Voc, Vmp, Imp, and Why It Matters
- Solar Safety Basics: Cables, Heat, and Preventing Connector Melt
- Balcony Solar + Power Station: A Practical Setup for Apartments
- MC4, Anderson, DC Barrel: Solar Connectors and Adapters Explained
Keep reading
About this site
Portable Energy Lab publishes practical, independent guides about portable power—clear sizing, safe use, and real-world expectations.
Affiliate disclosure
Some links on this site may be affiliate links. If you buy through these links, we may earn a small commission at no extra cost to you. This helps support our content. Learn more.