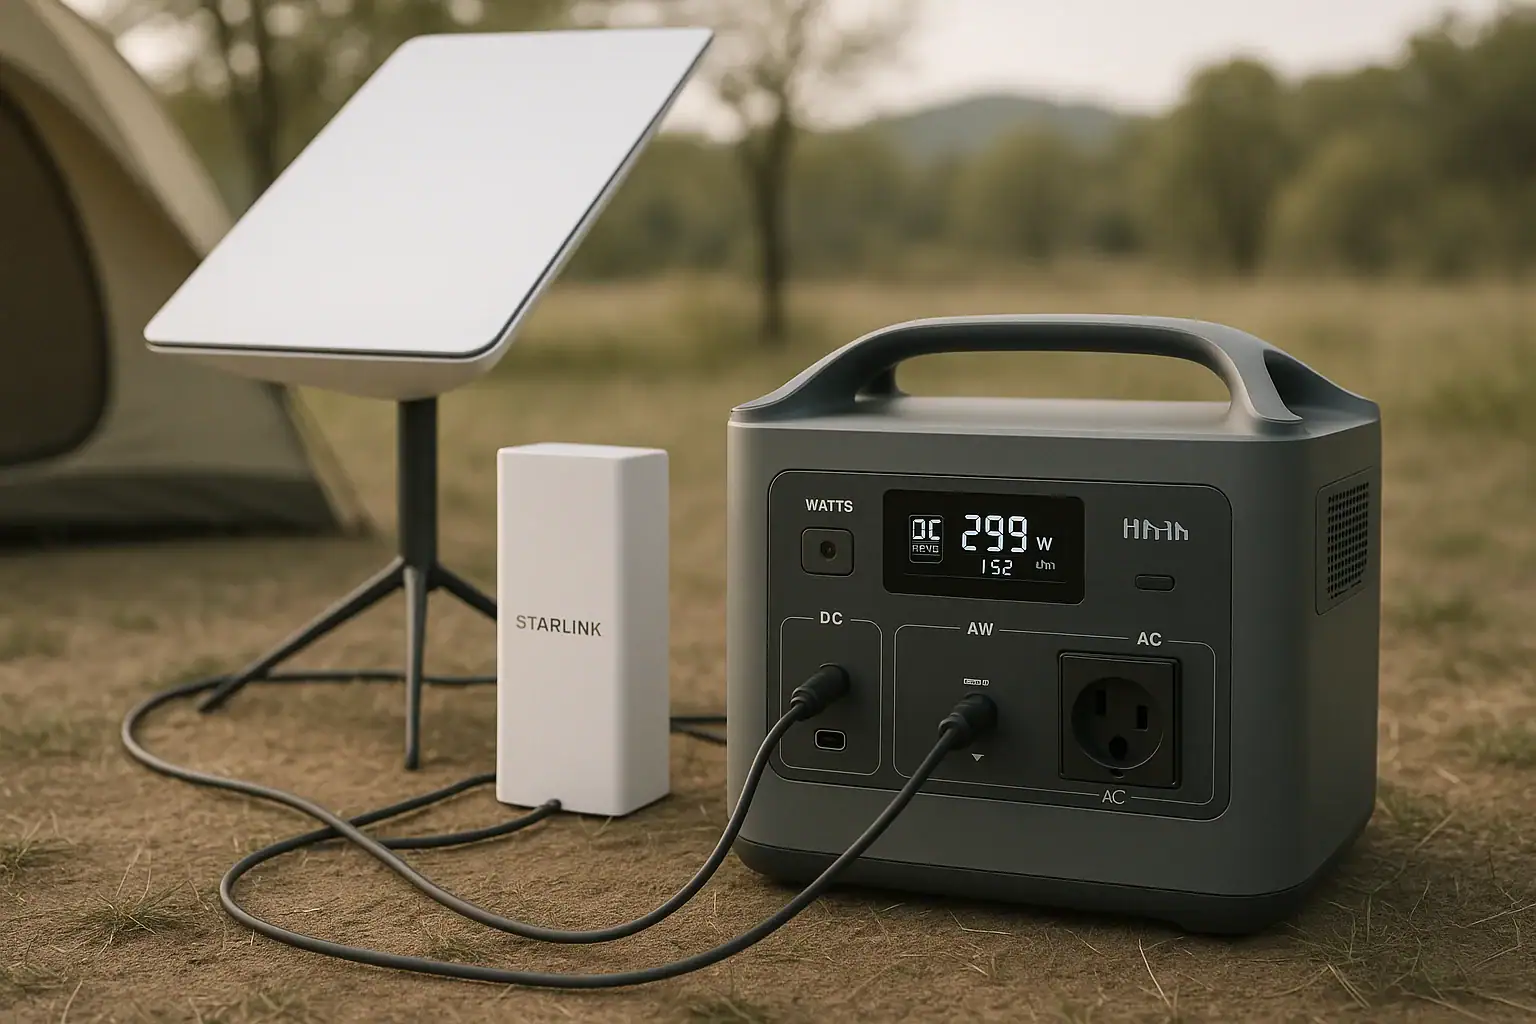
A portable power station can reliably run Starlink as long as its continuous output (watts), battery capacity (watt-hours), and inverter type match the system’s power draw and startup needs. Most Starlink setups pull modest watts but can still drain a small battery faster than expected, so understanding runtime, surge watts, and input limits is essential.
People search for terms like “Starlink power consumption,” “runtime calculator,” “inverter efficiency,” “DC vs AC power,” and “portable power station for Starlink RV” because they want a stable internet connection off-grid without killing their battery in a few hours. This guide explains how Starlink’s power draw works, how to estimate runtime, why different Starlink hardware versions matter, and which specs to prioritize when choosing a portable power station. You will learn how to avoid common mistakes, protect your gear, and quickly judge whether a given battery size can support work, gaming, or streaming sessions over satellite internet.
Understanding Starlink Power Needs and Why They Matter for Portable Power Stations
Starlink is relatively low power compared to big appliances, but it is a constant, always-on load. That makes its power profile very important when you are running from a portable power station with limited watt-hours.
Most Starlink kits include three main pieces that affect power draw:
- Dish/antenna (the phased-array terminal)
- Router or combined router/power supply unit
- Cabling and, in some versions, an external power brick
Across different generations, many users see typical Starlink power consumption in a range that often falls between a low idle draw and a higher draw under heavy data use or in extreme weather. The dish can briefly spike above its normal level during boot, tracking, or de-icing cycles.
This matters because portable power stations are limited by:
- Continuous output (W): Whether they can run Starlink at all without overloading.
- Battery capacity (Wh): How many hours of runtime you get before recharging.
- Inverter efficiency: How much energy is lost converting DC battery power to AC for the Starlink power brick.
Understanding these basics lets you match your Starlink setup with a power station that can provide stable, long-lasting power for work, travel, or emergency backup.
How Starlink Draws Power and How Portable Power Stations Deliver It
Starlink typically runs from AC power using its own power supply, which then converts AC to low-voltage DC for the dish and router. A portable power station, however, stores energy as DC in its internal battery. To feed Starlink, the station usually has to:
- Convert battery DC to AC using an inverter.
- Let the Starlink power brick convert AC back to DC.
This double conversion (DC → AC → DC) wastes some energy as heat. Inverter efficiency on many portable power stations often falls somewhere around a typical percentage range, which directly reduces actual runtime compared with a simple capacity ÷ load calculation.
The basic runtime estimate formula is:
Estimated runtime (hours) ≈ (Battery capacity in Wh × efficiency) ÷ Average Starlink draw in W
For example, if a power station has a usable capacity around a certain watt-hour value and Starlink averages a moderate watt draw, you can quickly predict whether it will last through a workday, an evening, or an overnight session.
Other key concepts include:
- Continuous vs. surge watts: Starlink’s startup or heater spikes are usually short, so continuous rating is more important than surge rating, but the inverter must still tolerate brief peaks.
- DC vs. AC outputs: Some users explore DC-DC powering to avoid inverter losses, but this requires compatible voltage and cabling; for most people, using the standard AC adapter is simpler and safer.
- Input limits: Your recharge sources (solar, wall, vehicle) must keep up with how much Starlink drains if you want indefinite off-grid use.
Putting it all together, a portable power station for Starlink must consistently supply enough watts, for enough hours, with acceptable efficiency and safe voltage quality.
| Term | What it means | Why it matters for Starlink |
|---|---|---|
| Continuous watts | Maximum power the inverter can output steadily | Must exceed Starlink’s typical draw with margin |
| Surge watts | Short-term peak power rating | Helps handle brief startup or heater spikes |
| Watt-hours (Wh) | Total stored energy in the battery | Determines approximate runtime in hours |
| Inverter efficiency | How much energy is lost converting DC to AC | Lower efficiency means shorter runtime |
| Input (charging) watts | How fast the station can recharge | Affects ability to run Starlink while recharging |
Real-World Runtime Examples for Starlink on Portable Power Stations
To make the math more concrete, it helps to walk through some typical Starlink and portable power station pairings. These are simplified examples to illustrate the relationships between power draw, capacity, and runtime.
Example 1: Small portable power station for short Starlink sessions
Imagine a compact unit with a battery capacity in the lower hundreds of watt-hours and an inverter efficiency near a common mid-range value. If your Starlink kit averages a moderate wattage during normal use, you can estimate:
- Usable energy ≈ capacity × efficiency.
- Runtime ≈ usable energy ÷ average Starlink draw.
This type of setup might be enough for a few hours of connectivity in the evening, quick email checks, or occasional remote work in a vehicle, but it is unlikely to cover a full day of continuous Starlink use without recharging.
Example 2: Mid-size power station for a workday of Starlink
Consider a mid-size station with roughly mid-range watt-hours of capacity. With the same Starlink power draw and efficiency assumptions, the usable energy increases proportionally, and so does runtime. Many users find that this size range can support a typical workday of video calls, browsing, and downloads, especially if Starlink is not running heaters heavily.
Example 3: Larger portable power station for extended Starlink uptime
A larger unit with higher watt-hours of capacity can provide significantly longer runtimes. If your Starlink setup averages the same draw, the larger battery can support overnight use or multi-day sessions when combined with periodic recharging from solar panels or a generator. In this range, you can often run Starlink plus a laptop and some lighting, as long as the combined load stays within the inverter’s continuous watt rating.
Example 4: Running Starlink while charging the power station
If your portable power station is receiving input power from solar or a vehicle while Starlink is running, the net battery drain equals Starlink’s draw minus the effective charging power (after conversion losses). For instance, if Starlink uses a certain watt level and solar is contributing a similar or slightly lower watt level, the battery may drain slowly instead of quickly, extending overall runtime.
These examples show that you do not need an enormous battery to run Starlink, but you do need enough watt-hours to cover your typical session length plus some margin for higher draw conditions.
Common Mistakes When Powering Starlink from Portable Power Stations
Many runtime disappointments and connection issues come from a few predictable mistakes. Recognizing them early helps you troubleshoot and plan better.
Underestimating average power draw
Users often assume Starlink’s power consumption is closer to its lowest idle value and forget about higher draw periods during heavy data use, cold temperatures, or heater operation. This leads to over-optimistic runtime estimates. Watching real-time watt readings on the power station’s display over several hours gives a better average.
Ignoring inverter losses
Calculating runtime as battery watt-hours divided by Starlink watts, without factoring in inverter efficiency, can easily overstate runtime by a noticeable margin. Always multiply capacity by a realistic efficiency factor before dividing by the load.
Running other loads on the same power station
Starlink is rarely the only device plugged in. Laptops, monitors, lights, and chargers add up. If your total load doubles, your runtime halves, all else equal. When troubleshooting short runtimes, measure or estimate the combined watt draw of everything on the power station.
Using a power station with marginal continuous wattage
If your inverter’s continuous rating is too close to Starlink’s maximum draw, especially during heater or boot phases, you may see shutdowns or error messages. Choosing a unit with comfortable headroom above Starlink’s typical and peak draw helps avoid nuisance trips.
Letting the battery run to 0% too often
Frequently draining the portable power station to empty can reduce long-term battery health and make runtime less predictable. It also increases the risk of Starlink abruptly losing power mid-session, which can interrupt downloads and calls.
Not accounting for temperature
Both Starlink and the portable power station behave differently in extreme heat or cold. Battery capacity effectively shrinks in low temperatures, and Starlink may use more power for heaters. In hot conditions, fans and thermal management may increase draw. If your runtime suddenly drops in a weather change, this is a likely cause.
Safety Basics When Running Starlink on a Portable Power Station
Powering Starlink from a portable power station is generally straightforward, but there are important safety practices to follow to protect both your equipment and yourself.
Use a pure sine wave AC output
Starlink’s power brick is designed for clean AC power. A pure sine wave inverter output is strongly preferred for sensitive electronics to minimize the risk of overheating, noise, or unexpected shutdowns. Modified sine wave outputs can be harder on power supplies and networking equipment.
Avoid overloading the inverter
Keep the combined load of Starlink plus any other devices comfortably below the portable power station’s continuous watt rating. Sudden shutdowns from overload can interrupt connectivity and stress the inverter. If you see overload warnings, unplug non-essential devices or step up to a higher-capacity unit.
Provide adequate ventilation
Both Starlink hardware and the portable power station generate heat. Place them on stable, dry surfaces with good airflow. Avoid covering vents or enclosing the power station in tight spaces where heat can build up, as this may trigger thermal throttling or shutdown.
Protect from moisture and dust
Neither device should be exposed directly to rain, snow, or heavy dust. Use covers, canopies, or enclosures that still allow ventilation. Keep connections dry and off the ground where puddles or condensation can form.
Use appropriate cables and adapters
Stick to manufacturer-specified power cables and avoid improvised adapters that change voltage or polarity without clear specifications. For advanced setups that attempt DC-DC powering, consult reliable electrical guidance and consider working with a qualified professional, as incorrect wiring can damage equipment or create shock hazards.
Do not integrate into household wiring yourself
A portable power station for Starlink should feed the router and dish directly, not backfeed into home electrical panels. Any permanent or semi-permanent integration with home circuits should only be designed and installed by a licensed electrician.
| Safety aspect | Good practice | Potential issue if ignored |
|---|---|---|
| Ventilation | Keep vents clear and allow air circulation | Overheating, thermal shutdowns |
| Load level | Stay well below continuous watt rating | Inverter overload, power loss |
| Moisture protection | Use dry, sheltered locations | Corrosion, shorts, equipment damage |
| Cable management | Use undamaged, appropriate cables | Loose connections, arcing, failures |
| Battery care | Avoid repeated full discharges | Reduced capacity and shorter lifespan |
Related guides: Inverter Efficiency Explained: Why Your Runtime Is Shorter Than Expected • AC vs DC Power: How to Maximize Efficiency and Runtime • Do Portable Power Stations Work While Charging? Pass-Through vs UPS Mode • Input Limits (Volts/Amps/Watts) Explained: How Not to Damage Your Unit
Maintaining and Storing a Portable Power Station Used for Starlink
Because Starlink often runs for many hours at a time, your portable power station experiences long, steady discharge cycles. Good maintenance and storage habits help preserve capacity and ensure reliable runtime when you need it.
Avoid constant deep discharges
Try not to run the power station to 0% every time you use Starlink. Keeping typical discharge cycles to moderate depths is generally easier on most lithium-based batteries than repeated full drains. If you need maximum runtime occasionally, it is fine, but avoid making deep discharge the daily norm.
Recharge promptly after use
After running Starlink for several hours, recharge the power station as soon as practical. Letting it sit at very low state-of-charge for long periods can accelerate battery aging. Regular, timely recharges also ensure the unit is ready for the next outage or trip.
Store at a partial charge for longer breaks
If you will not be using Starlink or the power station for weeks or months, store the battery at a moderate state-of-charge in a cool, dry location. Extremely hot or cold storage conditions can reduce lifespan and available capacity.
Keep firmware and monitoring tools up to date
Many modern portable power stations include firmware updates and companion apps that improve charging profiles, display accuracy, and protection behaviors. Checking for updates periodically can help you get more accurate runtime estimates and better performance under Starlink’s steady load.
Inspect ports and cables regularly
Because Starlink typically uses at least one AC outlet continuously, inspect the port and plug for looseness, discoloration, or heat buildup. Replace damaged cables and avoid using cracked or overly worn power cords.
Track real-world runtime logs
For off-grid cabins, RVs, or mobile offices, it can be useful to keep simple notes: date, starting battery percentage, hours of Starlink uptime, and ending percentage. Over time, this gives you a personalized runtime profile that is more accurate than generic estimates and helps you spot gradual capacity loss.
Practical Takeaways and Specs to Look For in a Portable Power Station for Starlink
When you match Starlink with a portable power station, you are essentially balancing three things: how many watts Starlink needs, how many watt-hours your battery can provide, and how efficiently the power station turns stored energy into usable AC. Once you understand these relationships, choosing hardware becomes much more straightforward.
For short evening sessions or backup connectivity during brief outages, a modest-capacity station may be sufficient. For full workdays, travel, or multi-day off-grid use, you will want more watt-hours, higher input charging power, and better inverter efficiency. It also helps to leave headroom for other devices like laptops, monitors, and lighting.
Specs to look for
- Battery capacity (Wh): Look for enough watt-hours to cover your typical Starlink usage window (for example, several hundred Wh for a few hours, or higher for full-day use). More capacity equals longer runtime.
- Continuous AC output (W): Choose an inverter rating comfortably above Starlink’s maximum expected draw plus any additional devices (for example, several hundred watts or more). This prevents overloads and shutdowns.
- Inverter type and efficiency: Prefer pure sine wave output with efficiency in a higher percentage range. Cleaner power and better efficiency mean more stable operation and longer runtimes.
- AC outlet count and placement: Ensure there are enough grounded AC outlets with room for Starlink’s plug and any power bricks. Good spacing avoids blocked outlets and loose adapters.
- Input (charging) power and options: Look for sufficient solar, wall, or vehicle charging wattage (for example, a few hundred watts of solar input) so you can recharge while running Starlink and reduce net battery drain.
- Battery chemistry and cycle life: Consider chemistries known for long cycle life and stability. Higher cycle ratings mean the station will better tolerate frequent Starlink use over years.
- Display and monitoring: A clear screen showing real-time watts in/out, remaining percentage, and estimated runtime helps you manage Starlink sessions and avoid unexpected shutdowns.
- Low-temperature performance: If you will use Starlink in cold climates, look for built-in low-temperature protections or heating support for the battery so capacity and charging are more reliable.
- Portability and noise level: Check weight, handle design, and cooling fan noise, especially for RV, van, or indoor use. Quieter, easier-to-move units are more pleasant during long Starlink sessions.
- Protection features: Overload, over-temperature, short-circuit, and low-voltage protections help safeguard both the power station and your Starlink hardware under continuous operation.
By focusing on these specs and understanding how Starlink’s power draw interacts with a portable power station’s capabilities, you can build a reliable, efficient setup that keeps your satellite internet running wherever you need it.
Frequently asked questions
Which specs and features should I prioritize when choosing a portable power station for Starlink?
Prioritize battery capacity in watt-hours to meet your desired runtime, a continuous AC output rating comfortably above Starlink’s peak draw, and a pure sine wave inverter for clean power. Also consider inverter efficiency, input charging power (solar/wall/vehicle), outlet layout, and low-temperature performance.
How can I estimate how long a portable power station will run Starlink?
Estimate runtime by multiplying usable battery capacity (Wh) by inverter efficiency, then dividing by the average Starlink watt draw. Factor in additional devices on the same station and expect shorter runtimes during heater cycles or heavy data use.
What is a common mistake that leads to disappointing Starlink runtimes?
A frequent error is underestimating the average load by relying on idle draw numbers and ignoring inverter losses and other connected devices. Measuring real-world watts over several hours gives a much more accurate runtime prediction.
Is it safe to run Starlink from a portable power station?
Yes, it is generally safe when you use a pure sine wave output, avoid overloading the inverter, provide ventilation, protect against moisture, and use proper cables. For any advanced DC wiring or permanent electrical integration, consult a qualified electrician.
Can I power Starlink directly from a power station’s DC output to reduce losses?
Direct DC powering can reduce conversion losses but requires compatible voltage, connectors, and safety protections; it is not universally supported and can risk damage if done incorrectly. Unless you have verified compatibility and safe cabling, using the AC adapter is the simpler option.
Will charging the power station with solar let me run Starlink indefinitely?
Possibly, if your effective charging input (after losses) consistently equals or exceeds Starlink’s draw, but solar variability, shading, and battery management mean continuous operation depends on system sizing and conditions. Plan for margins and realistic solar production rather than assuming indefinite runtime.
Recommended next:
- Portable Power Stations for Apartments
- Portable Power Stations for RV and Motorhomes
- Can a Portable Power Station Run a Microwave? What to Check Before You Try
- Can a Portable Power Station Run a Space Heater? Realistic Limits
- Can a Portable Power Station Run an Air Conditioner? Sizing and Expectations
- Powering a Coffee Maker, Kettle, or Induction Cooktop: What Works and Why
- More in Home / Appliances →
Related guides
Browse this topic →

- Beginner-friendly sizing, runtime & specs
- Solar & charging (MPPT, fast charging, cables)
- Batteries (LiFePO4, cycles, care & storage)
- Safety, cold-weather performance, real-world tips
More in Home / Appliances
See all →- Backup Power for Security Cameras and Wi-Fi: Sizing a 24/7 Setup
- Running a Pellet Stove During a Power Outage: Starting Surge, Runtime, and Safe Setup
- What Size Portable Power Station for a Chest Freezer? Runtime Planning for Outages
- Powering a TV and Streaming Setup: Estimating Runtime Without Guessing
- Using a Portable Power Station as Emergency Lighting: Efficient Options
Keep reading

About this site
Portable Energy Lab publishes practical, independent guides about portable power—clear sizing, safe use, and real-world expectations.
Affiliate disclosure
Some links on this site may be affiliate links. If you buy through these links, we may earn a small commission at no extra cost to you. This helps support our content. Learn more.