Can a Portable Power Station Run an Evaporative Cooler?

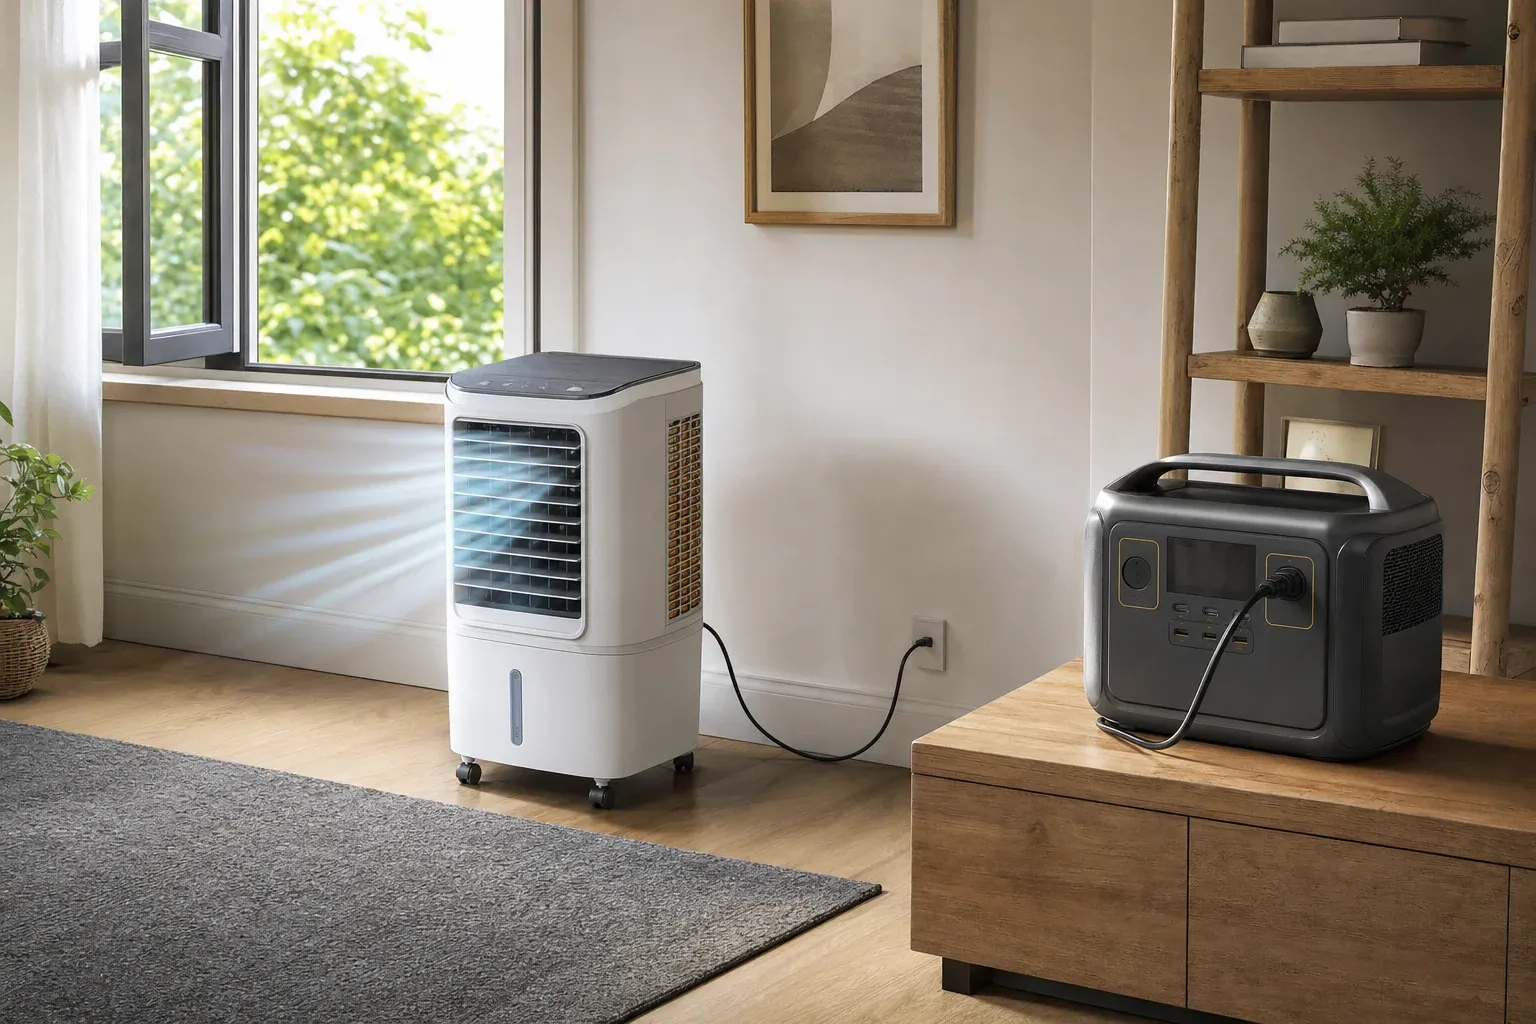
Evaporative cooler powered by a portable power station kept on a separate dry surface

Quick answer: Usually, yes. A portable power station can run an evaporative cooler when its AC voltage and frequency match the cooler, its continuous and applicable surge ratings cover the actual load, and both manuals permit the setup. Estimate runtime with usable AC watt-hours divided by the cooler’s measured average watts.

How to size a portable power station for an evaporative cooler

An evaporative cooler can be a manageable portable-power load, but compatibility is not automatic. A direct evaporative cooler uses a blower to move air through wetted media and a pump to circulate water. The U.S. Department of Energy describes direct systems this way and notes that incoming air needs an exit, commonly through an open window or vent (DOE HVAC guide).

A portable power station for an evaporative cooler must pass five separate checks:

  1. Electrical match: The cooler’s required voltage and frequency must match the station’s AC output.
  2. Continuous output: The station’s continuous AC rating must cover the highest sustained wattage of the mode you intend to use.
  3. Startup output: Documented or safely observed motor-starting demand must remain within the station’s applicable surge capability.
  4. Energy capacity: Usable energy at the AC outlet must support the runtime you need.
  5. Permitted setup: Both manuals must allow the intended location, ventilation, cord arrangement, and proximity to moisture.

These checks apply to a cord-connected cooler plugged directly into the station. Do not modify a plug, improvise an adapter, backfeed a household outlet, or connect a station to permanently wired equipment. A fixed electrical installation needs equipment and professional work approved for that purpose.

Find the cooler’s actual power demand

Start with the cooler’s nameplate and manual. Record the exact model, input voltage, frequency, and listed watts. If it lists only amperes, volts multiplied by amps gives volt-amperes, not necessarily actual watts for a motor load. Obtain wattage from the manufacturer or measure the complete appliance with an appropriately rated plug-in power meter in a dry, manual-approved setup.

Model differences can be substantial, so a generic wattage range is not a dependable sizing method. As one model-specific example, Hessaire lists its MC18M mobile cooler at 85 W total consumption; that value applies to that model, not to evaporative coolers generally (Hessaire MC18M specifications).

Measure fan, pump, and accessory settings

Follow the cooler manual for filling and operation. Then record stable power for every mode you expect to use:

  • Low, medium, and high fan settings, if provided
  • Fan-only operation
  • Fan plus water pump at each intended speed
  • Oscillation and other powered features
  • Automatic modes over a representative interval

For example, the MMBT12/MMBT14 owner’s manual documents blower settings that do not operate the pump, confirming that fan-only and pump-on modes can be distinct loads. The same manual specifies 120 V/60 Hz power and a GFCI-protected receptacle for those models (MMBT12/MMBT14 owner’s manual). Do not apply those requirements or operating details to another cooler without checking its manual.

Enabling the pump or changing fan speed can change power use, but the amount is model-specific. Measuring the complete appliance is more reliable than adding component amp ratings because motor power factor and operating conditions affect actual watts.

Check startup separately from running watts

Nameplate wattage may not describe brief motor-starting demand. Look for manufacturer documentation first. If both manuals permit testing, start the cooler with its normal controls in the most demanding intended mode while watching the meter’s maximum indication and the station’s overload indicators.

Many consumer plug-in meters can miss a short inrush event. A successful start shows that the tested combination worked under those conditions; it does not quantify every unseen peak. Repeated overloads, shutdowns, alarms, or unstable output mean the combination should not be used. Do not assume an evaporative cooler has zero startup surge. For more on that distinction, see surge watts vs. running watts.

Compare watts, watt-hours, and station limits

Watts (W) describe instantaneous power. Compare measured running watts with the station’s continuous AC rating, and compare documented or observed startup behavior with the station’s applicable surge rating.

Watt-hours (Wh) describe stored energy. Battery capacity and inverter output are separate specifications. For example, one specific power-station manual lists 288 Wh capacity, 300 W continuous AC output, and 600 W surge peak as separate ratings (Jackery Explorer 300 Plus manual). Those figures apply only to that model.

Do not treat advertised battery Wh as automatically available at the AC receptacle. Inverter conversion and the station’s operating limits reduce or reserve some energy. Use manufacturer-provided usable AC energy or a safe, documented discharge measurement when available. Otherwise, any reduction factor is only a planning assumption, not a guaranteed efficiency. See usable capacity versus advertised capacity for the distinction.

Evaporative-cooler power decision table

This table is an arithmetic illustration using 500 usable AC Wh after all assumed losses. The loads are examples, not a claimed typical range.

Measured average load Minimum continuous output Estimated runtime from 500 usable Wh
85 W At least 85 W About 5.9 hours
150 W At least 150 W About 3.3 hours
288 W At least 288 W About 1.7 hours
500 W At least 500 W About 1.0 hour

Passing the continuous-output check does not prove startup compatibility. The surge check is separate, and the station manual may set further operating limits.

Calculate runtime from measured watts

Use this equation:

Estimated runtime = usable AC watt-hours ÷ time-weighted average watts

If the cooler stays in one mode, use that mode’s stable measured watts. If settings change during use, measure energy over a representative interval or calculate a time-weighted average. Do not apply a compressor-air-conditioner duty-cycle assumption to an evaporative cooler; its blower and pump may run continuously, depending on its controls.

Illustrative calculation with stated assumptions

Suppose a hypothetical station is labeled 1,024 Wh. For planning only, assume 85% reaches the AC load after conversion and reserve losses. This is an assumption, not a universal efficiency or measured result:

1,024 Wh × 0.85 = 870 usable AC Wh

Suppose meter readings show the cooler using 180 W for 45 minutes of each hour and 90 W for the remaining 15 minutes:

(180 W × 0.75) + (90 W × 0.25) = 157.5 W average

870 Wh ÷ 157.5 W = about 5.5 hours

Actual runtime can differ with operating mode, battery state, temperature, inverter behavior, and automatic shutoff settings. Replace the assumed 85% factor with documented or measured usable AC energy whenever possible.

Keep the station dry and maintain airflow

An evaporative cooler combines electricity with a water reservoir, pump, fill connection, or wet media. Keep the power station outside every spill, spray, drainage, and refill path. Do not place it on the cooler, beside an overflow point, or where damp exhaust reaches it. Preserve the ventilation clearances required by both products.

Power-station restrictions vary. The cited Explorer 300 Plus manual, for example, calls for a dry, ventilated location and prohibits exposure to rain or wet environments. That is model-specific guidance, but it illustrates why the station’s own manual must control placement.

Confirm whether the cooler manual requires GFCI protection and whether the proposed supply arrangement actually provides it. Do not assume every power station has GFCI protection merely because it has an AC receptacle. Follow current local electrical requirements, or consult the authority having jurisdiction or a qualified electrician when the arrangement is unclear. See grounding and GFCI with portable power stations for related considerations.

Certification has a defined scope. UL Solutions explains that UL 2743 covers portable power packs for activities such as camping or temporary loss of normal power; that certification does not make a pack a permanently installed residential energy-storage system under UL 9540 (UL Solutions portable power pack guidance).

Nameplate and plug-in-meter checklist

  • Cooler make and exact model number
  • Required input voltage and frequency
  • Nameplate watts or amperes
  • Fan-only watts at each intended speed
  • Fan-plus-pump watts at each intended speed
  • Watts used by oscillation or other accessories
  • Documented startup demand or safely observed maximum
  • Any station overload, alarm, or shutdown during startup
  • Station continuous and surge AC ratings
  • Battery capacity and documented or assumed usable AC Wh
  • Low-load or automatic AC shutoff behavior
  • GFCI instructions for the cooler and supply
  • Indoor/outdoor rating and dry-placement requirements
  • Cooler exhaust-air and station ventilation clearances

The right station is not determined by battery capacity alone. Confirm the electrical match, measure the complete cooler in its intended modes, verify startup separately, and calculate runtime from usable AC energy. If either manual prohibits the location or power arrangement, choose a different setup rather than improvising around the restriction.
AC Extension Cord Voltage Drop With Portable Power Stations

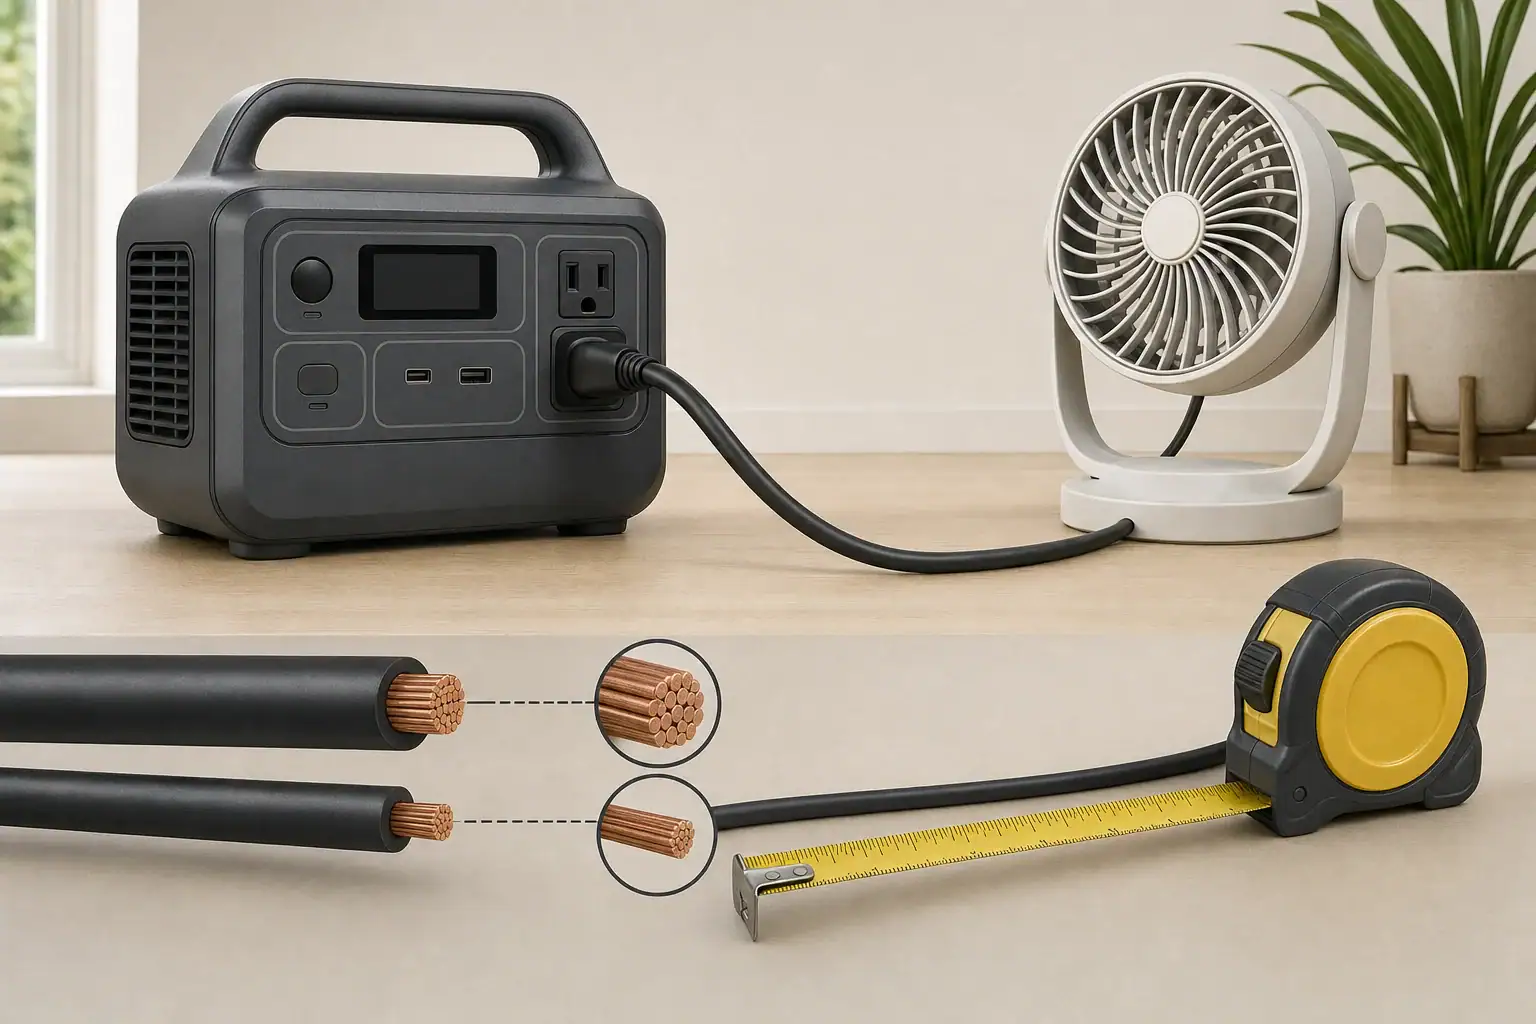
Portable power station powering an appliance through an AC extension cord with conductor-size comparison

Quick answer: For AC extension cord voltage drop with portable power stations, use the appliance nameplate amps first. Choose the shortest listed cord whose printed rating covers the load, then check gauge and length with a voltage-drop calculation. Lower AWG numbers generally mean larger conductors and less calculated drop.

AC extension cord voltage drop: gauge, length, and load

An extension cord has to meet three separate limits: the appliance demand, the cord’s printed rating, and the portable power station’s AC-output limits. Wire gauge and length affect voltage drop, but a favorable calculation does not make an underrated cord or power station suitable.

For a 120 V setup, use the table below as a conservative planning check based on a 3% calculated voltage-drop target. It assumes copper conductors at a 20°C reference temperature and the stated current flowing continuously. It is not an ampacity table, a legal limit, or a guarantee that every appliance will operate correctly.

Approximate maximum one-way cord length at a 3% calculated voltage-drop target
Assumed load 16 AWG 14 AWG 12 AWG 10 AWG
600 W / 5 A 90 ft 143 ft 226 ft 360 ft
1,200 W / 10 A 45 ft 71 ft 113 ft 180 ft
1,500 W / 12.5 A 36 ft 57 ft 91 ft 144 ft
1,800 W / 15 A 30 ft 48 ft 75 ft 120 ft

How to use the table: Select a practical cord shorter than the listed length, then confirm its printed current or wattage rating covers the appliance. Also confirm the station’s continuous AC-output rating, any receptacle-specific limit, and its total output shared with other connected loads.

The calculation uses copper resistance values of approximately 4.02, 2.52, 1.59, and 0.9988 ohms per 1,000 feet for 16, 14, 12, and 10 AWG respectively at 20°C, from the NIST Copper Wire Tables. Actual cord assemblies can differ because conductor temperature, stranding, plugs, receptacles, and contact condition add variables.

Find the appliance current before choosing a cord

Use the appliance nameplate input amperage when it is available. Read the appliance manual as well, particularly if it gives extension-cord instructions or identifies a startup requirement.

For single-phase AC, the relationship is:

watts = volts × amps × power factor

Dividing watts by 120 V is therefore a useful estimate only for a load with power factor near 1. For example, a hypothetical 1,200 W resistance load at 120 V draws about 10 A. Motors and electronic power supplies can have a power factor below 1, so their real watts alone may not reveal current. The DOE Electrical Science handbook explains the relationship among true power, apparent power, and power factor.

If power factor or starting current is unknown, do not invent a multiplier. Use the appliance nameplate and manual. A motor may draw more current while starting, but the amount and duration depend on the specific appliance.

Calculate AC extension cord voltage drop

For a two-conductor 120 V load circuit, an idealized calculation is:

voltage drop = 2 × one-way length (ft) × current (A) × resistance (ohms per 1,000 ft) ÷ 1,000

The factor of two accounts for the outgoing and return conductors. Convert the result to a percentage with:

drop percentage = voltage drop ÷ supply voltage × 100

Illustrative calculation: 1,200 W resistance load on a 50-foot cord

Assumptions: 120 V station output, power factor near 1, 10 A load current, a 50-foot one-way cord length, and the NIST 20°C reference resistance. This is a calculation, not a measurement of a particular cord or station.

  • 16 AWG: 2 × 50 ft × 10 A × 4.02 ohms/1,000 ft ÷ 1,000 = 4.02 V. That is about 4.02 ÷ 120 × 100 = 3.35%.
  • 12 AWG: 2 × 50 ft × 10 A × 1.59 ohms/1,000 ft ÷ 1,000 = 1.59 V. That is about 1.59 ÷ 120 × 100 = 1.33%.

Under these assumptions, the 12 AWG cord has less calculated drop than the 16 AWG cord. Neither result establishes the cord’s allowable current rating; the cord’s own printed marking remains controlling.

Check the appliance, cord, and power station separately

  1. Appliance: Check nameplate amps, operating voltage, and manufacturer instructions. Do not assume that a station can start a motorized appliance just because its listed running watts fit.
  2. Cord: Check the printed current or wattage rating, conductor gauge, jacket marking, and indoor or outdoor designation. Select a listed cord appropriate for the environment and inspect it before use.
  3. Power station: Check the exact model’s continuous AC-output rating, total shared-output limit, surge specification, receptacle limits, and displayed warnings or fault indicators.

The DOE Electrical Safety handbook identifies conductor gauge, cord length, intended use, inspection, environmental markings, and NRTL listing as relevant cord-selection considerations.

Power-station specifications are model-specific. For example, the EcoFlow DELTA user manual lists AC specifications and protection functions for that model only. Do not transfer those values to another station. A station’s surge rating also does not authorize operation above its continuous rating.

When a shorter or heavier cord may help

A cord may be worth investigating when an appliance runs directly from the station but not through the cord, a motor struggles to start, lights dim markedly under load, or a shutdown appears only with the extension cord connected. These signs do not prove voltage drop: overload, startup demand, temperature protection, a low battery, appliance protection, or a damaged connection can also be involved.

Use a controlled direct-versus-cord check

  1. Disconnect other AC loads. Note the station battery level and any displayed fault indication.
  2. If the appliance manufacturer permits it, connect the appliance directly to the station and observe whether it operates normally.
  3. Repeat with the extension cord, without changing the appliance or station settings.
  4. If the issue occurs only with the cord, inspect its printed rating, length, gauge, plugs, and receptacle fit. A shorter appropriately rated cord or a lower-AWG listed cord can reduce calculated drop.
  5. Stop using the cord if insulation is damaged or if there are bent contacts, discoloration, an abnormal odor, arcing, or an unusually hot plug or connector.

Do not repeatedly reset an overload or protection fault without identifying the cause. Follow the appliance and station manuals for model-specific warnings and service guidance.

Watts, watt-hours, and runtime

Watts (W) describe instantaneous load and help determine whether the station and cord can support an appliance. Watt-hours (Wh) describe stored energy and are used for runtime planning.

A simple Wh ÷ W result is an idealized estimate, not a promised AC runtime. Inverter operation and cord resistance consume some energy, and results vary with the station, load, cord, connections, and operating conditions.

This article covers cords connected to a power station’s AC receptacle. Solar-extension cables are DC equipment with different voltage, current, connector, polarity, and compatibility requirements; select them only according to the solar source and power-station manuals.

Bottom line

Start with nameplate amps, verify the printed ratings of the appliance, cord, and power station separately, and calculate drop for the intended one-way cord length. When two cords meet all applicable ratings, the shorter cord or the one with the lower AWG number will generally have less calculated voltage drop.

Can a Power Station Run a Corded Leaf Blower?

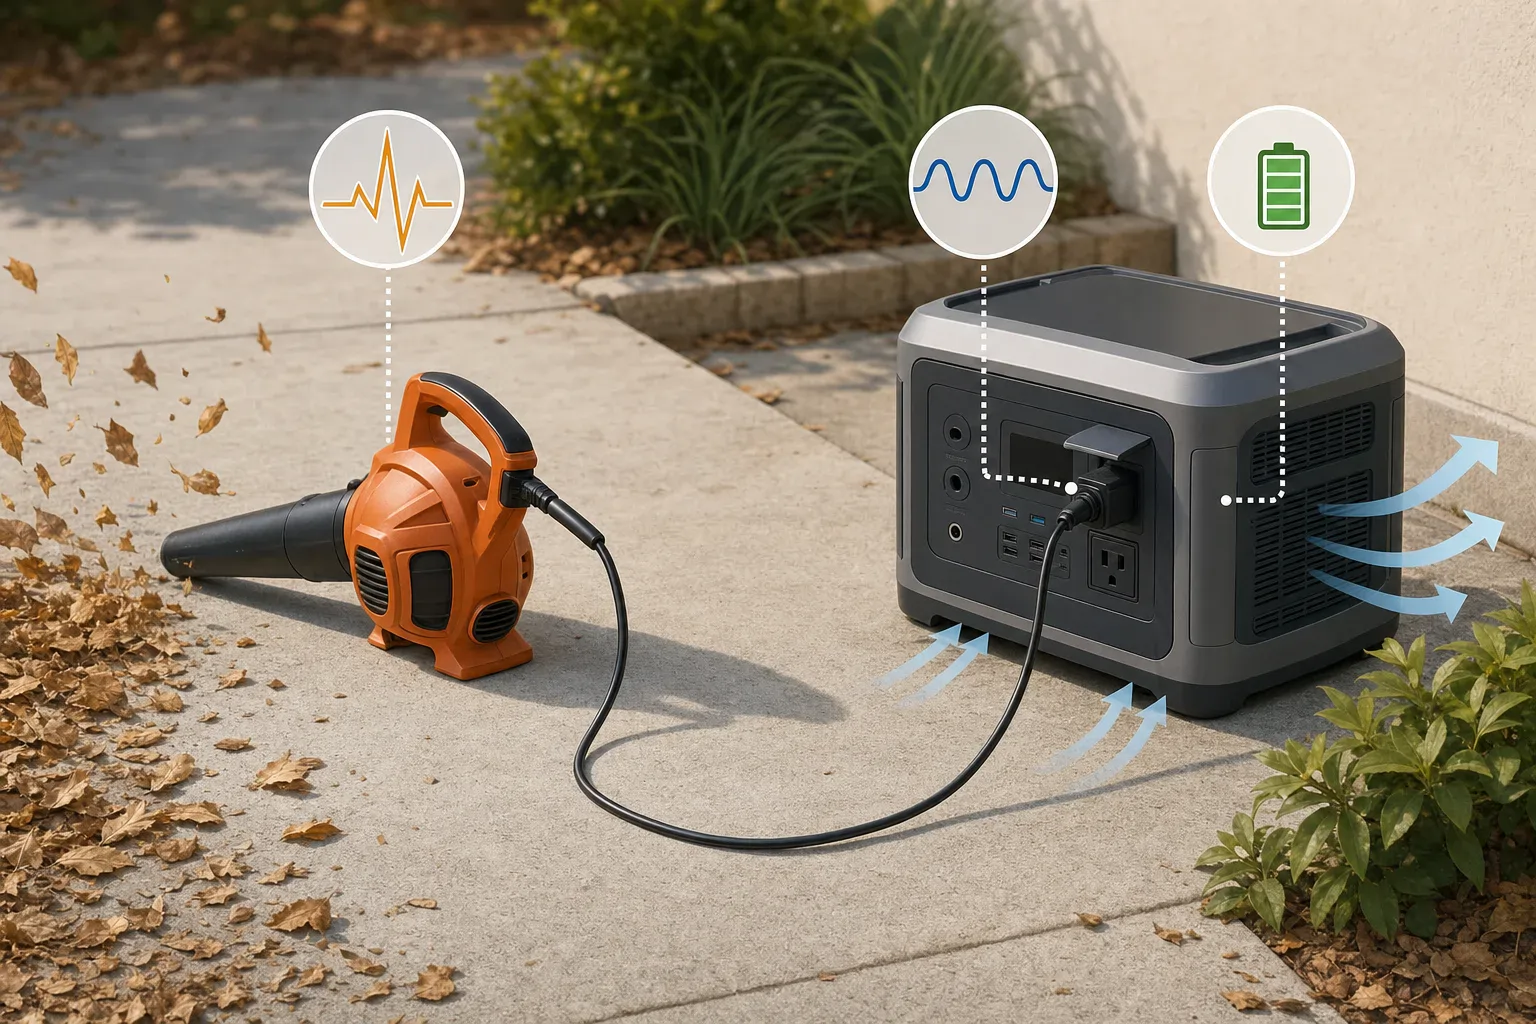
Illustration of a corded leaf blower connected to a portable power station on a dry driveway

Quick answer: A portable power station can run a corded leaf blower only when its AC output supports the blower’s running load and its surge capability starts the motor. Check voltage, frequency, output limits, and startup behavior separately. Battery watt-hours affect operating time, not whether the blower can start.

Size a portable power station for a corded leaf blower

There are three separate questions: can the inverter supply the blower while it runs, can it tolerate motor startup, and how long can the battery supply that load? A large battery does not compensate for an undersized AC inverter.

Start with the exact model numbers and manuals. Confirm that the power station’s AC output voltage and frequency match the blower’s label, then compare the station’s continuous output, any outlet or total-output current limit, and its published surge specification.

Use the blower label as a screening check

Look for volts, amps, watts, frequency, and the model number. If the label provides volts and amps, calculate:

VA = volts × amps

For example, BLACK+DECKER describes its BV6600 as having a 12-amp motor and variable-speed selections. If a 120V supply applies, the nameplate screening calculation is:

120V × 12A = 1,440VA

This is not proof that the blower uses 1,440W. For AC loads, apparent power is volts × amps, while true power depends on power factor: watts = volts × amps × power factor. BLACK+DECKER does not publish measured running watts, power factor, or startup demand for the BV6600 on its cited product page. Treat those values as unknown until documented or measured. See the BLACK+DECKER BV6600 product page and Fluke’s electrical glossary.

When power factor is unavailable, use nameplate VA as a cautious screening figure and check the station manual for watt, VA, and AC-current restrictions. Read more about the distinction in VA vs. watts for portable power stations.

Startup is a separate limit

A corded blower motor can draw more power while starting than after reaching speed. There is no verified universal startup multiplier for corded leaf blowers, so do not assume that a stated surge rating guarantees compatibility. Compare documented startup demand, if available, with the station’s surge rating and its stated conditions. Surge output is not continuous output.

As one specification example, EcoFlow’s US DELTA 2 manual lists a 1,024Wh battery, 1,800W total AC output, and 2,700W surge output. Those figures apply to that model only and do not certify it for a particular blower. The manual also says X-Boost is not compatible with every appliance and is more suitable for heating devices; do not use that feature as evidence that a blower motor will run. See the EcoFlow DELTA 2 manual.

Leaf-blower power-station decision table

What you find Practical decision
Station continuous output is below the blower’s measured maximum running watts Do not use the pairing.
Nameplate VA is close to the station’s watt, VA, or AC-current limit Treat the match as marginal; obtain better load data before relying on it.
Running load appears to fit, but startup demand is unknown Check both manuals and perform a normal, supervised startup test from a full charge with no other loads connected.
The station reports overload, shuts down, or trips during startup The pairing is not compatible under those conditions. Do not bypass protection.
Running demand and startup both remain within documented limits The electrical match is promising; calculate runtime from average operating watts.

A 1,500W station is too close to a 1,440VA nameplate calculation to support a universal compatibility claim. Watts and VA are different quantities, and the blower’s startup demand remains unknown. More continuous-output and surge headroom is preferable, but the manuals and a successful normal startup are the deciding evidence.

Estimate corded leaf blower runtime

Runtime depends on energy delivered at the AC outlet and the blower’s average power during real work:

runtime (hours) = usable AC energy (Wh) ÷ average blower power (W)

Do not assume all nominal battery watt-hours reach the AC outlet. Conversion losses, the station’s shutdown reserve, temperature, battery condition, and operating mode can change usable output. See usable capacity versus advertised capacity for why battery nameplate capacity is not an AC-runtime guarantee.

Illustrative calculation, not a test result

Assume a station has 1,024Wh of nominal battery capacity and a blower averages 1,200W during the intended work cycle:

1,024Wh ÷ 1,200W = 0.853 hours

0.853 hours × 60 minutes/hour = about 51 minutes

That is an ideal mathematical ceiling, not an expected field runtime, because it assumes every nominal watt-hour is delivered to the blower. If a controlled record instead showed 850Wh delivered at the AC outlet under comparable conditions, the estimate would be:

850Wh ÷ 1,200W = 0.708 hours, or about 42.5 minutes

For a useful personal estimate, record the blower’s average watts during representative use and divide a known usable AC-energy result by that average. Variable speed and pauses can change average consumption, so measure the work pattern you actually expect.

Safe setup and pre-use checks

  1. Identify both models. Record the blower’s voltage, frequency, and amps or watts; record the station’s continuous AC watts, surge specification, and AC-output limits.
  2. Read both manuals. Confirm output compatibility and follow any manufacturer restrictions for motor loads or operating environment.
  3. Use an appropriate extension cord. Follow the blower manual’s model-specific wire-gauge and length table rather than copying a table from another tool.
  4. Inspect before use. Do not use damaged plugs, loose receptacles, cut insulation, or worn cords.
  5. Keep equipment dry and ventilated. Keep the station, plugs, and cord connections away from standing water, wet grass, and debris while preserving the station’s required ventilation clearances.
  6. Test with no other loads. Fully charge the station, disconnect other devices, start the blower in the intended mode, and watch for an overload warning or shutdown.
  7. Stop for warning signs. Disconnect if the station overloads, the motor sounds unstable, or a plug or cord becomes abnormally hot. Never defeat protective devices or remove a grounding pin.

For example, Toro’s manual for blower model 51619 calls for a polarized, UL-listed extension cord recommended for outdoor use and provides a model-specific gauge-by-length table. It also warns against damaged cords, standing water, and wet grass. Those instructions are not a universal cord table for other blowers. See the Toro 51619 operator’s manual.

OSHA’s cord-safety guidance likewise emphasizes factory-assembled cord sets, inspection, suitable service markings, strain relief, and moisture control. Its regulatory requirements apply to covered workplaces, not automatically to every home, but the hazard-control guidance is relevant. See OSHA’s extension-cord and electrical-safety guidance.

When not to use a power station with a blower

Do not use the pairing when the blower exceeds the station’s continuous output, startup causes an overload, the match is marginal and necessary limits cannot be verified, or the required cord arrangement conflicts with either manual. Adding battery capacity may extend runtime, but it will not make an undersized inverter start a motor.

Can a Portable Power Station Run a Toaster Oven?

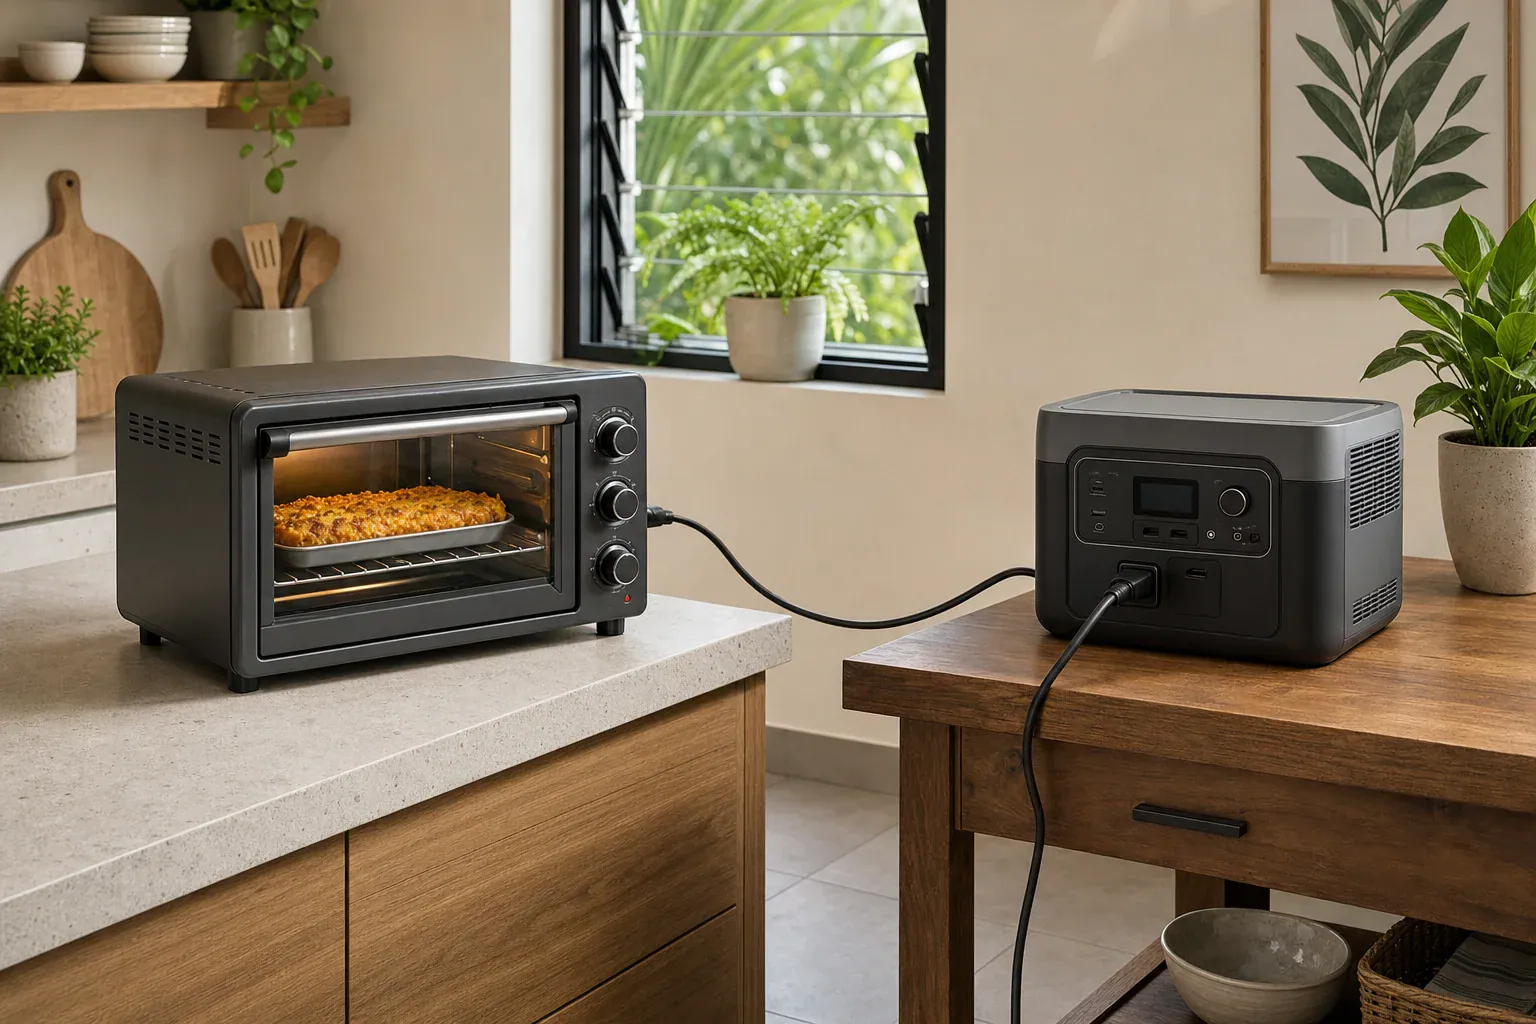
Illustration of a toaster oven plugged directly into a portable power station on separate surfaces

Quick answer: Yes. A portable power station can run a toaster oven when its continuous AC output meets or exceeds the oven’s nameplate input watts, with room for any other simultaneous loads. Battery watt-hours affect cooking-session count, but actual energy use varies with thermostat cycling, recipe settings, and AC conversion losses.

Can a portable power station run a toaster oven safely?

Start with the electrical label on the exact toaster oven rather than a generic wattage range. Compare the oven’s input watts with the power station’s continuous AC output, not its short-term surge rating. Also confirm that the station provides the voltage and frequency required by the appliance.

For example, the Hamilton Beach 31190-series manual lists 120V, 60Hz, 1,500W. The Breville BOV670 manual lists 120V, 60Hz, 1,800W. Those ratings apply only to the models covered by those manuals.

  1. Find the oven’s input watts on its rating label or in its manual.
  2. Find the station’s total continuous AC-output rating.
  3. Add the watts of every load that will run at the same time.
  4. Use the pairing only if the total remains within the station’s continuous-output limit.

Two documented compatibility examples

This is a comparison of published ratings, not a performance test or a runtime guarantee.

Published toaster-oven ratings compared with power-station AC-output ratings
Power station Published capacity and AC output 1,500W Hamilton Beach oven 1,800W Breville oven
EcoFlow DELTA 2 1,024Wh; 1,800W continuous total AC output; 2,700W surge Passes the rating screen; 300W remains for other loads At the published continuous-output ceiling
Jackery Explorer 1000 Plus 1,264.64Wh rated capacity; 2,000W rated total AC output; 4,000W surge peak Passes the rating screen; 500W remains for other loads Passes the rating screen; 200W remains for other loads

The DELTA 2 manual instructs users to keep total loaded-device power at or below 1,800W. An oven rated at the station’s exact ceiling leaves no published allowance for another AC appliance. A modest margin can be practical, but neither oven manual establishes a required margin percentage.

Watts decide whether it runs; watt-hours estimate cooking sessions

Watts (W) are the rate of power use. They determine whether the station can support the oven while its heating elements are energized.

Watt-hours (Wh) are stored energy. They help estimate how many cooking sessions the battery may support. However, a station’s advertised battery capacity is not automatically the energy available from its AC outlets. Inverter conversion and the station’s own operating consumption reduce delivered AC energy. See usable capacity versus advertised capacity for the distinction.

The cited manufacturer specifications provide battery-capacity ratings, but they do not establish usable AC watt-hours for these toaster-oven loads. Exact session counts cannot be derived from the advertised Wh figure alone.

Does a toaster oven need startup or surge headroom?

The manuals for the two example ovens do not publish separate startup-watt figures. There is no basis here for assuming that either oven requires twice its nameplate wattage or any other generic startup multiplier.

Use the station’s continuous-output rating as the primary limit for a heating appliance. Surge output describes brief overload capability; it does not make a lower-continuous-output station suitable for sustained cooking. If the manuals for your exact oven or power station state a model-specific starting requirement, follow those instructions. For more on the distinction, see surge watts versus running watts.

Why thermostat cycling changes energy use

Nameplate watts should not be treated as a guaranteed average draw for every recipe. The Breville BOV670 manual states that the top and bottom elements cycle on and off in Bake mode to regulate temperature. The station must still support the oven’s heat-on demand, even when the session’s average consumption is lower.

No universal cycling percentage is available. Preheating, selected mode and temperature, food load, room conditions, and door opening can affect energy used during a session. A full-nameplate calculation is useful as a conservative planning assumption, but it is not a measured runtime result.

Illustrative watt-hour calculation

Assume, only for this example, that a 1,500W oven draws its full nameplate input for a complete 20-minute session, including preheating:

1,500W × (20 ÷ 60 hours) = 500Wh per session

Using the Jackery Explorer 1000 Plus’s published 1,264.64Wh battery capacity as an idealized comparison:

1,264.64Wh ÷ 500Wh = 2.53 idealized sessions

This is not a claim that the station will provide 2.53 sessions. AC conversion and station overhead reduce energy delivered at the outlet, while thermostat cycling can reduce the oven’s energy consumption below the full-power assumption. The actual number of complete sessions is unknown until it is measured with the intended recipe.

How to measure your own cooking-session energy

  1. Use the same cooking mode, temperature, preheat routine, and duration that you expect to repeat.
  2. Disconnect unrelated loads so the oven is the only meaningful load on the station.
  3. Record the watt-hours used for one complete preheat-and-cook session from the station display, if it provides an energy reading, or use a plug-in energy meter rated for the appliance load and used according to its instructions.
  4. Repeat the observation, since thermostat cycling and cooking conditions can vary.
  5. When available, use a manufacturer-published usable-AC-energy figure measured under comparable conditions rather than substituting battery capacity.

Once both values are known, calculate complete sessions as:

complete sessions = floor(usable AC Wh ÷ measured Wh per session)

Operating and cord precautions

  • Follow the toaster oven’s manual before using an extension cord or power strip. The Breville BOV670 instructions recommend a dedicated outlet and do not recommend an extension cord or power strip.
  • If the oven manual permits an extension cord, use one with an electrical rating at least equal to the appliance. The Hamilton Beach 31190-series instructions provide model-specific extension-cord guidance.
  • Keep every simultaneous load within the power station’s stated limits. Do not rely on surge output for sustained cooking.
  • Set the toaster oven on a stable surface and maintain the clearances required by its manual. Keep the power station separate from the oven’s heat, steam, grease, and spills.
  • Do not operate the toaster oven unattended. The Hamilton Beach instructions also direct users to unplug the appliance when it is not in use.
  • Plug the appliance into the power station’s AC outlet only. Never connect a power station to a household receptacle or use it to backfeed building wiring.

Bottom line

A toaster oven is a high-draw cooking load, so the continuous AC-output number is the first pass-or-fail check. Match the exact oven label to the exact station manual, avoid competing loads, and measure watt-hours for the recipe you actually plan to cook. That approach is more reliable than generic toaster-oven wattage ranges or advertised battery capacity alone.

Can a Portable Power Station Run a Clothes Dryer?

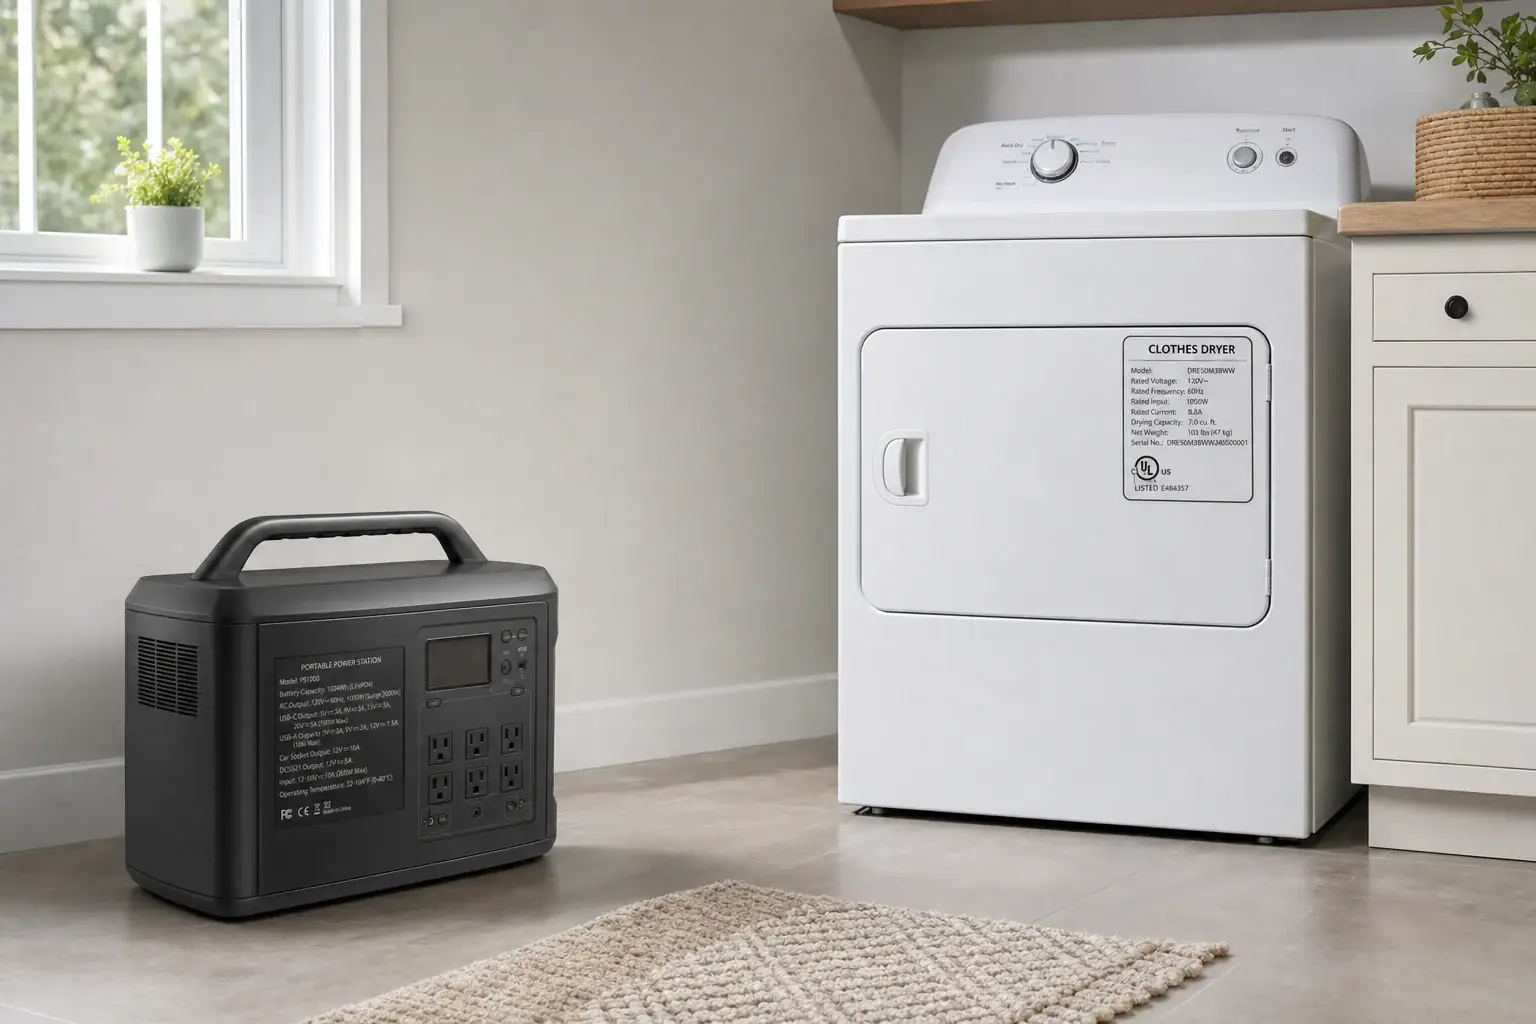
Portable power station near a clothes dryer in a bright laundry room

Most portable power stations cannot run a standard electric clothes dryer. A conventional dryer commonly needs 240-volt split-phase power and several thousand watts, while many portable stations provide only 120-volt AC output.

It is possible with certain high-output systems designed to supply the dryer’s exact voltage, continuous wattage, startup surge, receptacle, and grounding requirements. Compact 120-volt, heat-pump, and gas dryers may be easier to power, but their nameplates and manuals must still be checked individually.

Why dryer type matters

The heating method usually determines how demanding a dryer is. The following ranges are illustrative planning figures, not universal specifications:

Illustrative electrical requirements by dryer type
Dryer type Possible supply Illustrative input range Main compatibility issue
Conventional electric Usually 240 V About 4,000–6,000 W while heating High output and split-phase voltage
Compact electric Often 120 V About 1,200–1,800 W Long runtime and substantial battery use
Heat-pump 120 V or 240 V, depending on model About 700–2,000 W Compressor startup and model-specific voltage
Gas Often 120 V for controls and motor Several hundred watts Motor surge, ignition, controls, and proper gas operation

Check the dryer’s nameplate and current manufacturer documentation rather than selecting a station from these broad ranges. A dryer’s branch-circuit rating is not necessarily its actual operating wattage. For example, a 240-volt, 30-amp circuit represents up to 7,200 volt-amperes of circuit capacity, but the appliance may draw less.

Four requirements must match

1. Output voltage and configuration

A 240-volt dryer requires a power source specifically designed to provide the correct 240-volt split-phase output. Two ordinary 120-volt outlets do not become a compatible dryer supply through an adapter. Likewise, added battery capacity does not give a 120-volt inverter 240-volt capability.

The station must also have a manufacturer-approved outlet and operating configuration compatible with the appliance. Do not use improvised adapters, combine independent outputs, backfeed a receptacle, or connect a portable power station to a home electrical panel.

2. Continuous output power

The station’s continuous AC rating must exceed the dryer’s maximum simultaneous demand, not merely its average consumption. Heating elements, the drum motor, blower, controls, and—where present—a compressor may operate together.

If only voltage and current are listed, multiplying them provides a useful upper-bound estimate:

Apparent power in volt-amperes = volts × amperes

For motors and compressors, volt-amperes and watts are not always identical because of power factor. Use the manufacturer’s input-watt specification when available.

3. Startup or surge capacity

Resistance heating elements generally do not create a large startup surge, but motors and compressors can briefly draw more than their normal running power. The station’s surge rating must accommodate that event without shutting down.

Surge ratings are not directly comparable unless their permitted duration is known. A high surge number available for only a fraction of a second may not support a motor that takes longer to start. Dryer and power-station manufacturers may specify these values differently.

4. Battery energy

Output power, measured in watts, determines whether the dryer can operate. Battery capacity, measured in watt-hours or kilowatt-hours, determines approximately how long it can operate. A station can have enough inverter power to start a dryer yet too little stored energy to finish a load.

A simplified estimate is:

Usable AC energy = rated battery capacity × usable-capacity fraction × inverter efficiency

For example, assume a station has a 5,000 Wh battery, 90% usable capacity, and 90% inverter efficiency:

5,000 Wh × 0.90 × 0.90 = 4,050 Wh, or 4.05 kWh of estimated AC energy

If a dryer drew 4,500 W continuously for 45 minutes, the simplified energy requirement would be:

4,500 W × 0.75 hour = 3,375 Wh

That example leaves little practical margin after accounting for changing loads, battery temperature, conversion losses, aging, and cycle length. Real dryers cycle their heaters or compressors, so an appliance’s documented energy per cycle may provide a better estimate than multiplying maximum wattage by time. Use the dryer’s current manufacturer data when available.

When running a dryer is realistic

A conventional 240-volt electric dryer is realistic only with a large system that explicitly supports the required split-phase voltage, outlet, continuous load, surge, and enough usable energy for the drying cycle. Merely adding expansion batteries solves the runtime problem, not an inverter-output limitation.

A compact 120-volt dryer may work with a much smaller station, but its heating load can still be close to the limit of a typical household outlet-style inverter. A heat-pump dryer may consume less energy per cycle, although compressor surge and voltage requirements vary. A gas dryer usually has a lower electrical demand because gas supplies the heat, but it still requires a compatible electrical source and a properly installed, safely operating fuel and exhaust system.

Compatibility checklist

  • Confirm the dryer’s required voltage and phase configuration.
  • Find the appliance’s maximum input watts or rated current.
  • Account for motor or compressor startup demand.
  • Verify the station’s continuous and time-limited surge ratings.
  • Confirm that the outlet and grounding arrangement are manufacturer-approved.
  • Estimate usable AC energy after capacity and inverter losses.
  • Leave operating margin rather than sizing both devices to identical ratings.

Electronic controls can also be sensitive to waveform or grounding characteristics. Follow both manufacturers’ instructions, including any requirement for pure sine-wave power. Keep the station dry, ventilated, and clear of dryer heat and exhaust, and do not exceed the rating of any manufacturer-approved cord or accessory.

Bottom line

A standard 240-volt electric dryer is beyond the capabilities of most portable power stations, though certain large split-phase systems may support one. Lower-power compact, heat-pump, or gas dryers are more practical candidates. Compatibility depends on all four factors—voltage, continuous watts, startup surge, and usable battery energy—not battery capacity alone.

Air Fryer on a Power Station: Wattage and Runtime

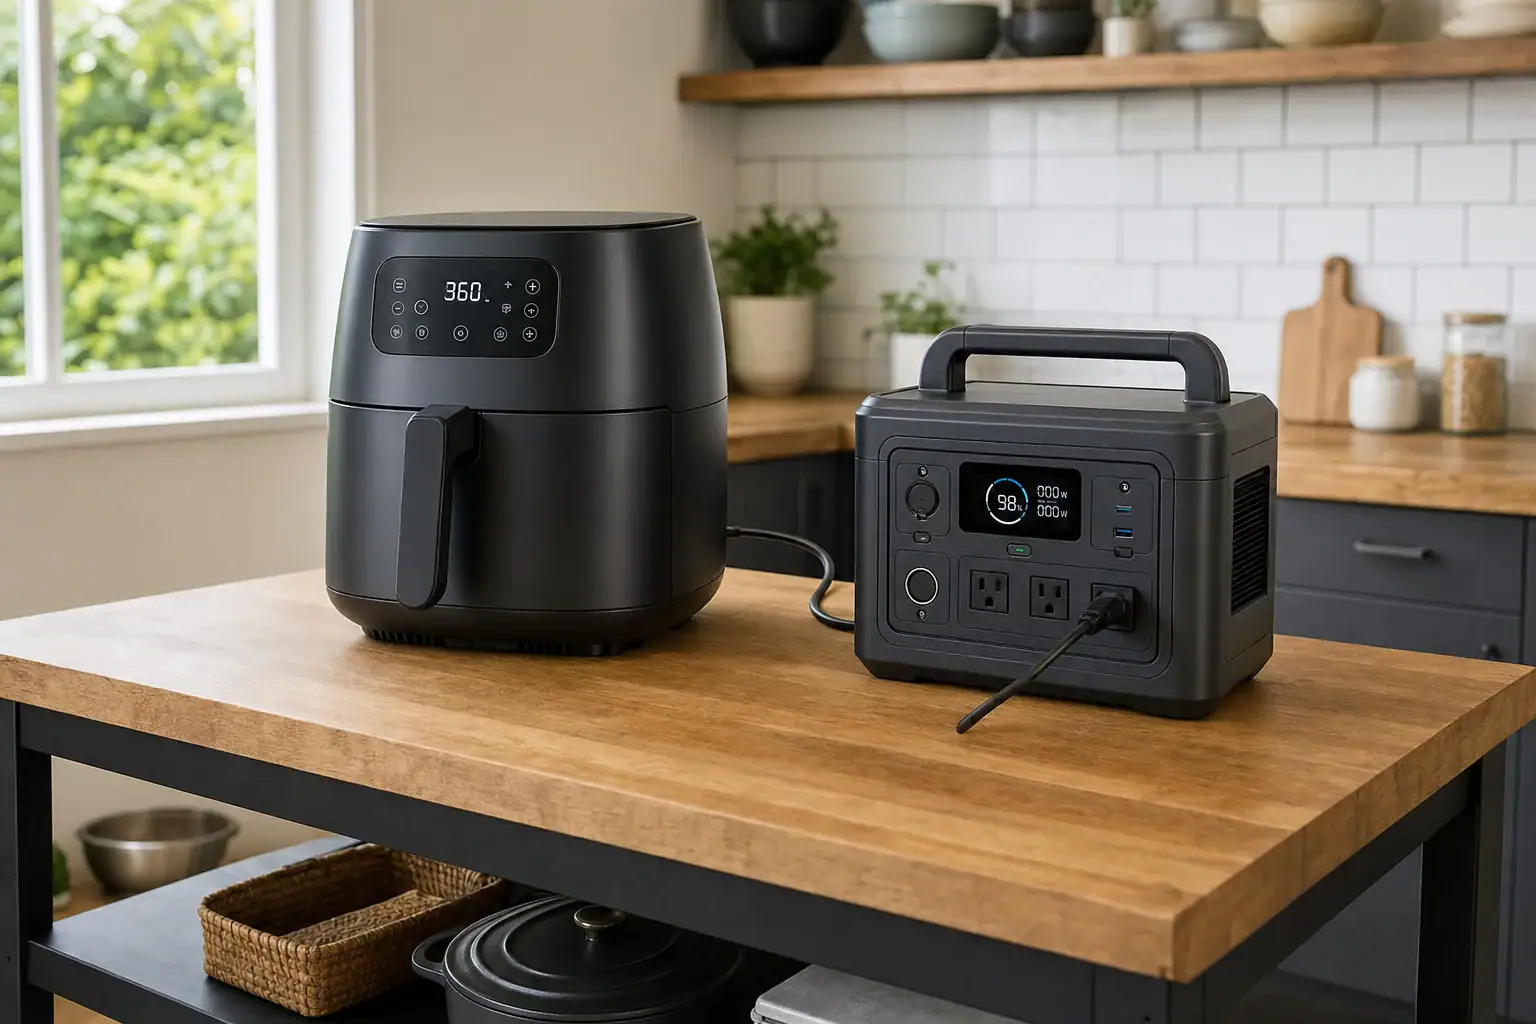
Countertop air fryer connected to a portable power station with ventilation space around both devices

An air fryer can run on a power station if the station’s continuous AC output exceeds the fryer’s maximum input wattage. Many countertop air fryers are rated around 1,200 to 1,800 watts, but the appliance nameplate or manual is the authority. A 1,000-watt power station, for example, cannot reliably operate a 1,500-watt air fryer even if its battery has plenty of watt-hours.

For runtime, divide usable battery energy by the air fryer’s power draw. As a quick example, a 1,000-watt-hour power station running a 1,500-watt fryer may provide roughly 30 to 35 minutes of full-power operation after allowing for inverter losses and the station’s reserve. Actual cooking time can differ because the heating element may cycle on and off.

Match the air fryer to the AC output rating

Check the air fryer’s label or manual for its rated input in watts. If only volts and amps are listed, approximate watts with volts × amps, but use the manufacturer’s stated maximum input when available. Control electronics, the fan and the heating element can make a simple calculation less exact.

Next, compare that figure with the power station’s continuous AC output. The continuous rating—not the battery capacity and not the short-duration surge rating—determines whether the inverter can keep the fryer running.

  • Continuous watts: The output the power station is designed to sustain under specified conditions.
  • Surge watts: Short-duration capacity intended for startup peaks. It does not make an undersized continuous inverter suitable for a high-wattage fryer.
  • Watt-hours: Stored energy used to estimate how long the load can run.

Air fryers are dominated by a resistive heating load, although the fan motor can create a brief startup increase. Choosing an inverter with some capacity above the appliance’s nameplate wattage reduces the chance of an overload shutdown. A margin of about 20% is a practical planning assumption, not a universal manufacturer requirement. Output capability may also be reduced by temperature, battery state of charge or model-specific operating limits.

Calculate estimated runtime

A useful planning formula is:

Runtime in minutes = battery capacity in Wh × usable fraction ÷ air fryer watts × 60

The usable fraction accounts for inverter conversion losses, the power station’s own consumption and any battery reserve enforced by its controls. If no model-specific AC energy figure is available, 0.80 to 0.90 can serve as an illustrative planning range. It is not a guaranteed efficiency rating.

The table below uses an 85% usable-energy assumption and assumes the air fryer draws its listed wattage continuously. Real results can be higher or lower.

Illustrative full-power air fryer runtime at 85% usable battery energy
Battery capacity 1,200 W fryer 1,500 W fryer 1,800 W fryer
500 Wh About 21 minutes About 17 minutes About 14 minutes
1,000 Wh About 43 minutes About 34 minutes About 28 minutes
1,500 Wh About 64 minutes About 51 minutes About 43 minutes

Capacity alone does not establish compatibility. A 500 Wh power station might have enough energy for a short cooking cycle but still lack the continuous inverter output needed to start or run the fryer.

Estimate energy for one cooking cycle

Multiply watts by operating hours to estimate the AC energy required. A 1,500-watt air fryer used for 15 minutes has a conservative full-power estimate of:

1,500 W × 0.25 hours = 375 Wh of AC energy

With an 85% usable-energy assumption, the battery capacity needed would be approximately:

375 Wh ÷ 0.85 = 441 Wh

This estimate treats the fryer as drawing full rated power for the entire cycle. Thermostat cycling may reduce actual consumption, while preheating, added cooking time, a cold battery or other connected loads can increase the capacity required. For dependable planning, include preheat time and avoid counting on unverified cycling savings.

What to check before cooking

  • Confirm the fryer’s maximum input wattage, voltage and frequency from its label or current manufacturer instructions.
  • Verify that the station’s continuous AC rating exceeds that input, preferably with reasonable headroom.
  • Calculate capacity from the total expected time, including preheating and any second cooking batch.
  • Subtract energy reserved for other devices and account for the station’s current state of charge.
  • Check the power station display during operation. An overload warning or shutdown indicates that the setup is not compatible under those conditions.

Use both appliances within their operating instructions

Place the air fryer on a stable, heat-resistant surface with the clearances required by its manufacturer. Keep the power station dry, ventilated and away from the fryer’s hot exhaust, grease and steam. Do not cover either device or operate it inside a closed compartment.

If an extension cord or power strip is being considered, follow the appliance and power-station manufacturers’ current instructions and use equipment rated for the full load. Pass-through operation—charging the station while powering the fryer—should be used only when the station manufacturer expressly permits it and its input, output and thermal limits can accommodate the load.

A portable power station should power the appliance through its normal AC receptacle. It is not a reason to modify the fryer, bypass protection features or connect the station to household wiring.

Bottom line

Size the inverter from the air fryer’s maximum watts and size the battery from the planned cooking time. For a 1,500-watt fryer, a station needs more than 1,500 watts of continuous AC output, while a 1,000 Wh battery offers roughly half an hour of conservative full-power runtime after typical conversion losses. The exact result depends on the two manufacturers’ specifications, battery conditions and how often the fryer’s heating element cycles.

Can a Portable Power Station Run a Dishwasher?

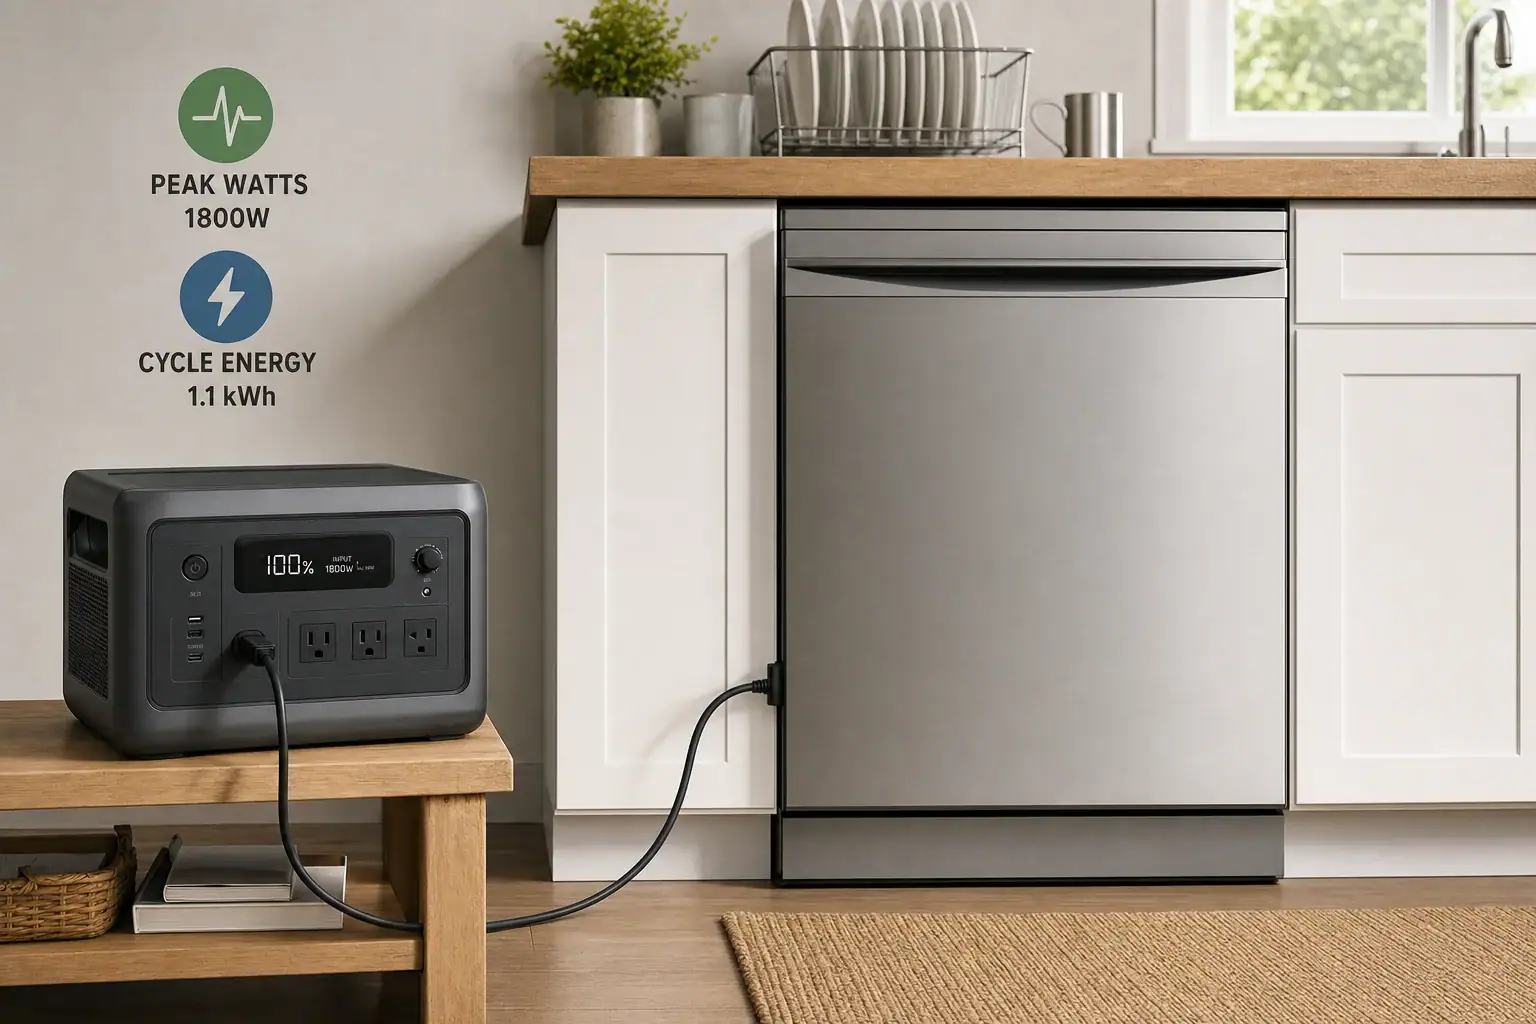
Cord-connected dishwasher powered by a portable power station kept safely away from water

Yes, a portable power station can run some dishwashers—but only if its inverter can handle the dishwasher’s maximum power draw and motor-starting surge, while its battery stores enough energy for the entire cycle. The dishwasher must also have a compatible factory-installed plug and an electrical configuration permitted by both manufacturers.

A built-in dishwasher that is hardwired into the home is not a suitable candidate for an improvised connection. Do not add a cord, alter the appliance, connect a power station to a home panel, or attempt to backfeed household wiring.

Dishwasher watts and cycle energy are different requirements

Two power-station specifications determine whether a dishwasher will run:

  • Output power, in watts: The inverter must support the dishwasher’s highest simultaneous load. Water heating and heated drying commonly create the largest sustained demand.
  • Battery energy, in watt-hours: The battery must supply enough total energy to finish the selected wash and dry cycle.

A station rated for 1,000 watts and 2,000 watt-hours has substantial energy capacity but may still shut down if the dishwasher draws more than 1,000 watts at any moment. Conversely, a high-output station with a small battery might start the appliance but run out of energy before the cycle ends.

How to determine the required inverter output

Check the dishwasher’s rating plate and manual for maximum input watts, rated current, voltage, and any stated circuit requirements. Manufacturer specifications vary by model, cycle, water temperature, and drying method.

If only rated current is provided, multiplying voltage by amperage offers a conservative screening estimate. For example, 120 volts × 12 amps equals 1,440 volt-amperes. That is not necessarily the appliance’s exact wattage because motors and electronic controls can affect power factor, but it indicates that a 1,000-watt inverter is unlikely to be appropriate. Verify compatibility with the appliance and power-station manufacturers rather than relying only on this estimate.

The power station’s continuous AC rating should exceed the dishwasher’s maximum simultaneous demand. Allowing roughly 15% to 25% headroom can reduce the chance of overload, but that margin is a practical sizing assumption rather than a universal manufacturer requirement.

Account for motor-starting surge

Dishwasher circulation and drain pumps may briefly draw more power when starting. The heating element is primarily a sustained resistive load rather than a major startup surge. Confirm that the station’s surge rating—and the time for which it can provide that output—covers the appliance’s starting demand. A high surge number is not useful if the station can sustain it only for less time than the motor needs.

Do not assume that an eco cycle eliminates the peak-load issue. It may reduce total energy consumption while still operating the same heater or pump at full power for shorter periods.

How much battery capacity is needed?

Use the dishwasher manufacturer’s cycle-energy figure when available. Because a dishwasher cycles its heater and pumps on and off, multiplying its maximum wattage by the full cycle duration usually overestimates energy use.

A useful sizing formula is:

Required nominal capacity in Wh ≈ cycle energy in kWh × 1,000 ÷ (AC efficiency × planned usable fraction)

AC conversion consumes some energy, so the battery’s advertised watt-hour capacity is not normally equal to the energy delivered at its outlet. Actual efficiency depends on load, inverter design, temperature, battery condition, and manufacturer rating methods. An 85% efficiency assumption is reasonable for an illustration, but it is not a guaranteed value for every station.

For example, suppose a dishwasher cycle is listed at 1.1 kWh. Assuming 85% AC efficiency and reserving 20% of the battery rather than planning a complete discharge:

1.1 × 1,000 ÷ (0.85 × 0.80) ≈ 1,620 Wh

Under those assumptions, about 1.6 kWh of nominal battery capacity is the calculated minimum for one cycle. A larger capacity provides room for a longer cycle, heated drying, battery aging, low temperatures, or differences between published and actual consumption. If a manufacturer states usable energy specifically at the AC outlet, avoid subtracting the same conversion loss twice.

Connection and safety limitations

  • Use only a permitted plug connection. A factory cord-and-plug-connected dishwasher may be compatible. A hardwired unit should not be converted or disconnected for this purpose without guidance from the appliance manufacturer and a qualified electrician.
  • Do not use home wiring as an intermediary. A portable power station must never be connected to a receptacle to energize household circuits or attached directly to an electrical panel.
  • Keep the station dry. Position it on a stable surface away from the sink, hoses, leaks, steam, and wet floors while maintaining the ventilation clearances stated in its manual.
  • Do not defeat grounding or protection. Portable stations differ in neutral-to-ground configuration and ground-fault protection. Confirm that the station’s outlet arrangement is compatible with the dishwasher, and never remove a grounding pin or bypass a protective device.
  • Avoid extension cords and power strips. Dishwasher manuals commonly restrict them. Follow the appliance manufacturer’s current instructions rather than improvising a longer connection.

A power station also should not be assumed to function as a certified uninterruptible power supply. Transfer behavior varies, and some dishwashers may stop, drain, or restart their cycle after an interruption.

Compatibility checklist

  • Dishwasher is factory cord-and-plug connected
  • Correct AC voltage and frequency
  • Pure sine wave output unless the appliance manufacturer specifies otherwise
  • Continuous watts above the maximum appliance load
  • Surge output sufficient for pump startup
  • Enough usable watt-hours for the selected cycle and conversion losses
  • Compatible grounding and ground-fault protection
  • Direct, dry connection that follows both manuals

Bottom line

A sufficiently large portable power station may run a plug-connected dishwasher, but both output and battery capacity must be sized independently. Use the dishwasher’s maximum electrical input to select inverter power and its per-cycle energy consumption to estimate battery capacity. If the appliance is hardwired or its grounding requirements are unclear, do not improvise a connection.

Can a Portable Power Station Run a Hair Dryer?

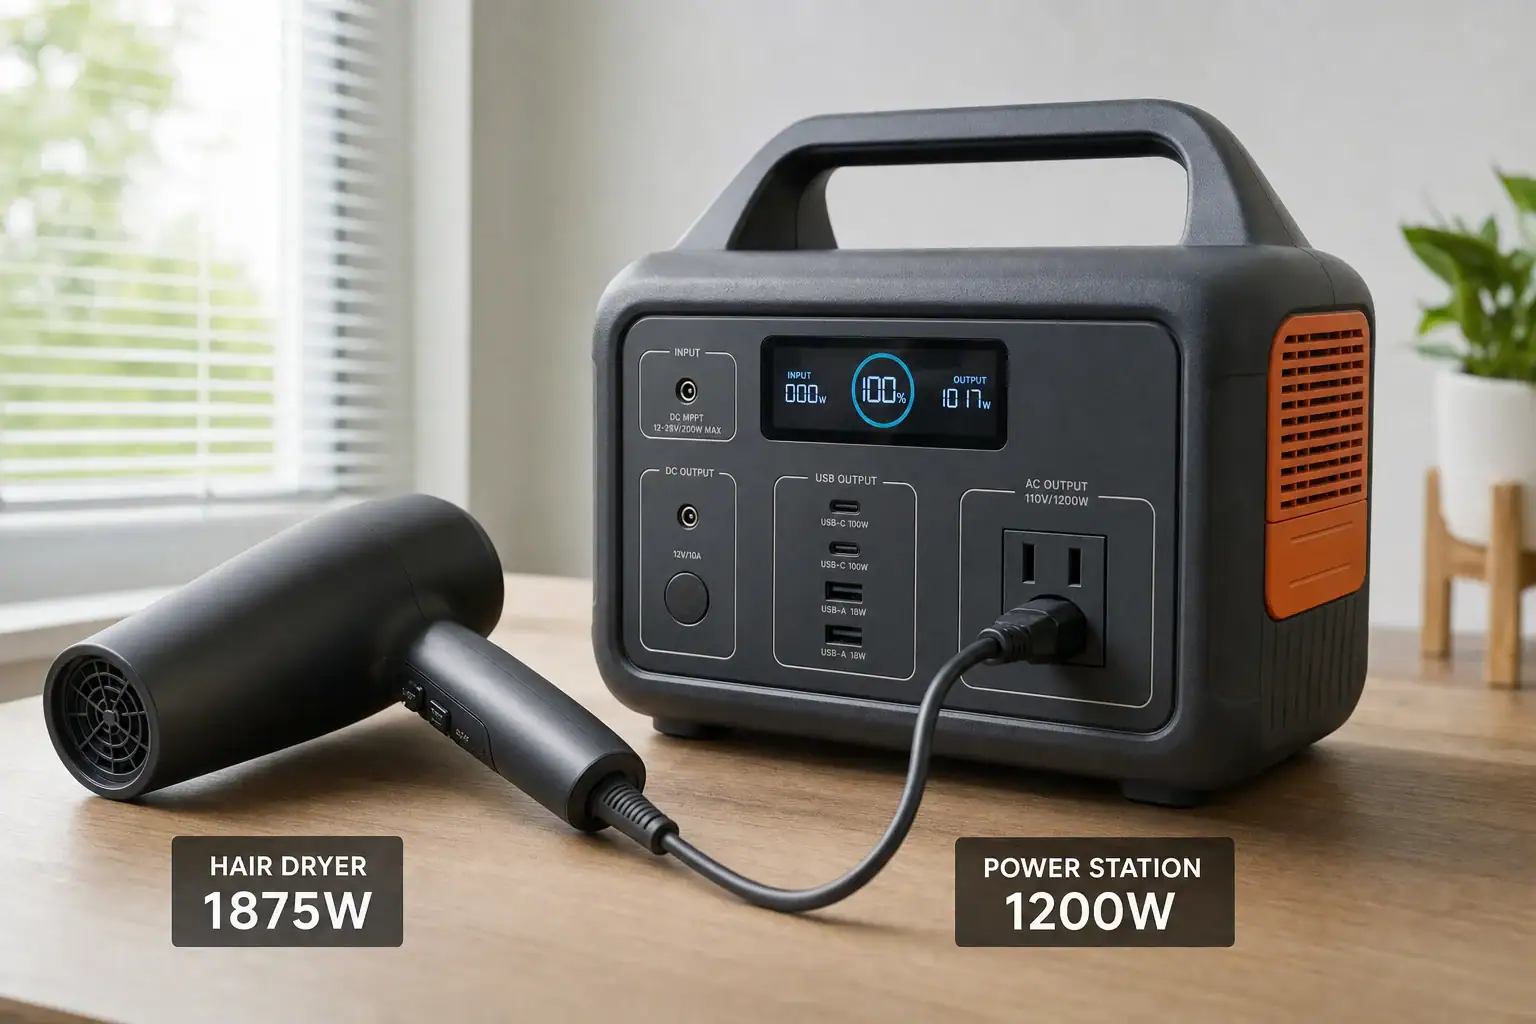
Hair dryer beside a portable power station in a dry indoor setting

Yes, a portable power station can run a hair dryer if the station’s continuous AC output is at least as high as the dryer’s maximum input wattage. Hair dryers are demanding appliances: many full-size models draw roughly 1,200 to 1,875 watts, although the actual rating varies. A small power station with a 300- or 500-watt inverter will not run a typical full-size dryer.

Check the electrical label on the hair dryer rather than relying on a general wattage estimate. The power station must also provide the correct outlet voltage and frequency, have enough battery capacity for the intended drying time, and accommodate any brief startup demand from the dryer’s motor.

How to determine whether the power station is compatible

1. Compare continuous output with dryer wattage

Find the dryer’s rated watts on its label or in its manufacturer instructions. Then compare that number with the power station’s continuous AC output rating.

For example, a 1,500-watt dryer requires a power station rated for at least 1,500 watts of continuous AC output. A station advertised with a 1,500-watt surge rating but only 1,000 watts of continuous output is not sufficient. Surge or peak output is available only briefly and does not support the heating element during normal operation.

Ratings may apply to all AC outlets combined. If other devices are connected, add their wattage to the dryer’s demand and compare the total with the station’s continuous limit.

2. Allow for startup behavior

A hair dryer combines a resistive heating element with a fan motor. The heater generally does not create the large startup surge associated with compressors, but the motor and electronic controls can cause a brief increase or irregular demand when the dryer starts or changes settings.

The power station should therefore have some output headroom rather than matching the dryer’s rating exactly. Manufacturer designs vary, so a dryer near the station’s continuous limit may trigger overload protection even if the nameplate numbers appear compatible. The station’s published surge rating and appliance-compatibility guidance should be checked when available.

3. Confirm voltage and frequency

The dryer’s required voltage and frequency must match the power station’s AC output. In the United States, that commonly means a 120-volt, 60-hertz dryer and power station, but labels should still be verified.

Dual-voltage travel dryers must be set according to their manufacturer instructions. Do not assume that a plug adapter changes voltage, and do not use an improvised transformer or modified connection.

How long will the dryer run?

Battery capacity is usually listed in watt-hours (Wh). A simple runtime estimate is:

Runtime in hours = battery capacity in Wh × usable AC fraction ÷ dryer watts

The usable AC fraction accounts for inverter losses, internal power consumption, battery protection limits, temperature, and other variables. For illustration, an 85% usable fraction can provide a reasonable planning assumption, but it is not a guaranteed value. Check the power station manufacturer’s specifications when precise planning matters.

Illustrative runtime and energy calculations
Battery capacity Dryer load Assumption Estimated continuous runtime
500 Wh 1,200 W 85% usable AC energy About 21 minutes
1,000 Wh 1,500 W 85% usable AC energy About 34 minutes
1,000 Wh 1,875 W 85% usable AC energy About 27 minutes

These estimates assume uninterrupted operation at the stated wattage. Actual runtime can differ because heat settings may change power consumption, thermostats may cycle, and some stations reserve part of their stated capacity.

For a typical short session, energy use is often more useful than maximum runtime. A 1,500-watt dryer operated continuously for 10 minutes delivers:

1,500 W × 10 ÷ 60 = 250 Wh

At an illustrative 85% AC efficiency, that session would draw about 294 Wh from the battery: 250 Wh ÷ 0.85. Other loads and standby consumption would increase the total.

Do lower heat settings solve an output mismatch?

A lower setting may reduce consumption, but it should not be treated as a guaranteed way to operate a dryer that exceeds the station’s rating. Control designs vary: some settings reduce heater wattage, while others cycle full power on and off. The dryer may still briefly draw close to its maximum rating.

Use the dryer’s maximum labeled input when deciding whether the power station is compatible. A manufacturer-specified low-wattage mode can be considered only if the instructions explicitly state its electrical demand.

Safe operating considerations

  • Keep the power station, plugs, and connections dry. Do not place the station near a sink, tub, shower, or other source of splashing water.
  • Use the power station in the orientation and ventilation conditions specified by its manufacturer. A high-wattage load can create substantial inverter heat.
  • Do not defeat or remove an appliance leakage-current interrupter, ground-fault feature, polarized plug, or other safety device built into the dryer.
  • Inspect the dryer cord and plug before use. Do not operate equipment with damaged, loose, scorched, or unusually hot connections.
  • Avoid extension cords unless both equipment manufacturers permit them. Any cord used must be intact and appropriately rated for the full appliance load.
  • Stop using the setup if the station repeatedly reports an overload, shuts down from excessive temperature, smells unusual, or produces a hot connection. Repeatedly restarting it does not correct an output mismatch.

Some hair dryers use protective plugs that may behave differently with certain inverter grounding arrangements. Follow the instructions for both products, including any required plug test procedure. Do not bypass a protective plug if it will not reset or operate normally.

Quick compatibility checklist

  • Dryer maximum watts are below the station’s continuous AC rating.
  • Other connected loads are included in the total wattage.
  • The station has enough surge capacity and output headroom.
  • Voltage and frequency match the dryer’s requirements.
  • Estimated usable watt-hours cover the expected drying time.
  • The station can remain dry, stable, and properly ventilated during use.

Bottom line

A portable power station can run a hair dryer, but inverter output is usually the deciding factor. Compare the dryer’s maximum labeled wattage with the station’s continuous—not peak—AC rating, then estimate battery use in watt-hours after allowing for conversion losses. Because hair dryers combine high heat demand with a motor, choosing a station with reasonable output headroom is more reliable than operating at the inverter’s limit.

How to Measure Appliance Wattage for a Power Station

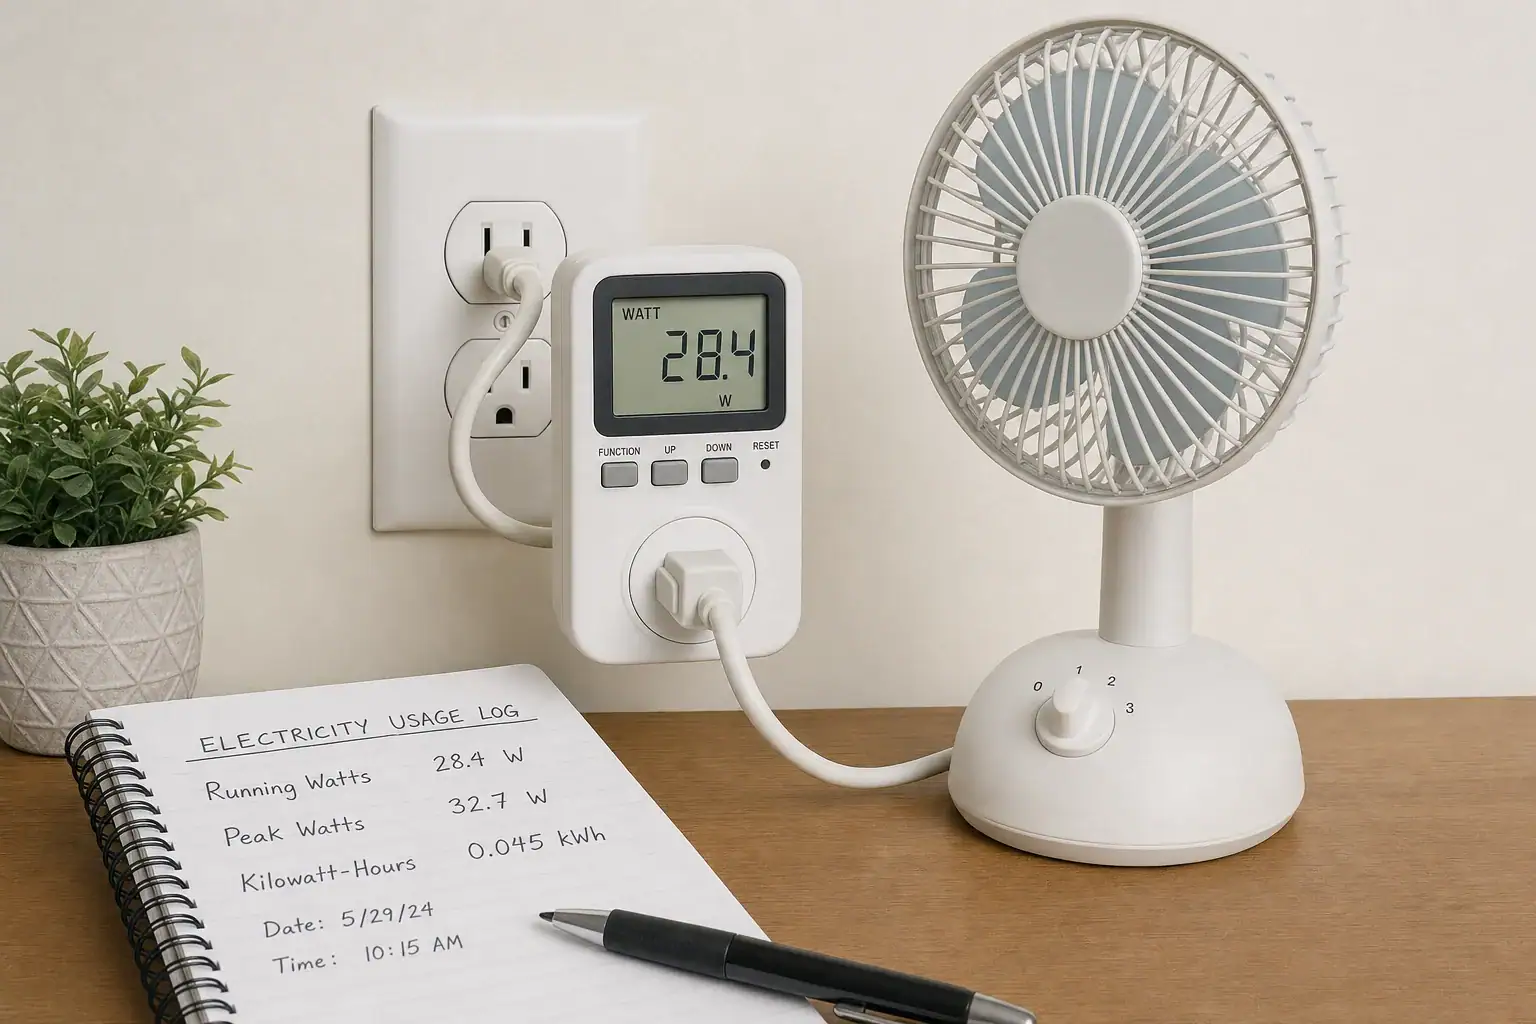
Plug-in electricity meter measuring the wattage of a small household fan

To measure appliance wattage before sizing a power station, use a properly rated plug-in electricity meter to record the appliance’s normal running watts, highest operating watts, and energy consumption in kilowatt-hours. Also check the appliance manual or manufacturer specifications for startup surge, because a basic meter may not capture a motor’s brief starting demand.

Use those readings for two separate decisions: running and startup watts determine the power station’s inverter rating, while watt-hours determine the battery capacity needed for the desired runtime. Measure every appliance you expect to operate, including loads that may run at the same time.

Start With the Appliance Label

Look for input watts on the appliance, power adapter, or manufacturer documentation. An input rating such as 120 V, 300 W provides a useful planning value, but it may represent maximum rather than typical consumption.

If the label lists only volts and amps, multiplying them gives volt-amperes:

Volts × amps = volt-amperes (VA)

VA and watts are not always equal for motors, compressors, and electronic power supplies because of power factor. For a simple resistive load, such as some heating elements, VA may be close to watts. For other appliances, measure real watts or use the manufacturer’s published wattage instead of assuming the two values are interchangeable.

Measure Real Power at the Outlet

A plug-in electricity meter is the most direct option for an ordinary cord-and-plug appliance. The meter must be rated for the outlet voltage, appliance current, plug type, and type of load. Follow its instructions, keep it dry, and do not use damaged cords or loose outlets.

  1. Connect the meter to the wall outlet according to its instructions.
  2. Connect the appliance to the meter.
  3. Run every mode you expect to use, including high heat, maximum speed, defrost, or other high-power settings.
  4. Record normal running watts and the highest displayed watts.
  5. For cycling appliances, leave the meter connected for a representative period and record kilowatt-hours.

Measure an appliance with its normal power adapter so the reading includes adapter losses. Do not use a household plug-in meter on hardwired equipment or circuits outside the meter’s rating. Hardwired or higher-voltage loads require appropriate instruments and qualified guidance. A portable power station should not be connected to home wiring, a panel, or a wall outlet as a power source unless a specifically designed, code-compliant system is installed under current official requirements.

Separate Running Watts From Startup Surge

Running watts are the power required after an appliance reaches normal operation. Startup surge is a short, higher demand produced when some motors, compressors, pumps, or transformers start.

A meter’s highest displayed value is not necessarily the true surge. Some meters update too slowly to capture a brief current spike. For a refrigerator, freezer, pump, or similar load, consult current manufacturer documentation for starting watts, locked-rotor information, or generator and inverter requirements. Do not repeatedly attempt to start an appliance from an undersized power station just to discover its limit.

The power station’s continuous AC rating must cover the combined running demand. Its surge rating must cover the relevant starting demand for the duration required by the appliance. Surge ratings vary in duration and test conditions among manufacturers, so two stations with the same advertised surge wattage may not behave identically.

Account for Simultaneous Loads

Add the running watts of appliances that may operate together. Then consider what happens when a motor starts while the other loads remain on:

Required startup power = existing running loads + starting demand of the appliance starting

If more than one motor can start at the same time, account for that overlap or manage the loads so their starts do not coincide. A planning margin can accommodate meter uncertainty, voltage variation, and differences between appliance samples, but it does not override either manufacturer’s limits.

Measure Energy for Battery-Capacity Sizing

Watts indicate instantaneous power; watt-hours indicate energy consumed over time. For a steady load:

Energy in Wh = watts × hours

A 100-watt appliance running continuously for six hours would use 600 Wh at the appliance. Cycling equipment should be measured in kilowatt-hours over a representative period instead of estimating from its running wattage.

Convert the meter reading with:

1 kWh = 1,000 Wh

For example, if a refrigerator uses an illustrative 0.9 kWh during a measured 24-hour period, its average energy use is 900 Wh per day. A 12-hour estimate would be 450 Wh only if that measured day is representative and consumption scales evenly enough for planning. Ambient temperature, thermostat setting, door openings, and operating mode can change the result.

Include Conversion Losses and Reserve

A power station’s stated battery capacity is generally not the same as the energy delivered to an AC appliance. The inverter consumes energy, conversion is not perfectly efficient, and the station may reserve some capacity for battery protection. Low-power loads can also be affected by the station’s own operating overhead.

If you are using an explicit delivery-efficiency assumption, estimate nominal capacity as:

Required nominal Wh = appliance energy ÷ (delivery efficiency × usable fraction)

For an illustrative calculation, suppose an appliance needs 600 Wh, assumed AC delivery efficiency is 85%, and 10% of nominal capacity is kept as a reserve:

600 ÷ (0.85 × 0.90) ≈ 784 Wh

This is a planning estimate, not a guaranteed runtime. Use manufacturer-provided usable-capacity or efficiency information when available, and note the conditions under which it was specified. Battery temperature, load level, battery age, inverter behavior, and automatic shutoff settings can all affect delivered energy.

Build a Useful Measurement Record

For each appliance, write down:

  • Normal running watts
  • Highest measured operating watts
  • Manufacturer-stated startup or surge requirement, if applicable
  • Measured Wh or kWh over a representative interval
  • Expected daily runtime or duty cycle
  • Other loads that may operate simultaneously

When matching those figures to a power station, verify its continuous output rating, surge rating and duration, battery watt-hours, AC voltage and frequency, and any per-port current limits. All must be compatible; sufficient battery capacity does not compensate for an undersized inverter.

Use the Highest Credible Number

If the label, meter, and documentation disagree, determine what each number represents. A label may show maximum input, a meter may show typical operation, and the manual may list a separate startup requirement. Size continuous output around the highest credible simultaneous running load, size surge output around reliable starting data, and size battery capacity from measured energy use with clearly stated loss and reserve assumptions.

Home Office Backup Power Runtime Plan

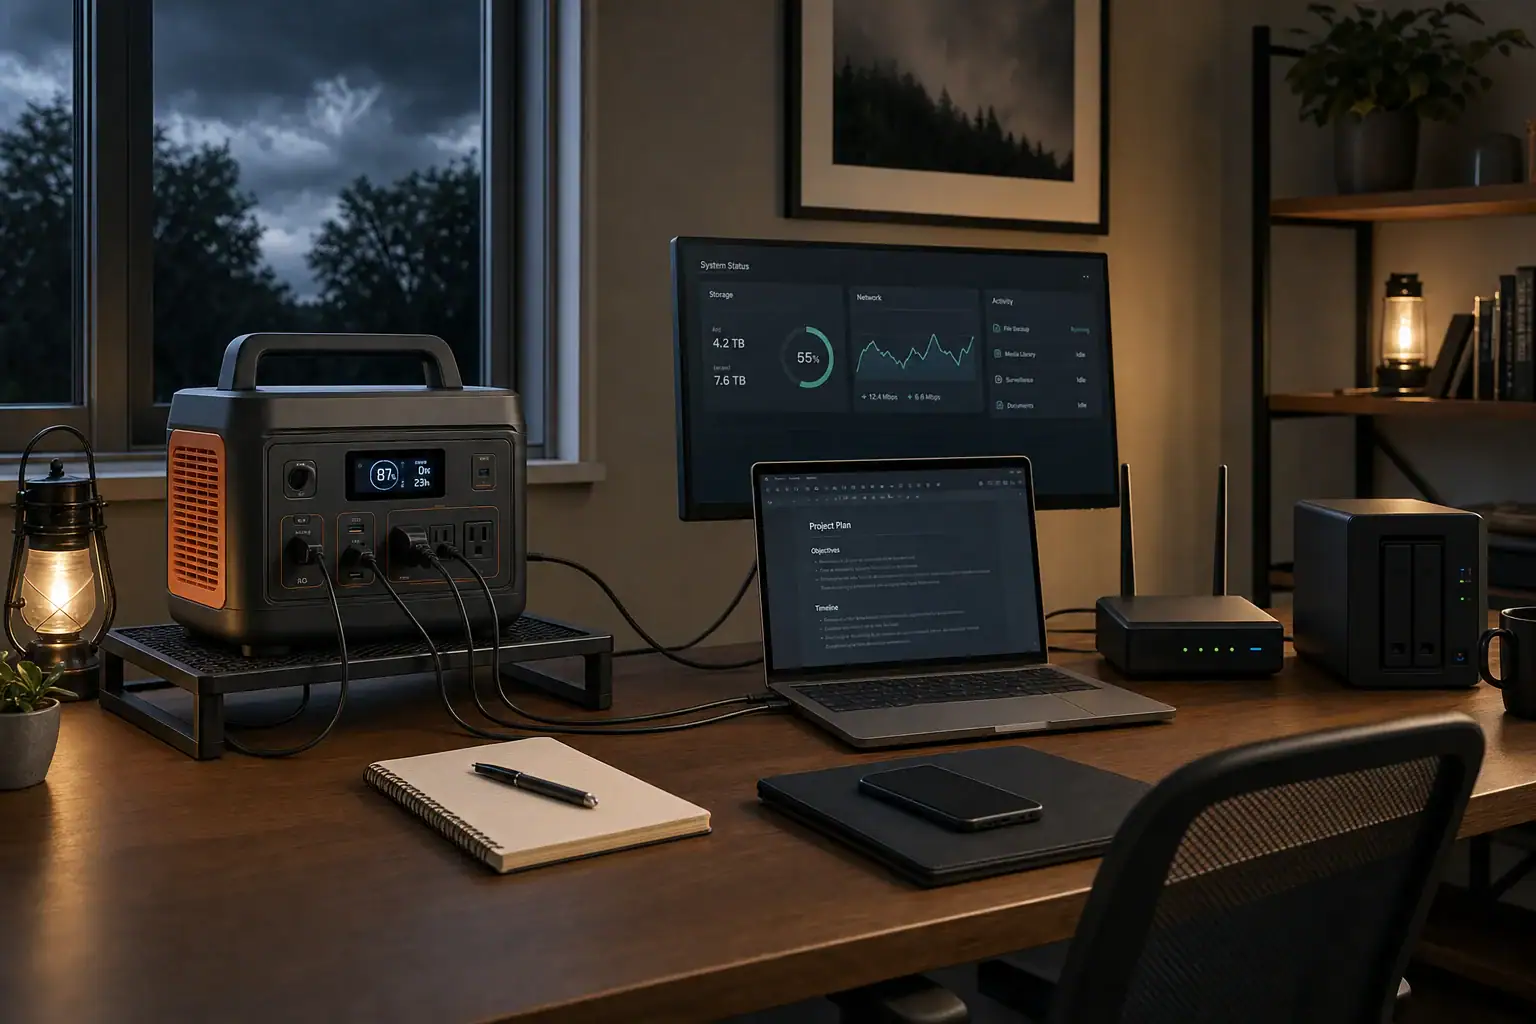
Portable power station supplying a laptop, monitor, router, and NAS in a home office

To plan backup power for a laptop, router, monitor, and NAS, add their average operating watts and multiply by the desired runtime. Then divide by a conservative planning factor—such as 0.80—to account for AC conversion losses, internal power use, battery limits, and a small reserve.

For an illustrative 110-watt office load, plan on about 275 watt-hours for two hours, 550 watt-hours for four hours, or 1,100 watt-hours for eight hours. Actual runtime can differ substantially, so measure the complete setup when possible and verify that the power station’s continuous output and changeover behavior suit the equipment.

Build an Average-Watt Load Budget

Use average operating draw rather than simply adding the maximum ratings printed on power adapters. Adapter labels describe what the adapter can supply, not necessarily what the device consumes continuously.

Illustrative home-office power budget
Device Assumed average draw What can change it
Laptop 45 W Charging state, processor workload, screen brightness
Router 10 W Model, connected radios and network activity
Monitor 25 W Size, brightness, resolution and sleep mode
NAS 30 W Drive count, drive activity, processor load and sleep settings
Total 110 W Average illustrative load, not a universal value

Include every device required for useful connectivity. A separate modem, fiber terminal, network switch, external drive or powered USB hub can materially change the total. Internet service may also fail upstream during a neighborhood outage even if local networking equipment remains powered.

Convert the Load into a Capacity Target

Portable power station capacity is normally stated in watt-hours, while output power is stated in watts. Use these planning formulas:

Required capacity in Wh = average load in W × desired hours ÷ planning factor

Estimated runtime in hours = rated capacity in Wh × planning factor ÷ average load in W

Using a 0.80 planning factor, the illustrative 110-watt setup produces these targets:

  • Two hours: 110 W × 2 ÷ 0.80 = 275 Wh
  • Four hours: 110 W × 4 ÷ 0.80 = 550 Wh
  • Eight hours: 110 W × 8 ÷ 0.80 = 1,100 Wh

The 0.80 factor is a planning assumption, not a guaranteed efficiency rating. It combines conversion losses with a modest operating reserve. Available AC energy varies with power-station design, load level, battery state, temperature, age, inverter overhead and manufacturer-defined shutdown thresholds. If the manufacturer publishes usable AC energy under conditions similar to yours, use that figure instead of applying a generic factor.

Plan a Reduced-Load Mode

The easiest way to extend runtime is to decide in advance which devices can be turned off. With a 500 Wh power station and the same 0.80 factor:

  • All four devices at 110 W: about 3.6 hours
  • Monitor off, 85 W remaining: about 4.7 hours
  • Monitor and NAS off, laptop plus router at 55 W: about 7.3 hours

These estimates assume the laptop continues averaging 45 watts. Runtime may be longer if its battery is already charged and power demand falls, or shorter during heavy work and rapid charging.

Give the NAS a Shutdown Deadline

A NAS does not necessarily need to run for the entire outage. A practical plan is to save active files, stop transfers and shut the NAS down using its normal software controls while enough backup energy remains. Follow the NAS manufacturer’s shutdown and power-loss guidance; do not simply disconnect it during disk activity.

After shutdown, the remaining capacity can support the laptop and network equipment longer. If continuous NAS availability or automatic safe shutdown is essential, use equipment specifically designed and documented for that function rather than assuming any portable power station will behave like a UPS.

Check Continuous Power, Startup Demand, and Waveform

Capacity determines approximate runtime, but the inverter’s watt rating determines whether it can run the load at all. Its continuous AC rating must exceed the highest simultaneous demand, including a laptop charging at high power and a NAS starting its drives.

NAS hard drives and some power adapters can briefly draw more power at startup than during normal operation. This is a surge, but surge ratings are manufacturer-specific and may apply for only a limited time. Do not size the system around the advertised surge number alone. Check the power station’s continuous rating, the NAS or adapter specifications, and—when available—the setup’s observed peak draw.

Also verify the waveform required by the connected equipment. Many modern switch-mode adapters tolerate a range of AC inputs, but compatibility should be confirmed in the equipment manufacturers’ current instructions.

Do Not Assume Seamless UPS Operation

A portable power station may offer pass-through power, an emergency power mode, or automatic changeover, but that does not automatically make it a certified or suitable UPS. A transfer interruption that seems brief can still reboot a router, interrupt a monitor, or cause a NAS shutdown.

If you intend to leave the office equipment connected while utility power is available, confirm all of the following in the current manufacturer documentation:

  • Whether simultaneous charging and AC output are supported
  • The specified transfer time for the relevant operating mode
  • Whether that mode is intended for continuous use
  • How the unit behaves when utility power returns or the battery becomes low
  • Whether AC output restarts automatically after an overload or shutdown

For work that cannot tolerate even a short interruption, use a power-continuity product documented for the required equipment and application. Keep important files saved regardless of the claimed transfer time.

Measure and Validate the Plan

A plug-in power meter can show the combined average draw of the office setup during representative work. Measure long enough to include laptop charging, monitor use and NAS activity. If possible, also observe startup demand when the NAS and other devices power on together.

Run a controlled practice session before relying on the plan. Confirm that the station supports the expected load, the NAS starts normally, and low-load settings do not turn off the AC output after higher-draw devices are removed. Keep the power station ventilated and follow its specified temperature, charging and storage instructions.

Use only compatible outputs and cables. A manufacturer-approved direct DC connection may avoid some inverter losses, but voltage, polarity, connector type and charging protocol must all match exactly. When uncertain, use the device’s normal AC adapter. Never connect a portable power station to home wiring or an electrical panel unless a specifically approved system is installed according to current manufacturer instructions and applicable electrical requirements.

A Practical Runtime Plan

  1. List every device required for work and internet access.
  2. Measure or conservatively estimate average operating watts.
  3. Calculate capacity with watts × hours ÷ 0.80, adjusting the factor if reliable manufacturer data supports a different assumption.
  4. Verify continuous output, startup demand, waveform requirements and outlet compatibility.
  5. Set a NAS shutdown point and a reduced-load mode for longer outages.
  6. Confirm changeover behavior instead of assuming seamless UPS operation.
  7. Test the complete setup under controlled conditions and revise the estimate using observed power consumption.

This approach sizes backup power around the work that must continue, while preserving a clear fallback plan when an outage lasts longer than expected.