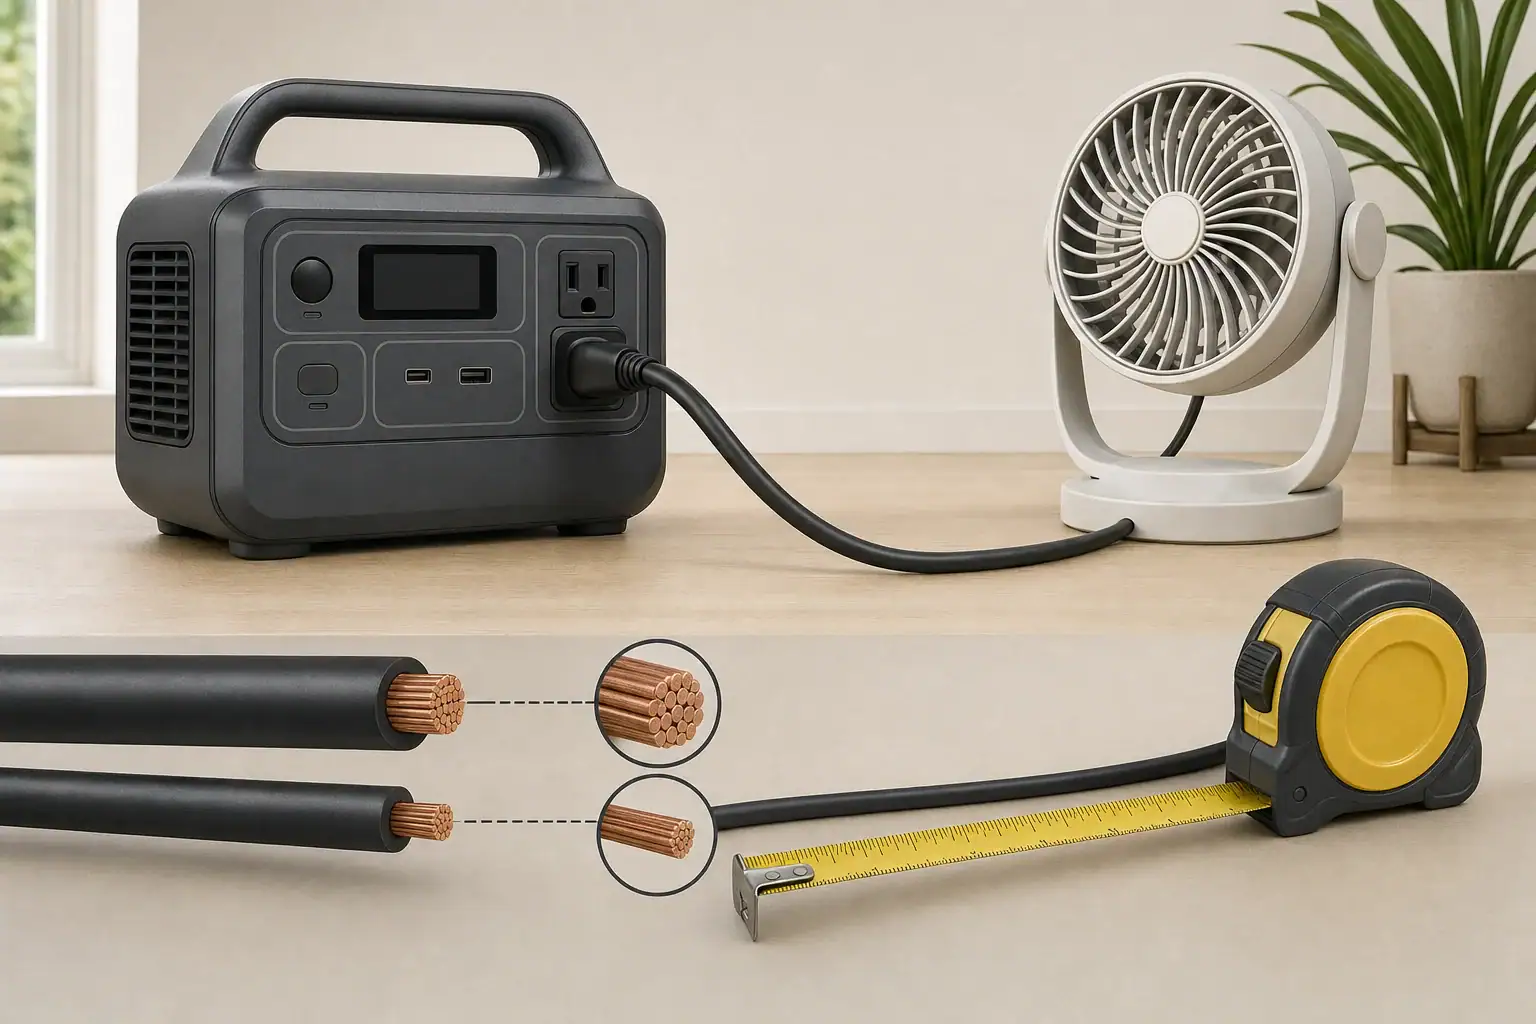
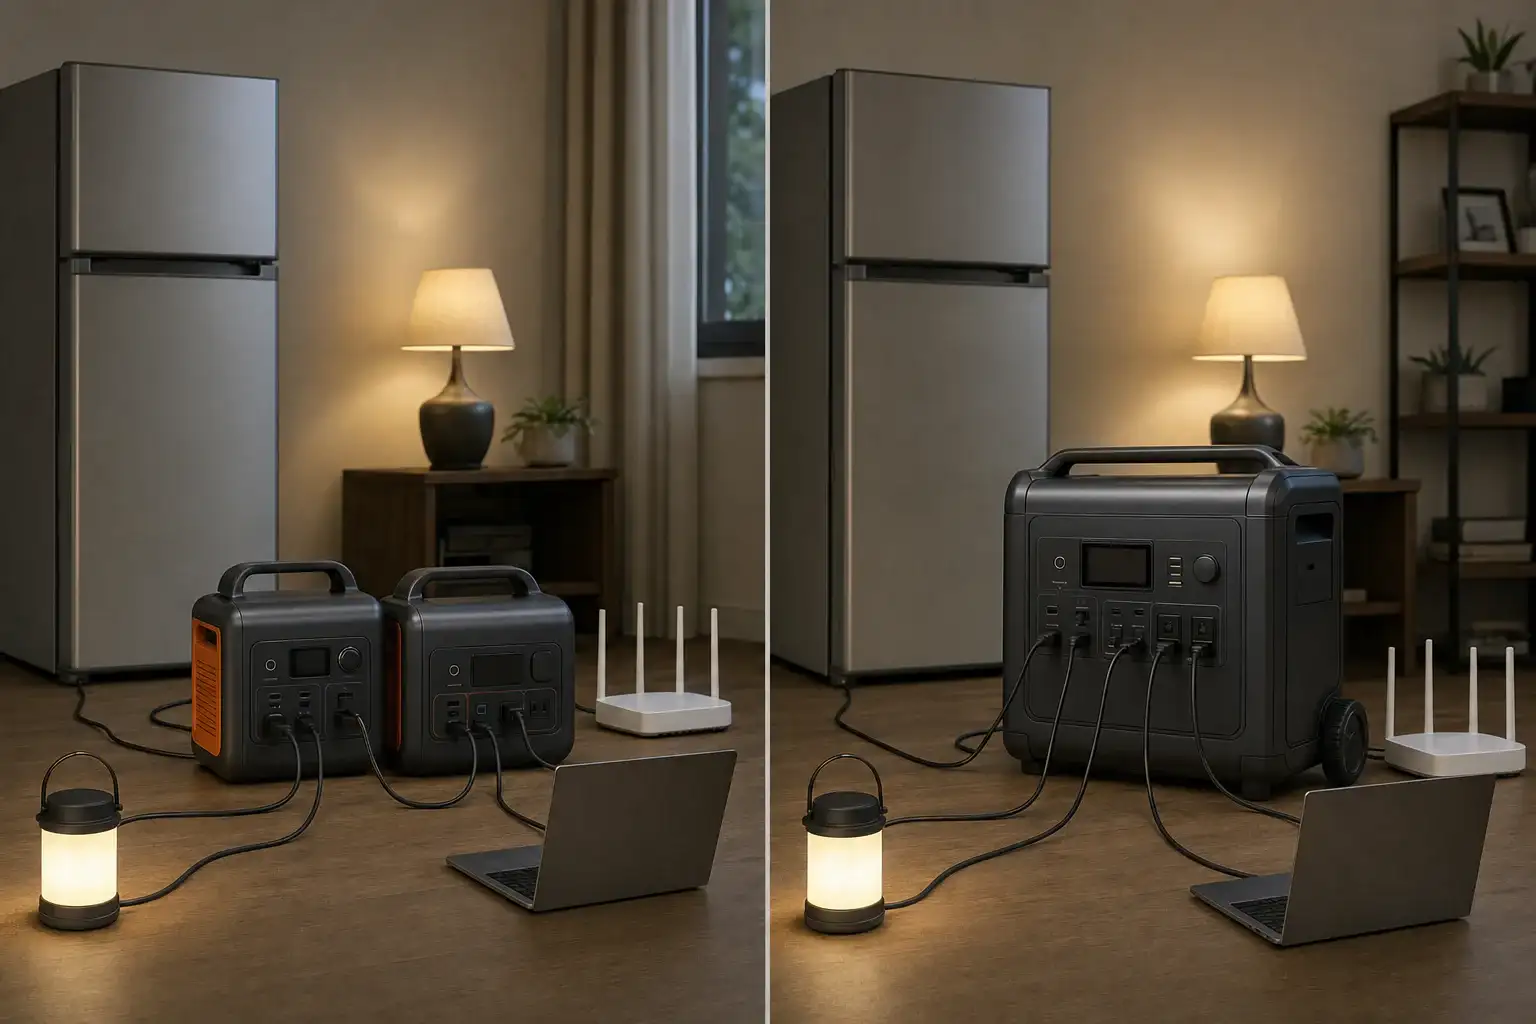
Quick answer: For AC extension cord voltage drop with portable power stations, use the appliance nameplate amps first. Choose the shortest listed cord whose printed rating covers the load, then check gauge and length with a voltage-drop calculation. Lower AWG numbers generally mean larger conductors and less calculated drop.
AC extension cord voltage drop: gauge, length, and load
An extension cord has to meet three separate limits: the appliance demand, the cord’s printed rating, and the portable power station’s AC-output limits. Wire gauge and length affect voltage drop, but a favorable calculation does not make an underrated cord or power station suitable.
For a 120 V setup, use the table below as a conservative planning check based on a 3% calculated voltage-drop target. It assumes copper conductors at a 20°C reference temperature and the stated current flowing continuously. It is not an ampacity table, a legal limit, or a guarantee that every appliance will operate correctly.
Approximate maximum one-way cord length at a 3% calculated voltage-drop target
Assumed load
16 AWG
14 AWG
12 AWG
10 AWG
600 W / 5 A
90 ft
143 ft
226 ft
360 ft
1,200 W / 10 A
45 ft
71 ft
113 ft
180 ft
1,500 W / 12.5 A
36 ft
57 ft
91 ft
144 ft
1,800 W / 15 A
30 ft
48 ft
75 ft
120 ft
How to use the table: Select a practical cord shorter than the listed length, then confirm its printed current or wattage rating covers the appliance. Also confirm the station’s continuous AC-output rating, any receptacle-specific limit, and its total output shared with other connected loads.
The calculation uses copper resistance values of approximately 4.02, 2.52, 1.59, and 0.9988 ohms per 1,000 feet for 16, 14, 12, and 10 AWG respectively at 20°C, from the NIST Copper Wire Tables. Actual cord assemblies can differ because conductor temperature, stranding, plugs, receptacles, and contact condition add variables.
Find the appliance current before choosing a cord
Use the appliance nameplate input amperage when it is available. Read the appliance manual as well, particularly if it gives extension-cord instructions or identifies a startup requirement.
For single-phase AC, the relationship is:
watts = volts × amps × power factor
Dividing watts by 120 V is therefore a useful estimate only for a load with power factor near 1. For example, a hypothetical 1,200 W resistance load at 120 V draws about 10 A. Motors and electronic power supplies can have a power factor below 1, so their real watts alone may not reveal current. The DOE Electrical Science handbook explains the relationship among true power, apparent power, and power factor.
If power factor or starting current is unknown, do not invent a multiplier. Use the appliance nameplate and manual. A motor may draw more current while starting, but the amount and duration depend on the specific appliance.
Calculate AC extension cord voltage drop
For a two-conductor 120 V load circuit, an idealized calculation is:
voltage drop = 2 × one-way length (ft) × current (A) × resistance (ohms per 1,000 ft) ÷ 1,000
The factor of two accounts for the outgoing and return conductors. Convert the result to a percentage with:
drop percentage = voltage drop ÷ supply voltage × 100
Illustrative calculation: 1,200 W resistance load on a 50-foot cord
Assumptions: 120 V station output, power factor near 1, 10 A load current, a 50-foot one-way cord length, and the NIST 20°C reference resistance. This is a calculation, not a measurement of a particular cord or station.
16 AWG:2 × 50 ft × 10 A × 4.02 ohms/1,000 ft ÷ 1,000 = 4.02 V. That is about 4.02 ÷ 120 × 100 = 3.35%.
12 AWG:2 × 50 ft × 10 A × 1.59 ohms/1,000 ft ÷ 1,000 = 1.59 V. That is about 1.59 ÷ 120 × 100 = 1.33%.
Under these assumptions, the 12 AWG cord has less calculated drop than the 16 AWG cord. Neither result establishes the cord’s allowable current rating; the cord’s own printed marking remains controlling.
Check the appliance, cord, and power station separately
Appliance: Check nameplate amps, operating voltage, and manufacturer instructions. Do not assume that a station can start a motorized appliance just because its listed running watts fit.
Cord: Check the printed current or wattage rating, conductor gauge, jacket marking, and indoor or outdoor designation. Select a listed cord appropriate for the environment and inspect it before use.
Power station: Check the exact model’s continuous AC-output rating, total shared-output limit, surge specification, receptacle limits, and displayed warnings or fault indicators.
The DOE Electrical Safety handbook identifies conductor gauge, cord length, intended use, inspection, environmental markings, and NRTL listing as relevant cord-selection considerations.
Power-station specifications are model-specific. For example, the EcoFlow DELTA user manual lists AC specifications and protection functions for that model only. Do not transfer those values to another station. A station’s surge rating also does not authorize operation above its continuous rating.
When a shorter or heavier cord may help
A cord may be worth investigating when an appliance runs directly from the station but not through the cord, a motor struggles to start, lights dim markedly under load, or a shutdown appears only with the extension cord connected. These signs do not prove voltage drop: overload, startup demand, temperature protection, a low battery, appliance protection, or a damaged connection can also be involved.
Use a controlled direct-versus-cord check
Disconnect other AC loads. Note the station battery level and any displayed fault indication.
If the appliance manufacturer permits it, connect the appliance directly to the station and observe whether it operates normally.
Repeat with the extension cord, without changing the appliance or station settings.
If the issue occurs only with the cord, inspect its printed rating, length, gauge, plugs, and receptacle fit. A shorter appropriately rated cord or a lower-AWG listed cord can reduce calculated drop.
Stop using the cord if insulation is damaged or if there are bent contacts, discoloration, an abnormal odor, arcing, or an unusually hot plug or connector.
Do not repeatedly reset an overload or protection fault without identifying the cause. Follow the appliance and station manuals for model-specific warnings and service guidance.
Watts, watt-hours, and runtime
Watts (W) describe instantaneous load and help determine whether the station and cord can support an appliance. Watt-hours (Wh) describe stored energy and are used for runtime planning.
A simple Wh ÷ W result is an idealized estimate, not a promised AC runtime. Inverter operation and cord resistance consume some energy, and results vary with the station, load, cord, connections, and operating conditions.
This article covers cords connected to a power station’s AC receptacle. Solar-extension cables are DC equipment with different voltage, current, connector, polarity, and compatibility requirements; select them only according to the solar source and power-station manuals.
Bottom line
Start with nameplate amps, verify the printed ratings of the appliance, cord, and power station separately, and calculate drop for the intended one-way cord length. When two cords meet all applicable ratings, the shorter cord or the one with the lower AWG number will generally have less calculated voltage drop.
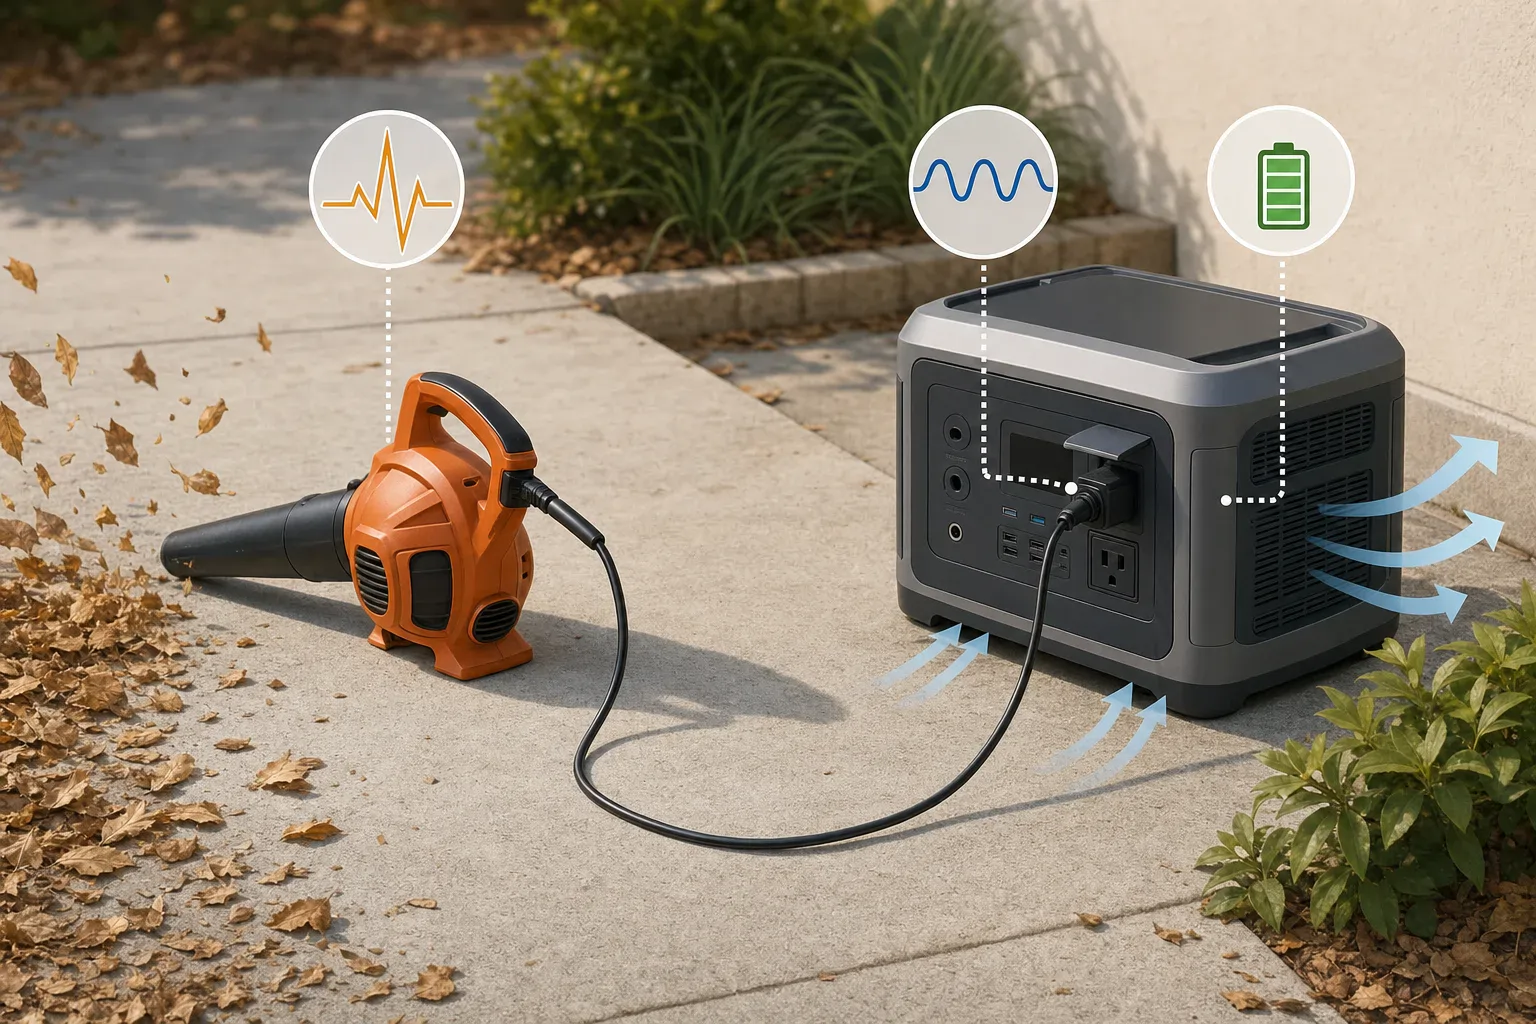
Quick answer: A portable power station can run a corded leaf blower only when its AC output supports the blower’s running load and its surge capability starts the motor. Check voltage, frequency, output limits, and startup behavior separately. Battery watt-hours affect operating time, not whether the blower can start.
Size a portable power station for a corded leaf blower
There are three separate questions: can the inverter supply the blower while it runs, can it tolerate motor startup, and how long can the battery supply that load? A large battery does not compensate for an undersized AC inverter.
Start with the exact model numbers and manuals. Confirm that the power station’s AC output voltage and frequency match the blower’s label, then compare the station’s continuous output, any outlet or total-output current limit, and its published surge specification.
Use the blower label as a screening check
Look for volts, amps, watts, frequency, and the model number. If the label provides volts and amps, calculate:
VA = volts × amps
For example, BLACK+DECKER describes its BV6600 as having a 12-amp motor and variable-speed selections. If a 120V supply applies, the nameplate screening calculation is:
120V × 12A = 1,440VA
This is not proof that the blower uses 1,440W. For AC loads, apparent power is volts × amps, while true power depends on power factor: watts = volts × amps × power factor. BLACK+DECKER does not publish measured running watts, power factor, or startup demand for the BV6600 on its cited product page. Treat those values as unknown until documented or measured. See the BLACK+DECKER BV6600 product page and Fluke’s electrical glossary.
When power factor is unavailable, use nameplate VA as a cautious screening figure and check the station manual for watt, VA, and AC-current restrictions. Read more about the distinction in VA vs. watts for portable power stations.
Startup is a separate limit
A corded blower motor can draw more power while starting than after reaching speed. There is no verified universal startup multiplier for corded leaf blowers, so do not assume that a stated surge rating guarantees compatibility. Compare documented startup demand, if available, with the station’s surge rating and its stated conditions. Surge output is not continuous output.
As one specification example, EcoFlow’s US DELTA 2 manual lists a 1,024Wh battery, 1,800W total AC output, and 2,700W surge output. Those figures apply to that model only and do not certify it for a particular blower. The manual also says X-Boost is not compatible with every appliance and is more suitable for heating devices; do not use that feature as evidence that a blower motor will run. See the EcoFlow DELTA 2 manual.
Leaf-blower power-station decision table
What you find
Practical decision
Station continuous output is below the blower’s measured maximum running watts
Do not use the pairing.
Nameplate VA is close to the station’s watt, VA, or AC-current limit
Treat the match as marginal; obtain better load data before relying on it.
Running load appears to fit, but startup demand is unknown
Check both manuals and perform a normal, supervised startup test from a full charge with no other loads connected.
The station reports overload, shuts down, or trips during startup
The pairing is not compatible under those conditions. Do not bypass protection.
Running demand and startup both remain within documented limits
The electrical match is promising; calculate runtime from average operating watts.
A 1,500W station is too close to a 1,440VA nameplate calculation to support a universal compatibility claim. Watts and VA are different quantities, and the blower’s startup demand remains unknown. More continuous-output and surge headroom is preferable, but the manuals and a successful normal startup are the deciding evidence.
Estimate corded leaf blower runtime
Runtime depends on energy delivered at the AC outlet and the blower’s average power during real work:
runtime (hours) = usable AC energy (Wh) ÷ average blower power (W)
Do not assume all nominal battery watt-hours reach the AC outlet. Conversion losses, the station’s shutdown reserve, temperature, battery condition, and operating mode can change usable output. See usable capacity versus advertised capacity for why battery nameplate capacity is not an AC-runtime guarantee.
Illustrative calculation, not a test result
Assume a station has 1,024Wh of nominal battery capacity and a blower averages 1,200W during the intended work cycle:
1,024Wh ÷ 1,200W = 0.853 hours
0.853 hours × 60 minutes/hour = about 51 minutes
That is an ideal mathematical ceiling, not an expected field runtime, because it assumes every nominal watt-hour is delivered to the blower. If a controlled record instead showed 850Wh delivered at the AC outlet under comparable conditions, the estimate would be:
850Wh ÷ 1,200W = 0.708 hours, or about 42.5 minutes
For a useful personal estimate, record the blower’s average watts during representative use and divide a known usable AC-energy result by that average. Variable speed and pauses can change average consumption, so measure the work pattern you actually expect.
Safe setup and pre-use checks
Identify both models. Record the blower’s voltage, frequency, and amps or watts; record the station’s continuous AC watts, surge specification, and AC-output limits.
Read both manuals. Confirm output compatibility and follow any manufacturer restrictions for motor loads or operating environment.
Use an appropriate extension cord. Follow the blower manual’s model-specific wire-gauge and length table rather than copying a table from another tool.
Inspect before use. Do not use damaged plugs, loose receptacles, cut insulation, or worn cords.
Keep equipment dry and ventilated. Keep the station, plugs, and cord connections away from standing water, wet grass, and debris while preserving the station’s required ventilation clearances.
Test with no other loads. Fully charge the station, disconnect other devices, start the blower in the intended mode, and watch for an overload warning or shutdown.
Stop for warning signs. Disconnect if the station overloads, the motor sounds unstable, or a plug or cord becomes abnormally hot. Never defeat protective devices or remove a grounding pin.
For example, Toro’s manual for blower model 51619 calls for a polarized, UL-listed extension cord recommended for outdoor use and provides a model-specific gauge-by-length table. It also warns against damaged cords, standing water, and wet grass. Those instructions are not a universal cord table for other blowers. See the Toro 51619 operator’s manual.
OSHA’s cord-safety guidance likewise emphasizes factory-assembled cord sets, inspection, suitable service markings, strain relief, and moisture control. Its regulatory requirements apply to covered workplaces, not automatically to every home, but the hazard-control guidance is relevant. See OSHA’s extension-cord and electrical-safety guidance.
When not to use a power station with a blower
Do not use the pairing when the blower exceeds the station’s continuous output, startup causes an overload, the match is marginal and necessary limits cannot be verified, or the required cord arrangement conflicts with either manual. Adding battery capacity may extend runtime, but it will not make an undersized inverter start a motor.
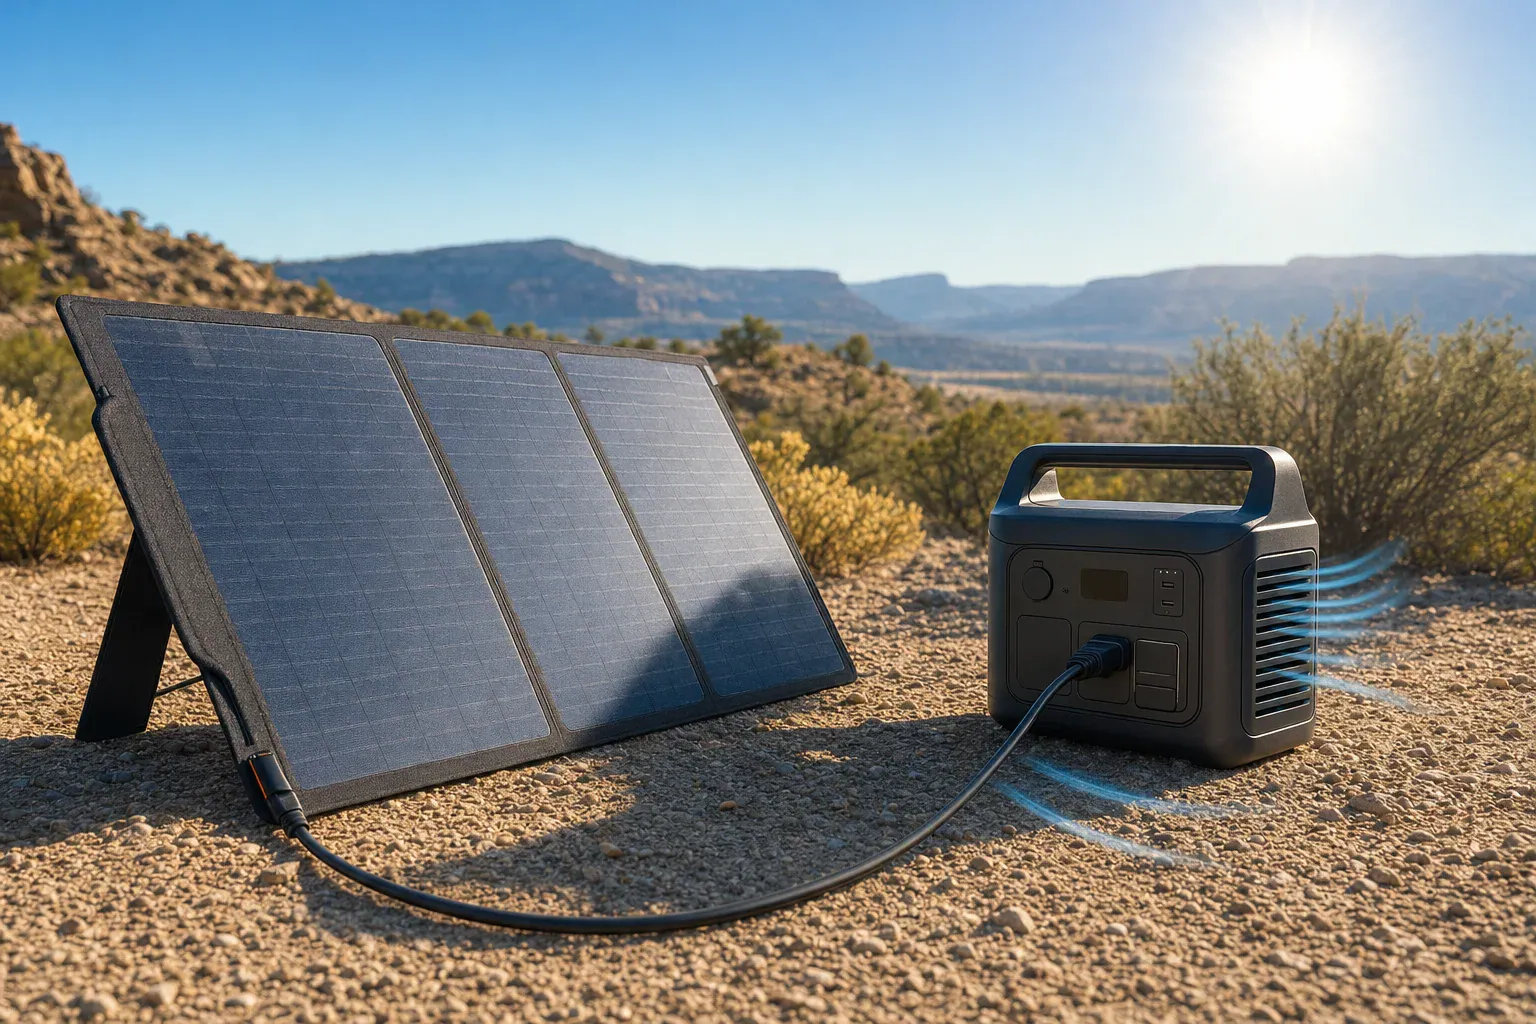
Quick answer: Solar panel rated watts are a maximum-power rating measured under standardized test conditions, not guaranteed charging input. Real charging output varies with sunlight, panel temperature, orientation, cabling, and the power station’s permitted solar voltage, current, wattage, and battery-charging behavior.
What do solar panel rated watts mean?
Solar panel rated watts describe the panel’s maximum-power rating under defined test conditions. They are an instantaneous power value, not a promise that the panel will continuously deliver that number of watts to a portable power station.
Standard test conditions use irradiance of 1,000 watts per square meter and a solar-cell temperature of 25°C (77°F), according to the U.S. Department of Energy. They also specify an Air Mass 1.5 solar spectrum. NREL notes that these standardized conditions are useful for ratings but “do not represent actual operating conditions” (NREL PDF).
Outdoor conditions and the equipment connected to the panel differ from those rating conditions. As a result, a lower number on a station display is not, by itself, evidence that the panel is defective.
Keep watts, displayed input, and watt-hours separate
Number
What it means
Do not confuse it with
Panel rated power (W)
The nameplate maximum under its specified test conditions.
A guaranteed field charging rate.
Panel-terminal power (W)
Voltage multiplied by current at the panel terminals at a particular moment.
The station display unless the manufacturer says it measures there.
Displayed charging input (W)
Power reported by the station at its own model-specific measurement point.
A laboratory measurement of panel output.
Battery capacity or energy (Wh)
An amount of energy stored or transferred over time.
Instantaneous charging power.
Watts and watt-hours are different units. If input remained at 100 W for two hours, the energy reaching that measurement point would be 200 Wh. That does not necessarily mean the battery stored exactly 200 Wh: the station’s charging electronics, battery-management behavior, and any active loads can affect stored energy or the displayed net result.
Why the station may show less than the panel rating
The charging path is panel → cable and connectors → the station’s solar charge controller → battery. The power accepted by the station is limited by the power available from the panel under current conditions and by the station’s documented input requirements.
Sunlight intensity, shading, panel aim, and cell temperature can change the power available from the panel.
Cables, connectors, and the approved system configuration can affect the charging path.
The station may have a permitted PV voltage range, maximum input current, and maximum solar-input wattage.
The station may reduce charging under some battery-state or temperature conditions.
For example, the EcoFlow DELTA 2 manual lists solar charging at 500 W maximum and requires panel output voltage to remain within 60 V (manufacturer manual). Those are limits for that model, not general limits for all power stations.
A larger panel therefore does not guarantee an equally large displayed input. More importantly, wattage alone is not a compatibility check. Consult the station manual before connecting any panel or array, and do not exceed its stated PV voltage limit.
Specifications to compare before connecting solar
Specification
What it describes
What to check
Panel Pmax
Nameplate maximum power.
Use it as a standardized rating, not an output promise.
Panel Vmp
Voltage near rated maximum-power operation.
Check the station can operate with the panel at this voltage.
Panel Imp
Current near rated maximum-power operation.
Compare with the station’s stated input-current limit.
Panel Voc
Open-circuit voltage.
Confirm the manufacturer-approved configuration remains within the station’s maximum PV voltage requirement.
Station PV input range and maximum voltage
What the solar charge controller accepts.
Follow the manual’s stated range and maximum for the exact model.
Station maximum PV current and watts
Input acceptance ceilings.
Treat them as ceilings, not predicted charging results.
Connector and polarity
Physical and electrical connection details.
Use manufacturer-approved cables and adapters; a fitting connector is not proof of compatibility.
On a panel data sheet, Pmax is usually close to Vmp × Imp, subject to rounding and the stated test conditions. For a fuller explanation of these labels, see How to Read Solar Panel Specs for Power Stations. If the voltage, current, polarity, or approved configuration cannot be verified, do not connect the equipment until the manufacturer confirms compatibility.
Is there a standard percentage of rated output?
No universal percentage is supported for portable solar panels and power stations. A fixed rule such as “expect 80%” hides differences in sunlight, temperature, placement, cables, panel design, station limits, battery state, and the location of the display measurement.
One manufacturer’s documentation illustrates why conditions matter. EcoFlow says actual generation from its specific 130 W rigid panel can vary with irradiance, temperature, shading, installation angle, cables, system configuration, and degradation (manufacturer manual). That statement and that panel’s specifications should not be generalized to every portable panel.
An illustrative rated-watts comparison
Assumptions for illustration only: A compatible panel is rated at 200 W. A power station shows 120, 125, 130, 125, 128, and 122 W at five-minute intervals over 30 minutes. These invented readings are not expected results for a 200 W panel.
Average displayed input:
(120 W + 125 W + 130 W + 125 W + 128 W + 122 W) ÷ 6 = 125 W
Observed displayed-input ratio for this one session:
125 W ÷ 200 W × 100 = 62.5%
If the 125 W average held for 0.5 hours, energy at the station’s reported input point would be:
125 W × 0.5 h = 62.5 Wh
This is a documented observation of one hypothetical setup, not a universal conversion from rated watts to real output. It also does not establish the increase in usable battery capacity.
How to measure your charging output safely
Read the panel label or manual and record Pmax, Vmp, Imp, and Voc.
Read the station manual and record its accepted PV voltage range, maximum PV voltage, maximum input current, maximum solar watts, connector, and polarity requirements.
Use only a manufacturer-approved or documented compatible panel, cable, adapter, and configuration. Do not exceed the station’s stated PV voltage limit.
For a clearer observation, disconnect optional output loads so appliance use does not complicate the displayed input.
Record the battery state. Avoid interpreting a reading near full charge as the panel’s maximum capability if the station is reducing charging.
Place the panel securely in an unshaded location with rear airflow. Adjust its aim without handling exposed conductors.
After the reading settles, log displayed solar input every five minutes for 30 minutes.
Add the readings and divide by the number of readings to find the average displayed input. Divide that average by panel rated watts only as a setup-specific comparison.
Record the date, time, location, cloud conditions, panel orientation, battery state, and any temperature information available.
When retesting, change one factor at a time, such as panel orientation or cable length.
Label the result as displayed station input unless the manufacturer identifies exactly where and how the number is measured. If cable length is part of the comparison, see Solar Extension Cables and Voltage Drop.
Do inverter ratings affect solar charging watts?
No. A station’s continuous AC output and surge ratings apply to the inverter and connected AC loads. They are separate from the station’s solar-input rating. A power station can have a high AC output rating and a much lower maximum solar-input rating.
Surge power is short-duration load support, not additional solar charging capacity. Solar charging enters the station as DC power; using stored energy through an AC outlet adds an inverter conversion stage. See Inverter Efficiency Explained for why input energy should not be assumed to equal AC energy delivered to a load.
Bottom line
Use solar panel rated watts to identify a standardized maximum-power class, not to predict one guaranteed charging number. Verify voltage, current, wattage, connector, polarity, and approved configuration first. Then measure and document your station’s displayed input under your own conditions instead of relying on a universal percentage.
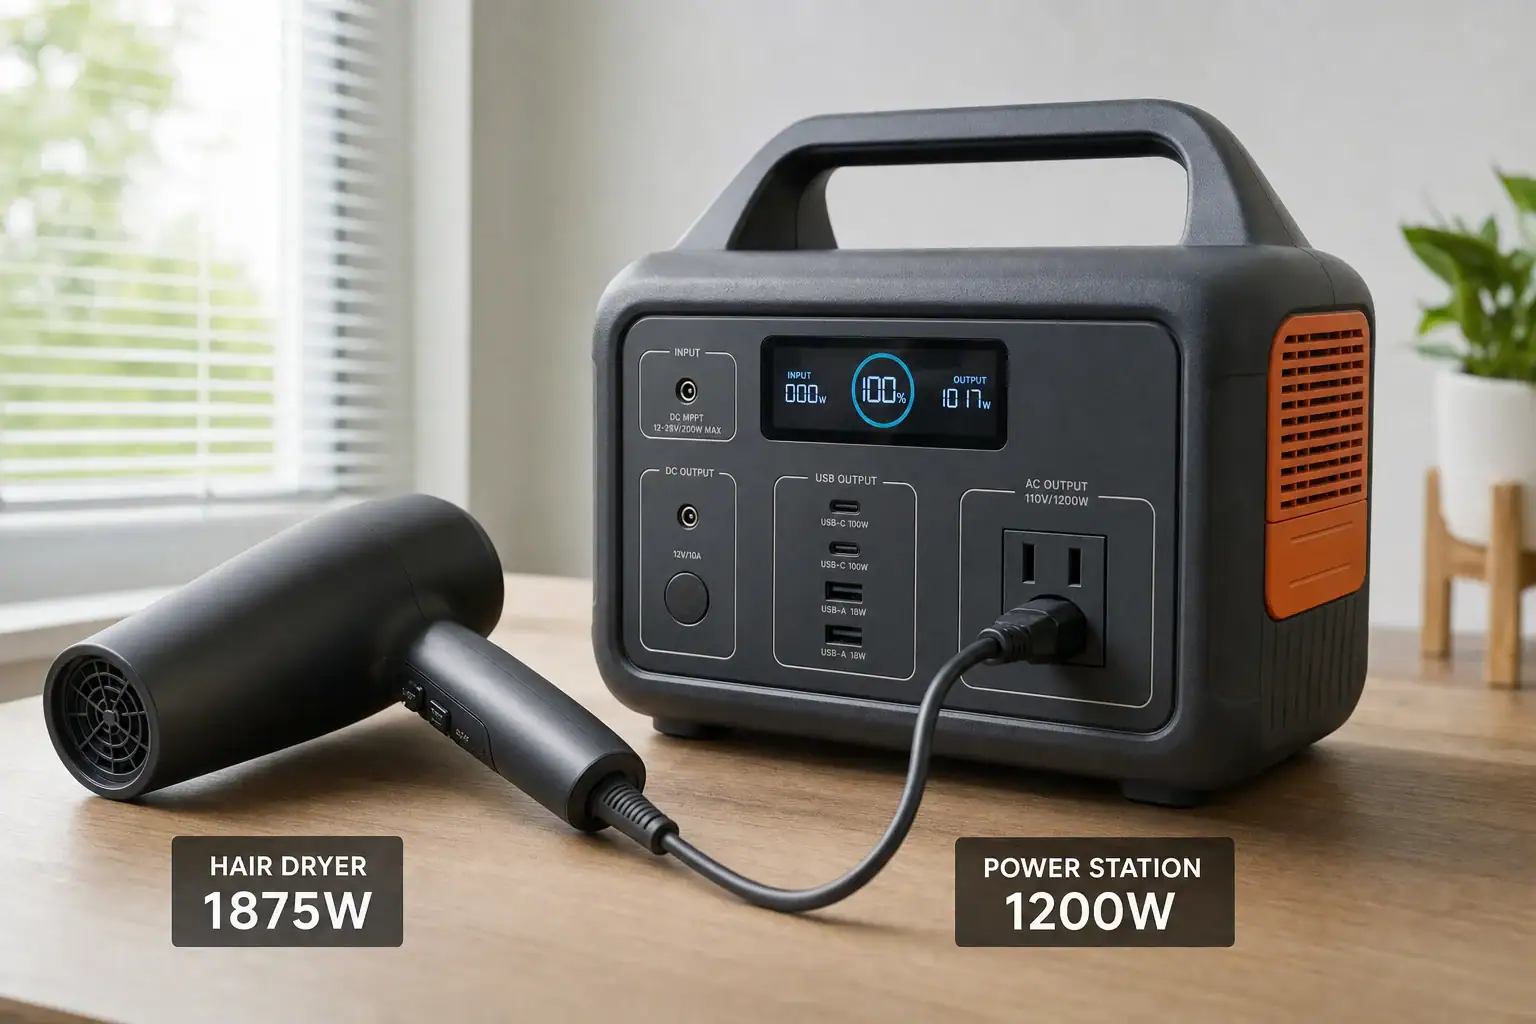
Yes, a portable power station can run a hair dryer if the station’s continuous AC output is at least as high as the dryer’s maximum input wattage. Hair dryers are demanding appliances: many full-size models draw roughly 1,200 to 1,875 watts, although the actual rating varies. A small power station with a 300- or 500-watt inverter will not run a typical full-size dryer.
Check the electrical label on the hair dryer rather than relying on a general wattage estimate. The power station must also provide the correct outlet voltage and frequency, have enough battery capacity for the intended drying time, and accommodate any brief startup demand from the dryer’s motor.
How to determine whether the power station is compatible
1. Compare continuous output with dryer wattage
Find the dryer’s rated watts on its label or in its manufacturer instructions. Then compare that number with the power station’s continuous AC output rating.
For example, a 1,500-watt dryer requires a power station rated for at least 1,500 watts of continuous AC output. A station advertised with a 1,500-watt surge rating but only 1,000 watts of continuous output is not sufficient. Surge or peak output is available only briefly and does not support the heating element during normal operation.
Ratings may apply to all AC outlets combined. If other devices are connected, add their wattage to the dryer’s demand and compare the total with the station’s continuous limit.
2. Allow for startup behavior
A hair dryer combines a resistive heating element with a fan motor. The heater generally does not create the large startup surge associated with compressors, but the motor and electronic controls can cause a brief increase or irregular demand when the dryer starts or changes settings.
The power station should therefore have some output headroom rather than matching the dryer’s rating exactly. Manufacturer designs vary, so a dryer near the station’s continuous limit may trigger overload protection even if the nameplate numbers appear compatible. The station’s published surge rating and appliance-compatibility guidance should be checked when available.
3. Confirm voltage and frequency
The dryer’s required voltage and frequency must match the power station’s AC output. In the United States, that commonly means a 120-volt, 60-hertz dryer and power station, but labels should still be verified.
Dual-voltage travel dryers must be set according to their manufacturer instructions. Do not assume that a plug adapter changes voltage, and do not use an improvised transformer or modified connection.
How long will the dryer run?
Battery capacity is usually listed in watt-hours (Wh). A simple runtime estimate is:
Runtime in hours = battery capacity in Wh × usable AC fraction ÷ dryer watts
The usable AC fraction accounts for inverter losses, internal power consumption, battery protection limits, temperature, and other variables. For illustration, an 85% usable fraction can provide a reasonable planning assumption, but it is not a guaranteed value. Check the power station manufacturer’s specifications when precise planning matters.
Illustrative runtime and energy calculations
Battery capacity
Dryer load
Assumption
Estimated continuous runtime
500 Wh
1,200 W
85% usable AC energy
About 21 minutes
1,000 Wh
1,500 W
85% usable AC energy
About 34 minutes
1,000 Wh
1,875 W
85% usable AC energy
About 27 minutes
These estimates assume uninterrupted operation at the stated wattage. Actual runtime can differ because heat settings may change power consumption, thermostats may cycle, and some stations reserve part of their stated capacity.
For a typical short session, energy use is often more useful than maximum runtime. A 1,500-watt dryer operated continuously for 10 minutes delivers:
1,500 W × 10 ÷ 60 = 250 Wh
At an illustrative 85% AC efficiency, that session would draw about 294 Wh from the battery: 250 Wh ÷ 0.85. Other loads and standby consumption would increase the total.
Do lower heat settings solve an output mismatch?
A lower setting may reduce consumption, but it should not be treated as a guaranteed way to operate a dryer that exceeds the station’s rating. Control designs vary: some settings reduce heater wattage, while others cycle full power on and off. The dryer may still briefly draw close to its maximum rating.
Use the dryer’s maximum labeled input when deciding whether the power station is compatible. A manufacturer-specified low-wattage mode can be considered only if the instructions explicitly state its electrical demand.
Safe operating considerations
Keep the power station, plugs, and connections dry. Do not place the station near a sink, tub, shower, or other source of splashing water.
Use the power station in the orientation and ventilation conditions specified by its manufacturer. A high-wattage load can create substantial inverter heat.
Do not defeat or remove an appliance leakage-current interrupter, ground-fault feature, polarized plug, or other safety device built into the dryer.
Inspect the dryer cord and plug before use. Do not operate equipment with damaged, loose, scorched, or unusually hot connections.
Avoid extension cords unless both equipment manufacturers permit them. Any cord used must be intact and appropriately rated for the full appliance load.
Stop using the setup if the station repeatedly reports an overload, shuts down from excessive temperature, smells unusual, or produces a hot connection. Repeatedly restarting it does not correct an output mismatch.
Some hair dryers use protective plugs that may behave differently with certain inverter grounding arrangements. Follow the instructions for both products, including any required plug test procedure. Do not bypass a protective plug if it will not reset or operate normally.
Quick compatibility checklist
Dryer maximum watts are below the station’s continuous AC rating.
Other connected loads are included in the total wattage.
The station has enough surge capacity and output headroom.
Voltage and frequency match the dryer’s requirements.
Estimated usable watt-hours cover the expected drying time.
The station can remain dry, stable, and properly ventilated during use.
Bottom line
A portable power station can run a hair dryer, but inverter output is usually the deciding factor. Compare the dryer’s maximum labeled wattage with the station’s continuous—not peak—AC rating, then estimate battery use in watt-hours after allowing for conversion losses. Because hair dryers combine high heat demand with a motor, choosing a station with reasonable output headroom is more reliable than operating at the inverter’s limit.
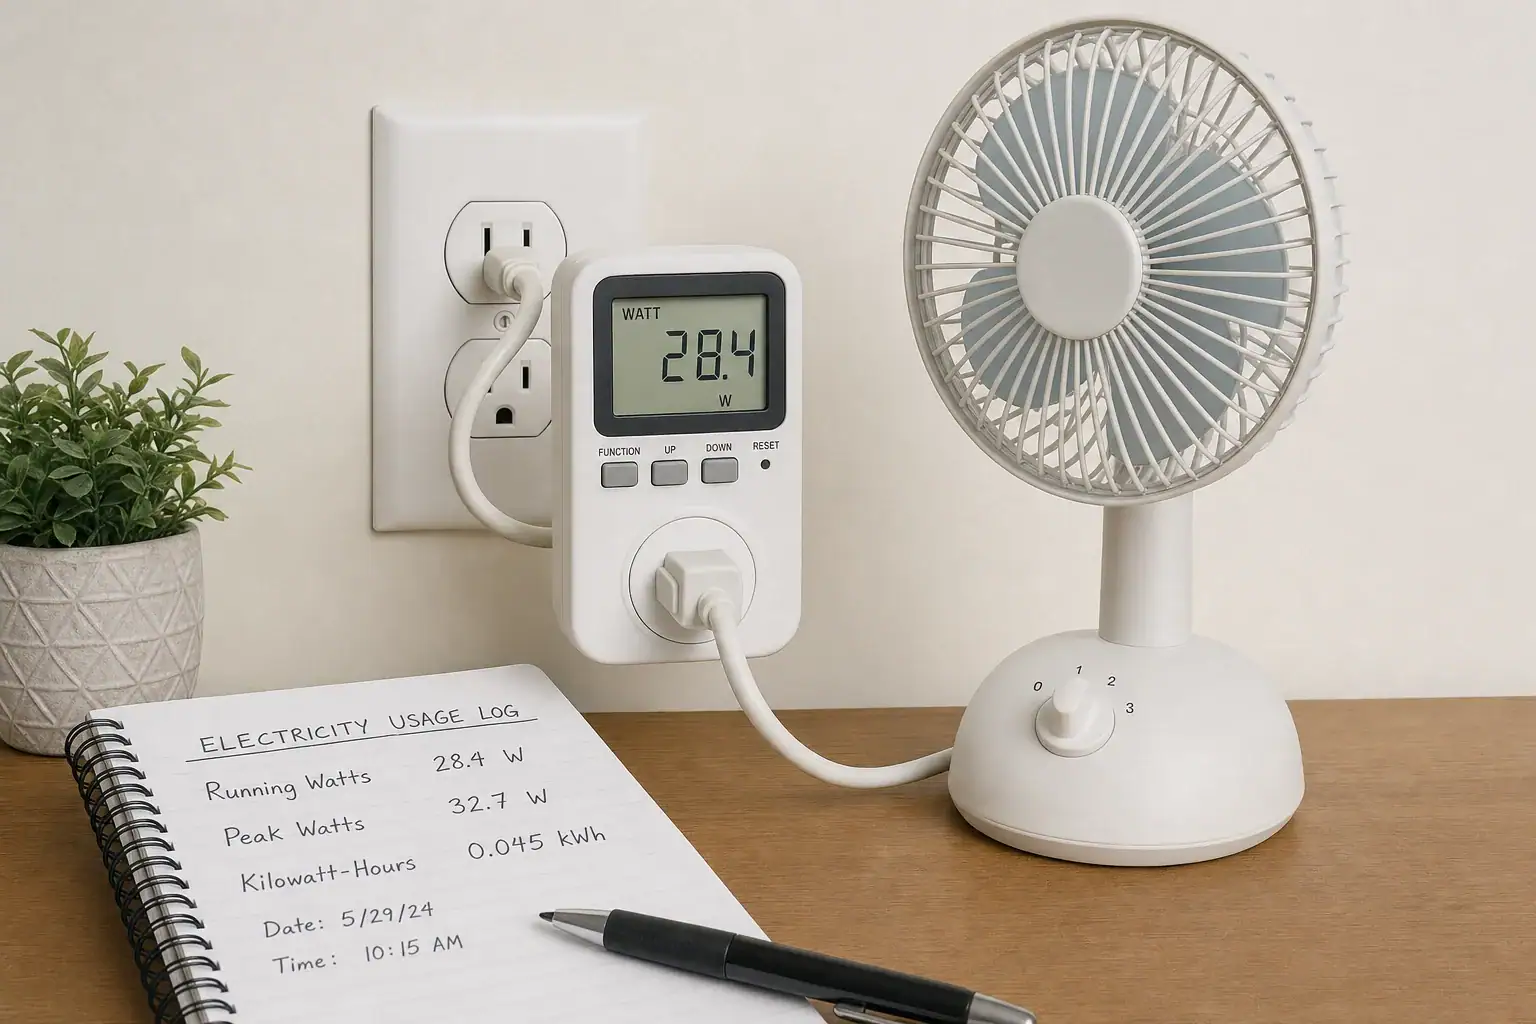
To measure appliance wattage before sizing a power station, use a properly rated plug-in electricity meter to record the appliance’s normal running watts, highest operating watts, and energy consumption in kilowatt-hours. Also check the appliance manual or manufacturer specifications for startup surge, because a basic meter may not capture a motor’s brief starting demand.
Use those readings for two separate decisions: running and startup watts determine the power station’s inverter rating, while watt-hours determine the battery capacity needed for the desired runtime. Measure every appliance you expect to operate, including loads that may run at the same time.
Start With the Appliance Label
Look for input watts on the appliance, power adapter, or manufacturer documentation. An input rating such as 120 V, 300 W provides a useful planning value, but it may represent maximum rather than typical consumption.
If the label lists only volts and amps, multiplying them gives volt-amperes:
Volts × amps = volt-amperes (VA)
VA and watts are not always equal for motors, compressors, and electronic power supplies because of power factor. For a simple resistive load, such as some heating elements, VA may be close to watts. For other appliances, measure real watts or use the manufacturer’s published wattage instead of assuming the two values are interchangeable.
Measure Real Power at the Outlet
A plug-in electricity meter is the most direct option for an ordinary cord-and-plug appliance. The meter must be rated for the outlet voltage, appliance current, plug type, and type of load. Follow its instructions, keep it dry, and do not use damaged cords or loose outlets.
Connect the meter to the wall outlet according to its instructions.
Connect the appliance to the meter.
Run every mode you expect to use, including high heat, maximum speed, defrost, or other high-power settings.
Record normal running watts and the highest displayed watts.
For cycling appliances, leave the meter connected for a representative period and record kilowatt-hours.
Measure an appliance with its normal power adapter so the reading includes adapter losses. Do not use a household plug-in meter on hardwired equipment or circuits outside the meter’s rating. Hardwired or higher-voltage loads require appropriate instruments and qualified guidance. A portable power station should not be connected to home wiring, a panel, or a wall outlet as a power source unless a specifically designed, code-compliant system is installed under current official requirements.
Separate Running Watts From Startup Surge
Running watts are the power required after an appliance reaches normal operation. Startup surge is a short, higher demand produced when some motors, compressors, pumps, or transformers start.
A meter’s highest displayed value is not necessarily the true surge. Some meters update too slowly to capture a brief current spike. For a refrigerator, freezer, pump, or similar load, consult current manufacturer documentation for starting watts, locked-rotor information, or generator and inverter requirements. Do not repeatedly attempt to start an appliance from an undersized power station just to discover its limit.
The power station’s continuous AC rating must cover the combined running demand. Its surge rating must cover the relevant starting demand for the duration required by the appliance. Surge ratings vary in duration and test conditions among manufacturers, so two stations with the same advertised surge wattage may not behave identically.
Account for Simultaneous Loads
Add the running watts of appliances that may operate together. Then consider what happens when a motor starts while the other loads remain on:
Required startup power = existing running loads + starting demand of the appliance starting
If more than one motor can start at the same time, account for that overlap or manage the loads so their starts do not coincide. A planning margin can accommodate meter uncertainty, voltage variation, and differences between appliance samples, but it does not override either manufacturer’s limits.
Measure Energy for Battery-Capacity Sizing
Watts indicate instantaneous power; watt-hours indicate energy consumed over time. For a steady load:
Energy in Wh = watts × hours
A 100-watt appliance running continuously for six hours would use 600 Wh at the appliance. Cycling equipment should be measured in kilowatt-hours over a representative period instead of estimating from its running wattage.
Convert the meter reading with:
1 kWh = 1,000 Wh
For example, if a refrigerator uses an illustrative 0.9 kWh during a measured 24-hour period, its average energy use is 900 Wh per day. A 12-hour estimate would be 450 Wh only if that measured day is representative and consumption scales evenly enough for planning. Ambient temperature, thermostat setting, door openings, and operating mode can change the result.
Include Conversion Losses and Reserve
A power station’s stated battery capacity is generally not the same as the energy delivered to an AC appliance. The inverter consumes energy, conversion is not perfectly efficient, and the station may reserve some capacity for battery protection. Low-power loads can also be affected by the station’s own operating overhead.
If you are using an explicit delivery-efficiency assumption, estimate nominal capacity as:
For an illustrative calculation, suppose an appliance needs 600 Wh, assumed AC delivery efficiency is 85%, and 10% of nominal capacity is kept as a reserve:
600 ÷ (0.85 × 0.90) ≈ 784 Wh
This is a planning estimate, not a guaranteed runtime. Use manufacturer-provided usable-capacity or efficiency information when available, and note the conditions under which it was specified. Battery temperature, load level, battery age, inverter behavior, and automatic shutoff settings can all affect delivered energy.
Build a Useful Measurement Record
For each appliance, write down:
Normal running watts
Highest measured operating watts
Manufacturer-stated startup or surge requirement, if applicable
Measured Wh or kWh over a representative interval
Expected daily runtime or duty cycle
Other loads that may operate simultaneously
When matching those figures to a power station, verify its continuous output rating, surge rating and duration, battery watt-hours, AC voltage and frequency, and any per-port current limits. All must be compatible; sufficient battery capacity does not compensate for an undersized inverter.
Use the Highest Credible Number
If the label, meter, and documentation disagree, determine what each number represents. A label may show maximum input, a meter may show typical operation, and the manual may list a separate startup requirement. Size continuous output around the highest credible simultaneous running load, size surge output around reliable starting data, and size battery capacity from measured energy use with clearly stated loss and reserve assumptions.
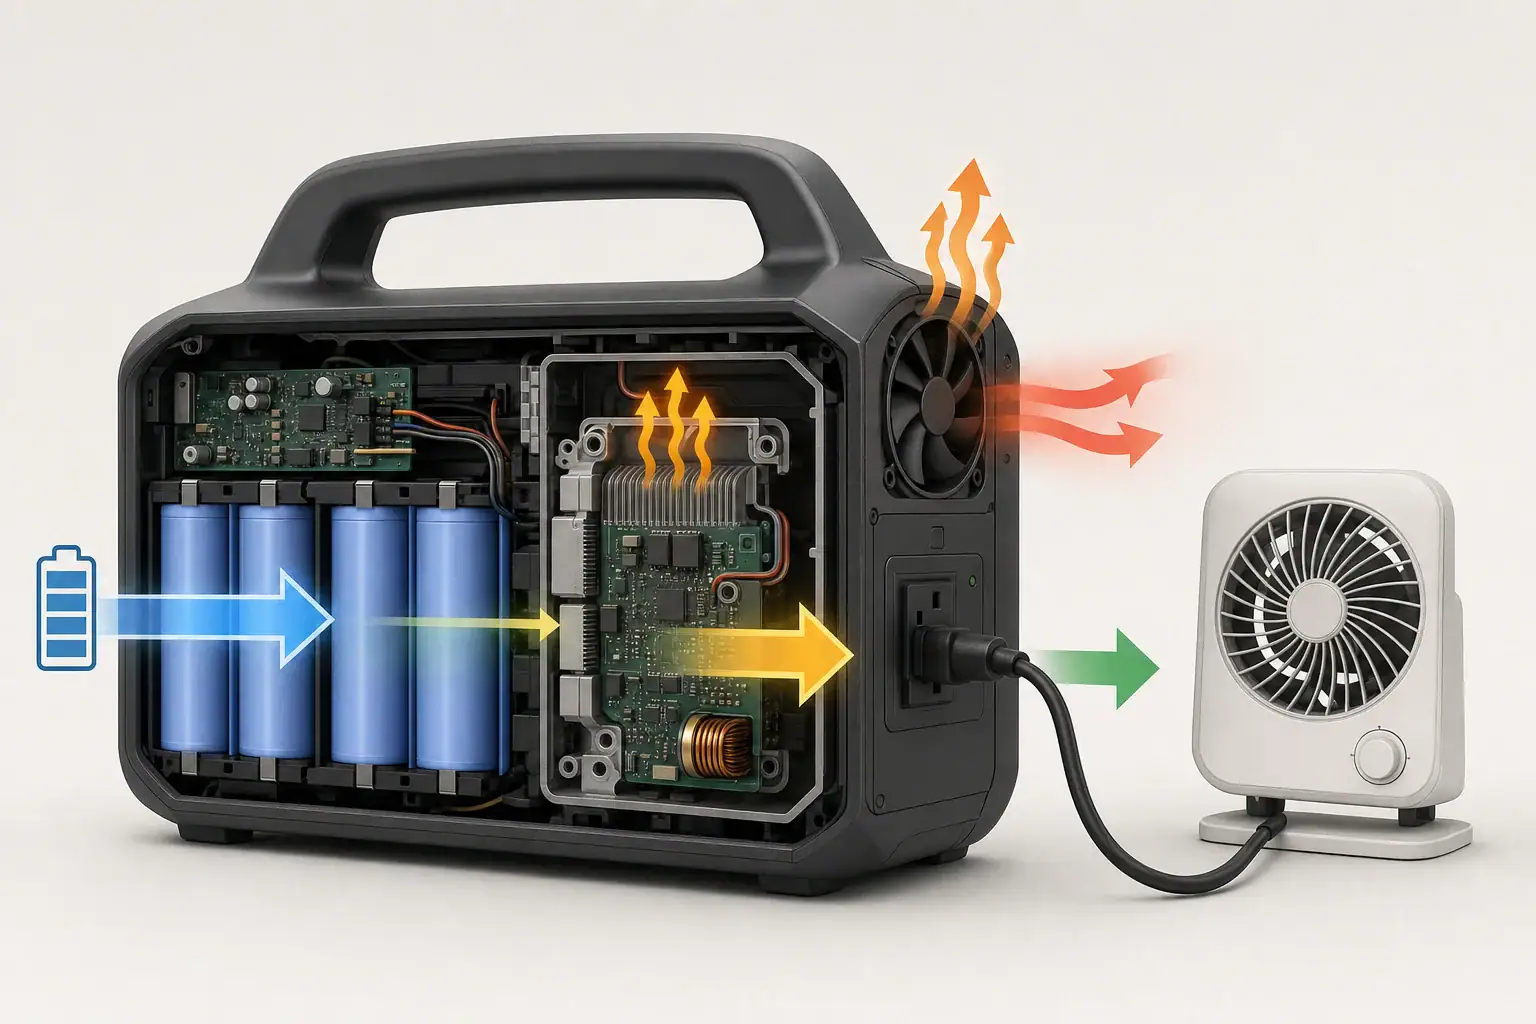
Large power stations waste energy on small AC loads because the inverter consumes power simply by being switched on, even when the connected device needs only a few watts. This AC inverter standby loss, also called inverter idle draw, no-load consumption, or parasitic drain, can substantially reduce runtime.
A high-capacity unit may contain an inverter designed to supply 1,500 watts, 2,000 watts, or more. Keeping its control circuits, switching electronics, cooling system, and AC output active requires energy. That fixed overhead matters little with a large appliance, but it can equal or exceed the demand of a router, clock, charger, or other small load.
As a result, the displayed AC efficiency or estimated runtime may look unexpectedly poor. Eco mode can help in some situations, but it may also shut the outlet off when a load is below its detection threshold. Understanding the difference between battery capacity, inverter efficiency, and standby consumption makes it easier to choose the right output and estimate realistic operating time.
What AC inverter standby loss means and why it matters
A portable power station stores direct-current energy in its battery. Its AC inverter converts that energy into household-style alternating current. Standby loss is the battery power consumed while the inverter is enabled but supplying no useful load, or only a very small one.
This loss is usually expressed in watts. If an active inverter draws 15 watts before powering anything, it consumes about 15 watt-hours every hour. Over 10 hours, that is roughly 150 watt-hours unavailable to the connected equipment. Actual battery use may differ because control electronics, temperature, cooling fans, display activity, and battery-management overhead can add further consumption.
Standby loss matters most when the useful load is small or runs for a long time. A 15-watt overhead is minor beside a 1,000-watt appliance, but it is significant beside a 5-watt modem. It can also make a large-capacity station deliver less runtime than a simple capacity-divided-by-load calculation suggests.
How inverter size, efficiency, and fixed overhead interact
An inverter does not have one efficiency percentage that applies at every output level. Its conversion efficiency normally changes with load. It may perform well near a moderate share of its rated output while becoming relatively inefficient at very low loads.
Total battery draw can be estimated as the useful AC load divided by conversion efficiency, plus any overhead not already included in that efficiency figure. For example, a 20-watt device operating through an inverter at 80% efficiency would require about 25 watts before additional system losses. If measured standby overhead adds another 12 watts, total battery-side demand could approach 37 watts.
Inverter rating also affects the design tradeoff. A large inverter needs components capable of handling high current, surge watts, voltage regulation, and thermal stress. It does not necessarily consume more at idle than every smaller inverter, but oversized systems often have more active circuitry than low-power converters. The relevant specification is measured no-load consumption, not inverter wattage alone.
Eco mode reduces waste by turning off or sleeping the inverter when output falls below a set threshold. It periodically checks for a load and restarts when demand rises. This works well for some intermittent appliances, but continuous low-watt devices may fail to keep the inverter awake.
Useful AC load
Inverter overhead
Approximate total draw
Overhead share
5 W
15 W
20 W
75%
20 W
15 W
35 W
43%
100 W
15 W
115 W
13%
500 W
15 W
515 W
3%
How fixed inverter overhead becomes less significant as the useful load increases. Example values for illustration.
Real-world runtime examples with small AC loads
Consider a power station with 1,000 watt-hours of nominal battery capacity. A basic calculation suggests that a 10-watt internet router could run for 100 hours. That result assumes every stored watt-hour reaches the router, which is not realistic.
If the inverter and supporting electronics consume 15 watts while the router uses 10 watts, battery draw is already about 25 watts before accounting for other conversion losses. Usable runtime might then be closer to 30 to 36 hours, depending on usable battery capacity, temperature, state of charge, and shutdown reserve. The large difference is caused by fixed overhead continuing every hour.
A 60-watt television presents a different balance. Adding 15 watts of overhead produces roughly 75 watts of battery demand before smaller losses. The overhead remains important, but it no longer dominates consumption. With a 600-watt appliance, the same 15-watt draw has only a modest effect on runtime.
Intermittent loads require separate analysis. A compact refrigerator may draw 70 watts while its compressor runs and almost nothing between cycles. Eco mode could save energy during the off periods, but only if it reliably detects the next startup and supports the compressor surge. Without eco mode, the inverter continues consuming standby power throughout every idle period.
Common mistakes and troubleshooting cues
One common mistake is dividing advertised battery capacity by the appliance wattage and treating the answer as guaranteed runtime. Nominal capacity is measured at the battery, while the appliance receives energy after conversion and system losses. Battery reserve, temperature, cell voltage, and meter calibration also affect usable energy.
Another mistake is trusting a small AC plug meter as the complete measurement. It reports power delivered to the appliance but usually cannot see energy consumed inside the power station. To identify standby loss, compare the station’s battery-side discharge reading with the measured AC output when possible. Display values may be rounded, especially below 10 watts, so a longer runtime test can reveal more than an instant reading.
If the battery percentage falls while AC output shows zero watts, likely causes include inverter idle draw, display rounding, wireless features, cooling, or background electronics. If an outlet repeatedly switches off, check whether eco mode is enabled and whether the load is below its detection threshold. A device that cycles on and off unexpectedly may also have an intermittent demand pattern that the inverter does not recognize.
Confirm that no other AC or DC outputs are active.
Turn off unnecessary displays, wireless control, or lighting features.
Compare battery decline with the AC outlet disabled and enabled over equal periods.
Test eco mode cautiously to verify that the connected equipment restarts correctly.
Direct DC operation can avoid AC conversion, but it is not automatically safe or efficient. The output voltage and polarity must match the equipment, and the port must support the required starting and continuous current.
Safety basics when using AC outputs
Standby loss is mainly an efficiency issue, but normal electrical precautions still apply. Keep the power station dry, allow ventilation around cooling openings, and do not cover it to suppress fan noise. Heat raises conversion losses and may trigger output reduction or shutdown.
Use cords and power strips rated for the actual load. Inspect plugs for damage, looseness, discoloration, or unusual heat. A small steady load is unlikely to approach the inverter’s continuous rating, but another appliance connected to the same station can create an overload or high surge.
Do not open the enclosure, modify the battery, bypass protection systems, or attempt to alter the inverter’s sleep threshold. Do not connect a portable power station directly to home wiring through improvised cords. Any connection intended to supply building circuits requires properly approved equipment and a qualified electrician.
Critical medical, communications, or safety equipment should not rely on eco mode unless its behavior has been verified. Automatic outlet shutdown can be more consequential than the energy saved.
Maintenance and storage practices that limit avoidable loss
AC standby loss does not usually indicate a damaged battery. However, unnecessary time with the inverter enabled adds charge cycles over the long term. Turn off the AC section when no AC device is in use rather than relying only on unplugging the appliance.
Store the station according to its stated charge and temperature guidance, with all outputs disabled. Check it periodically because battery-management electronics may consume a small amount of energy even when the main outlets are off. Avoid leaving the battery fully depleted for extended periods.
Keep vents free of dust and debris so the inverter can cool efficiently. If idle consumption rises sharply, the fan runs continuously at room temperature, or the case becomes warm with no connected load, shut the AC output off and consult qualified service support. Compare tests at similar temperatures and states of charge because cold or hot conditions can distort runtime results.
Inverter idle draw
Energy used in 8 hours
Energy used in 24 hours
Energy used in 72 hours
5 W
40 Wh
120 Wh
360 Wh
15 W
120 Wh
360 Wh
25 W
200 Wh
600 Wh
1,800 Wh
Cumulative energy consumed when an inverter remains active continuously. Example values for illustration.
For small continuous loads, the most efficient option is often a properly matched USB or DC output that avoids running the AC inverter. When AC is required, estimate runtime using usable battery capacity and total battery-side draw rather than appliance wattage alone. A station’s large watt-hour capacity does not guarantee efficient operation at low output.
For an approximate test, fully charge the station, disable unrelated features, connect a stable known load, and record battery percentage or reported energy over several hours. Repeat with the AC inverter enabled but no appliance connected. Because percentage displays are coarse, longer tests generally provide a more useful comparison. Stop if the equipment behaves abnormally or becomes excessively warm.
Specs to look for
AC no-load consumption: Look for a disclosed value in watts, such as roughly 5 to 20 watts; lower draw preserves runtime on small loads.
Low-load efficiency: Look for efficiency data at loads such as 10, 25, or 50 watts, not only near full output; this shows how the inverter handles electronics and chargers.
Usable battery capacity: Look for measured AC-delivered watt-hours or a clearly stated usable-energy estimate; nominal cell capacity alone can overstate runtime.
Eco mode threshold: Look for a documented or adjustable threshold, often in the approximate 5-to-30-watt range; it determines whether small devices keep the outlet awake.
Eco mode restart behavior: Look for automatic load checks and reliable restart with intermittent equipment; poor detection can interrupt refrigerators, pumps, or communications devices.
Independent output controls: Look for separate switches for AC, USB, and DC sections; this prevents unused conversion circuits from remaining active.
Regulated DC outputs: Look for voltage, current, connector, and power specifications that match intended devices; a suitable direct output can avoid inverter loss.
Display resolution: Look for input and output readings that register low single-digit or low double-digit watts; better resolution helps diagnose parasitic draw.
Continuous and surge ratings: Look for enough capacity for the intended appliance without extreme oversizing; adequate surge support matters for motors even when average consumption is low.
The key comparison is not simply battery size or maximum inverter watts. For routers, monitoring equipment, lighting, chargers, and other small loads, no-load draw, low-load efficiency, eco mode behavior, and suitable DC outputs often have a greater effect on practical runtime.
Frequently asked questions
How much AC inverter standby loss is normal?
Idle draw varies by inverter design, output capacity, temperature, and enabled features. A few watts to several tens of watts may be possible, so the most useful comparison is the manufacturer’s measured AC no-load consumption in watts.
Why does my power station battery drop when nothing is plugged into the AC outlet?
The AC inverter can continue using battery power for its switching electronics, controls, display, cooling, and output circuitry even with no appliance connected. Wireless functions and other active outputs may also contribute, while low readings on the display can be rounded to zero.
What power station specs matter most for small AC loads?
Look for AC no-load consumption, efficiency at low output levels, usable AC-delivered capacity, and eco mode threshold and restart behavior. Independent output switches and suitably rated USB or regulated DC ports can also reduce unnecessary conversion losses.
Is it a mistake to calculate runtime by dividing watt-hours by appliance watts?
Yes, that calculation is only a theoretical starting point because it assumes all stored battery energy reaches the appliance. Actual runtime can be lower due to inverter standby draw, conversion losses, battery reserve, temperature, and the station’s usable capacity.
Should eco mode be used with a router or other low-watt device?
Eco mode may reduce energy use, but a low-watt device can fall below the inverter’s detection threshold and cause the outlet to shut off. Test the setting with the specific device before relying on it for communications, monitoring, or other equipment that must remain powered.
Is it safe to leave an AC inverter turned on overnight?
It can be safe when the power station is used according to its instructions, kept dry and well ventilated, and connected with properly rated cords. However, leaving the inverter on can consume substantial energy, so it should be switched off when AC power is not needed.
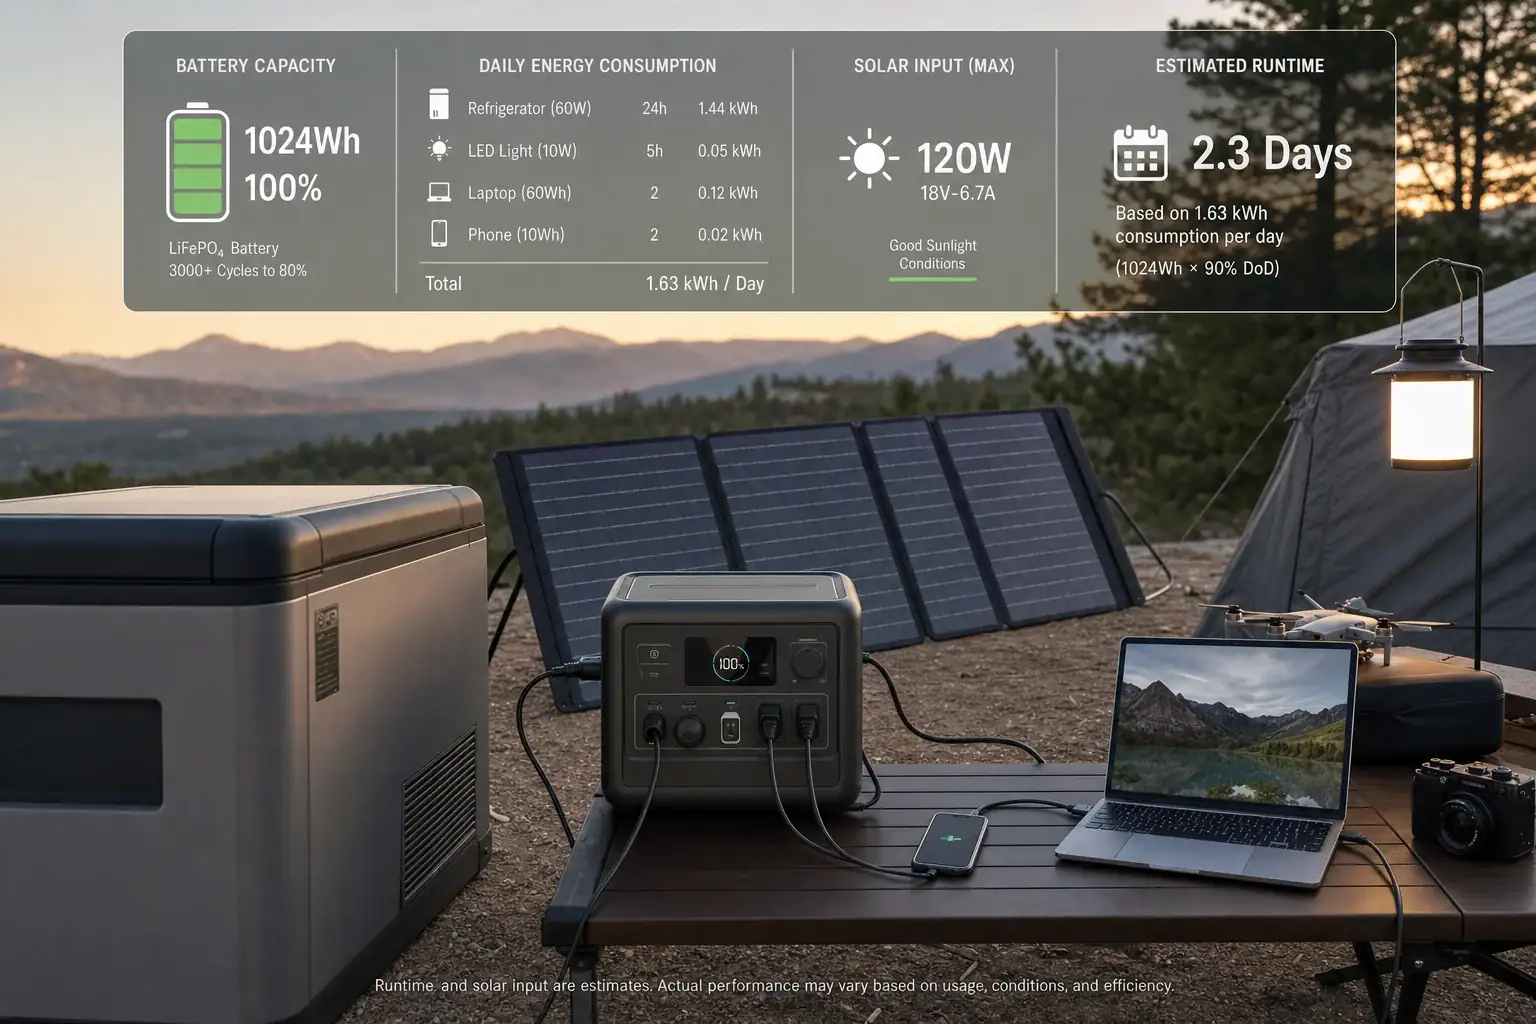
Days of autonomy is the estimated number of days a solar generator or portable power station can run selected devices before its usable stored energy is depleted. It is a practical form of runtime expressed in days rather than hours. The estimate depends on usable battery capacity, daily energy use, inverter loss, and whether solar recharge is available.
Autonomy is not simply the battery’s watt-hour rating divided by the wattage printed on one appliance. Refrigerators cycle, electronics draw standby power, inverters consume energy, and solar output changes with weather and season. A system that appears sufficient on paper may therefore run for less time in actual conditions.
A reliable estimate starts with a daily energy budget for essential loads. It then accounts for conversion losses, battery reserve, temperature, aging, and realistic solar production. This approach helps compare capacities, plan emergency backup, and decide which devices should remain powered when energy is limited.
1. What Days of Autonomy Means and Why It Matters
Days of autonomy describes how long stored energy can support a defined group of loads. In its strictest form, it assumes no new energy enters the battery during that period. A power station with two days of autonomy could support the planned loads for about 48 hours without solar, wall, vehicle, or generator charging.
The phrase is also used more loosely for solar-supported systems. In that context, autonomy may describe how long the system can continue through cloudy weather while receiving little or no useful solar energy. This distinction matters because a system may operate continuously in good sun but last only a day or two when solar production falls.
Autonomy is always tied to a particular load plan. A battery does not have one universal number of days. It might run lights and communication devices for several days, a refrigerator for a shorter period, or a high-wattage heater for only a few hours. The result changes whenever a device, operating schedule, or charging source changes.
This metric is useful for outage preparation, camping, mobile work, and off-grid use. It translates technical specifications into a planning question: how many complete days can the available energy cover while maintaining a reasonable reserve?
2. How Battery Capacity, Loads, and Solar Input Determine Autonomy
The basic calculation uses watt-hours. First estimate usable stored energy:
Usable energy in Wh = nominal battery capacity in Wh × usable capacity percentage
A 2,000 Wh battery operated with a 90% usable allowance provides about 1,800 Wh for planning. The allowance accounts for system protection, reserve settings, conversion losses not included elsewhere, and the preference to avoid planning around a completely empty battery.
Next calculate daily consumption. Multiply each device’s actual or average wattage by its hours of operation per day, then add the results:
Daily energy in Wh = device watts × operating hours per day
A constant 40 W load running for 10 hours uses 400 Wh. A cycling appliance requires its average consumption over time rather than only its running-watt specification. A plug-in energy meter or the power station’s history display can provide a more representative figure.
Without charging, the planning formula is:
Days of autonomy = usable stored energy ÷ total daily energy use
With solar, subtract expected net daily solar harvest from daily use before dividing. Net harvest is the energy that actually reaches the battery after panel conditions, charging losses, and input limits. If expected harvest equals or exceeds consumption, simple division may suggest continuous operation. In practice, battery size still determines how well the system bridges nights, storms, shade, and seasonal shortfalls.
Example values for illustration. Estimated autonomy assumes no charging during the stated period.
Load plan
Nominal capacity
Usable allowance
Daily use
Estimated autonomy
Lights and communications
1,200 Wh
85%
400 Wh
2.6 days
Refrigeration and small devices
3,000 Wh
90%
1,800 Wh
1.5 days
Basic camping loads
800 Wh
90%
300 Wh
2.4 days
3. Real-World Autonomy Examples
Essential electronics during an outage
Suppose a 1,000 Wh power station has an estimated 88% usable allowance, providing 880 Wh. A communication device uses 60 Wh per day, LED lights use 120 Wh, and a small fan uses 280 Wh. Total daily demand is 460 Wh. Dividing 880 Wh by 460 Wh gives about 1.9 days without recharging.
If a solar array delivers 300 Wh of net energy on a reasonably sunny day, the battery must supply only the remaining 160 Wh. Under those conditions, stored energy could cover several days. However, planning around the full solar estimate would leave little margin for clouds, shade, or higher-than-expected fan use.
Refrigerator backup
A refrigerator’s compressor may have a running draw of 100 W but operate only part of each hour. If measured use is 1,500 Wh per day and miscellaneous loads add 300 Wh, total demand is 1,800 Wh per day. A 3,000 Wh station with 90% usable energy provides 2,700 Wh, or approximately 1.5 days of no-solar autonomy.
The refrigerator’s startup surge must also remain within the inverter’s surge capability. Surge capacity affects whether the appliance starts, while battery watt-hours determine how long it can operate. These are separate specifications.
Solar-supported off-grid use
Consider daily loads totaling 900 Wh. A 500 W solar array receiving four effective peak-sun hours has a theoretical yield of 2,000 Wh. After allowing for heat, panel angle, charging conversion, and variable conditions, a planning estimate might be 1,300 to 1,500 Wh.
That harvest could replace the day’s use and recharge some reserve in favorable weather. It does not guarantee indefinite autonomy. Several overcast days, shading, or a power station’s solar input limit could reduce collection below the load. A useful off-grid plan therefore considers both daily energy balance and no-solar reserve.
4. Common Calculation Mistakes and Troubleshooting Cues
Using inverter watts as battery capacity: Inverter output is measured in watts and indicates how much power can be delivered at once. Battery capacity is measured in watt-hours and indicates stored energy. A 2,000 W inverter does not provide 2,000 Wh of capacity unless the battery specification separately says so.
Using rated watts for cycling devices: Refrigerators, pumps, and some climate-control equipment switch on and off. Runtime estimates improve when based on measured watt-hours over a full day rather than a brief wattage reading.
Ignoring conversion and idle losses: AC loads require the inverter, which consumes energy and creates heat. The inverter can also draw power while switched on with no active load. DC or USB outputs may avoid some conversion losses, but they still are not perfectly efficient.
Assuming panel wattage equals daily harvest: A 400 W array rarely delivers exactly 400 W for every daylight hour. Clouds, panel temperature, orientation, shade, cable losses, and the solar charge controller’s voltage and current limits affect collection.
Overlooking hidden loads: Displays, wireless features, adapters, and appliances in standby mode can create meaningful consumption over several days. If runtime is unexpectedly short, disconnect nonessential devices and compare the power station’s reported output with the load inventory.
Planning to zero percent: Displayed state of charge is an estimate, and shutdown may occur earlier under a heavy load, low temperature, or aging battery. Maintaining a planning reserve reduces the chance that essential equipment stops unexpectedly.
5. Safety Basics for Multi-Day Portable Power
Operate portable power stations in dry, ventilated locations within the temperature range stated for the equipment. Keep the unit away from standing water, direct rain, blocked vents, combustible materials, and sources of excessive heat. Do not place it in an enclosed container while charging or supplying substantial loads.
Confirm that continuous output and surge output are suitable for connected appliances. Motors, compressors, and pumps can require a short startup surge several times higher than their normal running power. Repeated overload shutdowns are a cue to reduce the load rather than bypass protection.
Use charging cables and connectors intended for the power station’s input range. Solar panel voltage must remain compatible with the unit’s solar input specification, including expected changes in cold weather. Avoid damaged cords, loose connectors, and improvised adapters.
Never connect a portable power station directly to household wiring through an improvised cord or receptacle. Any system intended to supply home circuits requires approved transfer equipment and evaluation by a qualified electrician. Do not open the power station, alter battery cells, or bypass built-in protections.
For medical equipment, autonomy calculations should not be the only backup plan. Verify compatibility with the device provider, retain an alternate power source when possible, and include extra reserve for delayed charging or unexpected consumption.
6. Maintenance and Storage Factors That Affect Autonomy
Battery capacity gradually declines with age, charge cycles, temperature exposure, and storage conditions. A unit that originally delivered 1,800 usable Wh may provide less after extended service. Rechecking actual runtime periodically helps keep an autonomy plan realistic.
Follow the manufacturer’s storage guidance for state of charge and inspection intervals. For many battery chemistries, moderate charge levels are preferable for long storage, but the appropriate range varies by system design. Avoid leaving a stored unit fully depleted, and recharge it when the level approaches the recommended minimum.
Store the power station in a cool, dry area away from freezing conditions and prolonged high heat. Cold temperatures can temporarily reduce available output and charging performance. High temperatures can accelerate permanent battery aging. Allow equipment to reach an acceptable operating temperature before heavy charging or discharging.
Inspect accessible cables, ports, and housings before use. Stop using equipment that shows swelling, cracks, liquid intrusion, unusual odors, excessive heat, or damaged connectors. Cleaning should be limited to exterior surfaces and performed according to the supplied safety instructions.
Run a periodic load test using the devices included in the emergency plan. Record starting state of charge, watt-hours consumed, operating time, and ending state of charge. This practical test can reveal increased appliance consumption, battery degradation, or settings that create avoidable standby losses.
Example values for illustration. Actual storage and testing intervals depend on the equipment and operating environment.
Start by identifying essential devices and measuring or estimating their watt-hours per day. Calculate autonomy without solar first because this reveals the system’s stored-energy reserve. Then add a conservative net solar estimate to evaluate how charging may extend operation.
Separate energy capacity from output capability. Watt-hours determine duration, continuous watts determine which loads can run together, and surge watts determine whether motor-driven equipment can start. Build in a margin for conversion losses, battery aging, cold weather, and variable appliance behavior.
A larger battery is not always the only way to gain autonomy. Reducing idle losses, choosing lower-energy loads, limiting operating hours, improving solar exposure, and prioritizing essential devices can extend runtime without changing the power station.
Specs to look for
Battery capacity in watt-hours: Compare nominal capacities such as 1,000 Wh, 2,000 Wh, or 4,000 Wh because stored watt-hours are the starting point for autonomy.
Usable capacity: Look for tested or documented usable energy near 80% to 95% of nominal capacity because internal reserves and conversion losses reduce deliverable energy.
Continuous AC output: Select an output rating above the combined running load, with roughly 20% to 30% headroom, to reduce overload risk.
Surge output: Check for enough short-duration capacity to start refrigerators, pumps, and other motors because running watts alone may not show startup demand.
Inverter efficiency and idle draw: Favor clear efficiency information and low no-load consumption, such as an idle draw below roughly 10 to 20 W, because continuous losses accumulate over multiple days.
Solar input range: Compare maximum input watts, voltage range, and current limit with the planned panels because the lowest applicable limit can cap charging speed.
Recharge time: Look for realistic AC and solar recharge estimates, such as two to eight hours under stated conditions, because faster recovery can restore reserve between outages or cloudy periods.
Cycle-life specification: Compare the number of cycles expected before capacity falls to a stated percentage, often around 70% to 80%, because long-term capacity loss directly reduces autonomy.
Expandable capacity: If multi-day backup is important, check whether compatible external batteries can increase watt-hours without unsafe modifications.
Operating and storage temperature ranges: Choose ranges appropriate for the intended climate because extreme heat and cold can reduce performance, charging ability, and battery life.
The most useful autonomy figure is conservative, load-specific, and updated with real measurements. Treat solar production as a variable energy source rather than a guarantee, maintain a reserve for essential loads, and repeat the calculation whenever battery condition or daily consumption changes.
Frequently asked questions
How do I calculate days of autonomy for a portable power station?
Estimate usable battery energy in watt-hours, then divide it by the total watt-hours your planned devices use each day. For a more realistic result, include inverter losses, standby consumption, battery reserve, and any reduction expected from cold temperatures or battery aging.
Can solar panels provide unlimited days of autonomy?
Solar panels can extend runtime substantially when their net daily energy production meets or exceeds daily consumption. They do not guarantee unlimited operation because production changes with weather, shade, season, panel angle, and the power station’s solar input limits. Battery capacity is still needed to cover nighttime use and periods of poor solar generation.
What solar generator specs matter most for multi-day backup?
Battery capacity in watt-hours is the primary specification for estimating duration, while continuous and surge output determine which appliances can run. Also compare usable capacity, inverter idle draw, solar input voltage and wattage limits, charging efficiency, operating temperature range, and whether the battery can be expanded.
What is the most common mistake when estimating portable power station runtime?
A common mistake is dividing battery watt-hours by an appliance’s listed running watts without accounting for operating time and losses. Cycling appliances such as refrigerators should be estimated from measured daily watt-hour use, and the calculation should include inverter consumption, standby loads, and a reserve rather than assuming the battery can be used to zero.
How many days can a portable power station run a refrigerator?
The answer depends on the refrigerator’s measured daily energy use and the power station’s usable battery capacity. For example, a refrigerator and small miscellaneous loads using 1,800 Wh per day would use a 2,700 Wh usable battery reserve in about 1.5 days without recharging. The station must also have enough surge output to start the compressor.
Is it safe to use a portable power station indoors during an outage?
Battery-powered portable power stations can generally be used indoors when operated in a dry, well-ventilated area and according to the manufacturer’s instructions. Keep vents clear, avoid heat and water exposure, use undamaged cables, and do not connect the unit directly to household wiring without approved transfer equipment installed by a qualified electrician.
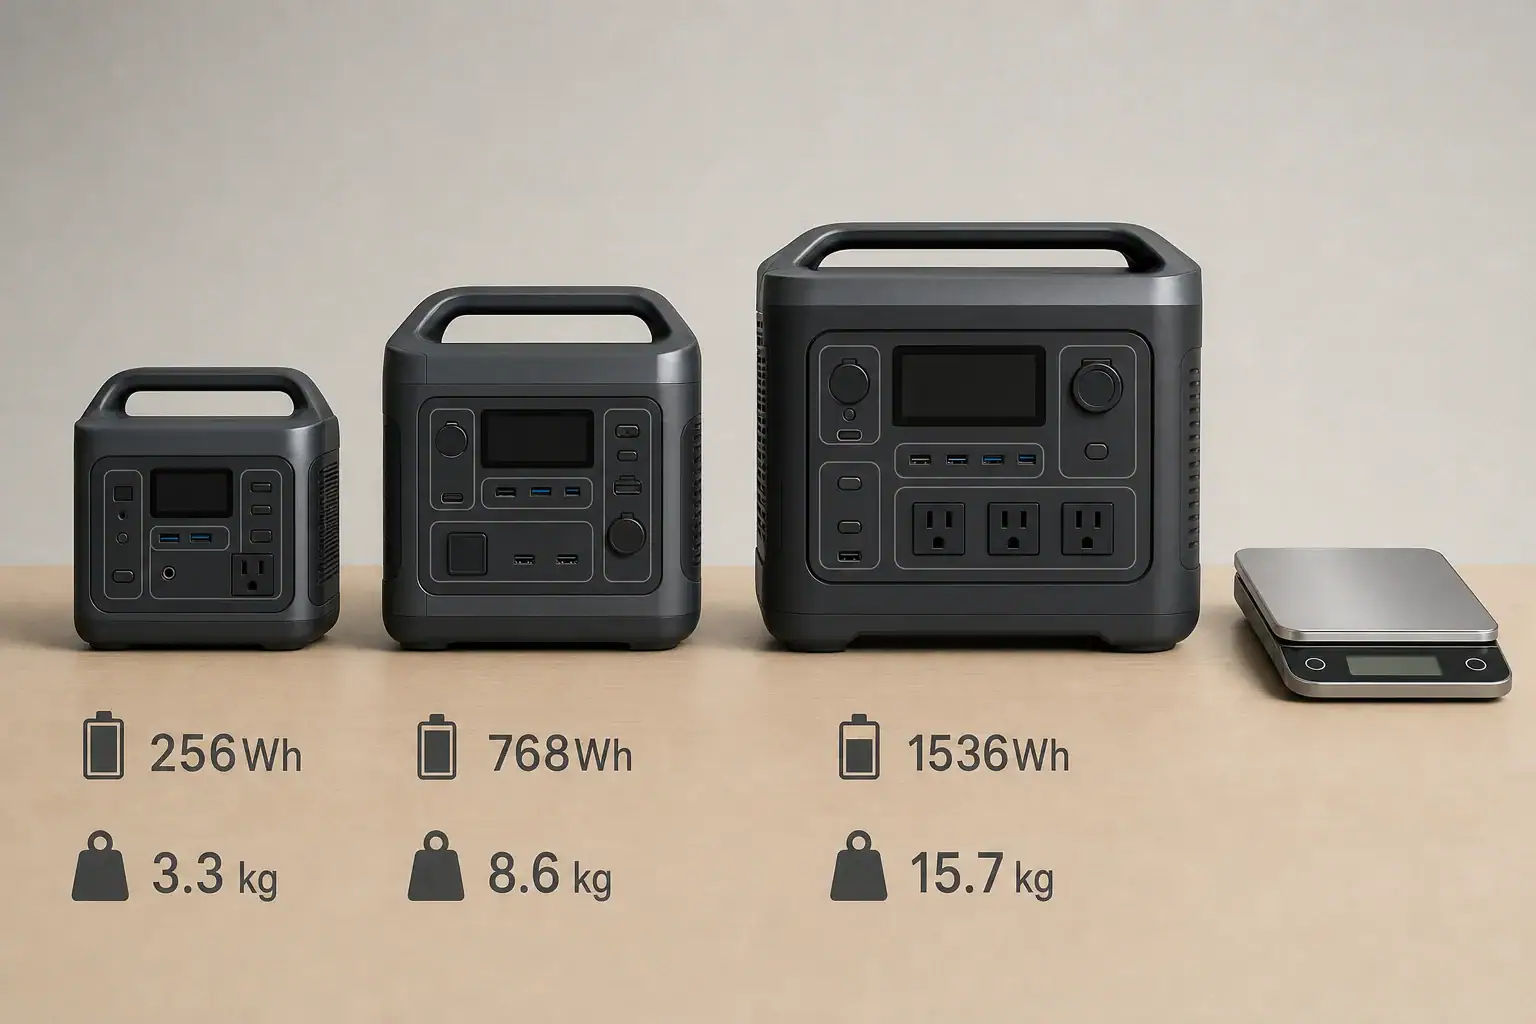
Wh per pound tells you how much listed battery capacity a portable power station carries for each pound of total product weight. A higher number generally indicates better capacity-to-weight efficiency, which can make a unit easier to carry for a given amount of stored energy.
This metric is useful when comparing portable power station weight, battery capacity, energy density, runtime, and portability. It can quickly reveal whether one model offers substantially more watt-hours without adding proportionate bulk. However, it does not measure output power, charging speed, battery longevity, or the amount of energy actually delivered through an outlet.
The best comparison therefore begins with a simple Wh-per-pound calculation and then considers usable capacity, inverter watts, surge watts, battery chemistry, ports, and intended loads. Weight efficiency matters most for camping, mobile work, emergency kits, and any situation in which the power station will be carried regularly.
1. What Wh per Pound Means and Why It Matters
Watt-hours per pound is a capacity-to-weight ratio. It compares the power station’s nominal energy capacity in watt-hours with its complete listed weight in pounds.
Wh per pound = listed watt-hour capacity ÷ total product weight in pounds
For example, a 1,000 Wh power station weighing 30 pounds has a ratio of about 33.3 Wh per pound. A 1,000 Wh model weighing 40 pounds provides 25 Wh per pound. Both list the same capacity, but the first carries that capacity in a lighter package.
This ratio matters because capacity and weight often increase together. More battery cells can provide longer runtime, but they also add mass. The enclosure, inverter, cooling system, charger, handles, ports, and structural protection contribute additional weight without increasing the listed watt-hour capacity.
A high ratio can be valuable when carrying equipment between a vehicle, campsite, job site, or storage area. A lower ratio is not automatically bad. Extra weight may come from a larger inverter, more durable enclosure, stronger cooling system, built-in charging hardware, or other features. Wh per pound should be treated as a comparison tool rather than a complete quality score.
2. How Capacity, Weight, and Runtime Work Together
A watt-hour measures stored energy. In simplified terms, a 500 Wh battery could theoretically supply 100 watts for five hours. Real runtime is shorter because the inverter, battery management system, wiring, and connected devices consume or lose some energy.
Nominal capacity is the energy rating associated with the battery pack. Usable capacity is what can actually reach a device after reserve margins and conversion losses. When using an AC outlet, a rough planning assumption might be 75% to 90% of nominal capacity, although results vary by load and system design. DC devices may avoid some inverter losses.
A practical runtime estimate is:
Runtime in hours = nominal Wh × expected usable fraction ÷ average load watts
If a 1,000 Wh station delivers about 85% of its capacity through AC, approximately 850 Wh is available to the appliance. A steady 100-watt load might then run for about 8.5 hours. Cycling appliances complicate the estimate because their average consumption can be much lower than their nameplate wattage.
Output power is separate from capacity. A lightweight station may have enough watt-hours for a task but lack the continuous inverter watts or surge watts needed to start an appliance. Likewise, a high-output model can operate a large load yet drain quickly if its battery capacity is modest.
Listed capacity
Weight
Wh per pound
Approximate usable AC energy at 85%
300 Wh
8 lb
37.5 Wh/lb
255 Wh
600 Wh
18 lb
33.3 Wh/lb
510 Wh
1,000 Wh
30 lb
33.3 Wh/lb
850 Wh
2,000 Wh
55 lb
36.4 Wh/lb
1,700 Wh
Example values for illustration.
3. Real-World Wh-per-Pound Comparisons
Consider two power stations for a camping trip. Unit A lists 500 Wh and weighs 12 pounds, giving it 41.7 Wh per pound. Unit B lists 700 Wh and weighs 20 pounds, giving it 35 Wh per pound. Unit A is more weight-efficient, but Unit B still carries 200 Wh more total energy. If the user needs maximum runtime and moves the station only from a vehicle to a picnic table, the heavier option may be more practical.
For another example, compare a 1,200 Wh station weighing 32 pounds with a 1,500 Wh station weighing 43 pounds. Their ratios are 37.5 and 34.9 Wh per pound, respectively. The first is easier to carry per unit of capacity, while the second has more total stored energy. The right choice depends on whether mobility or runtime has priority.
Runtime also depends on the load. Suppose a station has 1,000 Wh of nominal capacity and 850 Wh of estimated usable AC energy:
A 10-watt light could run for roughly 85 hours.
A 50-watt portable refrigerator averaging 25 watts over time could run for roughly 34 hours.
A steady 100-watt device could run for roughly 8.5 hours.
A 500-watt appliance could run for roughly 1.7 hours.
These estimates do not account for temperature, battery age, intermittent inverter behavior, startup surges, or changing appliance demand. For refrigerators, pumps, and power tools, measured average consumption is usually more useful than the maximum nameplate rating.
4. Common Comparison Mistakes and Troubleshooting Cues
Comparing battery-only weight with total product weight: Use the complete ready-to-use weight. A battery module’s cell-level energy density is not directly comparable with a finished power station that includes an inverter, case, display, cooling, and charging electronics.
Confusing watts with watt-hours: Watts describe power at a moment in time. Watt-hours describe stored energy. A 2,000-watt inverter does not mean the station has 2,000 Wh of capacity.
Assuming listed capacity equals outlet energy: Some energy remains unavailable because of battery protection margins and conversion losses. If observed runtime is modestly below the nominal calculation, this may be normal rather than a fault.
Ignoring surge requirements: Motors and compressors may draw several times their running power briefly. If an appliance will not start even though expected runtime looks adequate, check continuous output, surge output, and whether other loads are connected.
Using peak load instead of average load: A refrigerator may draw 80 watts while its compressor runs but average much less over a full day. Conversely, a device with heating elements may remain near its rated wattage continuously.
Comparing different battery configurations: An expandable system may list the base unit and added battery separately. Include the weight and capacity of every component that must be transported. External power bricks and required adapters may also affect practical carry weight.
Overlooking test conditions: Very cold or hot temperatures can reduce available energy. If runtime is unexpectedly short, let the station reach an appropriate operating temperature, reduce unnecessary loads, verify that energy-saving modes are not shutting down low-power devices, and compare results using a stable measured load.
5. Safety Basics When Evaluating Capacity and Weight
Weight affects safe handling. A high-capacity station may require two hands, two people, or a cart even if it has built-in handles. Check the full weight before lifting, keep the load close to the body, and avoid carrying heavy equipment on unstable or wet surfaces.
Place the power station on a stable, dry surface with ventilation openings unobstructed. Do not operate or charge it in standing water, enclosed hot spaces, or locations where combustible materials can block airflow. Follow the stated operating and charging temperature ranges.
Connected devices must remain within the station’s continuous output, surge output, port rating, and total combined output. Extension cords should be appropriately rated and undamaged. A power station should not be connected to household wiring by improvised cords or methods. Any integration with home circuits requires suitable equipment and a qualified electrician.
Do not open the enclosure, modify battery packs, bypass protective electronics, or use damaged charging accessories. Stop using a unit that is swollen, cracked, unusually hot, leaking, emitting an unusual odor, or repeatedly shutting down under ordinary loads. Battery energy is substantial even when the Wh-per-pound figure appears modest.
6. Maintenance and Storage Factors That Preserve Useful Capacity
Wh per pound is calculated from fixed specifications, but useful capacity can decline as a battery ages. Cycle count, calendar age, storage charge, temperature, and frequent operation near maximum limits can all influence long-term performance.
For routine storage, follow the manufacturer’s recommended state of charge rather than assuming that permanently full or empty is best. Many battery systems are commonly stored at a moderate charge level and checked periodically. Recharge intervals vary because standby electronics and natural self-discharge can slowly reduce the displayed percentage.
Store the station in a dry, temperature-controlled area away from direct sunlight and freezing or extreme heat. Clean exterior vents without opening the enclosure. Before a planned trip or outage, charge the unit, confirm that its outlets work, inspect cables, and test it with a representative load.
If apparent capacity has fallen, first consider colder temperatures, higher-than-expected loads, AC conversion losses, and display calibration behavior. A controlled runtime test with a stable load can provide a more meaningful comparison than the percentage display alone. Persistent or severe capacity loss should be addressed through qualified service rather than battery modification.
Storage factor
Better practice
Why it matters
Temperature
Use a dry, moderate indoor environment when possible
Extreme heat can accelerate aging, while cold can temporarily reduce output
State of charge
Follow the specified storage range, often a moderate level
Long periods at empty or full may increase stress in some battery chemistries
Periodic checks
Inspect and check charge every few months
Helps prevent deep discharge during long storage
Pre-use testing
Test outlets and a typical load before travel
Confirms that capacity and output are available when needed
Calculate Wh per pound by dividing nominal watt-hours by total product weight. Use the result to compare models in a similar capacity and output class, but do not choose solely by the highest ratio. Total capacity determines potential runtime, while inverter output determines which appliances can operate.
For frequent carrying, a ratio in the mid-30s or higher may indicate relatively efficient packaging, although battery chemistry and included hardware can shift the number. A lower ratio may still be reasonable when the design provides more output power, physical protection, ports, charging equipment, or expansion capability.
Specs to look for
Nominal capacity: Look for watt-hours appropriate to the expected daily load, such as 300–600 Wh for light electronics or 1,000–2,000 Wh for longer appliance use; this establishes potential runtime.
Total product weight: Compare the complete ready-to-use weight, including required external charging equipment when relevant; this reflects actual portability.
Wh per pound: Calculate capacity divided by weight and compare units with similar functions; this shows how efficiently stored energy is packaged.
Usable capacity or tested efficiency: Look for clear energy-delivery information or plan around roughly 75%–90% of nominal capacity through AC; this produces more realistic runtime estimates.
Continuous inverter output: Select output above the combined sustained load, such as 1,000 watts for devices totaling about 700–800 watts; operating margin helps avoid overload shutdowns.
Surge output: Check for short-duration capacity suitable for motors, pumps, and compressors, sometimes around 1.5–2 times continuous output; this affects whether an appliance can start.
Battery chemistry and cycle rating: Compare the stated capacity-retention point after hundreds or thousands of cycles; this helps estimate long-term value and weight efficiency over time.
Charging input: Compare maximum AC, vehicle, and solar input, such as 200 watts versus 800 watts; faster supported input can reduce recovery time between uses.
Port and expansion details: Check AC outlets, regulated DC ports, USB power profiles, and optional battery capacity; these determine whether the stored energy can be delivered conveniently to intended devices.
The most useful model is not necessarily the lightest or the one with the most watt-hours. It is the one that provides enough usable energy and output for the intended loads at a weight that can be transported, positioned, and stored safely.
Frequently asked questions
What is a good Wh per pound for a portable power station?
A good Wh-per-pound figure depends on capacity class, battery chemistry, inverter size, and included features. Ratios in the mid-30s Wh per pound or higher can indicate efficient packaging for many finished portable power stations, but comparisons are most useful between models with similar output and functionality.
How do I calculate Wh per pound?
Divide the listed battery capacity in watt-hours by the complete product weight in pounds. For example, a 720 Wh unit weighing 24 pounds provides 30 Wh per pound. Use the ready-to-use weight rather than the battery-cell or battery-module weight.
What specs and features matter besides Wh per pound?
Check usable energy, continuous AC output, surge output, charging input, port types, battery chemistry, and cycle-life rating. These specifications determine what devices the station can run, how long it may run them, how quickly it can recharge, and whether it suits the intended use.
Does a higher Wh per pound mean a portable power station will run longer?
Not necessarily. A higher ratio means more listed capacity for each pound, while total watt-hours and the device’s average power draw determine potential runtime. A heavier model with lower Wh per pound can still run appliances longer if it has more total usable energy.
Is it a mistake to compare watts and watt-hours directly?
Yes. Watts measure the amount of power a station can supply at one time, while watt-hours measure stored energy. A station needs sufficient watts and surge capability to start and operate a device, plus enough usable watt-hours to run it for the desired duration.
Is it safe to carry and use a heavy portable power station?
It can be safe when the unit is handled within its weight limits and used according to its instructions. Lift carefully or use a cart or second person when needed, keep ventilation clear, operate on a stable dry surface, and avoid damaged cables or equipment. Do not connect a power station to home wiring without appropriate equipment and qualified installation.
Two small power stations are usually better for redundancy, portability, and powering devices in separate locations, while one large power station is generally better for high-wattage appliances, longer uninterrupted runtime, and simpler management.
The right choice depends on more than total battery capacity. Compare usable watt-hours, continuous output, surge watts, charging speed, inverter efficiency, and the power requirements of your essential equipment. Two 1,000-watt-hour units may have roughly the same stored energy as one 2,000-watt-hour unit, but they do not necessarily deliver the same AC output or runtime to every appliance.
For basic outage coverage, two smaller units can keep a router, lights, medical equipment, or electronics separated from a refrigerator or freezer. A larger unit may be more practical when a single appliance has a demanding compressor start, heating element, pump, or motor. The better backup setup is the one that matches both your energy needs and your highest simultaneous load.
1. What the Two Backup Configurations Mean and Why the Choice Matters
A two-unit setup uses separate portable power stations, each with its own battery, inverter, charging system, outlets, and battery management system. The units can serve different rooms or appliance groups, or one can remain charged as a reserve while the other is in use. Unless the equipment specifically supports an approved expansion or parallel function, their AC outputs should be treated as independent power sources.
A one-unit setup concentrates the available energy and output in a single larger power station. This can simplify charging, monitoring, and appliance connections. It may also provide a higher continuous inverter rating, a larger surge allowance, more outlets, and support for loads that would exceed the rating of either small unit.
The distinction matters because battery capacity and inverter output measure different things. Watt-hours indicate approximately how much energy is stored. Watts indicate how much power can be delivered at one moment. Two small stations may offer plenty of combined watt-hours but still be unable to start an appliance if neither inverter can handle its surge independently.
Redundancy is the main advantage of two units. If one is depleted, unavailable, or develops a fault, the other may continue supporting a critical load. The main advantage of one large unit is consolidated performance: its full capacity and inverter output are available through one system without moving devices between separate supplies.
2. Capacity, Output, Runtime, and Charging Explained
Start with usable energy rather than advertised capacity alone. Conversion losses, inverter efficiency, standby consumption, temperature, battery condition, and load size reduce the energy that reaches an appliance. As a planning estimate, an AC-powered load may receive about 75% to 90% of the listed battery capacity. Efficient DC or USB connections may avoid some inverter losses.
Estimated runtime can be calculated by multiplying rated capacity by an assumed efficiency factor, then dividing by average load watts. A 2,000-watt-hour station at 85% usable efficiency would provide about 1,700 watt-hours to an AC load. A steady 200-watt load could therefore run for roughly 8.5 hours. Cycling appliances require an average-power estimate rather than their maximum label wattage.
With two stations, add their usable energy only when both can actually serve the planned loads. Their inverter wattage should not normally be added. For example, two units rated at 800 watts continuous do not create a single 1,600-watt outlet. They can run two separate loads of up to about 800 watts each, subject to surge ratings and other limits.
Charging logistics also differ. Two units may accept more combined solar or wall-charging power if they can charge simultaneously from suitable independent sources. However, they require more cables and monitoring. One large unit may have a higher input limit and simpler controls, but charging the entire energy reserve depends on that single charging system.
Factor
Two small stations
One large station
Example capacity
2 × 1,000 Wh
1 × 2,000 Wh
Usable AC energy at 85%
About 850 Wh per unit
About 1,700 Wh total
Continuous output
Separate 800 W outputs
Single 2,000 W output
Load placement
Can serve separate rooms
Loads remain near one source unless safely extended
Failure tolerance
One unit may remain available
Single point of failure
Handling
More trips, lower weight per unit
Fewer pieces, higher weight per unit
Example values for illustration.
3. Real-World Backup Examples
Refrigerator, internet equipment, and lights
Assume a refrigerator averages 70 watts over time but briefly requires several hundred watts when its compressor starts. A router and modem use 20 watts, while several LED lights use 30 watts. Two small stations could isolate the refrigerator on one unit and the communications equipment and lights on the other. This arrangement protects the smaller critical loads from being shut down if the refrigerator drains its assigned battery.
One large station could power everything together and may handle the compressor surge more comfortably. Its display would also provide one combined estimate of remaining runtime. The tradeoff is that a shutdown, overload, or depleted battery affects every connected device.
Medical device and household appliances
For a critical medical device, redundancy may be more valuable than maximum output. One station can operate the device while the second remains charged or is recharging. Selection should be based on the device manufacturer’s power requirements, including whether it needs pure sine wave AC, heated accessories, or uninterrupted operation. A backup plan should not rely solely on a runtime estimate from a power station display.
If the household also needs to operate a high-draw appliance, a larger station may be appropriate because many compact units cannot support electric kettles, microwave ovens, space heaters, or cooking appliances. These loads can consume 1,000 to 1,800 watts or more and drain batteries quickly even when the inverter can support them.
Camping, remote work, and mobile use
Two smaller stations can be divided between a campsite and a vehicle, or between work equipment and general lighting. They are easier for one person to lift and can be charged at different times. One larger station reduces the number of devices and cables, but its weight may make frequent movement inconvenient. Wheels or sturdy handles can matter as much as nominal capacity in this use case.
4. Common Selection Mistakes and Troubleshooting Cues
A common mistake is comparing only total watt-hours. If a refrigerator needs a starting surge above a small station’s inverter limit, owning a second identical station does not solve the problem unless the system expressly supports a compatible combined-output mode. Repeated overload warnings, immediate AC shutdowns, or restarts when a compressor engages indicate an output or surge mismatch rather than insufficient battery capacity.
Another mistake is estimating runtime from the appliance’s maximum rating. Refrigerators, freezers, pumps, and some medical devices cycle on and off. Measure or estimate average consumption over several hours when possible. Conversely, do not use average wattage to select the inverter; inverter sizing must account for peak and startup demand.
Users also overlook idle losses. Running a 10-watt device through a large AC inverter may consume noticeably more than the device alone. A compatible DC or USB output can be more efficient for routers, phones, and laptops. If runtime is much shorter than expected, check the actual load, AC inverter overhead, cold temperature, battery state of charge, and whether an unplanned device is connected.
With two units, unbalanced use is another concern. One may cycle heavily while the other remains full, causing uneven aging. Assigning loads based only on outlet convenience can also leave one station overloaded and the other underused. Rotate duties when practical and monitor wattage on each display.
5. Safety Basics for Either Backup Setup
Use power stations in dry, ventilated locations and follow their specified temperature ranges. Do not cover cooling vents or place a unit next to combustible materials, direct heat, standing water, or heavy foot traffic. Inspect the enclosure, plugs, and cables before use. Stop using a unit that is swollen, cracked, unusually hot, wet, smoking, or producing a strong abnormal odor.
Never connect the AC output of one portable power station to another unit’s AC output. Do not improvise parallel connections, use double-ended power cords, bypass protection systems, or attempt to combine inverter outputs. Only use expansion batteries and connection methods specifically designed as compatible parts of the same system.
A portable power station should not be connected to household wiring through an improvised cord or wall receptacle. Supplying selected home circuits requires appropriate equipment and professional installation. Consult a qualified electrician for any transfer equipment, inlet, grounding, or code-compliance questions.
Extension cords should be correctly rated for the load, suitable for the environment, fully uncoiled when carrying substantial current, and positioned to avoid damage or trip hazards. A power station does not make a fuel-burning generator safe indoors; generators must remain outdoors at a safe distance according to their instructions because of carbon monoxide.
6. Maintenance, Charging, and Storage for Multiple or Single Units
For emergency readiness, inspect and recharge each station on a regular schedule instead of assuming it remained full in storage. Batteries gradually self-discharge, and displays consume a small amount of energy. Check the manual for the preferred long-term state of charge. Many battery systems are stored more comfortably at a partial charge, while emergency equipment may be kept higher and checked more often to prioritize availability.
A two-station setup requires labeling and recordkeeping. Note each unit’s last recharge date, battery percentage, cable set, and assigned loads. Rotate which unit receives regular use so one battery does not accumulate far more cycles than the other. Periodically test critical appliances under controlled conditions to confirm startup behavior and realistic runtime.
Store stations in a cool, dry area away from freezing conditions, excessive heat, and direct sunlight. Temperature can affect both available capacity and battery aging. Before an expected outage, bring a cold unit into its permitted operating range before charging or placing it under a heavy load.
Keep charging accessories organized and verify that solar panels fall within the station’s voltage, current, and power input ranges. Two smaller stations may need separate solar inputs or alternating charging sessions. One large unit may accept more solar wattage, but panel output still varies with weather, season, orientation, and shading.
Choose two small power stations when separate load zones, easier lifting, flexible charging, and backup redundancy are the priorities. This approach is especially useful for communications, lighting, electronics, and other modest loads that can be divided without combining AC outputs.
Choose one large power station when a demanding appliance requires higher continuous or surge output, when consolidated runtime is important, or when managing one charging system is preferable. A large unit may also offer more practical support for several simultaneous loads, provided their combined power remains within its limits.
For many households, the decision should begin with an appliance inventory. Record operating watts, startup watts, daily watt-hours, desired backup duration, and outlet type. Then compare those requirements with usable capacity and inverter performance rather than selecting by battery size alone.
Specs to look for
Battery capacity: Look for watt-hours matched to the energy budget, such as 1,000 to 2,000 Wh for moderate backup needs; capacity largely determines potential runtime.
Usable energy: Plan around roughly 75% to 90% of rated capacity for AC loads; conversion and standby losses reduce delivered energy.
Continuous AC output: Choose a rating above the combined running watts, with approximately 20% to 30% headroom when practical; this reduces overload shutdowns.
Surge output: Check both surge wattage and supported duration for compressors, pumps, and motors; a brief headline rating may not support a longer startup event.
AC waveform: Look for pure sine wave output when powering sensitive electronics, medical equipment, variable-speed motors, or appliances that specify it.
Charging input: Compare maximum wall and solar input, supported voltage range, and estimated recharge time; faster input can restore backup capacity during short utility windows.
Port selection: Confirm the number and type of AC, USB-C power delivery, USB, and regulated DC ports; direct DC charging may improve runtime for compatible devices.
Battery chemistry and cycle rating: Compare expected capacity retention after hundreds or thousands of cycles; this helps estimate durability under frequent use.
Weight and handling: Compare total weight, weight per unit, handles, and wheels; a 20-pound unit and a 60-pound unit create very different transport demands.
Expansion and monitoring: Look for clearly supported expansion options, accurate input and output displays, low-charge alerts, and per-port controls; these features simplify energy management without unsafe improvisation.
Neither arrangement is universally better. Two small stations favor resilience and flexibility, while one large station favors concentrated output and simplicity. Matching the setup to actual load measurements provides a more reliable answer than comparing capacity labels alone.
Frequently asked questions
Is it better to buy two small power stations or one large power station?
Two smaller units are often better when you want backup redundancy, easier lifting, or power in separate rooms. One larger unit is usually better when a single appliance needs more continuous wattage or startup surge capacity than either small unit can provide.
Can two small power stations run one high-wattage appliance?
Usually no. Unless the manufacturer specifically supports an approved combined-output or parallel configuration, each power station’s AC outlets remain independent and cannot be safely combined to increase wattage for one appliance.
What power station specs matter most for home backup?
Compare usable watt-hours, continuous AC output, surge capacity, charging input, outlet types, and expected recharge time. Also check inverter waveform, battery cycle rating, weight, and whether the unit can safely support the appliance’s startup demand as well as its normal running watts.
What is the most common mistake when choosing a power station?
A common mistake is comparing battery capacity alone while ignoring continuous and surge output. Two stations with the same combined watt-hours as one larger station may still fail to start a refrigerator, pump, or other motor-driven appliance if neither individual inverter can handle the startup load.
How long will two 1,000 Wh power stations last compared with one 2,000 Wh unit?
If efficiency, battery condition, and loads are similar, their total usable energy can be roughly comparable when both units are used. Actual runtime varies with inverter losses, temperature, standby draw, and whether the loads can be split between the two separate stations.
Is it safe to connect two portable power stations together?
Do not connect one station’s AC output to another station’s AC output or use improvised methods to combine inverters. Use only manufacturer-approved expansion batteries, cables, and connection methods, and keep the units dry, ventilated, and within their specified operating conditions.
A portable power station load priority list ranks devices by necessity, power demand, and required runtime so the battery lasts through the most important parts of a blackout. Instead of plugging in everything at once, assign each load to an essential, conditional, or optional tier.
A useful plan accounts for continuous watts, surge watts, battery capacity, usable watt-hours, and expected runtime. It also distinguishes appliances that run constantly from equipment that cycles on and off. This helps prevent inverter overloads and reduces the chance of spending stored energy on comfort loads before refrigeration, communications, lighting, or health-related equipment has been covered.
Build the list before an outage, verify device wattage where possible, and revise it as household needs change. The result should be a short, practical schedule that anyone in the home can follow without doing calculations in the dark.
1. What a Load Priority List Is and Why It Matters
A load priority list is a written order for deciding which devices receive power first, which may operate only under certain conditions, and which should remain off. It turns a portable power station from a general backup battery into a managed emergency resource.
A simple list normally uses three tiers:
Tier 1: Essential loads. Equipment needed for health, safety, food preservation, basic lighting, or critical communication.
Tier 2: Conditional loads. Useful devices that may run when battery state of charge and outage duration allow.
Tier 3: Optional loads. High-consumption or convenience devices that can usually wait until utility power returns.
Priority is not based on wattage alone. A low-power medical or communications device may deserve continuous service, while a higher-power refrigerator may need only periodic operation. Personal circumstances also matter. A medical device, well pump controller, or accessibility aid may be essential in one household but absent from another.
The list matters because battery energy is finite. A power station that can operate a 1,000-watt appliance may still run it for only a short time. Prioritization protects runtime while keeping the inverter within its continuous and surge ratings.
2. How Power Demand, Battery Capacity, and Runtime Work Together
Start by recording each device’s running watts, starting surge if applicable, expected hours of use, and priority tier. The label on a device may show watts directly or list volts and amps. Multiplying volts by amps gives an approximate input figure, but measured consumption is often more useful because appliances cycle and operating conditions vary.
Separate power from energy
Watts describe the rate at which a device uses power. Watt-hours describe how much stored energy is consumed over time. A 20-watt light used for five hours consumes about 100 watt-hours. A 500-watt load used for 30 minutes consumes about 250 watt-hours.
Estimate basic runtime with this relationship:
Estimated runtime in hours = usable battery watt-hours divided by average load watts.
Usable energy is normally lower than the battery’s advertised capacity because of inverter losses, standby consumption, temperature, battery protections, and conversion between DC battery power and AC output. For planning, using roughly 75% to 90% of stated capacity can provide a more realistic starting range, depending on the output type and operating conditions.
Account for startup demand and cycling
Refrigerators, freezers, pumps, compressors, and some fans can draw a brief starting surge above their normal running wattage. The surge must remain within the power station’s short-duration capability. Do not assume that a low running-watt figure guarantees successful startup.
Cycling loads require a duty-cycle estimate. A refrigerator drawing 120 watts while its compressor runs does not necessarily consume 120 watt-hours every hour. If it runs approximately one-third of the time, its average may be closer to 40 watts, although room temperature, door openings, condition, and thermostat settings can change that result.
Planning field
Illustrative entry
Reason to record it
Device
Refrigerator
Identifies the load clearly
Running power
120 watts
Helps estimate ongoing demand
Starting surge
600 watts
Checks whether the inverter can start it
Daily energy
900 watt-hours
Supports a full-outage energy budget
Priority
Tier 1
Defines when it receives power
Operating rule
Limit door openings
Reduces avoidable consumption
Example values for illustration.
3. Real-World Load Priority Examples
Example 1: Short evening outage
Assume a household has about 900 usable watt-hours available. Its essential plan includes a 10-watt modem for five hours, two 8-watt LED lights for five hours, four phone charges totaling 60 watt-hours, and a refrigerator budget of 350 watt-hours.
The estimated energy use is 50 watt-hours for the modem, 80 watt-hours for lighting, 60 watt-hours for phones, and 350 watt-hours for refrigeration. That totals 540 watt-hours. The remaining 360 watt-hours provide a reserve for longer operation, conversion losses beyond the estimate, or an unexpected essential need.
A television drawing 100 watts for three hours would use another 300 watt-hours. It could fit mathematically, but it belongs in a conditional tier because using it would consume most of the reserve.
Example 2: Overnight outage with uncertain restoration
When restoration time is unknown, the objective changes from convenience to endurance. A household might power one efficient light instead of several, charge phones only when needed, and operate internet equipment during scheduled communication periods rather than continuously.
Refrigeration may receive the largest energy allocation, but it should be evaluated by measured daily consumption rather than compressor running watts alone. Opening the door less often can lower energy use. Heating appliances, electric cooking devices, hair dryers, and portable air conditioners generally move to the optional tier because their high draw can deplete a modest battery quickly.
Example 3: Health-related equipment
If a person relies on electrically powered medical equipment, that load should be evaluated first rather than added to a general household estimate later. Record its normal consumption, startup behavior, required hours, acceptable interruption time, and backup options. Confirm compatibility and emergency procedures with the equipment provider or a qualified medical professional. The portable power station should not be treated as the only contingency when interruption could create a serious risk.
4. Common Planning Mistakes and Troubleshooting Cues
Using only the battery capacity number. A 1,000-watt-hour rating does not mean every output can deliver all 1,000 watt-hours. Apply a realistic usable-energy allowance.
Confusing watts with watt-hours. Watts determine whether the inverter can support a load; watt-hours help determine how long it can run.
Ignoring simultaneous demand. Several acceptable devices can overload the inverter when used together. Add their running watts and consider overlapping startup surges.
Planning around maximum output. Operating near the inverter limit leaves little room for surge events and can increase heat or trigger shutdown.
Underestimating idle consumption. An energized AC inverter consumes some power even when connected devices use little or none.
Assuming labels equal real-world use. A plug-in power meter can reveal cycling, standby demand, and operating changes, provided it is used according to its instructions.
Skipping a reserve. Keep roughly 10% to 25% of usable energy unassigned when outage length is uncertain.
If the power station shuts down when an appliance starts, suspect a startup surge, excessive combined load, low battery state of charge, overheating, or an incompatible load. Disconnect optional devices, allow the unit to cool if necessary, and compare the appliance demand with the power station’s stated output ratings. Repeated shutdowns are a reason to stop and review the equipment instructions rather than repeatedly resetting it.
5. Safety Basics for Blackout Load Management
Place the power station in a dry, stable, ventilated location with clearance around its cooling openings. Keep it away from heaters, standing water, combustible materials, and areas accessible to small children. Follow the specified operating temperature range and do not cover the unit while it is charging or supplying power.
Do not connect a portable power station to household wiring through improvised cords, a wall receptacle, or any method that can backfeed the electrical system. Permanent or panel-connected backup arrangements require approved equipment and a qualified electrician. Never open the power station, alter its battery pack, bypass protection circuits, or replace fuses with unapproved parts.
Inspect cords and plugs before an outage. Avoid damaged insulation, loose adapters, overloaded power strips, and tightly coiled extension cords carrying substantial current. Use extension cords with suitable current ratings and keep connections dry.
Battery backup does not replace smoke alarms, carbon monoxide alarms, evacuation plans, or medically appropriate contingency planning. If a power station becomes swollen, unusually hot, damaged, wet, or produces an unusual odor, stop using it and follow the manufacturer’s isolation and service guidance.
6. Maintaining the List and Storing the Power Station
A load list should be tested rather than filed away. Every few months, verify that listed devices are still in the home, confirm their wattage, and check whether family health or communication needs have changed. Mark appliances that have been replaced because the new model may have different running and surge behavior.
Run a short simulation with essential loads under safe, supervised conditions. Watch total output, remaining battery percentage, estimated runtime, heat, and fan behavior. A successful short test does not guarantee full-duration performance, but it can expose missing cables, unexpected surges, or unrealistic energy estimates.
Store the power station according to its instructions, typically in a cool, dry area away from direct sun and extreme temperatures. Check charge level periodically because batteries slowly self-discharge. If the unit is not intended to remain at 100% during long-term storage, follow its specified storage charge range. Update the written priority list after each real outage while actual consumption and operating problems are still easy to remember.
Readiness check
Example interval
What to confirm
Battery state of charge
Monthly
Charge remains within the recommended storage range
Cables and adapters
Every three months
No damage, corrosion, or missing parts
Essential-load test
Every three to six months
Devices start and total demand stays within ratings
Priority list review
Twice a year
Loads, wattage, contacts, and household needs are current
Full visual inspection
Before storm season
No swelling, impact damage, blocked vents, or abnormal wear
Keep the finished list simple enough to use under stress. Put Tier 1 loads at the top, assign each one an energy budget, state whether it runs continuously or on a schedule, and reserve part of the battery for changing conditions. List Tier 2 and Tier 3 devices below them with a clear rule such as use only above 50% charge or use only when restoration is expected soon.
Recalculate the plan whenever battery capacity, appliance inventory, or essential needs change. For each scenario, confirm both energy capacity and output capability: enough watt-hours to support the desired duration and enough inverter power to handle simultaneous loads and startup surges.
Specs to look for
Battery capacity: Look for a watt-hour rating that covers the essential-load budget plus roughly 10% to 25% reserve; capacity largely determines potential runtime.
Usable energy: Look for test data or clear efficiency information suggesting about 75% to 90% availability under typical loads; conversion losses affect real runtime.
Continuous AC output: Look for a rating above the combined running demand, with reasonable headroom; this reduces overload risk during normal operation.
Surge output: Look for a short-duration rating capable of supporting compressor, pump, or motor startup, often two or more times running power; inadequate surge capacity can prevent startup.
Output options: Look for AC, regulated DC, USB-A, and USB-C outputs that match essential devices; direct DC or USB operation may avoid unnecessary inverter losses.
Recharge input: Look for a charging rate that can restore a meaningful share of capacity in several hours; faster recovery matters during intermittent utility service or limited generator time.
Low-load efficiency: Look for modest inverter idle consumption and power-saving controls; small continuous loads can otherwise lose substantial energy to overhead.
Battery cycle life: Look for capacity-retention estimates stated at a defined number of cycles, such as 2,000 to 3,000 cycles to a specified remaining capacity; this helps compare long-term durability.
Monitoring: Look for displays that show input watts, output watts, battery percentage, and estimated runtime; clear information supports better decisions during an outage.
The best load priority list is conservative, measurable, and easy to revise. Protect essential functions first, avoid unnecessary simultaneous loads, and treat the remaining battery percentage as a limited emergency reserve rather than unused capacity.
Frequently asked questions
How do I make a portable power station load priority list?
List every device you may need during an outage, then record its running watts, expected operating time, and any startup surge. Place health, safety, communication, and food-preservation loads first; assign convenience loads to lower tiers. Include an energy reserve so the plan remains useful if the outage lasts longer than expected.
What should be included in Tier 1 during a blackout?
Tier 1 commonly includes medically necessary equipment, basic lighting, phones, essential communications equipment, and refrigeration when appropriate. The exact list depends on the household, including health needs, local conditions, and whether other backup options are available. A device should be Tier 1 only when its interruption would create a meaningful safety, health, or essential-function problem.
What portable power station specs matter most for blackout backup?
Prioritize usable battery capacity in watt-hours, continuous AC output, surge capability, and the output ports needed for essential devices. Also consider inverter idle consumption, recharge speed, monitoring information, and operating-temperature limits. The unit must have enough energy for the desired runtime as well as enough output power to start and run loads safely.
What is the most common mistake when using a portable power station during an outage?
A common mistake is treating the battery capacity rating as if all of it will be available to connected devices. Conversion losses, standby use, temperature, and battery protections reduce usable energy, while simultaneous appliances can exceed the inverter rating. Planning with measured or conservative estimates and keeping a reserve helps avoid unexpected shutdowns.
Can a portable power station run a refrigerator during a blackout?
It may run a refrigerator if the power station can handle both the refrigerator’s running demand and its startup surge. Runtime depends primarily on the refrigerator’s average energy use, which changes with compressor cycling, room temperature, and door openings. Test compatibility in advance under safe conditions rather than relying only on the appliance’s running-watt label.
Is it safe to connect a portable power station to household wiring?
Do not connect a portable power station to household wiring through improvised cords, a wall outlet, or any setup that could backfeed utility lines. A panel-connected backup system requires compatible approved equipment and a qualified electrician. For ordinary use, connect devices directly to the power station with suitable, undamaged cords and keep the unit dry and ventilated.