Portable Power Stations for Camping and Van Life

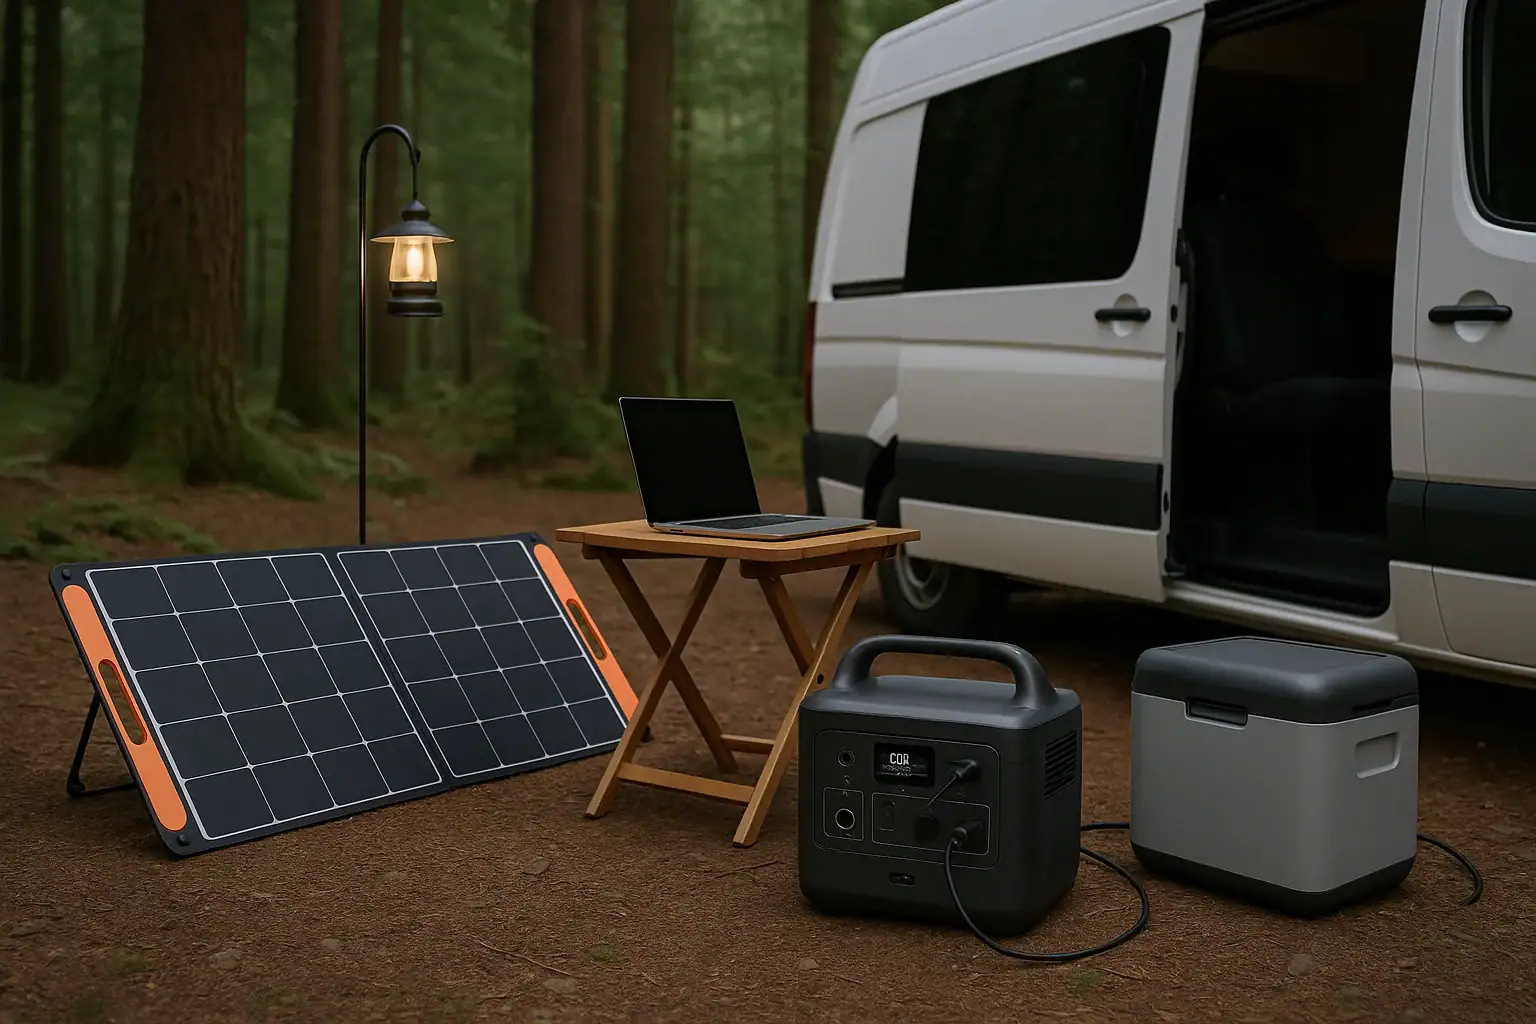
Portable power station at a campsite with camper van and solar panels

Portable power stations for camping and van life are compact battery systems that store energy and provide AC and DC power for your gear when you are off-grid. They turn stored battery capacity into usable watts through outlets, USB ports, and sometimes high-wattage DC outputs, letting you run lights, fridges, fans, laptops, and more without a noisy generator. When you understand watt-hours, surge watts, runtime estimates, and input limits, it becomes much easier to choose the right size unit and avoid running out of power in the middle of a trip.

For campers and van dwellers, a portable power station acts like a silent, rechargeable power bank for your entire setup. It can be charged from wall outlets, a vehicle 12V socket, or solar panels, then used to power devices through pure sine wave AC, USB-C PD profiles, and regulated 12V ports. The key is matching your daily energy use and peak loads to the station’s capacity and output ratings.

This guide explains what these systems are, how they work, how to size them for real-world camping and van life, what mistakes to avoid, and which specs matter most before you buy.

What Portable Power Stations Are and Why They Matter Off-Grid

A portable power station is a self-contained battery system with built-in inverters, voltage regulation, and multiple output ports designed to replace or supplement traditional fuel generators. Instead of burning fuel, it stores energy in a rechargeable battery (usually lithium-based) and converts that energy into AC and DC power on demand.

For camping and van life, this matters because it provides quiet, low-maintenance power that can be used in campgrounds, public lands, and urban stealth camping spots where generators are noisy, restricted, or inconvenient. You can charge the station during the day and have reliable power at night without idling your engine.

These systems are especially useful for:

  • Short camping trips where you want to run lights, phones, cameras, and a laptop.
  • Extended van life with a 12V fridge, fans, routers, and work electronics.
  • Hybrid setups where a portable unit supplements a van’s built-in electrical system.

Understanding what a portable power station can and cannot do helps you avoid undersizing your system, overloading outlets, or expecting it to power full residential appliances that exceed its limits.

How Portable Power Stations Work for Camping and Van Life

Portable power stations combine several components in one enclosure: a battery pack, a charge controller, an inverter, and various output ports. Together, these manage energy flow in and out of the battery and convert stored DC energy into forms your devices can use.

Battery and capacity (Wh)

The battery is rated in watt-hours (Wh), which tells you how much energy it can store. A 500 Wh station can theoretically provide 500 watts for one hour, 250 watts for two hours, and so on, though real-world runtime is slightly less due to conversion losses and inverter efficiency.

Inverter and AC output (W)

The inverter converts DC battery power into AC power for standard household-style outlets. Two main ratings matter:

  • Continuous output (W): the maximum power it can provide steadily.
  • Surge watts (peak W): a short burst for starting motors or compressors.

For camping and van life, continuous output determines whether you can run items like an electric kettle or induction cooktop, while surge watts affect start-up of devices like small compressors.

DC outputs and USB ports

DC ports include 12V car-style sockets, barrel ports, and sometimes high-current outputs for fridges or other gear. USB-A and USB-C ports provide regulated power for phones, tablets, and laptops. USB-C PD (Power Delivery) profiles can supply higher wattage (for example, 60–100 W) for modern laptops and fast charging.

Charging inputs and input limits

Portable power stations can usually be charged via:

  • AC wall outlet (fastest in many cases).
  • 12V vehicle socket while driving.
  • Solar panels through built-in or external solar charge controllers.

The input limit (in watts) controls how fast the station can recharge. If the input limit is 200 W and you connect 400 W of solar, the station will still only accept 200 W. For van life, higher input limits reduce downtime and help you recover from cloudy days.

Battery chemistry and cycle life

Most portable power stations use either lithium-ion (NMC/NCA) or lithium iron phosphate (LiFePO4) batteries. Lithium-ion typically offers higher energy density (more capacity in less weight), while LiFePO4 usually provides more cycle life and improved thermal stability. Both types require proper charge and temperature management, which the station handles automatically.

Built-in protections

Modern units include protections against overcharge, over-discharge, short circuits, and over-temperature. These help prevent damage to the battery and connected devices, which is especially important in the variable conditions of camping and van travel.

ComponentTypical RatingRole in Camping/Van Life
Battery capacity300–2,000 WhDetermines runtime for fridges, lights, and electronics.
AC continuous output300–2,000 WLimits which appliances you can run at once.
AC surge output600–4,000 WHandles start-up spikes from motors and compressors.
Solar input limit100–600 WControls how fast you can recharge from panels.
USB-C PD output30–100 WPowers and fast-charges laptops and devices.
Example values for illustration.

Real-World Camping and Van Life Power Scenarios

Understanding real-world usage helps translate specs into practical decisions about capacity, runtime, and charging strategies.

Weekend camping with basic electronics

On a two- or three-night camping trip, you might power LED string lights, phones, cameras, a Bluetooth speaker, and occasionally a laptop. Daily energy use could look like this:

  • LED lights: 10 W for 4 hours = 40 Wh
  • Phone charging: 10 Wh per phone, 2 phones = 20 Wh
  • Camera batteries: 20–30 Wh
  • Laptop: 60 W for 2 hours = 120 Wh

Total daily draw might be around 200 Wh. A 500 Wh portable power station could comfortably cover this for two days without recharging, or longer with some solar input or vehicle charging.

Van life with a 12V fridge and fans

For van life, a 12V compressor fridge is often the biggest continuous load. A typical small fridge may average 30–50 W over 24 hours, depending on ambient temperature and insulation, using roughly 700–1,200 Wh per day. Add in:

  • Vent fan: 20–40 W for several hours.
  • Lights: 5–15 W in the evening.
  • Electronics: 50–150 Wh for phones, laptops, routers.

Daily consumption can easily reach 1,000–1,500 Wh. In this scenario, a 1,000 Wh station might only cover a day of use without recharging, while a larger unit paired with solar would be better suited for continuous off-grid living.

Occasional high-wattage appliances

Some campers want to run high-wattage appliances like electric kettles, induction cooktops, hair dryers, or portable heaters. These draw large amounts of power:

  • Electric kettle: 800–1,500 W
  • Induction cooktop: 800–1,800 W
  • Hair dryer: 800–1,500 W
  • Space heater: 1,000–1,500 W

Even if your power station’s inverter can handle the wattage, these devices quickly drain capacity. For example, a 1,000 W heater running for one hour uses about 1,000 Wh, nearly the entire capacity of a 1,000 Wh station. Many van dwellers instead reserve high-draw tasks for shore power or use alternative cooking and heating methods.

Hybrid setups with solar and alternator charging

In van life, a common strategy is to charge the portable power station from both solar panels and the vehicle alternator. For example:

  • Roof-mounted solar: 200–400 W, providing 600–1,600 Wh per sunny day depending on conditions.
  • Alternator via 12V socket: 60–120 W while driving.

This combination can keep a medium-size station topped up, especially if your daily use is aligned with your charge input. Matching your solar array and driving habits to your average consumption is critical for sustained off-grid living.

Common Mistakes, Limits, and Troubleshooting Cues

Portable power stations are straightforward to use, but several recurring mistakes and misunderstandings can lead to poor performance or unexpected shutdowns.

Undersizing capacity and overestimating runtime

One of the most common mistakes is choosing a unit with too little capacity for your actual loads. People often assume that a few hundred watt-hours will last for days, then are surprised when a fridge or fan drains it quickly. To avoid this, estimate your daily watt-hour usage and look for a station with at least 1.5–2 times that amount, especially if you cannot recharge fully every day.

Ignoring continuous vs surge watts

Another frequent issue is focusing on surge watts instead of continuous output. If a station lists 1,000 W surge but only 500 W continuous, it cannot run a 700 W appliance for more than an instant. If your device causes the station to shut down or beep and cut power, check whether its running wattage exceeds the continuous rating.

Overloading DC or USB ports

Even when the AC inverter is under its limit, individual DC ports and USB outputs also have their own maximum ratings. Plugging too many devices into a single port cluster can cause those ports to turn off or the unit to display an overload warning. If this happens, unplug some devices, power-cycle the DC or USB section, and spread loads across different ports.

Slow charging and input limit confusion

Users sometimes expect faster charging than the input limit allows, especially when adding more solar panels. If your station is only accepting, for example, 150–200 W even though you connected 300 W of panels, it is likely capped by its internal charge controller. Check the stated input wattage limit and design your solar array around that value rather than the panel rating alone.

High or low temperatures can cause the station to reduce output or shut down to protect the battery. Symptoms include:

  • Fans running at high speed and reduced output power.
  • Error icons or temperature warnings on the display.
  • Refusal to charge or discharge until cooled or warmed.

Storing or operating the unit in direct sun, near heaters, or in freezing conditions can trigger these protections. Move it to a shaded, ventilated area and allow time for temperature to normalize.

When to seek professional help

If your power station repeatedly shuts down under light loads, shows error codes you cannot clear, or physically swells, leaks, or smells unusual, stop using it. Do not open the unit or attempt internal repairs. Instead, contact the manufacturer or a qualified technician familiar with battery systems for guidance.

Safety Basics for Using Portable Power Stations Outdoors

Portable power stations are generally safer and cleaner than fuel generators, but they still store significant energy and must be used responsibly, especially in confined spaces like vans and tents.

Ventilation and heat management

These units generate heat when charging and discharging. Place them in a location with airflow around the vents, avoid covering them with bedding or gear, and keep them away from direct sun when possible. In a van, avoid placing the station in a fully sealed compartment without ventilation.

Moisture and dust protection

Most portable power stations are not fully waterproof. Keep them off wet ground, away from splashes, and protected from rain. If camping in humid or dusty environments, store the unit in a dry, elevated spot and avoid operating it in standing water, mud, or blowing sand.

Safe cable routing and trip hazards

At a campsite, AC cords and DC cables can become trip hazards or get pinched in doors. Route cables along edges, secure them where possible, and avoid running cords where vehicles or people are likely to cross. Damaged cables can overheat or short, so replace frayed cords instead of taping over them.

Proper load selection

Only connect devices that are compatible with the station’s voltage and wattage ratings. Avoid plugging in high-heat devices like large space heaters or hot plates unless your unit is specifically sized for them. Do not daisy-chain power strips into power strips, and avoid plugging another power station or large battery charger into the AC outlet unless the manufacturer explicitly allows it.

Safe use in vans and enclosed spaces

Unlike fuel generators, portable power stations do not emit exhaust, so they can be used inside vans and RVs with reasonable ventilation. However, avoid placing them where they could block exits, sit under bedding, or be crushed by shifting cargo. Secure the unit so it cannot slide or tip during driving.

High-level electrical safety

Do not attempt to hardwire a portable power station directly into a home or van AC electrical system without appropriate transfer equipment and expertise. If you want to integrate a portable unit with an existing electrical panel or complex van electrical system, consult a qualified electrician or professional van upfitter to design a safe solution.

Safety AreaGood PracticeRisk Reduced
VentilationKeep vents clear and avoid enclosed boxes.Overheating and thermal shutdown.
MoistureElevate off wet ground, protect from rain.Short circuits and corrosion.
Cable managementSecure cords, avoid pinch points.Trips, damaged insulation, shorts.
Load selectionStay within rated watts and voltages.Overload, shutdowns, potential damage.
Example values for illustration.

Related guides: Portable Power Station Buying GuideHow to Choose the Right Size Portable Power StationCan You Charge a Portable Power Station with Solar Panels?

Maintaining and Storing a Portable Power Station for Travel

Proper maintenance and storage habits extend the life of your portable power station and keep it ready for trips.

Regular usage and cycling

Lithium batteries perform best when used periodically rather than left fully charged or fully empty for long periods. If you only camp a few times a year, plan to cycle the station every couple of months by discharging it partially and recharging it. This helps keep the battery management system active and the cells balanced.

Optimal state of charge for storage

For long-term storage between camping seasons, many manufacturers recommend storing the battery at a partial state of charge rather than 0% or 100%. A range around 40–60% is commonly suggested. Check the display, charge or discharge to roughly mid-level, then store the unit.

Temperature considerations in vans and storage spaces

Extreme heat and cold both accelerate battery wear. In van life, it is common for interior temperatures to rise significantly in the sun. Whenever possible, park in shade, use ventilation or window covers, and avoid leaving the power station in direct sunlight on the dashboard or near heaters. In cold climates, avoid charging the battery when it is below freezing; allow it to warm up inside the vehicle first.

Keeping ports, fans, and surfaces clean

Dust, sand, and pet hair can clog cooling fans and ports over time. Periodically inspect the intake and exhaust vents and gently clean them with a soft brush or compressed air, taking care not to force debris inside. Wipe the exterior with a dry or slightly damp cloth, avoiding harsh cleaners or solvents.

Monitoring health indicators

Many units display battery health, cycle count, or error codes. Pay attention to any changes in runtime, unusual noises, or repeated warnings. A noticeable drop in capacity over time is normal, but sudden, severe changes may warrant contacting the manufacturer or a professional.

Transport and mounting

When transporting your portable power station in a van or vehicle, secure it to prevent movement during braking or rough roads. Use straps, brackets, or dedicated storage compartments to keep it from tipping or sliding. Avoid stacking heavy gear on top of the unit to protect the case and ports.

Practical Takeaways and Specs to Look For

For camping and van life, the best portable power station is the one that reliably supports your specific loads, charging habits, and travel style. Weekend campers may prioritize light weight and simple USB/AC outputs, while full-time van dwellers often focus on larger capacity, robust solar input, and long cycle life.

When planning your setup, start by listing all the devices you want to power, their wattage, and how many hours per day you expect to use them. Convert that into a daily watt-hour estimate, then compare it to the station’s capacity and your expected solar or driving-based recharging. Remember that cloudy weather, shade, and seasonal changes can significantly affect solar production, so build in a buffer.

Also consider future needs. If you might add a 12V fridge, more work electronics, or additional lighting, it can be more cost-effective to choose a slightly larger unit now instead of upgrading later.

Specs to look for

  • Battery capacity (Wh): For weekend camping, 300–700 Wh is often sufficient; for van life with a fridge, 1,000–2,000 Wh or more is typically more comfortable. Higher capacity extends runtime between charges.
  • AC continuous output (W): Match this to your highest expected simultaneous load. For light use, 300–500 W may be enough; for small appliances or cooktops, 1,000–1,500 W is often more appropriate.
  • Surge watts (peak W): Look for at least 1.5–2 times the continuous rating if you plan to run devices with motors or compressors. Adequate surge capacity helps avoid nuisance shutdowns at start-up.
  • Solar input limit (W): For regular off-grid use, 200–400 W of solar input capacity provides more reliable daily recharging. Higher input limits shorten recovery time after cloudy days.
  • USB-C PD output (W): If you charge modern laptops or tablets, aim for at least one USB-C PD port in the 60–100 W range to support fast, efficient charging without using the inverter.
  • 12V output type and regulation: Regulated 12V outputs help keep fridges and sensitive DC gear stable, especially as the battery discharges. Check that the current rating supports your devices.
  • Battery chemistry and cycle life: Compare estimated cycle life (for example, 500–3,000 cycles to a certain percentage of original capacity). Longer cycle life is valuable for daily van life use.
  • Weight and form factor: For car camping, weights under 20–30 lb are easier to move. In van builds, consider dimensions and handle placement for secure mounting and access.
  • Display and monitoring: A clear screen showing input/output watts, remaining runtime, and state of charge makes daily management easier and helps you fine-tune your energy use.
  • Noise level (fans): If you plan to sleep near the unit, quieter cooling fans and adjustable charge rates can make nighttime operation more comfortable.

By matching these specs to your actual camping or van life routine, you can choose a portable power station that delivers quiet, dependable power wherever you park.

Frequently asked questions

Which specs and features matter most when choosing a portable power station for camping or van life?

Key specs include battery capacity (Wh) for runtime, continuous AC output (W) for simultaneous loads, and surge watts for motor start-ups. Also check solar input limits, USB-C PD output for fast laptop charging, battery chemistry/cycle life, and weight/form factor for portability. These together determine how the unit matches your devices and charging habits.

What is a common mistake people make when estimating how long a station will last?

Many people underestimate their total daily watt-hour usage and ignore inverter/conversion losses and surge events. Always calculate the combined Wh of all devices, add a safety buffer (about 1.5–2x), and factor in real-world inefficiencies to avoid running out of power unexpectedly.

Is it safe to use a portable power station inside a van or tent?

Portable power stations are generally safer than fuel generators because they do not emit exhaust, so they can be used inside vans and tents with reasonable ventilation. Still, place them where vents are clear, secure them against movement, and avoid covering them or placing them under bedding to prevent overheating. Follow the manufacturer’s safety guidelines and stop use if you notice swelling, leaks, or unusual smells.

How long will a portable power station typically run a 12V fridge?

Runtime depends on the fridge’s average draw; a small compressor fridge often averages 30–50 W, which translates to roughly 700–1,200 Wh per day. A 1,000 Wh station might therefore cover about one day of fridge use without recharging, and running the fridge from a regulated 12V output is more efficient than using the inverter. Always check your fridge’s spec sheet and add margin for warmer ambient temperatures and door openings.

Can I recharge a portable power station with roof solar panels and while driving at the same time?

Some stations support simultaneous charging from multiple inputs, but many have a combined input limit that caps total charging power. Check the unit’s stated input limits and supported input combinations before wiring panels and alternator sources. When configured correctly, solar plus alternator charging can significantly reduce downtime between uses.

How should I store and maintain the battery when I’m not traveling?

For long-term storage, keep the battery at a partial state of charge (commonly around 40–60%) and avoid leaving it fully charged or fully depleted. Cycle the unit every couple of months, store it in a cool, dry place away from extreme temperatures, and periodically check the charge level to maintain battery health. Regularly clean vents and ports to prevent dust buildup.

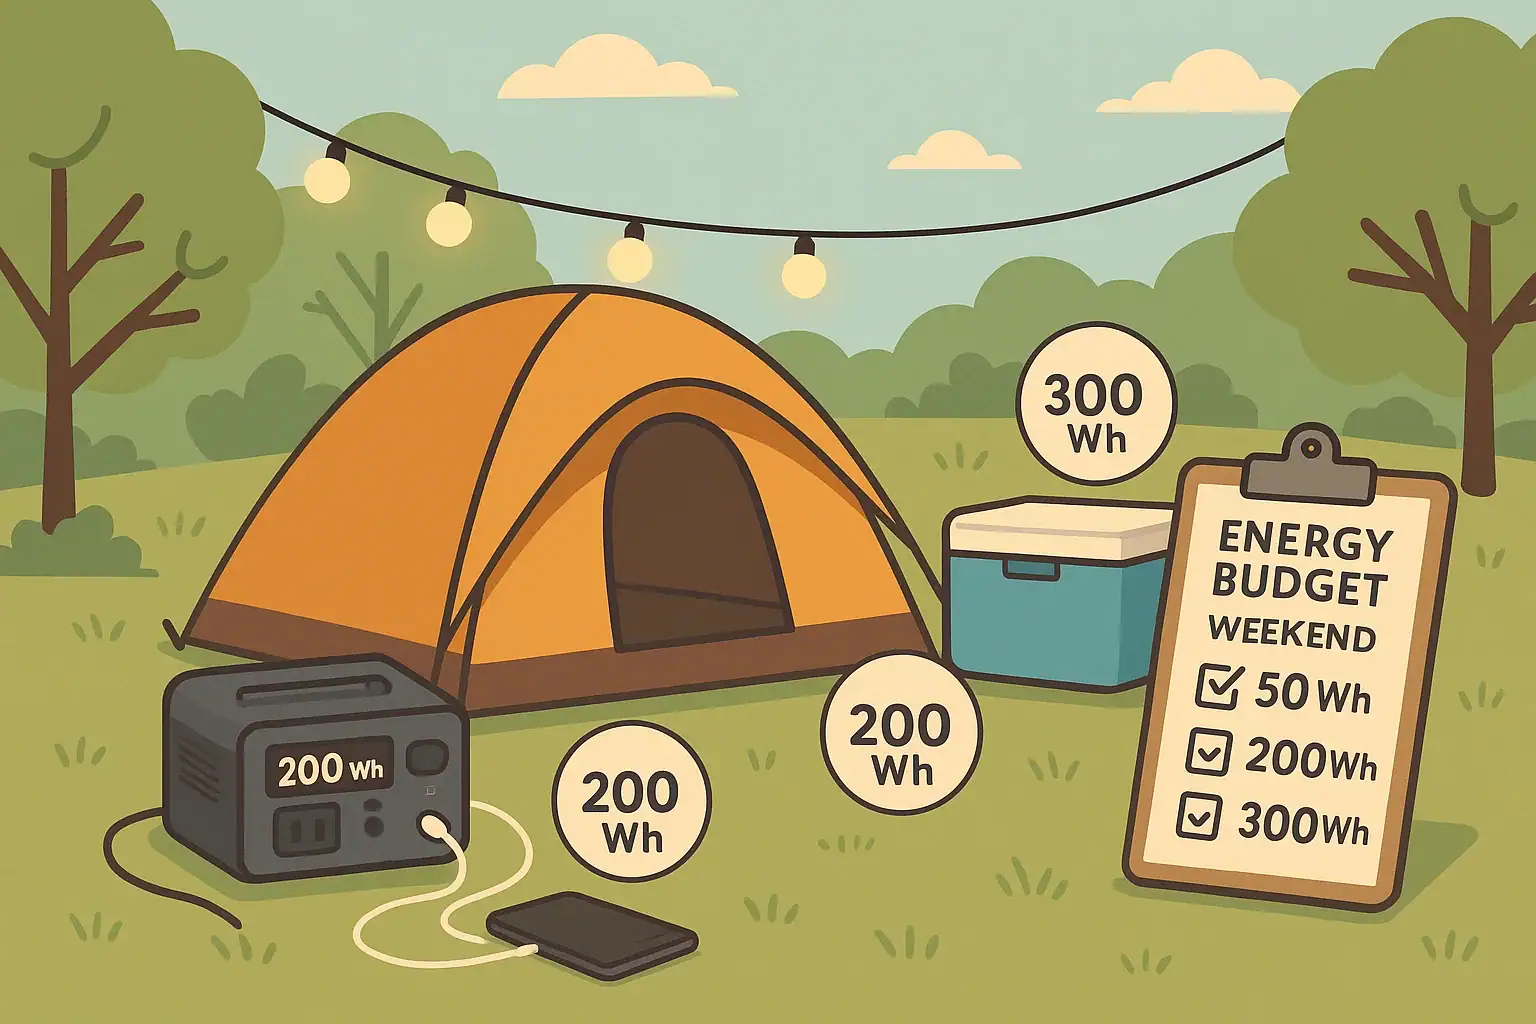
Camping Power Planning: A Simple Energy Budget for a Weekend

Weekend camping setup with portable power station and devices showing an energy budget plan

A simple weekend camping power plan starts with adding up how many watt-hours your gear will use, then matching that to a portable power station with enough capacity, output watts, and charging options. Once you understand basic terms like watt-hours, surge watts, runtime, and input limit, you can quickly tell if your setup will last two or three nights off-grid.

This guide shows how to make an easy energy budget for a weekend, so you are not guessing at battery percentage or wondering why your devices shut off early. You will learn how to estimate power draw, convert watts to watt-hours, and size a camping battery or solar generator for phones, lights, a fridge, or a CPAP. No advanced math, no brands—just clear steps and example numbers you can copy for your own trip.

Understanding a Weekend Camping Power Budget and Why It Matters

For camping, a power budget is a simple estimate of how much energy your devices will use over your trip, usually measured in watt-hours (Wh). It is like a spending plan for electricity: instead of dollars, you are spending stored energy from a portable power station or battery pack.

Watt-hours tell you how long a battery can run your gear. If you know your devices use about 500 Wh over a weekend, you can look for a power station with a usable capacity that meets or exceeds that number. This is more reliable than guessing based on amp-hours (Ah) or just looking at battery percentage bars.

Planning a camping power budget matters because:

  • It prevents running out of power early. You know in advance if your battery can handle a second or third night.
  • It helps you choose the right size power station. You avoid overspending on a huge unit or buying one that is too small.
  • It clarifies what you can realistically run. For example, whether a mini-fridge plus lights and phone charging is practical.
  • It guides your charging strategy. You can decide if you need solar input, vehicle charging, or just a full charge before leaving.

Instead of treating your camping battery like a mystery box, a basic energy budget turns it into a predictable resource you can manage confidently all weekend.

Key Power Concepts for Weekend Camping: Watts, Watt-Hours, and Runtime

To build a simple weekend energy budget, you only need a few key concepts: watts (W), watt-hours (Wh), runtime, and efficiency. Once you understand these, you can quickly estimate how long your portable power station will keep your camping gear running.

Watts (W): how fast power is used

Watts measure the rate of power use. A 10 W LED lantern uses power slowly; a 300 W mini-fridge uses power much faster. Device labels, user manuals, or power adapters usually list watts. If you only see volts (V) and amps (A), multiply them: V × A ≈ W.

Watt-hours (Wh): total energy over time

Watt-hours measure how much energy is used or stored. A 500 Wh battery can, in theory, power a 50 W device for about 10 hours (500 ÷ 50 = 10). Portable power stations are usually rated in Wh, which makes them easy to compare.

Runtime: how long your gear can run

To estimate runtime, you divide usable battery capacity by the load:

Runtime (hours) ≈ Usable Wh ÷ Device Watts

Usable Wh is slightly less than the rated capacity because of inverter and conversion losses. A rough rule is to assume 80–90% of the listed watt-hours for AC loads.

Continuous watts vs. surge watts

Portable power stations list two important output limits:

  • Continuous output (W): The maximum power they can supply steadily (for example, 300 W).
  • Surge or peak output (W): A higher short-term limit to handle startup spikes from devices like compressor fridges or small pumps.

If your device’s running watts exceed the continuous rating, it will not run. If its startup surge exceeds the surge rating, it may trip protection or shut off at startup.

Input limit and recharge time

The input limit tells you how many watts the power station can accept from wall charging, solar panels, or vehicle charging. Higher input means faster recharging, which is important if you plan to top up during the day with solar or from your car.

Putting it together for a weekend

For a weekend camping trip, you combine these ideas: estimate each device’s daily Wh use, multiply by the number of days, then compare the total to your portable power station’s usable capacity and recharge options.

Concept What It Means Example Value
Device power (W) How fast a device uses power LED lantern: 10 W
Battery capacity (Wh) Total stored energy Portable power station: 500 Wh
Continuous output (W) Max steady power the unit can supply AC inverter: 300 W
Surge output (W) Short spike for startup loads AC inverter surge: 600 W
Input limit (W) Max charging power accepted Solar/AC charging: 100–200 W
Key power terms for planning a camping energy budget. Example values for illustration.

Real-World Weekend Camping Energy Budget Examples

To make camping power planning concrete, it helps to walk through a few realistic weekend scenarios. These examples assume two nights away, arriving Friday evening and leaving Sunday, with about 36–40 hours of actual use.

Example 1: Minimalist weekend (lights and phones only)

This setup is common for tent camping with basic comfort and safety lighting.

  • 2 smartphones: About 10 Wh per full charge × 2 phones × 2 charges each ≈ 40 Wh.
  • 1 tablet or e-reader: Around 15 Wh per charge × 1–2 charges ≈ 15–30 Wh.
  • LED lantern: 8 W × 4 hours per night × 2 nights = 64 Wh.
  • String lights: 5 W × 5 hours per night × 2 nights = 50 Wh.

Estimated total for the weekend: roughly 170–190 Wh.

A small portable power station with around 250–300 Wh of usable capacity comfortably handles this, even accounting for inverter losses and a bit of extra use.

Example 2: Family camping with cooler and devices

This scenario adds a small 12 V compressor cooler or low-power mini-fridge.

  • Compressor cooler: A typical draw might average 40 W when cycling. Over 24 hours, that is roughly 40 W × 12 hours of active run time ≈ 480 Wh per day (duty cycle varies with temperature and insulation).
  • Phones and tablets: 4 phones × 2 charges each at 10 Wh = 80 Wh; 1 tablet at 20 Wh × 2 charges = 40 Wh.
  • LED lighting: 20 W total (lanterns and strips) × 4 hours per night × 2 nights = 160 Wh.

Estimated total for the weekend: cooler about 900–1,000 Wh plus devices and lights around 280 Wh, for roughly 1,200–1,300 Wh.

In this case, a mid-sized power station around 1,000–1,500 Wh usable capacity is more appropriate, especially if you do not plan to recharge with solar or from your vehicle.

Example 3: CPAP user plus basic camp power

Many campers use a CPAP machine overnight and want to keep lights and phones powered too.

  • CPAP machine (DC mode, no heated hose/humidifier): Often averages 30–50 W. For 8 hours per night × 2 nights, that is about 480–800 Wh.
  • Phones and a small fan: 2–3 phones at 10 Wh each × 2 charges ≈ 40–60 Wh; USB fan at 5 W × 4 hours per night × 2 nights = 40 Wh.
  • LED lighting: 10–15 W × 4 hours per night × 2 nights ≈ 80–120 Wh.

Estimated total for the weekend: roughly 600–1,000 Wh depending on the CPAP’s actual draw.

A power station with around 800–1,200 Wh usable capacity is a common target for this type of trip, especially if the CPAP will be the primary load.

How to adapt these examples to your own trip

To use these examples for your own weekend:

  1. List your actual devices and look up their watt ratings.
  2. Estimate daily hours of use for each device.
  3. Calculate daily Wh (watts × hours), then multiply by the number of days.
  4. Add a 20–30% buffer for unexpected use, cold weather, or inverter losses.

This quick process gives you a realistic weekend energy budget that matches how you actually camp.

Common Camping Power Planning Mistakes and How to Spot Problems Early

Many campers either overshoot or undershoot their power needs. Understanding common mistakes helps you troubleshoot issues before they ruin your weekend.

Mistake 1: Confusing watt-hours with amp-hours

Some batteries list only amp-hours (Ah), which can be misleading without voltage. A 20 Ah battery at 12 V has about 240 Wh (20 × 12), not 20 Wh. When comparing to your devices, always convert to watt-hours so everything is in the same unit.

Mistake 2: Ignoring inverter losses

Using AC outlets on a portable power station is convenient, but the inverter wastes some energy as heat. If you ignore this, your runtime estimate will be too optimistic. As a rule of thumb, assume you only get about 80–90% of the rated Wh for AC loads. USB and DC outputs are usually more efficient.

Mistake 3: Underestimating fridge and cooler usage

Portable fridges and coolers do not draw their rated watts all the time, but they cycle on and off. Hot weather, frequent opening, and poor ventilation can increase their duty cycle dramatically. A cooler that averages 20–30 W in mild conditions might average double that in direct sun. If your portable power station seems to drain faster than expected, this is often the culprit.

Mistake 4: Overloading the continuous or surge rating

Plugging in a device that exceeds the power station’s continuous output or surge rating can cause shutdowns or error codes. Signs include the AC output turning off immediately when a device starts, beeping alarms, or warning lights. Check your devices’ watt ratings and keep total load under the continuous limit, with some margin for startup spikes.

Mistake 5: Forgetting about recharging options

Some campers assume they will “just recharge with solar” but bring panels too small for their actual use or ignore the input limit on the power station. If your input limit is 100 W and you bring 200 W of panels, you still only charge at 100 W. Cloud cover, shading, and short winter days further reduce real-world solar input.

Early warning signs your weekend budget is off

  • Battery drops faster than expected during the first evening.
  • Fans, fridges, or CPAP machines cause the inverter to click off or alarm.
  • Solar or vehicle charging barely moves the battery percentage during the day.
  • You find yourself turning off lights or unplugging devices to “save” power.

If you see these signs on day one, reduce non-essential loads, switch more devices to DC or USB where possible, and prioritize recharging during peak sunlight or while driving.

Safety Basics for Using Portable Power on Camping Trips

Even small portable power stations and camping batteries store significant energy. Using them safely keeps your trip trouble-free and protects your gear.

Ventilation and placement

  • Place the power station on a stable, dry surface away from standing water and direct rain.
  • Avoid covering the unit with blankets, clothing, or sleeping bags. Most units rely on airflow for cooling.
  • Keep vents and fans unobstructed to prevent overheating and automatic shutdowns.

Temperature awareness

  • Avoid leaving batteries in direct sun inside a closed vehicle or tent, where temperatures can rise quickly.
  • In cold weather, keep the unit above freezing when possible, as low temperatures can temporarily reduce capacity and charging performance.

Cable and connection safety

  • Use cables rated for the current your devices draw, especially for 12 V DC and high-wattage AC loads.
  • Do not daisy-chain multiple power strips or extension cords from a small power station.
  • Avoid running cords where people walk or where they can snag and pull the power station off a table.

Charging safety

  • Use only compatible chargers and follow the manufacturer’s input limits for AC, DC, and solar charging.
  • Do not attempt to modify charging cables, bypass built-in protections, or connect directly to vehicle or RV wiring without proper equipment.
  • If you are unsure about integrating a portable power station with an RV electrical system, consult a qualified electrician or RV technician.

General battery precautions

  • Do not open the power station or battery enclosure; internal components are not user-serviceable.
  • Keep units away from open flames, campfires, and high-heat cooking areas.
  • If you notice swelling, unusual smells, smoke, or excessive heat, disconnect loads, move the unit to a safe, open area if it is safe to do so, and stop using it.

Following these basic practices makes it much less likely that a power issue will interrupt your camping weekend.

Maintaining and Storing Your Camping Power Setup Between Trips

Good maintenance and storage habits help your portable power station deliver reliable runtime every camping season and extend its overall lifespan.

Regular use and partial cycling

  • Use the power station periodically, even between camping trips, to keep the battery active.
  • Avoid fully discharging the battery whenever possible; stopping around 10–20% remaining is gentler on most chemistries.
  • Recharge to a comfortable level after each trip so it is ready for the next outing.

Storage state of charge

  • For long-term storage (several months), many batteries prefer being stored around 40–60% charge rather than 100% or 0%.
  • Check the charge level every few months and top up if it drops significantly.

Environment and handling

  • Store your power station in a cool, dry place away from direct sunlight and moisture.
  • Avoid dropping, crushing, or stacking heavy items on top of the unit.
  • Keep dust and debris away from vents and ports; gently clean with a dry cloth as needed.

Monitoring performance over time

  • Pay attention if your camping runtime noticeably decreases with the same loads; this can indicate normal battery aging.
  • Test your setup at home before longer trips, especially if you rely on critical devices like a CPAP machine.
  • Keep notes on approximate runtimes and charging times; this personal data is more useful than generic estimates.

With basic care, a portable power station can remain a dependable part of your camping kit for years, making your weekend energy budgeting more predictable.

Maintenance Task Recommended Frequency Purpose
Top-up charge check Every 2–3 months Prevents deep discharge during storage
Full test run with camping loads Before each season Verifies runtime and identifies weak spots
Visual inspection of cables and ports Before each trip Catches damaged cords or loose connections
Cleaning vents and exterior As needed Maintains airflow and cooling performance
Simple maintenance habits to keep camping power stations reliable. Example values for illustration.

Related guides: Portable Power Station Buying GuideSurge Watts vs Running Watts: How to Size a Portable Power StationPortable Power Stations for CPAP and Medical Devices: What to Look ForHow Many Solar Watts Do You Need to Fully Recharge in One Day?

Practical Weekend Power Planning Tips and Specs to Look For

When you combine a simple energy budget with the right portable power station specs, weekend camping power becomes predictable instead of stressful. The process boils down to three steps: estimate your loads, choose enough usable watt-hours, and match your charging options to how and where you camp.

For a typical two-night trip:

  • Minimal setups (lights and phones) often fall under 200–300 Wh.
  • Family setups with a cooler and multiple devices often land around 800–1,500 Wh.
  • CPAP-focused setups usually need 600–1,200 Wh depending on settings and temperature.

Add a buffer of about 20–30% above your calculated needs to account for weather, inverter losses, and unplanned use. If you plan to recharge with solar or your vehicle, factor in realistic daily input based on your panel size, input limit, and daylight hours.

Specs to look for

  • Battery capacity (Wh): Look for 300–500 Wh for minimalist weekends, 800–1,500 Wh for fridges or CPAP. This directly sets your potential runtime.
  • Continuous AC output (W): Aim for at least 200–300 W for basic lights and electronics, 500–1,000 W if you plan to run fridges or multiple devices. Ensures your loads do not overload the inverter.
  • Surge or peak output (W): Choose a unit with surge roughly 1.5–2× your highest startup load. Helps handle compressor fridges and motors without tripping protection.
  • Input limit and charging options: For solar, 100–300 W input is typical for weekend use; vehicle and AC charging should refill your battery within 4–8 hours. This affects how quickly you can recover from a low state of charge.
  • Number and type of ports: Multiple USB-A and USB-C ports plus at least one or two AC outlets and a 12 V socket make it easier to power several devices without adapters.
  • Display and monitoring: A clear screen showing watts in/out, remaining percentage, and estimated runtime helps you manage your energy budget in real time.
  • Weight and form factor: For car camping, 10–30 lb units are common; choose a size you can comfortably move between home, vehicle, and campsite.
  • Operating temperature range: Check that the unit is rated for the temperatures you expect when camping, especially in hot summers or cold shoulder seasons.
  • Battery chemistry and cycle life: Higher cycle life ratings are useful if you camp frequently or use the unit for other purposes year-round.

By matching these specs to a realistic weekend energy budget, you can choose and use a portable power solution that keeps your campsite running smoothly from Friday night to Sunday afternoon.

Frequently asked questions

What specs and features matter most when choosing a portable power station for a weekend camping trip?

Battery capacity in watt-hours (Wh) and the continuous and surge watt ratings are the core specs, since they determine how long and what you can run. Also consider the input limit and charging options, the number and types of ports, weight and form factor, operating temperature range, and whether the unit provides clear monitoring of watts in/out and remaining charge.

How can confusing watt-hours and amp-hours lead to a planning mistake?

Watt-hours measure stored energy while amp-hours depend on voltage; comparing Ah without converting can make a battery look much larger or smaller than it really is. Always convert Ah to Wh using Wh = Ah × V so you compare capacities on the same basis and avoid underestimating your needs.

Is it safe to use a portable power station inside a tent or vehicle overnight?

Using a power station in a tent or vehicle is generally acceptable if the unit is placed on a stable, ventilated surface away from flammable materials and direct heat. Avoid covering vents, keep the unit out of confined hot spots, follow the manufacturer’s safety guidance, and do not leave a unit showing signs of damage or overheating unattended.

Can I rely on solar panels alone to recharge my power station during a weekend?

Solar can often top up a battery during a weekend, but real-world factors like panel size, the power station’s input limit, shading, cloud cover, and daylight hours determine how much energy you actually get. Match panel output to the unit’s input limit and plan conservatively; don’t assume ideal conditions will fully recharge your battery every day.

Why does my power station shut off when a fridge or CPAP starts, and what can I do?

Startup surges can exceed a unit’s surge rating or the combined load can exceed the continuous output, which triggers protective shutdowns. Check the continuous and surge watt ratings, reduce simultaneous loads during startup, and consider a unit with higher surge capacity or staggered device starts to avoid tripping protections.

How much extra buffer should I add to my energy budget to avoid running out of power?

Adding a buffer of about 20–30% above your calculated needs is a common practice to cover inverter losses, weather impacts, and unexpected use. Increase the buffer further if conditions are colder, if you have inefficient loads, or if you rely solely on intermittent solar charging.

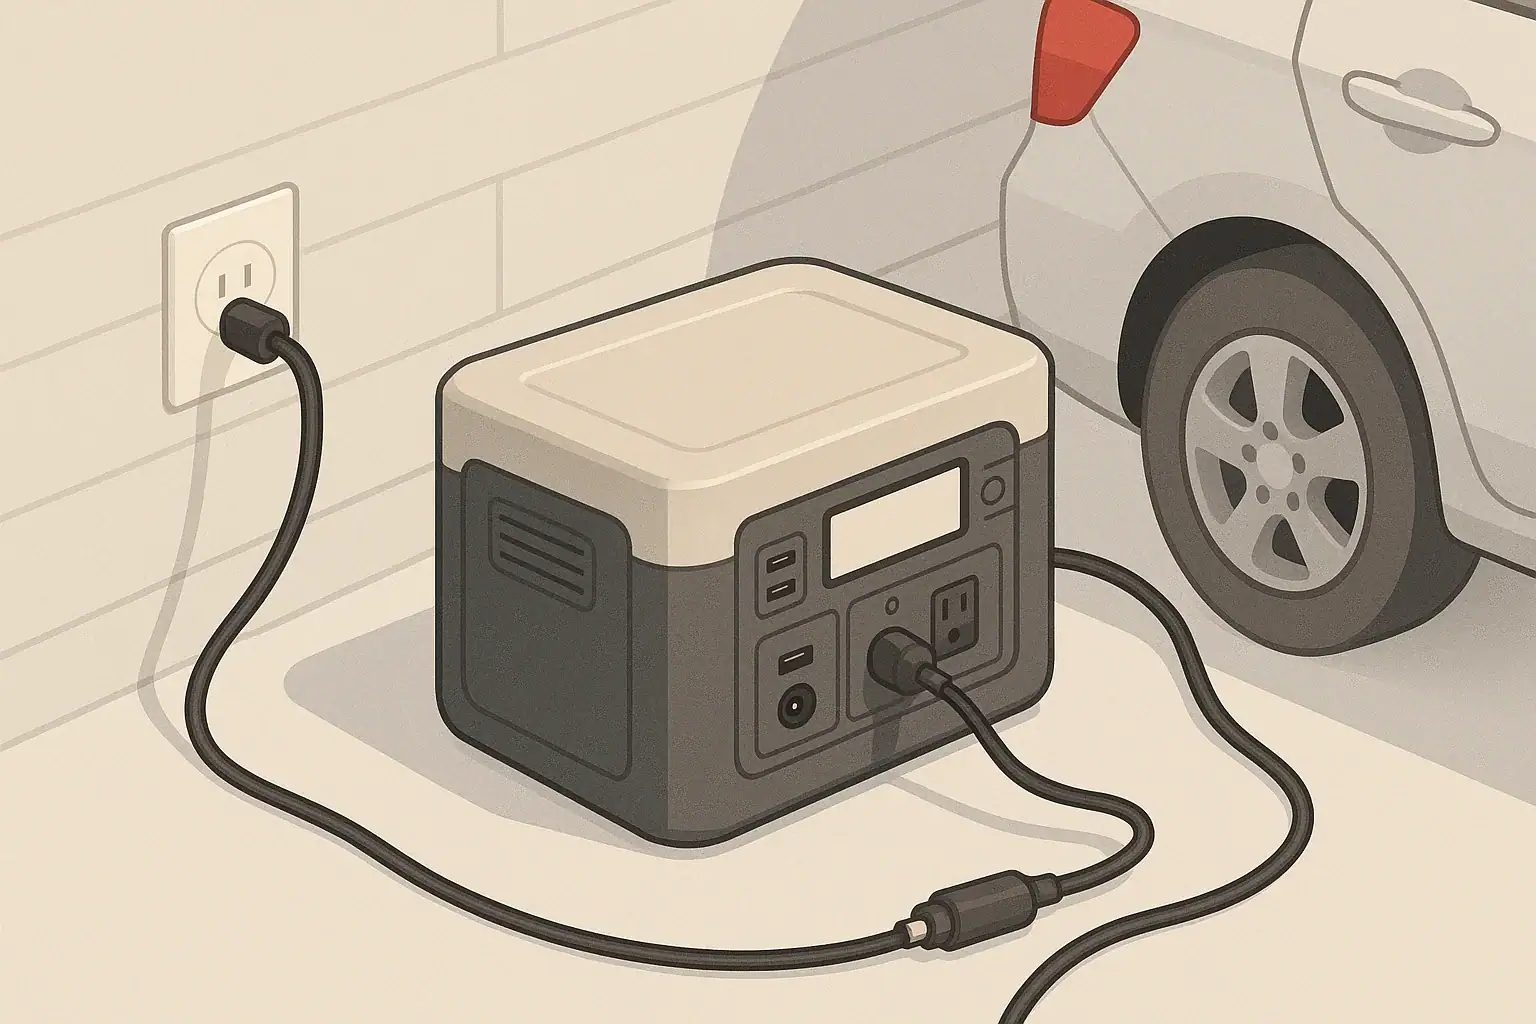
Car Charging Explained: 12V Socket vs DC-DC Charger vs Alternator (Speed and Safety)

Portable power station charging from car and wall outlets

In plain English, using a car’s 12V socket to charge a portable power station is usually the slowest option, a dedicated DC-DC charger is much faster, and pulling directly from the alternator is the most powerful but also the most complex and risky if done wrong. All three methods rely on the same vehicle charging system, but they tap into it in very different ways for speed, efficiency, and safety.

If you only need to top up a small battery on road trips, the cigarette-style 12V outlet is often enough. If you are running a larger portable power station for camping, vanlife, or off-grid work, a properly installed DC-DC charger fed from the alternator can cut charge times by several hours. Understanding these differences helps you avoid dead starter batteries, blown fuses, overheated wiring, and unrealistic expectations about “charging while you drive.”

This guide breaks down how car charging actually works, compares 12V sockets vs DC-DC chargers vs alternators, and walks through real-world examples, common mistakes, and key safety and spec checks before you plug anything in.

What car charging really means and why it matters

When people talk about “charging from the car,” they are usually referring to three different but related pieces of the same system:

  • 12V accessory socket (cigarette lighter socket) – The plug-in outlet on the dash or console you use for phone chargers and small devices.
  • DC-DC charger – A separate device wired into the vehicle’s 12V system that converts power into a controlled charge for a second battery or portable power station.
  • Alternator – The engine-driven generator that actually produces electrical power and keeps the starter battery charged while the engine runs.

All three are part of the same energy path: fuel turns the engine, the engine turns the alternator, the alternator feeds the 12V system, and from there you either use the 12V socket directly or a DC-DC charger to refill your portable power station.

This matters because each step adds limits and losses. A small 12V socket circuit might only give you tens of watts, while a well-sized DC-DC charger can safely pull a few hundred watts from the alternator. Your decisions here affect how long you have to drive to recharge, how hard the alternator works, how much fuel you burn idling, and how likely you are to trip fuses or flatten the starter battery.

Key concepts and how 12V sockets, DC-DC chargers, and alternators actually work

To compare car charging options, it helps to separate a few basic concepts: power vs energy, current limits, and where losses occur.

Power vs energy

  • Power (W) – How fast energy is moving right now. A 120W car charger is moving energy twice as fast as a 60W charger.
  • Energy (Wh) – How much total work you can do. A 500Wh portable power station can, in theory, run a 50W device for about 10 hours (500 ÷ 50).

Charge time is roughly:

Charge time (hours) ≈ Battery capacity (Wh) ÷ Charging power (W) × 1.1–1.3 (to account for losses).

What limits a 12V accessory socket

A 12V socket is limited by its fuse rating, wiring, and connector. Many passenger vehicles use fuses in the 10–15A range on these circuits. At typical running voltage (around 13.5V):

  • 10A × 13.5V ≈ 135W (theoretical maximum)
  • 15A × 13.5V ≈ 200W (theoretical maximum)

In reality, you usually cannot run them at full rating continuously without heat and voltage drop. Many portable power stations will limit car input to around 60–120W to stay within safe margins for typical sockets and cables.

How a DC-DC charger changes the picture

A DC-DC charger is wired closer to the battery and alternator, usually with heavier-gauge cable and its own fusing. Instead of being stuck with a light-duty accessory socket, it can pull a controlled, higher current directly from the vehicle’s 12V system and boost or buck the voltage as needed.

Common DC-DC charger settings for portable power stations and auxiliary batteries are in the 20–40A range. At about 13.5V, that means roughly 270–540W of input power, assuming the alternator and wiring can support it and the power station’s DC input is sized appropriately.

Alternator capacity and smart alternators

The alternator is the upstream source. It has to power:

  • Vehicle electronics and lights
  • HVAC blowers and engine management
  • Charging the starter battery
  • Any extra loads like a DC-DC charger or large inverter

Older vehicles often run the alternator at a fairly steady voltage. Many newer vehicles use smart alternators that reduce output when the starter battery is full to improve fuel economy. That can cause charging to slow down or pulse if your DC-DC charger or portable power station expects a steady 13–14V supply.

Where efficiency losses happen

  • 12V socket to DC input – One conversion inside the power station (DC to DC). Losses might be around 10–15%.
  • 12V socket → inverter → AC charger → power station – Multiple conversions (DC to AC, then AC to DC). Losses can be 20–30% or more, plus extra heat.
  • DC-DC charger to DC input – DC-DC conversion, usually 85–95% efficient when properly sized.

That is why direct DC charging is preferred whenever possible: you get more of the alternator’s output stored in the battery for the same driving time and fuel burned.

Comparison of car charging paths for portable power stations – Example values for illustration.
Charging path Typical install complexity Approx. continuous power (W) Typical use case Key pros Main trade-offs
12V socket → DC car input Very low (plug-in) 60–120 Small to mid-size power stations, road trips Simple, no wiring changes, low cost Slow for large batteries, socket and cable limits
12V socket → inverter → AC charger Low (plug-in) 60–150 Units with AC-only charging Works with older or basic power stations Higher losses, more heat, easier to blow fuses
Hardwired DC-DC charger Medium (professional recommended) 200–400 Vanlife, overlanding, frequent off-grid use Much faster charging, stable voltage Higher cost, adds alternator load
High-output alternator with DC-DC High (custom system) 400–800+ Large systems, work vehicles Very fast charging for big batteries Complex design, must manage heat and load
Idling for charging (any path) Low user effort Similar to driving, depends on setup Top up when parked Convenient in some scenarios Fuel use, exhaust risk, engine wear

Real-world examples: how long charging actually takes

Numbers on spec sheets can feel abstract, so it helps to walk through some realistic scenarios. These examples assume the power station supports the stated input power and that the vehicle wiring and fuses are appropriate.

Example 1: 300Wh compact portable power station

  • Via 12V socket at 80W: 300Wh ÷ 80W ≈ 3.75 hours. With losses, expect about 4–5 hours of driving.
  • Via DC-DC charger at 250W: 300Wh ÷ 250W ≈ 1.2 hours. With losses, roughly 1.5 hours of driving.

For a small unit, the 12V socket can be practical if you are already driving several hours a day. A DC-DC charger is nice to have but not essential.

Example 2: 500Wh mid-size portable power station

  • Via 12V socket at 100W: 500Wh ÷ 100W ≈ 5 hours. With losses, plan on 5.5–6.5 hours of driving.
  • Via DC-DC charger at 300W: 500Wh ÷ 300W ≈ 1.7 hours. With losses, around 2–2.5 hours.

This is where the difference becomes noticeable. A weekend trip with only an hour or two of daily driving may never fully recharge a 500Wh unit over 12V alone if you are using it heavily at night.

Example 3: 1,000Wh large portable power station

  • Via 12V socket at 100W: 1,000Wh ÷ 100W ≈ 10 hours. With losses, 11–13 hours of driving.
  • Via DC-DC charger at 400W: 1,000Wh ÷ 400W ≈ 2.5 hours. With losses, about 3 hours.

For large units, a 12V socket is often best treated as a slow top-up method, not your primary charging plan. A higher-power DC-DC charger or regular access to wall charging or solar becomes important.

Example 4: Matching daily use to driving time

Imagine this typical camping pattern:

  • Evening: laptop at 50W for 4 hours (200Wh) + lights at 10W for 5 hours (50Wh) + phone charging at 10Wh.
  • Total daily use ≈ 260Wh.

With a 500Wh power station:

  • Two hours of driving at 100W puts back about 200Wh before losses, maybe 170–180Wh stored.
  • You would slowly drift down in state of charge over several days if car charging is your only source.

Add a DC-DC charger at 300W and those same two hours can realistically refill most or all of what you used, keeping the battery more stable over a longer trip.

Example daily use and charge time planning – Example values for illustration.
Power station size Daily use (Wh) Charging method Charge power (W) Driving time to replace daily use*
300Wh 150Wh (lights, phones) 12V socket 80W About 2–2.5 hours
500Wh 260Wh (laptop + lights) 12V socket 100W About 3–3.5 hours
500Wh 260Wh DC-DC charger 300W About 1–1.5 hours
1,000Wh 400Wh (fridge + devices) 12V socket 100W About 4.5–5 hours
1,000Wh 400Wh DC-DC charger 400W About 1.5 hours

*Times include a modest allowance for efficiency losses.

Common mistakes and troubleshooting cues

Most car charging problems come from exceeding circuit limits, misunderstanding how the vehicle behaves when the engine is off, or pushing equipment in high heat. Recognizing the early warning signs can prevent damage and frustration.

1. Assuming the 12V socket stays live with the engine off

Symptom: The portable power station stops charging as soon as you turn off the ignition.

  • Many vehicles cut power to 12V sockets when the key is off to protect the starter battery.
  • Some sockets stay live, but draining them with the engine off can leave you unable to start the car.

What to do: Test your socket behavior, avoid long car-only charging with the engine off, and use low-power draws if you must top up while parked.

2. Blown fuses from overloading the 12V outlet

Symptom: The 12V socket suddenly stops working for everything, not just the power station.

  • High loads from inverters or multiple devices can exceed the socket’s fuse rating.
  • Installing a larger fuse than specified can overheat wiring and is unsafe.

What to do: Reduce the load (lower-wattage charger, fewer devices) and replace the fuse with the same rating the vehicle specifies.

3. Charging that pulses, ramps down, or never reaches full speed

Symptom: The input wattage on the power station display jumps up and down or is much lower than expected.

  • Smart alternators may lower voltage once the starter battery is full.
  • Long, thin cables cause voltage drop, making the power station reduce current.
  • High temperatures can cause the power station to throttle input to protect itself.

What to do: Shorten or upgrade cables, improve ventilation, and consider a DC-DC charger that can regulate input from a smart alternator.

4. Hot connectors and cables

Symptom: The 12V plug, socket, or cable feels very warm or hot to the touch.

  • Loose or under-rated connectors create resistance, which turns into heat.
  • Coiled cables and tight bundles trap heat and make this worse.

What to do: Stop charging, let everything cool, and inspect for discoloration or deformation. Use heavier-gauge, automotive-rated cables and avoid coiling during use.

5. Alternator strain and dimming lights

Symptom: Headlights dim or engine idle changes noticeably when high charging loads are active.

  • This can indicate that the alternator is near its limit or that the starter battery is weak.
  • Repeated heavy loading on a marginal alternator can shorten its life.

What to do: Reduce DC-DC charger current settings if adjustable and have the vehicle charging system inspected if symptoms persist.

Common car charging issues and quick checks – Example values for illustration.
Symptom Likely cause Quick check Suggested action
Charging stops when parked Socket switched off with ignition Test socket with phone charger, engine off Only charge with engine on or use low draw briefly
No power from 12V socket Blown fuse Check vehicle fuse panel Replace with same-rated fuse and reduce load
Wattage fluctuates wildly Smart alternator, voltage drop, or heat Observe pattern while driving vs idling Shorten cables, improve cooling, consider DC-DC charger
Hot 12V plug or cable High current through small connector Feel connector after 15–20 minutes Use heavier cable or lower input setting
Dimming lights with charger on Alternator or battery near limit Compare lights with charger on vs off Reduce charger current, have vehicle system checked

Safety basics for charging from a car

Car charging is generally safe when kept within design limits, but it happens in a confined, moving, sometimes hot environment. A few habits go a long way toward preventing problems.

Placement and securing the power station

  • Place the unit on a flat, stable surface such as the cargo area floor.
  • Avoid locations that could interfere with pedals, seat tracks, or airbag deployment zones.
  • Secure the power station so it cannot become a projectile in hard braking or a collision.

Ventilation and heat management

  • Keep vents clear on all sides; do not cover the unit with blankets, jackets, or bags.
  • In hot weather, interior temperatures can soar. High heat accelerates battery wear and triggers thermal throttling.
  • If the fan runs constantly or the case feels very warm, reduce charging power or move the unit to a cooler spot.

Cable routing and protection

  • Route cables where they will not be pinched by seat tracks, door seals, or hatch latches.
  • Avoid trip hazards in the passenger area; keep cords away from pedals.
  • Use automotive-rated 12V plugs and cables, and avoid cheap, thin adapters for higher-current use.

Idling and exhaust safety

  • Never run a vehicle in an enclosed or poorly ventilated space just to charge a power station.
  • Be mindful of wind direction and surroundings if idling near tents, open windows, or other vehicles.
  • Whenever possible, prioritize charging while driving instead of extended idling.

AC power in vehicles

  • If you use an inverter to get 120V AC inside the vehicle, keep it away from moisture and soft materials.
  • Do not exceed the inverter or outlet rating, and avoid daisy-chaining power strips.
  • Use grounded plugs where available and keep AC cords tidy to reduce snag and damage risks.

Maintenance and long-term use when car charging

Portable power stations that live in vehicles or are used frequently for car charging benefit from occasional checks on both the power station and the vehicle side.

Battery health and storage state of charge

  • Most lithium-based units prefer storage around a moderate state of charge rather than completely full or empty.
  • Check the charge level every few months and top up if it drifts too low.
  • Avoid leaving the unit at 0% for extended periods, which can shorten battery life.

Temperature exposure in vehicles

  • Long-term storage in a hot car (especially in direct sun) accelerates battery aging.
  • Very cold conditions temporarily reduce capacity and can make charging less efficient.
  • When possible, move the unit indoors between trips or park in shade to moderate temperature swings.

Routine inspections before trips

  • Inspect 12V plugs and cables for cracks, discoloration, or loose parts.
  • Check that the power station’s vents are free of dust and debris.
  • Do a quick test charge from the car to confirm stable input power and no error messages.

Vehicle-side checks

  • If you notice slow engine cranking or dim lights even without the power station connected, have the starter battery tested.
  • For systems with DC-DC chargers, periodically verify that mounting hardware, cables, and fuses are secure.
  • Follow the vehicle’s normal service schedule for alternator and charging system checks, especially if you regularly draw higher currents.

Practical takeaways and specs to look for

Car charging works best when your expectations line up with what the vehicle can safely deliver. For small and mid-size portable power stations, a well-behaved 12V socket is often enough to top up during normal driving. For larger systems or heavy daily use, a properly sized DC-DC charger that respects alternator limits is usually worth the extra complexity.

Think in terms of energy per day rather than just battery size. Estimate how many watt-hours you use, compare that to how many watt-hours you can realistically put back during your normal driving, and then decide whether the 12V socket, a DC-DC charger, or an alternate source like wall or solar charging needs to carry most of the load.

Quick planning checklist

  • Match daily use and driving time: Estimate daily watt-hours used and confirm your chosen charging method can replace that energy in the hours you actually drive.
  • Respect 12V socket limits: Know the fuse rating for each socket and keep continuous loads well below that number, especially when using inverters.
  • Prefer direct DC charging: Use the power station’s DC car input or a DC-DC charger instead of going through an inverter whenever possible.
  • Watch for warning signs: Hot connectors, blown fuses, dimming lights, or fluctuating input power mean you are near or past safe limits.
  • Have a backup plan: For trips with little driving or high energy use, plan for occasional wall charging, solar, or reduced consumption.

Specs to look for on portable power stations and vehicle setups

  • Car/DC input wattage: Check the maximum wattage and voltage range for the 12V/DC input. Higher limits are more useful with DC-DC chargers.
  • Adjustable input current: Some units let you limit car charging current, which helps avoid overloading weaker 12V sockets or small alternators.
  • Supported input types: Note whether the unit supports direct 12V DC input, higher-voltage DC, or only AC charging.
  • Clear input monitoring: A display that shows real-time input watts and error codes makes troubleshooting much easier.
  • Thermal management: Look for multiple vents and fans sized appropriately for the unit’s charge and discharge ratings.
  • Cable quality: Prefer included or aftermarket 12V cables with solid connectors and adequate wire gauge for the expected current.
  • Vehicle circuit ratings: From the vehicle side, know the alternator output rating, 12V socket fuse sizes, and any limits recommended for accessory loads.
  • DC-DC charger settings: If using a DC-DC charger, check for adjustable current, compatibility with smart alternators, and proper fuse and wire sizing guidance.

With a realistic view of what your 12V socket, DC-DC charger, and alternator can safely deliver, you can design a car charging setup that keeps your portable power station ready without overtaxing the vehicle or relying on optimistic assumptions about “charging while you drive.”

Frequently asked questions

What specifications should I prioritize when choosing a portable power station and vehicle components for car charging?

Check the power station’s car/DC input wattage and supported input voltage range, whether it allows adjustable input current, and the quality of the supplied 12V cable and connectors. From the vehicle side, know the alternator output rating and each 12V socket’s fuse size, and ensure any DC-DC charger you use is rated for the expected current and compatible with smart alternators.

Will charging from the 12V socket with the engine off drain my starter battery?

Yes—many vehicles cut power to accessory sockets with the ignition off, but some keep them live; leaving a power station plugged in and drawing power while the engine is off can flatten the starter battery. Test how your sockets behave and avoid extended car-only charging, or use low draws and monitor battery state to prevent being unable to start the vehicle.

What safety precautions should I follow when charging a power station from a running vehicle?

Secure the power station, keep vents clear for cooling, route cables away from moving parts and pedals, and never run the engine in an enclosed space. Also use automotive-rated cables and correct fusing, avoid exceeding socket or alternator limits, and prioritize charging while driving over long idling to reduce exhaust and engine-wear risks.

Is charging through an inverter less efficient than direct DC-to-DC charging?

Yes. Using an inverter to convert 12V DC to AC and then back to DC in the power station adds conversion steps and typically increases losses, often in the 20–30% range, whereas a direct DC-DC path or a dedicated DC-DC charger will usually be significantly more efficient.

How do modern smart alternators affect charging performance for auxiliary batteries while driving?

Smart alternators can vary output to prioritize fuel economy and battery health, which may cause charging to pulse or slow once the starter battery reaches target voltage. Using a DC-DC charger designed to work with smart alternators or locating charging closer to the battery with heavy-gauge wiring helps provide more consistent charging to auxiliary systems.

What are common signs that I’m overloading a 12V charging circuit and how should I respond?

Watch for blown fuses, hot plugs or cables, dimming lights, fluctuating input wattage, or connectors that become very warm. If you notice these signs, stop charging, let components cool, replace fuses only with the correct rating, reduce charger current or load, and upgrade to heavier-gauge wiring or a DC-DC charger if needed.

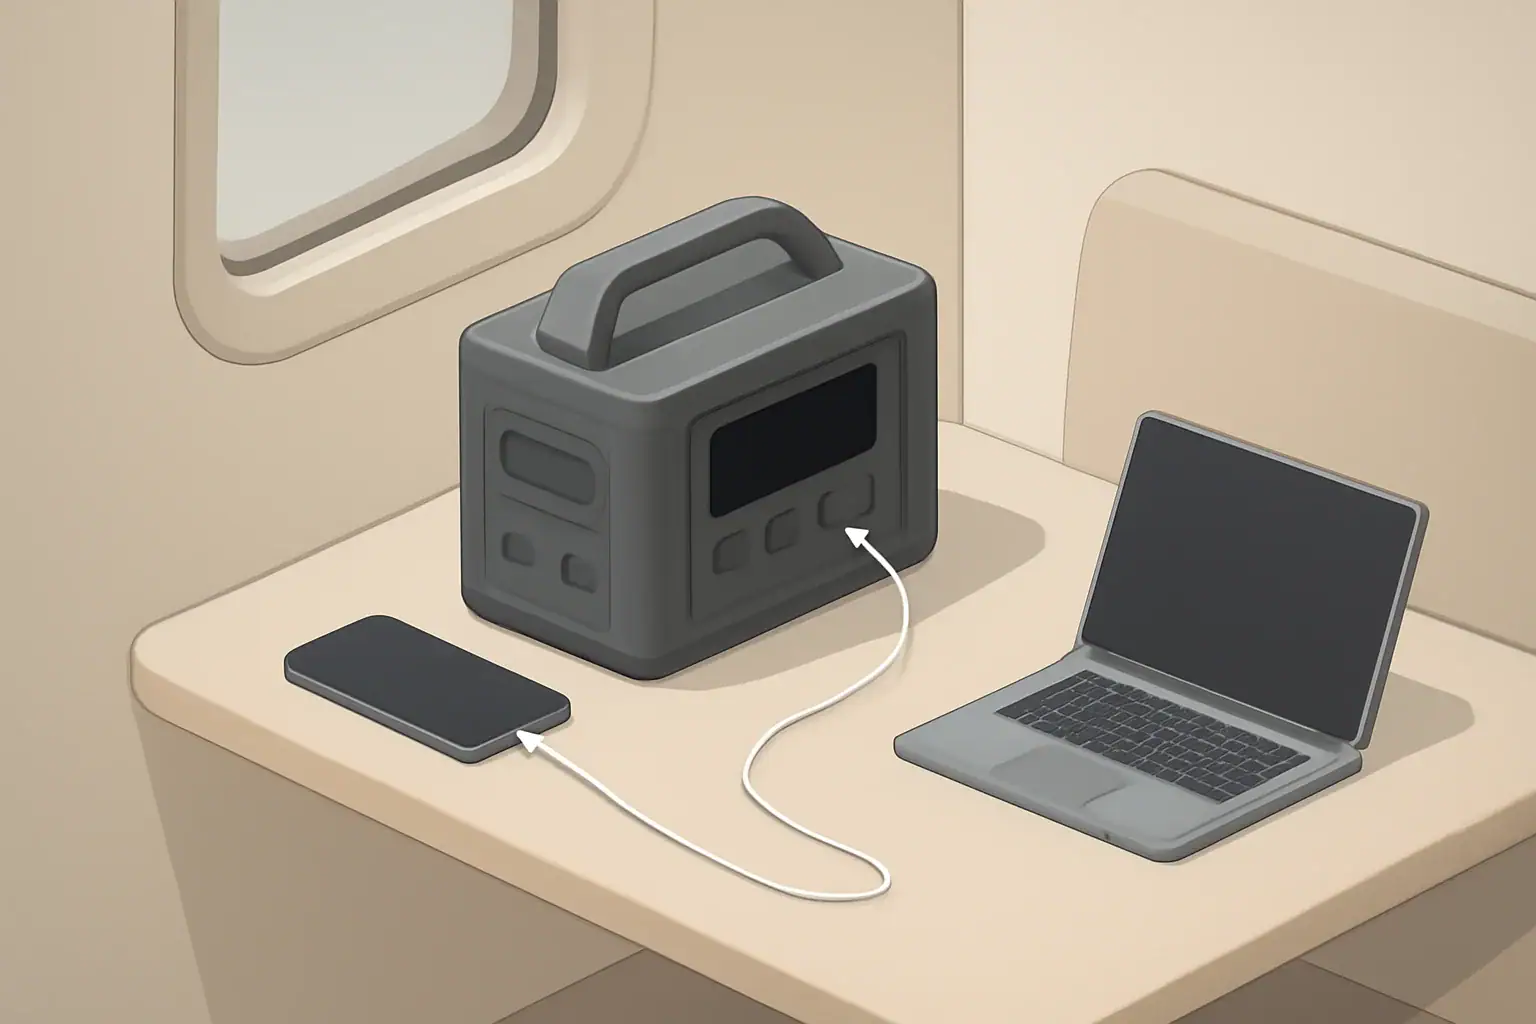
Portable Power Stations for RV and Motorhomes: Sizing, Setup, and Safe Use

Isometric illustration of power station charging devices

Portable power stations for RV and motorhomes are self-contained battery systems that let you run RV appliances and electronics without a generator or shore power. They combine a large battery, inverter, and multiple outlets in one box, so you can plug in gear much like you would at home. For many campers, they are the simplest way to add quiet off-grid power for boondocking, travel days, and overnight stops.

This guide explains how these units work in an RV context, how to size one for your rig, and what to expect from real-world runtime. You will see practical examples, common mistakes to avoid, key safety basics, and a clear checklist of specs to look for before you buy. The goal is to help you choose and use a portable power station that actually matches how you camp, instead of guessing based on marketing numbers.

What a Portable Power Station Does in an RV and Why It Matters

For RV and motorhome owners, a portable power station acts as a quiet, battery-based power source that can replace or supplement a generator and built-in house batteries. It is especially useful for:

  • Boondocking or dry camping without hookups
  • Overnight parking in rest areas or driveways where generator use is restricted
  • Running critical loads like a CPAP, fridge, or furnace fan during power outages
  • Powering outdoor cooking gear, tools, or devices away from the RV

Unlike a traditional RV battery bank, a portable station is plug-and-play: you place it where you need power, plug in your devices, and recharge it from shore power, solar, or your vehicle. This flexibility matters if you rent RVs, share rigs, or do not want to modify factory wiring.

However, capacity and inverter limits mean a portable power station will not replace every part of a full RV electrical system. Understanding what it can realistically power, and for how long, is the key to choosing the right size and avoiding disappointment.

Key Concepts: How Portable Power Stations Work in RVs

Most portable power stations share the same building blocks. Knowing these parts and units of measurement will help you match a station to your RV loads.

Core components

  • Battery pack: Stores energy, usually rated in watt-hours (Wh). Common chemistries include lithium-ion and lithium iron phosphate (LiFePO4). More Wh means longer runtime.
  • Battery management system (BMS): Electronic protection that prevents overcharge, over-discharge, overheating, and short circuits.
  • Inverter: Converts DC battery power to 120V AC for household-style outlets. Rated in continuous watts and surge (peak) watts.
  • Charge controller / input electronics: Manage incoming power from AC wall charging, solar panels, or a 12V vehicle outlet.
  • Output ports: Typically include AC outlets, 12V DC ports, and USB ports for phones, tablets, and laptops.

Key electrical terms for RV use

  • Watt (W): Power. How fast energy is used. A 60W laptop charger uses more power than a 10W phone charger.
  • Watt-hour (Wh): Energy. Capacity of the battery. A 1000Wh station can theoretically power a 100W device for about 10 hours (1000 ÷ 100).
  • Continuous vs surge power: Continuous is what the inverter can supply steadily; surge is a short burst for starting motors (fridges, pumps, some fans).
  • Depth of discharge (DoD): How much of the battery’s capacity you regularly use. Shallower discharges generally extend battery life.

Waveform and why it matters in an RV

Most RV owners are better served by a pure sine wave inverter, which closely matches utility power and works well with sensitive electronics, induction motors, and many medical devices. Modified or stepped sine wave inverters can cause extra heat, noise, or malfunction in some RV appliances, especially those with motors or power bricks.

Simple sizing approach for RV loads

To estimate daily energy needs, use this basic process:

  1. List each device you want to run (fridge, CPAP, lights, laptop, fan, etc.).
  2. Find its power draw in watts (from the label or manual).
  3. Estimate how many hours per day each device will run.
  4. Multiply watts × hours for each device to get watt-hours per day.
  5. Add all device Wh, then add 10–20% to cover inverter and system losses.
Typical RV device energy use and suggested power station sizes. Example values for illustration.
Device / Load Approx. Power (W) Daily Use (hours) Daily Energy (Wh) Suggested Station Capacity Range (Wh)
LED interior lights (set of 4) 20 4 80 300–500
Laptop + phone charging 70 3 210 500–1000
12V compressor fridge (small) 45 (average) 12 (duty cycle) 540 1000–1500
CPAP (no heated hose) 40 8 320 500–1000
Microwave (short use) 1000 0.25 250 1500–2000 (inverter must handle surge)

Use your actual appliance ratings where possible; labels on RV fridges and microwaves often list both running watts and higher startup or input watts.

Real-World RV Examples and Use Scenarios

To make sizing more concrete, here are common RV and motorhome scenarios and what a portable power station typically handles in each.

Weekend boondocking (no hookups)

  • Typical loads: LED lights, water pump, vent fan, small 12V or compact AC fridge, phone and laptop charging.
  • Estimated daily energy: 600–1200Wh depending on fridge efficiency and fan use.
  • Practical station size: Around 1000–2000Wh, possibly paired with 100–300W of solar to top up during the day.
  • What this looks like in practice: You can run lights and fans in the evening, keep food cold, and charge devices, then recharge the station from solar and/or driving the next day.

Overnight stops and CPAP support

  • Typical loads: One CPAP machine, a couple of phones, maybe a small reading light.
  • Estimated daily energy: 300–500Wh per person using CPAP, plus 50–100Wh for small electronics.
  • Practical station size: 500–1000Wh for one CPAP user; more for two users or multiple nights without recharging.
  • Realistic expectation: A mid-size station can often run a CPAP for several nights if you disable heated humidification, which significantly cuts power draw.

Extended off-grid travel

  • Typical loads: Larger fridge, laptops, router or hotspot, fans, occasional microwave or induction cooktop, maybe a TV.
  • Estimated daily energy: 1500–3000Wh or more, depending on cooking style and climate.
  • Practical station size: 2000–5000Wh total capacity, usually combined with a substantial solar array or occasional generator use.
  • Reality check: Running high-draw items like air conditioning or long microwave sessions from a portable station alone is rarely practical; they drain batteries quickly and may exceed inverter limits.

Travel-day and outdoor power

  • Typical loads: Charging tablets for kids, powering a 12V cooler, running an air compressor briefly, or using small tools at a campsite.
  • Practical station size: 300–1000Wh is usually sufficient, especially if you can recharge from the vehicle alternator while driving.
  • Benefit: Keeps the RV’s house batteries from being cycled hard for small, mobile loads.

What portable stations usually cannot do well

  • Run a rooftop air conditioner for long periods (very high continuous and surge power)
  • Support electric resistance heaters for more than very short bursts
  • Replace a whole-house RV electrical system in large motorhomes without careful load management

Common Mistakes and Troubleshooting Cues

Many RV owners run into similar issues when they first start using portable power stations. Recognizing these patterns can save you time and frustration.

Frequent sizing and usage mistakes

  • Confusing watts with watt-hours: Assuming a 1000W inverter means the station has 1000Wh of energy. In reality, inverter watts and battery Wh are separate specs.
  • Ignoring startup surges: A fridge or pump may only list 100–200W running, but need 2–3 times that briefly to start.
  • Overestimating solar input: A 200W panel rarely delivers 200W all day; shading, angle, and heat reduce real output.
  • Running everything on AC: Using the inverter for small DC loads (like 12V lights or fridges) wastes energy in conversion losses.
  • Discharging to 0% regularly: Deep cycling every day can shorten battery lifespan, especially with certain chemistries.

Typical problems and what to check

Common portable power station issues in RVs and first troubleshooting steps. Example values for illustration.
Symptom Likely Cause What to Check First
Fridge will not start or clicks on and off Inverter surge rating too low or cable run too long Compare fridge startup watts to inverter surge spec; try shorter, heavier AC cord and limit other loads.
Station shuts down unexpectedly under load Overload or low battery protection Check total connected watts; reduce high-draw devices and confirm battery state of charge.
Charge time much longer than expected Input limited by adapter, cable, or settings Verify AC or solar input wattage on the display; confirm correct charging mode and adequate cable size.
CPAP stops overnight Battery too small or humidifier power draw higher than expected Check CPAP power rating with and without humidifier; consider direct DC use if available and reduce other loads.
Unit feels very hot during use Poor ventilation or continuous high load near maximum rating Improve airflow around the case, reduce load, and avoid enclosed compartments without ventilation.

Charging pitfalls specific to RVs

  • Alternator over-expectations: Vehicle 12V outlets often provide limited current; they are fine for topping off but not for fast charging a large station.
  • Mixed charging sources: Some stations limit total input if AC and solar are used together; others allow higher combined input. Always confirm the rated maximum.
  • Using undersized extension cords: Long, thin cords can drop voltage and reduce effective charging power or cause nuisance shutdowns.

Safety Basics for Portable Power Stations in RVs

Portable power stations are generally safer and cleaner than fuel-based generators, but they still store significant energy. Treat them as serious electrical equipment.

Placement and ventilation

  • Set the unit on a stable, level surface and secure it so it cannot slide or tip while driving.
  • Keep vents clear on all sides; do not stuff the station into a closed cabinet without airflow.
  • Avoid areas exposed to direct water spray, condensation, or standing water (such as near leaky windows or plumbing).
  • Keep away from direct heat sources like furnace outlets, ovens, or unshielded exhaust areas.

Temperature and environment

  • Most batteries perform poorly in extreme heat or cold. Avoid charging below freezing or leaving the unit in a closed vehicle in hot sun.
  • If camping in cold climates, keep the station inside the living space where temperatures are more moderate.

Connection and wiring practices

  • Use appropriately rated cords and plugs; avoid daisy-chaining multiple power strips or adapters.
  • Do not back-feed the RV’s shore power inlet by plugging the station into it without a proper transfer arrangement; this can create shock and fire hazards.
  • If integrating with existing RV circuits, use a qualified technician and appropriate overcurrent protection.
  • Do not modify the station’s internal wiring or bypass built-in protections.

Load management for safety

  • Stay within the inverter’s continuous and surge ratings; regularly running at the limit increases heat and wear.
  • Avoid plugging high-draw items (such as space heaters) into the station unless you have confirmed both power capability and runtime impact.
  • Supervise children around the unit and keep small metal objects away from exposed ports.

Maintenance and Long-Term Use in RV and Motorhomes

Portable power stations require less maintenance than traditional multi-component battery systems, but a few habits will keep them reliable for RV travel.

Routine checks

  • Inspect ports, cords, and plugs regularly for looseness, discoloration, or damage.
  • Wipe dust and debris from vents and surfaces to maintain airflow.
  • Monitor battery health indicators on the display if available, such as cycle count or capacity estimates.

Storage between trips

  • Store the station in a cool, dry place out of direct sunlight.
  • Avoid long-term storage at 0% or 100% charge; many manufacturers recommend storing around 40–60% state of charge.
  • Top up the battery every few months if the unit sits unused to offset self-discharge.

Using the station through the seasons

  • Summer: Pay attention to heat buildup in RV compartments and during solar charging. High temperatures accelerate battery aging.
  • Winter: Avoid charging when the battery is below its specified minimum temperature. If needed, warm the unit inside the RV before charging.
  • Shoulder seasons: These are ideal for frequent, moderate cycling, which many lithium batteries handle well.

When to consider replacement or upgrade

  • Noticeably reduced runtime for the same loads, even after full charging.
  • Frequent over-temperature or protection shutdowns at modest loads.
  • New camping patterns (for example, longer boondocking trips) that push the station beyond its original role.

Practical Takeaways and Specs to Look For

Choosing a portable power station for RV or motorhome use is easier when you match specifications to your actual camping style instead of buying by capacity alone.

Key takeaways

  • Start by listing your must-run devices (such as fridge and CPAP) and estimating daily energy use in watt-hours.
  • Choose capacity with at least 20–30% buffer above your typical daily needs, especially if you rely on solar.
  • Focus on inverter quality and surge capability if you plan to run fridges, pumps, or microwaves.
  • Plan realistic charging: know how fast you can recharge from shore power, solar, and the vehicle alternator.
  • Treat the station as a major electrical appliance: secure it, ventilate it, and follow safe wiring practices.

Specs to look for in an RV-ready portable power station

  • Battery capacity (Wh): Match to your daily Wh estimate; common RV setups fall between 500 and 3000Wh per station.
  • Inverter type: Pure sine wave is strongly preferred for sensitive electronics and motor loads.
  • Inverter ratings: Check both continuous watts and surge watts; compare to the highest-draw appliance you plan to run.
  • AC input power: Higher AC charging wattage means faster turnaround at campgrounds or when plugged into a home outlet.
  • Solar input range and maximum watts: Ensure compatibility with the panel wattage and voltage you intend to use on your RV.
  • 12V / vehicle charging options: Look for clear specs on charging via cigarette lighter or dedicated DC input, and note expected charge times.
  • Number and type of outlets: Confirm you have enough AC outlets, 12V ports, and USB ports for your typical setup.
  • Weight and form factor: Consider whether you can comfortably move the unit between storage and use locations in the RV.
  • Display and monitoring: A clear screen showing input, output, and remaining time can simplify day-to-day energy management.
  • Operating temperature range: Check that it aligns with the climates where you camp.

If you build your decision around these specs and your own load list, a portable power station can become a dependable part of your RV power system, giving you quiet, flexible energy wherever you park.

Frequently asked questions

What specs should I prioritize when choosing a portable power station for my RV?

Prioritize battery capacity in watt-hours (Wh) to meet your daily energy needs, the inverter’s continuous and surge watt ratings to handle your highest-draw appliances, and a pure sine wave inverter for sensitive electronics. Also check AC input charging watts and solar input limits so you can recharge as quickly as your camping style requires, plus weight, port selection, and operating temperature range.

What common mistakes do RV owners make when using portable power stations?

Common mistakes include confusing watts with watt-hours, ignoring equipment startup surges, and overestimating solar output or vehicle charging capability. Avoid these by calculating Wh needs from actual device ratings, comparing startup watts to inverter surge specs, and using realistic solar or alternator inputs.

Is it safe to use a portable power station inside an RV, and what precautions should I take?

Portable power stations are generally safe when used according to instructions: keep the unit ventilated, secure it against movement while driving, and avoid enclosed, unventilated compartments. Do not back-feed shore power, use properly rated cords, and avoid charging below the manufacturer’s minimum temperature to prevent damage or protection shutdowns.

Can I run my RV fridge or microwave from a portable power station?

You can run many small compressor fridges if the station’s inverter handles the fridge’s startup surge and the battery has sufficient Wh, but microwaves draw very high continuous power and deplete capacity quickly. Always compare the appliance’s running and startup watts to the station’s specs and estimate runtime from the station’s Wh capacity.

How should I charge a portable power station while on the road?

Charge from shore power when available for the fastest and most consistent input; solar is useful for daytime topping up but depends on panel size and conditions. Vehicle 12V or alternator charging can top off a station but is often limited in current—confirm the station’s DC input rating and use the recommended cable or a qualified installer for higher-power DC charging.

How can I extend the battery life of my portable power station during long trips?

Use shallower depth-of-discharge cycles (avoid frequent 0% drains), keep the unit within its recommended temperature range, and maintain regular topping charges during storage or long trips. Also minimize conversion losses by using DC outputs for DC loads when possible and follow the manufacturer’s maintenance and storage recommendations.