Solar Safety Basics: Cables, Heat, and Preventing Connector Melt

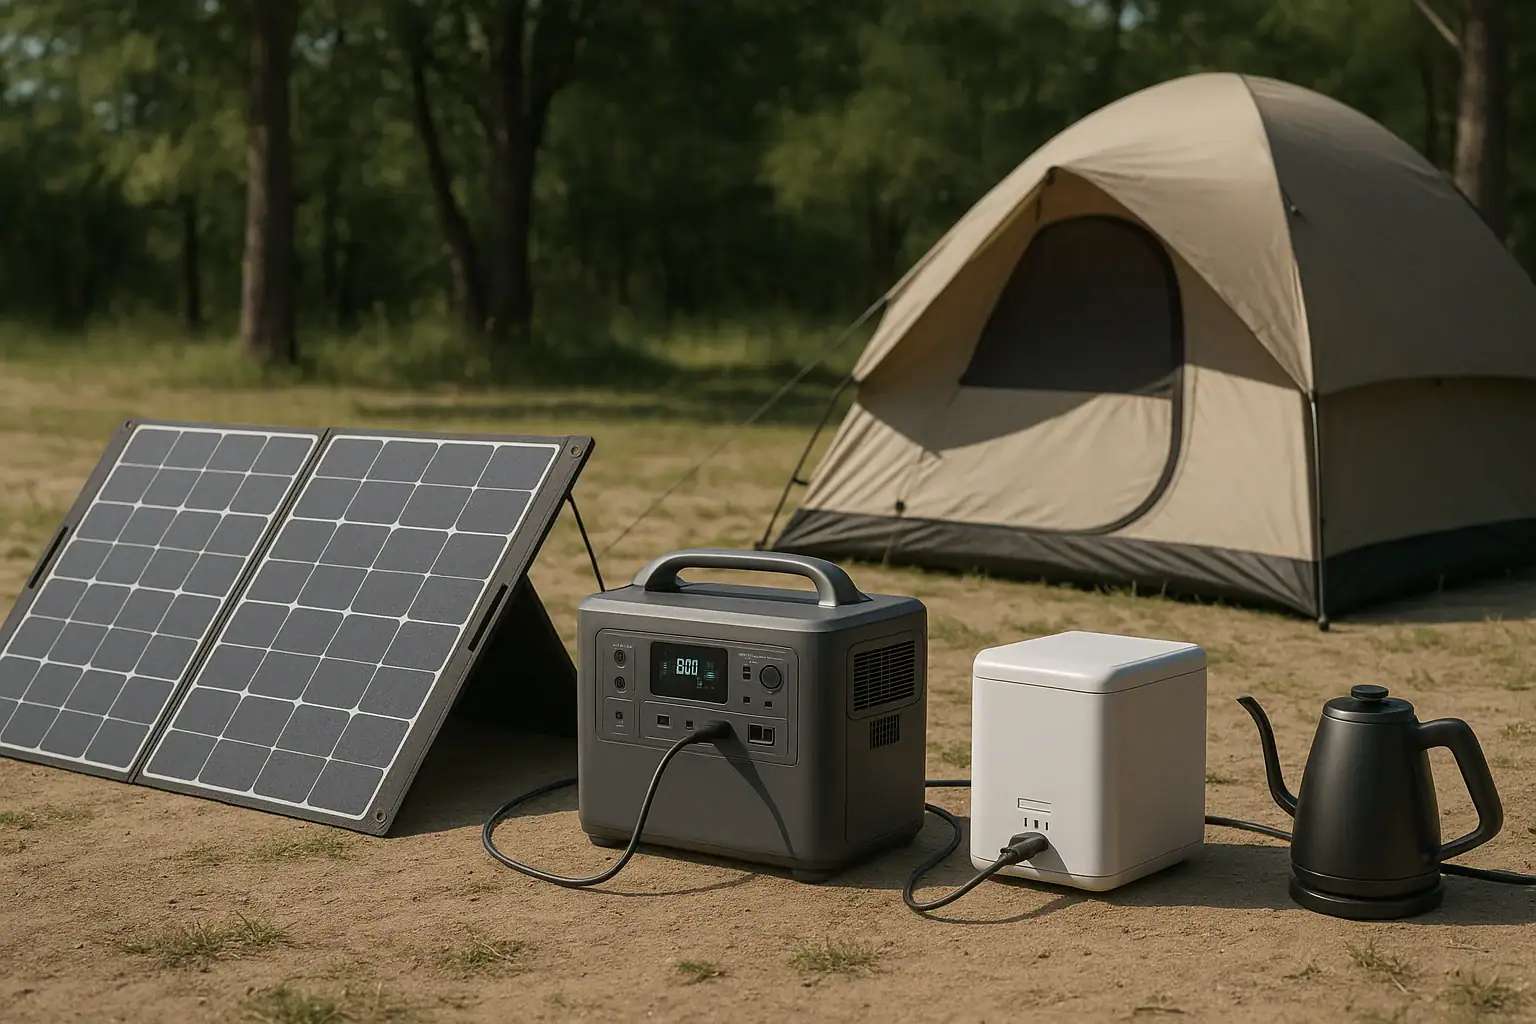
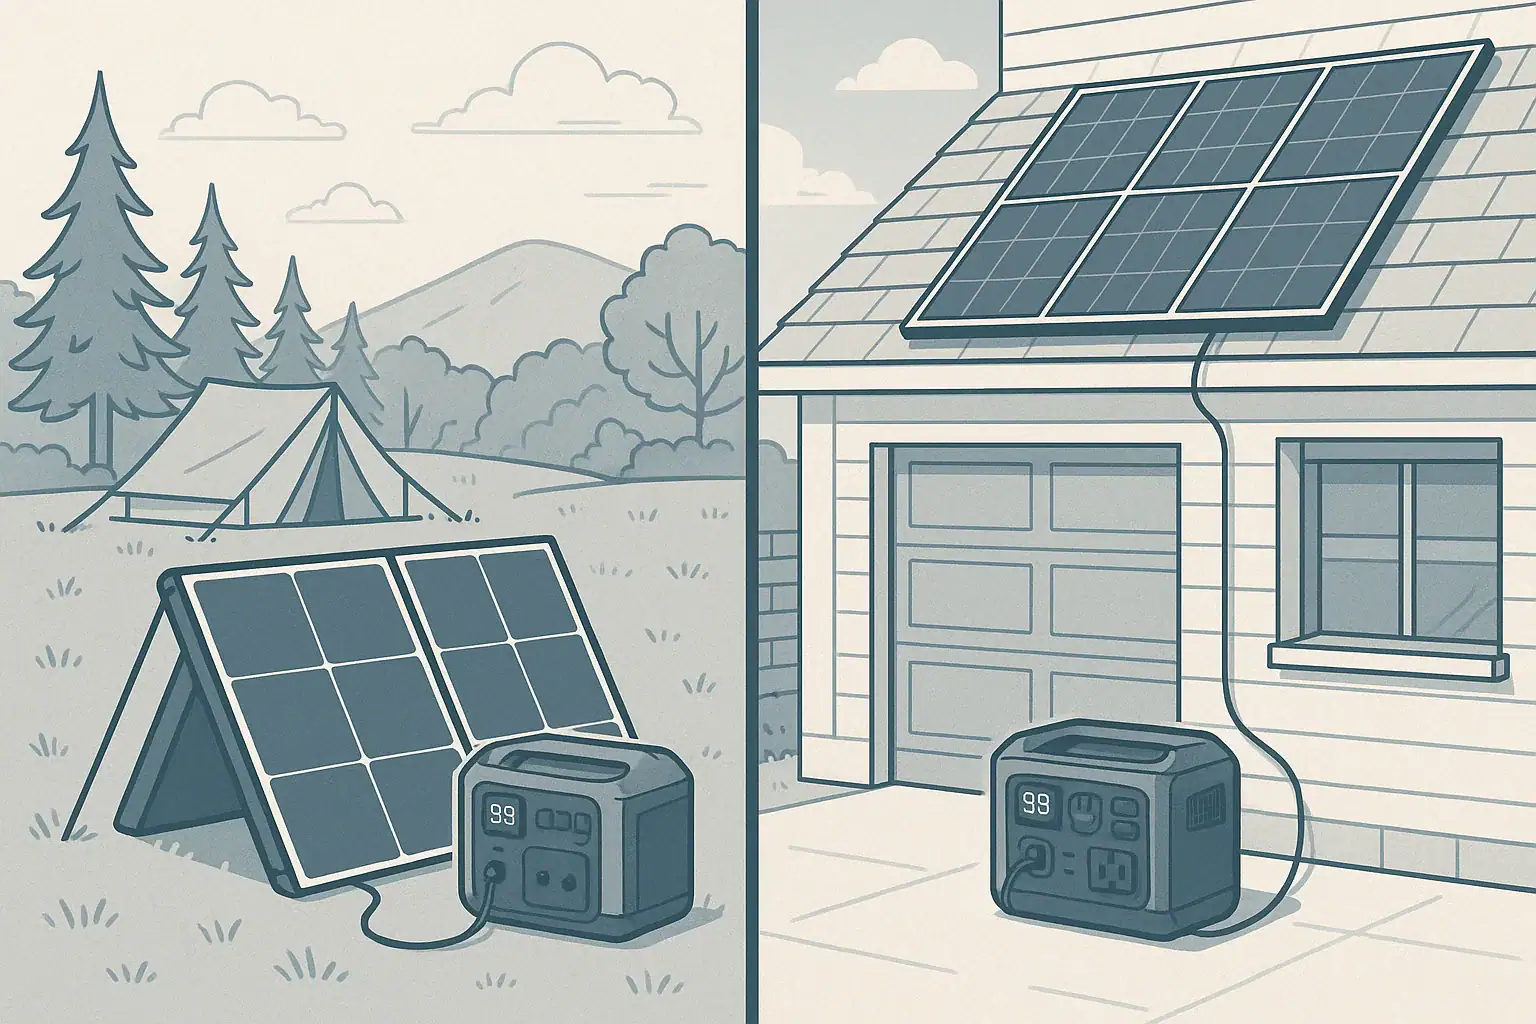
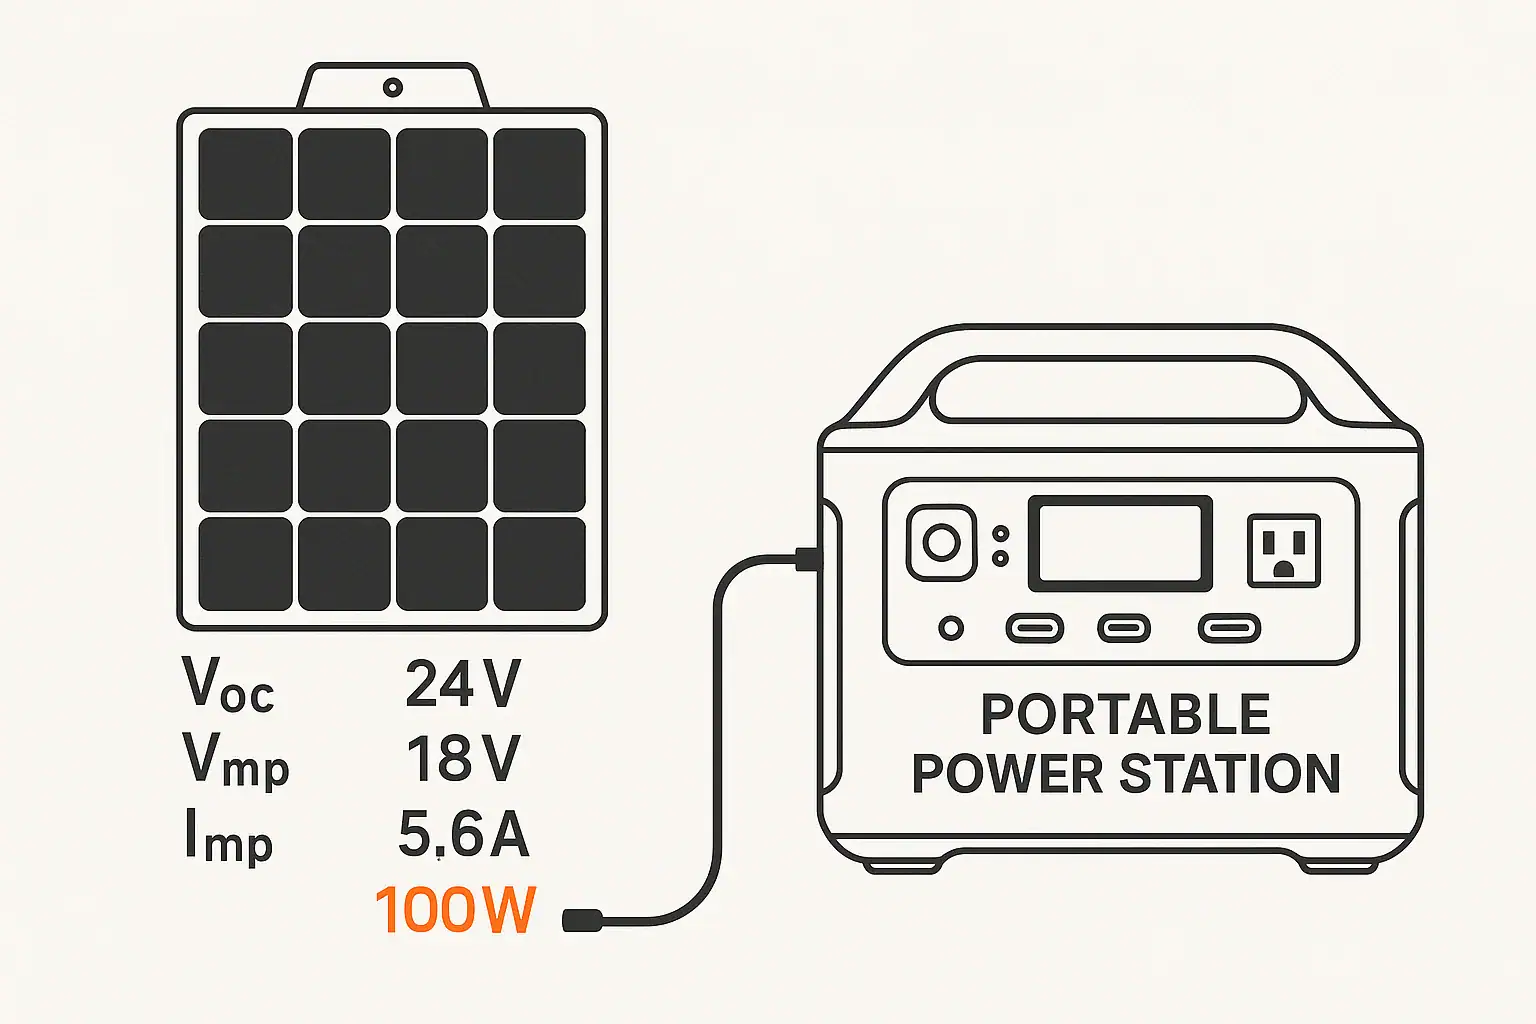
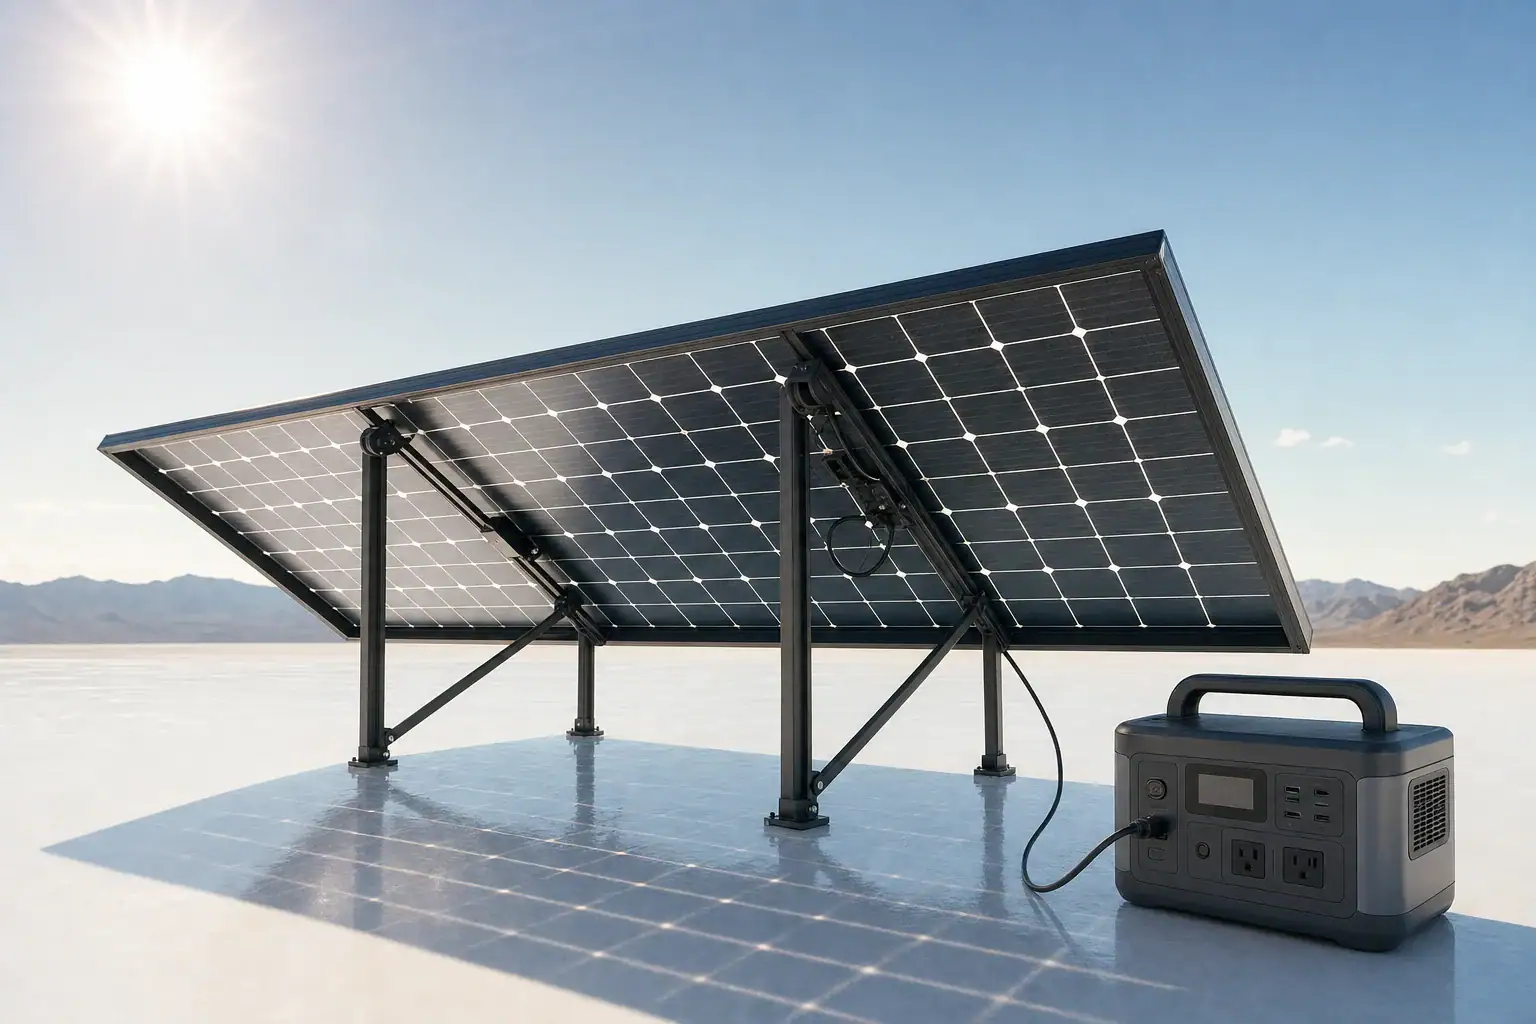
Portable power station connected to solar panel with tidy safe cabling

The most reliable way to prevent melted solar connectors and overheated cables is to keep current within the ratings of your wire and plugs, minimize heat buildup, and regularly inspect every connection in the chain. When cable size, connector type, and operating conditions all match the power you are moving, portable solar systems run safely for years.

This guide walks through the essentials of solar cable safety for portable power stations, folding panels, RV use, and small off-grid setups. You will see how cable gauge, length, and connector style affect heat, and how to spot trouble early before a plug softens or fails.

Along the way, you will find concrete examples, comparison tables, and practical checklists you can apply directly to your own solar charging kit. The goal is not to turn you into an engineer, but to give you enough understanding to choose safer cables and connectors and use them with confidence.

What Solar Cable and Connector Safety Really Means

In small solar and portable power systems, most safety issues do not start inside the battery. They start at the weak links: undersized wires, overloaded adapters, and loose or dirty connectors that run hotter than they should. Solar cable and connector safety is about keeping those weak links from turning into failures.

Any time current flows through a wire or a connector, some energy becomes heat. If that heat has nowhere to go, or if it is concentrated at a small contact point, temperatures can rise until plastic softens, insulation burns, or metal contacts lose their spring tension. Once that happens, resistance increases, which creates even more heat. This cycle is what eventually leads to partial melting or scorched plugs.

Safe solar cabling means:

  • Using wire that is thick enough for the current and length of the run.
  • Choosing connectors rated for the amps you expect to carry, with some margin.
  • Keeping cables and plugs cool enough by managing sun exposure and airflow.
  • Inspecting components regularly and retiring damaged parts before they fail under load.

When you get these basics right, you dramatically reduce the risk of melted connectors, nuisance shutdowns, or damage to your portable power station.

Key Concepts: Current, Cable Size, Heat, and Connectors

You do not need advanced math to make good decisions about solar cables and connectors, but a few simple ideas help explain why some setups run cool while others run hot.

Voltage, current, and power in small solar setups

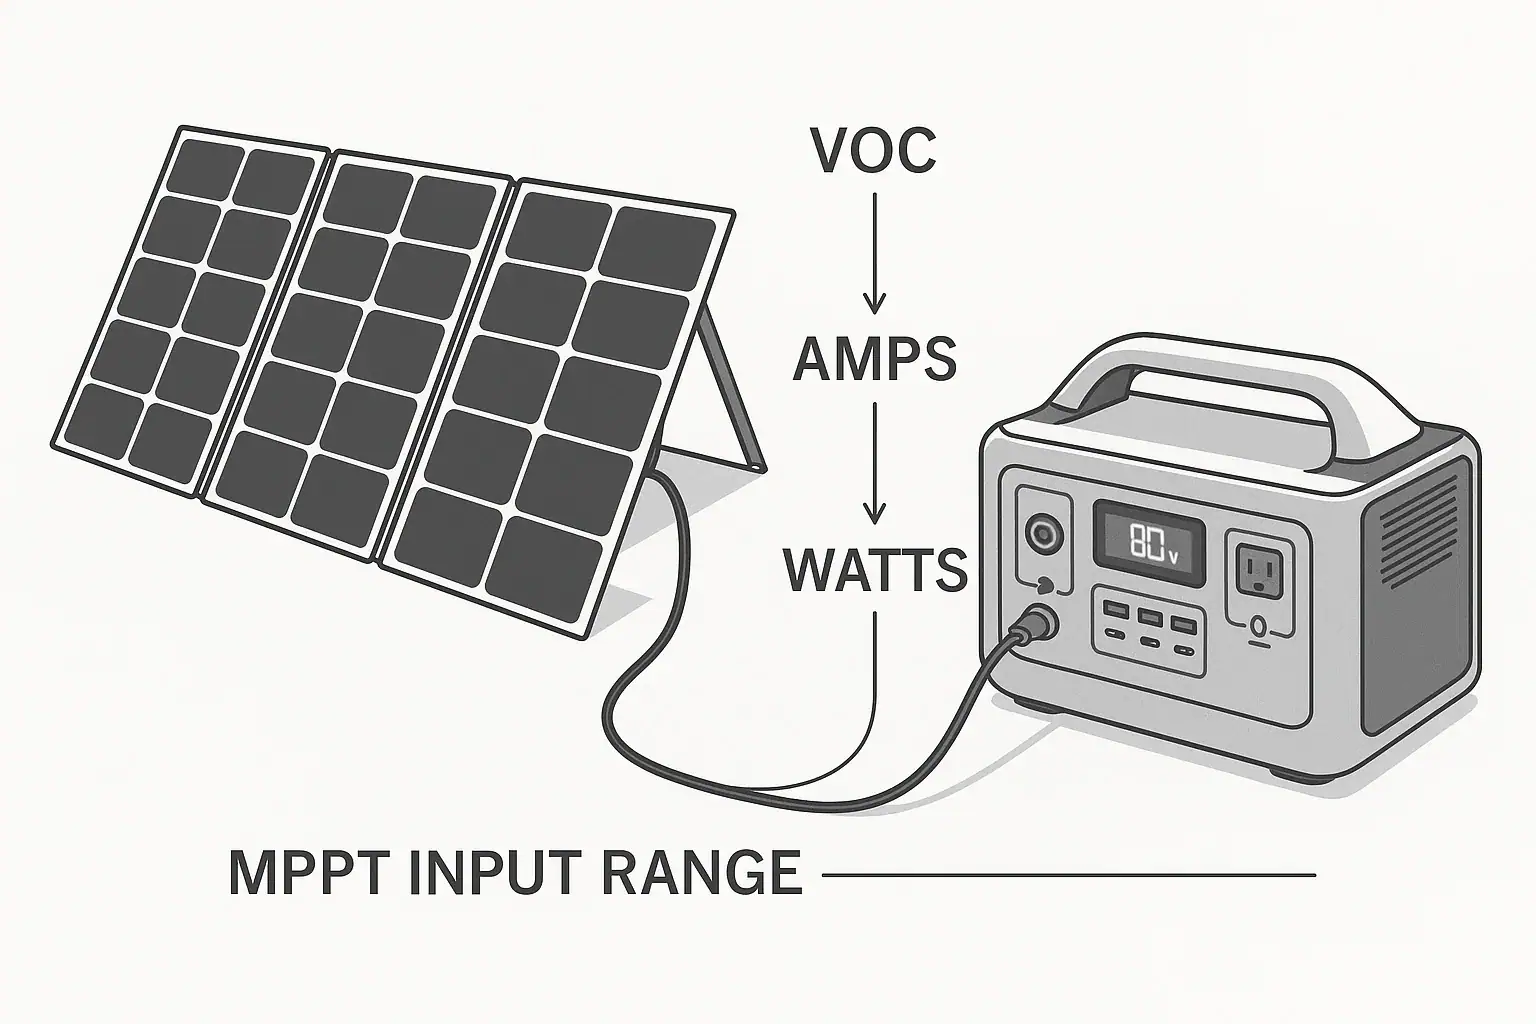
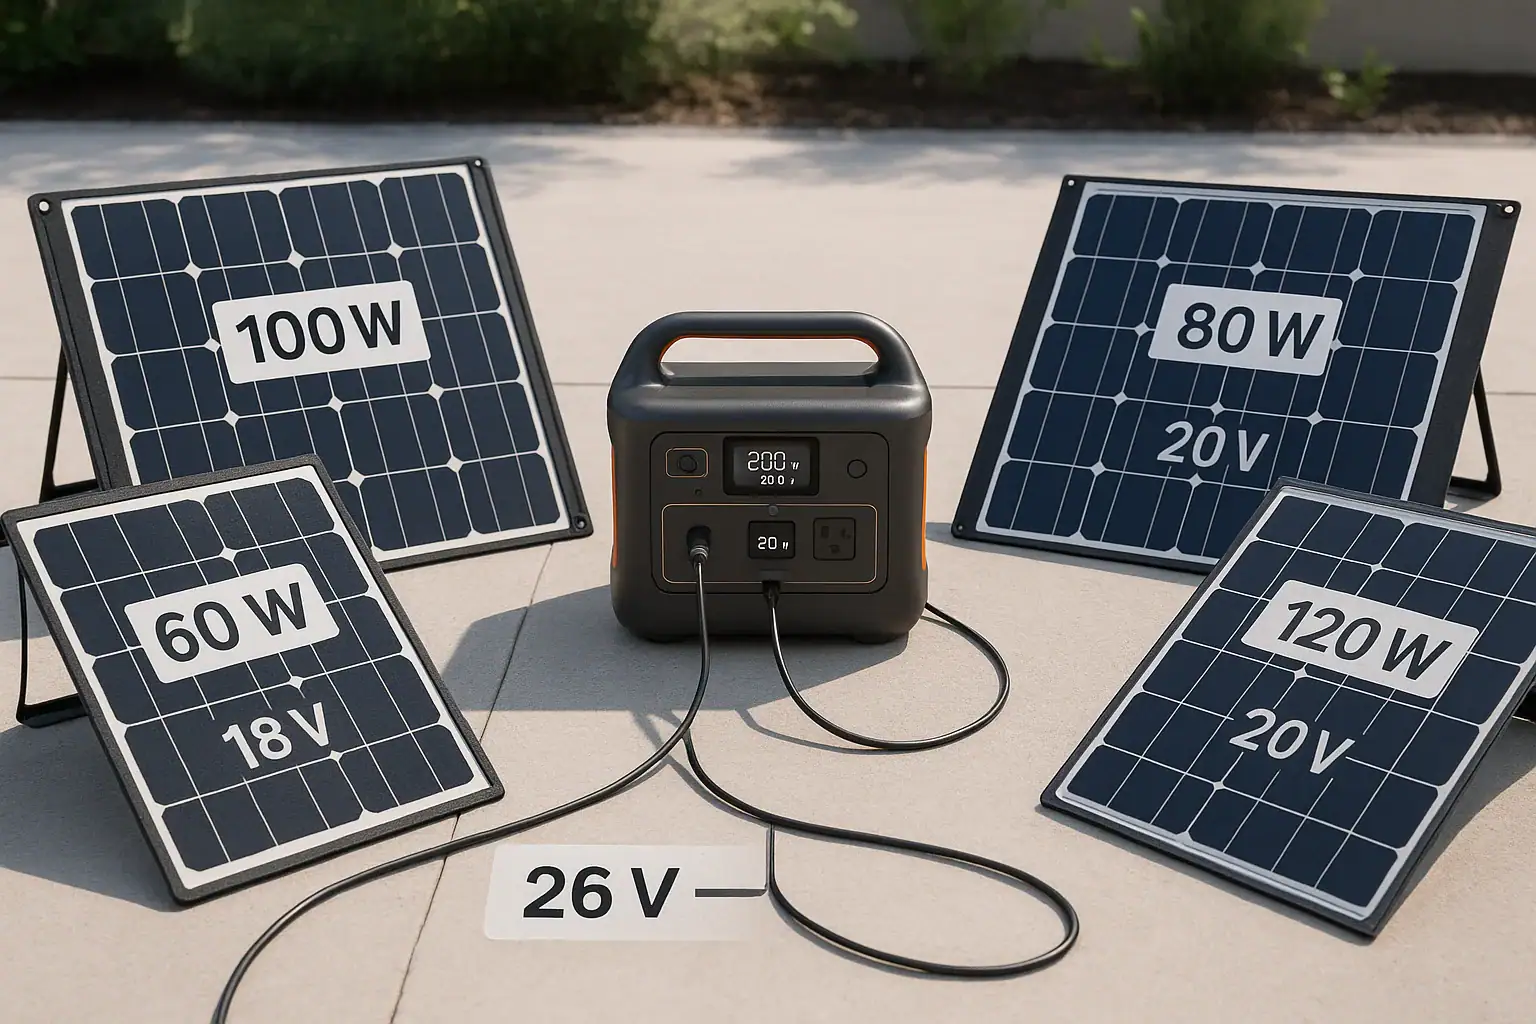
Most portable solar systems operate at low-voltage DC, often somewhere between about 12 V and 60 V depending on panel wiring and the power station’s input range. Power is the product of voltage and current:

  • Power (W) = Voltage (V) × Current (A)

For the same power level, lower voltage means higher current. Higher current is what stresses cables and connectors.

Example comparisons:

  • 200 W at 20 V ≈ 10 A
  • 200 W at 40 V ≈ 5 A
  • 400 W at 20 V ≈ 20 A

That last example (400 W at 20 V) can push the limits of common portable connectors if the wiring is thin or the plugs are not designed for continuous high current.

Why wire gauge and length matter

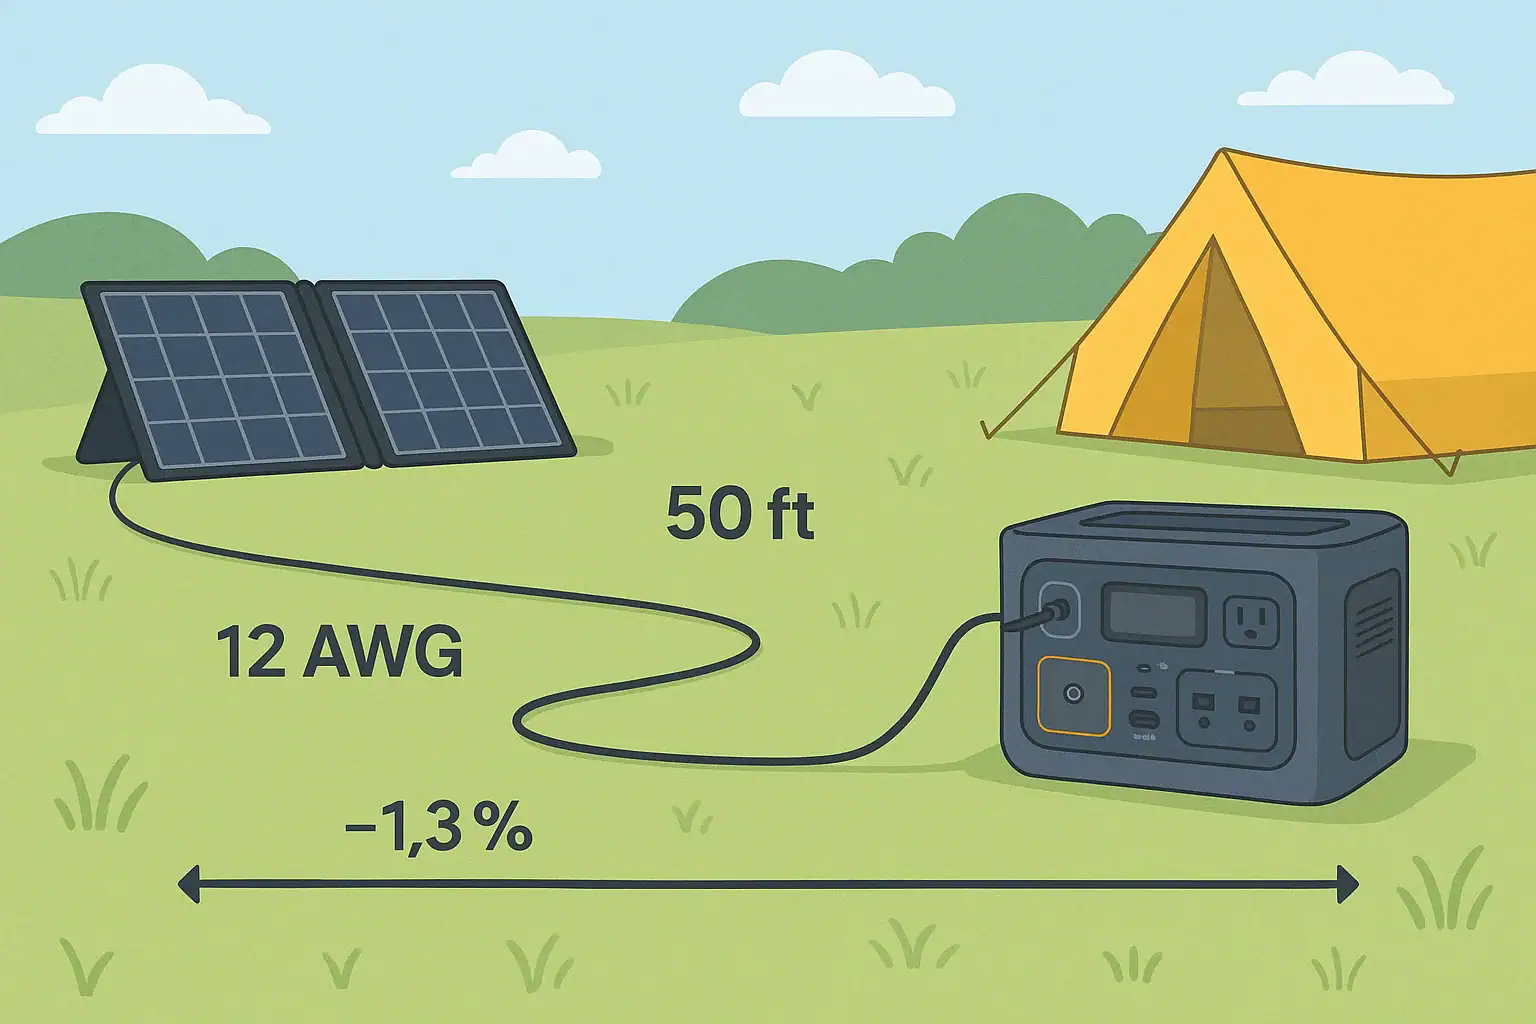
Wire gauge (AWG in the U.S.) describes the diameter of the conductor. Smaller AWG numbers mean thicker wire that can carry more current with less voltage drop and less heating. Longer cables add resistance, which increases both voltage drop and heat for the same current.

In portable solar use, general habits that help include:

  • Thicker wire (lower AWG number) for higher wattage or longer runs.
  • Shorter cables wherever practical to limit voltage drop and heating.
  • Avoiding very thin “speaker wire” or generic accessory cords for main solar runs.
Typical Portable Solar Runs: Cable and Connector Stress – Example values for illustration.
Solar Setup Example Approx. Voltage Approx. Current Typical Cable Choice Connector Stress Level
100 W folding panel to small power station (10 ft) 18–22 V 4–6 A Medium wire, short run Low, if connectors are in good condition
200 W panel to mid-size power station (20 ft) 18–22 V 9–11 A Thicker wire, modest length Moderate; check plugs for warmth in full sun
2 × 200 W panels in parallel (400 W total, 20 ft) 18–22 V 18–22 A Thick wire, well-rated splitters High; small adapters and light plugs may overheat
2 × 200 W panels in series (400 W total, 20 ft) 36–44 V 9–11 A Medium or thick wire Moderate; current is lower, but voltage limit must be respected
100 W panel through long, thin extension (40 ft) 18–22 V 4–6 A Thin wire, long run Moderate; cable can warm and charging slows from voltage drop

This table shows why higher current and longer runs demand better cabling and connectors, even at modest power levels.

Heat buildup and connector melt

Heat is rarely uniform across a system. The highest temperatures usually occur at concentrated contact points: plugs, adapters, splitters, and terminals. If a connector has high resistance (from corrosion, poor fit, or being pushed beyond its rating), it can become much hotter than the cable itself.

Warning signs that a connector is running too hot include:

  • Plastic that feels soft or rubbery while under load.
  • Darkening, yellowing, or bubbling near the contact area.
  • Acrid or “hot plastic” smell around connectors.
  • Plugs that are uncomfortable to hold for more than a second or two.

Once plastic deforms, contact pressure drops, resistance rises, and the connector can quickly progress from “a bit warm” to “partially melted.”

Common connector types in portable solar systems

Portable power stations and solar kits use several connector styles, each with its own strengths and limitations:

  • Barrel-style DC plugs – Common on smaller devices. Convenient, but can be a weak point if side-loaded or partially unplugged.
  • Multi-pin or locking DC connectors – Often used for higher-current inputs. More secure engagement, but still vulnerable to contamination or misalignment.
  • Solar-style polarized panel connectors – Two-conductor plugs designed for outdoor solar use. Generally robust when properly mated.
  • Cigarette lighter–style 12 V plugs – Designed originally for intermittent automotive use, not continuous high-current power transfer.

Problems often appear when several different connector types are chained together with multiple adapters, each adding resistance and another plastic housing that can overheat.

Real-World Examples of Heat and Connector Problems

Seeing how issues show up in real setups makes it easier to spot risks in your own system. The following scenarios are based on typical portable solar use rather than theoretical edge cases.

Example 1: Small camping setup that runs cool

A camper uses a 100 W folding panel with a short, factory-supplied cable to charge a compact power station placed in the shade. The cable is about 10 ft long, uses reasonably thick wire for the current, and the connectors are clean and fully seated.

In this case:

  • Current stays in the 4–6 A range, well within typical connector ratings.
  • Cable length is short, so voltage drop and heating are minimal.
  • Connectors stay in the shade with some airflow.

The user might feel only a slight warmth at the plugs after 20–30 minutes of strong sun, which is normal for many systems.

Example 2: RV user extending panel too far with thin wire

An RV owner wants to park in the shade while placing a 200 W portable panel in the sun. To reach the ideal spot, they add a long, thin extension cable intended for low-current accessories. The total run becomes about 40 ft.

In practice:

  • Current around 10 A runs through wire that is too thin for the length.
  • Voltage drop reduces charging efficiency at the power station.
  • The cable may feel warm along its length, and the connectors at each end get noticeably hotter.

On a hot day, this combination of electrical heating and high ambient temperature can push connectors toward softening, especially if they are low-quality or already worn.

Example 3: Parallel panels overloading a small splitter

A user combines two 200 W panels in parallel to feed a mid-size power station that accepts higher solar input. They use a compact splitter adapter designed for lower currents because it was convenient and inexpensive.

When both panels are in bright sun:

  • Total current can climb into the 18–22 A range.
  • The small splitter carries the entire combined current through tiny internal contacts.
  • The splitter body becomes the hottest part of the system, even if the main cable is thick.

If the splitter softens or fails, it can cause intermittent contact, arcing, and rapid localized heating. This is a common path to visible charring or partial melt at a single connector in an otherwise well-sized system.

Example 4: Power station charging inside a hot vehicle

During a road trip, a power station is left charging from a roof-mounted solar panel while the unit sits in a closed vehicle under direct sun. Even if the wiring is correctly sized, the internal electronics and connectors are working in a very hot environment.

Possible outcomes include:

  • Internal fans running more often and louder than usual.
  • Connectors at the DC input becoming hotter than expected.
  • Thermal protection triggering and reducing charging speed or shutting down.

While this may not immediately melt connectors, it reduces the safety margin. Any marginal or slightly damaged plug is more likely to become a problem in these conditions.

Example 5: Cigarette lighter–style plug used at high current

A user powers a high-draw 12 V appliance from a power station’s automotive-style outlet for several hours. The plug fits loosely and can wiggle in the socket.

Over time:

  • Intermittent contact causes tiny arcs and hot spots inside the plug.
  • The plastic nose of the plug may discolor or soften.
  • The user might smell hot plastic or notice the plug feels very hot when removed.

This is a clear sign that the connector is not appropriate for sustained high-current use and should be replaced with a more secure style for continuous loads.

Common Mistakes and Troubleshooting Hot Connectors

Many cable and connector problems come from a few predictable mistakes. Recognizing them early lets you fix issues before they become failures.

Frequent mistakes that lead to overheating

  • Using thin extension cables meant for low-current accessories as the main solar run.
  • Daisy-chaining multiple adapters (barrel-to-barrel, barrel-to-solar-style, multiple splitters) instead of using a single appropriate cable.
  • Allowing connectors to sit in direct sun on hot surfaces like roofs, asphalt, or metal.
  • Ignoring early warning signs such as warmth, discoloration, or an odd smell.
  • Reusing damaged connectors after they have already softened or partially melted once.

How to check for problems during use

When you first set up or change a solar configuration, plan a quick temperature check after the system has been running at good sun for 10–20 minutes.

  • Use the back of your hand to gently touch connectors, splitters, and the cable near each plug.
  • “Slightly warm” is usually acceptable; “too hot to hold comfortably” is a warning.
  • Smell around connectors for any hint of hot plastic or burning odor.

If anything feels too hot or smells off, disconnect safely (shade or cover panels first to reduce output), allow components to cool, and review your cable sizing and connector choices before trying again.

What to do if you find heat or damage

When troubleshooting, treat heat and visible damage as hard stops, not minor annoyances.

  • Softened or deformed plastic – Retire the connector or cable; do not bend it back into shape and keep using it.
  • Burn marks or charring – Replace the affected part and inspect mating connectors for matching damage.
  • Wobbly or intermittent plugs – Replace with a connector that fits snugly and is rated for your current.
  • Repeated overheating at the same spot – Reevaluate the entire path; a small adapter or splitter may be undersized.
Common Symptoms and Likely Causes – Example values for illustration.
Symptom You Notice Likely Cause Recommended Action
Connector too hot to touch in full sun Undersized connector or poor contact at pins Replace connector with higher-rated type; check for debris or corrosion
Cable warm along entire length Wire gauge too small or cable run too long Use thicker wire or shorten the run to reduce current per conductor
Hot plastic smell near power station input Overloaded or loose plug at the input jack Stop charging, inspect plug and jack, replace damaged parts
Intermittent charging when cable is bumped Loose, worn, or partially melted connector Retire and replace the connector; avoid side loading on new plugs
Visible corrosion (green or white deposits) on contacts Moisture exposure and oxidation increasing resistance Replace affected connectors; improve storage and moisture protection
Splitter or adapter is hottest component Splitter not rated for combined panel current Use a splitter or combiner rated above total amps or rewire panels

When to stop using a component immediately

Stop using a cable or connector right away if you see any of the following:

  • Melted, bubbled, or cracked plastic around the contacts.
  • Exposed metal conductors where insulation used to be.
  • Persistent hot spots that return quickly after cooling down.
  • Arcing, sparking, or visible smoke at a connection.

In these cases, replacement is safer than any attempt at repair in a portable solar context.

High-Level Safety Basics for Portable Solar Cabling

Beyond individual connectors and cables, it helps to think about your system as a whole. A few high-level practices create a wide safety margin even when conditions change.

Design for margin, not the bare minimum

Portable power systems often see real-world conditions that are harsher than lab tests: higher ambient temperatures, dust, vibration, and occasional rough handling. Designing for margin means:

  • Choosing wire that can comfortably handle more current than you expect to use.
  • Using connectors with current ratings that exceed your typical operating amps.
  • Assuming hot days and enclosed spaces, not ideal cool lab conditions.

This extra margin helps keep temperatures reasonable even when sunlight is stronger than expected or airflow is limited.

Manage heat from sun and surroundings

Dark cables and connectors can reach temperatures far above air temperature in full sun. To manage this:

  • Route cables in the shade of panels or along cooler surfaces when possible.
  • Keep connectors off very hot surfaces like black roofs, asphalt, or dark metal.
  • Avoid tight bundles; give cables some space for air to move around them.

On very hot days, it can be worth slightly reducing solar input or taking short breaks if you notice connectors trending warmer than usual.

Use protective devices where appropriate

Fuses and circuit breakers do not directly prevent connector melt from modest overloads, but they do limit current in the event of a short circuit or major fault. In some setups, adding an appropriately sized DC fuse or breaker between the panels and the power station input is recommended.

If you are planning more complex wiring, such as multiple panels on an RV roof or semi-permanent mounts, a qualified electrician or solar professional can help size protection devices and choose suitable cable routes.

Respect equipment ratings and limits

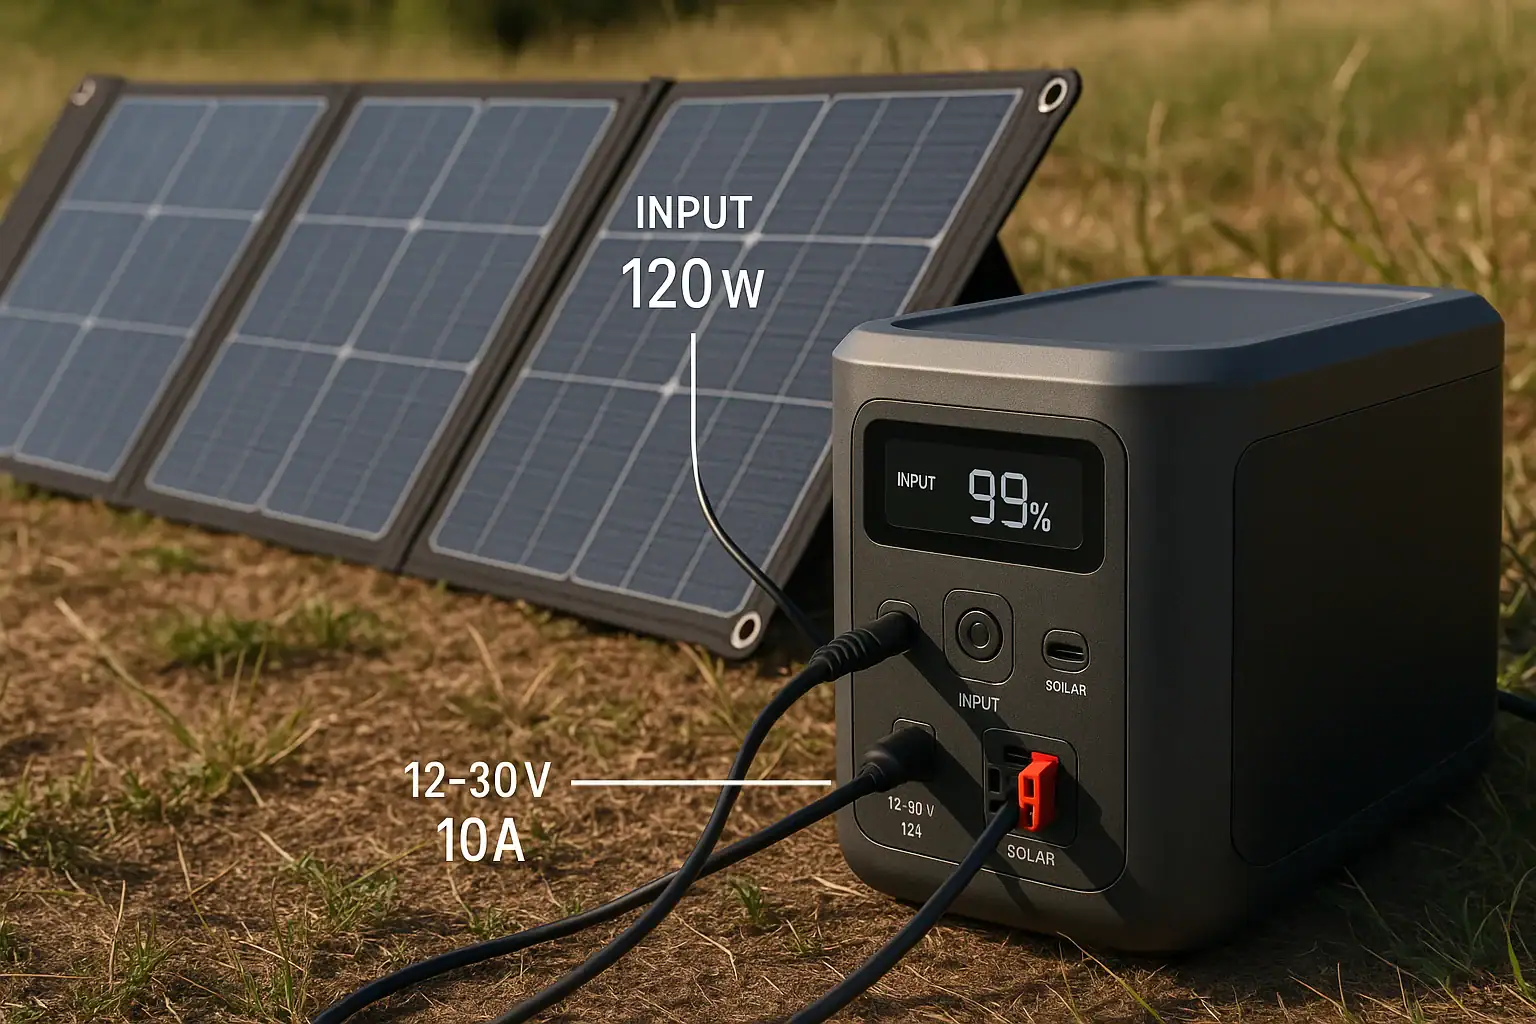
Every power station and panel has published limits for input voltage and current. Staying within these limits is fundamental:

  • Do not exceed the maximum solar input current or power rating.
  • Keep total panel voltage within the allowed DC input range, especially in series configurations.
  • Remember that cold weather can increase panel voltage slightly, which matters near the upper limit.

When in doubt, run panels at a more conservative configuration rather than pushing every limit simultaneously.

Maintenance and Storage for Long-Term Connector Health

Even well-designed systems can develop problems over time if cables are abused or stored poorly. Simple habits can extend the life of your solar wiring and keep connectors working safely.

Routine inspection habits

Before a camping trip, storm season, or extended RV travel, take a few minutes to check your solar cables and connectors.

  • Look for cuts, abrasions, or crushed spots in the cable jacket.
  • Inspect plugs for discoloration, cracks, or wobbling shells.
  • Check that locking or latching mechanisms still engage securely.

If you see any damage that exposes conductors or compromises mechanical strength, plan to replace that component before relying on it.

Cleaning and handling connectors

Clean, well-handled connectors run cooler and last longer.

  • Keep contacts dry and free of dirt, sand, or metal shavings.
  • Avoid spraying harsh cleaners directly into connectors; wipe around them instead.
  • When disconnecting, pull on the connector body, not the cable itself.

If a connector has been exposed to moisture, allow it to dry thoroughly before use. Visible corrosion is a sign that replacement is safer than attempting to scrape or sand the contacts.

Storage practices for cables and adapters

Good storage protects both the plastic housings and the metal contacts.

  • Coil cables loosely, avoiding tight kinks or sharp bends right at connectors.
  • Store cables in a dry bag, bin, or compartment where they will not be crushed.
  • Keep connectors away from standing water, fertilizers, or chemicals that can accelerate corrosion.

For RVs or vehicles stored in hot climates, consider removing sensitive adapters and storing them in a cooler indoor location when not in use for long periods.

Replacing aging or questionable components

Over years of use, even well-treated connectors can lose spring tension or develop internal wear. If you notice any of the following, plan to replace the part:

  • Plugs that no longer fit snugly or wiggle easily.
  • Connectors that have overheated in the past, even if they still “work.”
  • Adapters whose plastic feels brittle, chalky, or unusually soft.

Replacing a cable or adapter is usually far less costly than dealing with damage to a power station input or panel connector caused by a failing plug.

Practical Takeaways and Specs to Look For

Bringing everything together, a few practical rules of thumb will keep most portable solar users out of trouble.

Key takeaways for everyday use

  • Keep current within the ratings of your cables and connectors, with some safety margin.
  • Favor shorter, thicker cables over long, thin ones, especially above about 200 W of solar.
  • Minimize adapter chains and avoid making a tiny splitter carry the entire system current.
  • Check connector temperatures early in a new setup and after any major changes.
  • Retire any component that shows melting, charring, or repeated overheating.

Specs to look for when choosing cables and connectors

When you are shopping for or organizing components for your portable solar kit, use this checklist to compare options:

  • Wire gauge (AWG) – Choose a lower AWG (thicker wire) for higher wattage or longer runs; this reduces voltage drop and heat.
  • Current rating (A) – Ensure connectors, splitters, and adapters are rated above the maximum amps you expect in full sun.
  • Voltage rating (V DC) – Make sure cables and connectors are rated for or above your highest panel voltage, including series configurations.
  • Temperature rating – Higher temperature ratings provide more margin in hot climates or enclosed spaces.
  • Outdoor suitability – Prefer connectors and cable jackets described as suitable for outdoor or solar use, with good UV and moisture resistance.
  • Mechanical design – Look for secure locking or latching mechanisms and strain relief at the cable entry into the connector.
  • Length options – Use the shortest length that still reaches comfortably, rather than oversizing and coiling large amounts of extra cable.

By matching these specs to the way you actually use your portable solar system, you can keep cables and connectors running cool, avoid nuisance failures, and protect your power station investment over the long term.

Frequently asked questions

Which cable and connector specifications are most important for safe portable solar setups?

Prioritize wire gauge (lower AWG for thicker conductors), connector and splitter current ratings above your expected amps, and voltage ratings that exceed your highest panel voltage. Also consider temperature and UV resistance, secure mechanical designs (locking/strain relief), and choose the shortest practical cable length to limit heating and voltage drop.

Why is using thin extension cables or daisy-chaining adapters a bad idea?

Thin extensions and chains of adapters add resistance and multiple contact points, increasing voltage drop and localized heating. That extra resistance can cause connectors to run hot, degrade over time, and in extreme cases soften or melt under continuous load.

What simple system-level precautions reduce the risk of overheating or connector melt?

Design with margin by choosing thicker wire and higher-rated connectors than strictly needed, keep connectors out of direct sun and off hot surfaces, and avoid tight cable bundles to allow airflow. Regular inspections and removing or replacing questionable parts further reduce overheating risk.

How often should I inspect and replace solar cables and connectors?

Check connectors visually and by touch before trips and after major changes, and perform a quick temperature check after 10–20 minutes of full sun when setting up. Replace any component that shows wobble, discoloration, softening, corrosion, or persistent hot spots.

Can I use cigarette-lighter (12 V) plugs for continuous high-current charging?

No — cigarette-lighter–style plugs were designed for intermittent automotive use and can loosen, arc, and overheat under sustained high current. For continuous or high-current loads, use connectors and sockets rated for the amperage and duty cycle you expect.

What should I do immediately if a connector smells of hot plastic or is too hot to touch?

Safely reduce panel output (shade or cover panels), disconnect the affected components, and allow them to cool before inspecting. Retire and replace any connector showing deformation, charring, or persistent hot spots, and reassess cable gauge and connector ratings before reuse.

Balcony Solar + Power Station: A Practical Apartment Setup That Actually Works

Portable power station connected to solar panel on apartment balcony

A balcony solar power station is a small solar panel on your balcony connected to a portable power station that runs a few essential devices without touching your apartment’s wiring. It is a simple, off-grid way for renters and condo owners to get backup power and everyday solar charging with minimal equipment.

Instead of feeding electricity into your wall outlets, the balcony solar panel charges the portable battery, and you plug devices directly into the battery’s AC, DC, or USB ports. This makes the setup flexible, renter-friendly, and easy to move for travel or emergencies. With realistic expectations and basic planning, a balcony solar system can keep phones, laptops, lights, and a router running through short outages and help offset some daily electricity use.

This guide walks through what a balcony solar power station is, how it works in an apartment, realistic examples of what it can power, common mistakes to avoid, and the key specs to look for before you buy.

What a Balcony Solar Power Station Is and Why It Matters for Apartments

A balcony solar power station is a compact, self-contained solar and battery setup designed to work entirely off-grid in a small space. It usually consists of one or two portable solar panels on the balcony and a portable power station (battery with inverter and outlets) kept just inside the door or in a nearby room.

Unlike permanent rooftop solar, this setup does not connect to the building’s electrical system. That is what makes it practical for renters, small condos, and apartments with strict rules. You can usually set it up, move it, or store it without any electrical work or permits, as long as you follow building rules about visible equipment and safety.

For most apartment residents, the main reasons to consider a balcony solar power station are:

  • Backup power during short outages – Keep communication, lighting, and basic comfort devices running.
  • Everyday solar charging – Charge phones, tablets, and laptops from sunlight instead of wall outlets when the sun is out.
  • Portability – Take the power station on road trips or camping, then bring it back home for backup use.
  • No wiring changes – Everything stays plug-and-play, which is important when you do not control the building’s electrical system.

The key is to think of a balcony solar power station as a small, flexible energy island, not a full home replacement. When sized correctly, it can handle the most important low-power needs in a compact apartment.

How a Balcony Solar + Power Station Setup Works

A balcony solar power station is built from a few core components that work together as a simple off-grid system. Understanding each piece helps you size and use it correctly.

Core Components

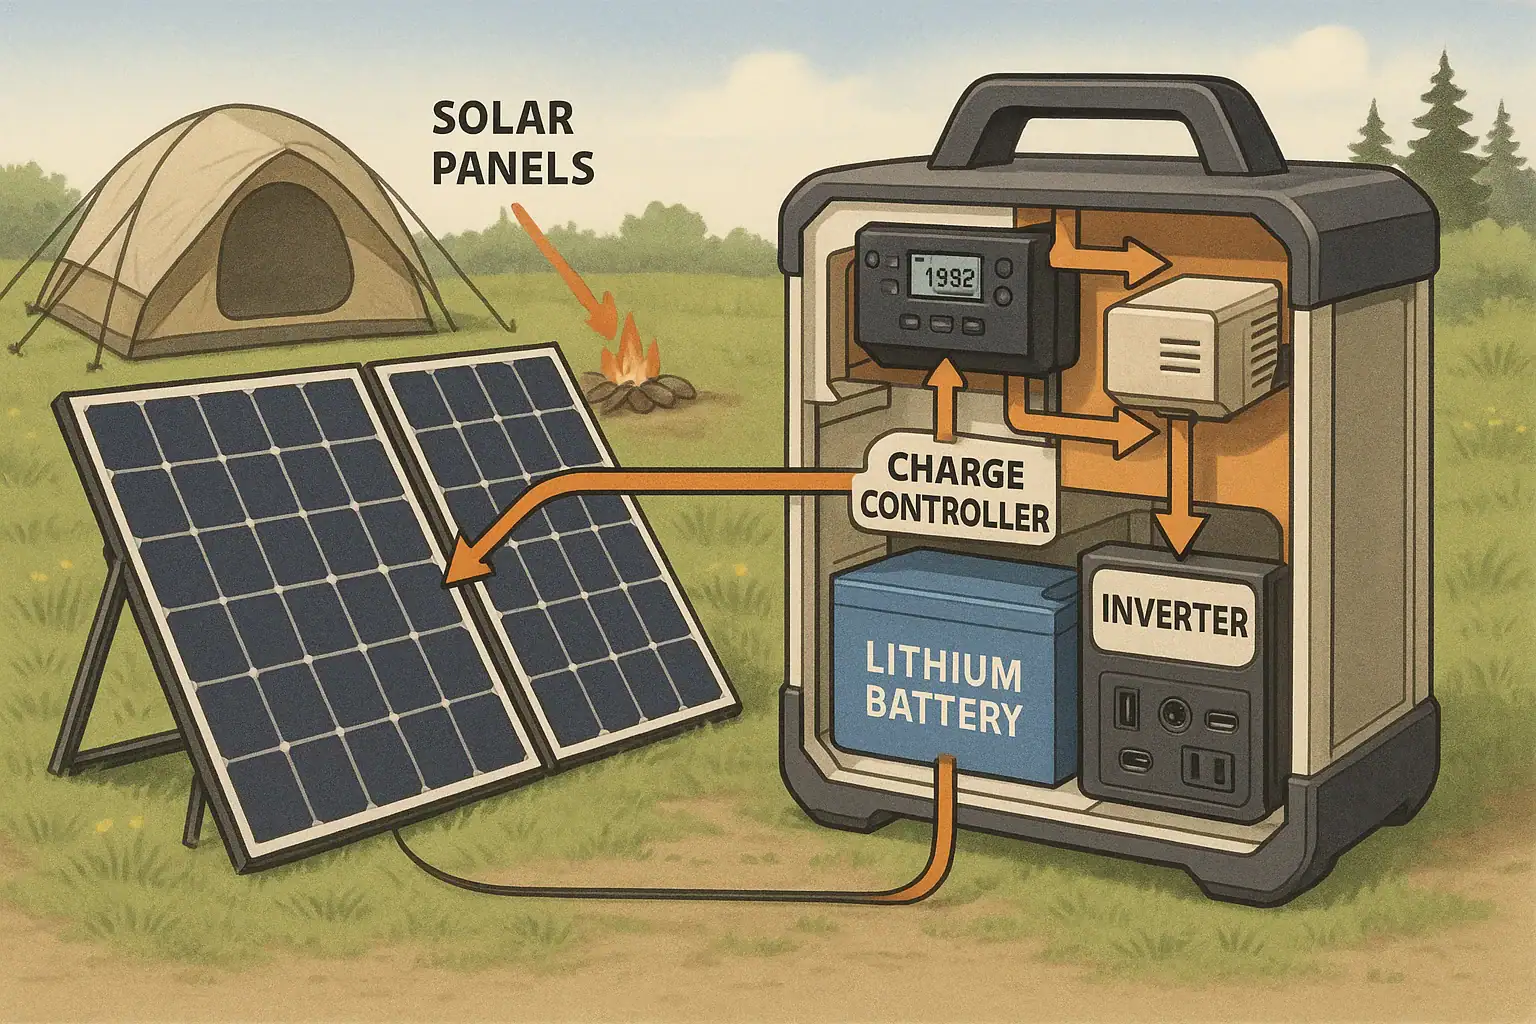
  • Portable power station – A rechargeable battery with built-in inverter, charge controller, and multiple output ports.
  • Balcony-friendly solar panel – A foldable or rigid panel that fits safely on the balcony and connects to the power station’s solar input.
  • Cables and adapters – Properly rated cables that match the connector type and voltage of both the panel and the power station.

The flow is simple: sunlight hits the solar panel, the panel sends DC power to the power station’s solar input, the power station stores that energy in its battery, and you plug devices into the outputs when needed.

Battery Capacity and Power Output

Two numbers define what your power station can do:

  • Battery capacity (Wh) – How much energy the battery can store. More watt-hours (Wh) means longer runtimes.
  • Inverter rating (W) – How much power (watts) the AC outlets can deliver at once. This limits what you can plug in at the same time.

For most apartments, a capacity between about 500 and 1,500 Wh and an inverter in the 300 to 1,500 W range covers basic needs like phones, laptops, routers, lights, and a few small appliances. Very power-hungry devices such as space heaters and hair dryers are usually not a good fit.

Solar Input and Balcony Conditions

The solar side has its own limits and practical constraints:

  • Panel wattage – Typical portable panels for balconies range from about 60 W to 200 W per panel.
  • Power station solar input limit – The maximum solar watts and voltage the power station can accept. Your panel or panel combination should stay within this limit.
  • Orientation and shading – A south-facing balcony with several hours of direct sun will perform far better than a shaded north-facing balcony.

Real solar output is usually lower than the panel’s rated wattage, especially on a balcony where railings, nearby buildings, and overhangs cause partial shade or bad angles. Planning with conservative expectations keeps the system from feeling disappointing.

Typical apartment-friendly system sizes
Use case Approx. battery size (Wh) Approx. inverter size (W) Suggested solar panel size (W) What this level can reasonably cover
Minimal backup 300–500 Wh 200–400 W 60–100 W Phones, router, one laptop, small LED lights for an evening
Comfortable short outages 500–1,000 Wh 300–800 W 100–200 W Phones, router, laptop, fan or small TV for several hours
Heavier mixed use 1,000–2,000 Wh 800–1,500 W 200–400 W Multiple laptops, lights, fan, occasional use of small kitchen appliances

Example values for illustration.

Outputs and Efficient Use

Most power stations provide several output types:

  • AC outlets (120 V) – For standard plugs; convenient but less efficient because they use the inverter.
  • DC ports (often 12 V) – For car-style devices, some coolers, and LED lighting; more efficient than AC for the same device.
  • USB-A and USB-C – For phones, tablets, and many laptops; usually the most efficient way to charge small electronics.

Whenever possible, charge devices over USB or DC instead of AC. That reduces inverter losses and stretches the usable runtime of your battery during an outage.

Pass-Through Charging and Daily Use

Many power stations support pass-through charging, where the unit can charge from solar or the wall while powering devices. In an apartment, people often:

  • Place the power station near the balcony door.
  • Charge it from the balcony solar panel during the day.
  • Plug in a laptop, router, or desk light while it is charging.

This creates a simple, solar-assisted workstation. Always check the manual for your specific model to confirm pass-through support and any limits on continuous use.

Real-World Examples: What You Can Power and for How Long

To make balcony solar practical, it helps to think in real runtimes instead of just watt-hours. The following examples assume moderate efficiency and leave some safety margin, since real performance varies with device behavior and inverter losses.

Example 1: 500 Wh Power Station with 100 W Balcony Panel

This is a common starter setup for a small apartment or studio.

  • Phone (10 W while charging) – Dozens of full charges over several days.
  • Wi-Fi router and modem (20 W total) – Around 15–18 hours of runtime from a full battery.
  • Laptop (60 W while in use) – About 6–7 hours of active work time.
  • LED lamp (10 W) – Roughly 30–35 hours of light.

In a short outage, you might run the router and a laptop for a few hours, then switch to just router and lights in the evening. The 100 W panel can slowly recharge the battery between outages or during lower usage days.

Example 2: 1,000 Wh Power Station with 200 W Balcony Panel

This level suits someone who works from home and wants more comfort in outages.

  • Router + modem (20 W) – 30+ hours of runtime.
  • Two laptops (total 100 W while in use) – 8–9 hours of active work time.
  • Small fan (30 W) – 20–24 hours of runtime.
  • LED TV (80 W) – 8–10 hours of viewing.

With a 200 W panel and several hours of good sun, you can recover a meaningful portion of the battery each day, especially if you limit high-demand devices to specific times.

Estimating runtimes for common apartment devices
Device Typical power draw (W) Approx. runtime on 500 Wh battery Approx. runtime on 1,000 Wh battery Notes
Smartphone charging 5–15 W 30–60+ full charges 60–120+ full charges Charge over USB for best efficiency.
Wi-Fi router + modem 10–30 W 15–30 hours 30–60 hours Turn off when not needed to save energy.
Laptop (in active use) 40–90 W 5–9 hours 10–18 hours Lower screen brightness to extend runtime.
LED lamp 5–15 W 25–75 hours 50–150 hours Efficient lighting is ideal for outages.
Small fan 20–50 W 8–20 hours 16–40 hours Run on lower speed when possible.
Compact fridge (efficient type) 40–100 W (running) 4–10 hours of compressor runtime 8–20 hours of compressor runtime Startup surge may be higher; test in advance.

Example values for illustration.

How Balcony Solar Helps Day to Day

Even outside of outages, a balcony solar power station can take over some routine charging:

  • Charge phones, tablets, and wireless earbuds during sunny hours.
  • Run a desk lamp and laptop at a home office powered mainly by the sun.
  • Use the power station for balcony or rooftop gatherings where outlets are inconvenient.

This everyday use keeps the battery active and familiar so you know exactly what to expect when a real outage happens.

Common Mistakes and Simple Troubleshooting

Most balcony solar power station issues come from sizing, placement, or connection mistakes rather than hardware failures. Recognizing these early saves frustration and money.

Common Planning and Setup Mistakes

  • Overestimating what the system can power – Expecting to run space heaters, air conditioners, or full-size kitchen appliances on a compact setup.
  • Ignoring balcony shading – Choosing panel sizes based on ideal conditions when the balcony only gets a few hours of partial sun.
  • Mismatched connectors or voltages – Buying a panel that does not match the power station’s solar input requirements.
  • Placing the panel where wind can catch it – Leaning a panel loosely against the railing without proper securing.
  • Leaving the power station in direct sun or rain – Shortening battery life or risking damage by ignoring environmental limits.

Quick Troubleshooting Cues

  • Solar is not charging, or charging very slowly
    • Check that the panel is facing the sun and not heavily shaded.
    • Verify all connectors are fully seated and polarity is correct.
    • Confirm the panel’s voltage and wattage are within the power station’s solar input specs.
    • Try in the middle of the day when the sun is highest to see if output improves.
  • Devices shut off unexpectedly
    • Check the battery state of charge; it may simply be empty.
    • Compare the device wattage to the inverter’s continuous rating; you may be overloading it.
    • For motor loads (fans, fridges), consider startup surges that briefly exceed the inverter rating.
  • Power station feels unusually hot
    • Move it out of direct sun and away from heat sources.
    • Reduce the number of devices connected or their total power draw.
    • Ensure ventilation openings are not blocked by walls, curtains, or blankets.
Common symptoms and likely causes in balcony setups
Symptom Likely cause Practical next step
Solar input reads near zero on a sunny day Loose connection or incompatible panel voltage Inspect all connectors, verify panel specs against power station input, and reseat cables.
Inverter shuts off when a device starts Startup surge exceeds inverter peak rating Try a smaller device, or use a power station with higher surge capacity for that load.
Battery drains faster than expected High AC loads and inverter losses Shift small devices to USB/DC, and avoid running multiple AC appliances at once.
Panel moves or rattles in strong wind Insufficient mounting or support Add straps, brackets, or a weighted stand designed for outdoor use.
Unit will not charge in cold weather Battery protection against charging below freezing Bring the power station indoors, let it warm to room temperature, then retry charging.

Example values for illustration.

When to Seek Professional Help

If you ever consider connecting a power station to building wiring, backfeeding an outlet, or modifying fixed electrical equipment, stop and consult a licensed electrician. A balcony solar power station is intended to remain a standalone system with devices plugged directly into its outlets.

Safety Basics for Balcony Solar and Indoor Battery Use

Balcony solar power stations operate at relatively low power compared with whole-home systems, but they still store and move enough energy to deserve careful handling. Good safety habits protect both people and property.

Electrical Safety Indoors

  • Use only power strips and extension cords rated for the loads you plan to connect.
  • Avoid daisy-chaining multiple power strips together.
  • Keep cords out of walkways to prevent tripping and accidental yanking of the power station.
  • Do not run cords where doors or windows will pinch them.

Balcony Placement and Weather Safety

  • Secure solar panels so they cannot tip, slide, or fall from the balcony.
  • Keep electrical connections away from areas where water can pool.
  • Bring the power station indoors during rain, storms, or extreme temperatures unless it is specifically rated for outdoor use.
  • Do not cover vents on the power station; it needs airflow for cooling.

Battery Handling and Ventilation

  • Place the power station on a stable, non-flammable surface such as tile or a sturdy shelf.
  • Allow space around the unit so fans and vents are not blocked.
  • If you notice swelling, cracking, unusual smells, or smoke, disconnect everything and stop using the unit.
  • Keep the battery away from flammable materials and out of reach of small children and pets.

High-Level Guidance on Integration

Do not connect a balcony solar power station directly to apartment outlets, breaker panels, or building circuits. Backfeeding power into wiring can endanger maintenance staff and neighbors, and it may violate building codes and lease terms. The intended safe use is to plug devices directly into the power station’s own outlets or a single, properly rated power strip.

Maintenance, Storage, and Long-Term Use in Small Spaces

With basic care, a balcony solar power station can remain reliable for many years. In apartments, the main challenges are temperature swings, limited storage space, and infrequent use between outages.

Battery Care Over Time

  • Avoid full discharge when possible – Try not to leave the battery at 0% for long periods; recharge after heavy use.
  • Store at partial charge – For long storage, many manufacturers recommend keeping the battery around 30–60% charged.
  • Exercise the battery – Use and recharge the system every few months so you stay familiar with its behavior and the cells remain active.

Temperature and Environmental Considerations

  • Do not charge the battery below freezing; let a cold unit warm up indoors first.
  • Avoid leaving the power station in hot, enclosed spaces like a sun-baked balcony closet.
  • Store foldable panels in a dry place where they will not be bent, crushed, or exposed to moisture.

Simple Inspection Routine

  • Check cables for nicks, cracks, or loose connectors.
  • Wipe dust from panel surfaces with a soft cloth; do not use abrasive cleaners.
  • Test your outage setup before storm season: confirm the panel charges the battery and that key devices run as expected.

Practical Takeaways and Specs to Look For

By now, the main pattern is clear: a balcony solar power station works best when it is sized for modest loads, placed carefully on the balcony, and used as a standalone power source. It will not replace the grid, but it can make short outages and everyday charging much more manageable in an apartment.

Quick Planning Takeaways

  • Decide which devices truly matter in an outage: phones, router, laptops, lights, and maybe a fan or compact fridge.
  • Choose a battery size that can power those devices for at least one evening without help from solar.
  • Match solar panel size to both your balcony’s sun exposure and the power station’s solar input limit.
  • Keep the power station indoors near the balcony door, with the panel outside and cables routed safely.
  • Use USB and DC outputs whenever possible to get more runtime from the same battery capacity.

Specs to Look For in a Balcony Solar Power Station Setup

  • Battery capacity (Wh) – For basic apartment backup, many people find 500–1,000 Wh to be a practical starting range.
  • Inverter continuous and surge rating (W) – Check both numbers and compare them to the highest-wattage device you plan to run.
  • Solar input rating (W and V) – Ensure your planned panel or panel combination stays within the watt and voltage limits.
  • Supported solar connector types – Confirm that the power station and panel use compatible connectors or that a proper adapter is available.
  • Number and type of outputs – Look for enough AC outlets, USB-A, USB-C, and DC ports to cover your devices without constant swapping.
  • Pass-through charging capability – Helpful if you want to use the power station like a small solar-assisted UPS for a router or laptop.
  • Weight and handle design – Matters if you plan to move the power station between rooms, vehicles, and trips.
  • Operating and storage temperature range – Important for balconies in very hot or cold climates.
  • Display and basic monitoring – A clear readout of input, output, and remaining battery helps you manage loads during an outage.

If you choose components with these specs in mind, secure the panel safely on the balcony, and follow simple maintenance and safety practices, a balcony solar power station can be a reliable, renter-friendly source of backup and everyday power in almost any apartment.

Frequently asked questions

Which technical specifications and features matter most when choosing a balcony solar power station?

Prioritize battery capacity (Wh) to match how long you need power, the inverter’s continuous and surge ratings to handle your devices, and the solar input limits (W and V) so panels are compatible. Also consider the number and types of outputs (AC, DC, USB), pass-through charging, connector compatibility, and physical factors like weight and operating temperature range.

What is the most common mistake people make when setting up balcony solar that reduces performance?

People often overestimate sun exposure and place panels where shading or poor angles drastically cut output. Mismatching panel voltage or wattage with the power station’s solar input and under-sizing the battery for realistic loads are other frequent errors.

What safety precautions should I take when using a balcony solar power station in an apartment?

Keep the power station indoors on a stable, ventilated surface, secure panels so they cannot fall, and route cables safely to avoid tripping or pinching. Never backfeed building wiring, keep connections dry, and follow the manufacturer’s temperature and usage limits.

Can a balcony solar power station run large appliances like space heaters or full-size refrigerators?

Most compact balcony setups are not well suited to continuous high-power appliances because their inverter and battery limits are too low and space heaters draw very high wattage. Some efficient small fridges or occasional small kitchen appliances may be possible with a larger-capacity system, but check continuous and surge ratings before trying.

Do I need permission from my landlord or homeowners association to put a solar panel on my balcony?

Rules vary by building and jurisdiction, so check your lease, HOA covenants, or landlord policies before installing anything visible on a balcony. Portable panels that do not alter wiring are often acceptable, but confirming safety and appearance rules beforehand prevents conflicts.

How much energy will a balcony solar panel actually produce compared with its rated wattage?

Actual energy is typically lower than rated wattage due to angle, shading, temperature, and real-world losses; expect the panel’s rated watts multiplied by effective sun-hours, minus system losses. Planning conservatively for partial shading and suboptimal angles gives more realistic expectations for daily energy yield.

MC4, Anderson, DC Barrel: Solar Connectors and Adapters Explained

Portable power station connected to solar panel with various connectors

Solar connectors and adapters let you safely join mismatched solar panels and portable power stations so you can actually charge your battery in the real world. Most panels use MC4, while many power stations use Anderson-style or DC barrel inputs, so understanding how these plug types relate is essential for a reliable setup.

This guide explains how common low-voltage solar connectors work, how to pick the right adapter cable, and what limits to watch so you do not damage your gear. It focuses on practical, brand-neutral information you can apply to camping systems, RV setups, and home backup power. Along the way, you will see concrete examples, quick sizing tips, and a checklist of specs to check before you click “buy” or head out on a trip.

What Solar Connectors and Adapters Are (and Why They Matter)

In a portable solar setup, the connector is simply the physical interface that carries low-voltage DC power between components. Adapters convert from one connector style to another, such as MC4 from a panel to an Anderson or DC barrel plug on a power station.

For portable power stations and small off-grid systems, connector choice matters for four main reasons:

  • Compatibility: Panels and power stations rarely share the same plug type.
  • Safety: Wrong polarity or undersized connectors can damage equipment or overheat.
  • Performance: Cable length, connector size, and wiring gauge affect voltage drop and charging speed.
  • Convenience: Some connectors lock and are weather-resistant; others are compact but more delicate.

Most portable systems in the 12–48 V DC range rely on three connector families:

  • MC4: The default for many rigid and foldable solar panels.
  • Anderson-style: Flat, high-current DC connectors common in RV and hobby systems.
  • DC barrel and round plugs: Compact inputs on many portable power stations and small devices.

Once you know which connector is on your panel and which is on your power station, you can choose an adapter that safely bridges the gap without wasting power or creating a weak link.

Key Connector Types and How They Work Together

Most portable solar systems use the same basic power path: solar panel → extension cable (optional) → adapter → portable power station input. The pieces in that chain are defined by their connector types.

MC4 Panel Connectors

MC4 connectors are the weather-resistant, locking plugs found on many solar panels. Each panel usually has two MC4 leads:

  • One positive (+) conductor
  • One negative (−) conductor

Key traits:

  • Outdoor-ready: Designed to stay on the panel side, exposed to sun and rain.
  • Locking mechanism: Clicks together and requires a tool or firm squeeze to separate.
  • Polarized: Keyed so positive and negative only connect in one orientation.

MC4 connectors are also used to combine multiple panels in series or parallel using MC4 “Y” or branch connectors and MC4 extension leads.

Anderson-Style Connectors

Anderson-style connectors use two flat contacts inside a rectangular housing. In portable solar and DC power applications, they are often:

  • High-current capable: Suitable for higher wattage inputs than many small barrel plugs.
  • Genderless: Identical halves plug into each other, which simplifies cable routing.
  • Modular: Common on extension leads, combiner boxes, and DC distribution points.

On portable power stations, an Anderson-style port is typically used as a dedicated high-current solar input or DC input. Panels with MC4 leads connect to this port via an MC4-to-Anderson adapter cable.

DC Barrel and Other Round Connectors

DC barrel connectors are the round plugs found on many laptops and small electronics, and they are common on compact power stations for solar or car charging.

Important characteristics:

  • Many sizes: Inner and outer diameters vary, so you must match the exact size.
  • Polarity sensitive: Most are center-positive, but you must confirm for each device.
  • Moderate current handling: Suitable for smaller to mid-size solar inputs when properly sized.

Panels rarely ship with barrel plugs; instead, an adapter converts from MC4 or another panel-side connector to the barrel size your power station uses.

Other Low-Voltage Connectors You May Encounter

In addition to MC4, Anderson-style, and DC barrel connectors, you may occasionally see:

  • Proprietary round solar ports: Similar to barrel connectors but with brand-specific dimensions or extra pins.
  • Automotive-style 12 V plugs: Used when charging through a vehicle or 12 V socket on a power station.
  • Terminal blocks or ring terminals: More common on separate charge controllers or distribution panels than on integrated power stations.

In most portable setups, the common pattern is MC4 leads on the panel side and either Anderson-style or barrel-type connectors on the power station side.

Choosing Solar Connector and Adapter Paths – Example values for illustration.
Panel side Power station input Typical adapter path When this makes sense
MC4 (rigid or folding panel) DC barrel MC4 → DC barrel cable Small to mid-size power stations with solar input under roughly 200 W
MC4 (one or two panels) Anderson-style MC4 → Anderson cable Higher solar input, RV or van setups, longer cable runs with heavier wire
MC4 (multiple panels via MC4 Y-branches) Anderson-style MC4 combiner → Anderson cable Combining several portable panels into one higher-power input
MC4 (panel) Proprietary round solar port MC4 → proprietary plug cable Compact power stations with brand-specific solar input jacks
MC4 (panel) 12 V car-style socket MC4 → charge controller → 12 V plug Less common; usually used when charging through a separate controller

Real-World Solar Connector and Adapter Examples

Putting the connector types into real scenarios makes it easier to see what you actually need to buy and how to set things up.

Example 1: Small Camping Power Station with One Panel

Imagine a compact power station with a DC barrel solar input and a single 100 W folding panel with MC4 leads.

  • Connectors involved: MC4 on the panel, barrel on the power station.
  • Adapter needed: A single MC4-to-barrel cable of the correct barrel size and polarity.
  • Typical cable run: 10–20 ft of extension between the panel and the station, often using MC4 extension leads.

In this case, the MC4 connectors stay outside at the panel, while the barrel plug connects to the power station placed under cover. Total power is moderate, so a correctly sized barrel connector and reasonably thick cable are usually sufficient.

Example 2: RV Setup with Multiple Portable Panels

Consider an RV owner using three portable 100 W panels to charge a mid-size power station with an Anderson-style solar input.

  • Panel side: Each panel has MC4 connectors.
  • Combining panels: The panels are wired in parallel using MC4 Y-branch connectors so voltage stays within the power station’s input range while current adds up.
  • Adapter path: MC4 combiner → heavy-gauge cable → Anderson plug at the power station.

Here, Anderson-style connectors and thicker cable are helpful because the combined current from three panels is higher. The RV owner can place the power station inside and run a single robust cable through a grommet or window to the outside panels.

Example 3: Home Backup with a Ground-Deployed Array

For a home backup system using a larger portable power station, a user might deploy two or three rigid panels in the yard and bring power inside during outages.

  • Panel side: Rigid panels with MC4 leads mounted on a temporary rack.
  • Wiring: Panels wired in series or series-parallel to stay within the power station’s voltage and current limits.
  • Adapters: MC4 extension cables running to a single MC4-to-Anderson or MC4-to-barrel adapter at the power station.

This setup emphasizes weather-resistant MC4 connections outdoors and a minimal number of adapter transitions near the power station indoors. Correct connector choice and cable gauge help reduce voltage drop over the longer run.

Connector Choices in Common Use Cases – Example values for illustration.
Use case Typical solar watts Common connector combo Potential weak point to watch
Weekend camping with one folding panel 60–120 W MC4 panel → MC4 extension → DC barrel input Loose or undersized barrel plug heating up under sun
RV roof plus portable panel add-on 200–400 W MC4 roof array → MC4 combiner → Anderson input Multiple MC4 joints exposed to vibration and weather
Home outage backup with ground array 200–600 W MC4 panels → heavy-gauge MC4 extension → Anderson or barrel Long cable runs causing voltage drop and slower charging
Remote work site with compact station 80–200 W MC4 panel → MC4 to proprietary round plug Ad-hoc adapters with unknown polarity or ratings

Common Mistakes and Troubleshooting Solar Connections

Most issues with solar connectors and adapters fall into a few predictable categories. Recognizing them makes troubleshooting much faster.

Mistake 1: Ignoring Voltage and Current Limits

Connecting panels that exceed your power station’s voltage or current rating is one of the most serious errors. Symptoms include:

  • No charging and an error message or fault indicator on the power station.
  • Unexpected shutdown of the DC input.
  • In extreme cases, permanent damage to the input circuitry.

Before combining panels in series or parallel, add up their open-circuit voltages (for series) and currents (for parallel) and compare them to the power station’s published limits.

Mistake 2: Wrong Polarity at the Adapter

Reversed polarity (positive and negative swapped) can instantly damage some devices. It most often occurs when:

  • Using third-party adapter cables wired differently than expected.
  • Crimping or soldering your own connectors without verifying wiring.
  • Mixing up color codes when extending or repairing cables.

If the power station does not charge or immediately shows an error after connecting, disconnect at once and verify polarity with markings or a multimeter if you are comfortable doing so.

Mistake 3: Using Undersized or Excessively Long Cables

Thin or overly long cables cause voltage drop and heating. Common signs include:

  • Power station shows much lower solar input watts than expected.
  • Cables feel noticeably warm under load, even in mild weather.
  • Charging cuts in and out as connectors expand and contract with heat.

Shorter, thicker cables reduce voltage drop and improve charging efficiency, especially at higher power levels.

Mistake 4: Daisy-Chaining Too Many Adapters

Stacking adapters (for example, MC4 to Anderson, Anderson to barrel, barrel to proprietary plug) adds resistance and extra failure points. Problems you might see include:

  • Intermittent charging when cables are bumped or moved.
  • Visible arcing or small sparks when connecting under load.
  • Discolored or melted plastic around one of the intermediate adapters.

Whenever possible, use a single, purpose-built adapter cable from panel connector to power station input.

Quick Troubleshooting Steps When Solar Input Is Low or Zero

If your power station is not charging from solar, work through these checks:

  • Step 1: Confirm the panel is in full sun and not shaded.
  • Step 2: Verify all connectors are fully seated and locked (especially MC4).
  • Step 3: Check that the adapter plug fits snugly in the power station and is the correct size.
  • Step 4: Compare panel voltage and power station input rating to rule out over-voltage or under-voltage.
  • Step 5: If comfortable and qualified, measure voltage at the end of the adapter cable to confirm polarity and approximate voltage.

Safety Basics for Low-Voltage Solar Connectors

Even though portable solar systems operate at relatively low voltage, they can still produce high current and enough energy to cause damage or injury if misused.

General Low-Voltage Solar Safety

  • Avoid live plugging under heavy load: Connect panels to the power station before placing them in full sun when practical.
  • Prevent shorts: Do not let exposed connectors or stripped wires touch each other or conductive surfaces.
  • Keep connectors dry: Water in connectors can cause corrosion or arcing; allow wet connectors to dry before use.
  • Use rated components: Select cables and connectors with voltage and current ratings that exceed your expected operating conditions.

Safe Routing Around Vehicles and Buildings

  • Route cables where they will not be pinched by doors, windows, or slide-outs.
  • Keep low-voltage solar wiring clearly separate from any household AC extension cords.
  • Avoid running cables where vehicles or equipment might drive over them.

Connector-Specific Safety Tips

  • MC4: Fully seat and lock the connectors; partially engaged MC4 plugs can overheat.
  • Anderson-style: Ensure contacts are crimped correctly and fully inserted into the housing so they cannot back out under load.
  • DC barrel: Do not use excessive force when inserting; if the plug does not seat cleanly, verify size and polarity instead of forcing it.

Long-Term Use, Maintenance, and Storage of Solar Cables

Connectors and adapters are wear items. Taking care of them extends their life and keeps your solar system reliable.

Routine Inspection and Cleaning

  • Periodically inspect MC4, Anderson-style, and barrel connectors for cracks, discoloration, or melted plastic.
  • Check for green or white corrosion on metal contacts, especially on outdoor MC4 connections.
  • Wipe dust and grit off connectors before plugging them together to reduce wear.

Protecting Cables from Mechanical Damage

  • Avoid tight bends near the connector; use gentle curves to reduce strain.
  • Use simple strain relief (such as cable ties or clips) to keep weight off the connector body.
  • Keep cables away from sharp edges and high-traffic walkways.

Storage Between Trips or Seasons

  • Coil cables loosely rather than folding them sharply.
  • Store connectors in a dry, cool place out of direct sunlight.
  • Cap or cover MC4 ends when not in use to keep out dust and moisture.

When to Retire or Replace Connectors and Adapters

  • Retire any cable that shows melted insulation, exposed conductors, or deformed plastic near the connector.
  • Replace barrel plugs that wobble noticeably or lose contact with minor movement.
  • Discard adapters that have been involved in a short circuit or show burn marks.

Practical Takeaways and Specs to Look For

By matching solar connectors and adapters correctly, you can safely get the most from your panels and portable power station without complex wiring.

Key Practical Takeaways

  • Identify the connector type on your panel (often MC4) and on your power station (often Anderson-style or DC barrel) before buying adapters.
  • Use as few adapter pieces as possible; a single well-made cable is usually better than a chain of small adapters.
  • Keep cable runs short and use adequately thick wire to limit voltage drop and heat.
  • Always confirm polarity and input voltage range before plugging into a power station.
  • Inspect connectors periodically and replace any that show signs of overheating or damage.

Specs to Look For When Choosing Cables and Adapters

When shopping for connectors, extension cables, and adapters for portable solar use, pay close attention to these specifications and details:

  • Connector type and size: MC4, Anderson-style, DC barrel diameter, or proprietary round plug.
  • Voltage rating: Should exceed the maximum open-circuit voltage of your panel or combined array.
  • Current or watt rating: Should comfortably exceed the expected solar current or power.
  • Wire gauge (AWG): Thicker wire (lower AWG number) is better for longer runs and higher currents.
  • Cable length: Long enough for convenient panel placement, but not so long that voltage drop becomes significant.
  • Weather resistance: UV-resistant insulation and sealed connectors for outdoor portions of the run.
  • Locking or strain relief features: Especially important in RVs, boats, and windy sites.
  • Clear polarity markings: Plus/minus symbols or color coding that make wiring orientation obvious.

Taking a few minutes to match connector types, ratings, and cable sizes to your actual solar input needs can prevent many common problems and help your portable power station charge faster and more reliably in everyday use.

Frequently asked questions

What specs and features matter most when choosing solar connector adapters?

Check connector type and exact size, voltage rating, and current or watt rating first to ensure safe operation. Also confirm wire gauge and overall cable length for acceptable voltage drop, plus weather resistance and clear polarity markings for outdoor use.

How can I avoid common polarity or wiring mistakes with adapter cables?

Always verify the adapter’s polarity markings before connecting and, if unsure, confirm with a multimeter or vendor documentation. Prefer purpose-built adapter cables over homemade or patched-together assemblies to reduce the risk of reversed wiring.

What basic safety steps should I follow when connecting portable solar panels?

Avoid live plugging under heavy sun when possible, prevent exposed conductors from touching, and use components rated above your expected voltage and current. Route cables safely to prevent pinching or abrasion and keep outdoor connectors dry and clean.

Why are undersized or overly long cables a frequent issue with solar setups?

Thin or long cables create significant voltage drop and can heat under load, reducing charging power and stressing connectors. Using a thicker gauge and keeping runs shorter preserves charging efficiency and lowers the risk of overheating.

Is it okay to daisy-chain several adapters to get the right connector combination?

Daisy-chaining multiple adapters is discouraged because each extra junction adds resistance and potential failure points, increasing the chance of intermittent contact or overheating. Whenever possible, use a single purpose-built cable from panel connector to device input.

What signs indicate an adapter or connector should be replaced?

Replace any connector or cable that shows melted or deformed plastic, exposed conductors, burn marks, loose or wobbling plugs, or heavy corrosion on contacts. These symptoms indicate compromised safety or reliability and warrant immediate replacement.

Shading and Angle: How Placement Changes Solar Charging Speed

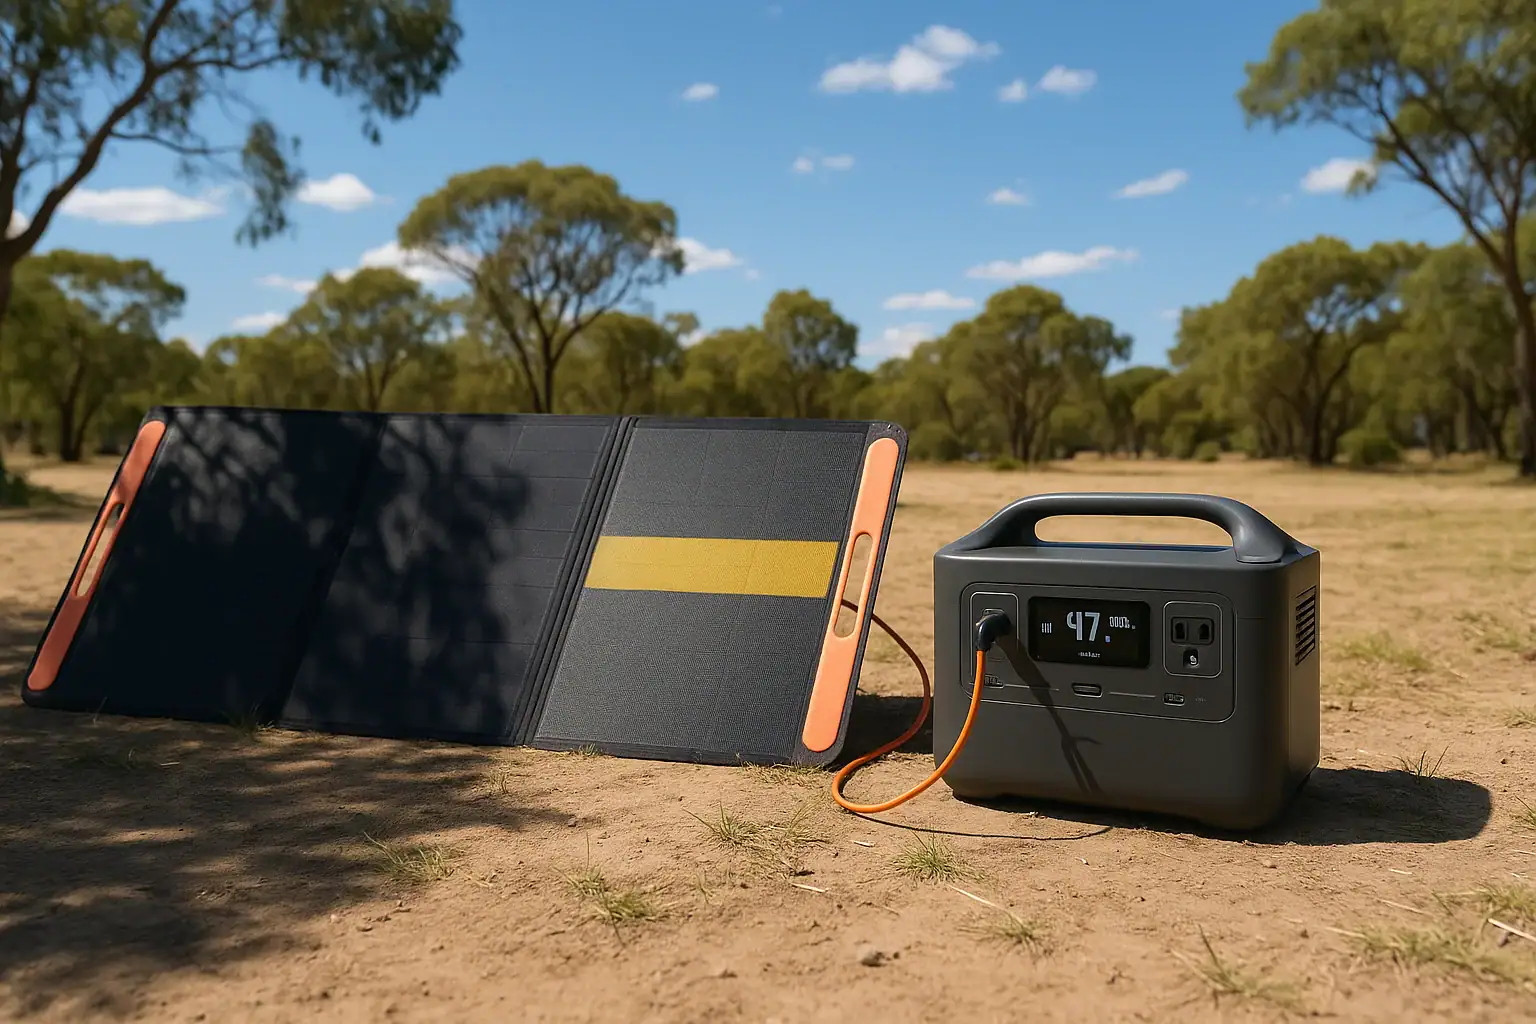
portable power station connected to solar panel outdoors

Solar panel shading and angle can easily cut your real charging speed by half or more, even with a good portable panel and power station. The way you place the panel in the sun usually matters more than the model you bought. A well-positioned panel in full sun, aimed roughly at the sun, often delivers two to three times more energy per day than the same panel left flat and partly shaded.

This guide explains how shading, tilt, and direction affect portable solar performance, and how to set up your panel so you get closer to its rated output. You will see simple rules of thumb, realistic examples, and quick checklists you can use for camping, RVs, off-grid work, or backup power at home.

The goal is not perfect math, but practical placement habits that turn limited daylight into the most watt-hours possible for your portable power station.

Why Placement Matters for Solar Charging Speed

Placement describes where and how you position a portable solar panel: whether it is shaded, how it is tilted, and which direction it faces. For small and medium panels used with portable power stations, placement is often the difference between a full battery by evening and a half-charged one.

Three main placement factors control solar charging speed in real use:

  • Shading – even small moving shadows can slash output.
  • Angle (tilt) – how steeply the panel is leaned relative to the sun.
  • Direction – which way the panel faces across the sky.

Because portable setups usually rely on just one or a few panels, every watt counts. A 100-watt panel will rarely deliver 100 watts in the field, but good placement can keep you closer to 60–80 watts at midday instead of 20–30 watts. Over a full day, that difference can mean hundreds of watt-hours of extra energy for lights, laptops, small fridges, and communication gear.

How Shading, Angle, and Direction Actually Affect Output

To manage expectations and plan charging time, it helps to understand what is happening inside the panel and how the sun’s path changes the light hitting it.

Why small shadows cause big power losses

A typical portable solar panel is made of many small solar cells wired together. When one cell in a series string is shaded, it can limit the current for that entire string, much like a kink in a hose limits water flow. Many panels include bypass diodes to route around shaded sections, but they cannot fully remove the loss.

In practice, this means:

  • A narrow shadow from a branch across one part of the panel can drop output far below half of the clear-sun value.
  • Shadows that move quickly, such as from trees or railings, cause the charging power on your power station screen to jump up and down.
  • Consistent full sun for a shorter time usually beats long hours of partial shade.

Why angle and direction change charging speed

Solar panels are most efficient when sunlight hits them close to perpendicular. As the sun moves across the sky, the angle between the sun’s rays and the panel changes, which changes how much light the panel can use.

  • Direction (azimuth): In most of the United States, the sun is generally to the south at midday. Pointing the panel roughly south provides the best all-day compromise.
  • Tilt angle: In summer, the sun is high, so a shallower tilt (panel closer to flat) works better. In winter, the sun is lower, so a steeper tilt (panel more upright) helps.

Shading, angle, and direction work together. A perfectly tilted panel in the wrong direction or under a small shadow can still perform poorly. For portable use, it is usually best to fix shade problems first, then improve tilt and direction as time allows.

Effective sun hours versus panel rating

The watt rating printed on a panel is measured in controlled test conditions: cool panel, direct overhead sun, and no shading. Real conditions are rarely that ideal. A more useful concept for planning is “effective sun hours” per day, which bundles all the variations into a single number you can use for rough estimates.

For many locations with decent weather, you might get the equivalent of 3–5 hours of strong sun per day on a well-placed panel. If your 100-watt panel averages about 60 watts during those strong hours, it might produce around 180–300 watt-hours per day. Poor placement, frequent shading, or very low winter sun can cut that in half.

Real-World Placement Examples and Daily Output

Seeing how placement changes real charging speed makes it easier to decide where to set your panel and how much effort to put into repositioning it.

Example: 100 W panel in different placements

The table below shows approximate daytime energy a 100-watt portable panel might collect in various placement scenarios. These are rough, illustrative numbers, not guarantees.

Example daily energy from a 100 W portable panel in different placements
Example values for illustration.
Placement scenario Conditions summary Approx. midday power Approx. daily energy
Ideal field placement Full sun, aimed south, tilted toward sun, no shade 60–80 W 250–350 Wh
Good but not perfect Full sun, reasonable tilt, small direction error 40–60 W 180–280 Wh
Flat on ground or roof Full sun, no tilt, some heat buildup 30–50 W 140–220 Wh
Light partial shade Thin tree branches or railing shadows part of day 15–40 W 80–180 Wh
Heavy shade or overcast Dense clouds or frequent solid shadows 5–20 W 30–100 Wh

If your power station has a 500 watt-hour battery, that same 100-watt panel might refill half or more of the battery in a day with ideal placement, or only a small fraction with poor placement. Scaling up to larger panels works similarly: better placement multiplies the value of every watt you carry.

Example: adjusting angle during the day

Consider a camping trip in late spring with a clear sky and a 200-watt folding panel:

  • No adjustment: Panel leaned at a medium angle facing roughly south all day might average around 90–120 watts during strong sun, for perhaps 400–600 watt-hours.
  • Two or three adjustments: Quickly re-aiming the panel mid-morning, midday, and mid-afternoon can keep it closer to 120–150 watts in strong sun, raising daily energy into the 600–800 watt-hour range.

Those extra watt-hours could cover a small 12-volt fridge plus phone and laptop charging instead of only the basics.

Scenario-based placement tips

  • Open-field camping: Place the panel several feet away from tents or vehicles, tilted toward the southern sky. Mark the spot and plan one or two quick repositionings as shadows move.
  • Forest or wooded sites: Look for small openings such as parking clearings or trail edges. You may need to place the panel away from the tent and run a cable back, while keeping cables visible and out of walkways.
  • RV or van parking: Roof-mounted panels are often fixed, so focus on parking where the roof sees as much open sky as possible. A portable ground panel can be aimed more precisely to supplement the roof array when parked.
  • Balcony or patio use: Railings and nearby walls can cast sharp, moving shadows. Elevate the panel slightly above the railing if possible and angle it so the entire surface stays clear of shadows during the strongest sun hours.

Common Placement Mistakes and How to Troubleshoot Them

Many portable solar problems are caused by placement rather than defective hardware. Recognizing the patterns on your power station’s display can help you fix issues quickly.

Visual and power-output clues

Use these simple checks when your solar charging speed seems low:

  • Is the panel truly in full sun? Look for thin lines of shade from branches, ropes, antennas, or railings across any part of the panel.
  • Is the power reading stable? Rapid jumps up and down often mean moving shade or intermittent cable connections.
  • Is the panel hot to the touch? Very hot panels lose efficiency; you may notice lower watts around midday on dark surfaces.
  • Is the power station limiting input? If the display shows the same wattage regardless of stronger sun, you may already be at the input limit.

Common mistakes that slow solar charging

Frequent placement and setup mistakes with portable solar
Example values for illustration.
Mistake Typical symptom Likely impact on output Quick fix
Panel partly shaded by tree or railing Power reading swings or stays far below expected Loss of 30–80% or more Move panel a few feet into clear, open sun
Panel laid flat on hot roof or ground Power lower at midday than in cooler morning Loss of 10–25% from heat and angle Tilt panel up to allow airflow and better angle
Panel facing wrong direction Good power only briefly, then sharp drop Loss of 20–50% over the day Rotate panel roughly toward the southern sky
Dirty or dusty panel surface Output slowly declines over days or weeks Loss of 5–15% depending on buildup Wipe gently with a soft, clean cloth
Very long, thin extension cable Panel voltage and power lower than expected Loss of 5–20% from voltage drop Use shorter or thicker cable where possible
Power station input already maxed out Watts stay capped even in perfect sun Extra panel capacity not used Check input rating; add more panels only if useful

Simple step-by-step troubleshooting routine

  1. Check shade: Walk around the panel and look for any shadow lines. Move the panel until the surface is completely sunlit.
  2. Check angle and direction: Tilt the panel so it faces the sun as directly as practical, then rotate it so its front points toward the brightest part of the sky.
  3. Check cables and connectors: Make sure connectors are fully seated, not bent, and not under tension. Avoid tight door gaps or sharp bends.
  4. Check panel surface: If visibly dusty, gently wipe it clean.
  5. Check power station limits: Compare the displayed solar input to the station’s solar input rating. If they match, you are likely at the limit.

Working through these steps in order will solve most “slow charging” complaints without needing tools or measurements.

Safety Basics for Portable Solar and Power Stations

Maximizing solar charging speed should never come at the cost of safety. Good placement also means protecting people, equipment, and surroundings.

Safe placement of the power station

Place the portable power station where it can stay dry, cool, and stable:

  • Set it on a flat, solid surface away from puddles and wet ground.
  • Keep vents clear on all sides so internal fans can move air freely.
  • Shelter it from direct rain, snow, and blowing dust.
  • Avoid placing it where people are likely to trip over cables or bump into it.

Do not open the power station or attempt to access internal batteries. Use only the external ports and follow the manufacturer’s instructions for maximum loads and charging methods.

Safe routing and handling of solar cables

Cables connect the panel to the power station and can introduce safety issues if routed carelessly:

  • Route cables along edges or behind objects instead of across walkways.
  • Avoid pinching cables under heavy doors, windows, or sharp metal edges.
  • Do not drive vehicles over cables or run them where wheels or chairs roll frequently.
  • Inspect connectors for moisture, dirt, or damage before use and after transport.

Weather and wind considerations

Portable panels are light and can act like sails in gusty wind:

  • Use built-in kickstands correctly and add weight at the base if wind is expected.
  • Avoid placing panels near edges where a fall could damage the panel or injure someone below.
  • In severe weather, fold and store the panel rather than trying to keep it deployed.

For home backup use, do not attempt to wire a portable power station directly into a household electrical panel unless a qualified electrician installs appropriate transfer equipment. Instead, power devices directly from the power station’s outlets and ports.

Maintenance and Long-Term Use for Reliable Output

Good maintenance keeps your portable solar panel and power station performing closer to their original ratings over many seasons. Shading and angle are daily concerns, while maintenance habits protect performance over the long term.

Keeping panels clean and clear

Dust, pollen, salt spray, and fingerprints gradually reduce light reaching the cells. On small panels, even a modest buildup can take away a noticeable share of output.

  • Wipe the panel periodically with a soft, non-abrasive cloth.
  • If needed, lightly dampen the cloth with clean water and avoid harsh cleaners.
  • Remove bird droppings or sticky residue as soon as practical to avoid staining.

Protecting panels in transport and storage

Portable panels are designed to fold and travel, but they still contain fragile cells and wiring. Cracks and impact damage can quietly reduce output.

  • Fold panels fully before transport and use protective sleeves or cases if provided.
  • Avoid stacking heavy gear directly on top of the folded panel.
  • Store panels in a dry place away from sharp objects and extreme temperatures.

Maintaining cables and connectors

Over time, repeated bending and exposure can wear cables and connectors, causing hidden resistance or intermittent connections that look like shading problems.

  • Coil cables loosely without tight kinks and secure them so they do not snag.
  • Inspect plug ends for corrosion, bent pins, or cracked housings.
  • Replace damaged cables promptly rather than fighting unreliable charging.

Storing the power station

For long-term reliability, store the power station according to its manual, typically:

  • In a cool, dry location away from direct sun and heat sources.
  • At a partial state of charge instead of completely full or empty if unused for months.
  • With periodic top-ups according to the manufacturer’s guidance to keep the battery healthy.

Practical Takeaways and Specs to Look For

Putting everything together, you can treat shading and angle as tools you actively manage rather than background conditions you accept. A few minutes of careful placement each day can be worth carrying an extra panel.

For everyday use with portable power stations, remember these core habits:

  • Place panels where they see full, unobstructed sun for as many hours as possible.
  • Face panels roughly toward the southern sky (in the U.S.) and tilt them toward the sun.
  • Check for moving shadows every hour or so when practical, especially near trees or structures.
  • Keep panels clean, cool, and well ventilated, and route cables safely.
  • Plan based on realistic daily energy, not just the nameplate watt rating.

Specs to look for when choosing portable solar for better placement flexibility

Certain panel and system features make it easier to avoid shading and optimize angle, even if you are not an expert in solar design. When comparing portable panels for a power station, consider:

  • Panel wattage and size: Higher wattage within a manageable size lets you collect more energy when placement is good.
  • Adjustable kickstands or frames: Multiple tilt positions help you aim the panel toward the sun without extra hardware.
  • Durable, foldable design: Sturdy hinges and handles make it easier to move the panel to better sun throughout the day.
  • Cable length and connector options: A reasonable cable length lets you place the panel in sun while keeping the power station in shade and protected.
  • Weather resistance: Panels with good environmental sealing tolerate outdoor placement and light rain better.
  • Clear watt and voltage labeling: Easy-to-read specs help you match panels to your power station’s solar input rating without guesswork.

By combining thoughtful placement with suitable hardware, you can get more usable energy each day from the same amount of portable solar capacity, making your power station a more reliable partner for camping, travel, work, and backup power.

Frequently asked questions

Which specs and features matter most when choosing a portable solar panel for flexible placement?

Prioritize wattage relative to the panel size you can carry, adjustable kickstands or mounting options for aiming, and a durable foldable design for easy repositioning. Also check reasonable cable length, weather resistance, and clear voltage/watt labeling so the panel matches your power station’s input.

What is a common placement mistake that causes a big drop in charging speed?

Partial or moving shade across even a small part of the panel is the most common mistake and can reduce output dramatically. If you see power readings that swing or stay far below expectations, move the panel a few feet to a fully sunlit spot first.

What basic safety precautions should I follow when using portable solar panels and a power station?

Keep the power station dry, on a flat stable surface, and with vents clear; route cables to avoid trip hazards and pinching; and secure panels against wind. Do not open internal battery compartments and follow the manufacturer’s limits for inputs and outputs.

How often should I adjust my panel angle during the day to get noticeably more energy?

One or two quick re-aimings (morning and early afternoon) often deliver most of the practical benefit for portable setups, while continuous tracking offers diminishing returns for the effort. On trips where you can comfortably reposition, three adjustments (mid-morning, noon, mid-afternoon) can increase daily output meaningfully.

Can dirt, bird droppings, or heat really reduce output and by how much?

Yes. Moderate dust or grime typically cuts a few percent up to around 10–15% on small panels, while heavy soiling and bird droppings can cause larger losses. High panel temperatures at midday can also reduce efficiency, often in the 10–25% range compared with cooler conditions.

Will long or thin extension cables affect charging speed?

Long thin cables can cause voltage drop and lower the power reaching your power station, sometimes by a few percent up to around 20% in extreme cases. Use the shortest practical run and thicker-gauge cable if you need longer distances to minimize losses.

Overpaneling Explained: Safely Using Bigger Solar Panels Than the Input Limit

portable power station connected to solar panel outdoors

You can often connect more solar panel watts than your portable power station’s solar input rating, as long as you stay under its maximum voltage and current limits. In that case, the charge controller usually just caps charging at its rated watts and ignores the extra potential power. The risk comes when voltage or current go beyond what the input electronics and connectors are designed to handle.

This practice is called overpaneling or oversizing a solar array. It is common in rooftop solar and can also make sense with portable power stations, solar generators, and off-grid setups. Done carefully, it can improve charging speed in real-world conditions with clouds, shade, and short winter days.

This guide explains how overpaneling works, how to read solar input and panel specs, where people get into trouble, and how to stay within safe limits. You will see practical examples, simple calculations, and checklists you can use before buying or rewiring panels.

What Overpaneling Means and Why It Matters

Overpaneling means connecting solar panels whose combined rated wattage is higher than the portable power station’s published maximum solar input in watts. For example, using 450 watts of panels on an input rated for 300 watts.

Three key points define whether that is acceptable:

  • Voltage (V) from the panels must stay at or below the station’s maximum input voltage.
  • Current (A) must stay within the input and connector amp ratings.
  • Power (W) above the limit is usually clipped by the charge controller if voltage and current are safe.

In practice, overpaneling matters because real solar output is almost always below the nameplate rating. Clouds, high temperatures, imperfect tilt, and partial shade can easily cut panel output by 30–60%. Modestly oversizing the array can help you still reach the power station’s maximum charge rate for more hours each day.

However, portable power stations have fixed internal wiring, connectors, and charge controllers. Unlike a custom-built solar system, you cannot upgrade those components. Understanding the limits is the difference between a faster-charging setup and a damaged input port.

Key Concepts: How Solar Input Limits and Overpaneling Work

Solar inputs on portable power stations are usually defined by three related ratings: maximum voltage, maximum current, and maximum solar power.

Voltage limits (V)

The voltage limit is the most critical number. It is often printed as something like “12–30 V DC” or “10–50 V max.” If the panels’ open-circuit voltage (Voc) ever exceeds this maximum, the input electronics can be permanently damaged.

  • Panels in series add voltage; current stays roughly the same.
  • Panels in parallel keep the same voltage; current adds.
  • Cold weather can increase Voc above the label value, sometimes by 10–20%.

Because of that cold-weather bump, you should design series strings so the coldest-expected Voc stays comfortably below the input’s maximum voltage.

Current limits (A)

The current limit may be specified directly (for example, “max 10 A”) or implied by the connector type. If the array can deliver more current than the controller or connector can handle, a good MPPT controller will usually limit current internally—but the external connectors and cables may still be stressed.

  • Parallel wiring adds current; high current can overheat small connectors.
  • Long cable runs with thin wire increase voltage drop and heat.
  • Fuses or breakers should be sized for the array’s short-circuit current (Isc).

Power limits (W)

The watt limit is what most product pages highlight: “max 100 W solar input,” “max 300 W,” and so on. Power is calculated as:

Power (W) = Voltage (V) × Current (A)

Modern MPPT charge controllers generally handle extra potential wattage by clipping the output at their rated maximum. As long as voltage and current are within safe limits, connecting somewhat more panel watts usually just means the station charges at full speed more often.

Solar Input Ratings and Overpaneling Planning Guide Example values for illustration.
Input spec to check What it controls How it affects overpaneling Practical design tip
Max input voltage (Vmax) Highest safe panel voltage Hard limit; exceeding can damage electronics Sum Voc of series panels and keep at least 10–20% below Vmax in cold climates
Recommended voltage range MPPT/PWM operating window Too low or too high reduces efficiency Aim for total Vmp inside this range for best charging
Max input current (Amax) Connector and controller current Parallel strings can exceed this even if watts look modest Add panel Imp values in parallel and stay under Amax with a safety margin
Max solar input power (Wmax) Highest charge rate in watts Extra watts above this are clipped Overpaneling 20–50% above Wmax is usually enough in real-world conditions
Controller type (MPPT vs PWM) How power is harvested MPPT benefits more from modest overpaneling For PWM, match panel voltage closely to battery; oversizing watts gives smaller gains
Connector rating Safe current and voltage at plug Can be lower than controller ratings Use cables and adapters with equal or higher ratings than the station’s connector

MPPT vs PWM behavior when overpaneled

MPPT controllers track the panel’s maximum power point and convert excess voltage into current. When overpaneled within V and A limits, they simply stop increasing current once Wmax is reached. This makes them well suited to modest overpaneling.

PWM controllers act more like a switch. They work best when panel voltage is close to battery voltage. Extra panel watts above the input rating often provide little benefit, because the controller cannot efficiently convert higher voltage into more current.

Real-World Overpaneling Examples and Use Cases

Numbers become much clearer with concrete scenarios. The following examples are simplified but show how to think through panel configurations against solar input limits.

Example 1: Modest overpaneling that stays within limits

Assume a portable power station with:

  • Solar input: 12–40 V
  • Max current: 10 A
  • Max power: 300 W

You have two 200 W panels, each rated approximately:

  • Voc: 22 V
  • Vmp: 18 V
  • Imp: 11.1 A

Two panels in series give Voc about 44 V, which already exceeds the 40 V limit in mild weather and even more in the cold. That series configuration is unsafe for this input.

Two panels in parallel keep Voc at 22 V but double Imp to about 22.2 A, far above the 10 A limit and likely above connector ratings. That is also not acceptable.

In this case, a single 200 W panel is within all limits and slightly over the watt rating would not be possible without changing panel size or using a different power station. The “overpaneling” idea is limited by both voltage and current constraints.

Example 2: Slight oversize on watts only

Now consider a station with:

  • Solar input: 12–60 V
  • Max current: 15 A
  • Max power: 400 W

You have three 160 W panels:

  • Voc: 21 V
  • Vmp: 18 V
  • Imp: 8.9 A

Two panels in series: Voc ≈ 42 V (safe below 60 V), Vmp ≈ 36 V, Imp ≈ 8.9 A. That string is about 320 W at STC, which is within both voltage and current limits and below Wmax.

Adding a second identical series string in parallel (four panels total) would be about 640 W of panels, Voc ≈ 42 V, Imp ≈ 17.8 A. That exceeds the 15 A limit, so it is not acceptable.

However, using three panels in a 2S+1 configuration is sometimes possible with careful design, for example:

  • One string of two panels in series (about 320 W)
  • One separate single panel used only when connected alone

In practice, many users in this situation choose two panels in series (320 W), which is a modest 20% oversize on a 400 W max input. Under real conditions, that pair may only produce 250–320 W, allowing the station to charge near its maximum on good days without stressing limits.

Example 3: Using overpaneling to reach daily energy targets

Suppose you want around 1.2 kWh of solar energy per day for remote work and a small fridge. You typically get about 4 hours of effective sun. Ignoring losses for a moment:

  • 300 W of panels × 4 hours ≈ 1.2 kWh
  • Because of clouds, angle, and heat, you might only get 60–70% of that.

To compensate, you might size the array at 400 W on an input limited to 300 W, assuming voltage and current remain in spec. On clear days, the power station will clip at 300 W, but on hazy or partly cloudy days, that extra panel capacity helps you still reach close to your daily energy goal.

Daily Energy Planning With Modest Overpaneling Example values for illustration.
Total panel watts Effective sun hours Approx. daily energy (kWh) after 30% losses Typical use case fit
200 W 4 h 0.6 kWh Phones, tablets, light laptop use, LED lights
300 W 4 h 0.84 kWh Single laptop plus router and small fan
400 W (on 300 W input) 4 h 1.12 kWh Modest overpaneling to support laptop + compact fridge
500 W (on 300–400 W input) 3–4 h 1.05–1.4 kWh More margin in cloudy or winter conditions

Common Overpaneling Mistakes and Troubleshooting Cues

Most overpaneling problems come from misunderstanding one of the limits or from wiring choices. Recognizing early warning signs can prevent damage.

Typical mistakes people make

  • Exceeding maximum voltage with series strings. Adding “one more panel” in series without recalculating total Voc, especially in cold climates.
  • Ignoring connector current ratings. Running high-current parallel arrays through small barrel or proprietary connectors not designed for that load.
  • Mixing very different panels. Combining panels with different voltages or currents, which can drag the whole array down and create unpredictable behavior.
  • Using long, thin extension cables. Causing large voltage drops so the station never reaches its rated input power, even with many panels.
  • Expecting STC watts in real conditions. Assuming that a 400 W array will always deliver 400 W and oversizing far beyond what is useful.

Troubleshooting: symptoms to watch for

  • Station will not accept solar input. Could be reversed polarity, open-circuit voltage above the maximum, or incompatible connector wiring.
  • Solar watts stuck far below expected. May indicate shading, poor angle, high cable losses, or that the controller is clipping due to hitting its watt limit.
  • Connectors or cables feel hot to the touch. Suggests excessive current, undersized wire, or poor-quality connections.
  • Intermittent charging or shutdowns. Can be caused by overcurrent protection, loose plugs, or thermal protection inside the power station.
Common Overpaneling Issues and Practical Fixes Example values for illustration.
Observed issue Likely cause Quick checks Practical fix
No solar charging Voltage out of range or polarity reversed Measure Voc at the connector; confirm positive/negative orientation Rewire series/parallel to fit voltage window; correct polarity
Charging stops on cold mornings Series Voc exceeds max input when cold Compare measured cold Voc to input Vmax Reduce panels in series or switch to parallel strings
Cables or plugs are hot Too much current for connector or wire gauge Check panel Imp × number of parallel strings Use thicker cable, fewer parallel strings, or a different connector path
Power lower than expected Voltage drop, shade, or controller clipping Compare panel-side voltage to input voltage at the station Shorten cable runs, improve panel angle, or accept clipping if at Wmax
Inconsistent readings Loose or corroded connections Inspect and gently wiggle connectors while monitoring watts Clean contacts, replace damaged adapters, secure strain relief

High-Level Safety Basics When Overpaneling

Overpaneling is only worth doing if it remains safe. The following principles apply whether you are using a small camping power station or a larger unit for RV or backup power.

Electrical and fire safety

  • Treat maximum input voltage as an absolute ceiling. Design your array with a margin for cold-weather Voc increase.
  • Respect continuous current ratings. Do not size arrays so that expected current is right at the connector’s maximum; allow headroom.
  • Use appropriate wire gauge. Higher current and longer runs require thicker cable to limit voltage drop and heat buildup.
  • Keep cables uncoiled under load. Coiled cable can trap heat and act like an inductor; lay it out straight when charging.

Protection and disconnects

  • Use fuses or breakers sized for the array. These should be chosen based on short-circuit current (Isc) and cable ratings.
  • Have a clear way to disconnect panels. A simple inline connector or switch makes it easy to safely disconnect during storms or when moving equipment.
  • Keep connections weather aware. Use junctions and adapters intended for outdoor use to reduce the chance of moisture-related faults.

Battery and device protection

  • Rely on the built-in battery management system. Within specified limits, it will regulate charge rate to protect the cells.
  • Avoid blocking cooling vents. Overpaneling can keep the device at higher charge rates longer; ensure airflow is not obstructed.
  • Monitor behavior after changes. When you change panel configuration, check the display, temperature, and connectors during the first few charge cycles.

Long-Term Use, Maintenance, and Storage With Overpaneled Systems

Once your array and wiring are set up correctly, most of the work is simple maintenance and good operating habits. Overpaneling does not usually require extra steps beyond what a well-designed solar setup needs, but it can keep the system operating near its limits more often.

Panel care and placement

  • Keep panel surfaces clean. Dust, pollen, and bird droppings can significantly reduce output. Gently clean with water and a soft cloth when needed.
  • Check for shading throughout the day. A small amount of shade on one panel in a series string can cut power dramatically.
  • Secure portable panels against wind. Overpaneling often means more surface area; use straps or weights so gusts do not flip panels.

Cable and connector inspections

  • Inspect connectors regularly. Look for discoloration, melted plastic, or loose pins—all signs of overheating.
  • Check strain relief. Heavy cables should not hang directly from small connectors; support them to prevent stress and fatigue.
  • Test voltage and polarity after rewiring. Any time you change series/parallel layout, verify Voc and polarity before plugging into the station.

Storage practices

  • Store the power station partially charged. Many lithium-based systems prefer storage around 30–60% charge if they will sit for months.
  • Keep panels and cables dry when stored. Moisture trapped in connectors can corrode contacts over time.
  • Label panel strings. Simple tags indicating “String 1: 2 in series” and so on make future troubleshooting and reconfiguration easier.

Practical Takeaways and Specs to Look For

Overpaneling can be a useful tool to get more reliable solar charging from a portable power station, especially in less-than-ideal sun. The key is to oversize wattage only within the hard limits of voltage, current, and connector ratings.

Quick practical rules

  • Never exceed the station’s maximum input voltage; design series wiring with a cold-weather safety margin.
  • Keep total array current within both the controller’s amp rating and the connector’s rating.
  • For MPPT-equipped units, consider modest overpaneling in the 20–50% range above the watt limit if allowed by the manufacturer.
  • Prioritize simple, robust wiring over squeezing in every possible watt.
  • Monitor new setups during the first few uses for temperature, stability, and consistent charging behavior.

Specs to look for when planning overpaneling

  • On the portable power station:
    • Solar input voltage range (minimum and maximum)
    • Maximum solar input power in watts
    • Maximum input current in amps
    • Type of solar charge controller (MPPT or PWM)
    • Connector type and its rated current and voltage
  • On each solar panel:
    • Rated power (Pmax)
    • Open-circuit voltage (Voc)
    • Voltage at max power (Vmp)
    • Current at max power (Imp)
    • Short-circuit current (Isc)
  • For the overall array:
    • Total Voc for each series string (including cold-weather margin)
    • Total Imp for all parallel strings
    • Estimated total panel watts versus the station’s Wmax
    • Wire gauge and length for each cable run
    • Fuse or breaker ratings relative to Isc and cable limits

If you walk through those specs before buying or rewiring panels, you can decide whether overpaneling makes sense for your setup, avoid the most common pitfalls, and get the most from your portable solar input limits.

Frequently asked questions

Which specifications and features matter most when planning to overpanel a portable power station?

Focus first on the station’s maximum input voltage, maximum input current, and maximum solar input power. Also check the controller type (MPPT vs PWM), connector ratings, and planned cable gauge and length because they determine safe current flow and voltage drop.

What common wiring mistake should I avoid when oversizing a solar array?

A frequent error is adding panels in series or parallel without recalculating total Voc or total Imp, which can push voltage or current beyond limits—especially in cold weather for Voc. Always measure or calculate combined Voc and Imp and include safety margins for temperature and cable losses.

Is overpaneling safe for my portable power station?

Overpaneling can be safe if the array stays within the station’s maximum voltage and current ratings and uses properly rated connectors and cables; the controller will usually clip excess watts. Exceeding the maximum input voltage is the primary safety risk and can permanently damage input electronics, so design with a margin for cold Voc.

How much can I reasonably oversize panel watts above the station’s watt limit?

For MPPT-equipped stations, modest oversizing of roughly 20–50% above the rated watt limit is commonly used to improve real-world charging, provided voltage and current remain within limits. The exact safe amount depends on Voc, Imp, connector ratings, and whether the controller and wiring can safely handle the increased potential.

Can mixing different panel models cause problems when overpaneling?

Yes; combining panels with different Vmp, Voc, or Imp can reduce overall output and create mismatch losses, and may produce unpredictable currents when strings are paralleled. To avoid issues, match panels electrically or use separate MPPT inputs or properly configured strings with blocking diodes where appropriate.

What are early warning signs that my overpaneled system might be unsafe?

Watch for hot connectors or cables, thermal shutdowns, no solar charging despite sun, or unusual smells or discoloration at junctions. These symptoms suggest excessive current, poor connections, or voltage out-of-range conditions and should prompt immediate inspection and corrective action.

How Many Solar Watts Do You Need to Fully Recharge a Power Station in One Day?

portable power station charging from solar panel outdoors

To fully recharge a portable power station in one day, you typically need solar watts equal to your battery capacity (Wh) divided by peak sun hours and then divided by about 0.75 for losses. In plain English, a 1,000 Wh power station in a 4-peak-sun-hour location usually needs around 330–400 W of solar.

This article explains how many solar watts you really need to recharge in a single day, not just in theory but in real outdoor conditions. You will see the core calculation, typical solar panel sizes for common battery capacities, and how weather, efficiency, and input limits change the result.

Whether you are planning off-grid camping, RV boondocking, or home emergency backup, the goal is the same: match your solar panel array to your power station so that daily solar charging keeps up with your daily energy use.

What “Full Recharge in One Day” Really Means and Why It Matters

When people ask how many solar watts they need to recharge in one day, they usually mean this: starting from a low state of charge in the morning and ending the day close to full, using only solar panels. In practice, that depends on both your battery size and your location.

Getting this sizing roughly right matters because it affects:

  • How many solar panels you buy and carry
  • Whether your battery recovers after a heavy-use day
  • How many cloudy days you can ride out before running low
  • How often you must fall back to vehicle or wall charging

For many users, the target is not perfection but reliability. If your solar array is too small, your state of charge slowly drifts downward over several days. If it is oversized, you spend more money and deal with bulkier gear than you really need.

Thinking in terms of watt-hours, solar charging watts, and realistic sun hours gives you a clear, repeatable way to answer the question for any portable power station size.

Key Concepts and the Core Solar Sizing Formula

Before doing the math, it helps to separate three ideas that often get mixed up: power, energy, and solar input limits.

Power vs. energy

  • Watts (W) measure power, or how fast energy is used or produced at a moment in time. A 100 W panel can deliver up to 100 W in ideal sun.
  • Watt-hours (Wh) measure energy, or how much work can be done over time. A 500 Wh battery can theoretically run a 50 W device for 10 hours (50 W × 10 h = 500 Wh).

Portable power station batteries are usually rated in watt-hours. Solar panels are rated in watts.

Peak sun hours (H)

Peak sun hours are not the same as daylight hours. They compress an entire day of changing sunlight into an equivalent number of hours at full sun strength. Typical ranges:

  • Cloudy regions or winter: about 2–3 peak sun hours
  • Moderate climates: about 3–5 peak sun hours
  • Sunny regions or summer: about 5–6+ peak sun hours

Using a realistic, slightly conservative number for your season and location is key to avoiding undersized solar.

System efficiency (η)

Not all solar power reaches the battery. Losses come from panel temperature, non-ideal angle, shading, wiring, and the charge controller. A practical overall efficiency for a portable setup is usually around 70–80%.

We represent this with an efficiency factor η (eta), typically 0.7–0.8.

Solar input limit

Every portable power station has a maximum solar input rating. Even if you connect more panel watts than this rating, the internal electronics will usually cap charging power at that limit.

Two numbers matter:

  • Maximum solar input power (W)
  • Allowed input voltage and current range

Your calculated “ideal” solar watts must still fit under this maximum input power to be realistically usable.

The core equation

The basic formula to estimate how many solar watts you need to fully recharge in one day is:

Required solar watts ≈ Battery capacity (Wh) ÷ [Peak sun hours (H) × Efficiency (η)]

In symbols:

Required solar watts ≈ C ÷ (H × η)

  • C = battery capacity in Wh
  • H = peak sun hours per day
  • η = system efficiency (0.7–0.8 typical)

Quick sizing table for common capacities

The table below uses a common scenario: 4 peak sun hours and 75% efficiency (η = 0.75). This gives a realistic starting point for many temperate locations in decent weather.

Battery capacity (Wh) Typical use case Approx. solar watts needed* Typical panel configuration
300 Wh Small camping setup, lights, phones 100 W One 100 W panel
600 Wh Light laptop use, fans, lights 200 W Two 100 W panels or one 200 W panel
1,000 Wh Heavier laptop use, small appliances 330–400 W Three to four 100 W panels
1,500 Wh RV or vanlife daily use 500–600 W Five to six 100 W panels
2,000 Wh Extended off-grid or backup power 650–700 W Six to seven 100 W panels
*Assumes 4 peak sun hours and 75% efficiency. Example values for illustration.

These numbers are starting points. In cloudier climates or winter, you may need to move toward the upper end or beyond these ranges.

Real-World Examples: From Formula to Practical Solar Arrays

Working through a few scenarios makes the calculation easier to apply to your own setup.

Example 1: 300 Wh power station, moderate climate

  • Battery capacity C = 300 Wh
  • Peak sun hours H = 4
  • Efficiency η = 0.75

Required solar watts:

300 ÷ (4 × 0.75) = 300 ÷ 3 = 100 W

In this case, a single 100 W panel is enough to refill the battery from empty in one good-sun day, assuming you are not drawing heavy loads at the same time. If you expect partial shade or occasional clouds, moving to 120–160 W gives a more comfortable margin.

Example 2: 600 Wh power station for weekend camping

  • Battery capacity C = 600 Wh
  • Peak sun hours H = 4
  • Efficiency η = 0.75

Required solar watts:

600 ÷ (4 × 0.75) = 600 ÷ 3 = 200 W

Two 100 W panels or one 200 W panel is a common match. If your daily use is closer to 300–400 Wh instead of the full 600 Wh, you will often end the day at or near 100% charge.

Example 3: 1,000 Wh (1 kWh) power station in a sunny region

  • Battery capacity C = 1,000 Wh
  • Peak sun hours H = 5 (bright, sunny location)
  • Efficiency η = 0.75

Required solar watts:

1,000 ÷ (5 × 0.75) = 1,000 ÷ 3.75 ≈ 270 W

In a very sunny region, a 250–300 W array can be enough for a 1 kWh station to recover fully in one day. If you want more reliability during shoulder seasons, 300–400 W is a more robust choice.

Example 4: 2,000 Wh power station in a cloudy or winter scenario

  • Battery capacity C = 2,000 Wh
  • Peak sun hours H = 3 (cloudier or winter conditions)
  • Efficiency η = 0.7 (more conservative)

Required solar watts:

2,000 ÷ (3 × 0.7) = 2,000 ÷ 2.1 ≈ 950 W

Nearly 1,000 W of solar is required to reliably refill 2,000 Wh in one short, hazy winter day. Many portable power stations cap solar input at much lower levels (for example, 400–800 W), so a true empty-to-full recharge in one day may not be realistic in this scenario. Instead, you might plan to use only 800–1,200 Wh per day and accept a slower, multi-day recovery.

Balancing daily usage and daily solar input

A more practical way to size your system is to match your daily energy use with your daily solar production rather than assuming you always start from empty.

  • Daily energy use (Wh) ≈ sum of device watts × hours used
  • Daily solar production (Wh) ≈ Panel watts × H × η

For example, if your daily loads total 400 Wh and your solar setup can produce about 600 Wh per day, your battery will generally end each day more charged than it started, except during stretches of poor weather.

Common Mistakes and How to Troubleshoot Slow Solar Charging

Even with the right number of solar watts on paper, real-world charging can be disappointingly slow. Many issues come down to a few repeatable mistakes.

Typical sizing and setup mistakes

  • Confusing watts with watt-hours. Buying a 500 W panel for a 500 Wh battery does not guarantee a one-hour recharge; you still need enough sun hours and must account for efficiency.
  • Ignoring peak sun hours. Using 6 hours of sun in the math when your location only gets 3–4 peak sun hours leads to chronic undersizing.
  • Overlooking the solar input limit. Connecting 600 W of panels to a power station that only accepts 300 W does not double your charging speed in full sun.
  • Poor panel placement. Flat panels on the ground, panels in partial shade, or panels pointed away from the sun can cut output dramatically.
  • Running heavy loads while charging. If your station is powering a 200 W appliance while solar is only providing 250 W, very little energy is left to refill the battery.

Troubleshooting slow solar charging

Use the station’s input wattage display (if available) to diagnose problems. Compare the number you see to the rated wattage of your panels.

Observed issue Likely cause Practical fix
Input watts are less than 50% of panel rating at midday Panel shaded, wrong angle, or heavy cloud cover Move panels to full sun, tilt toward sun, avoid obstructions
Input watts never exceed the station’s listed solar max Solar array is hitting the built-in input limit Accept the cap; adding more panels will only help in low light
Input watts drop sharply as battery nears full Charge controller is tapering current at high state of charge Normal behavior; estimate charge time from 10–80% instead of 0–100%
Battery still drains over several days despite panels Daily loads exceed average daily solar production Reduce usage, add panel watts within input limit, or add backup charging
Panels feel very hot and output is lower than expected High cell temperature reducing panel efficiency Allow airflow under panels, avoid placing directly on hot surfaces
Use these cues to quickly pinpoint why your real charging speed differs from the math. Example values for illustration.

When to increase solar vs. when to change behavior

If your observed input power is close to what the math predicts but you still run short on energy, the issue is usually daily consumption, not panel performance. In that case, either:

  • Add more solar watts (within the input rating), or
  • Reduce or reschedule heavy loads to align with peak solar hours

If your observed input power is far below expectations, focus first on placement, shading, wiring, and connector issues before buying more panels.

Solar and Battery Safety Basics

Solar charging a portable power station is generally safe, but higher power levels and outdoor conditions introduce risks that are easy to overlook.

Respect voltage and current limits

  • Always keep the combined panel voltage and current within the power station’s stated limits.
  • When wiring multiple panels, remember that series connections raise voltage and parallel connections raise current.
  • Do not assume that “more is better”; exceeding limits can trigger protection circuits or, in extreme cases, damage equipment.

Use appropriate cables and connectors

  • Select cables rated for the expected current and length to avoid overheating and excessive voltage drop.
  • Keep connectors clean, dry, and fully seated. Loose or corroded connections can heat up under load.
  • Avoid improvised or mismatched adapters that may not lock securely.

Protect equipment from weather and heat

  • Most portable power stations are not designed to sit in direct rain or heavy condensation. Keep them sheltered while allowing ventilation.
  • Do not leave the power station in enclosed, hot spaces (such as a closed vehicle in full sun) while charging.
  • Panels can be used outdoors, but inspect them regularly for cracked glass, damaged frames, or compromised junction boxes.

Safe handling and placement

  • Secure panels against wind gusts so they do not fall or become projectiles.
  • Route cables to avoid tripping hazards and damage from doors, hatches, or sharp edges.
  • Disconnect panels from the station before working on wiring changes.

Following these basics helps your solar setup operate safely and consistently, especially at higher wattages where currents and temperatures are higher.

Long-Term Use: Efficiency, Storage, and Seasonal Adjustments

Solar performance and battery behavior change over time. Planning for long-term use helps keep your “full recharge in one day” goal realistic across seasons and years.

Panel aging and cleanliness

  • Solar panels slowly lose output over many years, but dirt, dust, and pollen can cause much larger short-term losses.
  • Wipe panel surfaces gently with a soft cloth and clean water when you notice visible buildup.
  • Avoid abrasive cleaners or rough scrubbing that could scratch the surface.

Battery aging and capacity loss

  • Portable power station batteries gradually lose capacity after many charge cycles.
  • As usable capacity shrinks, the same solar array will refill the battery faster, but you will have less total energy to work with.
  • Plan for some capacity loss over the life of the system when sizing for critical loads.

Seasonal solar strategy

  • In summer, you may be able to rely on a “balanced” solar setup that roughly matches your daily usage.
  • In winter or at higher latitudes, you may shift to a “heavy” solar approach (more watts than the calculation suggests) or add backup charging.
  • Adjust panel tilt seasonally if you have a semi-permanent setup: steeper in winter, flatter in summer.

Storage and transport

  • Store the power station in a cool, dry place when not in use, ideally at a partial state of charge rather than completely full or empty.
  • Protect foldable panels from sharp bends, creases, or heavy loads during transport.
  • Periodically test your full setup (panels + station + cables) before long trips or storm seasons so you are not troubleshooting under pressure.

Putting It All Together: Practical Takeaways and Specs to Look For

By this point, you can estimate the solar watts needed to recharge your portable power station in one day and understand why real-world results may differ from simple math.

  • Use the core formula C ÷ (H × η) to get a realistic wattage target.
  • Compare that target to your station’s maximum solar input rating.
  • Decide whether you want minimal, balanced, or heavy solar coverage based on how critical your loads are and how variable your weather is.

As a quick guideline if your station’s input limit allows it:

  • Minimal solar (occasional top-ups): around 25–50% of the calculated watts
  • Balanced solar (typical full-day recovery): around 70–120% of the calculated watts
  • Heavy solar (high reliability or poor weather): 150% or more of the calculated watts

Specs to look for when choosing a power station and solar panels

When you are comparing options, these specifications directly affect how many solar watts you can use and how quickly you can recharge:

  • Battery capacity (Wh): The starting point for the solar sizing formula. Match this to your daily energy needs plus some margin.
  • Maximum solar input power (W): Sets the ceiling on how many panel watts you can effectively use in full sun.
  • Supported input voltage range (V): Determines how you can wire panels (series, parallel) and what panel types are compatible.
  • Maximum input current (A): Important when wiring panels in parallel; total current must stay below this limit.
  • Built-in charge controller type: A good MPPT controller can improve real-world efficiency compared with simpler designs, especially in variable conditions.
  • Display of input/output watts: Makes it much easier to troubleshoot solar performance and adjust panel placement.
  • Supported connector types: Check that the station and panels can connect cleanly without excessive adapters.
  • Operating temperature range: Important for both the battery and the charge controller if you plan to use the system in hot or cold environments.

Focusing on these specs, combined with the sizing method in this guide, will help you choose a portable power station and solar panel setup that can realistically recharge in one day under the conditions you actually expect to see.

Frequently asked questions

Which power station and solar panel specifications most affect whether you can recharge fully in one day?

Battery capacity (Wh), the number of peak sun hours at your location, overall system efficiency (losses from wiring, angle, temperature, and controller), and the power station’s maximum solar input rating are the primary factors. Together these determine the required panel wattage and whether the station can accept that power in full sun.

What is a common setup mistake that causes slow or incomplete recharging?

A frequent error is confusing panel watts with battery watt-hours and/or using optimistic peak sun hours in the math. Other common mistakes include poor panel placement, partial shading, and exceeding or overlooking the power station’s solar input limits.

What basic safety steps should I take when charging a power station with solar panels?

Respect the station’s voltage and current limits, use appropriately rated cables and connectors, and keep the station sheltered from direct rain while allowing ventilation. Secure panels against wind and avoid loose or corroded connections to reduce fire and damage risks.

How do peak sun hours change the amount of solar watts I need?

Peak sun hours appear in the denominator of the sizing equation, so fewer peak sun hours mean you need proportionally more panel watts to deliver the same energy. Use conservative peak sun hour estimates for winter or cloudy climates to avoid undersizing.

Can I simply add more panels if my power station charges slowly?

Only up to the station’s maximum solar input—adding panels beyond that will not increase the charge rate in full sun, though it can help maintain output in low-light conditions. If you need faster charging, check the input limits and consider a station with a higher accepted input or change usage patterns.

How can I quickly diagnose why observed input watts are much lower than panel ratings?

Check for shading, incorrect tilt or orientation, hot panel temperatures, loose or undersized cables, and whether the station is hitting its built-in solar input cap. Use the station’s input wattage display (if available) to compare expected vs. actual and isolate the issue.

Solar Panel Series vs Parallel: Best Way to Charge a Power Station

portable power station charging from solar panels outdoors

For most small portable power stations, parallel wiring is usually safer and more forgiving, while larger units often benefit from series or series-parallel wiring if their specs allow it. The best choice depends on your power station’s maximum solar voltage, current, and watt limits, plus how many panels you use and how shaded your setup is.

This guide explains solar panel series vs parallel wiring in plain language, focusing on portable power stations, solar generators, and small off-grid setups. You will see how each wiring method changes voltage and current, how to match panel strings to your power station input, and how shade, cable length, and temperature affect real charging speed.

By the end, you will be able to look at a panel label and a power station spec sheet and quickly decide whether series, parallel, or a mix of both makes the most sense for your camping, RV, or backup power system.

What Series and Parallel Mean for Portable Power Stations

When you combine solar panels to charge a portable power station, you can wire them in series, parallel, or a combination of both. These wiring choices change the voltage (V) and current (A) that reach the solar input, even if the total wattage (W) of the array stays similar in ideal sun.

Understanding this matters because every power station has hard limits, such as:

  • Maximum solar input voltage (V)
  • Maximum solar input current (A), sometimes
  • Maximum solar input power (W)

If your series voltage goes too high, you can trip protections or damage the input. If your parallel current goes too high, you can overheat cables or connectors. Getting series vs parallel right helps you:

  • Charge as fast as the power station allows, without exceeding limits
  • Handle shade and mixed conditions more predictably
  • Use reasonable cable sizes and lengths
  • Maintain safety margins in hot and cold weather

For portable systems used at home, in vehicles, or at campsites, this is usually less about squeezing out every last watt and more about staying within safe operating windows while keeping the setup simple to use.

How Series and Parallel Wiring Work

direct current (DC) is produced by solar panels. When you connect multiple panels, you can decide whether to add their voltages (series) or their currents (parallel). The basic rules are simple, but the implications for a power station are important.

Series wiring: higher voltage, same current

In a series connection, you connect the positive lead of one panel to the negative lead of the next, forming a chain. The remaining free positive and negative leads go to the power station’s solar input.

  • Voltage adds (Vtotal ≈ V1 + V2 + …)
  • Current stays roughly the same as one panel
  • Power ≈ Vtotal × I (same total watts as parallel in ideal sun)

Example: two similar 100 W panels, each with about 20 V and 5 A under load:

  • Series: ~40 V and ~5 A → ~200 W potential in good sun

This higher voltage can be helpful when:

  • Your power station allows a higher input voltage window
  • You need longer cable runs and want to reduce voltage drop
  • You are building a larger roof-mounted or semi-permanent array

The trade-off is that you must pay close attention to the maximum voltage rating of the power station, including cold-weather voltage increases.

Parallel wiring: same voltage, higher current

In a parallel connection, all panel positives are tied together, and all panel negatives are tied together. The combined positive and negative then go to the solar input.

  • Voltage stays roughly the same as one panel
  • Current adds (Itotal ≈ I1 + I2 + …)
  • Power ≈ V × Itotal (again, similar watts in ideal sun)

Using the same example panels:

  • Parallel: ~20 V and ~10 A → ~200 W potential in good sun

Parallel wiring tends to be more compatible with smaller power stations because the voltage stays low. However, the higher current means:

  • Cables and connectors must be rated for more amps
  • Voltage drop over long cables becomes more noticeable
  • Heat in undersized wiring can become a safety issue
Table 1. Series vs parallel for portable power stations – Example values for illustration.
Factor Series wiring Parallel wiring
Resulting voltage Adds with each panel; can approach input voltage limit Similar to a single panel; usually easier to keep within limits
Resulting current Similar to one panel; often easier on connectors Adds with each panel; can approach cable and connector ratings
Performance in partial shade One weak panel can drag down the whole string Each panel contributes more independently; shade impact is localized
Long cable runs Higher voltage reduces percentage loss from voltage drop Lower voltage is more affected by resistance in long cables
Risk focus More risk of exceeding max voltage, especially in cold weather More risk of overcurrent and cable heating
Typical use Larger or mid-sized stations with higher voltage input ratings Small to mid-sized stations with modest voltage limits

Real-World Examples and Simple Calculations

Once you understand the basics, the next step is to run quick checks using the panel labels and your power station manual. These simple examples show how series vs parallel changes what the device sees.

Example 1: Two 100 W panels and a small power station

Assume each 100 W panel is labeled approximately:

  • VOC (open-circuit voltage): 22 V
  • Vmp (voltage at max power): 18 V
  • Imp (current at max power): 5.5 A

Your small power station lists:

  • Max solar input voltage: 24 V
  • Max solar input power: 150 W

Series wiring of two panels:

  • String VOC ≈ 22 V + 22 V = 44 V → exceeds 24 V limit
  • Not safe for this device, even if it might appear to work briefly

Parallel wiring of two panels:

  • VOC stays ≈ 22 V → within the 24 V limit
  • Imp ≈ 5.5 A + 5.5 A = 11 A
  • Panel array could deliver ~18 V × 11 A ≈ 200 W, but the power station will cap at 150 W

In this case, parallel is clearly the better and safer choice.

Example 2: Four 100 W panels and a mid-sized power station

Now assume the same panels, but your power station lists:

  • Max solar input voltage: 60 V
  • Max solar input current: 15 A
  • Max solar input power: 400 W

Option A – All four in parallel:

  • VOC ≈ 22 V
  • Imp ≈ 4 × 5.5 A = 22 A → exceeds 15 A limit

Option B – Two in series, then those two strings in parallel (series-parallel):

  • Each series pair: VOC ≈ 44 V, Imp ≈ 5.5 A
  • Two series strings in parallel: VOC ≈ 44 V, Imp ≈ 11 A
  • Array power at max: ~18 V × 2 × 5.5 A × 2 ≈ 400 W

This series-parallel arrangement keeps both voltage and current within limits while allowing the power station to use close to its full 400 W solar capacity.

Estimating charge time

A quick way to estimate solar charge time in good sun is:

  • Charge time (hours) ≈ Battery capacity (Wh) ÷ Usable solar input (W)

For example, a 1000 Wh power station with about 300 W of real-world solar input might charge in roughly 3–4 hours of strong sun, after accounting for losses and conditions.

Table 2. Example setups and likely wiring choice – Example values for illustration.
Use case Typical gear Likely wiring Reasoning
Small backup at home 1–2 portable panels, small power station Parallel Low voltage limits; buildings and trees cause partial shade
Remote work setup 2–4 rigid panels, mid-sized station Series or series-parallel Higher voltage input, longer cable runs from yard to indoors
Weekend camping 1–2 folding panels, compact station Parallel Panels often moved and partly shaded; simple plug-and-play
RV or van roof array 4+ roof-mounted panels, larger station Series-parallel Balance voltage and current within controller limits

Common Mistakes and Troubleshooting Cues

Most problems people see when combining solar panels for a power station come from wiring choices that do not match the device’s specs or from conditions like shade and temperature. Recognizing the symptoms helps you correct them quickly.

Mistake 1: Exceeding maximum input voltage

What it looks like:

  • Power station refuses to start solar charging
  • Display shows an error code or “over-voltage” message
  • Charging works on warm days but fails on cold, bright mornings

Likely cause: Too many panels in series, pushing VOC near or above the rated maximum, especially in cold weather when voltage rises.

Fix:

  • Reduce the number of panels in series
  • Switch to parallel or series-parallel to stay within the voltage window
  • Leave extra voltage headroom instead of designing right at the limit

Mistake 2: Exceeding current limits or using undersized wiring

What it looks like:

  • Cables feel warm or hot to the touch during peak sun
  • Connectors look discolored or show signs of melting
  • Power station input occasionally cuts out under strong sun

Likely cause: Too many panels in parallel or thin extension cables that cannot handle the combined current.

Fix:

  • Check the power station’s maximum input current rating
  • Reduce the number of parallel panels or move to series-parallel
  • Use thicker, outdoor-rated solar cable sized for the expected amps

Mistake 3: Mismatched panels in series

What it looks like:

  • Array output is noticeably lower than expected
  • One panel is consistently cooler or warmer than the others

Likely cause: Combining panels with very different wattages or current ratings in the same series string. The lowest-performing panel limits the string current.

Fix:

  • Use panels of similar voltage and current ratings in each series string
  • If you must mix panels, do so in parallel where the impact is smaller

Mistake 4: Underestimating shade and panel placement

What it looks like:

  • Solar input drops sharply when a tree, antenna, or roof rack casts a shadow
  • Series strings lose most of their output when only one panel is shaded

Likely cause: Series wiring in a location with frequent partial shading, or panels placed at different angles.

Fix:

  • Favor parallel wiring where shading is unavoidable
  • Reposition portable panels to keep them in consistent sun
  • On roofs, plan string layouts to avoid regular shade from vents or racks

Quick troubleshooting checklist

  • Verify polarity on all connectors (positive to positive, negative to negative)
  • Check panel labels and recalculate string voltage and current
  • Test each panel alone to confirm it is producing power
  • Inspect all cables and connectors for damage, corrosion, or overheating

Safety Basics for Series and Parallel Solar Wiring

Portable power stations include built-in protections, but they cannot compensate for wiring that ignores basic electrical limits. A few habits go a long way toward safe, reliable operation.

Respect every component rating

  • Panels: Do not exceed their rated series fuse or connect them in ways the manufacturer does not support.
  • Cables: Use wire gauge that matches or exceeds the maximum expected current.
  • Connectors and adapters: Choose parts rated for outdoor DC use and the current of your array.
  • Power station input: Never exceed the published voltage or wattage limits.

Think about voltage and shock risk

As you add more panels in series, the open-circuit voltage can climb well above typical low-voltage DC thresholds. While still lower than household AC, higher DC voltage can increase shock risk and arc potential if connectors are mishandled.

  • Avoid touching bare conductors when panels are in sun
  • Make and break connections with panels covered or out of direct sunlight when possible
  • Do not work on wet connectors or cables

Use fuses or disconnects where appropriate

Many simple plug-in setups rely only on the power station’s internal protections. For larger or semi-permanent arrays, adding basic external protection is common practice:

  • Inline fuses sized for the string current
  • DC disconnect switches to isolate the array before rewiring

If you are unsure how to size or place these components, consulting a qualified electrician or solar professional is recommended, especially for RVs and long-term off-grid systems.

Keep the power station protected from weather and heat

  • Operate the power station in a dry, shaded location
  • Avoid enclosing it in tight compartments without ventilation
  • Keep air vents clear during both charging and discharging

Long-Term Use, Maintenance, and Storage

Series vs parallel wiring is only part of keeping your solar and power station setup working well over time. Basic care of panels, cables, and the power station itself helps maintain performance.

Panel care

  • Cleaning: Gently remove dust, pollen, and debris with water and a soft cloth or sponge. Avoid abrasive cleaners.
  • Inspection: Check for cracks, delamination, or damaged junction boxes that could affect output or safety.
  • Mounting: For roof-mounted panels, periodically verify that brackets and fasteners remain tight.

Cable and connector maintenance

  • Inspect cables for cuts, flattened sections, or exposed conductors
  • Keep connectors dry and off the ground where possible
  • Replace any connector that shows signs of overheating or corrosion

Power station storage

  • Store the unit in a cool, dry place when not in use
  • Follow the manufacturer’s guidance for long-term battery storage state-of-charge
  • Top up the battery periodically if the unit sits unused for months

Seasonal adjustments

  • In winter, expect higher panel voltage and lower overall output hours
  • In summer, check that cables and connectors are not overheating during long sunny days
  • Adjust panel tilt or placement seasonally if practical to improve production

Practical Takeaways and Specs to Look For

Choosing between solar panel series vs parallel wiring for a portable power station is mostly about matching your panels to the device’s input window and your environment.

  • Smaller power stations with low voltage limits usually favor parallel wiring.
  • Mid-sized and larger units with higher voltage inputs often work best with series or series-parallel.
  • Shady or cluttered locations tend to favor parallel; open, sunny spaces can benefit from series.
  • Long cable runs are easier to manage with higher voltage (series), as long as you stay within limits.

Specs to look for before deciding on series or parallel

  • From the power station:
    • Maximum solar input voltage (V) and any stated minimum voltage
    • Maximum solar input current (A), if listed
    • Maximum solar input power (W)
    • Recommended input voltage range for best MPPT performance, if specified
    • Supported connector types and any included adapters
  • From each solar panel:
    • VOC (open-circuit voltage)
    • Vmp (voltage at maximum power)
    • Imp (current at maximum power)
    • Recommended maximum series fuse rating
  • For your wiring plan:
    • Series string VOC: VOC × number of panels in series, with cold-weather headroom
    • Total array current: sum of Imp for parallel strings
    • Cable gauge sized for the highest current path
    • Expected shade patterns and whether panels can be placed together in full sun

If you can quickly answer these points from your labels and manual, you have everything you need to choose series, parallel, or a mix of both in a way that charges efficiently while staying safely inside the limits of your portable power station.

Frequently asked questions

Which power station and panel specifications matter most when deciding between series and parallel wiring?

Check the power station’s maximum solar input voltage, maximum input current (if listed), and maximum input power. From the panels, note V_OC, V_mp, and I_mp so you can calculate string V_OC and array current and ensure you stay within the station’s limits.

What common wiring mistake causes cable overheating?

Using too many panels in parallel without matching the cable gauge to the higher combined current often causes overheating. The fix is to either reduce parallel strings, reconfigure to series-parallel, or use thicker, outdoor-rated wiring sized for the expected amps.

Is wiring solar panels in series or parallel safer from a general safety perspective?

Neither is inherently safer; each has distinct hazards: series raises voltage which can increase shock and over-voltage risk for the power station, while parallel increases current which can overheat cables and connectors. Choose the method that keeps both voltage and current inside component ratings and use proper fusing and disconnects where appropriate.

How does partial shading affect a series string compared with a parallel array?

In a series string one shaded panel can reduce the current for the entire string, significantly lowering output. In parallel arrays shading tends to affect only the shaded panel’s contribution, making parallel more tolerant of mixed shade conditions.

Will rewiring panels to series always increase charging speed?

Not always — higher series voltage can reduce voltage drop and be beneficial for long runs or higher-voltage inputs, but if it exceeds the power station’s voltage limit it won’t work. Charging speed depends on staying within the station’s voltage, current, and wattage limits and on real-world conditions like sun, temperature, and MPPT efficiency.

Should I add fuses or a DC disconnect for a portable solar setup?

For small, short-term portable setups the power station’s internal protections are often sufficient, but fuses and a disconnect are recommended for larger or semi-permanent arrays. Inline fuses sized to the expected string current and a DC disconnect help isolate the array for safe maintenance and provide an extra layer of protection.

MPPT vs PWM in Portable Power Stations: Real Charging Differences Explained

Two portable power stations shown side by side for comparison

MPPT solar charging usually gives a portable power station noticeably faster and more consistent charging than PWM from the same solar panels. In real life that means shorter charge times, better performance in weak sun, and more flexibility in how you wire and place your panels.

This guide explains what MPPT and PWM actually do inside a portable power station, how much difference they make in watt-hours and hours of charging time, and when a simpler PWM input is still good enough. You will see plain-language examples, simple calculations, and typical use cases like camping, RV setups, and emergency backup power.

By the end, you will know how to read solar input specs, avoid common mistakes that slow charging, and decide whether it is worth paying more for MPPT in your next portable power station or solar generator.

What MPPT and PWM Mean and Why They Matter

A portable power station that accepts solar needs a built-in solar charge controller. That controller is almost always one of two types: PWM (pulse width modulation) or MPPT (maximum power point tracking). Both protect the battery and manage charging, but they do it in different ways that directly affect how much energy you actually store each day.

In simple terms:

  • PWM is simpler and cheaper but wastes more of the panel’s potential power, especially when panel voltage is much higher than the battery voltage.
  • MPPT is more advanced and usually harvests about 15–30% more energy from the same panels, especially in cold weather, weak sun, or partial shade.

Why this matters in real life:

  • Charging speed: MPPT can turn a “barely keeps up” solar setup into one that reliably refills the battery in a day of sun.
  • Panel flexibility: MPPT lets you use higher-voltage panels or series wiring to reduce cable losses.
  • Reliability of power: If you depend on solar for fridges, communication gear, or medical devices, the extra harvest from MPPT can be the difference between full and flat by morning.

If you only use solar occasionally, PWM can still be acceptable. But if solar is your main charging method, understanding MPPT vs PWM helps you choose a portable power station that matches your expectations.

Key Concepts: How MPPT and PWM Work With Solar Panels

To understand why MPPT usually wins, it helps to look at what the controller does with voltage and current between the solar panels and the battery inside your portable power station.

What the Solar Charge Controller Actually Does

Inside the power station, the solar charge controller:

  • Limits voltage and current to protect the battery from overcharging.
  • Manages charging stages for battery health (fast charge, then slower topping, then maintaining).
  • Tries to use the available solar power as effectively as its design allows.

The difference is how PWM and MPPT “use” the panel’s voltage and current.

PWM: Simple Voltage Matching

A PWM controller connects the panel to the battery and rapidly switches the connection on and off to control average current. It effectively drags the panel voltage down close to the battery voltage.

  • If the panel’s best operating voltage (Vmp) is much higher than the battery voltage, the extra voltage is mostly lost.
  • The panel is forced to run away from its most efficient point on the voltage–current curve.
  • Electronics are simple and inexpensive, which is why PWM often appears in smaller or budget power stations.

MPPT: Actively Finding Maximum Power

An MPPT controller continuously measures panel voltage and current and adjusts the operating point to stay near the panel’s maximum power point.

  • It runs the panel at or near Vmp, where voltage and current multiply to the highest wattage.
  • A DC–DC converter inside steps the higher panel voltage down to the battery voltage while increasing current.
  • As sunlight changes (clouds, angle, temperature), it retunes the operating point to keep power output close to the maximum available.

Energy Harvest in Numbers

Under many real-world conditions, MPPT can harvest roughly 15–30% more energy than PWM from the same panels. The exact gain depends on:

  • How much higher the panel voltage is than the battery voltage.
  • Temperature (panels run at higher voltage when cold).
  • Cloud cover, shade patterns, and time of day.
  • Cable length and wire thickness (voltage drop).

In cold, clear conditions with higher-voltage panels, the gain can be on the higher end. In very hot conditions with low panel voltage and short cables, the gain can be smaller but usually still present.

Real-World Examples and Typical Use Cases

Numbers are easier to understand with concrete examples. The following scenarios use rounded values to show how MPPT vs PWM changes daily energy harvest and charging time.

Example 1: Single 100 W Panel and a Mid-Size Power Station

Assume:

  • Solar panel: 100 W, Vmp 18 V, Imp 5.5 A.
  • Battery charging voltage inside the power station: about 13 V.
  • Good sun: 5 hours of strong midday-equivalent sunlight.

Approximate power into the battery:

  • PWM: Panel is pulled to about 13 V. Power ≈ 13 V × 5.5 A ≈ 71.5 W.
  • MPPT: Panel runs near 18 V. Power ≈ 18 V × 5.5 A ≈ 99 W, minus some conversion loss.

Over 5 sun hours:

  • PWM: about 70 W × 5 h ≈ 350 Wh into the battery.
  • MPPT: about 90–95 W × 5 h ≈ 450–475 Wh into the battery.

On a 500 Wh power station, that can mean the difference between almost full in one day (MPPT) versus needing part of a second day (PWM).

Setup Controller Type Effective Panel Power (W) Daily Energy (Wh, 5 sun hours) Approx. Time to Charge 500 Wh
100 W panel PWM ~70 W ~350 Wh About 1.4 days of good sun
100 W panel MPPT ~90–95 W ~450–475 Wh About 1 day of good sun
200 W panels PWM ~140 W ~700 Wh About 0.8 day of good sun
200 W panels MPPT ~180–190 W ~900–950 Wh About 0.6 day of good sun
Typical impact of MPPT vs PWM on daily energy harvest and charge time. Example values for illustration.

Example 2: Long Cable Run to a Sunny Spot

Imagine your power station sits inside a van or tent, but your panels are 10–15 meters away in full sun.

  • PWM setup: Panels wired for low voltage (close to battery voltage). Current is relatively high, so voltage drop in the long cable eats into your power. You may lose 10% or more unless you use thick, heavy cable.
  • MPPT setup: Panels wired in series for a higher voltage (within the power station’s limit). Current is lower, so the same cable has less voltage drop and you deliver more power to the controller.

In practice, this can be the difference between the station finishing its charge before sunset versus still being short by evening.

Example 3: Cloudy or Partially Shaded Days

On days with moving clouds or partial shade:

  • PWM: Panel voltage and current both sag, and the controller simply follows the battery voltage. Output can drop sharply and stay low until conditions improve.
  • MPPT: The controller re-scans the panel’s voltage–current curve and finds a new point that still delivers as much power as conditions allow. You may not get full rated power, but you typically get more than with PWM.

If you are relying on solar to run a fridge or communication gear in poor weather, this extra harvest can be very noticeable over a multi-day trip.

Common Mistakes and Troubleshooting Slow Solar Charging

Many “my solar is not working” problems turn out to be configuration issues rather than defective hardware. MPPT and PWM each have their own common pitfalls.

Frequent Mistakes With PWM Inputs

  • Using very high-voltage panels: A PWM controller will drag the panel voltage down to near battery voltage and throw away the extra. The result: you paid for panel wattage you can never use.
  • Long, thin cables: Because current is relatively high at low voltage, thin or very long cables cause large voltage drops and wasted power.
  • Overestimating charge speed: People often size panels based on the printed wattage, then discover the PWM controller only delivers 60–75% of that into the battery.

Frequent Mistakes With MPPT Inputs

  • Exceeding input voltage: Wiring too many panels in series can push the solar input above the controller’s maximum voltage rating, risking shutdown or damage.
  • Ignoring shading patterns: One panel in deep shade in a series string can pull the whole string down. MPPT cannot create power that the panels are not producing.
  • Expecting miracles in very poor sun: MPPT is more efficient, but it still needs a minimum amount of light. In heavy overcast, both PWM and MPPT will produce limited power.

Simple Troubleshooting Cues

If your portable power station charges slowly from solar, work through these checks:

  • Panel orientation: Is the panel broadly facing the sun, not lying flat or shaded?
  • Cables and connectors: Are all plugs fully seated, with no bent pins or damaged insulation?
  • Input limits: Is the total panel wattage and voltage within the power station’s stated solar input range?
  • Battery state: Charging always slows down as the battery nears full. Compare speed at 20–50% charge versus 90–100%.
  • Controller type vs expectation: If your unit uses PWM, mentally reduce the panel’s rated watts by around 25–35% when estimating charge times.
Symptom Likely Cause Quick Check or Fix
Solar input shows much lower watts than panel rating PWM controller or poor sun angle Confirm controller type; re-aim panel toward sun and compare midday readings
Solar input drops to zero intermittently Loose connector or panel cable strain Inspect and reseat all connectors; reduce cable tension
Unit will not accept solar at all Panel voltage outside allowed range Measure open-circuit panel voltage; compare with solar input spec
Panels far away, charging slower than expected Voltage drop in long, thin cables Use thicker cable or higher-voltage array with MPPT (within limits)
Good sun but sudden large power dips Moving shade from trees, poles, or people Watch panel surface for shadows; reposition if needed
Typical solar charging problems and quick diagnostic steps. Example values for illustration.

Safety Basics for Solar Charging and Controllers

Whether your portable power station uses MPPT or PWM, safe solar charging comes down to staying within the unit’s limits and handling DC power carefully.

Respect Voltage and Power Limits

  • Do not exceed maximum solar input voltage: Going above the rated input voltage can instantly damage the controller. This is especially important when wiring panels in series for an MPPT input.
  • Stay within maximum solar wattage: Oversizing the array far beyond the rated wattage can cause the unit to run hot or shut down. A modest amount of oversizing is often tolerated, but check the specs.
  • Match connectors and polarity: Reversed polarity on DC connectors can damage internal electronics. Always double-check markings before plugging in.

Manage Heat and Ventilation

  • Keep the power station ventilated: Both MPPT and PWM controllers generate heat while converting power. Do not cover the unit or block vents while charging at high solar input.
  • Avoid direct hot sun on the unit: It is fine for panels to be in full sun, but the power station itself will run cooler and last longer if shaded and ventilated.

Safe Handling of Panels and Cables

  • Secure panels in wind: A loose panel can flip, damage connectors, or injure someone.
  • Protect cables from pinch points: Avoid running cables through doors or windows that can crush insulation.
  • Disconnect safely: If you need to unplug panels under load, grip connectors firmly and avoid pulling on the cable itself.

These practices apply regardless of controller type. MPPT does not inherently require more safety precautions than PWM, but higher-voltage arrays for MPPT deserve extra attention to correct wiring and insulation.

Long-Term Use, Maintenance, and Seasonal Considerations

Good habits around storage, cleaning, and seasonal use help both MPPT and PWM systems perform closer to their potential over time.

Panel Care and Cleaning

  • Keep panel surfaces clean: Dust, pollen, and bird droppings reduce output. A soft cloth and clean water usually suffice.
  • Inspect for micro-cracks: After drops or impacts, check panels for broken glass or delamination, which can lower performance or create hot spots.

Battery and Controller Health Over Time

  • Avoid constant 0–100% cycles: Deep cycling every day can age the battery faster. If possible, operate between roughly 20–80% state of charge for daily use.
  • Store partially charged: For long-term storage, many manufacturers recommend storing around 40–60% charge and topping up every few months.
  • Monitor for unusual heat: During high solar input, the unit should be warm but not excessively hot. Persistent overheating suggests you are pushing limits or blocking ventilation.

Seasonal Adjustments

  • Winter: Short days and low sun angles reduce total energy, but cold panels run at higher voltage. MPPT benefits tend to be larger in these conditions.
  • Summer: Longer days but hotter panels mean slightly lower voltage. Expect both MPPT and PWM to run closer to their rated power at midday, with MPPT still ahead.
  • Travel and storage: When transporting, protect panel faces and avoid sharp bends in cables to prevent long-term damage that silently reduces output.

Practical Takeaways and Specs to Look For

Choosing between MPPT and PWM in a portable power station comes down to how much you rely on solar and how constrained your environment is.

  • Heavy or primary solar use: MPPT is usually worth it for campers, RV users, off-grid cabins, and anyone running fridges or critical loads from solar.
  • Occasional or backup solar use: PWM can be acceptable if you mostly charge from AC or vehicle power and just want solar as a slow top-up.
  • Space-limited setups: If you cannot add more panel area, MPPT’s extra 15–30% harvest is effectively “free panel upgrade” from the same footprint.

Specs to Look For on the Data Sheet

When comparing portable power stations, scan the solar section of the spec sheet for these details:

  • Controller type: Look for explicit wording like “MPPT solar charge controller.” If nothing is mentioned, assume PWM or confirm in the manual.
  • Maximum solar input power (W): This tells you the largest practical array size. More watts usually means faster charging if you can supply them.
  • Solar input voltage range (V): A wider range and a higher maximum voltage make it easier to wire panels in series and reduce cable losses, especially with MPPT.
  • Maximum solar input current (A): Important when using low-voltage, high-current arrays or PWM inputs where current is naturally higher.
  • Connector type and rating: Ensure the physical connector and adapter cables can safely handle the expected current.
  • Published solar charging times: Compare claimed charge times from a stated panel wattage. If they seem optimistic, remember that PWM will deliver less than the panel’s printed wattage.

Align these specs with how you plan to use the power station: how often you see full sun, how much panel area you can deploy, how far panels sit from the unit, and how critical it is that the battery reaches full each day. With that information, the choice between MPPT and PWM becomes a practical decision instead of a confusing acronym.

Frequently asked questions

Which solar input specifications should I check when choosing a portable power station?

Check the controller type (MPPT or PWM), the maximum solar input power (watts), the supported input voltage range, and the maximum input current. Also confirm connector types and any published solar charging times so you can match the station to your panel array and expected conditions.

Why is my solar charging much slower than the panel’s rated wattage?

Slower charging is often due to mismatches between panel Vmp and the controller (especially with PWM), cable voltage drop, shading, or the battery already being near full. Verify wiring, orientation, and controller type, and measure input watts at midday to isolate the cause.

Are there safety risks when wiring panels for MPPT or using higher-voltage arrays?

Yes—wiring panels in series can raise open-circuit voltage above the controller’s maximum and risk damage or failure. Always stay within the power station’s voltage and wattage limits, use proper insulation and connectors, and avoid exposing the unit to blocked ventilation or extreme heat while charging.

How much faster will MPPT charge compared with PWM in real use?

MPPT typically harvests about 15–30% more energy than PWM under many real-world conditions, which translates to noticeably faster charge times. The exact gain depends on panel voltage relative to battery voltage, temperature, shade, and cable losses.

Can I mix different solar panels or combine series and parallel wiring with a portable power station?

Mixing panels with different voltages or currents can cause mismatches that reduce output; it’s best to use panels with similar Vmp and current ratings. Series wiring increases array voltage (watch the controller’s max voltage) while parallel wiring increases current (watch max input current), so plan wiring to stay within limits.

How important are cable length and wire gauge for solar charging efficiency?

Very important—long or thin cables cause voltage drop and reduce power at the controller, especially with low-voltage (PWM-style) setups. Use thicker cable or run panels at higher voltage (within the controller’s allowed range) to reduce losses and improve delivered power.

Portable Power Station Input Limits (Volts, Amps, Watts) Explained

portable power station charging from a wall outlet indoors

Portable power station input limits tell you the maximum volts, amps, and watts you can safely feed into the unit from the wall, a car, or solar panels. If you go over those numbers, you risk overheating components, tripping protections, or permanently damaging the battery and charge electronics.

Understanding input limits is what lets you match the right AC charger, size a solar array correctly, and decide whether a car outlet can safely keep up with your camping or emergency needs. The same basic rules apply whether you call it a portable generator, battery box, or solar power station.

This guide breaks down what each number on the spec sheet means, shows realistic charging examples, and highlights common mistakes to avoid so you can charge efficiently without shortening the life of your unit.

What Input Limits Mean and Why They Matter

Every input on a portable power station is designed to accept only a certain amount of power. These limits are usually given as:

  • A voltage range (V)
  • A maximum current (A)
  • A maximum power (W)

All three limits matter at the same time. You must stay within the voltage range, not exceed the amp rating, and keep total watts at or below the published maximum. If you overshoot any of them, the unit may shut down, run hot, or in the worst case fail.

In practical terms, input limits control:

  • How fast the battery can charge: Higher allowed watts mean shorter charge times.
  • What sources you can safely use: Wall outlet, vehicle socket, or certain solar panel configurations.
  • How hard the internal electronics are worked: Pushing the limits constantly can reduce long-term reliability.

Before buying extra chargers or panels, or plugging into a new power source, you should be able to answer three questions: What voltage will it supply, how many amps can it deliver, and how many watts will that be in real use?

Key Concepts: Volts, Amps, Watts and How Input Limits Work

On the input side, volts, amps, and watts are tied together by a simple formula:

Watts (W) = Volts (V) × Amps (A)

Once you know any two, you can calculate the third. That is the core of understanding input limits.

Voltage (V): The Allowed Range

Voltage is the electrical “pressure.” Portable power stations typically list different voltage ranges for different inputs, such as:

  • AC input: 100–120 V or 220–240 V, 50/60 Hz
  • Car/DC input: 12–24 V DC
  • Solar input: A range such as 12–60 V DC

For DC and solar inputs, going above the maximum voltage is one of the fastest ways to damage the charge controller. Even if the current is low, an over-voltage event can punch through components designed for a lower rating.

Current (A): How Much Flow the Circuit Can Handle

Current is how much charge flows per second. Input current limits might look like:

  • AC input: 8 A at 120 V
  • Car input: 8 A max at 12/24 V
  • Solar input: 10 A max

If you try to push more current than the circuit is designed for, wiring, connectors, and internal components can overheat. Many units have internal current limiting, but that protection usually assumes you have matched the voltage correctly.

Power (W): How Fast You Can Charge

Power combines volts and amps to tell you how fast energy is moving into the battery. A higher allowed wattage means faster charging, up to the battery’s safe charge rate. For example:

  • 120 V × 5 A = 600 W
  • 24 V × 10 A = 240 W

Manufacturers often publish a maximum input wattage for each port or charging method. That number is a practical upper bound on how fast the battery can be charged without overheating or excessive stress.

Input type Typical rating example Max amps Resulting max watts (approx.) What it means in practice
Wall AC 100–120 V AC, 8 A 8 A ≈ 800 W Fastest everyday charge option for many units
Car DC 12 V DC, 8 A 8 A ≈ 100 W Slow but convenient charging while driving
Solar DC 12–60 V DC, 10 A 10 A Up to 400–600 W (model-dependent) Good for daytime recharging off-grid
Typical portable power station input ratings and what they mean for charging speed. Example values for illustration.

When you read a spec such as “Solar input: 12–60 V, 10 A, 400 W max,” you must obey all three numbers at once: keep array voltage between 12 and 60 V, short-circuit current at or below 10 A, and total panel wattage at or below about 400 W under ideal conditions.

Real-World Examples: AC, Car, and Solar Input Limits

Seeing how input limits work in real situations makes it easier to choose chargers and panels confidently.

Example 1: Wall AC Charging Time

Imagine a portable power station with a 1,000 Wh battery and an AC input rating of 800 W. Ignoring efficiency losses, the ideal charge time from empty would be:

  • Charge time ≈ Battery capacity ÷ Input power
  • Charge time ≈ 1,000 Wh ÷ 800 W ≈ 1.25 hours

In real life, charging slows down near 80–100% and there are conversion losses, so you might see closer to 1.5–2 hours from low to full. If you plug into a circuit that can only safely support 400 W, you would need to reduce the AC charge rate (if adjustable) and expect roughly double the charge time.

Example 2: Car Socket Limits

Consider a unit that accepts 12–24 V DC, 8 A max from a vehicle. At 12 V:

  • Max watts ≈ 12 V × 8 A = 96 W

With the same 1,000 Wh battery, a rough estimate for a full charge from a 12 V outlet is:

  • Charge time ≈ 1,000 Wh ÷ 96 W ≈ 10.4 hours (plus losses)

Car charging is usually for topping up during long drives, not for fast charging from empty.

Example 3: Matching a Solar Panel Array

Take a solar input spec of 12–60 V DC, 10 A max, 400 W max. You are considering two 200 W panels with these ratings each:

  • Voc (open-circuit voltage): 22 V
  • Vmp (voltage at max power): 18 V
  • Isc (short-circuit current): 12 A
  • Imp (current at max power): 11 A

You have two basic wiring options:

  • Series: Voltages add, current stays similar.
  • Parallel: Currents add, voltage stays similar.

If you wire the two panels in series:

  • Total Voc ≈ 22 V + 22 V = 44 V (within 60 V limit)
  • Total Isc ≈ 12 A (within 10 A only if the controller effectively limits current, which many do, but you should still check specs carefully)
  • Rated power ≈ 400 W (at the unit’s stated limit)

If you wire them in parallel:

  • Total Voc ≈ 22 V (within 60 V limit)
  • Total Isc ≈ 12 A + 12 A = 24 A (well above a 10 A limit)

In this simplified example, series is more likely to stay within spec, while parallel could exceed the current rating and should be avoided unless the unit specifically supports higher current or multiple parallel strings.

Scenario Configuration Approx. array Voc Approx. array Isc Approx. array watts Input limit risk
Two 200 W panels, series Series (2 × 200 W) 44 V 12 A 400 W Voltage OK; current close to limit, check controller behavior
Two 200 W panels, parallel Parallel (2 × 200 W) 22 V 24 A 400 W Current likely exceeds 10 A input rating
Single 200 W panel Single panel 22 V 12 A 200 W Comfortably within most small to mid-size limits
How different solar wiring choices affect voltage, current, and risk of exceeding input limits. Example values for illustration.

Real panels and power stations vary, but walking through simple calculations like these before you connect anything helps you avoid expensive mistakes.

Common Mistakes and Troubleshooting Input Problems

Most input-related issues fall into a few predictable patterns. Recognizing them early can prevent damage.

Typical User Mistakes

  • Assuming any DC barrel plug or adapter will work: Using a power brick with the wrong voltage, even if the connector fits.
  • Ignoring solar panel Voc in cold weather: Panel voltage rises as temperature drops, which can push an array over the unit’s max voltage.
  • Overloading a vehicle socket: Drawing near the fuse rating for hours, causing hot sockets or blown fuses.
  • Daisy-chaining too many panels in parallel: Current adds up quickly and can exceed the amp limit of the solar input.
  • Using thin, long extension cords: Voltage drop and heat buildup when fast-charging from AC over undersized cabling.

What to Check If Charging Is Slow or Not Working

If your portable power station will not charge, or charges much slower than expected, work through these checks:

  • Verify the source voltage: Use a multimeter if available to confirm that the charger, car outlet, or solar array is providing the expected voltage.
  • Read the display or indicator lights: Look for error codes related to over-voltage, over-current, or temperature.
  • Inspect connectors and cables: Loose, bent, or partially inserted plugs are a very common cause of intermittent charging.
  • Reduce input power: If the unit allows you to lower AC or DC input, try a lower setting to see if charging stabilizes.
  • Test one source at a time: Disconnect solar or DC inputs and test only AC (or vice versa) to isolate the problem.

Warning Signs You Are Pushing Input Limits

  • Cables, adapters, or input ports feel hot to the touch (not just warm).
  • The unit frequently stops and restarts charging or shows repeated protection trips.
  • Solar input wattage on the display bounces or cuts out at midday sun.
  • Vehicle fuses blow or accessory sockets become discolored or loose.

Any of these signs mean you should stop, let everything cool, and re-check the ratings and wiring before trying again.

Safety Basics for Using Input Limits Wisely

Input limits are primarily about safety: they protect your portable power station, connected wiring, and the power sources you use. A few habits go a long way.

AC Charging Safety

  • Know the circuit rating (typically 15 A or 20 A) and avoid running other large appliances on the same branch while fast-charging.
  • Use short, heavy-gauge extension cords if you must extend the reach; avoid thin, coiled cords for high-watt charging.
  • Keep the power station on a hard, flat surface with ventilation openings unobstructed.
  • If the outlet, plug, or cord becomes very warm or smells hot, unplug immediately and investigate.

DC and Vehicle Safety

  • Use only fused, properly rated cables for car charging.
  • Follow the vehicle and power station manuals on whether the engine must be running to avoid draining the starter battery.
  • Do not bypass or oversize fuses in an attempt to get more current.
  • Avoid routing cables where they can be pinched, slammed in doors, or abraded.

Solar Input Safety

  • Double-check polarity before connecting panels; reversed polarity can damage inputs not protected against it.
  • Secure panels and cables so they cannot blow over or chafe in the wind.
  • Cover the panels or disconnect them at the panels before rewiring series/parallel combinations.
  • Consider a margin below the maximum voltage and current ratings to account for temperature swings and measurement error.

Temperature and Input Limits

  • Do not attempt to fast-charge in closed vehicles or hot sheds where internal temperatures can rise quickly.
  • In very cold weather, expect the unit to limit or refuse charging until the battery warms into a safe range.
  • Never try to defeat thermal protections by covering sensors or forcing airflow in unusual ways.

Long-Term Use, Maintenance, and Preserving Input Hardware

Respecting input limits is not just about avoiding immediate failure; it also affects how long your portable power station will last.

Reducing Wear on Charge Electronics

  • Avoid constant max-rate charging: If your unit allows adjustable AC input, using a medium setting for everyday use is easier on the components.
  • Alternate charge sources: Mixing AC, moderate solar, and occasional car charging can spread wear over different circuits.
  • Keep vents clear: Dust buildup and blocked airflow make it harder to shed heat generated during charging.

Protecting Ports and Cables

  • Insert and remove plugs straight in and out to avoid loosening connectors over time.
  • Support heavy adapters so their weight is not hanging directly from the port.
  • Inspect cables periodically for nicks, kinks, or melted insulation; replace anything suspect.

Storage Practices That Help Input Circuits

  • Store the unit in a cool, dry place within the manufacturer’s recommended temperature range.
  • Avoid leaving AC chargers or solar cables permanently plugged in if the unit will sit unused for long periods.
  • Charge the battery to a moderate level (often around 40–60%) before long-term storage, then top up every few months.

Thoughtful use and occasional inspection can prevent small issues, such as a slightly loose connector or marginal cable, from becoming input-related failures later.

Practical Takeaways and Specs to Look For

Once you understand what the input numbers mean, choosing compatible chargers and solar panels becomes straightforward. You do not need advanced electrical knowledge; you only need to read a few lines on the label and do simple multiplication.

Key Takeaways

  • Always match the voltage first; the wrong voltage is more dangerous than too much potential current.
  • Use Watts = Volts × Amps to estimate how fast a given input will charge your battery.
  • On solar, design for the worst-case (coldest, sunniest conditions) when checking Voc and Isc against your unit’s limits.
  • Warm is normal; hot to the touch is a sign you are pushing or exceeding limits somewhere in the chain.
  • Back off from maximum input when you do not need the fastest possible charge to reduce wear and heat.

Specs to Look For on Your Portable Power Station

When reading manuals or product labels, look specifically for these items and write them down in one place:

  1. AC input voltage range and max watts
    Example: 100–120 V AC, 50/60 Hz, 800 W max.
  2. Car/DC input voltage range and max amps
    Example: 12/24 V DC, 8 A max.
  3. Solar input voltage range, max amps, and max watts
    Example: 12–60 V DC, 10 A max, 400 W max.
  4. Supported USB-C or other DC input profiles
    Example: 5/9/15/20 V, up to 100 W.
  5. Recommended charging temperature range
    Example: 32–104°F (0–40°C).
  6. Maximum recommended continuous charge rate as a percentage of battery capacity
    Example: Up to 0.8C (80% of battery capacity in watts).
  7. Any notes about reduced input at high or low temperatures
    Example: Charging power may be limited above 95°F (35°C).

Keep these numbers handy when you shop for additional chargers or panels or when you plan a new setup in a vehicle or off-grid system. Matching your sources to these limits is the simplest way to get reliable, safe performance from your portable power station for years to come.

Frequently asked questions

Which input specs and features matter most when choosing chargers or solar panels?

Prioritize matching the station’s allowed voltage range, the maximum input amps, and the total input wattage — all three must be respected. Also check supported connector types, any MPPT or charge-controller limits for solar, and recommended operating temperature ranges.

What happens if I accidentally use a charger with the wrong voltage?

Using a charger that supplies too high a voltage can damage the charge controller or other input circuitry, often immediately. A lower-than-required voltage typically won’t charge effectively and may cause slow or no charging, but it is less likely to cause catastrophic failure.

Can I connect multiple charging sources at once to speed up charging?

Some stations support combining sources, but only if the manual explicitly allows it and the combined watts and currents stay within the published limits. Combining without confirmation can exceed amp or voltage ratings and trigger protections or cause damage.

What are simple safety practices to prevent overheating or damage while charging?

Use properly rated, fused cables and short, heavy-gauge cords for high currents; keep ventilation clear; avoid charging in very hot or enclosed spaces; and stop if connectors or ports feel hot. Regularly inspect cables and follow the station’s specified temperature and input ratings.

How do temperature changes affect solar panel voltage and input limits?

Panel open-circuit voltage (Voc) rises as temperature drops, so cold conditions can push array voltage above a station’s max and risk damage. Account for worst-case cold Voc when sizing arrays and leave a safety margin below the stated voltage limit.

Why is my station charging slower than the rated input power?

Slower charging can be caused by the source not delivering its rated voltage or current, battery-management tapering near full, thermal/temperature limits reducing power, or losses from undersized cables and connectors. Verify voltages, check displays for limits or errors, and inspect cabling to troubleshoot.

Portable Power Stations for RV and Motorhomes: Sizing, Setup, and Safe Use

Isometric illustration of power station charging devices

Portable power stations for RV and motorhomes are self-contained battery systems that let you run RV appliances and electronics without a generator or shore power. They combine a large battery, inverter, and multiple outlets in one box, so you can plug in gear much like you would at home. For many campers, they are the simplest way to add quiet off-grid power for boondocking, travel days, and overnight stops.

This guide explains how these units work in an RV context, how to size one for your rig, and what to expect from real-world runtime. You will see practical examples, common mistakes to avoid, key safety basics, and a clear checklist of specs to look for before you buy. The goal is to help you choose and use a portable power station that actually matches how you camp, instead of guessing based on marketing numbers.

What a Portable Power Station Does in an RV and Why It Matters

For RV and motorhome owners, a portable power station acts as a quiet, battery-based power source that can replace or supplement a generator and built-in house batteries. It is especially useful for:

  • Boondocking or dry camping without hookups
  • Overnight parking in rest areas or driveways where generator use is restricted
  • Running critical loads like a CPAP, fridge, or furnace fan during power outages
  • Powering outdoor cooking gear, tools, or devices away from the RV

Unlike a traditional RV battery bank, a portable station is plug-and-play: you place it where you need power, plug in your devices, and recharge it from shore power, solar, or your vehicle. This flexibility matters if you rent RVs, share rigs, or do not want to modify factory wiring.

However, capacity and inverter limits mean a portable power station will not replace every part of a full RV electrical system. Understanding what it can realistically power, and for how long, is the key to choosing the right size and avoiding disappointment.

Key Concepts: How Portable Power Stations Work in RVs

Most portable power stations share the same building blocks. Knowing these parts and units of measurement will help you match a station to your RV loads.

Core components

  • Battery pack: Stores energy, usually rated in watt-hours (Wh). Common chemistries include lithium-ion and lithium iron phosphate (LiFePO4). More Wh means longer runtime.
  • Battery management system (BMS): Electronic protection that prevents overcharge, over-discharge, overheating, and short circuits.
  • Inverter: Converts DC battery power to 120V AC for household-style outlets. Rated in continuous watts and surge (peak) watts.
  • Charge controller / input electronics: Manage incoming power from AC wall charging, solar panels, or a 12V vehicle outlet.
  • Output ports: Typically include AC outlets, 12V DC ports, and USB ports for phones, tablets, and laptops.

Key electrical terms for RV use

  • Watt (W): Power. How fast energy is used. A 60W laptop charger uses more power than a 10W phone charger.
  • Watt-hour (Wh): Energy. Capacity of the battery. A 1000Wh station can theoretically power a 100W device for about 10 hours (1000 ÷ 100).
  • Continuous vs surge power: Continuous is what the inverter can supply steadily; surge is a short burst for starting motors (fridges, pumps, some fans).
  • Depth of discharge (DoD): How much of the battery’s capacity you regularly use. Shallower discharges generally extend battery life.

Waveform and why it matters in an RV

Most RV owners are better served by a pure sine wave inverter, which closely matches utility power and works well with sensitive electronics, induction motors, and many medical devices. Modified or stepped sine wave inverters can cause extra heat, noise, or malfunction in some RV appliances, especially those with motors or power bricks.

Simple sizing approach for RV loads

To estimate daily energy needs, use this basic process:

  1. List each device you want to run (fridge, CPAP, lights, laptop, fan, etc.).
  2. Find its power draw in watts (from the label or manual).
  3. Estimate how many hours per day each device will run.
  4. Multiply watts × hours for each device to get watt-hours per day.
  5. Add all device Wh, then add 10–20% to cover inverter and system losses.
Typical RV device energy use and suggested power station sizes. Example values for illustration.
Device / Load Approx. Power (W) Daily Use (hours) Daily Energy (Wh) Suggested Station Capacity Range (Wh)
LED interior lights (set of 4) 20 4 80 300–500
Laptop + phone charging 70 3 210 500–1000
12V compressor fridge (small) 45 (average) 12 (duty cycle) 540 1000–1500
CPAP (no heated hose) 40 8 320 500–1000
Microwave (short use) 1000 0.25 250 1500–2000 (inverter must handle surge)

Use your actual appliance ratings where possible; labels on RV fridges and microwaves often list both running watts and higher startup or input watts.

Real-World RV Examples and Use Scenarios

To make sizing more concrete, here are common RV and motorhome scenarios and what a portable power station typically handles in each.

Weekend boondocking (no hookups)

  • Typical loads: LED lights, water pump, vent fan, small 12V or compact AC fridge, phone and laptop charging.
  • Estimated daily energy: 600–1200Wh depending on fridge efficiency and fan use.
  • Practical station size: Around 1000–2000Wh, possibly paired with 100–300W of solar to top up during the day.
  • What this looks like in practice: You can run lights and fans in the evening, keep food cold, and charge devices, then recharge the station from solar and/or driving the next day.

Overnight stops and CPAP support

  • Typical loads: One CPAP machine, a couple of phones, maybe a small reading light.
  • Estimated daily energy: 300–500Wh per person using CPAP, plus 50–100Wh for small electronics.
  • Practical station size: 500–1000Wh for one CPAP user; more for two users or multiple nights without recharging.
  • Realistic expectation: A mid-size station can often run a CPAP for several nights if you disable heated humidification, which significantly cuts power draw.

Extended off-grid travel

  • Typical loads: Larger fridge, laptops, router or hotspot, fans, occasional microwave or induction cooktop, maybe a TV.
  • Estimated daily energy: 1500–3000Wh or more, depending on cooking style and climate.
  • Practical station size: 2000–5000Wh total capacity, usually combined with a substantial solar array or occasional generator use.
  • Reality check: Running high-draw items like air conditioning or long microwave sessions from a portable station alone is rarely practical; they drain batteries quickly and may exceed inverter limits.

Travel-day and outdoor power

  • Typical loads: Charging tablets for kids, powering a 12V cooler, running an air compressor briefly, or using small tools at a campsite.
  • Practical station size: 300–1000Wh is usually sufficient, especially if you can recharge from the vehicle alternator while driving.
  • Benefit: Keeps the RV’s house batteries from being cycled hard for small, mobile loads.

What portable stations usually cannot do well

  • Run a rooftop air conditioner for long periods (very high continuous and surge power)
  • Support electric resistance heaters for more than very short bursts
  • Replace a whole-house RV electrical system in large motorhomes without careful load management

Common Mistakes and Troubleshooting Cues

Many RV owners run into similar issues when they first start using portable power stations. Recognizing these patterns can save you time and frustration.

Frequent sizing and usage mistakes

  • Confusing watts with watt-hours: Assuming a 1000W inverter means the station has 1000Wh of energy. In reality, inverter watts and battery Wh are separate specs.
  • Ignoring startup surges: A fridge or pump may only list 100–200W running, but need 2–3 times that briefly to start.
  • Overestimating solar input: A 200W panel rarely delivers 200W all day; shading, angle, and heat reduce real output.
  • Running everything on AC: Using the inverter for small DC loads (like 12V lights or fridges) wastes energy in conversion losses.
  • Discharging to 0% regularly: Deep cycling every day can shorten battery lifespan, especially with certain chemistries.

Typical problems and what to check

Common portable power station issues in RVs and first troubleshooting steps. Example values for illustration.
Symptom Likely Cause What to Check First
Fridge will not start or clicks on and off Inverter surge rating too low or cable run too long Compare fridge startup watts to inverter surge spec; try shorter, heavier AC cord and limit other loads.
Station shuts down unexpectedly under load Overload or low battery protection Check total connected watts; reduce high-draw devices and confirm battery state of charge.
Charge time much longer than expected Input limited by adapter, cable, or settings Verify AC or solar input wattage on the display; confirm correct charging mode and adequate cable size.
CPAP stops overnight Battery too small or humidifier power draw higher than expected Check CPAP power rating with and without humidifier; consider direct DC use if available and reduce other loads.
Unit feels very hot during use Poor ventilation or continuous high load near maximum rating Improve airflow around the case, reduce load, and avoid enclosed compartments without ventilation.

Charging pitfalls specific to RVs

  • Alternator over-expectations: Vehicle 12V outlets often provide limited current; they are fine for topping off but not for fast charging a large station.
  • Mixed charging sources: Some stations limit total input if AC and solar are used together; others allow higher combined input. Always confirm the rated maximum.
  • Using undersized extension cords: Long, thin cords can drop voltage and reduce effective charging power or cause nuisance shutdowns.

Safety Basics for Portable Power Stations in RVs

Portable power stations are generally safer and cleaner than fuel-based generators, but they still store significant energy. Treat them as serious electrical equipment.

Placement and ventilation

  • Set the unit on a stable, level surface and secure it so it cannot slide or tip while driving.
  • Keep vents clear on all sides; do not stuff the station into a closed cabinet without airflow.
  • Avoid areas exposed to direct water spray, condensation, or standing water (such as near leaky windows or plumbing).
  • Keep away from direct heat sources like furnace outlets, ovens, or unshielded exhaust areas.

Temperature and environment

  • Most batteries perform poorly in extreme heat or cold. Avoid charging below freezing or leaving the unit in a closed vehicle in hot sun.
  • If camping in cold climates, keep the station inside the living space where temperatures are more moderate.

Connection and wiring practices

  • Use appropriately rated cords and plugs; avoid daisy-chaining multiple power strips or adapters.
  • Do not back-feed the RV’s shore power inlet by plugging the station into it without a proper transfer arrangement; this can create shock and fire hazards.
  • If integrating with existing RV circuits, use a qualified technician and appropriate overcurrent protection.
  • Do not modify the station’s internal wiring or bypass built-in protections.

Load management for safety

  • Stay within the inverter’s continuous and surge ratings; regularly running at the limit increases heat and wear.
  • Avoid plugging high-draw items (such as space heaters) into the station unless you have confirmed both power capability and runtime impact.
  • Supervise children around the unit and keep small metal objects away from exposed ports.

Maintenance and Long-Term Use in RV and Motorhomes

Portable power stations require less maintenance than traditional multi-component battery systems, but a few habits will keep them reliable for RV travel.

Routine checks

  • Inspect ports, cords, and plugs regularly for looseness, discoloration, or damage.
  • Wipe dust and debris from vents and surfaces to maintain airflow.
  • Monitor battery health indicators on the display if available, such as cycle count or capacity estimates.

Storage between trips

  • Store the station in a cool, dry place out of direct sunlight.
  • Avoid long-term storage at 0% or 100% charge; many manufacturers recommend storing around 40–60% state of charge.
  • Top up the battery every few months if the unit sits unused to offset self-discharge.

Using the station through the seasons

  • Summer: Pay attention to heat buildup in RV compartments and during solar charging. High temperatures accelerate battery aging.
  • Winter: Avoid charging when the battery is below its specified minimum temperature. If needed, warm the unit inside the RV before charging.
  • Shoulder seasons: These are ideal for frequent, moderate cycling, which many lithium batteries handle well.

When to consider replacement or upgrade

  • Noticeably reduced runtime for the same loads, even after full charging.
  • Frequent over-temperature or protection shutdowns at modest loads.
  • New camping patterns (for example, longer boondocking trips) that push the station beyond its original role.

Practical Takeaways and Specs to Look For

Choosing a portable power station for RV or motorhome use is easier when you match specifications to your actual camping style instead of buying by capacity alone.

Key takeaways

  • Start by listing your must-run devices (such as fridge and CPAP) and estimating daily energy use in watt-hours.
  • Choose capacity with at least 20–30% buffer above your typical daily needs, especially if you rely on solar.
  • Focus on inverter quality and surge capability if you plan to run fridges, pumps, or microwaves.
  • Plan realistic charging: know how fast you can recharge from shore power, solar, and the vehicle alternator.
  • Treat the station as a major electrical appliance: secure it, ventilate it, and follow safe wiring practices.

Specs to look for in an RV-ready portable power station

  • Battery capacity (Wh): Match to your daily Wh estimate; common RV setups fall between 500 and 3000Wh per station.
  • Inverter type: Pure sine wave is strongly preferred for sensitive electronics and motor loads.
  • Inverter ratings: Check both continuous watts and surge watts; compare to the highest-draw appliance you plan to run.
  • AC input power: Higher AC charging wattage means faster turnaround at campgrounds or when plugged into a home outlet.
  • Solar input range and maximum watts: Ensure compatibility with the panel wattage and voltage you intend to use on your RV.
  • 12V / vehicle charging options: Look for clear specs on charging via cigarette lighter or dedicated DC input, and note expected charge times.
  • Number and type of outlets: Confirm you have enough AC outlets, 12V ports, and USB ports for your typical setup.
  • Weight and form factor: Consider whether you can comfortably move the unit between storage and use locations in the RV.
  • Display and monitoring: A clear screen showing input, output, and remaining time can simplify day-to-day energy management.
  • Operating temperature range: Check that it aligns with the climates where you camp.

If you build your decision around these specs and your own load list, a portable power station can become a dependable part of your RV power system, giving you quiet, flexible energy wherever you park.

Frequently asked questions

What specs should I prioritize when choosing a portable power station for my RV?

Prioritize battery capacity in watt-hours (Wh) to meet your daily energy needs, the inverter’s continuous and surge watt ratings to handle your highest-draw appliances, and a pure sine wave inverter for sensitive electronics. Also check AC input charging watts and solar input limits so you can recharge as quickly as your camping style requires, plus weight, port selection, and operating temperature range.

What common mistakes do RV owners make when using portable power stations?

Common mistakes include confusing watts with watt-hours, ignoring equipment startup surges, and overestimating solar output or vehicle charging capability. Avoid these by calculating Wh needs from actual device ratings, comparing startup watts to inverter surge specs, and using realistic solar or alternator inputs.

Is it safe to use a portable power station inside an RV, and what precautions should I take?

Portable power stations are generally safe when used according to instructions: keep the unit ventilated, secure it against movement while driving, and avoid enclosed, unventilated compartments. Do not back-feed shore power, use properly rated cords, and avoid charging below the manufacturer’s minimum temperature to prevent damage or protection shutdowns.

Can I run my RV fridge or microwave from a portable power station?

You can run many small compressor fridges if the station’s inverter handles the fridge’s startup surge and the battery has sufficient Wh, but microwaves draw very high continuous power and deplete capacity quickly. Always compare the appliance’s running and startup watts to the station’s specs and estimate runtime from the station’s Wh capacity.

How should I charge a portable power station while on the road?

Charge from shore power when available for the fastest and most consistent input; solar is useful for daytime topping up but depends on panel size and conditions. Vehicle 12V or alternator charging can top off a station but is often limited in current—confirm the station’s DC input rating and use the recommended cable or a qualified installer for higher-power DC charging.

How can I extend the battery life of my portable power station during long trips?

Use shallower depth-of-discharge cycles (avoid frequent 0% drains), keep the unit within its recommended temperature range, and maintain regular topping charges during storage or long trips. Also minimize conversion losses by using DC outputs for DC loads when possible and follow the manufacturer’s maintenance and storage recommendations.