Camping Power Planning: A Simple Energy Budget for a Weekend

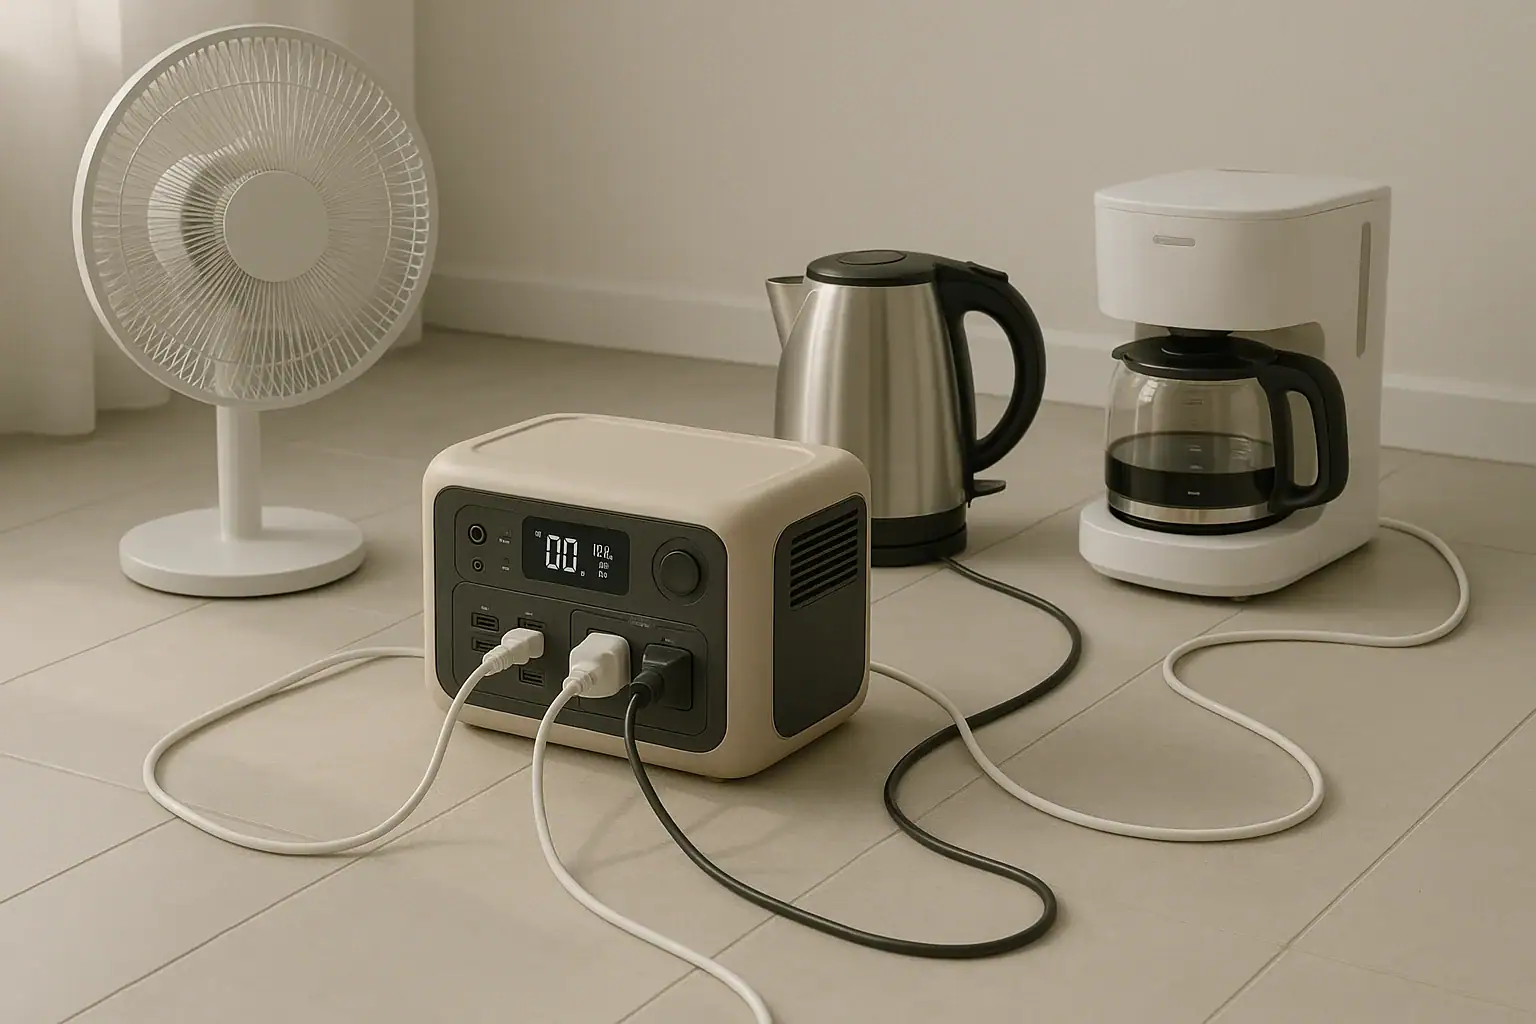
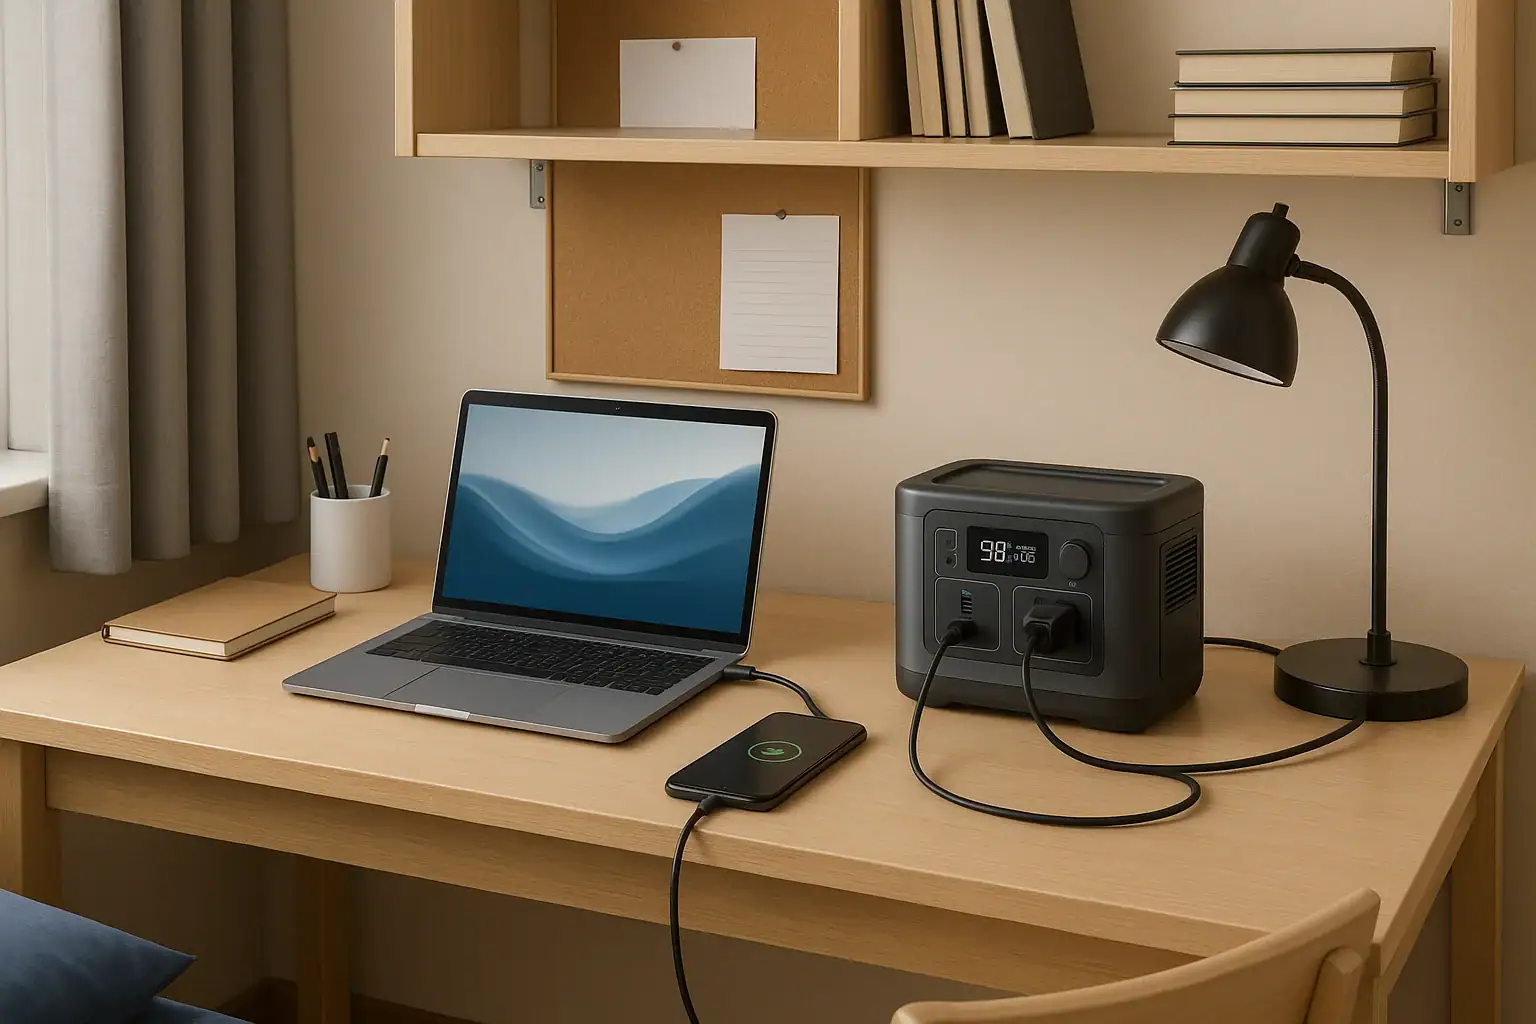
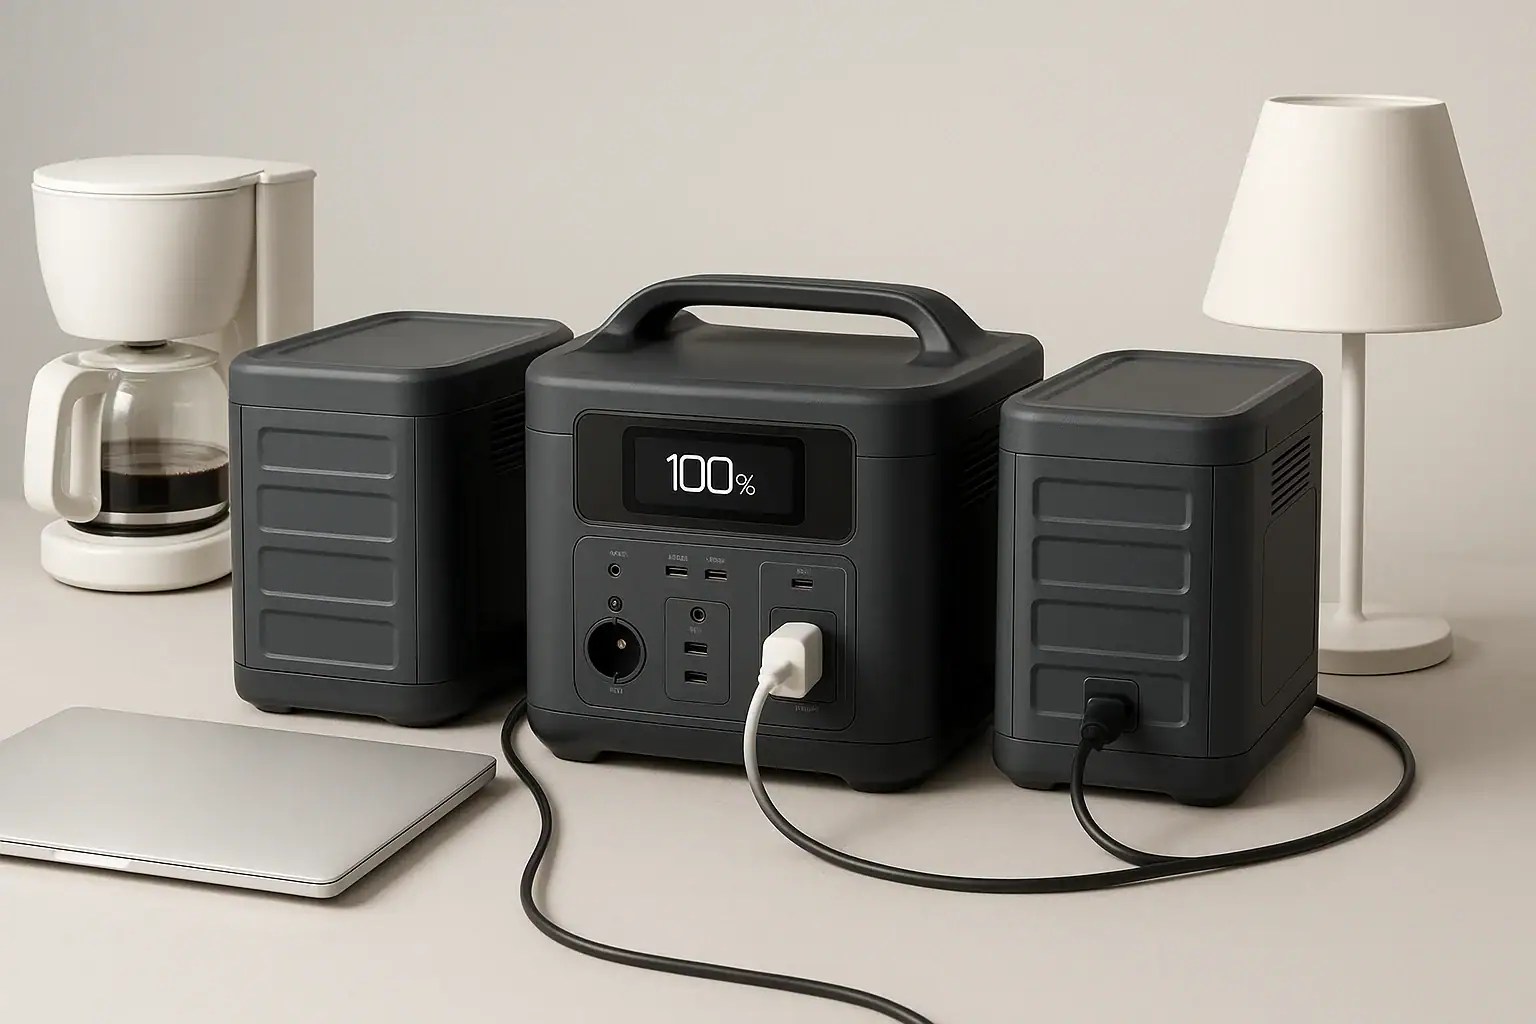
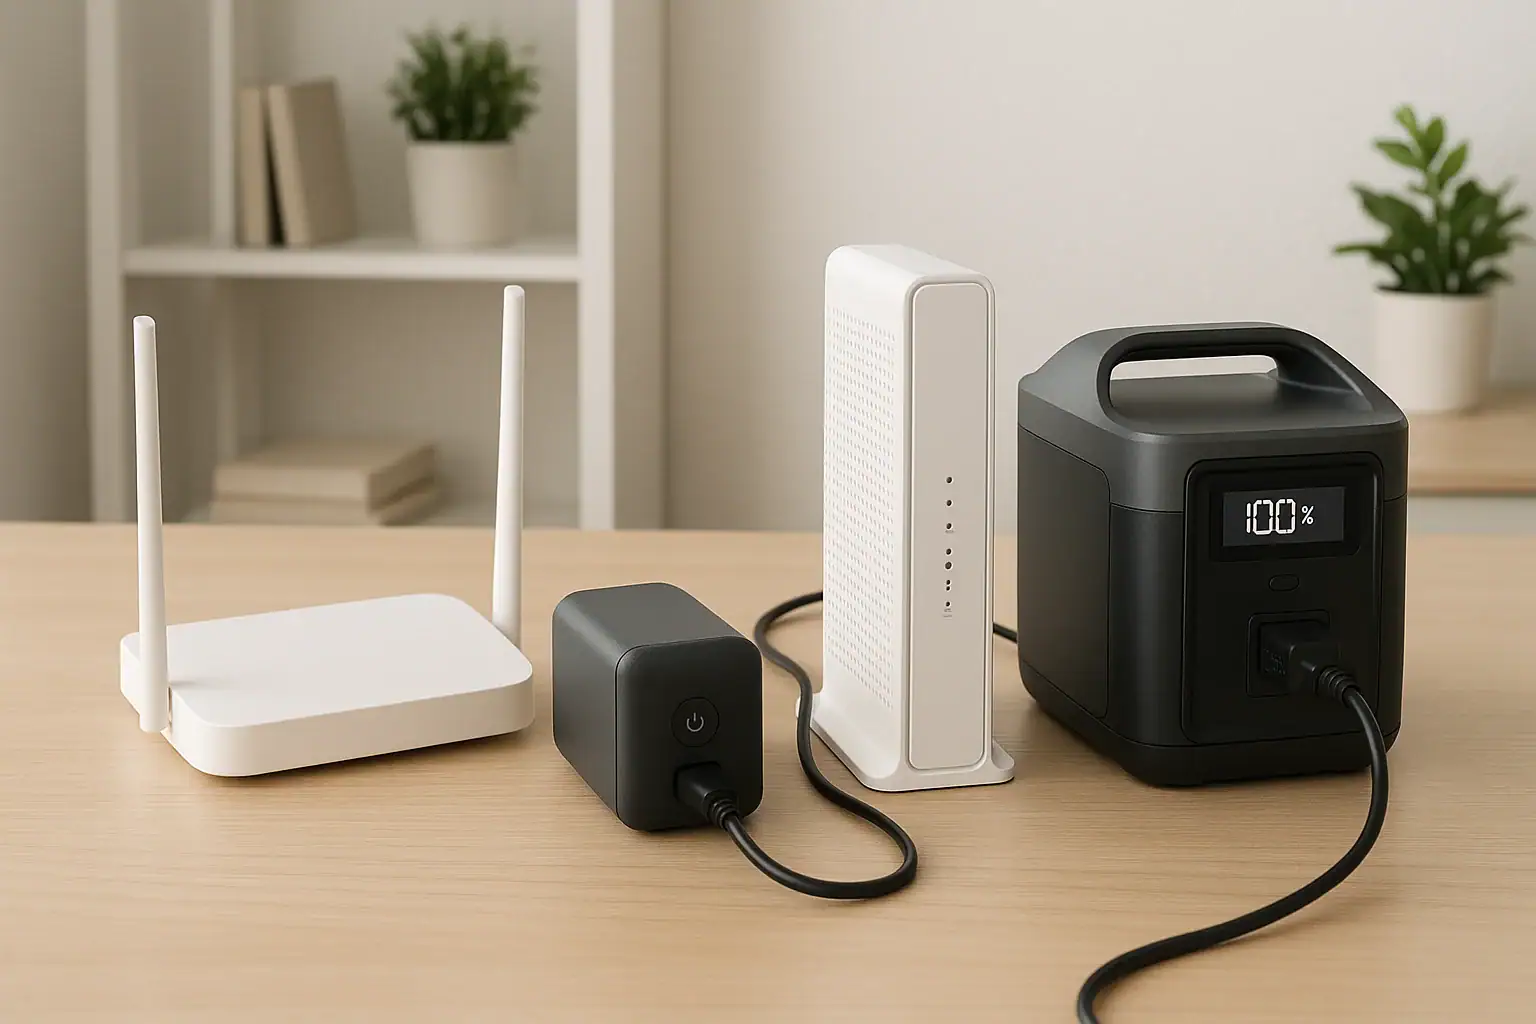
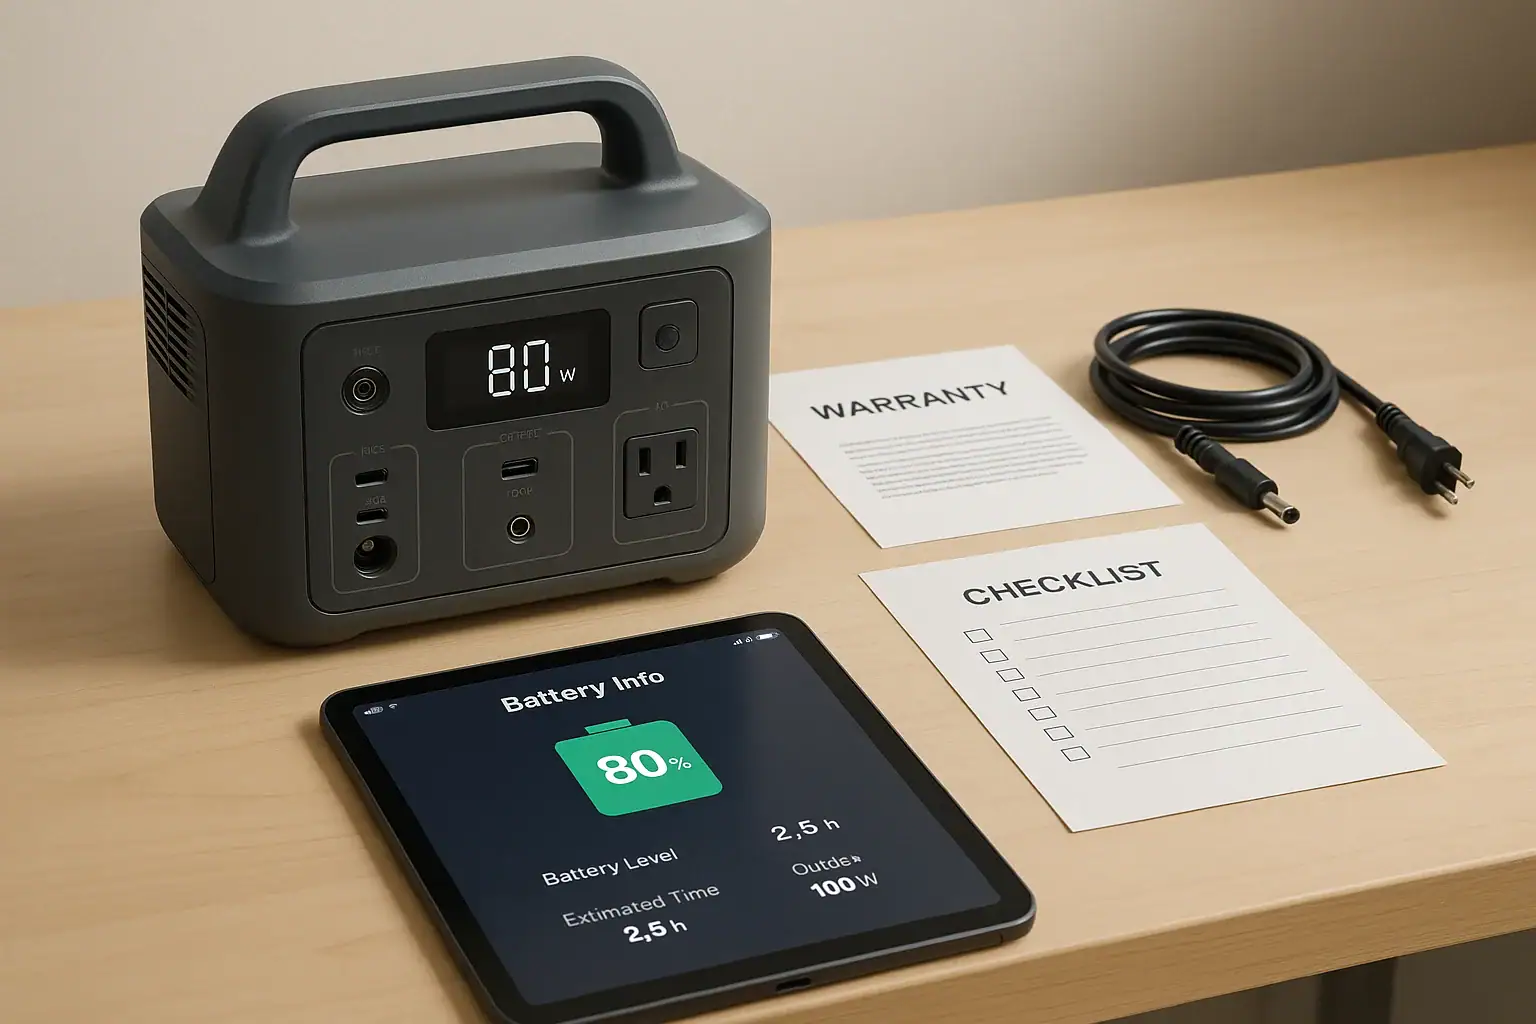
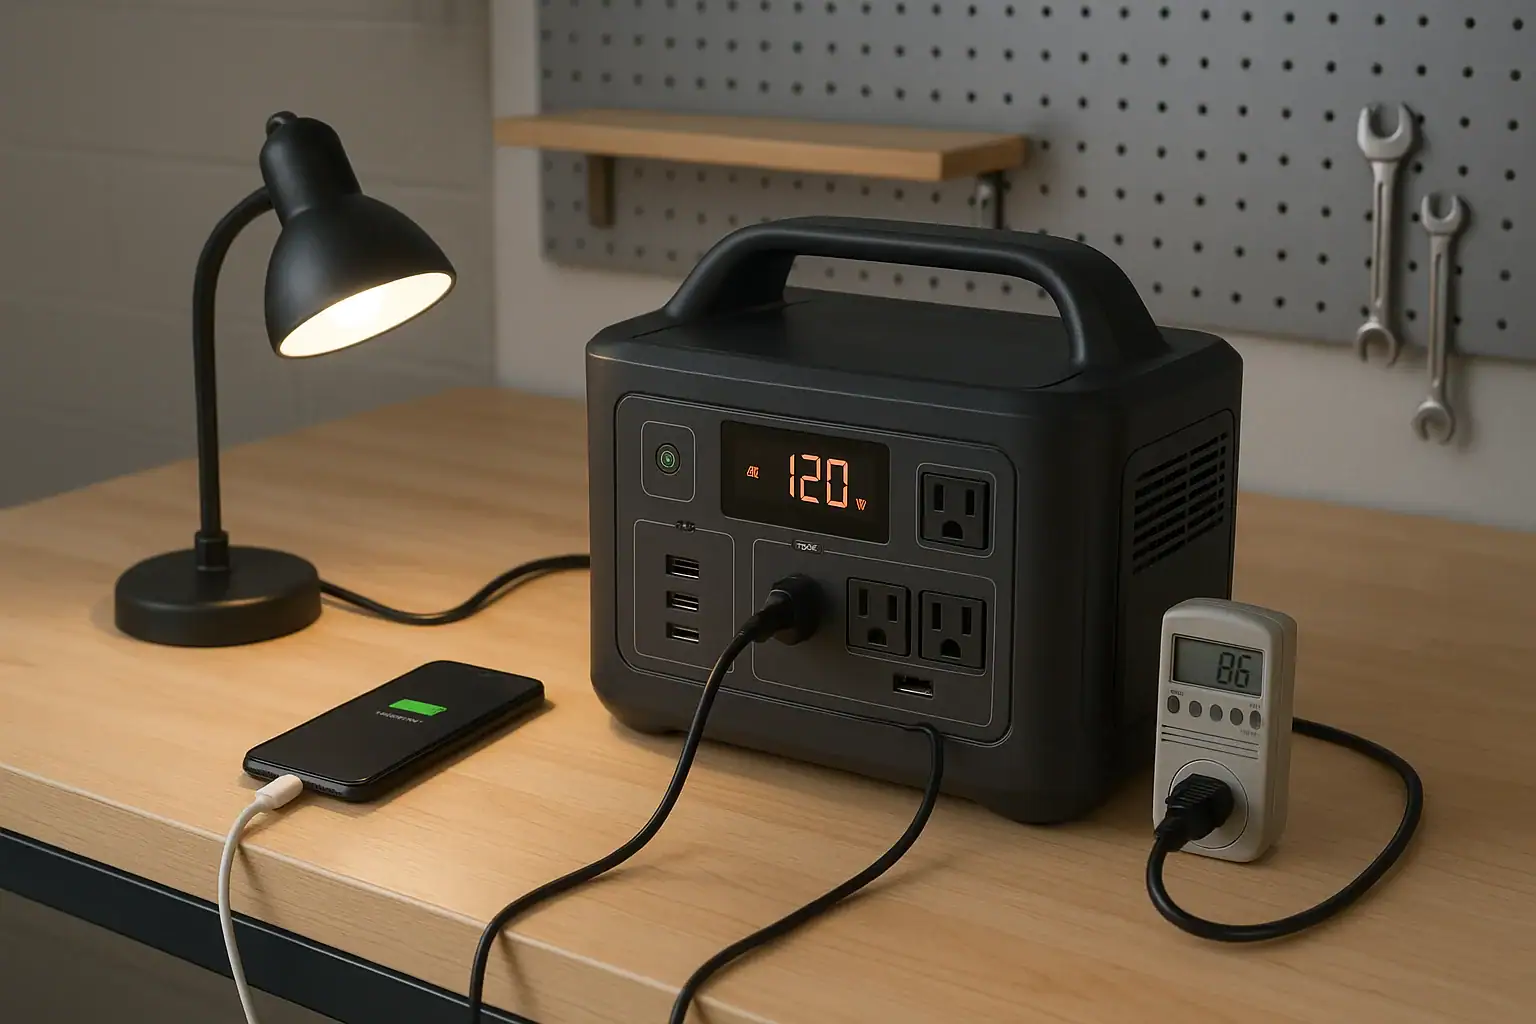
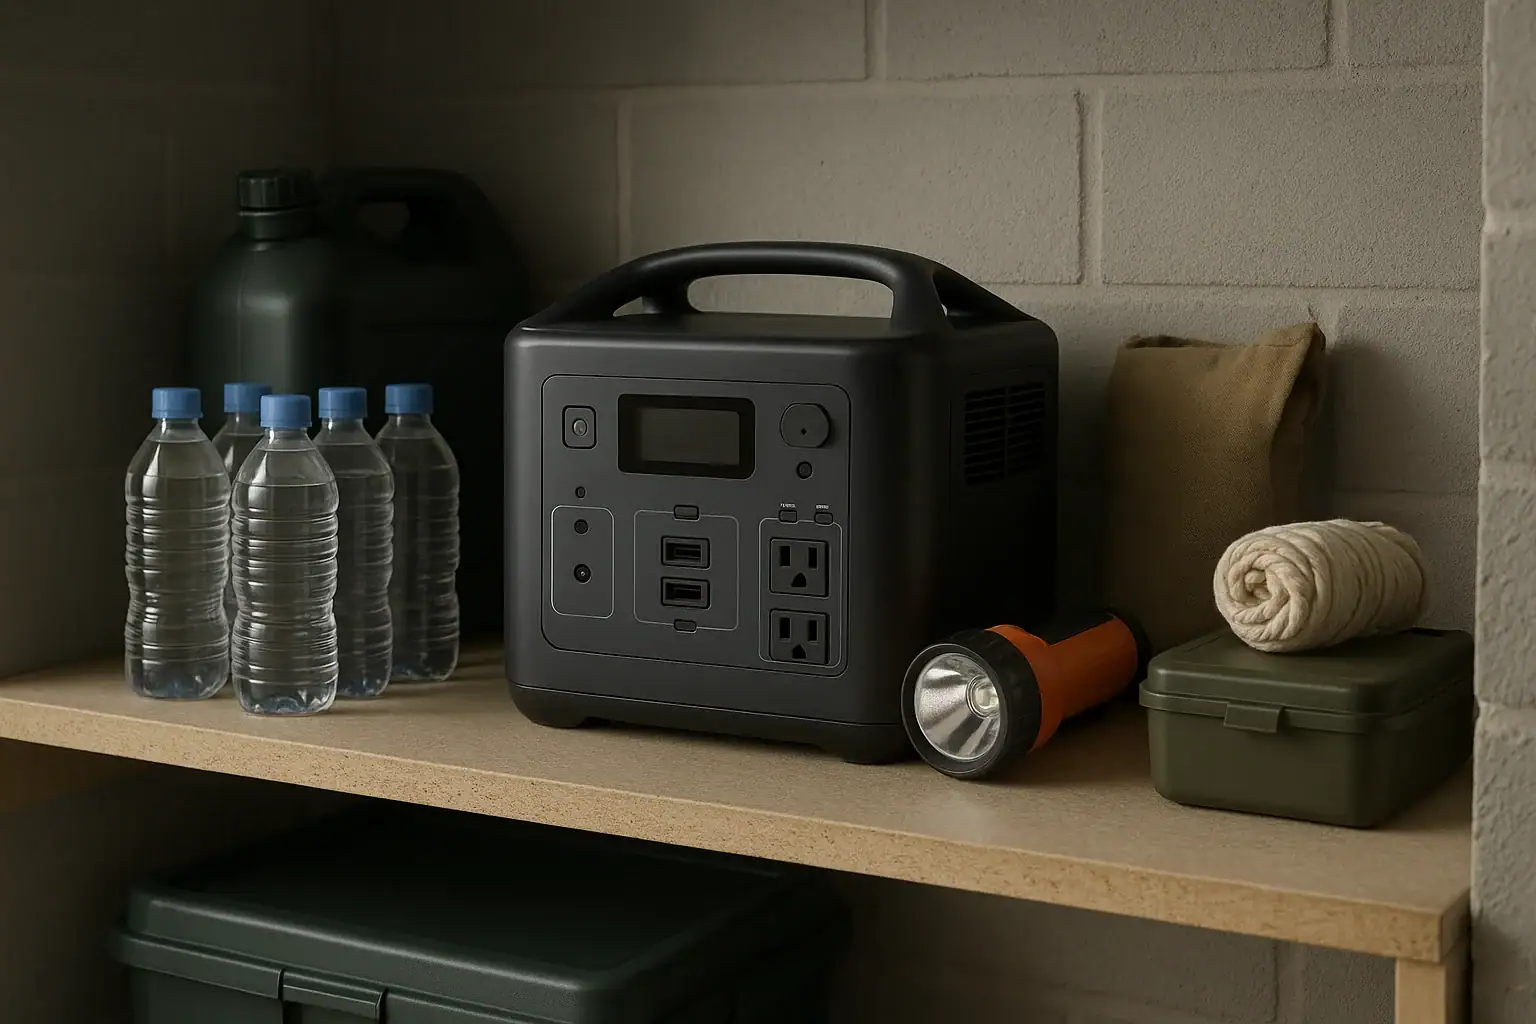
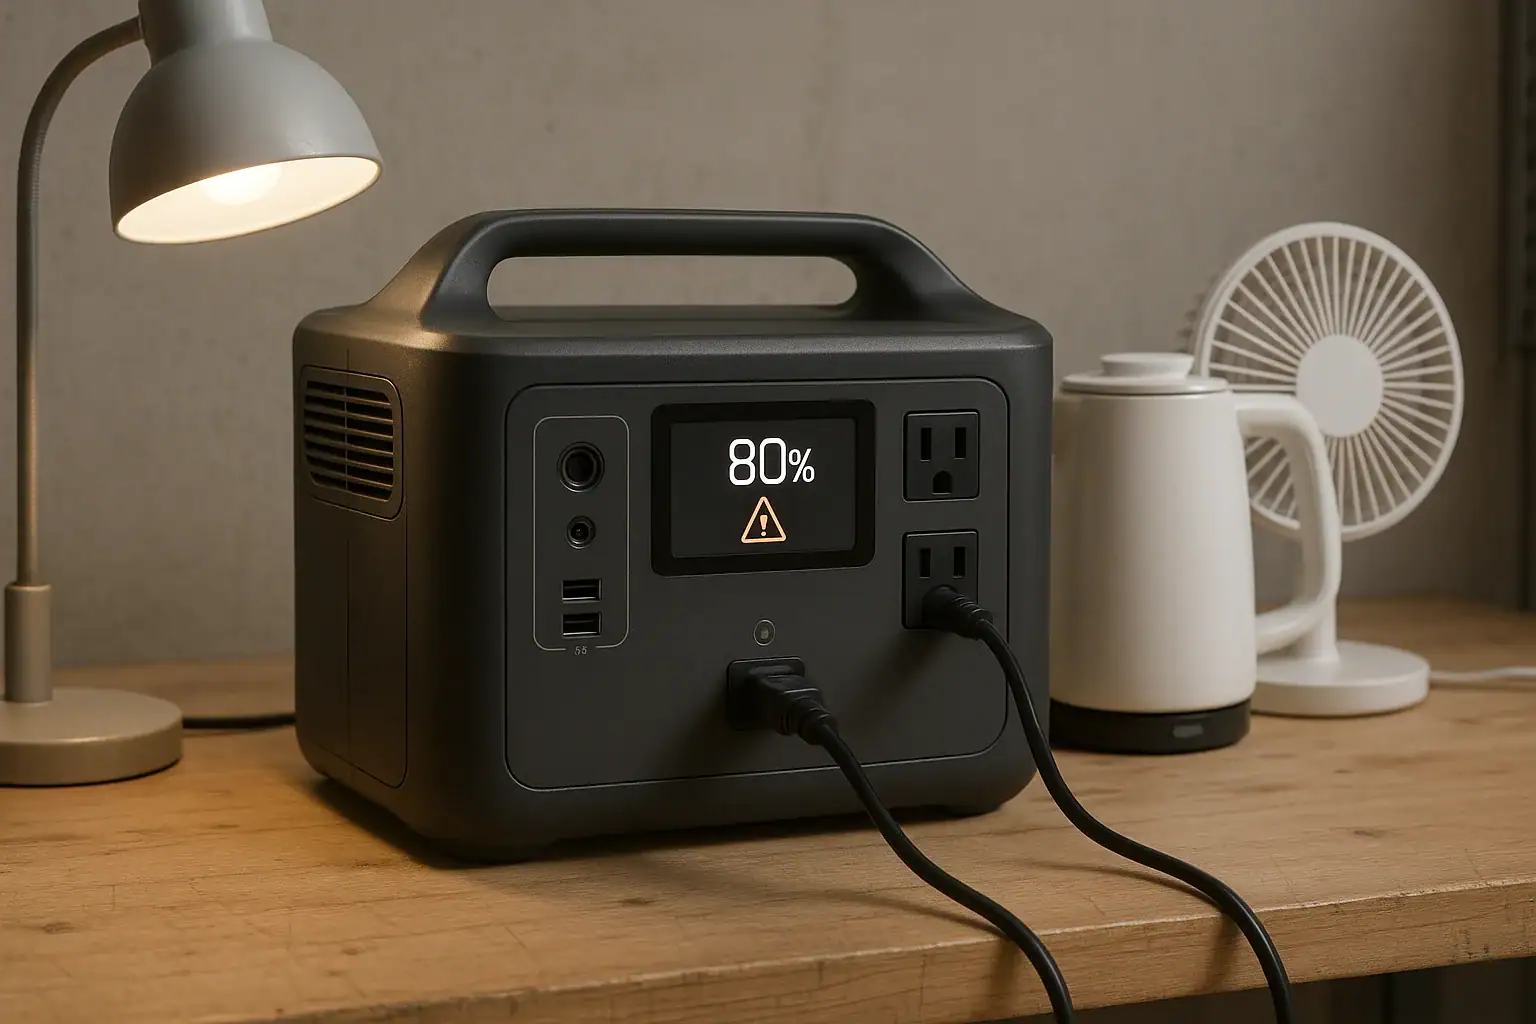
Weekend camping setup with portable power station and devices showing an energy budget plan

A simple weekend camping power plan starts with adding up how many watt-hours your gear will use, then matching that to a portable power station with enough capacity, output watts, and charging options. Once you understand basic terms like watt-hours, surge watts, runtime, and input limit, you can quickly tell if your setup will last two or three nights off-grid.

This guide shows how to make an easy energy budget for a weekend, so you are not guessing at battery percentage or wondering why your devices shut off early. You will learn how to estimate power draw, convert watts to watt-hours, and size a camping battery or solar generator for phones, lights, a fridge, or a CPAP. No advanced math, no brands—just clear steps and example numbers you can copy for your own trip.

Understanding a Weekend Camping Power Budget and Why It Matters

For camping, a power budget is a simple estimate of how much energy your devices will use over your trip, usually measured in watt-hours (Wh). It is like a spending plan for electricity: instead of dollars, you are spending stored energy from a portable power station or battery pack.

Watt-hours tell you how long a battery can run your gear. If you know your devices use about 500 Wh over a weekend, you can look for a power station with a usable capacity that meets or exceeds that number. This is more reliable than guessing based on amp-hours (Ah) or just looking at battery percentage bars.

Planning a camping power budget matters because:

  • It prevents running out of power early. You know in advance if your battery can handle a second or third night.
  • It helps you choose the right size power station. You avoid overspending on a huge unit or buying one that is too small.
  • It clarifies what you can realistically run. For example, whether a mini-fridge plus lights and phone charging is practical.
  • It guides your charging strategy. You can decide if you need solar input, vehicle charging, or just a full charge before leaving.

Instead of treating your camping battery like a mystery box, a basic energy budget turns it into a predictable resource you can manage confidently all weekend.

Key Power Concepts for Weekend Camping: Watts, Watt-Hours, and Runtime

To build a simple weekend energy budget, you only need a few key concepts: watts (W), watt-hours (Wh), runtime, and efficiency. Once you understand these, you can quickly estimate how long your portable power station will keep your camping gear running.

Watts (W): how fast power is used

Watts measure the rate of power use. A 10 W LED lantern uses power slowly; a 300 W mini-fridge uses power much faster. Device labels, user manuals, or power adapters usually list watts. If you only see volts (V) and amps (A), multiply them: V × A ≈ W.

Watt-hours (Wh): total energy over time

Watt-hours measure how much energy is used or stored. A 500 Wh battery can, in theory, power a 50 W device for about 10 hours (500 ÷ 50 = 10). Portable power stations are usually rated in Wh, which makes them easy to compare.

Runtime: how long your gear can run

To estimate runtime, you divide usable battery capacity by the load:

Runtime (hours) ≈ Usable Wh ÷ Device Watts

Usable Wh is slightly less than the rated capacity because of inverter and conversion losses. A rough rule is to assume 80–90% of the listed watt-hours for AC loads.

Continuous watts vs. surge watts

Portable power stations list two important output limits:

  • Continuous output (W): The maximum power they can supply steadily (for example, 300 W).
  • Surge or peak output (W): A higher short-term limit to handle startup spikes from devices like compressor fridges or small pumps.

If your device’s running watts exceed the continuous rating, it will not run. If its startup surge exceeds the surge rating, it may trip protection or shut off at startup.

Input limit and recharge time

The input limit tells you how many watts the power station can accept from wall charging, solar panels, or vehicle charging. Higher input means faster recharging, which is important if you plan to top up during the day with solar or from your car.

Putting it together for a weekend

For a weekend camping trip, you combine these ideas: estimate each device’s daily Wh use, multiply by the number of days, then compare the total to your portable power station’s usable capacity and recharge options.

Concept What It Means Example Value
Device power (W) How fast a device uses power LED lantern: 10 W
Battery capacity (Wh) Total stored energy Portable power station: 500 Wh
Continuous output (W) Max steady power the unit can supply AC inverter: 300 W
Surge output (W) Short spike for startup loads AC inverter surge: 600 W
Input limit (W) Max charging power accepted Solar/AC charging: 100–200 W
Key power terms for planning a camping energy budget. Example values for illustration.

Real-World Weekend Camping Energy Budget Examples

To make camping power planning concrete, it helps to walk through a few realistic weekend scenarios. These examples assume two nights away, arriving Friday evening and leaving Sunday, with about 36–40 hours of actual use.

Example 1: Minimalist weekend (lights and phones only)

This setup is common for tent camping with basic comfort and safety lighting.

  • 2 smartphones: About 10 Wh per full charge × 2 phones × 2 charges each ≈ 40 Wh.
  • 1 tablet or e-reader: Around 15 Wh per charge × 1–2 charges ≈ 15–30 Wh.
  • LED lantern: 8 W × 4 hours per night × 2 nights = 64 Wh.
  • String lights: 5 W × 5 hours per night × 2 nights = 50 Wh.

Estimated total for the weekend: roughly 170–190 Wh.

A small portable power station with around 250–300 Wh of usable capacity comfortably handles this, even accounting for inverter losses and a bit of extra use.

Example 2: Family camping with cooler and devices

This scenario adds a small 12 V compressor cooler or low-power mini-fridge.

  • Compressor cooler: A typical draw might average 40 W when cycling. Over 24 hours, that is roughly 40 W × 12 hours of active run time ≈ 480 Wh per day (duty cycle varies with temperature and insulation).
  • Phones and tablets: 4 phones × 2 charges each at 10 Wh = 80 Wh; 1 tablet at 20 Wh × 2 charges = 40 Wh.
  • LED lighting: 20 W total (lanterns and strips) × 4 hours per night × 2 nights = 160 Wh.

Estimated total for the weekend: cooler about 900–1,000 Wh plus devices and lights around 280 Wh, for roughly 1,200–1,300 Wh.

In this case, a mid-sized power station around 1,000–1,500 Wh usable capacity is more appropriate, especially if you do not plan to recharge with solar or from your vehicle.

Example 3: CPAP user plus basic camp power

Many campers use a CPAP machine overnight and want to keep lights and phones powered too.

  • CPAP machine (DC mode, no heated hose/humidifier): Often averages 30–50 W. For 8 hours per night × 2 nights, that is about 480–800 Wh.
  • Phones and a small fan: 2–3 phones at 10 Wh each × 2 charges ≈ 40–60 Wh; USB fan at 5 W × 4 hours per night × 2 nights = 40 Wh.
  • LED lighting: 10–15 W × 4 hours per night × 2 nights ≈ 80–120 Wh.

Estimated total for the weekend: roughly 600–1,000 Wh depending on the CPAP’s actual draw.

A power station with around 800–1,200 Wh usable capacity is a common target for this type of trip, especially if the CPAP will be the primary load.

How to adapt these examples to your own trip

To use these examples for your own weekend:

  1. List your actual devices and look up their watt ratings.
  2. Estimate daily hours of use for each device.
  3. Calculate daily Wh (watts × hours), then multiply by the number of days.
  4. Add a 20–30% buffer for unexpected use, cold weather, or inverter losses.

This quick process gives you a realistic weekend energy budget that matches how you actually camp.

Common Camping Power Planning Mistakes and How to Spot Problems Early

Many campers either overshoot or undershoot their power needs. Understanding common mistakes helps you troubleshoot issues before they ruin your weekend.

Mistake 1: Confusing watt-hours with amp-hours

Some batteries list only amp-hours (Ah), which can be misleading without voltage. A 20 Ah battery at 12 V has about 240 Wh (20 × 12), not 20 Wh. When comparing to your devices, always convert to watt-hours so everything is in the same unit.

Mistake 2: Ignoring inverter losses

Using AC outlets on a portable power station is convenient, but the inverter wastes some energy as heat. If you ignore this, your runtime estimate will be too optimistic. As a rule of thumb, assume you only get about 80–90% of the rated Wh for AC loads. USB and DC outputs are usually more efficient.

Mistake 3: Underestimating fridge and cooler usage

Portable fridges and coolers do not draw their rated watts all the time, but they cycle on and off. Hot weather, frequent opening, and poor ventilation can increase their duty cycle dramatically. A cooler that averages 20–30 W in mild conditions might average double that in direct sun. If your portable power station seems to drain faster than expected, this is often the culprit.

Mistake 4: Overloading the continuous or surge rating

Plugging in a device that exceeds the power station’s continuous output or surge rating can cause shutdowns or error codes. Signs include the AC output turning off immediately when a device starts, beeping alarms, or warning lights. Check your devices’ watt ratings and keep total load under the continuous limit, with some margin for startup spikes.

Mistake 5: Forgetting about recharging options

Some campers assume they will “just recharge with solar” but bring panels too small for their actual use or ignore the input limit on the power station. If your input limit is 100 W and you bring 200 W of panels, you still only charge at 100 W. Cloud cover, shading, and short winter days further reduce real-world solar input.

Early warning signs your weekend budget is off

  • Battery drops faster than expected during the first evening.
  • Fans, fridges, or CPAP machines cause the inverter to click off or alarm.
  • Solar or vehicle charging barely moves the battery percentage during the day.
  • You find yourself turning off lights or unplugging devices to “save” power.

If you see these signs on day one, reduce non-essential loads, switch more devices to DC or USB where possible, and prioritize recharging during peak sunlight or while driving.

Safety Basics for Using Portable Power on Camping Trips

Even small portable power stations and camping batteries store significant energy. Using them safely keeps your trip trouble-free and protects your gear.

Ventilation and placement

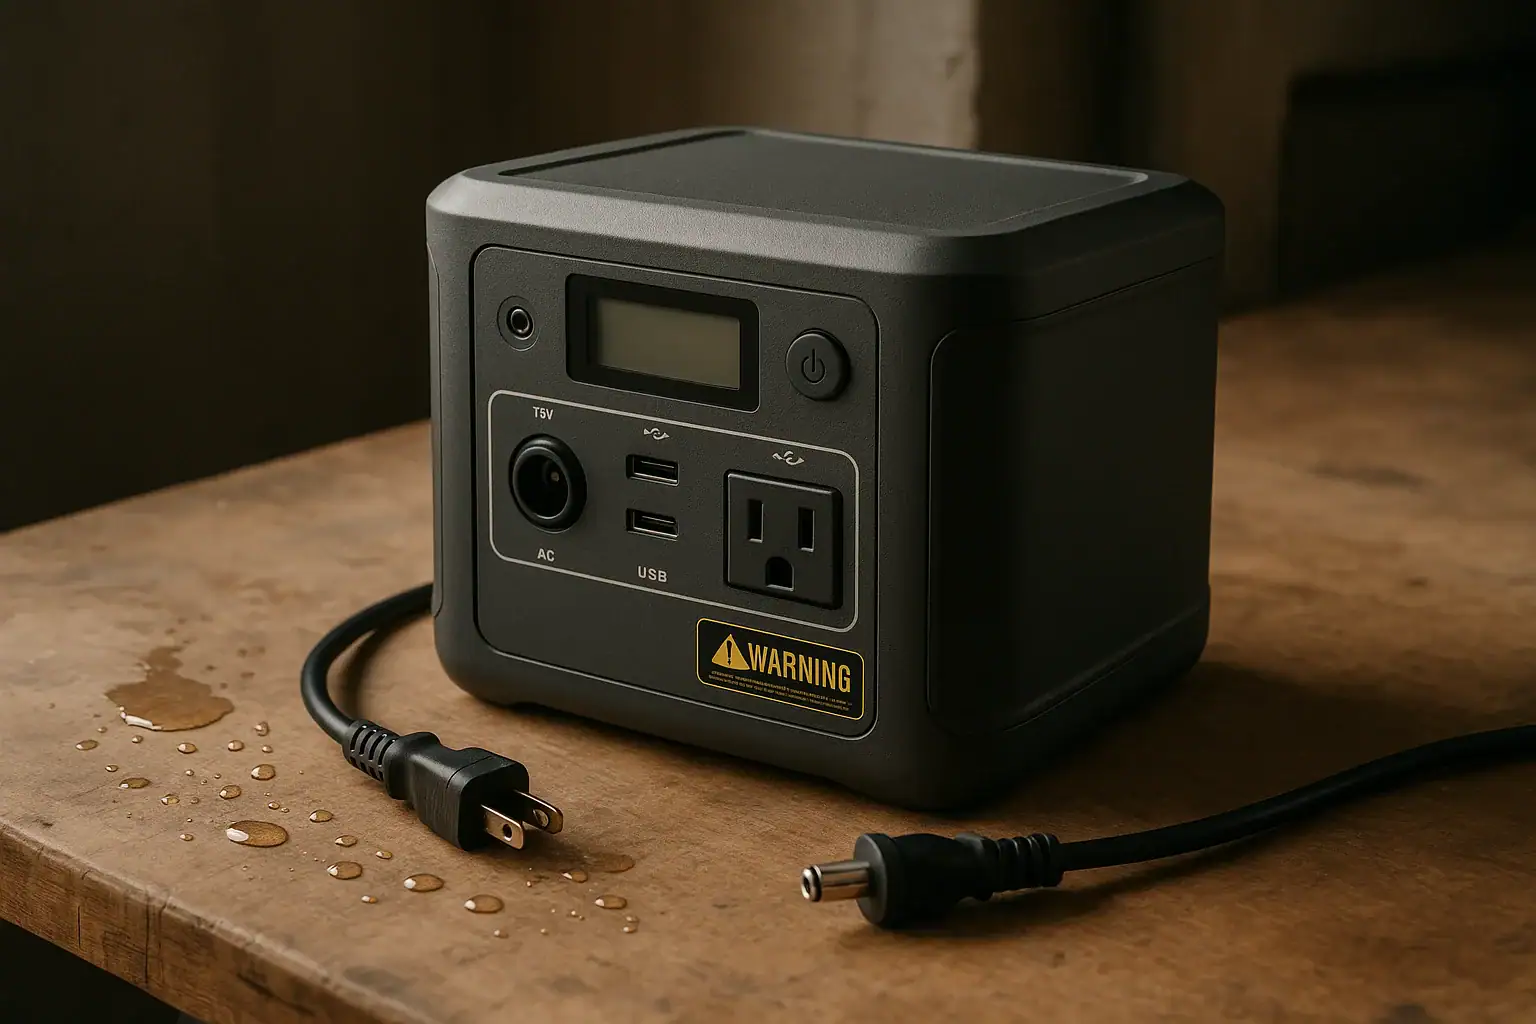
  • Place the power station on a stable, dry surface away from standing water and direct rain.
  • Avoid covering the unit with blankets, clothing, or sleeping bags. Most units rely on airflow for cooling.
  • Keep vents and fans unobstructed to prevent overheating and automatic shutdowns.

Temperature awareness

  • Avoid leaving batteries in direct sun inside a closed vehicle or tent, where temperatures can rise quickly.
  • In cold weather, keep the unit above freezing when possible, as low temperatures can temporarily reduce capacity and charging performance.

Cable and connection safety

  • Use cables rated for the current your devices draw, especially for 12 V DC and high-wattage AC loads.
  • Do not daisy-chain multiple power strips or extension cords from a small power station.
  • Avoid running cords where people walk or where they can snag and pull the power station off a table.

Charging safety

  • Use only compatible chargers and follow the manufacturer’s input limits for AC, DC, and solar charging.
  • Do not attempt to modify charging cables, bypass built-in protections, or connect directly to vehicle or RV wiring without proper equipment.
  • If you are unsure about integrating a portable power station with an RV electrical system, consult a qualified electrician or RV technician.

General battery precautions

  • Do not open the power station or battery enclosure; internal components are not user-serviceable.
  • Keep units away from open flames, campfires, and high-heat cooking areas.
  • If you notice swelling, unusual smells, smoke, or excessive heat, disconnect loads, move the unit to a safe, open area if it is safe to do so, and stop using it.

Following these basic practices makes it much less likely that a power issue will interrupt your camping weekend.

Maintaining and Storing Your Camping Power Setup Between Trips

Good maintenance and storage habits help your portable power station deliver reliable runtime every camping season and extend its overall lifespan.

Regular use and partial cycling

  • Use the power station periodically, even between camping trips, to keep the battery active.
  • Avoid fully discharging the battery whenever possible; stopping around 10–20% remaining is gentler on most chemistries.
  • Recharge to a comfortable level after each trip so it is ready for the next outing.

Storage state of charge

  • For long-term storage (several months), many batteries prefer being stored around 40–60% charge rather than 100% or 0%.
  • Check the charge level every few months and top up if it drops significantly.

Environment and handling

  • Store your power station in a cool, dry place away from direct sunlight and moisture.
  • Avoid dropping, crushing, or stacking heavy items on top of the unit.
  • Keep dust and debris away from vents and ports; gently clean with a dry cloth as needed.

Monitoring performance over time

  • Pay attention if your camping runtime noticeably decreases with the same loads; this can indicate normal battery aging.
  • Test your setup at home before longer trips, especially if you rely on critical devices like a CPAP machine.
  • Keep notes on approximate runtimes and charging times; this personal data is more useful than generic estimates.

With basic care, a portable power station can remain a dependable part of your camping kit for years, making your weekend energy budgeting more predictable.

Maintenance Task Recommended Frequency Purpose
Top-up charge check Every 2–3 months Prevents deep discharge during storage
Full test run with camping loads Before each season Verifies runtime and identifies weak spots
Visual inspection of cables and ports Before each trip Catches damaged cords or loose connections
Cleaning vents and exterior As needed Maintains airflow and cooling performance
Simple maintenance habits to keep camping power stations reliable. Example values for illustration.

Related guides: Portable Power Station Buying GuideSurge Watts vs Running Watts: How to Size a Portable Power StationPortable Power Stations for CPAP and Medical Devices: What to Look ForHow Many Solar Watts Do You Need to Fully Recharge in One Day?

Practical Weekend Power Planning Tips and Specs to Look For

When you combine a simple energy budget with the right portable power station specs, weekend camping power becomes predictable instead of stressful. The process boils down to three steps: estimate your loads, choose enough usable watt-hours, and match your charging options to how and where you camp.

For a typical two-night trip:

  • Minimal setups (lights and phones) often fall under 200–300 Wh.
  • Family setups with a cooler and multiple devices often land around 800–1,500 Wh.
  • CPAP-focused setups usually need 600–1,200 Wh depending on settings and temperature.

Add a buffer of about 20–30% above your calculated needs to account for weather, inverter losses, and unplanned use. If you plan to recharge with solar or your vehicle, factor in realistic daily input based on your panel size, input limit, and daylight hours.

Specs to look for

  • Battery capacity (Wh): Look for 300–500 Wh for minimalist weekends, 800–1,500 Wh for fridges or CPAP. This directly sets your potential runtime.
  • Continuous AC output (W): Aim for at least 200–300 W for basic lights and electronics, 500–1,000 W if you plan to run fridges or multiple devices. Ensures your loads do not overload the inverter.
  • Surge or peak output (W): Choose a unit with surge roughly 1.5–2× your highest startup load. Helps handle compressor fridges and motors without tripping protection.
  • Input limit and charging options: For solar, 100–300 W input is typical for weekend use; vehicle and AC charging should refill your battery within 4–8 hours. This affects how quickly you can recover from a low state of charge.
  • Number and type of ports: Multiple USB-A and USB-C ports plus at least one or two AC outlets and a 12 V socket make it easier to power several devices without adapters.
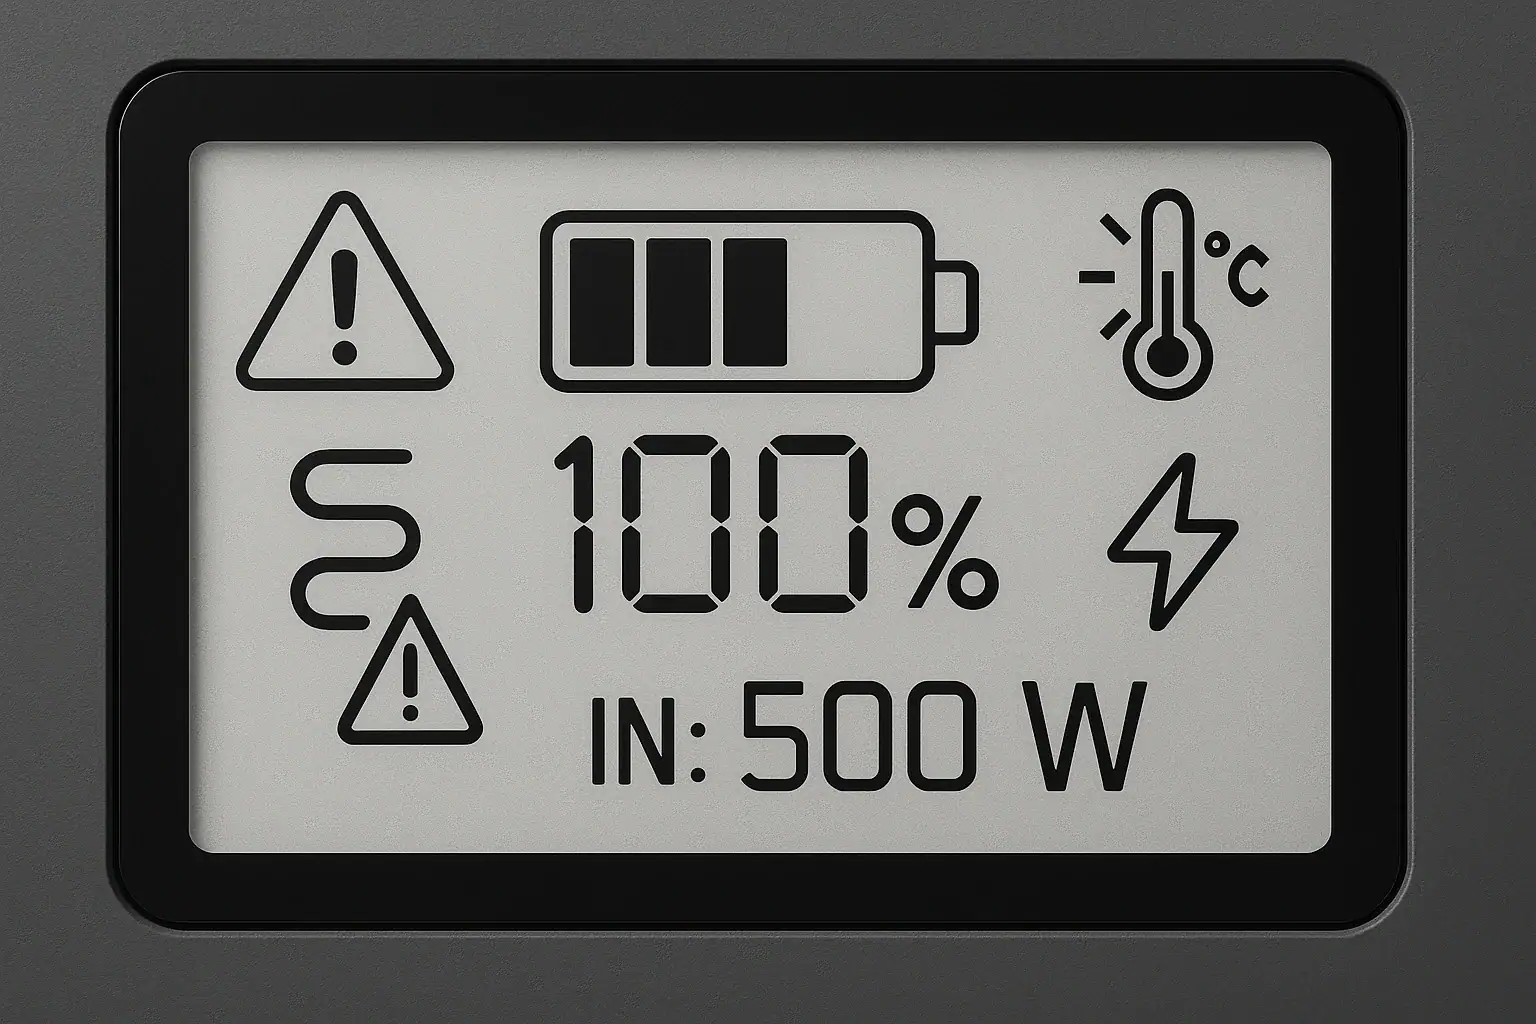
  • Display and monitoring: A clear screen showing watts in/out, remaining percentage, and estimated runtime helps you manage your energy budget in real time.
  • Weight and form factor: For car camping, 10–30 lb units are common; choose a size you can comfortably move between home, vehicle, and campsite.
  • Operating temperature range: Check that the unit is rated for the temperatures you expect when camping, especially in hot summers or cold shoulder seasons.
  • Battery chemistry and cycle life: Higher cycle life ratings are useful if you camp frequently or use the unit for other purposes year-round.

By matching these specs to a realistic weekend energy budget, you can choose and use a portable power solution that keeps your campsite running smoothly from Friday night to Sunday afternoon.

Frequently asked questions

What specs and features matter most when choosing a portable power station for a weekend camping trip?

Battery capacity in watt-hours (Wh) and the continuous and surge watt ratings are the core specs, since they determine how long and what you can run. Also consider the input limit and charging options, the number and types of ports, weight and form factor, operating temperature range, and whether the unit provides clear monitoring of watts in/out and remaining charge.

How can confusing watt-hours and amp-hours lead to a planning mistake?

Watt-hours measure stored energy while amp-hours depend on voltage; comparing Ah without converting can make a battery look much larger or smaller than it really is. Always convert Ah to Wh using Wh = Ah × V so you compare capacities on the same basis and avoid underestimating your needs.

Is it safe to use a portable power station inside a tent or vehicle overnight?

Using a power station in a tent or vehicle is generally acceptable if the unit is placed on a stable, ventilated surface away from flammable materials and direct heat. Avoid covering vents, keep the unit out of confined hot spots, follow the manufacturer’s safety guidance, and do not leave a unit showing signs of damage or overheating unattended.

Can I rely on solar panels alone to recharge my power station during a weekend?

Solar can often top up a battery during a weekend, but real-world factors like panel size, the power station’s input limit, shading, cloud cover, and daylight hours determine how much energy you actually get. Match panel output to the unit’s input limit and plan conservatively; don’t assume ideal conditions will fully recharge your battery every day.

Why does my power station shut off when a fridge or CPAP starts, and what can I do?

Startup surges can exceed a unit’s surge rating or the combined load can exceed the continuous output, which triggers protective shutdowns. Check the continuous and surge watt ratings, reduce simultaneous loads during startup, and consider a unit with higher surge capacity or staggered device starts to avoid tripping protections.

How much extra buffer should I add to my energy budget to avoid running out of power?

Adding a buffer of about 20–30% above your calculated needs is a common practice to cover inverter losses, weather impacts, and unexpected use. Increase the buffer further if conditions are colder, if you have inefficient loads, or if you rely solely on intermittent solar charging.

Remote Work Power Kit: Keeping Laptop, Monitor, and Internet Running

Remote work power kit with portable power station running a laptop, monitor, and Wi-Fi router

A reliable remote work power kit is a portable setup that keeps your laptop, monitor, and internet running using a battery-based power station and efficient devices. It is designed to provide enough runtime, stable wattage, and the right ports to mimic a normal desk even when the wall outlet is unavailable. Whether you call it a backup power station, off-grid desk setup, or mobile office power, the core idea is the same: match your total load to the power station’s capacity, output watts, and inverter limits.

This kind of kit matters for power outages, travel, van life, or simply working in places without convenient outlets. By understanding input limits, surge watts, and realistic runtimes, you can avoid random shutdowns, slow charging, or overloaded inverters. The goal is not just to turn devices on, but to keep them running long enough to finish meetings, upload files, and stay connected. The rest of this guide walks through how remote work power kits work, what to avoid, and which specs to focus on.

What Is a Remote Work Power Kit and Why It Matters

A remote work power kit is a portable power solution built around a battery-powered unit (often called a portable power station) that can safely run typical desk gear: a laptop, external monitor, Wi ‑Fi router or hotspot, and small accessories like a phone charger or webcam light.

Instead of relying on wall outlets, the kit uses stored energy measured in watt-hours (Wh) and delivers it through AC outlets, USB ports, and sometimes DC outputs. When sized correctly, it acts like a mini wall outlet you can carry with you.

This matters because modern remote work depends on stable internet and predictable uptime. A short power blip can drop a video call, corrupt a file, or interrupt a remote presentation. With a properly designed kit, you can:

  • Bridge short outages without losing connection.
  • Work from cabins, vehicles, coworking patios, or client sites with limited outlets.
  • Protect productivity during storms or grid instability.

For most people, the goal is not to power a whole house, but to keep essential work tools online with minimal noise, heat, and complexity. A well-matched kit focuses on efficiency and runtime, not just maximum watts.

How a Portable Power Station Remote Work Setup Actually Works

To build a remote work power kit around a portable power station, it helps to understand how power flows and which numbers matter.

Battery capacity and runtime

The battery inside the power station is rated in watt-hours (Wh). This tells you roughly how long it can run your devices:

Approximate runtime (hours) = battery Wh × 0.8 ÷ total device watts

The 0.8 factor accounts for inverter and conversion losses. For example, if your total desk load is 80 W and your battery is 512 Wh:

512 × 0.8 ÷ 80 ≈ 5.1 hours of runtime.

Continuous watts vs. surge watts

The AC inverter inside the power station has two important ratings:

  • Continuous output (W): the maximum power it can supply steadily.
  • Surge (peak) output: a short burst for devices that briefly draw extra power at startup.

Remote work gear is usually low-surge, so continuous watts are the main constraint. Add up the wattage of your laptop charger, monitor, router, and any extras, and keep that total well below the inverter’s continuous rating for stable operation.

Ports, voltage, and PD profiles

Most kits rely on a mix of ports:

  • AC outlets: for standard laptop bricks and monitors.
  • USB-C PD (Power Delivery): can directly power many modern laptops (45–100 W) without the bulky brick.
  • USB-A: for phones and small peripherals.
  • DC outputs: sometimes used for routers or low-voltage gear.

USB-C PD profiles matter because they define how much power a port can negotiate. A 65 W PD port may run an ultrabook but struggle with a power-hungry workstation laptop under load.

Charging the power station (input limits)

The power station itself must be recharged via AC wall power, solar panels, vehicle DC, or a mix. The input limit (W) determines how fast it can refill. The input limit (W) determines how fast it can refill. For daily remote work, a higher input limit means you can recharge the battery between work sessions or during breaks.

For example, a 500 Wh unit charging at 250 W can go from empty to full in about 2–3 hours, while charging at 60 W could take most of a day.

ComponentTypical Power Draw (W)Notes
Work laptop (light use)20–40Higher under heavy CPU/GPU load.
24-inch monitor20–30LED panels are more efficient.
Wi ‑Fi router / modem8–15Combo units may be on the higher side.
USB phone charging5–15Depends on fast charging settings.
Desk lamp / ring light5–20LED is best for battery use.
Example values for illustration.

Example Remote Work Power Kits and Runtimes

Putting the concepts together, here are realistic example scenarios that show how a portable power station can support remote work.

Lightweight laptop-only setup

Devices:

  • 13-inch laptop via USB-C PD (30 W average)
  • Smartphone charging (5 W average)

Total load: ~35 W

With a 256 Wh power station:

  • 256 × 0.8 ÷ 35 ≈ 5.8 hours of runtime.

This is enough for a half day of focused work, especially if the laptop battery itself can carry some of the load when the power station runs low.

Standard home office kit

Devices:

  • 15-inch laptop via AC brick (45 W average)
  • 24-inch monitor (25 W)
  • Wi ‑Fi router (10 W)
  • Phone charging (5 W)

Total load: ~85 W

With a 512 Wh power station:

  • 512 × 0.8 ÷ 85 ≈ 4.8 hours of runtime.

This is a solid baseline for most remote workers who need to survive an afternoon outage or work from a location without reliable power.

Extended outage or off-grid workday

Devices:

  • 15-inch laptop (50 W average under heavier use)
  • 27-inch monitor (35 W)
  • Router + modem combo (15 W)
  • Phone and tablet (10 W)

Total load: ~110 W

With a 1024 Wh power station:

  • 1024 × 0.8 ÷ 110 ≈ 7.4 hours of runtime.

Paired with a reasonably fast AC or solar charger, this can support a full workday, especially if you reduce screen brightness and close power-hungry apps during video calls.

Mobile hotspot instead of home router

If you are working from a vehicle or a location without wired internet, a mobile hotspot or phone tethering can replace the router + modem. This often reduces power draw because the hotspot or phone is already charging from USB, not from a separate AC-powered device.

For example, replacing a 15 W router/modem with a 5–10 W hotspot can add an extra hour or more of runtime over a full workday, depending on your overall load and battery size.

Common Remote Work Power Mistakes and Troubleshooting Tips

Many remote workers run into the same issues when they first try to power their desk from a portable power station. Knowing these pitfalls makes troubleshooting much easier.

Underestimating total power draw

It is common to assume a laptop uses whatever is printed on the charger (for example, 65 W) at all times. In reality, usage fluctuates. However, if you add a monitor, router, and other gear, the peaks can approach or exceed the inverter’s continuous rating.

Symptoms:

  • Power station shuts off unexpectedly.
  • Warning icons or overload messages on the display.
  • Fans running at high speed frequently.

Fix: Add up the rated watts of each device and leave at least 20–30% headroom below the inverter’s continuous limit.

Ignoring inverter efficiency losses

Some users calculate runtime by dividing battery Wh by device watts and are disappointed when the actual runtime is shorter. The missing piece is inverter and conversion losses.

Symptoms:

  • Real-world runtime is 10–30% lower than expected.
  • Battery seems to drain quickly even at moderate loads.

Fix: Multiply battery capacity by 0.7–0.85 in your calculations and prefer DC or USB-C outputs over AC when possible.

Using inefficient monitors or lighting

Older or high-brightness monitors can draw much more power than expected, and some desk lamps use inefficient bulbs.

Symptoms:

  • Monitor feels unusually warm.
  • Runtime improves noticeably when the monitor is off.

Fix: Use energy-efficient LED monitors, lower brightness, and LED lighting. Consider smaller screen sizes for battery-powered sessions.

Overloading USB-C PD ports

Not all USB-C ports are equal. Some provide only 15–30 W, while others support 60–100 W PD.

Symptoms:

  • Laptop charges slowly or not at all.
  • Laptop battery continues to drain under heavy load.

Fix: Match your laptop’s power needs to the PD port rating. If the laptop requires 65 W and the port only offers 45 W, expect slower charging or use the AC adapter instead.

Forgetting about internet equipment

During outages, people often focus on the laptop and forget that the modem, router, or hotspot also need power.

Symptoms:

  • Laptop stays on, but there is no internet.
  • Router reboots when switching power sources.

Fix: Include all networking gear in your power budget and, if possible, run it from a dedicated DC or USB output for better efficiency.

Safety Basics for Running Remote Work Gear on a Power Station

Portable power stations are designed to be safer and simpler than improvised battery setups, but there are still important safety practices to follow when building a remote work power kit.

Respect power limits and ratings

Never exceed the power station’s rated continuous or surge output. Consistently overloading the inverter can trigger protective shutdowns and may shorten the lifespan of both the power station and connected devices.

Use power strips only as a way to add outlets, not to increase total wattage beyond what the power station can handle. Avoid daisy-chaining multiple strips.

Provide adequate ventilation

Power stations generate heat, especially under higher loads or while charging. Place the unit on a hard, flat surface with open space around the vents. Do not cover it with bags, papers, or fabric, and keep it away from direct heat sources.

Use appropriate cables and adapters

Use cables rated for the current and power you need, particularly for USB-C PD and AC extensions. Damaged or low-quality cables can overheat, cause intermittent connections, or reduce charging speed.

Avoid stacking heavy plugs or adapters directly on the power station’s outlets, as this can stress the sockets. A short, high-quality extension cord or power strip with a built-in switch can help organize connections safely.

Keep moisture and dust away

Do not operate the power station in wet or extremely dusty environments. Liquids, condensation, or fine dust can damage internal components or create shock risks. If you must work outdoors, use a sheltered, dry location and protect the unit from direct rain or splashes.

Do not attempt internal modifications

Do not open the power station, modify the battery pack, or bypass built-in protections. If you need to integrate backup power with home wiring or complex equipment, consult a qualified electrician rather than attempting DIY panel work.

Safety AreaGood PracticeWhy It Matters
Load managementStay 20–30% below max continuous watts.Reduces shutdowns and component stress.
VentilationKeep vents clear and unit off soft surfaces.Prevents overheating and throttling.
CablingUse undamaged, properly rated cables.Reduces fire and shock risks.
EnvironmentAvoid moisture, extreme heat, and dust.Protects electronics and battery health.
ModificationsLeave internals sealed; no DIY rewiring.Keeps built-in protections effective.
Example values for illustration.

Related guides: Portable Power Station Buying GuideSurge Watts vs. Running Watts: How to Size a Portable Power StationCan a Portable Power Station Replace a UPS?AC vs DC Power: How to Maximize Efficiency and Runtime

Maintaining and Storing Your Remote Work Power Kit

A remote work power kit is only useful if it works when you need it. Basic maintenance and smart storage habits extend battery life and ensure consistent performance.

Regular charging habits

Lithium-based batteries prefer moderate charge levels. Avoid leaving the power station completely full or empty for long periods. For most users:

  • Keep the charge level between roughly 20% and 80% during regular use.
  • Top up to a higher level before a known storm or planned outage.

If you rarely use the kit, schedule a reminder every 1–3 months to check the charge and cycle it briefly under a light load.

Storage environment

Store the power station in a cool, dry place away from direct sunlight. High temperatures accelerate battery aging. Avoid leaving it in a hot vehicle or near heating vents for extended periods.

For long-term storage (several months), many manufacturers recommend storing the battery partially charged rather than full. Check the user manual for specific guidance for your unit.

Inspecting cables and connectors

Periodically inspect all AC and USB cables for fraying, bent connectors, or discoloration. Replace any damaged cables immediately. A single bad cable can cause intermittent power drops that feel like random device issues.

Keep dust out of ports by covering the power station or using it in a clean area. Gently remove visible dust with dry air or a soft brush; avoid liquids.

Testing before critical use

Before relying on the kit for an important presentation or trip, run a test session:

  • Connect your full remote work setup.
  • Measure how long the power station lasts under typical use.
  • Note which ports and cables you used.

This real-world test often reveals small issues—like a power-hungry monitor or a weak USB-C cable—before they cause problems during an actual outage.

Practical Takeaways and Specs to Look For in a Remote Work Power Kit

Designing a reliable remote work power kit comes down to balancing capacity, output, and efficiency for your specific devices. Start by measuring or estimating the power draw of your laptop, monitor, and internet gear. Then choose a portable power station that can comfortably handle that load for the number of hours you need, with room for growth.

Whenever possible, run devices from USB-C PD or DC outputs instead of AC to squeeze more runtime out of the same battery. Keep cords organized, avoid overloading the inverter, and test your setup before you really need it. With these basics in place, your remote work kit can turn almost any location into a functional office.

Specs to look for

  • Battery capacity (Wh): Look for 300–600 Wh for partial days and 800–1200 Wh for full workdays; this directly affects runtime for your laptop, monitor, and router.
  • AC inverter continuous watts: Aim for at least 200–400 W for a typical desk; ensures headroom for laptop, monitor, and networking gear without overloads.
  • USB-C PD output rating: Seek 60–100 W PD on at least one port if you plan to power a modern laptop without its AC brick; improves efficiency and reduces cable clutter.
  • Number and type of outlets: At minimum, 1–2 AC outlets plus several USB-A and USB-C ports; allows you to connect all work devices without extra hubs.
  • Input charging power (W): Look for 150–300 W AC input if you need to recharge between work sessions; higher input means faster turnaround after outages.
  • Display and monitoring: A clear screen showing input, output, and remaining runtime helps you manage loads and avoid unexpected shutdowns.
  • Weight and size: For a portable remote office, units in the 7–25 lb range balance capacity with carryability, especially if you move between rooms or locations.
  • Noise level (fan behavior): Favor models known for quiet operation at 50–150 W loads, so fans do not disrupt calls or recordings.
  • Battery chemistry and cycle life: Higher cycle ratings (for example, 1500+ cycles to 80% capacity) offer better long-term value if you plan to use the kit frequently.

Frequently asked questions

What features should I prioritize when buying a remote work power kit?

Prioritize battery capacity (Wh) for the runtime you need, the AC inverter’s continuous watt rating for your combined load, and at least one high-wattage USB-C PD port to run a modern laptop efficiently. Also consider input charging power, the number and types of outlets, weight, and noise level for practical portability and daily use.

How can I estimate how long a power station will run my laptop and monitor?

Add the average watts for each device to get total load, then divide the battery Wh multiplied by a conversion factor (about 0.7–0.85) by that load. This gives a realistic runtime estimate, but real-world testing is recommended because actual draw and inverter losses vary with workload.

What is a common mistake that causes unexpected shutdowns during remote work?

A common mistake is underestimating total power draw and running close to or above the inverter’s continuous rating; this often triggers protective shutdowns. To avoid it, sum all device watts and leave 20–30% headroom below the inverter limit.

How can I safely operate a portable power station indoors?

Use the unit on a hard, flat surface with clear ventilation, do not expose it to moisture or dust, and use properly rated cables and outlets. Respect the power ratings and avoid internal modifications; consult a qualified electrician for any complex home integrations.

Can I recharge a power station quickly while still using it for work?

Some units support pass-through use while charging and accept high input power to recharge faster, but charging speed depends on the unit’s input limit and thermal behavior. Check the specifications for simultaneous input/output limits and monitor temperatures during fast charging to avoid overheating.

Will using USB-C PD instead of AC outlets extend my runtime?

Yes. Using USB-C PD or other DC outputs bypasses the inverter, reducing conversion losses and typically extending runtime compared with powering devices through AC outlets. Ensure the PD port’s wattage matches your laptop’s requirements to avoid slow charging or battery drain under load.

Portable Power Stations for Photography and Drone Charging: A Field Guide

Portable power station charging camera and drone batteries in the field

Portable power stations for photography and drone charging work by storing energy in a rechargeable battery and delivering it through AC outlets and DC or USB ports sized to your gear’s wattage and runtime needs. In practice, you match battery capacity, inverter watts, USB-C PD profiles, and input limits to the camera bodies, gimbals, lights, and drone batteries you need to keep running in the field.

Whether you call it a portable generator, battery power pack, or field power hub, the core idea is the same: convert stored watt-hours into usable power for chargers and accessories. For photographers and drone pilots, that means enough capacity for full shooting days, stable power for sensitive electronics, and fast recharging between sessions. Understanding surge watts, continuous output, and realistic runtime helps you avoid dead batteries, failed flights, and missed shots when you are far from the grid.

Understanding Portable Power Stations for Photo and Drone Work

In the context of photography and drone charging, a portable power station is a self-contained battery system with multiple outputs designed to safely power and recharge your field equipment away from wall outlets. It combines a high-capacity battery, an inverter for AC power, and regulated DC ports such as USB-A, USB-C PD, and 12 V outputs.

For photo and aerial workflows, these devices replace or supplement wall power on location. Instead of relying on a vehicle or limited camera batteries, you carry a single power hub that can handle camera battery chargers, drone charging hubs, laptops, tablets, wireless transmitters, field monitors, and small LED or panel lights.

This matters because modern cameras and drones draw more power than ever. High-resolution stills, 4K and 6K video, high frame rate recording, and long drone missions all consume significant energy. A well-matched power station lets you plan runtimes, schedule battery rotations, and maintain consistent uptime for client shoots, time-lapses, mapping flights, and inspections.

Key concepts for photographers and drone pilots include:

  • Capacity (Wh): How much energy is stored, which directly affects how many camera and drone batteries you can recharge.
  • Output power (W): How many watts the station can supply at once, which determines how many devices can charge simultaneously.
  • Port types: AC outlets for standard chargers, USB-C PD for laptops and cameras, and DC outputs for some field gear.
  • Recharge speed: How quickly the station itself can be refilled between shooting days.

How Portable Power Stations Deliver Power to Cameras and Drones

A portable power station works by storing energy in an internal battery, then converting and regulating that energy to match your devices. For photography and drones, three parts are especially important: the battery chemistry and capacity, the inverter for AC power, and the DC outputs for direct charging.

Battery and capacity: Capacity is usually expressed in watt-hours (Wh). To estimate how many charges you will get, divide the station’s usable watt-hours by the watt-hours of your camera or drone battery, then adjust down for conversion losses. For example, a 500 Wh station might realistically deliver around 350–420 Wh to your gear after efficiency losses.

Inverter and AC output: Many camera and drone chargers are designed for household AC power. The station’s inverter converts the battery’s DC power to AC. Two ratings matter:

  • Continuous watts: The power level it can supply steadily, such as 300 W or 600 W.
  • Surge watts: A higher short-term rating for startup spikes, often relevant for devices like some lights or small monitors.

As long as the total draw from your chargers and accessories stays below the continuous rating, you can power them reliably.

DC and USB outputs: Many modern cameras, gimbals, and accessories support USB-C PD or standard USB charging. USB-C PD ports negotiate a voltage and current “profile” with the device (for example, 5 V, 9 V, 15 V, or 20 V at a certain number of amps), allowing faster and more efficient charging. For drone work, AC outlets are still common because most flight battery chargers expect wall power, but some smaller drones and controllers can charge via USB-C.

Recharging the power station: Input power determines how quickly the station refills between sessions. Typical options include AC wall charging, vehicle 12 V charging, and solar panels. The input limit (in watts) caps how fast the battery can safely recharge. For field use, higher input limits shorten downtime between days.

All of this is managed by an internal battery management system that monitors voltage, temperature, and current to protect both the station and your devices.

Component Typical Range Relevance for Photo/Drone Use
Battery capacity 300–1500 Wh Determines how many camera and drone batteries you can recharge.
AC continuous output 300–1000 W Limits how many chargers and accessories can run at once.
USB-C PD output 45–100 W per port Enables fast charging for cameras, laptops, and controllers.
AC input for recharging 150–800 W Controls how quickly the station refills between shooting days.
Example values for illustration.

Field Scenarios: Power Planning for Shoots and Flights

Real-world photo and drone work highlights how important it is to match a portable power station to your workflow. Thinking in terms of watt-hours and runtime helps you avoid underestimating your needs.

Example 1: Landscape photographer with mirrorless kit

Suppose you shoot sunrise to sunset with a mirrorless camera, two extra batteries, and a lightweight LED panel for occasional fill. Each camera battery is around 15 Wh, and the LED light draws 20 W when used. You might burn through four batteries (60 Wh) and run the light for 2 hours (40 Wh), plus some overhead for charging losses. A station with 200–300 Wh of usable capacity would comfortably cover this, with margin for a phone, GPS, and tablet.

Example 2: Wedding or event photographer

An all-day event with dual camera bodies, multiple flashes, wireless triggers, and a laptop for quick backups can easily double or triple consumption. If you are recharging eight camera batteries (120 Wh), keeping a laptop running for 3–4 hours (120–200 Wh), and topping up flash packs, a 500–700 Wh station gives more realistic headroom. Multiple AC outlets let you run several chargers simultaneously during short breaks.

Example 3: Drone pilot with multiple flight batteries

Drone flight batteries often range from about 40–70 Wh each. If you carry six batteries and plan to recharge half of them in the field, you might need 120–210 Wh just for flight packs, plus controllers, phones, and tablets. Add conversion losses and you quickly reach 250–350 Wh. For mapping or inspection work with heavier drones and more batteries, 700–1000 Wh or more is often practical.

Example 4: Hybrid photo, video, and drone production

On mixed shoots, you may be powering camera chargers, drone hubs, a laptop, a field monitor, and a small key light at the same time. Here, AC output becomes as important as capacity. A station with around 600 W continuous output can usually handle a couple of camera chargers, a drone charger, and a modest LED light, while still leaving a USB-C PD port free for the laptop.

Estimating runtime and charge counts

To estimate whether a station will last a full day:

  • Add the watt-hours of all batteries you plan to recharge (camera, drone, and accessory packs).
  • Add watt-hours for any devices you will power directly (watts × hours of use).
  • Multiply the total by roughly 1.2 to 1.4 to account for conversion losses.
  • Compare this to the station’s rated capacity; aim for at least 20–30% extra margin.

This approach keeps expectations realistic and helps you decide whether to bring one larger station or two smaller ones.

Common Power Pitfalls and Troubleshooting in the Field

Even experienced photographers and drone pilots run into avoidable power issues. Recognizing the most common mistakes and their symptoms makes troubleshooting much easier.

Underestimating total load

One frequent problem is plugging in too many chargers and lights at once, exceeding the station’s continuous watt rating. Symptoms include the inverter shutting off, warning indicators, or chargers cycling on and off. The fix is to unplug nonessential devices and stagger charging. Check the wattage labels on chargers and accessories to avoid overloading.

Ignoring surge watts

Some lights, monitors, or other gear draw a short surge when they start up. If this exceeds the station’s surge limit, it may trip protection even if the steady draw seems fine. In practice, turn on high-draw devices one at a time, and avoid running them at maximum power if you are near the station’s limits.

Using the wrong ports or cables

Another common issue is slow or unreliable charging because a device is plugged into a low-power USB port instead of a higher-wattage USB-C PD port, or because of a poor-quality cable. If your laptop or camera charges slowly or not at all, try a known-good cable and a higher-rated port. For drones, ensure you are using the manufacturer’s recommended AC charger with the station’s AC outlet.

Misreading battery indicators

Portable power stations often show remaining capacity as a percentage or estimated runtime. These readings can fluctuate with changing loads. If you see sudden drops, it may be due to a high, temporary draw. Treat the display as an estimate, not an exact fuel gauge, and keep a mental tally of how many batteries you have charged.

Charging in extreme conditions

Charging the station or your camera and drone batteries in very cold or very hot environments can trigger thermal protection. If charging slows or stops and you see a temperature warning, move the station and batteries to a shaded, moderate-temperature area and allow them to stabilize before resuming.

Not testing the setup before critical shoots

Finally, many issues arise simply because the full kit is never tested together before a paid job or remote expedition. It is wise to simulate a typical shooting day at home or in a controlled location, running all your chargers and accessories from the station to confirm compatibility, load, and runtime.

Safety Basics for Powering Cameras and Drones

Portable power stations are designed with built-in protections, but safe habits are still essential, especially when powering sensitive electronics like cameras, drones, and laptops.

Respect power ratings

Always stay within the station’s rated continuous and surge watt limits. Overloading can trigger shutdowns and, in extreme cases, stress internal components. Similarly, ensure that any power strips or extension cords used are rated for the load you intend to place on them.

Use appropriate chargers

Use manufacturer-approved or reputable third-party chargers for camera and drone batteries. Avoid improvising with unverified adapters or cables that might bypass built-in protections. For USB-C PD charging, use cables rated for the wattage you need, particularly for laptops and higher-draw devices.

Avoid moisture and physical damage

Keep the power station off wet ground and away from direct rain or splashes. Moisture and electronics do not mix, and while some enclosures are more robust than others, most portable stations are not fully waterproof. Protect the unit from impacts, drops, and crushing loads in transport.

Ventilation and heat

Do not cover the station’s vents or place it in confined, unventilated spaces while charging or under heavy load. Heat buildup can shorten battery life and may trigger thermal shutdown. In hot environments, keep the unit shaded and allow airflow around it.

Charging in vehicles

When charging a power station from a vehicle’s 12 V outlet, follow the manufacturer’s guidance. Avoid running a large station at high input draw from a small vehicle outlet for extended periods without the engine running, as this can drain the starter battery. If you plan complex vehicle-based setups, consult a qualified automotive electrician.

Do not open or modify

Internal batteries and electronics are not user-serviceable. Do not open the enclosure, attempt to modify the battery pack, or bypass built-in protections. For any repair or performance concerns, follow the manufacturer’s support process or consult a qualified technician.

Safety Area Key Practice Why It Matters
Load management Stay under continuous watt rating Prevents shutdowns and stress on internal components.
Environment Keep dry and well-ventilated Reduces risk of damage and thermal issues.
Cabling Use rated cables and chargers Protects sensitive cameras and drones from power issues.
Handling Avoid drops and impacts Preserves battery integrity and long-term reliability.
Example values for illustration.

Related guides: Portable Power Station Buying GuideSurge Watts vs Running Watts: How to Size a Portable Power StationHow to Estimate Runtime for Any Device: A Simple Wh Formula + 5 Worked Examples

Care, Maintenance, and Storage for Reliable Field Power

Proper care and storage extend the life of a portable power station and help ensure it performs consistently on important shoots and flights.

Regular cycling

Most modern lithium-based power stations benefit from occasional cycling. If you only use the unit a few times a year, it is still wise to discharge and recharge it every few months. This keeps the battery active and gives you a chance to confirm that everything is working before you rely on it in the field.

Optimal storage charge

For longer storage periods, many manufacturers recommend storing the battery at a partial charge rather than completely full or completely empty. Around 40–60% state of charge is commonly suggested. Check the unit every few months and top up if it has drifted significantly lower.

Temperature considerations

Store and transport the station in moderate temperatures whenever possible. Avoid leaving it in a hot vehicle in direct sun or exposed to freezing conditions for extended periods. Extreme temperatures accelerate battery aging and can temporarily reduce available capacity.

Keep ports and vents clean

Dust, sand, and moisture are common around outdoor shoots. Periodically inspect ports and vents and gently remove debris. Use dust caps or cases where practical, especially if you shoot in coastal, desert, or muddy environments.

Labeling and organization

For multi-person crews, clearly label which chargers and cables are intended for the power station. This reduces confusion on set and helps prevent under-rated extension cords or adapters from being used with higher loads.

Monitor performance over time

As with any battery, capacity will slowly decline with age and cycle count. If you notice that the station no longer delivers the expected number of camera or drone battery charges, adjust your planning. For critical work, consider adding a second unit or reducing your dependence on a single station as it ages.

Practical Takeaways and Power Station Buying Criteria

For photographers and drone pilots, a portable power station is essentially a field “fuel tank” for your batteries and electronics. The right choice depends on how much gear you run, how long you are away from grid power, and how quickly you can recharge between sessions.

Start by listing your actual devices: camera bodies, number and size of batteries, drones and flight packs, lights, laptop, monitors, and accessories. Estimate total daily energy use in watt-hours and add a healthy margin. Then match that to a station with enough capacity, the right mix of ports, and a recharge speed that fits your schedule.

Weight and size also matter. A smaller unit may be ideal for solo landscape work or lightweight drone scouting, while larger capacity is better suited to team productions, long events, or repeated mapping flights.

Specs to look for

  • Battery capacity (Wh): Look for roughly 300–600 Wh for light solo work, 600–1200 Wh for heavier hybrid photo/drone shoots. This determines how many batteries you can recharge per day.
  • AC continuous output (W): Aim for at least 300–500 W for a few chargers and small lights, 600–1000 W if you plan to run multiple chargers plus a laptop and modest lighting. This ensures stable power without overloading.
  • Number and type of AC outlets: Two or more grounded outlets make it easier to run multiple camera and drone chargers simultaneously, reducing downtime between flights or shooting blocks.
  • USB-C PD output (W per port): Seek 45–100 W per PD port if you plan to charge laptops, cameras, and controllers directly. Higher PD wattage shortens charge times and may allow you to skip some AC chargers.
  • Recharge input power (W): Look for 200–800 W AC input if you need fast turnarounds between days. Higher input lets you refill a depleted station in a few hours instead of overnight.
  • Battery chemistry and cycle life: Compare stated cycle life (for example, several hundred to a few thousand cycles to a certain percentage of original capacity). Longer cycle life is valuable for frequent use.
  • Weight and form factor: Consider units under 20 lb for backpack or carry use, heavier units if they will mostly stay in a vehicle or on a cart. Manageable weight makes it practical to bring enough capacity.
  • Display and monitoring: A clear display showing input/output watts and remaining capacity helps you plan charging order and avoid surprises on long days.
  • Environmental operating range: Check the recommended operating temperature range if you often shoot in very hot, cold, or high-altitude locations. Staying within that range supports reliable performance.

By aligning these specifications with your actual shooting patterns, you can select a portable power station that keeps cameras, drones, and accessories running smoothly, minimizing downtime and missed opportunities when working off the grid.

Frequently asked questions

Which specs and features matter most when choosing a portable power station for photography and drone charging?

Prioritize battery capacity (Wh) to meet your planned charge counts, AC continuous output (W) to run multiple chargers at once, and USB-C PD port wattage for direct device charging. Also consider recharge input power for turnaround speed, port count and types, weight/form factor, and the stated cycle life for long-term use.

How do I estimate the right capacity and runtime for a full shooting day?

Add up the watt-hours of all batteries you will recharge and the watt-hours for devices you will run directly (watts × hours), then multiply the total by about 1.2–1.4 to account for conversion losses. Compare that adjusted total to the station’s usable Wh and include a 20–30% safety margin to avoid running flat during the day.

What common mistakes do photographers and drone pilots make with portable power stations?

Frequent errors include underestimating total load and exceeding the continuous watt rating, using low-power ports or poor cables for high-draw devices, and failing to test the full kit together before a job. These oversights lead to unexpected shutdowns, slow charging, or compatibility problems in the field.

Are portable power stations safe to use with cameras and drone batteries?

Yes, when used correctly: stay within the unit’s continuous and surge limits, use appropriate chargers and rated cables, and keep the station dry and well ventilated. Built-in battery management systems provide protections, but safe handling and adherence to ratings are still essential.

Can I recharge a power station with solar panels in the field, and what should I plan for?

Solar recharging is possible and common for field use, but plan for the station’s maximum input wattage, available sun hours, and the combined wattage of panels and charge controller. Expect variable recharge times depending on weather and be prepared with a backup charging option if you need guaranteed turnaround speed.

How should I maintain and store a power station between shoots to preserve battery life?

Store the unit at a partial charge (commonly around 40–60%), avoid extreme temperatures, and cycle the battery every few months if it sits unused. Periodically inspect and clean ports and vents, and monitor capacity over time to adjust planning as the battery ages.

Portable Power Stations for CPAP and Medical Devices: What to Look For

Portable power station powering a CPAP machine as medical backup

Portable power stations for CPAP and medical devices should be chosen based on wattage, battery capacity, runtime, and safety protections, not just price or size. To keep equipment running through outages or travel, you need to match your device’s power draw to the station’s output limits, inverter type, and battery capacity so you get predictable runtime and avoid overloads or alarms.

People often search for terms like CPAP backup power, watt hours, surge watts, runtime calculator, and inverter type because medical devices have strict power needs and must run reliably all night. Understanding input limits, output ports, and how battery capacity translates to hours of use helps you avoid underpowered units that shut off early. This guide explains how portable power stations work with CPAP machines, oxygen concentrators, and similar equipment, what specs matter most, and how to evaluate runtime and safety so you can choose confidently.

Understanding Portable Power Stations for CPAP and Medical Devices

A portable power station is a rechargeable battery system with built-in electronics that convert stored energy into usable AC and DC power for your devices. For CPAP machines and other medical equipment, it acts like a compact, silent generator that can keep critical devices running during power outages, camping trips, or travel where reliable grid power is not guaranteed.

Unlike simple power banks that only offer small USB outputs, portable power stations typically provide multiple types of outputs: AC outlets for standard plugs, DC barrel or car-style ports, and USB/USB-C ports. This flexibility is important because medical devices vary widely in how they connect and how much power they draw.

For CPAP and similar devices, the most important aspects are continuous output power (in watts), surge capability for startup loads, and total stored energy (in watt-hours). These determine whether the station can power your device at all and for how many hours. When matched correctly, a portable power station can provide overnight CPAP runtime, support low-to-moderate power oxygen concentrators, or keep smaller devices like nebulizers and suction units running as needed.

Because CPAP machines and many medical devices are designed to run steadily for hours, they benefit from stable, clean power. That is why inverter type and voltage consistency matter: they help ensure your equipment works as intended, without unexpected shutdowns or errors.

Key Power Concepts: Watts, Watt-Hours, and Inverter Type

To choose a portable power station for CPAP and medical devices, you need to understand a few key electrical concepts: watts, watt-hours, and inverter type. These determine compatibility, runtime, and how safely your equipment will operate.

Watts (W) measure power at a moment in time. Your CPAP or medical device will list a watt rating or an amp rating at a certain voltage (for example, 1.5 A at 120 V). Multiply volts by amps to estimate watts. The portable power station’s AC output must exceed the continuous watts your device needs, with some margin for safety. If your device draws 60 W, a station that can continuously supply 150 W or more offers comfortable headroom.

Watt-hours (Wh) measure stored energy, similar to the size of a fuel tank. To estimate runtime, divide the power station’s usable watt-hours by your device’s average watt draw. For example, a 500 Wh station powering a 40 W CPAP might deliver around 10–11 hours in practice after accounting for inverter losses and efficiency.

Surge watts refer to short bursts of extra power available during startup. Some devices, especially those with motors or compressors, briefly draw more power when they first turn on. CPAP machines typically have modest startup surges, but oxygen concentrators and some pumps can spike higher. The power station’s surge rating should comfortably exceed these brief peaks.

Inverter type matters for how the AC power is shaped. Pure sine wave inverters closely mimic household grid power and are the preferred option for sensitive electronics and medical devices. Modified sine wave inverters may cause some equipment to run hotter, noisier, or not at all. For CPAP and most medical devices, a pure sine wave output is strongly recommended.

Finally, input limits describe how fast you can recharge the power station from wall outlets, solar, or car chargers. For medical backup, faster recharge can be valuable between outages or during extended emergencies when you have intermittent access to power.

ConceptWhat it MeansWhy it Matters for CPAP/Medical Use
Watts (W)Instantaneous power drawMust be below the station’s continuous output rating to avoid overload
Watt-hours (Wh)Total stored energyDetermines approximate runtime for overnight or multi-hour use
Surge wattsShort-term peak powerHelps handle startup spikes from motors or compressors
Inverter typeHow AC power is shapedPure sine wave is better for sensitive medical electronics
Input limitMax charging powerAffects how quickly you can recharge between outages
Key power concepts that affect how portable power stations work with CPAP and medical devices. Example values for illustration.

Practical Examples: Matching Portable Power to CPAP and Other Devices

Seeing real-world style examples makes it easier to estimate what size portable power station you might need for CPAP and medical devices. Exact numbers will vary by model and settings, but these scenarios illustrate typical ranges and trade-offs.

Example 1: Standard CPAP Without Humidifier

A typical CPAP machine running without a heated humidifier and at moderate pressure might draw around 30–50 W once running. If you pair this with a 500 Wh portable power station, you can estimate runtime as follows:

  • Average draw: assume 40 W
  • Battery: 500 Wh
  • Theoretical runtime: 500 Wh ÷ 40 W = 12.5 hours
  • Realistic runtime after efficiency losses: roughly 9–11 hours

This can cover a full night of sleep for most users. If you need two nights without recharging, you might look for roughly double the capacity, or plan to recharge during the day.

Example 2: CPAP With Heated Humidifier and Heated Hose

Turning on the heated humidifier and heated hose can significantly increase power draw, often into the 70–120 W range depending on settings and room temperature. With the same 500 Wh station:

  • Average draw: assume 90 W
  • Theoretical runtime: 500 Wh ÷ 90 W ≈ 5.5 hours
  • Realistic runtime: around 4–5 hours

In this scenario, an overnight runtime may require a larger power station, reduced humidity settings, or running the CPAP without heat to conserve power during outages.

Example 3: Small Oxygen Concentrator or Suction Device

Some portable or small home oxygen concentrators draw in the range of 90–300 W depending on flow rate and design. A modest suction device might draw 50–150 W but only intermittently. For a 300 W device on a 1,000 Wh station:

  • Average draw: assume 300 W continuous
  • Theoretical runtime: 1,000 Wh ÷ 300 W ≈ 3.3 hours
  • Realistic runtime: approximately 2.5–3 hours

This demonstrates how higher-wattage medical equipment can quickly use up stored energy, even with a larger power station. In such cases, understanding duty cycle (how often the device actually runs) and having a plan for recharging becomes essential.

Example 4: Multiple Low-Power Medical Devices Together

Many households use more than one small medical device: a CPAP, a phone for communication, maybe a small nebulizer. If your CPAP draws 40 W, your phone charger uses 10 W, and a nebulizer runs at 60 W but only for 15 minutes per session, you can estimate average combined load and total runtime. The key is adding up the approximate wattage of everything you plan to run simultaneously and then comparing that to both the continuous output rating and the battery capacity of the power station.

Common Mistakes and Troubleshooting When Powering Medical Devices

Several recurring mistakes cause portable power stations to underperform or shut down unexpectedly when used with CPAP and medical devices. Recognizing these issues helps you troubleshoot and plan more effectively.

1. Underestimating power draw

Many users assume their CPAP or medical device uses less power than it actually does, especially when heated humidifiers or other comfort features are enabled. This leads to shorter-than-expected runtimes. If you notice your station depleting much faster than you calculated, check the device’s manual for typical watt usage with and without optional features, and consider reducing heat or pressure settings if medically acceptable and advised by your care provider.

2. Ignoring inverter type

Using a power station with a modified sine wave inverter can cause some medical devices to behave unpredictably or display error codes. If your device will not start, shuts off, or makes unusual noises, inverter compatibility may be the issue. For sensitive equipment, pure sine wave output is generally the safer choice.

3. Overloading the AC output

Plugging multiple devices into one portable power station can exceed its continuous watt rating, triggering overload protection. Symptoms include the AC output shutting off, warning lights, or error messages on the station. If this happens, unplug non-essential devices and restart the AC output. Always add up the wattage of all connected devices and keep it comfortably below the station’s continuous rating.

4. Not accounting for efficiency losses

Runtime estimates based solely on watt-hours divided by device watts ignore inverter and conversion losses. In real use, you might only get 80–90% of the theoretical runtime. If your power station consistently runs out earlier than your calculations, assume a safety margin and choose a larger capacity or lower power settings.

5. Poor ventilation or placement

Placing the power station in a confined space, under blankets, or near heat sources can cause it to overheat and shut down. If you notice the cooling fan running constantly, warm casing, or thermal warnings, move the unit to a well-ventilated, dry area away from direct sunlight.

6. Forgetting to pre-charge before outages or travel

A portable power station that is only partially charged will not provide the runtime you expect. If you rely on CPAP or other critical devices, make it a habit to keep the station topped up and verify charge level before storms, planned travel, or seasons when outages are more likely.

Safety Basics When Using Portable Power for Medical Equipment

When medical devices depend on a portable power station, safety and reliability are as important as runtime. While these systems are designed to be user-friendly, there are key practices to reduce risk and keep equipment operating properly.

Use appropriate outlets and adapters

Always plug medical devices into the type of outlet they are designed for. If your CPAP has an AC power brick, use the AC outlet on the station. If it has an approved DC adapter, use the DC port specified. Avoid improvised adapters or unapproved cables that could overheat or fail.

Do not exceed rated outputs

Stay below the station’s continuous watt rating for each output type. Overloading can trip internal protections and cause sudden shutdowns, which is especially problematic during sleep or when running critical medical equipment.

Maintain dry, stable placement

Keep the power station on a stable, flat surface where it cannot be knocked over. Avoid moisture, spills, and condensation. Liquids and electronics do not mix, and even minor spills can cause failures or safety hazards.

Allow proper ventilation

Portable power stations generate heat during charging and discharging. Ensure vents are not blocked and that there is adequate airflow around the unit. Overheating can shorten battery life and trigger protective shutdowns.

Avoid DIY modifications

Do not open the power station, modify internal batteries, or bypass built-in protections. These systems include safety electronics calibrated to the original design. Altering them can create fire, shock, or failure risks. For any advanced setup involving home circuits, consult a qualified electrician rather than attempting to integrate the station directly into household wiring.

Plan for medical continuity

Portable power is one part of a broader medical preparedness plan. Discuss backup power needs with your healthcare provider, especially if you rely on oxygen concentrators, ventilators, or other life-supporting equipment. For high-dependency situations, multiple backup options and clear emergency plans are important.

Safety AreaGood PracticeRisk if Ignored
Outlet usageUse correct AC/DC ports and approved adaptersOverheating, device malfunction
Load limitsStay under continuous watt ratingSudden shutdowns during use
PlacementStable, dry, ventilated locationTipping, spills, overheating
ModificationsLeave unit sealed, no internal changesFire or shock hazards
PlanningInclude power in medical preparednessInsufficient backup for critical devices
Core safety practices when using portable power stations with medical devices. Example values for illustration.

Related guides: Portable Power Station Buying GuideCan a Portable Power Station Replace a UPS?Portable Power Station Terminology Explained

Maintenance, Storage, and Long-Term Reliability

Proper maintenance and storage help ensure your portable power station is ready when you need it for CPAP or medical devices. Batteries age over time, and poor habits can reduce capacity or cause the unit to fail prematurely.

Regular charging cycles

Most modern portable power stations use lithium-based batteries that prefer partial rather than constant 0–100% cycles. If you rarely use the unit, top it up every few months according to the manufacturer’s guidance. Avoid leaving it fully discharged for long periods, as this can permanently reduce capacity.

Storage conditions

Store the power station in a cool, dry place away from direct sunlight and extreme temperatures. High heat accelerates battery degradation, while very low temperatures can temporarily reduce available capacity. For long-term storage, many manufacturers recommend keeping the battery partially charged rather than at 0% or 100%.

Inspect cables and connectors

Periodically check power cords, adapters, and ports for signs of wear, fraying, or damage. Replace any questionable cables before they cause intermittent connections or overheating. Clean dust and debris from vents and ports with a dry cloth or gentle air, avoiding liquids.

Test before you rely on it

Before storm seasons, travel, or anticipated outages, run a full overnight test with your CPAP or medical device connected to the power station. This confirms compatibility, gives you a realistic sense of runtime, and can reveal any issues with settings or cabling.

Monitor battery health over time

Over years of use, you may notice reduced runtime compared to when the unit was new. This is normal battery aging. If runtime becomes too short for your medical needs, consider adjusting device settings to reduce power draw, adding a second power station, or upgrading to a higher-capacity unit.

Safe transport

When traveling, secure the power station so it cannot slide or tip. Avoid crushing forces or impacts that could damage the case or internal components. If flying, check applicable rules for battery size and carry-on requirements, as larger batteries may be restricted.

Key Takeaways and “Specs to Look For” Checklist

Choosing a portable power station for CPAP and medical devices comes down to matching your equipment’s power needs to the station’s output, capacity, and safety features. Start by understanding your device’s watt draw with typical settings, decide how many hours of backup you need, and then look for a station with sufficient watt-hours and a pure sine wave inverter. Build in extra capacity for efficiency losses and future needs, and always test your setup before relying on it in an emergency.

Specs to look for

  • AC continuous output (W) – Choose a rating comfortably above your total device load (for example, at least 2–3 times your CPAP watt draw) so you avoid overloads and can add small accessories.
  • Battery capacity (Wh) – For overnight CPAP use, look for enough watt-hours to cover your device’s average watts times desired hours, plus 20–30% extra to account for inverter losses.
  • Inverter type – Prefer pure sine wave AC output for sensitive medical electronics to minimize noise, heat, and compatibility issues.
  • Number and type of outlets – Ensure there are enough AC outlets and any needed DC ports for your CPAP, oxygen concentrator, or other devices, so you do not rely on unsafe splitters.
  • Surge power rating – Look for surge watts that exceed startup needs of any motor-based devices (such as concentrators or pumps) to prevent tripping protections.
  • Recharge options and input limits – Consider how fast the unit can recharge from wall, car, or solar (for example, several hundred watts of input for quicker turnaround between outages).
  • Display and monitoring – A clear screen showing remaining battery percentage, input/output watts, and estimated runtime helps you manage power during long outages.
  • Operating temperature range – Check that the unit’s recommended temperature range aligns with your climate and storage conditions for reliable performance.
  • Weight and portability – Balance capacity with a weight you can comfortably move, especially if you expect to travel or reposition the station frequently.
  • Built-in protections – Look for overcurrent, overvoltage, short-circuit, and temperature protections to safeguard both the power station and your medical devices.

By focusing on these specifications and testing your setup ahead of time, you can select a portable power station that provides dependable backup for CPAP and other medical equipment when you need it most.

Frequently asked questions

What specs and features should I prioritize when choosing a portable power station for CPAP and medical devices?

Prioritize AC continuous output (watts) that exceeds your combined device load, battery capacity in watt-hours to meet your required runtime, a pure sine wave inverter for clean power, and a surge rating that covers startup peaks. Also check the number and type of outlets, input charging limits, and monitoring screens to manage usage during outages.

Why does my portable power station run out faster than I calculated?

Runtime often falls short because of underestimated device draw (especially heated humidifiers), inverter and conversion losses, standby power draw, and battery aging. Use the device manual for realistic wattage, factor in 10–25% efficiency losses, and test the setup overnight to get an accurate expectation.

Is it safe to run medical devices on a portable power station?

Yes, when the station is correctly matched to the device’s power needs, uses the proper outlet or adapter, and has a pure sine wave inverter and built-in protections. Maintain ventilation, avoid overloading, and include the power station in a broader medical contingency plan discussed with your healthcare provider.

How many hours will a portable power station run a CPAP overnight?

It depends on the CPAP’s average watt draw and the station’s usable watt-hours. A rough method is: usable Wh ÷ device watts × 0.8–0.9 (for efficiency). For example, a 500 Wh station powering a 40 W CPAP typically provides roughly 9–11 hours in real-world use.

Can I recharge a portable power station with solar panels during a prolonged outage?

Yes, if the station supports solar input and you have panels sized to the unit’s input limit. Charging rate depends on the station’s maximum solar input, available sunlight, and any charge controller; plan for variable recharge times and check compatibility before relying solely on solar.

Will a modified sine wave inverter cause problems with my CPAP or oxygen concentrator?

Modified sine wave output can cause some medical devices to run poorly, display errors, overheat, or not start at all. For sensitive medical equipment, a pure sine wave inverter is recommended to avoid compatibility and reliability issues.

What’s in the Box? Essential Cables and Adapters You May Need

Portable power station with essential cables and adapters laid out in front

Most portable power stations include only a few basic cables in the box, so you may still need extra adapters or leads to match your devices and charging sources. Understanding what each cable does, which connector types you have, and how much power each port can safely handle helps you avoid slow charging, tripped protection circuits, or damaged gear. People often search for terms like input limit, PD profile, surge watts, runtime, and DC output when trying to figure out which cable or adapter they’re missing.

This guide walks beginners through the typical cables, plugs, and adapters used with portable power stations, the differences between them, and how to match specs to real-world needs. By the end, you’ll know what usually comes in the box, what you may need to buy separately, and which technical details matter most for safe, efficient charging at home, on the road, or at a campsite.

1. What “What’s in the Box” Really Means for Portable Power Stations

When you unbox a portable power station, the included cables and adapters determine what you can actually power or recharge on day one. The battery capacity and inverter rating might look impressive, but without the right AC cord, DC barrel plug, USB-C PD cable, or solar adapter, you may not be able to use that capacity effectively.

Manufacturers usually include only the essentials needed to charge the unit from a wall outlet and sometimes a vehicle socket. Everything else is considered optional, because users have different devices, plug types, and power needs. That is why beginners are often surprised to find that their fridge, CPAP, or solar panel will not connect directly, even though the power station has enough watt-hours and surge watts on paper.

Understanding the role of each cable and adapter matters because:

  • Compatibility: Connectors must physically fit and match voltage and current ratings.
  • Performance: Cable gauge, length, and PD profile can limit charging speed and runtime.
  • Safety: Underrated or improvised adapters can overheat, trip protections, or damage equipment.
  • Planning: Knowing what is included helps you budget for missing pieces before a trip or outage.

Thinking of the power station as a central hub and the cables as the “roads” in and out makes it clear: without the right roads, the power cannot reliably reach where you want it to go.

2. Core Cable Types and How They Work With Your Power Station

Most portable power station setups revolve around a small set of cable and adapter types. Each one serves a specific function: charging the station (inputs), powering your gear (outputs), or adapting between shapes and standards so everything fits together.

AC charging cables

AC charging cables connect your portable power station to a household wall outlet. On one end is a standard plug for your region, and on the other is usually a figure-eight, cloverleaf, or IEC-style connector that plugs into the power station’s AC input or power brick. Key specs include the maximum input watts the station can accept and the cable’s current rating. A wall cord that matches or exceeds the station’s input limit helps avoid overheating and ensures you can recharge as fast as the unit allows.

DC car charging cables

DC car charging cables plug into a 12 V vehicle socket (often called a cigarette lighter socket) and feed DC power into the power station’s car/DC input. These are useful for road trips and vehicle-based camping. They typically provide much lower watts than AC charging, so knowing the station’s DC input limit and your vehicle’s socket rating helps set realistic expectations for charge times.

Solar charging adapters and leads

Solar charging cables connect portable solar panels to the power station’s solar input. Common connectors include MC4 on the panel side and a barrel plug, Anderson-style connector, or proprietary plug on the power station side. Because solar voltage and current vary with sunlight, using correctly rated cables and matching the input voltage range of the station is critical to avoid protection shutdowns or inefficient charging.

DC output cables and barrel adapters

Many portable power stations provide DC outputs via barrel jacks or a regulated 12 V car socket. DC output cables may have barrel plugs on one end and a different barrel size or connector on the other, allowing you to power routers, LED lights, or small appliances. The key is matching voltage (for example, 12 V vs 24 V), polarity (center positive vs center negative), and current rating to the device’s label.

USB-A and USB-C PD cables

USB-A cables handle lower-power devices like phones and small accessories, while USB-C PD (Power Delivery) cables support higher power levels and different PD profiles. A high-quality USB-C cable rated for 60 W or 100 W can unlock the full output of a PD port, while a low-rated cable may limit charging speed or fail to negotiate the correct PD profile, leading to slower charging or no charge at all.

AC extension cords and plug adapters

Extension cords and plug adapters are often not included, but many users rely on them to reach distant devices or convert between outlet shapes. It is important to use cords with adequate gauge and current rating for the inverter’s continuous watts. Thin or very long extension cords can cause voltage drop, heat buildup, and nuisance shutdowns under higher loads.

Cable or Adapter TypeTypical UseKey Specs to Match
AC charging cableCharge from wall outletInput watts, plug type, current rating
DC car charging cableCharge from 12 V vehicle socketVehicle socket rating, DC input limit
Solar adapter/leadConnect solar panelVoltage range, connector type, max amps
DC barrel cablePower DC devicesVoltage, polarity, barrel size
USB-C PD cableFast-charge phones/laptopsPD watt rating, cable quality
AC extension cordExtend AC outletsWire gauge, length, amp rating
Example values for illustration.

Related guides: Extension Cords and Power Strips: Safe Practices With Portable Power StationsCharging From a Car: What’s Safe, What’s Slow, and What Can BreakAC vs DC Power: How to Maximize Efficiency and Runtime

3. Real-World Setups: What You’ll Actually Need Beyond the Box

Once you understand the basic cable types, it becomes easier to plan what you need for specific scenarios. Here are common beginner use cases and the cables or adapters that often turn out to be essential.

Weekend camping with phones, lights, and a small fan

For a short camping trip, many people expect to plug everything straight into the portable power station. In practice, you may need:

  • Several USB-A or USB-C cables for multiple phones and power banks.
  • A USB-C PD cable rated for at least 60 W if you plan to charge a modern laptop.
  • A short, properly rated AC extension cord to position a small fan or light farther from the power station.
  • Optional 12 V DC cable if you are using a DC-powered camping fan or LED strip directly from the 12 V port.

The station likely includes an AC charging cable, but not the extra USB or DC leads for every device, so bringing your own matching cables is essential.

Road trip with car charging and fridge or cooler

On a road trip, you may want to keep the power station charged from the vehicle while it runs a 12 V fridge or cooler. In this scenario, you often need:

  • The DC car charging cable that fits the power station’s DC input.
  • A 12 V car-style cable for the fridge, plugged into the station’s 12 V socket.
  • Possibly a spare fuse or fused adapter if the fridge draws close to the socket’s limit.

Because vehicle sockets are usually limited to around 10–15 A, using cables and adapters rated for that current helps prevent blown fuses and intermittent shutdowns when the compressor starts (surge watts).

Home backup for router, CPAP, and small electronics

During power outages, many users want to run a Wi-Fi router, modem, CPAP machine, and phone chargers. To do this efficiently, you may need:

  • DC barrel cables or adapters that match your router or modem voltage and plug size, allowing you to run them from DC instead of the inverter, which can extend runtime.
  • A properly rated AC extension cord to place the CPAP near your bed while the power station stays in a safe location.
  • USB-C PD cables for tablets and phones to use the high-efficiency USB outputs.

Some CPAP machines also support direct DC input with a manufacturer-specific cable, which is usually not included with the power station. Using that instead of AC can reduce conversion losses and improve runtime.

Solar-powered off-grid weekend

If you plan to keep your portable power station topped up with solar panels, you will almost always need extra cables beyond what comes in the box. Typical needs include:

  • MC4 extension leads from the panels to a shaded area where the power station sits.
  • An MC4-to-barrel or MC4-to-Anderson adapter that matches the station’s solar input.
  • Possibly a Y-branch or parallel adapter if your station supports parallel panel connections within its voltage and current limits.

Without the correct solar adapters, your panels may sit unused, even though the power station supports solar charging on paper.

Worksite or DIY projects with power tools

Using a portable power station with power tools introduces higher surge watts and continuous load. You may need:

  • Heavy-duty AC extension cords with adequate gauge (lower AWG number) for the expected amps.
  • Shorter cords where possible to reduce voltage drop under load.
  • Plug adapters if your tools have different plug shapes than the station’s outlets.

While these accessories are simple, choosing the correct rating is vital to avoid nuisance tripping of the inverter or overheating cords when tools start up.

4. Common Cable Mistakes and How to Spot Problems Early

Many issues that users attribute to a “bad power station” actually come from mismatched or low-quality cables and adapters. Recognizing the warning signs early can save time and protect your equipment.

Underrated or overly long extension cords

Running high-wattage devices like kettles, heaters, or power tools through thin, very long extension cords can cause:

  • Warm or hot cable insulation.
  • Voltage drop, leading to devices stalling or shutting off.
  • Inverter overload or low-voltage protection trips, even when the device’s rated watts are within limits.

If you notice dimming lights, slow tool startup, or warm plugs, check the cord’s amp rating and consider a shorter, heavier-gauge cord.

Wrong barrel connector size or polarity

DC barrel connectors come in many sizes and polarity arrangements. Common mistakes include:

  • Using a plug that “almost fits” but is loose, causing intermittent power.
  • Reversing polarity when using generic adapters, potentially damaging the device.
  • Feeding 12 V into a device that expects 19 V or 24 V, which may cause failure to start.

Troubleshooting cues include devices that briefly power on then shut off, no response at all, or unusual heat near the connector. Always verify barrel size, voltage, and polarity markings before connecting.

Low-quality or mismatched USB-C PD cables

USB-C PD relies on communication between the power station, cable, and device to negotiate a PD profile. Problems arise when:

  • The cable is only rated for 3 A or 15–30 W, but you expect 60–100 W charging.
  • The cable is charge-only and does not support full PD communication.
  • The device requests a PD profile the port cannot provide, leading to fallback to lower power.

Symptoms include laptops charging very slowly, not charging while in use, or showing “plugged in, not charging.” Using a higher-rated PD cable that clearly lists its watt rating often resolves these issues.

Overloading car sockets and DC cables

Vehicle and 12 V sockets have limited current ratings. Drawing too much through an undersized DC cable or adapter can cause:

  • Blown fuses in the vehicle or power station.
  • Hot connectors or melted plastic around the plug.
  • Frequent shutdowns when a compressor or pump starts.

If a device repeatedly trips the socket or feels hot at the plug, reduce the load, shorten the cable, or use a higher-rated DC connector and fuse.

Using adapters that change shape but not voltage

Some plug adapters only change the physical shape of a plug without converting voltage or frequency. When combined with a portable power station’s AC output, this can lead to confusion about what is safe to connect. Always confirm that the device’s voltage and frequency requirements match the power station’s AC output before relying on a simple shape adapter.

5. Safety Basics for Using Cables and Adapters With Portable Power Stations

Portable power stations are designed with multiple layers of protection, but cable and adapter choices still play a major role in overall safety. Following a few high-level practices can reduce risks of overheating, shock, or damage to connected devices.

Match ratings, not just shapes

Two cables may look identical but have very different current or watt ratings. Always check:

  • The amp or watt rating printed on the cable or its packaging.
  • The maximum output of the port you are using (AC, DC, or USB).
  • The device’s voltage and current requirements on its label.

Use the lowest of these values as your safe operating limit. This prevents overloading a cable or adapter that could otherwise overheat.

Avoid daisy-chaining adapters and splitters

Stacking multiple plug adapters, splitters, or extension cords increases resistance and the chance of poor connections. This can lead to localized heating, arcing, and unreliable power delivery. Whenever possible, use a single, high-quality cable of the correct length instead of chaining several together.

Keep connections dry and off the ground

Moisture and conductive dust are major risks around power connections. For portable power stations used outdoors or in vehicles:

  • Keep cables and plugs off wet ground and away from puddles.
  • Avoid placing the power station directly on damp surfaces.
  • Use cable management to prevent tripping or pulling on connections.

If a cable or connector gets wet, disconnect it from all power sources and allow it to dry completely before reuse.

Do not modify or open cables or the power station

Cutting, splicing, or otherwise modifying power cables and adapters can defeat built-in protections and create shock or fire hazards. Similarly, opening the portable power station’s case or bypassing its internal protections is unsafe. If you need a different connector or length, purchase a properly rated cable or consult a qualified electrician for custom solutions.

Respect input and output limits

Every input (AC, DC, solar) and output (AC, DC, USB) on a portable power station has its own limit. Exceeding these can trip protections or, in extreme cases, damage the unit. Pay attention to:

  • AC inverter continuous watts and surge watts for short peaks.
  • DC port amp limits, especially for 12 V sockets.
  • Solar input voltage and current ranges.
  • USB and USB-C PD watt ratings per port.

If you are unsure whether a specific setup is safe, reduce the number of devices, shorten cables, and avoid running everything at maximum load simultaneously.

6. Caring for Your Cables and Adapters: Storage and Longevity

Good cable management and storage practices help maintain reliable connections and reduce the chance of failures at critical moments, such as during a power outage or while traveling off-grid.

Coiling and storing without stress

Repeatedly bending cables sharply or wrapping them too tightly around the power station can weaken internal conductors and strain reliefs. To extend cable life:

  • Use loose coils with gentle bends, avoiding tight loops.
  • Secure coils with soft ties or hook-and-loop straps instead of hard knots.
  • Avoid hanging heavy adapters by their cable, which can pull on connectors.

For USB-C and DC barrel cables, pay special attention to the connector ends, which are prone to damage from repeated flexing.

Labeling and organizing by function

As you add more cables and adapters for AC, DC, USB, and solar, it becomes easy to mix them up. Simple labeling and organization can prevent incorrect connections:

  • Use colored tags or labels to mark solar, car, and wall charging cables.
  • Group DC barrel adapters by voltage and plug size.
  • Keep high-wattage USB-C PD cables separate from low-power ones.

Storing everything in a dedicated pouch or case alongside the power station reduces the chance of leaving a critical cable behind.

Inspecting regularly for wear and damage

Before trips or storm seasons, visually inspect cables and adapters for:

  • Cracked or frayed insulation.
  • Loose, bent, or corroded pins.
  • Discoloration or melted areas near connectors.

If you notice any of these signs, retire the cable and replace it. It is better to discard a questionable cable than risk overheating or intermittent power during an emergency.

Protecting from heat, cold, and UV

Extreme temperatures and direct sunlight can degrade cable jackets over time. When storing your portable power station and accessories:

  • Keep them in a cool, dry location away from direct sun.
  • Avoid leaving cables in hot vehicles for long periods.
  • Use protective sleeves or conduit for cables that remain outdoors.

These steps help maintain flexibility and prevent cracking, especially for solar and outdoor extension cords.

Travel and vehicle storage tips

For users who keep their portable power station in a vehicle or RV, cable storage is especially important:

  • Use a small organizer or bag to keep AC, DC, USB, and solar cables separate.
  • Secure heavy adapters so they do not swing and stress connectors while driving.
  • Keep a spare basic charging cable (AC or DC) in case the primary one is misplaced.

Having a predictable place for every cable makes setup faster and reduces the chance of relying on improvised or unsafe substitutes.

Care PracticeApplies ToBenefit
Loose coilingAC, DC, USB, solarReduces internal conductor stress
Labeling by functionAll cables/adaptersPrevents misconnection and confusion
Regular inspectionHigh-use cablesEarly detection of wear and damage
Temperature controlOutdoor and vehicle-stored cablesPrevents jacket cracking and brittleness
Dedicated storage pouchTravel setupsKeeps critical cables with the power station
Example values for illustration.

7. Putting It All Together: Planning Your Cable and Adapter Kit

For beginners using portable power stations, the most effective approach is to treat cables and adapters as part of your core system, not afterthoughts. Start by listing the devices you want to power, how you plan to recharge the station (wall, car, solar), and where you will use it (home, vehicle, campsite, worksite). Then map each connection path from source to station to device, identifying which cables you already own and which you need to add.

In practice, a reliable kit usually includes: the original AC charging cable, a DC car charging cable, one or more solar adapters if you use panels, a few high-quality USB-C PD cables, several USB-A leads, at least one heavy-duty AC extension cord, and a small set of DC barrel adapters for routers, lights, or other DC devices. Keeping these organized and checked for wear ensures your portable power station is ready when you need it, with minimal surprises about what was or was not included in the box.

Specs to look for

  • AC charging input watts: Look for a wall charging cable and input that support roughly 150–800 W, depending on battery size, so the station can recharge in a reasonable time without overloading the cord.
  • DC car charging current rating: Choose car/DC cables rated for at least 10–15 A at 12 V to safely handle typical vehicle socket limits and avoid blown fuses during long drives.
  • Solar input voltage and connector type: Match solar cables and MC4 adapters to an input range around 12–50 V and ensure the connector type (barrel, Anderson-style, etc.) fits the station’s solar port.
  • USB-C PD cable watt rating: Use USB-C cables clearly rated for 60–100 W if you plan to fast-charge laptops or tablets, so the PD profile can deliver full power without throttling.
  • USB-A and USB-C port outputs: Check for 2–3 A at 5 V for basic USB-A and 18–65 W for USB-C PD ports, then match your cables so phones and laptops charge at their intended speeds.
  • AC extension cord gauge and length: For loads up to about 10–13 A, look for shorter cords with heavier gauge (for example, 14 AWG or thicker) to minimize voltage drop and heating when running appliances.
  • DC output voltage and barrel size: Confirm whether DC ports are regulated 12 V or higher (such as 24 V) and match barrel diameter and polarity to your devices to avoid no-start or damage.
  • Connector durability and strain relief: Prefer cables with reinforced ends and flexible jackets, especially for travel or outdoor use, to reduce failure at the connector over time.
  • Temperature and outdoor rating: For solar and extension cords used outside, look for insulation suitable for outdoor or higher-temperature environments so cables remain flexible and safe in the sun.

By focusing on these specs and planning your cable and adapter kit around how you actually use your portable power station, you can unlock its full potential while keeping your setup safe, efficient, and ready for future upgrades.

Frequently asked questions

What specs and features should I prioritize when choosing cables and adapters for a portable power station?

Prioritize matching amp/watt ratings, connector type and polarity, and the supported input/output voltage ranges. For USB-C, check the PD watt rating; for AC, confirm continuous and surge watt capability; for solar, verify compatible voltage range and connector type. Also consider cable gauge and length since thin or long cables increase voltage drop and limit performance.

How can I avoid common cable mistakes that lead to slow charging or tripped protections?

Always use cables and adapters rated for the port’s maximum watts and the device’s requirements, avoid undersized or overly long extension cords, and verify barrel size and polarity before connecting. Don’t daisy-chain adapters or rely on cheap, unmarked cables, since poor connections increase resistance and can cause thermal issues or protection trips.

What basic safety practices should I follow when using cables and adapters with a portable power station?

Check that every cable’s current or watt rating matches or exceeds the device and port limits, keep connections dry and off the ground, and avoid modifying cables or the power station. Regularly inspect cables for damage and replace any with frayed insulation, melted areas, or corroded pins to reduce fire and shock risks.

Are the cables included with a power station usually sufficient for connecting solar panels or specialty devices?

Often they are not; manufacturers typically include only basic wall and sometimes car charging cables, while solar panels and specialty devices frequently require MC4 adapters, Anderson connectors, or proprietary leads. Check the station’s input connector and voltage range and plan to buy matching adapters or extension leads if needed.

How do I choose the right USB-C PD cable for fast laptop charging?

Choose a USB-C cable explicitly rated for the wattage your laptop requires (commonly 60–100 W for laptops) and ensure it supports PD communication and the correct current (for example, an e‑marked 5 A cable for 100 W). Higher-quality, certified cables reduce negotiation failures and minimize the chance of the port falling back to lower power.

What maintenance steps extend the life of power cables and adapters?

Store cables in loose coils with gentle bends, keep them in a cool, dry place away from direct sunlight, and use soft ties or an organizer to prevent strain on connectors. Regularly inspect for cracks, fraying, or discoloration and replace any damaged items rather than attempting repairs.

Winter Use: Why Charging Slows in Cold Weather and How to Plan Around It

Portable power station charging slowly in cold winter weather at a campsite

Charging slows in cold weather because low temperatures reduce battery chemistry activity and trigger built‑in protection limits that cut charging current and input watts. Portable power stations automatically restrict charge rate, adjust voltage, or pause charging to avoid damage when the battery pack is too cold. That is why you see lower input watts, longer charge time, and sometimes “temperature” or “low temp” warnings on the display during winter use.

If you rely on a portable power station for winter camping, backup power, off‑grid cabins, or van life, cold‑weather charging behavior matters. Understanding how temperature affects charge rate, runtime, state of charge (SoC) accuracy, and solar input lets you plan around slower charging instead of being surprised by it. With a few simple strategies—insulating the unit, pre‑warming, adjusting your charge schedule, and choosing the right specs—you can keep winter performance predictable and safe.

This guide explains what is happening inside the battery, why your charge time estimate changes, how different chemistries behave in the cold, and what to look for when comparing portable power stations for cold‑weather use.

Cold-Weather Charging: What It Means and Why It Matters

Cold‑weather charging is any situation where you charge a portable power station while its battery is below normal room temperature, especially near or below freezing. In this range, the charger and battery management system (BMS) automatically change how fast the battery can accept energy.

For users, this shows up as reduced input watts, longer charge time, and sometimes a charge that stops before reaching 100% until the battery warms up. You might also see the estimated runtime jump around because the state of charge reading becomes less accurate when the cells are cold.

This matters because many people depend on portable power stations for critical winter tasks: running a CPAP overnight, powering communication devices, keeping a small heater fan or furnace blower running, or supporting tools on a job site. If you expect a two‑hour recharge from wall power or solar and it actually takes four hours in low temperatures, your entire power plan can fail.

Understanding cold‑weather charging helps you:

  • Estimate realistic charge time in winter conditions.
  • Avoid forcing the battery to charge when it is too cold, which can shorten its lifespan.
  • Decide where to place the power station (indoors vs. outdoors, insulated vs. exposed).
  • Choose models and specs that handle low temperatures better.

Instead of treating slow winter charging as a defect, it is more accurate to see it as a built‑in safety feature. Once you know how it works, you can plan around it.

How Temperature Affects Battery Charging Inside a Portable Power Station

Portable power stations rely on lithium‑based batteries, usually either lithium iron phosphate (LiFePO4) or lithium‑ion variants such as NMC. Both chemistries are sensitive to temperature, and their safe charging window is narrower than their safe discharging window.

At the cell level, low temperatures slow down the chemical reactions that move lithium ions between electrodes. When you try to push the same charging current into a cold cell, ions can plate onto the surface of the anode instead of inserting into it. This lithium plating is permanent damage that reduces capacity and can increase internal resistance and safety risk. To prevent this, the BMS and charger reduce current or stop charging when the battery is too cold.

Most portable power stations monitor:

  • Cell temperature: Internal sensors track how warm or cold the pack is.
  • Input current and power: The BMS caps the charge amps or watts based on temperature.
  • Voltage: The charger adjusts its profile (constant current/constant voltage) to stay within safe limits.

As the battery gets colder, several things happen:

  • Charge current limit drops: The system may cut maximum input from, for example, 400 W at room temperature down to 100–200 W or less in the cold.
  • Internal resistance rises: More energy is lost as heat, and the pack cannot accept high power efficiently.
  • Usable capacity shrinks temporarily: You might only see 60–80% of the usual watt‑hours available until the battery warms up.
  • SoC estimation becomes less accurate: Voltage‑based fuel gauges can misread charge level when the battery is cold, especially under load.

Some portable power stations include built‑in battery heaters or “low‑temperature charging” features. These systems divert part of the input power to warming the pack before allowing a higher charge rate. Others simply refuse to charge below a certain temperature, displaying a temperature warning instead of accepting power.

Solar charging in cold weather adds another layer. Solar panels often produce higher voltage in low temperatures, which can help reach the minimum MPPT input voltage. But the battery’s cold‑limited charge current still caps how much of that solar power can actually flow into the pack, so you might see the solar input fluctuate or sit below the panel’s rated watts.

Cold weather effects on portable power station charging and runtime. Example values for illustration.
Battery Temperature Typical Charge Power Limit Approx. Usable Capacity Common BMS Behavior
68°F (20°C) 80–100% of rated input (e.g., 400–600 W) 90–100% Normal charging, accurate SoC
41°F (5°C) 50–80% of rated input 80–95% Moderate current limit, slightly slower charging
32°F (0°C) 25–60% of rated input 70–90% Noticeable slowdown, possible warnings
14°F (-10°C) 0–30% of rated input 50–80% Severely limited or disabled charging

Real-World Winter Scenarios: What Slow Charging Looks Like

In practice, cold‑weather charging issues show up differently depending on how and where you use your portable power station. Seeing specific scenarios helps you recognize normal behavior versus real problems.

Winter Camping and Overlanding

Imagine winter camping with overnight lows around 20°F (−6°C). You leave your portable power station in the unheated tent vestibule, running LED lights and a small 12 V fridge. By morning, the battery is cold and at 40% SoC. When you connect a 400 W AC charger from a nearby cabin outlet, the display only shows 120–150 W of input and estimates 4–5 hours to full instead of the usual 2 hours.

This is typical behavior: the BMS is limiting current to protect the cold battery. If you move the unit inside the cabin for 30–60 minutes and then plug it in again, you may see the input rise to 300–400 W as the battery warms.

Van Life and RV Use in Freezing Conditions

For van dwellers, the power station might sit on the floor near a door, where temperatures overnight drop close to freezing. In the morning, you start driving and expect the alternator or DC‑DC charger to push 300 W into the station. Instead, you see 80–150 W for the first hour, slowly increasing as the van interior warms.

Solar input behaves similarly. On a clear, cold morning, your panels may be capable of 500 W, but the power station only accepts 200–250 W until the pack temperature rises. If you do not account for this delayed ramp‑up, you might assume something is wrong with your solar setup.

Emergency Backup During Winter Outages

During a winter power outage, you may keep the portable power station in an unheated garage to run a sump pump or charge phones. After several hours of use, you bring it inside to charge from a small generator. Because the pack is cold and partially depleted, the BMS may limit charge current, so your generator runs for longer than expected to refill the battery.

If you are powering sensitive loads like medical devices, the combination of reduced usable capacity and longer recharge time can be critical. Planning extra runtime margin and bringing the unit into a warmer space before charging becomes essential.

Job Sites and Outdoor Work

On winter job sites, portable power stations often sit on concrete or in the back of a truck. At 15–25°F (−9 to −4°C), tools may still run, but charging between tasks is slow. Even if you plug into a high‑power AC circuit, the unit might only accept a fraction of its rated input. Workers sometimes misinterpret this as a faulty charger when it is simply temperature‑limited charging.

Common Cold-Weather Mistakes and Troubleshooting Clues

Many winter charging problems are avoidable once you recognize how temperature interacts with charge rate and runtime. Here are typical mistakes and what to look for when troubleshooting.

Mistake 1: Leaving the Power Station Fully Exposed to the Cold

Storing the unit in the open bed of a truck, on frozen ground, or in an uninsulated shed leads to a very cold battery pack. Even if the display shows an acceptable ambient temperature, the cells themselves can be much colder, especially after sitting overnight. The result is slow or refused charging when you finally plug in.

Troubleshooting cue: If charge power is low and you see a temperature icon, snowflake symbol, or “low temp” message, move the unit into a warmer space and wait 30–60 minutes before trying again.

Mistake 2: Assuming Rated Input Watts Apply in All Conditions

Manufacturers list maximum AC and solar input at ideal temperatures. Users often plan charge time using these values without accounting for cold‑weather derating. In freezing conditions, actual input may be half—or less—of the rated figure.

Troubleshooting cue: Compare your observed input watts at room temperature to what you see in the cold. If the charger delivers full power indoors but not outdoors, temperature limits are the likely cause, not a defective adapter.

Mistake 3: Fast Charging a Very Cold Battery

Trying to force fast charging immediately after the unit has been in sub‑freezing conditions can stress the battery, even if the BMS allows some current. Repeatedly doing this can shorten long‑term capacity and increase internal resistance.

Troubleshooting cue: If the case feels very cold to the touch and you notice the fan running hard or the unit making more noise than usual during charging, pause and let it warm up before continuing.

Mistake 4: Misreading Winter Runtime as Permanent Capacity Loss

Usable capacity temporarily reduces in the cold, so your power station might appear to “shrink” in winter. Users sometimes assume the battery is worn out when it simply needs to warm up.

Troubleshooting cue: Run the same load test at room temperature and at near‑freezing temperatures. If capacity is normal indoors but lower outdoors, the battery is probably healthy and just cold‑limited.

Mistake 5: Blocking Ventilation While Trying to Insulate

Wrapping the power station tightly in blankets or foam to keep it warm can block air vents. During charging, this may cause overheating or force the BMS to throttle power for the opposite reason—too much heat.

Troubleshooting cue: If input watts drop after a few minutes of charging and the fan runs continuously, check that vents are clear and the unit can breathe while still being protected from the cold floor or direct drafts.

Cold-Weather Charging Safety Basics

Winter conditions add both cold‑related and general electrical safety concerns. Following a few high‑level rules helps protect you, your devices, and the battery pack.

  • Respect the specified temperature range: Never attempt to charge a portable power station below its stated minimum charging temperature. If the unit blocks charging, do not try to bypass protections.
  • Avoid DIY heating tricks: Do not use open flames, heating pads, or improvised heaters directly on the power station. Instead, bring it into a moderately warm space and let it equilibrate naturally.
  • Keep the unit dry: Snow, condensation, and slush can introduce moisture into ports and vents. Use weather‑resistant placement and keep the unit off wet ground.
  • Use rated cords and adapters: In cold weather, cables become stiff and more prone to cracking. Use properly rated, undamaged cords and avoid tight bends that could damage insulation.
  • Do not overload the inverter: Cold temperatures already stress the battery. Avoid running surge‑heavy loads near the inverter’s maximum continuous watt rating, especially when the battery is low and cold.
  • Monitor the unit while charging: In winter, check the display periodically for temperature warnings, unexpected shutdowns, or rapid swings in input power.
  • For home backup integration, use a professional: If you intend to connect a portable power station to home circuits, consult a qualified electrician and use proper transfer equipment rather than improvised wiring.

Winter Storage, Transport, and Long-Term Care

How you store and transport a portable power station in cold seasons has a major impact on both immediate performance and long‑term battery health.

Storing in Cold Climates

If you store the unit in a garage, shed, or RV over winter, aim for a location that stays above freezing when possible. Extreme cold does not usually cause immediate failure, but repeated deep cold cycles can accelerate aging.

  • Store at partial charge: Keeping the battery around 30–60% SoC for long storage reduces stress compared to 0% or 100%.
  • Avoid full discharge in the cold: Letting the battery sit empty in low temperatures can increase the risk of it falling into a deep‑discharge state that the charger may not recover.
  • Check periodically: Every 2–3 months, bring the unit into a warmer space, check SoC, and top up slightly if it has dropped significantly.

Transporting in Winter

When transporting a portable power station in a vehicle during winter:

  • Keep it inside the cabin rather than in an open bed if possible.
  • Use a padded case or insulated box to moderate rapid temperature swings.
  • Avoid leaving it for long periods in a locked, unheated car at sub‑freezing temperatures.

Pre-Warming Before Charging

Before connecting to AC, DC, or solar input after the unit has been in the cold:

  • Bring it into a space around 50–70°F (10–21°C) for at least 30 minutes.
  • Let internal condensation evaporate if it has moved from very cold to humid conditions.
  • Start with a moderate charge rate if adjustable, then increase once the battery has warmed.

Balancing Winter Use and Battery Lifespan

Occasional cold‑weather use is expected and supported by modern portable power stations, but repeated fast charging in very low temperatures can shorten lifespan. To balance performance and longevity:

  • Use the fastest charging modes mainly at moderate temperatures.
  • In harsh winter conditions, accept slower charging as a trade‑off for longer battery life.
  • Whenever possible, schedule heavy charging sessions for warmer parts of the day or indoors.
Winter storage and use guidelines for portable power stations. Example values for illustration.
Situation Recommended SoC Temperature Goal Charging Advice
Long-term winter storage 30–60% Above 32°F (0°C) if possible Top up briefly every 2–3 months
Daily winter use 20–80% Keep unit insulated from extreme cold Charge indoors or during warmer hours
Emergency outage 40–100% Indoor placement preferred Expect slower charging, plan extra time
Vehicle transport 30–80% Interior cabin instead of open bed Pre‑warm before high‑power charging

Related guides: Charging in Freezing Temperatures: Why It’s Risky and How to Avoid DamageWinter Storage Checklist: Keeping Batteries Healthy in the ColdTemperature Limits Explained: Safe Charging/Discharging Ranges and What Happens Outside Them

Planning Around Slow Winter Charging: Practical Steps and Key Specs

Planning for cold‑weather performance turns slow winter charging from an unpleasant surprise into a manageable constraint. Focus on three areas: how you use the unit, where you place it, and which specs you prioritize when choosing a portable power station.

Usage and Placement Strategies

  • Charge earlier and longer: In winter, assume your charge time might double compared to room‑temperature conditions. Start charging as soon as you have AC, DC, or solar available instead of waiting until the battery is low.
  • Keep the battery as warm as safely possible: Place the unit in a tent, cabin, or vehicle interior rather than fully outdoors. Use a box or soft insulation under and around it while keeping vents clear.
  • Prioritize critical loads: When capacity is reduced by cold, power essentials first (medical devices, communication, heating controls) and delay non‑essential loads until the battery is warmer and better charged.
  • Align solar with warmer hours: If you rely on solar input, angle panels for low winter sun and expect the best charging between late morning and mid‑afternoon when both irradiance and temperatures are higher.

Choosing Cold-Weather-Friendly Features

When evaluating portable power stations for use in cold climates, certain specifications and design features are especially important.

Specs to look for

  • Charging temperature range: Look for clearly stated minimum charging temperatures (for example, around 32–41°F / 0–5°C). A wider supported range means more flexibility in winter without manual pre‑warming.
  • Battery chemistry: Compare LiFePO4 versus other lithium‑ion chemistries. LiFePO4 often offers longer cycle life, while some NMC‑type packs may have slightly better cold‑temperature performance. Choose based on how often you expect sub‑freezing use.
  • Maximum AC and DC input watts: Higher rated input (e.g., 400–1,000 W) gives more headroom. Even when cold derating cuts this in half, you still get practical charge power for shorter winter top‑ups.
  • Solar input voltage and watt limits: A flexible MPPT range and higher solar watt capacity (for example, 300–800 W) help compensate for shorter winter days and lower sun angles.
  • Low-temperature charging protection: Look for explicit mention of low‑temp charging protection, including automatic current reduction or charge cutoff, to prevent lithium plating and extend battery life.
  • Built-in battery heating or pre-heat modes: Some systems can warm the battery using grid or solar input before full‑power charging. This feature can dramatically improve usability in consistently cold environments.
  • Display and app temperature readouts: A screen or app that shows pack temperature and clear temperature warnings helps you understand when slow charging is normal and when you should move or warm the unit.
  • Usable capacity at low temperatures: If available, compare stated or tested capacity at 32°F (0°C) versus 68°F (20°C). Smaller percentage drop means more reliable winter runtime.
  • Enclosure and port design: Recessed ports, protective covers, and robust cases help keep moisture and snow away from electrical contacts during outdoor winter use.
  • Cycle life and warranty: Higher cycle ratings and solid warranty coverage provide a buffer if you expect frequent cold‑weather charging, which is more demanding on the battery over time.

By combining realistic expectations about winter charge time with thoughtful placement and the right feature set, you can rely on a portable power station year‑round, even when temperatures drop well below freezing.

Frequently asked questions

What specifications and features matter most when buying a portable power station for cold weather?

Look for a clearly stated minimum charging temperature, a chemistry suited to your use (LiFePO4 or other lithium variants), and higher maximum AC/DC and solar input watts so derating still provides useful charge power. Built‑in preheat or battery‑heating modes, an MPPT with a wide input voltage range, and temperature readouts on the display or app are also valuable for winter reliability.

How does placing a power station on cold ground or leaving it in an unheated vehicle affect charging?

Cold placement lowers cell temperature, which increases internal resistance and triggers the BMS to reduce or stop charging to avoid lithium plating. That results in lower input watts and much longer charge times until the pack warms, so keeping the unit off frozen surfaces or inside a warmer space improves charging speed.

Is it safe to use external heaters or DIY heating methods to warm a battery before charging?

Using open flames, direct‑contact heating pads, or improvised heaters is unsafe and not recommended. The safer approach is to move the unit into a moderately warm environment or use manufacturer‑approved preheat modes; avoid methods that can overheat components or introduce moisture.

Why does solar seem to produce less charge power on cold mornings even when panels are sunny?

Cold air can improve panel output voltage and even efficiency, but the battery pack’s cold‑limited charge current still caps how much solar energy the BMS will accept. The MPPT may show higher panel power while the power station only accepts a lower wattage until the battery warms up.

How much longer should I expect charging to take at freezing temperatures?

Charge time can easily double or more near freezing compared with room temperature, depending on the unit and conditions. Expect significantly reduced input watts and plan for slower ramps; pre‑warming the pack or scheduling charging during warmer daylight hours shortens overall time.

Will frequent charging in cold weather permanently damage the battery?

Repeated fast charging while the pack is very cold increases the risk of lithium plating, which reduces capacity and raises internal resistance over time. Occasional cold‑weather use is generally supported, but regularly charging without proper preheating or BMS protection can accelerate degradation.

Portable Power Station vs Power Bank vs UPS: Which Backup Fits Your Gear?

Portable power station, power bank, and UPS compared side by side for device backup

For most people, the right backup is a portable power station for AC devices, a power bank for phones and tablets, and a UPS for desktop computers and network gear. The best choice depends on your wattage needs, runtime expectations, input limit for charging, and whether you care more about mobility or seamless battery backup.

When you compare a portable power station vs power bank vs UPS, you are really choosing between high-capacity AC power, compact USB charging, and instant switchover protection. Each handles surge watts, output ports, and battery management differently. Understanding basic specs like watt-hours, PD profiles, and inverter type makes it much easier to match the right backup power to your gear and avoid surprises.

This guide walks through how each option works, where it fits best, common mistakes, and what specs actually matter when you are planning for outages, travel, or everyday backup power.

Understanding Portable Power Stations, Power Banks, and UPS Units

All three devices store energy in batteries, but they are designed for different jobs. Knowing what each one is meant to do helps you avoid buying the wrong type of backup power.

Portable power stations are self-contained battery systems with AC outlets, DC ports, and USB ports. They are built to run appliances and electronics during outages, camping, or work on the go. Their main focus is higher power output and longer runtime for multiple devices.

Power banks are compact battery packs with USB or USB-C ports, sometimes with power delivery (PD) for laptops. They are optimized for portability and charging phones, tablets, earbuds, and small laptops, not for running AC appliances.

UPS (uninterruptible power supply) units sit between wall power and sensitive electronics like desktop PCs, servers, and routers. Their main job is to provide instant switchover when grid power fails and to filter or regulate voltage. They usually have modest runtime but very fast response.

Choosing between them matters because they solve different problems: keeping a workstation from crashing, keeping a phone charged on the road, or running a fridge or CPAP during an outage. Matching your gear and usage scenario to the right category is the foundation for every other decision about capacity, ports, and safety.

How Each Backup System Works and Key Power Concepts

Portable power stations, power banks, and UPS units all rely on rechargeable batteries, but their internal designs and power electronics differ.

A portable power station typically includes:

  • A large lithium battery pack rated in watt-hours (Wh)
  • A built-in inverter that converts DC battery power to AC outlets
  • DC outputs (like car sockets) and USB/USB-C ports
  • Charging inputs from wall outlets, car chargers, or sometimes solar panels

Power flows from the battery through an inverter to supply AC loads, and directly from DC regulators to USB and DC ports. Some models support pass-through power, where the unit can charge while powering devices, but this depends on the design and input/output limits.

A power bank is simpler. It usually has:

  • A smaller lithium battery pack
  • USB-A and/or USB-C ports with fixed or negotiable PD profiles
  • Basic charge and discharge control circuitry

There is no AC inverter; everything is DC. Power banks negotiate voltage and current with connected devices (for example, 5 V, 9 V, 12 V, or 20 V) up to a certain wattage limit. They are optimized for efficiency and small size, not whole-appliance power.

A UPS adds another layer: it continuously monitors wall power and switches to its internal battery and inverter when the input fails or goes out of range. Some UPS systems are line-interactive or double-conversion, which means they also correct voltage fluctuations and provide cleaner power. Switchover times are measured in milliseconds to keep computers and network gear running without rebooting.

Key concepts that apply across all three include:

  • Watt-hours (Wh): Battery energy capacity, which helps estimate runtime.
  • Watts (W): How much power a device draws at any moment.
  • Surge watts: Short bursts of higher power needed by some devices at startup.
  • Input limit: The maximum power the device can accept while charging.
  • Efficiency: Losses in inverters and regulators that reduce usable runtime.

Understanding these basics lets you compare very different products using the same language: how long they will run your gear and how safely they handle the load.

Backup Type Typical Use Output Style Runtime Pattern
Portable Power Station Outages, camping, AC appliances AC, DC, USB Hours to a day, depending on load
Power Bank Phones, tablets, small laptops USB / USB-C only Several recharges for small devices
UPS Desktop PCs, routers, servers AC only Minutes to an hour, enough to shut down
Example values for illustration.

Real-World Scenarios: Which Backup Fits Which Gear?

Comparing a portable power station vs power bank vs UPS becomes clearer when you map them to everyday situations and devices.

Mobile phones, tablets, earbuds, and handheld gaming devices are best served by power banks. They use low to moderate wattage through USB, and you often need them on the move. A compact power bank can provide multiple full charges without adding much weight to a bag.

Lightweight laptops and ultrabooks can work with either a higher-output power bank with USB-C PD or a small portable power station. Choose a power bank if you only need extra hours while traveling and you can charge from outlets regularly. Choose a portable power station if you also want to power other gear like cameras, drones, or small AC devices.

Desktop PCs, gaming rigs, and home office setups are classic UPS territory. A UPS can keep your system running long enough to save work and shut down safely, while also smoothing out brief sags and spikes in line voltage. Portable power stations can power desktops too, but they do not provide instantaneous switchover when the grid drops unless used with additional hardware, which complicates things.

Routers, modems, and network switches benefit from a UPS because they need uninterrupted power to maintain internet connections during short outages. Routers, modems, and network switches are usually more practical to keep on a small UPS near your networking gear than routing those devices through a distant portable power station.

Appliances like mini-fridges, CPAP machines, fans, and LED lights are where portable power stations shine. Their AC outlets and higher surge capacity make them suitable for running small appliances during longer outages or off-grid trips. They are also useful on job sites for power tools, as long as you respect surge and continuous watt limits.

Short, frequent outages vs long, rare outages also guide your choice. For short, frequent blips, a UPS is most valuable. For long outages, a portable power station with enough watt-hours and the ability to recharge from various sources is more effective. Power banks fill the gap of personal device charging in both scenarios.

In practice, many households use a mix: a UPS for the main computer and router, a portable power station for essential appliances and flexible AC power, and a few power banks scattered in bags and drawers for phones and small electronics.

Common Mistakes and Troubleshooting Power Limits

People often run into issues when they assume all battery backups behave the same. Recognizing common mistakes helps you troubleshoot problems before they damage gear or drain batteries too quickly.

1. Confusing watts and watt-hours

Watts describe how much power your gear draws; watt-hours describe how much energy the battery holds. A portable power station with 500 Wh and a 500 W inverter can theoretically run a 250 W device for about two hours, but only if you account for inverter losses and real-world efficiency. Mistaking these units leads to overestimating runtime.

2. Ignoring surge watts on appliances

Devices with motors or compressors, like fridges and some power tools, may need two to three times their running watts for a brief startup surge. If your portable power station or UPS only matches the running watts and not the surge, it may shut down or fail to start the device. Check both continuous and surge ratings.

3. Overloading USB ports on power banks

Power banks have total output limits. Plugging in multiple devices that collectively exceed the maximum output (for example, trying to pull 60 W from a bank rated for 30 W total) can cause ports to shut off or charging to slow dramatically. If your phone or laptop charges slowly, check both the PD profile and total output rating.

4. Using a UPS for long-duration loads

UPS units are designed primarily for short runtimes. Running a high-wattage desktop or multiple monitors for extended periods will drain the battery quickly and can overheat the UPS. If your UPS battery seems to die in minutes, calculate the total load and compare it to the unit’s VA/W rating and expected runtime chart.

5. Expecting seamless switchover from portable power stations

Most portable power stations are not designed as inline UPS replacements. When grid power fails, they do not instantly switch without interruption unless specifically engineered for that role. If your PC or sensitive gear reboots when you switch sources, it is a sign you are using the wrong type of backup for that task.

6. Overlooking input limits when recharging

Large portable power stations can take many hours to recharge if the input wattage is low. If your station accepts only 100 W of input but you expect it to refill a 1000 Wh battery in a couple of hours, you will be disappointed. Similarly, small power banks may not support high-wattage fast charging unless both the charger and cable match the required PD profile.

When troubleshooting, start by listing your devices, their wattage, and how long you need them to run. Compare those numbers with the backup’s continuous watts, surge watts, and watt-hour capacity. Many issues become obvious once you see the math.

Safety Basics for Battery Backup Devices

Portable power stations, power banks, and UPS units all pack significant energy into compact enclosures. Treating them with basic respect helps avoid overheating, damage, or fire risk.

Use within rated limits. Never exceed the maximum continuous watt rating or the maximum current per port. Running near the limit for long periods increases heat and stress on internal components.

Allow ventilation. All three device types need airflow, especially under heavy load or while charging. Avoid covering vents, stacking devices, or tucking them into tightly closed cabinets during use.

Protect from moisture and extreme temperatures. Keep units dry and away from direct rain, condensation, or spills. High heat accelerates battery wear and can trigger thermal protection; extreme cold reduces available capacity and may cause charging to pause until temperatures rise.

Use appropriate cables and adapters. For power banks and portable power stations, use cables rated for the voltage and current you need. Damaged or undersized cables can overheat. Avoid daisy-chaining multiple adapters or using improvised plug combinations.

Avoid DIY modifications. Do not open cases, bypass fuses, or modify battery packs. Internal battery management systems and protections are calibrated for the original design. If you need custom wiring or integration with home circuits, consult a qualified electrician rather than attempting panel connections yourself.

Store and transport safely. When traveling, especially by air, follow rules for lithium batteries. Prevent terminals from shorting, and avoid packing heavy objects that could crush or puncture the case.

By respecting these basics, you greatly reduce the chance of failures and help your backup power gear deliver its rated performance over many charge cycles.

Maintaining and Storing Your Backup Power Gear

Good maintenance practices extend the life of portable power stations, power banks, and UPS units and ensure they are ready when you need them.

1. Manage state of charge during storage

For long-term storage, many lithium-based systems do best when kept partially charged rather than full or empty. Check your device manual, but a common guideline is around 40–60% charge. For a portable power station used mostly for emergencies, top it up, then periodically check and recharge to keep it in that mid-range if you will not use it for months.

2. Cycle the battery periodically

Completely idle batteries can drift out of calibration. Every few months, lightly use and recharge your portable power station and power banks. For a UPS, perform a controlled test by safely shutting down connected equipment and letting the UPS run on battery for a short period, then recharge fully.

3. Keep firmware and software up to date

Some modern portable power stations and UPS units support firmware updates that improve charging profiles, efficiency, or safety behavior. If your device offers this, check for updates occasionally and follow the manufacturer’s instructions without interrupting the process.

4. Maintain a clean, stable environment

Dust buildup in vents can trap heat, especially for UPS units that run continuously. Periodically inspect and gently clean external vents. Keep all devices on stable surfaces away from direct sunlight, heaters, or very cold drafts.

5. Watch for aging signs

Shortened runtime, unusual noises from fans or relays, swelling cases, or strong odors are warning signs. If a power bank or portable power station gets noticeably hot under light load, or a UPS fails self-tests, retire or service the device rather than pushing it harder.

6. Label and organize

For households using multiple backup devices, label which gear is intended for which loads: one UPS for networking, one portable power station for appliances, specific power banks for travel. Keep matching cables nearby so you do not scramble for the right connector during an outage.

Device Type Check Interval Storage Charge Target
Portable Power Station Every 3–6 months Around half to two-thirds full
Power Bank Every 3–4 months Roughly 40–60% charged
UPS Self-test every 1–3 months Kept plugged in and topped off
Example values for illustration.

Related guides: Portable Power Station vs Power BankSurge Watts vs Running Watts: How to Size a Portable Power StationDo Portable Power Stations Work While Charging? Pass-Through vs UPS ModeHow to Estimate Runtime for Any Device: A Simple Wh Formula + 5 Worked Examples

Choosing the Right Backup and Key Specs to Compare

When deciding between a portable power station, power bank, and UPS, start with your primary goal: uninterrupted power for sensitive electronics, extended runtime for appliances, or mobile charging for personal devices.

If you need seamless protection for desktops and networking gear, a UPS is the right tool. Focus on enough runtime to save work and shut down cleanly rather than all-day operation. For running AC appliances and multiple devices during outages or off-grid trips, a portable power station offers the versatility and capacity you need. For daily convenience and travel, power banks keep phones, tablets, and small laptops topped up with minimal bulk.

It is common to combine all three: a UPS for your workstation and router, a portable power station for essential household loads and flexible AC power, and several power banks for personal electronics. The key is to match each device’s strengths to specific jobs rather than expecting a single solution to do everything perfectly.

Specs to look for

  • Battery capacity (Wh or mAh): For portable power stations, compare watt-hours (for example, 300–1500 Wh) to estimate runtime for your total load; for power banks, higher mAh (10,000–30,000 mAh) means more phone or laptop recharges.
  • Continuous and surge output (W): Check both continuous watts and surge watts; aim for at least 20–30% headroom above your devices’ combined running watts, and ensure surge capacity can handle motor or compressor startups.
  • Output types and PD profiles: Look for the right mix of AC outlets, DC ports, and USB/USB-C with PD levels that match your gear (for example, 18–65 W for laptops) so you do not need extra adapters.
  • Input charging power and options: Higher input wattage (for example, 100–500 W on larger stations) shortens recharge time; multiple input methods (wall, car, solar) add flexibility during extended outages.
  • Inverter waveform (for AC outputs): Pure sine wave inverters are generally better for sensitive electronics and some appliances; modified sine wave may be acceptable for simple resistive loads but can cause noise or heat in others.
  • UPS capacity and runtime rating: For UPS units, compare VA/W ratings and manufacturer runtime charts at 50–80% load to ensure you get at least several minutes to shut systems down safely.
  • Cycle life and battery chemistry: Look for approximate cycle life (for example, 500–3000 cycles to a given percentage of original capacity) and note whether the chemistry is typical lithium-ion or a longer-life variant, which affects long-term value.
  • Weight, size, and portability: For power stations and power banks, balance capacity against portability; a 5–10 lb station is easier to move frequently, while larger units may be better as semi-permanent outage backups.
  • Safety certifications and protections: Check for overcurrent, overvoltage, short-circuit, and temperature protections, plus relevant safety marks, to reduce risk when running higher loads or using the device frequently.
  • Noise level and cooling: Fans in portable power stations and UPS units can be noticeable; if you plan to use them in bedrooms or quiet offices, consider typical fan behavior under light and heavy loads.

By comparing these specs against your actual devices and usage patterns, you can confidently choose whether a portable power station, power bank, UPS, or a combination of all three is the best fit for your backup power needs.

Frequently asked questions

What specs and features matter most when choosing between a portable power station, power bank, and UPS?

Key specs include battery capacity (Wh or mAh), continuous and surge watt ratings, available output types and PD profiles, input charging power, inverter waveform, and safety protections. Match capacity to your runtime needs, ensure watt ratings exceed your total load, and confirm the ports and PD levels fit your devices.

How can I estimate how long a backup unit will run my devices?

Divide the battery capacity in watt-hours by the device’s watt draw to get a baseline runtime, then reduce the result to account for converter or inverter losses (typically 10–20%). For multiple devices, add their wattages to calculate total load before dividing. This gives a practical runtime estimate to plan around.

What is a common mistake people make when sizing backup power?

A frequent mistake is confusing watts (instantaneous power draw) with watt-hours (stored energy), which leads to overestimating runtime. Other common errors include ignoring surge demands for motors and compressors and overlooking input limits that make recharging slow. Double-check continuous and surge ratings plus input wattage to avoid these pitfalls.

Are battery backup devices safe to use at home?

Yes, when used according to manufacturer guidelines: keep units ventilated, avoid moisture and extreme temperatures, and do not exceed rated outputs or modify internals. Use properly rated cables and follow storage and transport rules for lithium batteries. Retire or service units that show swelling, strong odors, or abnormal heat.

Can I use a portable power station as a UPS for my desktop or router?

Most portable power stations do not provide true instant switchover and may cause brief interruptions when grid power fails, which can reboot sensitive equipment. Some models offer UPS-like passthrough, but you should verify the device explicitly supports seamless switchover. For guaranteed uninterrupted protection, a purpose-built UPS is typically the safer choice.

How long will it take to recharge a large portable power station during an outage?

Recharge time equals battery capacity divided by the station’s maximum input wattage, adjusted for charging inefficiency; faster AC or car inputs recharge quicker than solar. Solar recharging is subject to panel wattage and sunlight variability, so plan for slower and variable recharge rates. Check the unit’s maximum input rating to set realistic expectations.

Energy Budget for a Power Outage: Lights, Phone, Internet, and Small Appliances

Portable power station running lights phone internet and small appliances during a power outage

An effective energy budget for a power outage means estimating how many watt-hours you need to keep lights, phone, internet, and small appliances running for your target runtime. You match that total to the capacity and output limits of a portable power station so you do not overload it or run out of power too soon. Thinking in terms of wattage, watt-hours, surge watts, and battery capacity helps you plan realistically instead of guessing.

When you map out your loads and hours of use, you can see whether a compact backup unit is enough for basic communication and lighting or if you need a larger capacity setup for extended blackouts. This same method works whether you are calculating a simple phone-charging kit, a work-from-home backup for your modem and router, or a small emergency power system for fans and a compact fridge. The goal is a clear, repeatable process you can adjust as your needs or devices change.

Understanding Your Energy Budget During an Outage

An energy budget for a power outage is a simple plan that matches what you want to power with how much stored energy you actually have. Instead of asking, “How long will this portable power station last?” you ask, “How many watt-hours will my essential devices use, and does my battery capacity cover that?”

For portable power stations, three ideas matter most:

  • Power (watts): how much power devices draw at a given moment.
  • Energy (watt-hours): how long that power draw can be sustained.
  • Capacity: the size of the battery, usually in Wh, which sets your total energy limit.

During an outage, you typically care about four categories of loads:

  • Lights (LED lamps, lanterns, small work lights).
  • Communication (phones, tablets, laptops).
  • Internet (modem, router, maybe a low-power switch).
  • Small appliances (fans, compact fridge, coffee maker, microwave in short bursts).

The reason this energy budgeting matters is that battery capacity is finite. Every extra light left on or appliance cycled longer than planned eats into runtime. By assigning rough watt and watt-hour numbers to each item, you can decide what to prioritize, what to limit, and whether your existing power station capacity is enough for a 4-hour, 8-hour, or multi-day outage.

Key Concepts: Watts, Watt-Hours, and Portable Power Capacity

To build a reliable outage plan, you need to understand how power and energy relate to a portable power station’s capacity and output limits.

Power (Watts) vs. Energy (Watt-Hours)

Watts (W) measure the rate of power use. A 10 W LED bulb uses 10 watts whenever it is on. A 60 W laptop adapter uses up to 60 watts while charging at full speed.

Watt-hours (Wh) measure energy over time. The basic formula is:

Energy (Wh) = Power (W) × Time (hours)

If that 10 W bulb runs for 5 hours, it uses 10 W × 5 h = 50 Wh. A 60 W laptop charger running for 2 hours uses about 120 Wh.

Portable Power Station Capacity

Portable power stations list a battery capacity such as 300 Wh, 500 Wh, 1000 Wh, or more. This is the theoretical energy the battery can store. In practice, usable energy is lower because of inverter and conversion losses, often leaving you with roughly 80–90% of the rated capacity for AC loads.

Usable energy estimate:

Usable Wh ≈ Rated Wh × 0.8 to 0.9

For a 500 Wh unit, that might mean 400–450 Wh available to run AC devices.

Continuous Watts and Surge Watts

Power stations also list a continuous output (for example, 300 W, 600 W, 1000 W) and a higher surge or peak rating. Continuous watts is what it can safely output for long periods. Surge watts handle brief startup spikes, such as from a small compressor or motor.

For an outage energy budget, you must keep your total running loads under the continuous watt rating and make sure any devices with motors fall under the surge rating when they start.

Input Limits and Recharge Strategy

Your energy budget also depends on how quickly you can recharge. Portable power stations have an input limit in watts for AC charging, solar input, or car charging. If the input limit is low, you cannot replace energy as fast as you use it, which shortens practical runtime over a long outage.

Thinking in terms of daily energy use vs. daily recharge helps you decide whether you can sustain internet and lighting for multiple days or if you must conserve aggressively.

DeviceTypical Power (W)Example Daily Use (hours)Approx. Energy Use (Wh)
LED room light8–12432–48
Wi​-Fi router + modem15–25690–150
Smartphone charging5–15210–30
Laptop charging40–70280–140
Small fan20–40480–160
Compact fridge (cycling)50–80 avg.8 (on/off)400–640
Example values for illustration.

Real-World Energy Budget Examples for Lights, Phone, Internet, and Small Appliances

Once you understand watts and watt-hours, you can build sample energy budgets to see how far different portable power station capacities will go.

Scenario 1: Basic Communication and Safety Lighting (Short Outage)

Goal: keep a small household connected and safely lit during a 4–6 hour outage in the evening.

  • Two LED bulbs at 10 W each, on for 4 hours: 2 × 10 W × 4 h = 80 Wh.
  • Wi​-Fi router + modem at 20 W for 4 hours: 20 W × 4 h = 80 Wh.
  • Two smartphones charging at 10 W each for 1.5 hours: 2 × 10 W × 1.5 h = 30 Wh.
  • Occasional laptop top-up at 50 W for 1 hour: 50 Wh.

Total: about 240 Wh.

A portable power station with around 300–400 Wh usable capacity could comfortably handle this scenario without running flat, assuming you stay under its continuous watt rating (in this case, your peak draw is around 100–120 W).

Scenario 2: Work-from-Home Backup for a Full Day

Goal: keep internet, a laptop, and modest lighting running for remote work during an 8–10 hour daytime outage.

  • Wi​-Fi router + modem at 20 W for 9 hours: 180 Wh.
  • Laptop at an average of 45 W for 6 hours (periodic charging): 270 Wh.
  • One LED desk lamp at 8 W for 6 hours: 48 Wh.
  • Phone charging at 10 W for 2 hours: 20 Wh.

Total: about 520 Wh.

With inverter losses, you would want a power station rated around 700–800 Wh or more to have margin for higher draw moments, background losses, and any unplanned use, such as briefly running a low-power fan.

Scenario 3: Overnight Comfort with a Fan and Small Fridge

Goal: maintain some food cooling and basic comfort overnight (8–12 hours).

  • LED room light at 10 W for 3 hours in the evening: 30 Wh.
  • Wi​-Fi router + modem at 20 W for 4 hours: 80 Wh.
  • Small fan at 30 W for 8 hours: 240 Wh.
  • Compact fridge averaging 60 W over 10 hours (cycling): 600 Wh.

Total: about 950 Wh.

For this scenario, a 1000 Wh class portable power station may be just adequate, but you would want to watch fridge duty cycle, fan speed, and unnecessary loads. If you cannot recharge during the day, using the fridge only intermittently or pre-chilling items before the outage becomes important.

Scenario 4: Stretching Limited Capacity Over Multiple Days

Goal: make a mid-size power station last through a 2–3 day outage by limiting daily use.

Assume a 1000 Wh unit with about 800 Wh usable each day after some recharge from solar or occasional AC input. You might plan:

  • LED lighting: 2 bulbs at 8 W each for 3 hours: 48 Wh.
  • Internet: router + modem 20 W for 3 hours: 60 Wh.
  • Phones and a tablet: 30 Wh.
  • Laptop: 50 W for 2 hours: 100 Wh.
  • Small fan: 25 W for 4 hours: 100 Wh.

Total: about 338 Wh per day.

This leaves margin for inverter losses and unplanned draws while giving you critical services each day. The key is strict control of hours used, especially for fans and internet, which can quietly consume a lot of watt-hours if left on continuously.

Common Energy Budget Mistakes and How to Spot Problems

Energy budgeting for outages is straightforward, but several recurring mistakes cause people to run out of power earlier than expected or overload their portable power station.

Underestimating Runtime for Always-On Devices

Many users underestimate how long they leave certain devices on. Routers, modems, and lights often run far longer than planned. A 20 W router running for 12 hours uses 240 Wh by itself. If your battery is only 300–400 Wh usable, that single device can dominate your energy budget.

Troubleshooting cue: if your battery drains faster than your paper calculations, check which devices stayed on continuously and how many hours they actually ran.

Ignoring Inverter and Conversion Losses

Calculations that simply sum watt-hours of devices and compare directly to rated battery capacity ignore conversion losses. Running AC loads through an inverter may reduce usable energy by 10–20% or more.

Troubleshooting cue: if you expect 500 Wh of use from a 500 Wh unit but see shutdown earlier, assume only 400–450 Wh are practically available and rebuild your plan with that in mind.

Overloading Continuous Watt Capacity

Even if you have plenty of watt-hours, you can still trip the inverter by exceeding the continuous watt rating. For example, a coffee maker at 900 W plus a microwave at 700 W will overload a 1000 W power station, even if you only run them briefly.

Troubleshooting cue: if the AC output shuts off when you start a high-power appliance, add up the watt ratings of everything running at that moment and compare to the power station’s continuous output spec.

Forgetting Surge Watts for Motor Loads

Small fridges, pumps, and some fans draw a higher surge current at startup. If that surge exceeds the power station’s surge rating, the unit can fault or shut down even though the running watts look safe on paper.

Troubleshooting cue: if a device trips the power station only at startup, but runs fine when started alone, you are likely at or above the surge limit when other loads are present.

Not Accounting for Charging Efficiency of Phones and Laptops

Charging electronics is not perfectly efficient. A 60 W laptop adapter may draw close to its rating even when the laptop battery is nearly full, then taper off. Fast-charging phones at high PD profiles can also draw more than expected for a short period.

Troubleshooting cue: if runtime is shorter than expected when fast-charging, consider reducing charging speed, staggering device charging, or using lower-power USB outputs instead of AC adapters.

Safety Basics When Using Portable Power for Outages

Safety is as important as runtime when using portable power stations during an outage. High-capacity batteries and inverters can deliver significant current, so basic precautions help prevent damage and injury.

Avoid Overloading Outlets and Cords

Even if your power station can supply 1000 W, the cords and power strips you use must be rated for the loads you plug into them. Use heavy-duty extension cords for higher-wattage devices and avoid daisy-chaining multiple power strips.

Keep total loads within the power station’s continuous watt rating and within the limits of each outlet or extension cord. If cords feel hot to the touch, reduce the load or replace them with higher-rated ones.

Ventilation and Heat Management

Portable power stations contain electronics and batteries that generate heat under load and while charging. Place the unit on a hard, flat surface with adequate airflow around vents. Avoid covering it with blankets or clothing, and keep it away from direct heat sources.

High temperatures reduce battery life and can trigger thermal protection, shutting the unit down when you need it most.

Indoor Use and Appliance Selection

Use only electric devices with a portable power station. Never try to power fuel-burning heaters or similar appliances designed for direct fuel use through a battery-based system. For heat, rely on safe electric space heaters only if your power station and wiring can handle the load, and even then, use them sparingly because they draw large amounts of power.

For cooking, small electric appliances such as low-wattage kettles or compact induction plates can work in short bursts if their wattage is within your power station’s limits.

High-Level Connection Guidance

Do not attempt to wire a portable power station directly into your home’s electrical panel or circuits without a proper transfer device and a qualified electrician. Backfeeding a home system can be dangerous to you and to utility workers.

Instead, plug essential devices directly into the power station or into appropriately rated extension cords. If you need whole-circuit backup, consult a licensed electrician about safe, code-compliant options.

Battery and Child Safety

Keep the power station out of reach of small children and pets, especially during outages when the unit may be on the floor and surrounded by cords. Do not place liquids on top of the unit and avoid operating it in damp or wet locations.

Maintaining and Storing Your Portable Power for Reliable Outage Use

A well-maintained portable power station is much more likely to deliver its rated capacity during an unexpected outage. Batteries age over time, and poor storage habits can significantly reduce runtime when you need it most.

Regular Top-Ups and Exercise Cycles

Most modern portable power stations prefer to be stored partially charged rather than completely full or empty. Check the manufacturer’s guidance, but a typical recommendation is to keep the battery between about 30% and 80% when stored long term.

Every few months, it is helpful to:

  • Charge the unit to a moderate level.
  • Run a few typical devices (lights, router, phone) for a few hours.
  • Recharge it again to your preferred storage level.

This light exercise helps the battery management system stay calibrated and confirms that your energy budget estimates still match real-world behavior.

Storage Temperature and Environment

Store your power station in a cool, dry place away from direct sunlight and extreme temperatures. High heat accelerates battery degradation, while very low temperatures can temporarily reduce capacity and may prevent charging.

During winter, avoid leaving the unit in an unheated garage for long periods if you expect to need it quickly. Bring it indoors so it can deliver closer to its rated capacity during a cold-weather outage.

Monitoring Capacity Over Time

Batteries slowly lose capacity with age and use. Over several years, you may notice that your power station does not last as long as it did when new. To track this, occasionally compare your expected runtime for a known set of loads with what you actually get.

If you see a consistent drop, adjust your energy budget by reducing daily watt-hour expectations or planning for an earlier recharge. In some cases, you might need to upgrade to a larger capacity unit or add a secondary system to cover longer outages.

Cable and Port Care

Inspect power cords, DC cables, and USB leads for wear, fraying, or loose connectors. Damaged cables can cause intermittent charging, wasted energy, or even short circuits. Replace questionable cables and avoid sharply bending or pinching them in doors or windows.

Keep ports clean and free of dust. Gently unplug connectors by the plug body rather than pulling on the cable to extend their life.

Keeping an Updated Outage Plan

Your energy budget should evolve as your devices and household needs change. If you add a more powerful router, multiple laptops, or extra lighting, revisit your watt and watt-hour estimates. Keep a simple written list of priority loads and their approximate consumption so you can make quick decisions during an outage.

Maintenance TaskRecommended FrequencyBenefit to Outage Readiness
Charge to storage level (e.g., 40–60%)Every 1–3 monthsReduces battery stress and preserves capacity
Run test load (lights, router, phone)Every 3–6 monthsVerifies real runtime vs. energy budget
Inspect cables and portsEvery 6 monthsPrevents power loss from damaged wiring
Check storage environmentSeasonallyEnsures safe temperatures and dryness
Update device list and watt estimatesAnnually or after major changesKeeps outage plan aligned with actual needs
Example values for illustration.

Related guides: Portable Power Station Buying GuideCan a Portable Power Station Replace a UPS?Running a Router and Modem During a Power Outage: How Many Hours Can You Get?

Practical Takeaways and Specs to Look For in a Portable Power Station

Planning an energy budget for a power outage comes down to three steps: list the devices you truly need, estimate their watt-hour use over the hours you expect to be without grid power, and choose a portable power station whose usable capacity and output ratings comfortably cover that total.

For lights, phone, internet, and a few small appliances, many households find that keeping daily use under a few hundred watt-hours is realistic if they prioritize and avoid running high-wattage devices continuously. Short, high-power tasks (like making coffee or briefly using a microwave) are possible if they fit within the inverter’s continuous and surge ratings and do not consume too much of your limited energy budget.

As you fine-tune your plan, remember that conservation is often the easiest “upgrade.” Dimming or reducing lights, limiting router uptime, and staggering phone and laptop charging can extend runtime dramatically without changing any hardware.

Specs to look for

  • Battery capacity (Wh) – For basic lights, phone, and internet, look for roughly 300–800 Wh; for adding small appliances or multi-day use, 800–1500 Wh or more. Higher capacity extends runtime but adds weight and cost.
  • Usable continuous AC output (W) – Aim for at least 300–600 W for lights, router, and electronics; 800–1200 W if you plan to run a compact fridge, microwave, or coffee maker briefly. This determines what you can run at the same time.
  • Surge/peak watt rating – Choose a unit whose surge rating comfortably exceeds the startup draw of any motor loads (fans, small fridge). A surge rating around 1.5–2× the continuous rating offers more headroom for brief spikes.
  • Number and type of outlets – Look for a mix of AC outlets, USB-A, and USB-C (including higher-wattage PD profiles such as 45–100 W) to charge phones and laptops efficiently without extra adapters. More ports allow simultaneous charging without overloading any one outlet.
  • Charging input options and max input (W) – A higher AC and solar input limit (for example, 100–400 W) lets you recharge faster between outages or during daytime. Multiple input paths (AC, car, solar) add flexibility in emergencies.
  • Display and monitoring – A clear screen showing remaining percentage, estimated runtime, input/output watts, and error indicators helps you manage your energy budget in real time instead of guessing.
  • Efficiency and inverter type – A pure sine wave inverter with good efficiency reduces wasted energy and works better with sensitive electronics and some small appliances. Higher efficiency means more usable watt-hours from the same capacity.
  • Battery chemistry and cycle life – Look for batteries rated for many charge cycles (for example, 500–3000 cycles to a given percentage of original capacity). Longer cycle life supports years of seasonal tests and real outages without major capacity loss.
  • Weight, size, and portability – Consider whether you need to move the unit between rooms or locations. Lighter, more compact models are easier to deploy quickly, while heavier, higher-capacity units may be better as semi-permanent home backups.
  • Built-in protections and certifications – Features such as overcurrent, overvoltage, short-circuit, and temperature protection, plus relevant safety certifications, help ensure safe operation under varying loads during outages.

By matching these specs to your calculated energy budget and realistic usage patterns, you can choose and use a portable power station that keeps your essential lights, communication, internet, and small appliances running smoothly through most outages.

Frequently asked questions

Which specifications should I prioritize when selecting a portable power station for outage use?

Prioritize battery capacity in watt-hours (Wh) to meet your energy needs, the continuous AC output (W) so you can run required devices simultaneously, and the surge rating to handle motor start-ups. Also consider usable port types (AC, USB-C PD), input recharge power (for solar or AC charging), inverter efficiency, and monitoring features to manage runtime effectively.

How do people most often miscalculate the battery capacity they need?

Common miscalculations come from assuming rated Wh equals usable energy, ignoring inverter/conversion losses, and underestimating how long always-on devices (like routers) run. Failing to account for surge draws or frequent fast-charging spikes can also make real-world runtime much shorter than paper estimates.

What are the basic safety steps for using a portable power station indoors during an outage?

Place the unit on a hard, flat surface with good ventilation, keep it dry and away from children and pets, and use properly rated cords and outlets. Never backfeed household wiring without a licensed electrician and a transfer switch, and avoid operating fuel-burning appliances with a battery-based station.

Can a 500 Wh power station run a home router and charge phones for a day?

Yes, typically a 500 Wh unit has about 400–450 Wh usable after losses; a 20 W router could run for roughly 20 hours on 400 Wh, and phone charges generally consume only tens of watt-hours each. Actual runtime depends on router draw, number of phone charges, and inverter efficiency.

Is solar a practical way to recharge a portable power station during extended outages?

Solar can be practical if the power station supports solar input and your panel array can deliver near the unit’s max input rating; clear weather and properly sized panels improve recharge speed. Expect variability from weather and allow for slower recharge on cloudy days, so factor daily recharge potential into your energy budget.

What are the easiest ways to extend a power station’s runtime without buying a larger battery?

Reduce consumption by dimming or limiting lighting hours, staggering and slowing device charging, preferring efficient DC/USB charging over AC adapters, and turning off routers or fans when not needed. Pre-chilling food, minimizing high-wattage appliance use, and strict scheduling of essentials all help stretch available watt-hours.

300Wh vs 500Wh vs 1000Wh: Choosing Capacity for Your Use Case (With Examples)

Comparison of 300Wh, 500Wh, and 1000Wh portable power station capacities with typical device icons

300Wh, 500Wh, and 1000Wh portable power stations mainly differ in how long they can run your devices and what loads they can realistically support. In practice, capacity affects runtime, recharge time, weight, and how many devices you can power at once. When people search for terms like runtime calculator, watt-hour capacity, surge watts, or off-grid backup, they are really asking: how big does my battery need to be for my specific use case?

This guide explains 300Wh vs 500Wh vs 1000Wh in plain language, then walks through real-world examples such as camping, CPAP backup, laptops, fridges, and small power tools. You will see how watt-hours, inverter efficiency, and continuous vs surge watts all interact so you can estimate runtime and avoid overloading. By the end, you will know which capacity range fits your needs today—and which specs to prioritize if you later compare different portable power stations.

Understanding 300Wh, 500Wh, and 1000Wh: What Capacity Really Means

Watt-hours (Wh) measure how much energy a portable power station can store. A 300Wh unit can theoretically deliver 300 watts for one hour, 150 watts for two hours, and so on. A 500Wh model stores more energy, and a 1000Wh model roughly doubles that again.

In simple terms:

  • 300Wh: Suited for light loads and short trips—phones, cameras, small lights, and a laptop for part of a day.
  • 500Wh: A mid-range option—better for overnight use, running more devices at once, or powering small appliances briefly.
  • 1000Wh: A larger battery bank—suitable for longer runtimes on fridges, CPAP machines, or multiple laptops and lights.

Actual runtime depends on load wattage, inverter efficiency, and how far the battery is discharged. Most portable power stations use an inverter to convert DC battery power to AC; this conversion is not 100% efficient, so real-world runtimes are lower than simple math suggests.

Capacity matters because it determines:

  • How long you can run critical devices (runtime).
  • How many devices you can power at once without draining the battery too quickly.
  • How often you need to recharge from wall outlets, solar panels, or vehicle DC ports.
  • Weight and size—the higher the capacity, generally the bulkier the unit.

Choosing between 300Wh, 500Wh, and 1000Wh is about matching stored energy to your typical daily consumption and backup needs, not just picking the biggest number.

How Capacity, Watts, and Runtime Work Together

To compare 300Wh vs 500Wh vs 1000Wh meaningfully, it helps to understand how watt-hours, watts, and runtime interact.

Basic runtime estimate (ignoring losses):

Runtime (hours) ≈ Battery capacity (Wh) ÷ Device load (W)

Real use is more complex because of inverter efficiency and battery management systems. A more realistic quick rule is:

Usable Wh ≈ Rated Wh × 0.8 (assuming around 80% overall efficiency and some reserve capacity).

So, approximate usable energy:

  • 300Wh → about 240Wh usable
  • 500Wh → about 400Wh usable
  • 1000Wh → about 800Wh usable

Example: A 60W laptop charger on a 500Wh unit:

  • Usable energy ≈ 400Wh
  • Runtime ≈ 400Wh ÷ 60W ≈ 6.6 hours of continuous charging

Key concepts that affect your choice:

  • Continuous output (W): The maximum power the inverter can supply continuously. A 300Wh unit might provide 200–300W continuous, while a 1000Wh unit can often support 800–1200W or more, depending on design.
  • Surge or peak watts: Short bursts for starting motors or compressors. Even if capacity is high, low surge watts can prevent starting devices like fridges or some power tools.
  • Input limits: How fast the station can recharge from AC, car DC, or solar. Larger batteries (1000Wh) usually take longer to refill, especially if the input wattage is modest.
  • Depth of discharge: Many systems reserve some capacity to protect the battery, so you rarely get 100% of the rated Wh.

The right capacity is the one that gives you enough usable watt-hours for your daily or overnight loads, within the continuous and surge watt limits of the power station.

Comparison of 300Wh, 500Wh, and 1000Wh capacities, typical continuous output ranges, and example runtimes for a 60W load. Example values for illustration.
Rated Capacity Approx. Usable Wh* Typical Continuous Output Range Est. Runtime @ 60W Load
300Wh ~240Wh 150–300W ~4 hours
500Wh ~400Wh 300–600W ~6.5 hours
1000Wh ~800Wh 600–1200W ~13 hours

Real-World Use Cases: 300Wh vs 500Wh vs 1000Wh

Looking at specific scenarios makes it easier to choose between 300Wh, 500Wh, and 1000Wh. These examples assume around 80% usable capacity and typical device wattages.

Light travel, day hikes, and short work sessions (300Wh)

  • Phones and small devices: A modern smartphone battery is roughly 10–15Wh. With 240Wh usable in a 300Wh unit, you could get 10–15 full phone charges, plus some extra for lights.
  • Laptop and camera: A 60W laptop plus a 10W camera charger might draw ~70W. Estimated runtime: 240Wh ÷ 70W ≈ 3.4 hours of continuous charging.
  • LED lighting: Two 5W LED lights (10W total) could run for 240Wh ÷ 10W ≈ 24 hours.

A 300Wh power station works well for single-day events, light vanlife work sessions, or as a compact backup for small electronics.

Weekend camping and basic home backup (500Wh)

  • CPAP machine (with DC adapter, ~40W average): 400Wh usable ÷ 40W ≈ 10 hours. Many users can get a full night or more, depending on settings and humidifier use.
  • Laptop + phone charging + lights: Suppose 60W laptop + 10W phone + 10W lights = 80W. Runtime: 400Wh ÷ 80W ≈ 5 hours of continuous use, often enough for an evening’s work and entertainment.
  • Small cooler or mini-fridge: A very efficient 60W average-draw cooler might run ~6.5 hours. Real fridges cycle on and off, so practical runtime can be longer, but 500Wh is still better for short-term rather than multi-day refrigeration.

A 500Wh unit is a versatile mid-size option for weekend camping, short power outages, or portable work setups where you need more headroom than a 300Wh can offer.

Longer outages, RV use, and heavier loads (1000Wh)

  • Household fridge: A modern fridge may average 80–150W over time. With 800Wh usable, a realistic runtime might be 5–8 hours, depending on efficiency and how often the compressor cycles. It is not full-house backup, but it can bridge shorter outages.
  • Multiple laptops and devices: Two 60W laptops + 20W of phones and lights ≈ 140W. Runtime: 800Wh ÷ 140W ≈ 5.7 hours continuous, often enough for a full workday when usage is intermittent.
  • CPAP plus other loads: A 40W CPAP overnight plus intermittent phone and light use is more comfortable on 1000Wh, especially for multi-night trips or unreliable grid power.
  • Small power tools: Occasional use of a 300–500W tool is more realistic on a 1000Wh unit with a higher continuous and surge rating, though it is still not a substitute for a full jobsite power source.

If your priority is extended runtime for essential loads—fridge, CPAP, work electronics, or a small entertainment setup—a 1000Wh power station offers significantly more flexibility than 300Wh or 500Wh.

Common Capacity Mistakes and How to Avoid Them

Many capacity frustrations come from misunderstandings about watt-hours and real-world power draw. Here are frequent pitfalls when choosing between 300Wh, 500Wh, and 1000Wh.

  • Confusing watts with watt-hours: Watts measure power at a moment; watt-hours measure energy over time. A 300W device can run on a 300Wh battery, but only for about an hour at best, not all day.
  • Ignoring inverter efficiency: Assuming the full rated Wh is available leads to optimistic runtime expectations. Planning with 70–80% of rated capacity is more realistic.
  • Overlooking continuous output limits: A 1000Wh unit with a 500W inverter cannot run a 900W appliance, no matter how big the battery is. Capacity and inverter rating must both be adequate.
  • Underestimating surge watts: Devices with motors or compressors (fridges, some pumps, some tools) can need 2–3× their running watts to start. A 500Wh power station with low surge capacity may fail to start them even if average watts look fine.
  • Stacking too many small loads: Multiple chargers, routers, and lights can add up. A 500Wh unit that seems large on paper can drain fast if total draw is 200–300W for several hours.
  • Not accounting for recharge opportunities: For solar or vehicle charging, smaller capacities (300Wh or 500Wh) may refill fully during a day of sun, while a 1000Wh unit may not, depending on panel wattage and input limits.

Troubleshooting cues that suggest you chose the wrong capacity:

  • Battery drops from full to empty in a few hours at your typical use—consider stepping up from 300Wh to 500Wh or from 500Wh to 1000Wh.
  • Devices shut off when they start up, even though running watts seem within limits—check surge ratings and consider a larger, higher-output unit.
  • You regularly hit low-battery warnings before night is over—your daily consumption is higher than the stored energy; a capacity upgrade or reduced load is needed.

Carefully listing your devices and estimating their wattage and runtime before purchasing is the best way to avoid these issues.

Safety Basics When Using Different Capacity Sizes

Regardless of whether you choose a 300Wh, 500Wh, or 1000Wh power station, the core safety principles remain the same. Higher capacity increases the amount of stored energy, so it is important to use and manage it responsibly.

  • Stay within rated output limits: Never exceed the continuous or surge watt ratings of the AC, DC, or USB outputs. Overloading can trigger protection circuits or cause overheating.
  • Allow ventilation: Place the power station on a stable surface with adequate airflow. Avoid covering vents or enclosing the unit in tight spaces, especially at higher loads.
  • Avoid extreme temperatures: High heat accelerates battery wear and can trigger thermal protection; deep cold can temporarily reduce capacity. Follow the manufacturer’s recommended operating ranges.
  • Use compatible chargers and cables: Match input voltage and current ratings. For DC and solar inputs, only use supported profiles and connectors to avoid damage.
  • Keep away from moisture: Even rugged units are vulnerable to water intrusion. Protect from rain, splashes, and condensation, particularly when using AC outlets.
  • Do not open or modify the unit: Internal components store significant energy. Repairs, modifications, or battery replacements should be handled by qualified professionals or authorized service providers.
  • Be cautious with high-power appliances: Larger capacity (like 1000Wh) may tempt use with space heaters or kettles. These devices often exceed safe continuous output or drain the battery extremely quickly.

Following these high-level practices helps ensure that whichever capacity you choose, you use it within its safe operating envelope.

Typical safety considerations for 300Wh, 500Wh, and 1000Wh portable power stations, including load limits and operating environments. Example values for illustration.
Capacity Class Typical Use Common Load Range Key Safety Focus
300Wh Small electronics, lights 10–150W Prevent overload from unexpected high-watt devices
500Wh CPAP, laptops, small appliances 50–300W Ventilation and managing multiple simultaneous loads
1000Wh Fridge, multi-device setups 100–800W Heat buildup and staying within inverter limits

Related guides: Portable Power Station Buying GuideHow to Estimate Runtime for Any DeviceHow Many Solar Watts Do You Need to Fully Recharge in One Day?

Maintenance and Storage Considerations by Capacity Size

Good maintenance habits extend the life of any portable power station, but capacity influences how you approach storage, cycling, and recharging.

  • Periodic cycling: All sizes benefit from being used and recharged periodically. Lightly cycling a 300Wh, 500Wh, or 1000Wh unit every 1–3 months helps keep battery management systems active and healthy.
  • Storage charge level: Many lithium-based systems last longer when stored partially charged (often around 40–60%), rather than at 0% or 100%. Check your manual for specific guidance.
  • Self-discharge over time: Larger capacities like 1000Wh can take longer to recharge if allowed to sit discharged. Before storms, trips, or expected outages, top up the battery so full capacity is available.
  • Charging sources and time: A 300Wh unit may recharge in a few hours from a standard AC adapter, while a 1000Wh unit can take significantly longer at the same input wattage. For solar, match panel power and available sunlight to the battery size you choose.
  • Temperature-controlled storage: Store all capacity sizes in cool, dry environments. Prolonged exposure to high heat (for example, in a closed vehicle in summer) can permanently reduce capacity.
  • Keep connectors clean: Dust and oxidation on AC, DC, and USB ports can cause poor connections or intermittent charging. Periodically inspect and gently clean connectors as recommended by the manufacturer.
  • Monitor firmware and indicators: Some units provide state-of-charge, cycle count, or health indicators. Regularly checking these can help you notice early signs of capacity loss or charging issues.

Whether you own a compact 300Wh unit for occasional use or a 1000Wh system for backup, consistent maintenance and thoughtful storage can preserve usable capacity for years.

Putting It All Together: Which Capacity Should You Choose?

Choosing between 300Wh, 500Wh, and 1000Wh comes down to your devices, how long you need to run them, and how often you can recharge.

  • Choose around 300Wh if you mainly charge phones, cameras, and a laptop for short periods, want a lightweight option, and have frequent access to recharging.
  • Choose around 500Wh if you need overnight capability for a CPAP, more comfortable runtimes for laptops and lights during camping, or a compact backup for brief outages.
  • Choose around 1000Wh if you want longer runtimes for fridges, multi-device work setups, or several nights of essential loads without constant recharging.

Always start by estimating your daily watt-hour usage. List your devices, note their wattage, and multiply by the hours you expect to run them. Then match that total to a capacity tier with some safety margin.

Specs to look for

  • Battery capacity (Wh): Look for 250–350Wh for light use, 400–700Wh for mid-range, and 800–1200Wh for heavier or multi-day needs. This determines how long your devices can run.
  • Continuous AC output (W): Aim for at least 200–300W for 300Wh units, 300–600W for 500Wh, and 600–1200W for 1000Wh class. Ensures your typical loads can run without tripping protection.
  • Surge/peak watts: Seek surge ratings roughly 1.5–2× the continuous output if you plan to run fridges, pumps, or tools. This helps start inductive loads without shutdowns.
  • AC, DC, and USB port mix: Ensure enough outlets for your devices (for example, 1–2 AC outlets, multiple USB-A, and at least one USB-C PD port). The right mix avoids overloading a single port.
  • Input charging power (W): For 300Wh, 60–150W input can recharge in a few hours; for 1000Wh, 200–400W or more is helpful. Higher input reduces downtime between uses.
  • Battery chemistry and cycle life: Compare typical cycle life ranges (for example, 500–2500 cycles to 80% capacity). Longer cycle life is valuable if you use the station frequently.
  • Weight and portability: 300Wh units may weigh under 10 lb, 500Wh around 10–20 lb, and 1000Wh often 20–30 lb or more. Consider how far and how often you will carry it.
  • Display and monitoring: A clear screen with remaining percentage, estimated runtime, and input/output watts helps you manage capacity and avoid surprises.
  • Operating temperature range: Check that the specified range matches your climate and intended use (for example, cold-weather camping or hot garages).
  • Built-in protections: Look for overcurrent, overvoltage, short-circuit, and temperature protections. These features safeguard both the power station and your devices.

By focusing on these specs and understanding how 300Wh, 500Wh, and 1000Wh capacities translate into real runtimes, you can select a portable power station that fits your actual use case instead of relying on guesswork.

Frequently asked questions

Which specs and features should I prioritize when comparing 300Wh, 500Wh, and 1000Wh power stations?

Prioritize battery capacity (Wh) for runtime, continuous AC output (W) for the types of devices you plan to run, and surge watts for motor-starting loads. Also consider input charging power, port mix (AC, DC, USB-C), cycle life, weight, and built-in protections like overcurrent and thermal limits.

What is a common mistake people make when estimating runtime?

A frequent mistake is confusing watts with watt-hours and assuming 100% of rated Wh is usable. Plan using a realistic usable Wh (often 70–80% of rated capacity) and check inverter efficiency and continuous/surge limits for a more accurate runtime estimate.

Are larger capacity units inherently safer than smaller ones?

Not necessarily—larger units store more energy, which increases the potential hazard if misused. Safety depends on following rated output limits, ensuring ventilation, avoiding extreme temperatures and moisture, and using the unit within the manufacturer’s specifications.

How do I calculate how long a specific device will run on a given battery capacity?

Estimate runtime by dividing usable Wh by the device’s watt draw: Runtime ≈ usable Wh ÷ device watts. Use a conservative usable Wh (for example, 70–80% of rated capacity) and account for duty cycles, inverter losses, and intermittent use to refine the estimate.

Can I recharge a 1000Wh unit fully in one day with solar panels?

Possibly, but it depends on panel wattage, available sun hours, and the station’s input limits. A 1000Wh battery typically needs several hundred watts of sustained input (for example, 200–400W) and multiple peak-sun hours to recharge fully in a day once conversion losses are considered.

How often should I cycle or top up my portable power station in storage?

Periodically cycle and top up batteries every 1–3 months to keep the battery management system active and preserve capacity. Store most lithium-based units at a partial charge (commonly around 40–60%) and follow the manufacturer’s specific storage recommendations.

Dual Input Explained: Can You Combine Wall + Solar Charging Safely?

Diagram of a portable power station using both wall and solar charging inputs.

You can usually combine wall and solar charging on a portable power station safely only if the manufacturer explicitly supports dual input and the total charging watts stay within the unit’s input limit. Mixing inputs without checking specs can overload the charger, trigger protection circuits, or shorten battery life.

People search this topic when they want faster charging, wonder about “pass-through” or “dual input” modes, or worry about damaging a battery with too many input watts. Terms like input limit, charge controller, MPPT, surge watts, and state of charge often appear in manuals but are not clearly explained.

This guide breaks down how dual input charging really works, why some models accept wall plus solar at the same time and others do not, and what to check on the spec sheet before plugging in. You will learn practical wattage examples, common mistakes, and the key features that matter if you plan to use combined charging regularly.

What Dual Input Charging Means and Why It Matters

In the context of portable power stations, dual input charging means using two separate charging sources at the same time, most commonly a wall outlet (AC adapter) plus solar panels (DC input). The power station’s internal electronics decide how much power to accept from each source and how fast to charge the battery.

Dual input matters for three main reasons: charging speed, flexibility, and battery health. Combining wall and solar can significantly reduce charge time if the unit is designed to accept the extra watts. It also lets you top up from solar while on grid power, or keep charging at a decent rate when one source is weak (for example, cloudy solar conditions plus a low-watt wall outlet).

However, not every portable power station supports true dual input. Some units have multiple ports but share a single internal charge controller with a fixed input wattage limit. In those cases, plugging in wall and solar together may not increase charging speed and can sometimes cause the unit to shut down the extra input or throw an error.

Understanding what dual input really means on your model helps you avoid overloading the system, misreading the display, or assuming that more cables always equal faster charging. It is ultimately about how much safe charging power the internal hardware is designed to handle, not just how many ports are visible on the outside.

How Combining Wall and Solar Charging Actually Works

Inside a portable power station, incoming power flows through one or more charge controllers that regulate voltage, current, and total input watts before energy reaches the battery pack. When you connect both wall and solar, you are effectively asking the system to blend two sources into a single safe charging profile.

The wall charger (or built-in AC charger) typically provides a stable DC output at a fixed voltage and current, such as 24 V at 10 A (about 240 W). Solar input is more variable and usually passes through an MPPT or PWM controller that tracks panel voltage and limits current to a safe level. If the unit supports dual input, the firmware coordinates these controllers so the combined watts do not exceed the maximum charging power.

In many designs, the power station assigns priority to one input. For example, it might take as much as possible from the wall charger first, then add solar until the total hits the input limit. In others, it may cap each input at a certain level or dynamically adjust based on solar conditions and battery state of charge.

Battery chemistry also influences how dual input behaves. Lithium iron phosphate (LiFePO4) and NMC lithium-ion packs both require a constant-current/constant-voltage (CC/CV) charging profile, but they may have different recommended charge rates (often expressed as a C-rate, like 0.5C). The internal battery management system (BMS) ensures that, regardless of how many sources you connect, the battery is not charged faster than its safe limit.

Because of these internal limits, plugging in a 500 W wall charger and 400 W of solar does not guarantee 900 W of charging. If the unit’s max input is 600 W, it may cap the total at that level, automatically throttling one or both sources. The display will usually show the net input watts, which is the best way to confirm what is really happening.

Input typeTypical voltageTypical power rangeRole in dual input
Wall (AC adapter)About 20–60 V DC output100–800 WProvides stable, predictable charging power.
Solar (PV panels)About 12–60 V DC (open-circuit)50–600 WVariable power; depends on sunlight and panel angle.
Car / DC socket12–24 V DC60–180 WOften used as a secondary or backup input.
USB-C PD input5–20 V DC30–140 WSometimes can be combined with another DC or AC input.
Overview of common charging inputs and their role in dual input charging. Example values for illustration.

Real-World Dual Input Scenarios and What to Expect

To understand whether combining wall and solar will help in your situation, it helps to walk through realistic wattage and capacity examples. These are simplified scenarios, but they mirror what you will see on many portable power stations.

Imagine a 1,000 Wh power station with a maximum input of 500 W. If you use only the included wall charger rated at 300 W, a full charge from empty would take roughly 3.5–4 hours, allowing for efficiency losses and tapering at high state of charge. If you add solar panels that can deliver up to 250 W in good sun, the unit could theoretically accept the full 300 W from the wall plus up to 200 W from solar before hitting its 500 W limit. In practice, you might see 450–480 W total, cutting charge time closer to 2.5–3 hours.

Now consider a larger 2,000 Wh unit rated for 1,200 W max input. If you connect a 600 W AC charger and 600 W of solar (under ideal conditions), the station could accept nearly the full 1,200 W, bringing it from 0% to 80% in around 1.5–2 hours. The last 20% typically slows down as the BMS reduces current to protect the battery, so total time may be closer to 2.5 hours.

There are also cases where dual input does not speed things up. Some power stations share a single 300 W charge controller across both the wall and solar ports. When you plug in both, the unit might cap total input at 300 W and simply juggle which source it uses more heavily. You might see the display hover around 280–300 W whether or not solar is connected, especially if the wall charger alone already hits the limit.

Weather can also change the picture. If your solar panels are rated at 200 W but clouds reduce them to 60–80 W, adding that to a 300 W wall charger still helps, but the improvement is modest. Instead of 300 W, you might see 360–380 W. Over a full charge cycle, that could save 30–45 minutes, which might or might not matter depending on your use case.

Finally, some models allow combining DC sources, such as solar plus USB-C PD input, while AC plus solar is not supported. In that case, you might run a 200 W solar array and a 100 W USB-C PD charger together to reach 300 W total, even though the AC adapter cannot be used at the same time. The key is always to check which combinations are officially supported and verify actual input watts on the display.

Common Dual Input Mistakes and Troubleshooting Signs

Many dual input problems come from assuming that more cables automatically equal more charging power. When users do not understand the input limit or how ports share a controller, they can misinterpret warnings or think something is broken when it is not.

One frequent mistake is exceeding the recommended solar voltage or wattage while also using the wall charger. For example, connecting a large solar array that already pushes the input close to its limit, then plugging in the wall charger, can cause the unit to shut off the solar input, show an overvoltage or overcurrent error, or reduce both sources to a lower combined level.

Another issue is using non-matching or third-party adapters that are not designed to work together. An aftermarket AC adapter with higher voltage than specified, combined with solar panels wired in series, may stress the charge controller and trigger safety cutoffs. Even if the unit does not fail immediately, running it outside its intended charging profile can shorten battery lifespan.

Users also often overlook firmware behaviors. Some power stations are programmed to prioritize battery longevity over absolute speed. When the state of charge passes a certain threshold (for example, 80–90%), the system may automatically reduce input watts, regardless of how many sources are connected. This is normal and not a sign that dual input has stopped working.

Signs that your dual input setup is not working properly include the total input watts not increasing when you add a second source (and the manual says it should), repeated error icons on the display when both inputs are connected, the fan running at full speed followed by an abrupt drop in input watts, or the unit getting noticeably hotter than usual near the charge ports.

If you see these symptoms, first disconnect one input and confirm the unit charges correctly from a single source. Then test each combination separately (wall only, solar only, wall plus solar) while watching the input wattage and any warning indicators. If the behavior does not match the manual’s description or the input ratings on the label, it is safer to revert to single-source charging and contact the manufacturer for clarification.

Safety Basics for Combining Wall and Solar Charging

Safe dual input charging comes down to staying within the designed electrical limits and respecting how the power station manages its own protections. The most important number to know is the maximum total input power, usually expressed in watts. This value often assumes all active inputs combined, not per port.

Never exceed the specified input voltage range on any port, especially the solar or DC input. Solar panels wired in series can easily push voltage above what the charge controller can tolerate, even if the combined wattage seems modest. When in doubt, use series/parallel configurations that keep open-circuit voltage comfortably below the stated maximum.

Use only compatible connectors and adapters that match the polarity and voltage expectations of the device. For wall charging, stick to the supplied adapter or one that explicitly matches the voltage, current, and polarity requirements. For solar, follow the manufacturer’s guidance on panel wattage, wiring, and whether a separate charge controller is allowed or prohibited.

Thermal management is another key safety factor. Dual input charging typically produces more heat than single-source charging because the charge controller and BMS are working harder. Make sure the power station has adequate ventilation, keep it out of direct intense sun while charging, and avoid covering the vents. If the unit becomes uncomfortably hot to the touch, reduce input power or disconnect one source and let it cool.

Finally, remember that dual input does not change the safe use of the AC and DC output ports. Do not assume that faster charging means you can safely run larger loads indefinitely. Always consider both the continuous output rating and the surge watts rating when powering devices, and avoid daisy-chaining power strips or improvised wiring. For any connection to a building’s electrical system or transfer switch, consult a qualified electrician and follow local codes.

Charging Habits, Storage, and Long-Term Battery Health

How you use dual input over months and years has a direct impact on battery longevity. Even if the power station supports very high input wattage, running it at maximum charge rate every single cycle can add stress, especially in hot environments. Moderating charge speed when you are not in a rush is one of the simplest ways to extend battery life.

Whenever possible, avoid frequently charging from 0% to 100% at full speed. Many users find a sweet spot by charging between roughly 20% and 80% when daily usage allows. If your power station offers an adjustable input limit, consider setting it to a moderate level (for example, 50–70% of the maximum) for routine use and reserving full-speed dual input for emergencies or time-critical situations.

Temperature is another major factor. Charging at high input watts while the unit is already warm from heavy discharge can push internal temperatures higher, prompting the BMS to throttle charging or, in extreme cases, shut down. Letting the power station cool for a short period before initiating dual input charging can reduce thermal cycling stress on both the battery and electronics.

For storage, aim to keep the battery at a partial state of charge, often around 40–60%, and in a cool, dry place. Avoid leaving the unit plugged into wall power and solar simultaneously for weeks on end unless the manual explicitly supports float charging or UPS-style operation. Long-term trickle charging at high voltage can contribute to gradual capacity loss.

Periodically inspect your charging cables, connectors, and solar wiring. Loose connections or partially damaged cables can generate heat and resistance, especially when carrying higher currents from combined inputs. Replace any components that show discoloration, cracking, or intermittent behavior during charging.

PracticeRecommended approachEffect on battery life
Charge rateUse moderate watts for everyday charging; reserve max input for urgency.Reduces stress and slows capacity fade over time.
Charge windowOperate mostly between about 20–80% state of charge when practical.Helps maintain cycle life versus constant 0–100% cycles.
TemperatureCharge in a cool, shaded area; avoid hot car interiors.Prevents overheating and BMS throttling.
StorageStore around mid-charge, in a dry, moderate-temperature location.Minimizes long-term voltage and thermal stress.
Cable careInspect and replace worn or damaged charging leads.Improves efficiency and reduces risk of hot spots.
Key charging and storage habits that support long-term battery health. Example values for illustration.

Related guides: Solar Panel Series vs Parallel: Which Is Better for Charging a Power Station?Overpaneling Explained: Can You Connect Bigger Solar Panels Than the Input Limit?How to Read Solar Panel Specs for Power Stations: Voc, Vmp, Imp, and Why It Matters

Practical Takeaways and Buying Checklist for Dual Input Charging

When used within the designed limits, combining wall and solar charging can safely cut charge times and add flexibility to how you use a portable power station. The key is to treat dual input as a feature that must be explicitly supported and properly configured, not as a default capability of any unit with multiple ports.

Before relying on dual input in critical situations, test your setup under controlled conditions. Start with single-source charging, then add the second input while watching the display for total input watts, temperatures, and any warning indicators. If the real-world behavior matches the manual and stays within the published input ratings, you can be confident that your configuration is safe and effective.

Specs to look for

  • Maximum input wattage (AC + DC) – Look for a clearly stated combined input limit (for example, 400–1,200 W). This tells you how much benefit you can expect from dual input and helps avoid overloading.
  • Supported input combinations – Check whether the unit officially allows AC plus solar, solar plus USB-C, or only one source at a time. This matters because some models cap total input regardless of how many ports you use.
  • Solar input voltage and watt range – Look for a safe voltage window (for example, 12–60 V) and a recommended wattage (150–800 W). Matching panels to this range ensures efficient MPPT operation and reduces error conditions.
  • Charge controller type (MPPT vs. PWM) – MPPT controllers generally handle variable solar conditions better and can extract more watts from panels. This is important if you plan to rely heavily on solar as part of dual input.
  • Battery chemistry and cycle life rating – Specs like LiFePO4 with 2,000–4,000 cycles or NMC with 800–1,500 cycles indicate how well the battery tolerates frequent fast charging. This matters if you plan to use high-watt dual input often.
  • Adjustable input power or charge modes – Some units let you limit input watts or choose an “eco” or “silent” mode. This helps balance charge speed, fan noise, and battery longevity when you do not need maximum power.
  • Thermal and safety protections – Look for overvoltage, overcurrent, overtemperature, and short-circuit protections. Robust protections are crucial when combining multiple inputs that can vary in voltage and current.
  • Display detail and monitoring – A clear screen showing real-time input watts, battery percentage, and error icons makes it easier to verify that dual input is working as intended and to troubleshoot problems.
  • DC and USB-C PD input capabilities – If you plan to supplement wall or solar with USB-C or car charging, check the maximum PD wattage (for example, 60–140 W) and whether it can be used simultaneously with other inputs.

By focusing on these specifications and understanding how dual input charging is managed internally, you can safely take advantage of faster, more flexible charging without compromising the long-term health of your portable power station.

Frequently asked questions

Which specs and features should I check before attempting dual input wall and solar charging?

Check the combined maximum input wattage, supported input combinations (for example AC+solar or solar+USB-C), the solar input voltage range, charge controller type (MPPT vs PWM), and built-in thermal and electrical protections. A clear display and an adjustable input limit are also helpful to verify real-world behavior and avoid overloading the unit.

What is a common mistake that can damage the charger or battery when combining wall and solar?

Assuming more cables or higher-rated panels always increase charge speed is common; exceeding the device’s voltage or combined wattage limits or using mismatched adapters can trigger protections or stress the BMS. Always confirm port ratings and use manufacturer-approved wiring to avoid damage.

What high-level safety precautions should I follow when using wall and solar inputs together?

Stay within the specified voltage and combined wattage limits, verify correct connector polarity, and ensure adequate ventilation to prevent overheating. If you see error icons, excessive heat, or unusual behavior, disconnect one input and consult the manual or manufacturer.

How can I tell whether my power station is actually blending wall and solar power?

Watch the unit’s real-time input wattage on the display when both sources are connected; if blending occurs the net input should increase compared to a single source. If the displayed watts do not rise, check supported combinations in the manual and test each source separately to isolate the issue.

Can frequent dual input charging shorten battery lifespan?

Regularly charging at maximum input can increase thermal and electrochemical stress and accelerate capacity loss over many cycles. To extend battery life, use moderate charge rates for routine cycles, avoid constant 0–100% fast charging, and keep the unit cool while charging.

Is it safe to leave wall and solar connected for long periods (float or UPS-style operation)?

Only do so if the manual explicitly supports float charging or continuous UPS operation; otherwise long-term simultaneous connection can cause gradual voltage or thermal stress. For storage, follow manufacturer guidance—typically store at a partial state of charge and disconnect external inputs.