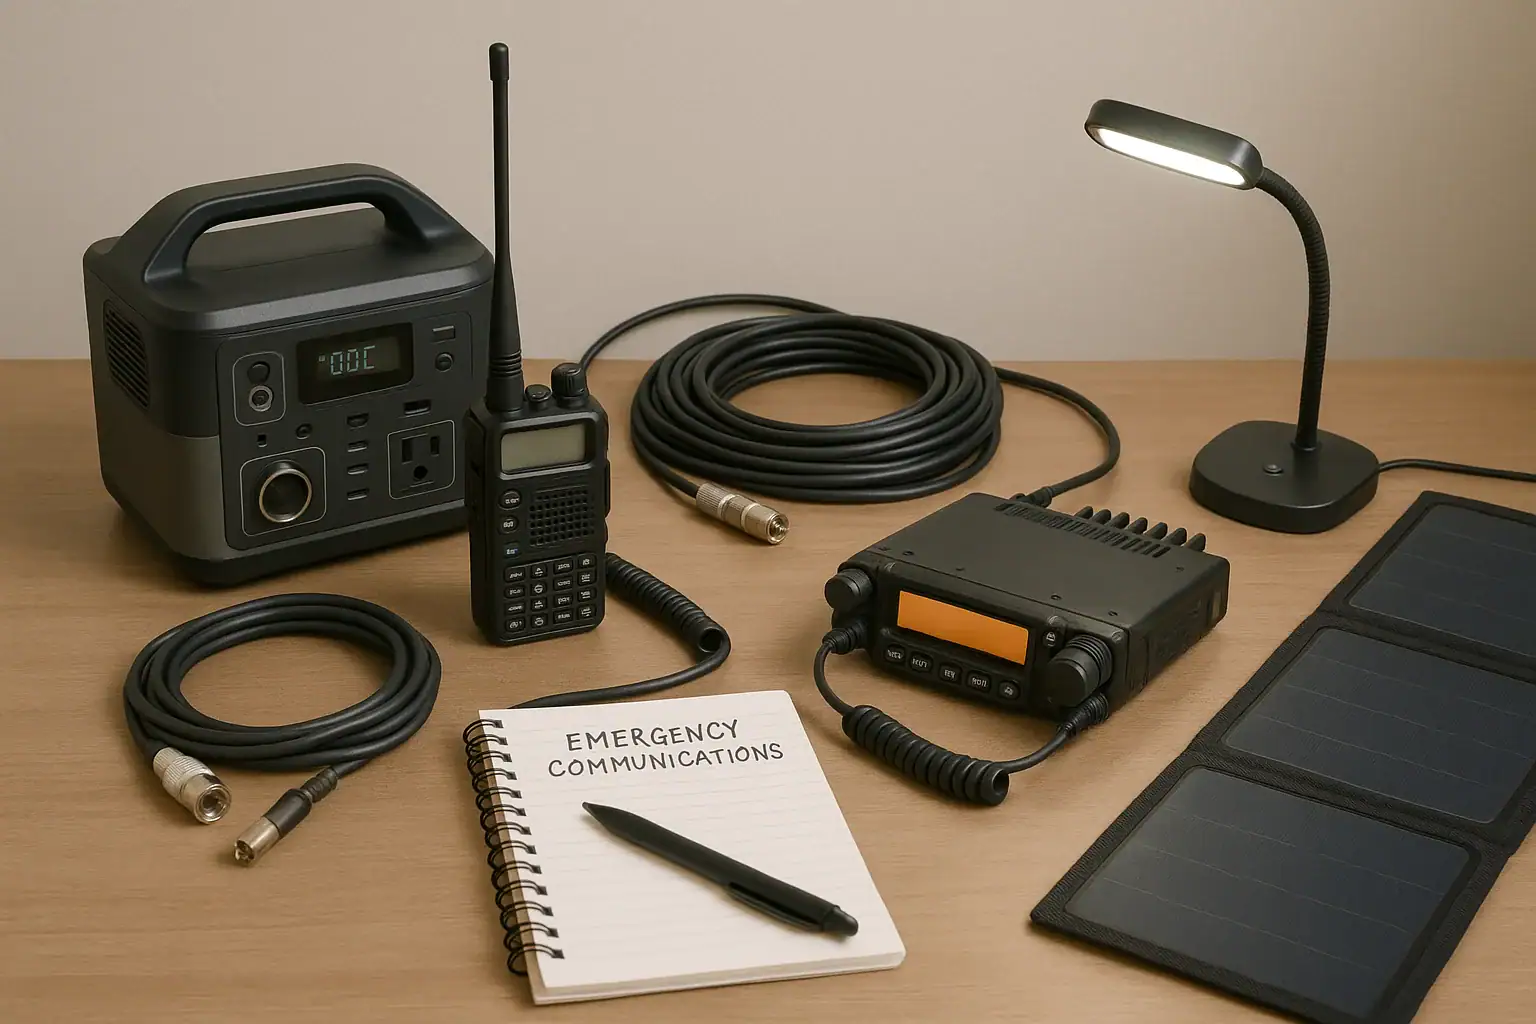
Portable Power Station for Amateur Radio and Emergency Communications

Portable power station powering amateur radio emergency communications equipment

A portable power station can run amateur radio and emergency communications gear when it provides clean output, enough watt-hours, and the right DC and AC ports for your station. For radio use, the most important factors are runtime, voltage stability, low electrical noise, recharge options, and whether the unit can handle both small receive loads and higher transmit bursts.

Unlike camping lights or phone charging, radio equipment can be sensitive to inverter noise, DC output limits, voltage drop, and grounding choices. Operators often search for terms such as pure sine wave, surge watts, input limit, solar charging, duty cycle, and noise floor because those details affect whether communications stay reliable during an outage, field exercise, or storm response.

The best choice is not simply the biggest battery. It is the power station whose usable capacity, ports, charging speed, and electrical behavior match the radios, accessories, and emergency plan you actually use.

What a Portable Power Station Does for Amateur Radio

A portable power station is a rechargeable battery system with built-in outputs for powering devices without a generator or wall outlet. For amateur radio, it can support handheld chargers, mobile transceivers, HF radios, tuners, small computers, LED lighting, hotspot devices, USB accessories, and limited household communication gear.

The main reason it matters is continuity. During emergency communications, the goal is not maximum power for a few minutes; it is predictable operation for hours or days. A station that can receive for long periods, transmit when needed, and recharge by AC, vehicle power, or solar is more useful than a high-output unit that drains quickly or creates radio-frequency interference.

Portable power stations also reduce fuel, noise, and ventilation concerns compared with engine-driven generators. They can be used indoors when operated according to the manufacturer’s instructions, and they are generally quiet enough for shelters, field day setups, public service events, and neighborhood emergency nets. However, they are still electrical devices with limits. Choosing one for radio service means looking beyond headline wattage and asking how the unit behaves with low-current loads, high transmit current, cold weather, charging cycles, and sensitive receivers.

How Portable Power Stations Support Radio Loads

Most power stations combine a battery pack, battery management system, inverter, DC outputs, USB outputs, charging inputs, and a display. The battery is usually rated in watt-hours, which estimates stored energy. A 500 watt-hour unit does not always deliver the full number to your radio because conversion losses occur, especially when running AC equipment through the inverter.

Radio loads vary by operating mode. Receive current is often modest, while transmit current can rise sharply. A VHF or UHF mobile radio may draw little while listening but much more at high power. An HF transceiver may have a low receive draw and a much higher transmit draw, especially at 100 watts output. Digital modes, packet, Winlink-style operation, and data interfaces can increase average consumption because transmit time may be longer than casual voice operation.

DC output is usually more efficient than AC when the radio accepts the available voltage and connector type. Many mobile and HF radios expect about 13.8 volts DC, while some power stations provide regulated 12-volt ports that may be limited in current. If the station cannot provide enough DC amperage, the radio may reset, reduce output, or fail during transmit. AC output can solve connector compatibility, but it adds inverter losses and can introduce electrical noise if the inverter or charger is noisy.

USB-C power delivery can be useful for laptops, tablets, hotspots, and some compact radio accessories. The PD profile matters because a port that supports only low wattage may not sustain a laptop or field computer. Solar input helps extend runtime, but the input limit controls how fast the battery can recharge from panels in good sun.

Radio setupIllustrative average loadPlanning note
Handheld radio charging and USB light10 to 25 wattsSmall stations can run a long time, but keep spare charged batteries if possible.
VHF or UHF mobile transceiver, mostly monitoring15 to 40 watts averageTransmit bursts raise current, so check the DC port rating.
HF transceiver, mixed receive and voice transmit35 to 100 watts averageDuty cycle changes runtime more than advertised transmit power alone.
HF digital station with laptop60 to 150 watts averageLaptop charging, interface devices, and longer transmit periods increase demand.
Typical amateur radio power planning examples. Example values for illustration.

Real-World Emergency Communications Examples

For a neighborhood VHF net, a portable power station might run a mobile radio at low or medium power, charge handheld batteries, and keep a phone or tablet available for logging. In this situation, the most valuable features are efficient 12-volt output, enough amperage for transmit, low idle drain, and a display that shows remaining watt-hours or estimated runtime.

For an HF field station, the power station may support a 100-watt transceiver, an antenna tuner, a small LED lamp, and a logging laptop. The operator may choose lower transmit power, shorter overs, and a higher-efficiency mode to extend runtime. If the inverter creates noise on the band, DC operation or physical separation between the power station and antenna feed line may help.

For a shelter or emergency operations table, the load may include radios, chargers, a hotspot, a small router, and administrative electronics. This kind of setup benefits from multiple outputs, clear load monitoring, and the ability to prioritize communications gear over comfort loads. A small fan, printer, or large laptop can consume more energy than expected, shortening radio runtime.

For a multi-day outage, recharge strategy becomes as important as capacity. A mid-size battery paired with practical solar input may outperform a larger unit that cannot recharge quickly. Solar charging is variable, so planning should assume partial production due to clouds, short winter days, panel angle, and shading. Vehicle charging can help, but it should be treated as a supplemental option and used safely according to vehicle and power station guidance.

Common Mistakes and Troubleshooting Cues

One common mistake is sizing by inverter watts instead of watt-hours. Inverter wattage tells you the maximum load the unit can run at one time. Watt-hours estimate how long it can run. A high-watt inverter does not guarantee long radio runtime if the battery capacity is small.

Another mistake is ignoring the 12-volt output rating. Many radios need more current during transmit than a small DC socket can deliver. If the radio powers on but shuts down, resets, or drops output when you transmit, the issue may be a current limit, voltage sag, an undersized cable, or a connector that is not meant for the load.

Noise is another troubleshooting clue. If the receiver noise floor rises when the power station, inverter, charger, or solar controller is connected, the source may be electrical interference. Try comparing battery-only operation against AC inverter operation, increasing physical separation, routing power leads away from antenna lines, and using ferrite chokes when appropriate. Avoid opening or modifying the power station or radio to chase noise problems.

Unexpectedly short runtime usually comes from average load being higher than assumed. Transmitting more often, charging a laptop, running an inverter with light loads, using bright lighting, or leaving accessories on can drain capacity quickly. Displays that estimate runtime can lag behind changing duty cycles, so manual calculations are still useful.

Charging problems often trace back to the input limit. A power station may accept only a certain wattage from solar or vehicle charging, even if the panel or adapter can produce more. Cold temperatures may also limit or prevent charging on many lithium-based systems. If the unit refuses to charge in winter conditions, temperature protection may be working as designed.

Safety Basics for Radio Use and Emergency Power

Use a portable power station within its rated limits and follow the manufacturer’s instructions for ventilation, charging, output use, and temperature range. Do not open the unit, modify the battery pack, bypass protection circuits, or use damaged cables. Battery systems can store significant energy even when they look compact.

For radio setups, protect cables from abrasion, foot traffic, moisture, and strain. Use appropriately sized power leads for the current involved, keep connectors secure, and avoid daisy-chaining multiple adapters that can loosen or overheat. If a connector feels hot, smells unusual, or shows discoloration, stop using it until the cause is identified.

Keep the power station away from standing water, blowing rain, and conductive surfaces. Outdoor emergency communications often happen in poor weather, so sheltering the power equipment is important. Water-resistant cases and covers can help protect accessories, but they should not block cooling vents or trap heat.

Do not connect a portable power station directly into home electrical wiring, panels, transfer equipment, or receptacles in a way that could backfeed utility lines. Whole-home or circuit-level backup arrangements require proper equipment and a qualified electrician. For communications readiness, it is usually simpler and safer to plug radio gear directly into the power station or into a properly rated power strip used within its limits.

Maintenance, Storage, and Readiness for Communications

Emergency communications gear should be ready before the outage starts. Store the power station at a moderate state of charge if it will sit unused, unless the manufacturer recommends a different approach. Check it periodically and top it up before storm season, field events, or planned drills.

Test the station with the actual radio load you expect to use. A short real-world test can reveal connector limitations, inverter noise, inaccurate runtime assumptions, laptop charging issues, and whether solar input is practical at your location. Keep a simple load list with estimated watts and priority levels so you know what to unplug first when capacity drops.

Temperature matters. Avoid storing the unit in very hot vehicles or freezing locations for long periods. In cold weather, charging may be restricted, while discharge performance can decline. If the power station has been stored in a cold area, let it reach an appropriate operating temperature before charging if the instructions call for it.

Keep supporting items together: DC cables, radio adapters, a compact watt meter if used, USB-C cables with sufficient rating, ferrites, extension cords for low-power accessories, solar cables, and printed operating notes. During an emergency, the missing adapter is often the weak link.

Readiness taskSuggested intervalWhy it matters
Check battery state of chargeEvery 2 to 3 monthsReduces the chance of finding an empty unit during an outage.
Run a radio load testBefore drills or storm seasonConfirms runtime, noise behavior, and connector compatibility.
Inspect cables and adaptersBefore each field useDamaged or undersized cables can cause heat, voltage drop, or resets.
Review solar charging setupSeasonallyPanel angle, shade, and input limits affect recharge expectations.
Readiness checks for emergency communications power. Example values for illustration.

Practical Takeaways and Specs to Look For


Related guides: Portable Power Station Watt-Hours Explained • Pure Sine Wave vs Modified Sine Wave: Does It Matter for a Portable Power Station? • Portable Power Station Basics: Outputs, Inputs, and What the Numbers Mean

A portable power station for amateur radio should be chosen as part of the whole communications system, not as a generic battery. Start with the radios, expected duty cycle, accessories, and likely outage duration. Then compare the required watt-hours, DC current, inverter quality, charging inputs, and portability.

For many operators, the best setup is a balance: enough capacity for core communications, efficient DC output, clean electrical behavior, and a recharge plan that works in real conditions. Oversizing can add weight and cost, while undersizing can leave the station unusable during the most important hours.

Specs to look for

  • Battery capacity: Look for a usable range such as 300 to 1000 watt-hours for many portable radio setups; this determines realistic runtime more than inverter wattage.
  • 12-volt DC output current: Look for enough amperage for your transceiver, often 10 to 30 amps depending on radio power; this helps prevent shutdowns during transmit.
  • Pure sine wave AC inverter: Look for a clean inverter if you must run AC chargers or a laptop supply; it reduces compatibility problems and may reduce electrical noise.
  • Low idle consumption: Look for efficient operation at small loads; radios often spend long periods receiving, so idle drain can waste capacity.
  • Solar input rating: Look for an input range such as 100 to 400 watts for field replenishment; the input limit controls how quickly panels can recharge the battery.
  • USB-C PD output: Look for ports that match laptop or tablet needs, such as 45, 65, or 100 watts; this avoids running an inverter just to power small electronics.
  • Recharge time: Look for AC and solar recharge times that fit your emergency plan; fast enough charging matters during short generator windows or limited sun.
  • Weight and form factor: Look for a size you can carry with radios, antennas, and cables; a powerful unit is less useful if it cannot be deployed.
  • Operating temperature range: Look for practical cold and heat performance; charging restrictions and capacity loss can affect winter or summer deployments.
  • Display and load monitoring: Look for watts-in, watts-out, state of charge, and estimated runtime; these help operators make better decisions during an event.

The practical goal is simple: keep essential communications running with predictable power. If the power station can support your radio’s transmit current, avoid adding noise, recharge from realistic sources, and remain ready in storage, it can be a strong foundation for amateur radio emergency preparedness.

Frequently asked questions

What size portable power station do I need for amateur radio?

The right size depends on your radio type, transmit power, duty cycle, and how long you need to operate without recharging. Many portable radio setups work well in the 300 to 1000 watt-hour range, but higher-power HF or digital stations may need more. The best way to size it is to estimate average watts, then add margin for transmit bursts and accessory loads.

What features matter most when choosing a portable power station for amateur radio?

Look for usable watt-hours, enough 12-volt DC output current, low idle drain, and a clean inverter if you need AC power. USB-C PD, solar input, recharge speed, and a clear display are also useful for field and emergency use. For radio service, stable output and low electrical noise are often more important than peak inverter wattage.

Why does my radio reset or shut off when I transmit from a power station?

This usually means the DC output cannot supply enough current, the cable is too small, or voltage is dropping under transmit load. Some power stations have 12-volt ports that are limited to a lower amperage than a mobile or HF radio needs. Using a properly rated DC connection and shorter, heavier cables often helps.

What is the most common mistake people make with portable power stations for radio use?

A common mistake is choosing by inverter watts instead of battery capacity and DC output capability. A unit can advertise high AC power but still have limited runtime or insufficient 12-volt current for transmit. Another frequent error is forgetting that laptops, lights, and chargers all reduce available radio runtime.

Is it safe to use a portable power station indoors for emergency communications?

Yes, it is generally safe indoors when the unit is used according to the manufacturer’s instructions and kept in a dry, ventilated area. Unlike fuel generators, it does not produce exhaust, but it still needs protection from heat, moisture, and damaged cables. Never modify the battery pack or connect it in a way that could backfeed household wiring.

How can I reduce electrical noise from a portable power station on my receiver?

First compare battery-only operation with inverter or charger operation to identify the source of the noise. If needed, increase physical separation, route power leads away from antenna cables, and use ferrites on problem lines. In some cases, running the radio directly from DC instead of AC can reduce interference.

Portable Power Station for Outdoor Movie Nights: Projector, Speakers, and Runtime

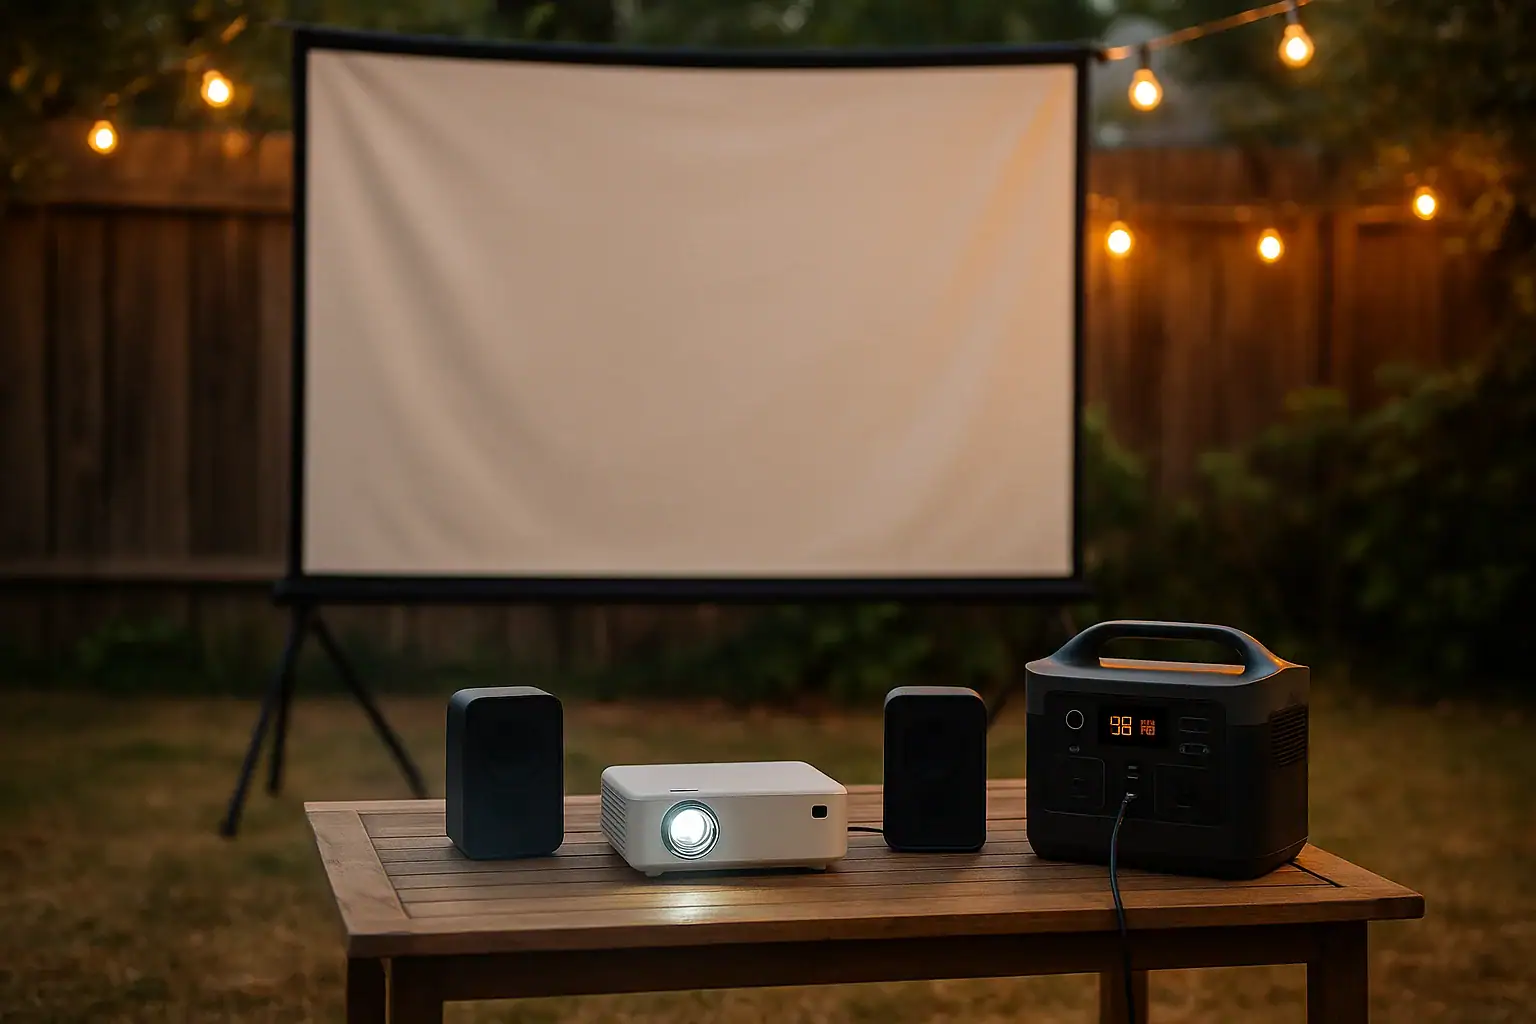
Portable power station running a projector and speakers for an outdoor movie night

A portable power station can run an outdoor movie night if its AC output can handle the projector and speakers, and its usable watt-hours are high enough for the full runtime.

For most backyard setups, the biggest factors are projector power draw, speaker load, battery capacity, inverter efficiency, and whether the station provides pure sine wave AC power. Terms like runtime, surge watts, watt-hours, AC outlet rating, and pass-through charging matter because they determine whether the movie plays smoothly or shuts off early.

The right size depends on the equipment, the length of the movie, and how much reserve power you want for setup time, previews, streaming devices, or a small fan. A compact projector and modest speakers may need far less power than a bright full-size projector with a soundbar and accessories.

What a portable power station does for outdoor movie nights and why it matters

A portable power station is a rechargeable battery system with built-in outlets for powering electronics away from a wall outlet. For an outdoor movie night, it acts as the central power source for the projector, speakers, media player, router or hotspot, and small accessories.

This matters because projectors and audio gear are more sensitive than many people expect. A projector may have a steady running wattage, a brief startup spike, and a cooling fan that needs stable power after the movie ends. Speakers may use little power at low volume but more when playing loud outdoor audio. If the battery is undersized, the setup may work at first and then shut down before the end credits.

The main sizing question is simple: how many watts will the equipment use, and for how many hours? A power station with enough continuous AC output and enough usable battery capacity can support a predictable movie experience. A station that only matches the average load with no reserve can be frustrating, especially when the movie is long, the projector brightness is high, or the weather is warm enough to require extra accessories.

Outdoor movie nights also introduce practical issues that do not matter indoors. Extension cord length, damp grass, uneven surfaces, dust, nighttime visibility, and trip hazards all affect how safe and convenient the system feels. A well-chosen power station reduces cable runs and makes the setup easier to place near the projector rather than near a distant outlet.

How runtime, watt-hours, and AC output work together

To estimate runtime, start with the total watts used by everything plugged in. Add the projector, speakers, streaming device, screen motor if used, and any supporting electronics. Then compare that load with the power station capacity in watt-hours. The basic idea is that a 500 watt-hour battery running a 100-watt load might seem like it should last five hours, but real runtime is lower because the inverter and electronics use some energy too.

A practical estimate is to multiply the listed battery capacity by 0.80 to 0.90 for AC loads. This accounts for inverter losses and normal operating overhead. For example, a 600 watt-hour unit may provide roughly 480 to 540 watt-hours of usable AC energy. If the outdoor movie setup draws 150 watts, that could mean about 3.2 to 3.6 hours of runtime under typical conditions.

Continuous AC output is different from battery capacity. Capacity tells you how long the system may run. Continuous AC output tells you how much load it can support at one time. A projector drawing 220 watts and speakers drawing 60 watts require at least 280 watts of continuous output, plus margin. Surge watts are also worth checking because some electronics draw a brief startup current when first powered on.

Pure sine wave AC output is generally preferred for projectors, powered speakers, media players, and chargers because it more closely resembles utility power. Many modern electronics are tolerant, but stable AC power helps reduce noise, overheating, unexpected shutdowns, or buzzing from audio equipment.

Example setupEstimated loadUsable energy needed for 3 hoursCapacity range to consider
Mini projector plus small Bluetooth-style speaker60 to 100 watts180 to 300 watt-hours250 to 400 watt-hours
LED projector plus powered stereo speakers120 to 200 watts360 to 600 watt-hours500 to 800 watt-hours
Bright projector plus soundbar and streaming device220 to 350 watts660 to 1050 watt-hours800 to 1200 watt-hours
Large projector plus audio system and fan350 to 600 watts1050 to 1800 watt-hours1200 to 2000 watt-hours
Example values for illustration.

Real-world outdoor movie night examples

A simple family movie night might use a compact LED projector rated around 70 watts, a small powered speaker drawing 15 watts, and a streaming stick powered by USB. The combined load may be under 100 watts. For a two-hour movie plus setup time, a small to mid-size power station can often provide enough runtime if it starts fully charged.

A more typical backyard setup might use a brighter projector in the 150 to 250 watt range, a pair of powered speakers at 30 to 80 watts combined, and a media device. This setup can draw 200 to 325 watts during normal operation. For a three-hour session, including time to focus the image and let the projector cool down afterward, a larger battery capacity becomes more important.

A neighborhood screening or sports watch party may use a high-brightness projector, an audio mixer, multiple speakers, a laptop, decorative lighting, and possibly a fan. Even if each item seems manageable, the total can climb quickly. In this case, both inverter output and total energy capacity need more margin. The power station should not be running near its maximum rating for hours if avoidable.

Runtime also changes with brightness settings. Many projectors use more power in bright or high-performance modes and less in eco mode. Audio volume has a similar effect, although it is usually smaller than projector demand. If the image is bright enough in a lower lamp or LED mode, reducing brightness can noticeably extend battery life.

Temperature can affect performance too. Batteries generally work best in moderate conditions. Very hot or cold evenings may reduce efficiency or trigger protection limits. For outdoor movie nights, it is wise to keep the unit shaded, dry, and ventilated rather than placing it under a blanket, inside a sealed box, or directly on wet ground.

Common mistakes and troubleshooting cues

Assuming the battery capacity equals usable runtime

The most common mistake is dividing battery watt-hours by equipment watts without allowing for inverter losses, idle consumption, or reserve time. If a power station is rated at 500 watt-hours, the usable AC energy may be closer to 400 to 450 watt-hours. Build in a buffer so the movie can finish even if the projector draws more than expected.

Ignoring the projector startup and shutdown behavior

Some projectors briefly draw more power when starting. Others keep fans running after the image turns off to cool internal components. If the station is nearly empty at the end of the movie, the projector may not complete its normal cooldown. That can be hard on the projector over time.

Using too many adapters or long light-duty cords

Multiple adapters, old extension cords, and thin cables can create voltage drop, heat, and clutter. If an extension cord is necessary, use one appropriate for outdoor conditions and for the load. Keep connections elevated and away from wet grass or foot traffic.

Overlooking outlet limits

A power station may have several outlets, but the total inverter limit still applies. If the AC output is rated for 300 watts continuous, plugging in three devices that total 420 watts can cause an overload shutdown. USB ports and DC outputs may also have their own limits.

Not testing the full setup before guests arrive

A projector may work alone, but the full setup may fail once speakers, a media player, and accessories are added. A short test at the same brightness and volume planned for the event is the easiest way to confirm expected runtime and catch buzzing, overload warnings, or connection problems.

Safety basics for backyard power and electronics

Outdoor power setups should be treated with more caution than indoor setups because moisture, people, pets, and darkness add risk. Place the portable power station on a stable, dry, elevated surface when possible. Keep it away from sprinklers, puddles, damp grass, pool areas, and drink tables.

Do not cover the unit while it is operating. Power stations need airflow to cool the inverter, battery management system, and charging electronics. If the unit becomes hot, shows an overload warning, or shuts down repeatedly, reduce the load and allow it to cool in a ventilated area.

Use outdoor-rated cords when cords are needed, and route them where people will not trip. Avoid pinching cords under furniture or running them through standing water. If the event requires permanent outdoor wiring, a dedicated outdoor receptacle, or integration with a building electrical system, consult a qualified electrician rather than improvising.

Keep children from pressing buttons, pulling plugs, or moving the power station during the movie. Also keep flammable materials away from vents and outlets. Most modern power stations include protective electronics, but those protections should not be treated as permission to overload, modify, or bypass the equipment.

Charging safety matters too. If you charge during the day with solar panels or from an outlet, use compatible charging inputs and cables. Do not force connectors, combine incompatible panels, or exceed the input limit. For movie night itself, starting with a full charge is usually simpler and more predictable than relying on charging while running the projector.

Maintenance, storage, and preparation before movie night

Good maintenance starts with charging the power station before the event and checking the display under load. Battery percentage indicators can be approximate, so a real test with the projector and speakers is more useful than relying only on a full icon.

Store the unit in a clean, dry, moderate-temperature location. Avoid long-term storage in a hot car, freezing shed, or humid garage corner. For many battery systems, storing at a partial charge when not in use is preferable to leaving the unit completely empty for months. Check the manual for the model-specific storage range, but as a general habit, recharge periodically and avoid deep discharge during storage.

Before guests arrive, inspect cords, plugs, and ports for damage or debris. Confirm that the projector, speakers, and media device all turn on from the station at the same time. If the power station has an estimated runtime display, watch it for several minutes after the load stabilizes. Early readings may change as the inverter calculates demand.

After the movie, let the projector complete its cooldown cycle before turning off the power station. Then unplug devices, wipe dust or moisture from the exterior, and recharge the station when practical. If the unit was used in a dusty yard, keep vents clear without opening the device or modifying it.

Preparation itemWhat to checkWhy it helps
Battery chargeStart near full for the eventReduces early shutdown risk
Combined loadRun projector, speakers, and media device togetherConfirms inverter capacity
Runtime estimateCompare display estimate with the movie lengthShows whether more reserve is needed
Cord placementKeep cords dry and out of walkwaysReduces trip and moisture hazards
VentilationLeave space around ventsHelps prevent heat-related shutdowns
Example values for illustration.

Related guides: Portable Power Station Basics: Outputs, Inputs, and What the Numbers Mean • Portable Power Station Watt-Hours Explained • Pure Sine Wave vs Modified Sine Wave: Does It Matter for a Portable Power Station? • Surge Watts vs Running Watts: How to Size a Portable Power Station

Practical takeaways and specs to look for

The best portable power station for an outdoor movie night is not necessarily the largest one. It is the one that matches the projector load, speaker demand, movie length, and outdoor conditions with enough reserve to avoid stress. For a small setup, a modest capacity may be enough. For bright projectors, larger speakers, or longer gatherings, prioritize both battery capacity and continuous AC output.

A useful sizing shortcut is to add the watts for every device, multiply by the number of hours you need, and then add 20 to 30 percent for inverter losses and reserve time. If the event matters, test the exact setup before the night of the screening. Real measurements beat guesses from labels, especially when projector brightness and speaker volume can change the load.

Specs to look for

  • Battery capacity: Look for roughly 300 to 600 watt-hours for compact setups, 700 to 1200 watt-hours for typical backyard projectors, and more for large systems; this determines how long the equipment can run.
  • Continuous AC output: Choose an output rating comfortably above the combined projector, speaker, and accessory load, such as 300 watts for light setups or 600 watts and higher for demanding ones; this prevents overload shutdowns.
  • Surge watts: Look for surge capacity above the expected startup draw of the projector and audio gear; this helps the system handle brief power spikes.
  • Pure sine wave inverter: Prefer pure sine wave AC for projectors, powered speakers, laptops, and media devices; it supports cleaner, more stable operation.
  • Usable runtime display: A display showing watts in, watts out, and estimated time remaining is helpful; it lets you monitor the event before the battery gets too low.
  • Number and type of outlets: Look for enough AC outlets plus USB-A, USB-C, or DC ports for media devices; this reduces adapter clutter and keeps the setup organized.
  • USB-C output: A 30 to 100 watt USB-C port can power many streaming devices, tablets, or laptops; using DC or USB where practical may reduce AC outlet congestion.
  • Recharge options: AC charging, vehicle charging, and compatible solar input add flexibility; solar is most useful for daytime recharging before the movie rather than nighttime operation.
  • Operating temperature range: Look for a range suitable for local evenings; heat and cold can reduce efficiency or trigger protection modes.
  • Weight and handle design: A manageable weight and sturdy handles matter if the setup moves between the house, yard, campsite, or community space.

For most outdoor movie nights, the winning approach is to size with margin, keep the power station dry and ventilated, and simplify the number of devices plugged in. A well-planned setup lets the projector, speakers, and media source run quietly in the background so the focus stays on the movie.

Frequently asked questions

What size portable power station do I need for a projector and speakers?

The right size depends on the combined watt draw of the projector, speakers, and any streaming device, plus how long you want them to run. For a small setup, a few hundred watt-hours may be enough, while brighter projectors and louder speakers often need 700 watt-hours or more. It is usually best to add a buffer for inverter losses and startup spikes.

What specs matter most when choosing a portable power station for outdoor movie nights?

The most important specs are battery capacity in watt-hours, continuous AC output, surge capacity, and pure sine wave AC power. Also look for enough outlets, a clear runtime display, and charging options that fit your setup. These features determine whether the projector and speakers can run smoothly for the full movie.

How long will a portable power station run a projector and speakers?

Runtime depends on the total load and the usable portion of the battery, not just the listed capacity. A simple setup drawing under 100 watts may run for several hours on a mid-size unit, while a brighter projector with larger speakers can use battery power much faster. The most accurate estimate comes from testing the actual equipment together.

What is the most common mistake people make with outdoor movie night power?

A common mistake is assuming the battery rating equals real AC runtime. In practice, inverter losses and reserve needs reduce the usable energy, so a station that looks large on paper may still fall short. Another frequent issue is forgetting to test the full setup before the event.

Is it safe to use a portable power station outside for a movie night?

Yes, if it is kept dry, ventilated, and placed on a stable surface away from water and foot traffic. Use outdoor-rated cords when needed and avoid covering the unit while it is running. Safety is mostly about preventing moisture exposure, overheating, and trip hazards.

Can I charge the power station while the projector is running?

Some units support pass-through charging, but it is not always the best choice for a movie night. Charging while powering the setup can add heat and complexity, and it may reduce available output on some models. Starting with a full charge is usually the simplest and most reliable option.

Portable Power Station for a Farmers Market Booth: Lights, Tablet, and Card Reader

Portable power station running lights, tablet, and card reader at a farmers market booth

A portable power station can run a farmers market booth if its battery capacity, AC output, USB ports, and runtime match your lights, tablet, card reader, and any small accessories.

For most produce, craft, or bakery booths, the power needs are modest: LED lights, a tablet point-of-sale setup, a card reader, and maybe a receipt printer or small fan. The important terms are watt-hours, continuous watts, surge watts, USB-C PD profile, inverter efficiency, and runtime. If those specs are sized correctly, a compact or mid-size unit can often cover a full market day without using a gas generator.

The goal is not to buy the largest unit possible. It is to estimate your actual loads, allow a margin for weather and long sales days, and choose convenient outlets that keep payment devices charged and reliable.

What a portable power station does for a farmers market booth

A portable power station is a rechargeable battery system with built-in output ports. It may provide AC outlets for plug-in devices, USB-A or USB-C ports for phones and tablets, and 12-volt DC output for certain accessories. For a farmers market booth, it acts as a quiet, indoor-safe power source for low to moderate loads.

This matters because market booths often operate in places where electrical service is limited, shared, expensive, or unavailable. A booth may need reliable power for checkout more than for heavy equipment. If your tablet or card reader dies during peak hours, you may lose sales even if your display lighting is still working.

Compared with a fuel generator, a portable power station is usually quieter, produces no exhaust during use, and is easier to place near a table. It is best suited for electronics, LED lighting, small fans, labels, scales, and other light-duty booth equipment. It is not the right tool for high-draw appliances such as large refrigerators, commercial coffee machines, heat presses, or cooking equipment unless the unit is specifically sized for those loads.

For this use case, the most important question is simple: how many watt-hours do you need to get through setup, selling hours, teardown, and a reserve? Once you know that, outlet type and charging convenience become easier to evaluate.

How to estimate power needs for lights, tablet, and card reader

Start by listing every device that will run at the booth. Note its watt rating if available. If a device only lists volts and amps, multiply volts by amps to estimate watts. For example, a 5-volt device drawing 2 amps uses about 10 watts. Then estimate how many hours each device will be used.

Battery capacity is listed in watt-hours. A 300 watt-hour power station does not deliver every watt-hour at the outlet because the inverter and internal electronics use some energy. For AC loads, it is reasonable to allow for inverter efficiency loss. For USB loads, losses are often lower, but still present. A practical planning method is to calculate your expected energy use, then add 20% to 40% reserve.

Continuous watts describe how much power the station can provide steadily. Surge watts describe short bursts when some devices start up. Most booth electronics have little surge demand, but some printers, pumps, or fans may briefly draw more power than their running watts. A tablet and card reader usually matter more for port compatibility than surge capacity.

For tablets, USB-C Power Delivery can be useful because some tablets charge faster or only maintain battery level reliably when the port supports the right power profile. A low-output USB port may show charging but still let the battery drain during heavy screen use, cellular data, or point-of-sale activity.

Booth deviceExample running wattsExample use timeEstimated energy
LED string lights10 to 25 W5 hours50 to 125 Wh
Tablet point-of-sale device8 to 20 W6 hours48 to 120 Wh
Card reader2 to 5 W6 hours12 to 30 Wh
Small receipt printer10 to 40 W intermittent1 hour equivalent10 to 40 Wh
Small fan15 to 40 W4 hours60 to 160 Wh
Example values for illustration. Actual use depends on device settings, weather, brightness, and charging behavior.

Real-world booth examples and sizing scenarios

A simple morning booth with a tablet, card reader, and one set of efficient LED lights may only need a few hundred watt-hours. If the market runs four to five hours and the tablet begins the day fully charged, a smaller unit can often keep the checkout system stable and provide lighting during early setup or cloudy conditions.

A busier booth with a tablet, card reader, label printer, compact scale, LED lighting, and a fan should plan for a larger battery. The fan alone can use as much energy as the checkout equipment. If the booth operates from early setup through afternoon teardown, the difference between a 4-hour and 8-hour runtime becomes significant.

A booth that depends on display lighting after sunset should treat lights as a core load, not an accessory. LED lights are efficient, but multiple strands, spotlights, signs, or illuminated menu boards can add up. In that case, calculate lighting separately and verify that the station has enough AC outlets or DC ports without unsafe adapters.

A prepared-food booth may have very different needs. A tablet and card reader are still small loads, but warmers, pumps, blenders, induction plates, refrigerators, or espresso equipment can exceed the output rating of many portable power stations. For food equipment, check running watts, start-up behavior, and local market rules before assuming a battery station is enough.

For many non-cooking booths, a practical target is enough capacity for expected use plus reserve. If the booth estimate is 250 watt-hours, a unit in the 350 to 500 watt-hour range may provide a reasonable buffer. If the estimate is 500 watt-hours, a 700 to 1,000 watt-hour class may be more comfortable, especially when lights and fans run continuously.

Common mistakes and troubleshooting cues at the market

The most common mistake is assuming that a fully charged power station will run everything all day without doing the math. A rated capacity is not the same as usable runtime under your exact load. Bright tablet screens, cellular connections, hot weather, and AC inverter losses can shorten runtime.

Another mistake is using the AC outlet for devices that could run from USB. If a tablet or card reader can charge from USB-C or USB-A, using the DC output may reduce conversion losses compared with plugging a wall charger into the AC inverter. The difference may be small for one device, but it can matter over a long market day.

If the tablet says it is charging but the battery percentage keeps dropping, the USB port may not provide enough power. Look for a higher-wattage USB-C port and confirm the cable supports the needed charging rate. Some cables are charge-only, some are limited to low power, and worn connectors can cause intermittent charging.

If the power station shuts off unexpectedly, check for overload, low battery, heat, or auto-sleep behavior. Some units turn off low-power outputs when they detect very small loads. A tiny card reader by itself may not draw enough to keep a port active. Combining it with a tablet charger or using a different output mode may help, depending on the unit.

If LED lights flicker, the issue may be a low-quality light string, a dimmer mismatch, a weak adapter, or an overloaded output. Check whether the lights require AC or DC power and whether their adapter is rated for outdoor conditions if exposed near a booth edge. Do not bypass plugs, cut connectors, or modify packs to force compatibility.

Safety basics for outdoor booth power

At a farmers market, the power station should be kept dry, shaded, ventilated, and protected from foot traffic. Most portable power stations are not intended to sit in rain, puddles, direct sprinkler spray, or wet grass. Even when a unit has some environmental resistance, its outlets and connected chargers may not.

Place the station where customers cannot trip over cords or bump the unit. Keep cords routed behind tables when possible, and avoid running them across walking paths. If a walkway crossing is unavoidable, follow market rules and use appropriate cord covers. Do not overload extension cords or power strips, and avoid daisy-chaining multiple strips together.

Use only equipment in good condition. Cracked chargers, frayed cords, loose plugs, and damaged outlet strips should be removed from service. Outdoor markets can be rough on equipment because cords are packed, unpacked, dragged, and exposed to dust. A quick visual inspection before each market day can prevent many problems.

Heat is another safety issue. Batteries and inverters work harder in hot environments. Do not put the power station inside a sealed plastic tote while it is operating. Do not cover its vents with tablecloths, boxes, or signage. Shade is helpful, but airflow still matters.

If your booth uses high-draw appliances, refrigeration, cooking equipment, or any connection to site electrical infrastructure, follow market rules and consult a qualified electrician or appropriate professional. A portable power station should not be modified, opened, or used to bypass built-in protections.

Maintenance, charging, and storage between market days

Reliability starts before market morning. Charge the power station fully the day before the event, then confirm the display shows an expected state of charge. If the station has been stored for months, test it with your actual booth devices before relying on it for payment processing.

Keep a simple power kit packed with the station: the correct charging cable, tablet cable, card reader cable, any approved adapters, and a small checklist. Label cables if several look similar. Many market-day power problems come from forgetting one small cord rather than from the battery itself.

Store the unit in a cool, dry place away from direct sun, freezing conditions, and moisture. Long-term storage at a partial charge is often preferred for lithium batteries, but follow the product manual for your specific unit. Recharge periodically if it will sit unused between seasons.

Clean dust from the exterior with a dry cloth and keep vents clear. Do not wash the unit, spray it, or use solvents. Check that buttons, ports, and outlet covers still work smoothly. If the case is swollen, cracked, smells unusual, or becomes unusually hot during use, stop using it and follow the manufacturer’s service guidance.

For recurring markets, track actual performance. Note the starting charge, ending charge, weather, devices used, and hours of operation. After a few events, you will know whether your setup has enough reserve or whether you need to reduce loads, improve charging habits, or choose a higher-capacity station later. For larger or multi-day setups, use a dedicated festival and vendor-event power plan.

Maintenance itemWhat to checkWhy it matters
Before market dayCharge level, cables, ports, and planned loadsPrevents checkout interruptions and missing-cable problems
During setupDry placement, shade, airflow, and cord routingReduces heat, water, and trip hazards
During the eventBattery percentage and device charging statusShows whether runtime is matching expectations
After teardownRemaining charge and any error messagesHelps improve sizing for future markets
Off-seasonStorage charge, temperature, and periodic inspectionSupports battery health and readiness
Example values for illustration. A simple routine can make booth power more predictable across the season.

Related guides: Portable Power Station Watt-Hours Explained • USB-C Power Delivery (PD) Explained for Portable Power Stations • Surge Watts vs Running Watts: How to Size a Portable Power Station

Practical takeaways and specs to look for

For a farmers market booth, the best portable power station is the one that covers your real loads with reserve, has the right ports for your checkout equipment, and is easy to carry, charge, and protect outdoors. Lights, tablets, and card readers are usually manageable loads, but fans, printers, signs, and food equipment can change the sizing quickly.

Before comparing products, estimate watt-hours for the full market day. Include setup and teardown, not just posted selling hours. Then decide which devices should use AC outlets and which should use USB or DC ports. A good booth setup keeps payment devices powered first, display lighting steady second, and convenience accessories within the remaining energy budget.

Specs to look for

  • Battery capacity: Look for a capacity above your calculated use, such as 300 to 500 Wh for a light checkout-and-LED setup or 700 to 1,000 Wh for longer days with fans or printers; this determines practical runtime.
  • Continuous AC output: Look for enough steady wattage for all AC devices running together, often 300 to 600 W for basic booth electronics; this prevents overload shutdowns.
  • Surge watt rating: Look for a surge rating above any device with a motor or printer startup draw; this helps with short spikes even when average wattage is low.
  • USB-C Power Delivery: Look for a USB-C PD port around 30 to 100 W if using a tablet point-of-sale system; this helps the tablet charge while the screen and payment app are active.
  • Number and type of outlets: Look for enough AC, USB-A, USB-C, and 12 V ports without stacking adapters; this keeps the booth cleaner and reduces connection problems.
  • Recharge time: Look for a recharge time that fits your schedule, such as same-day or overnight charging; this matters for back-to-back market days.
  • Display and low-battery information: Look for a clear percentage, watts-in, watts-out, or runtime estimate; this helps you manage power before checkout equipment fails.
  • Operating temperature range: Look for a range suitable for hot summer markets and cool mornings; batteries may reduce performance outside comfortable conditions.
  • Weight and handle design: Look for a size you can lift and transport with the rest of your booth gear, often under 20 to 35 pounds for many small vendors; portability affects whether you will actually bring it.
  • Pass-through charging behavior: Look for clear support if you plan to charge the station while running devices; this can help during long events but should be used according to the product manual.

The practical approach is to size for reliability, not guesswork. Add up the lights, tablet, card reader, and accessories, add a reserve, and choose ports that match your actual devices. That gives your booth quieter power, fewer payment interruptions, and a cleaner setup without overspending on capacity you do not need.

Frequently asked questions

How long will a portable power station run a farmers market booth?

Runtime depends on the station’s usable watt-hours and the total watt draw of your devices. A small booth with LED lights, a tablet, and a card reader may run for a full market day on a modest unit, while adding a fan or printer can shorten runtime quickly. The best estimate comes from adding up each device’s watts and hours of use, then leaving a reserve.

What specs matter most when choosing a portable power station for a farmers market booth?

The most important specs are battery capacity in watt-hours, continuous AC output, USB-C Power Delivery, and the number of ports that match your devices. Recharge time, weight, and clear battery status display also matter because they affect how easy the unit is to use on market days. If you plan to run a tablet and card reader, port compatibility can be just as important as total capacity.

Can I use a portable power station for a tablet and card reader all day?

Yes, many booths can power a tablet and card reader for a full day if the station has enough capacity and the right USB output. A tablet that is heavily used for point-of-sale work may need a higher-watt USB-C port to keep up with screen brightness and cellular data use. Testing your exact setup before market day is the safest way to confirm runtime.

What is the most common mistake people make with booth power?

The most common mistake is assuming the rated battery size equals all-day usable power. In real use, inverter losses, bright screens, hot weather, and extra accessories reduce runtime. Another frequent issue is using AC power for devices that could run more efficiently from USB.

Is a portable power station safe to use outdoors at a market?

It can be safe when used correctly, but it should be kept dry, shaded, ventilated, and out of walkways. Use undamaged cords, avoid overloading outlets, and follow market rules for cord routing. Do not place the unit where it can sit in rain, puddles, or direct sprinkler spray.

Do I need a bigger unit if I use LED lights and a small fan?

Often yes, because a fan can use as much or more energy than the checkout devices. LED lights are efficient, but several strands or bright display lights can add up over several hours. If the fan will run for most of the market day, include it in your watt-hour estimate before choosing a unit.

Portable Power Station for Tailgating: TV, Speakers, Cooler, and Lighting Setup

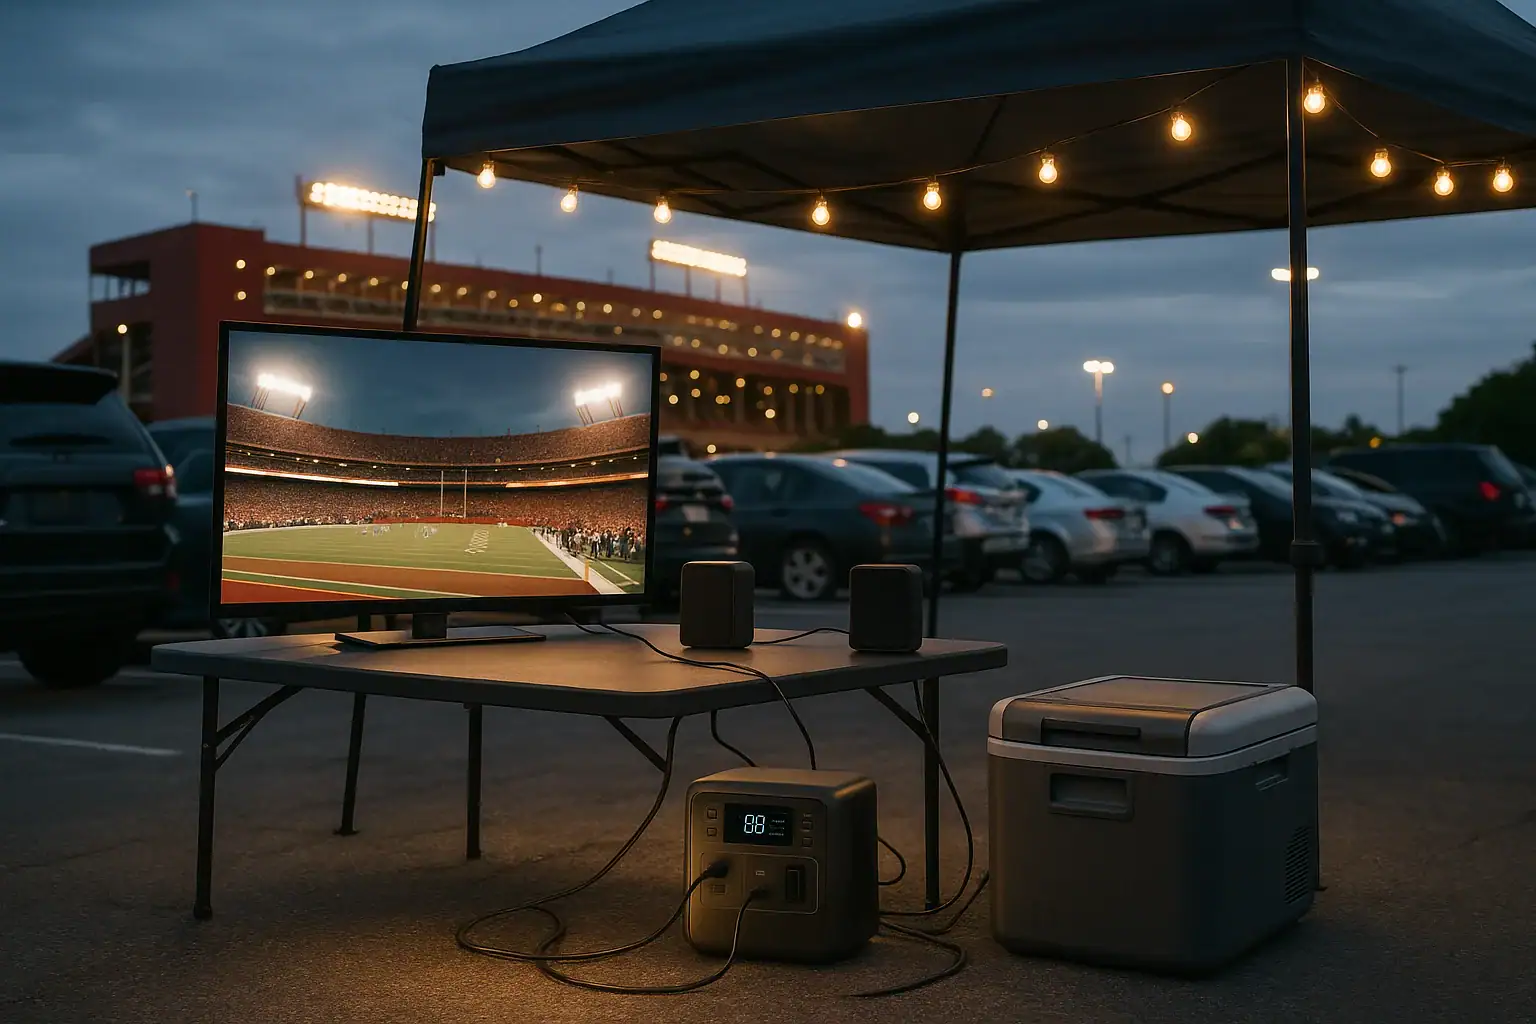
Portable power station running a tailgating TV, speakers, cooler, and lights

A portable power station can run a tailgating TV, speakers, cooler, and lighting if its watt-hours, inverter rating, outlets, and charging options match the total load.

For most game-day setups, the main questions are simple: how many watts the devices use, how long you need runtime, whether anything has surge watts, and whether the station has enough AC outlets and USB-C PD ports. A TV and LED lights are usually predictable loads. A cooler cycles on and off. Speakers vary widely depending on volume and whether they use AC, USB, or a built-in battery.

The right size depends less on the number of devices and more on the combined power draw over time. A small setup may need only a few hundred watt-hours, while an all-day tailgate with a TV, cooler, sound system, and lighting may need a larger battery capacity and a stronger pure sine wave inverter.

What a portable power station does at a tailgate and why it matters

A portable power station is a rechargeable battery system with built-in outputs for powering electronics away from a wall outlet. For tailgating, it replaces noisy fuel generators for many light-to-medium loads, especially entertainment and comfort items such as a TV, speakers, cooler, phone chargers, and LED lighting.

The reason it matters is control. In a parking lot, you may not have access to shore power, and vehicle outlets are not designed to run a full entertainment setup for hours with the engine off. A power station gives you a dedicated battery, a rated inverter for AC devices, DC ports for efficient low-voltage gear, and USB ports for phones, tablets, and small audio devices.

It also helps reduce common tailgating problems. TVs may shut off if the inverter is too small. Coolers may drain a battery faster than expected in hot weather. Speakers may create annoying hum if powered from a poor-quality AC source. Lights and phone chargers may use little power individually, but they still add up during a long pregame and postgame session.

For a reliable setup, think of the power station as the center of a small off-grid system. Every device connected to it needs three things: the right outlet type, enough running watts, and enough battery capacity for the time you plan to use it.

How to size power for a TV, speakers, cooler, and lights

The basic sizing formula is watts multiplied by hours equals watt-hours. If a 60-watt TV runs for 4 hours, it uses about 240 watt-hours before efficiency losses. Power stations are rated in watt-hours, but real usable energy is usually lower because inverters, voltage conversion, heat, cable losses, and standby consumption all take a share.

Start by listing each device and its typical watt draw. The label on the device or power adapter may show watts directly. If it shows volts and amps, multiply volts by amps to estimate watts. For example, a 12-volt cooler drawing 5 amps uses about 60 watts while running. However, compressor coolers cycle, so the average draw may be lower than the maximum. Thermoelectric coolers often run more continuously and can use more energy over a long day.

Next, check output type. A TV usually needs AC power unless it is a 12-volt travel model. Speakers may use AC, USB-C, or their own internal battery. Coolers may use 12-volt DC or AC. LED light strings may use USB, DC, or AC. Whenever possible, using DC or USB outputs can reduce conversion losses compared with running everything through the inverter.

Finally, compare the combined running watts with the continuous inverter rating. If the TV uses 80 watts, the cooler uses 60 watts while running, speakers use 40 watts, and lights use 20 watts, the live load is about 200 watts. A station with comfortable headroom is better than one operating at its limit, especially when a compressor starts or when volume, screen brightness, or ambient temperature increases.

Tailgating deviceTypical running drawPlanning note
32 to 43 inch LED TV40 to 100 wattsBrightness, screen size, and outdoor visibility settings can change power use.
Compact powered speakers10 to 75 wattsHigher volume and bass-heavy playback increase draw.
12-volt compressor cooler35 to 75 watts while runningAverage use depends on cycling, shade, starting temperature, and how often it is opened.
Thermoelectric cooler45 to 90 wattsOften runs continuously, so energy use can be higher over time.
LED string lights or area lights5 to 30 wattsEfficient, predictable load that is easy to budget.
Phones and small devices5 to 30 watts eachUSB charging is usually a small but steady add-on load.
Example values for illustration.

Real-world tailgating setup examples

A compact setup might include a small LED TV, one Bluetooth speaker that is mostly running from its own battery, a USB light, and a few phone charges. This type of setup may average under 100 watts most of the time. If the event lasts 4 to 5 hours, a station in the several-hundred-watt-hour range can often be enough, especially if the speaker is not drawing continuous AC power.

A moderate setup is more common for sports tailgating. It might include a 40-inch TV, powered speakers, a compressor cooler, LED lights after sunset, and several phones. The live load may average around 150 to 250 watts depending on the cooler and audio system. For a 5-hour event, that can mean roughly 750 to 1,250 watt-hours before allowing for inefficiency and reserve capacity. In this case, headroom matters because the cooler may cycle during the hottest part of the day and the TV may be set to high brightness.

A larger setup may include a bigger TV, soundbar or PA-style speaker, multiple lights, a cooler, a fan, and charging for many devices. This can move into the 300 to 600 watt range while everything is active. A larger power station may be appropriate, but the setup should still be kept realistic. Portable stations are excellent for electronics, cooling, and lighting, but high-heat appliances such as grills, hot plates, coffee makers, and space heaters can rapidly drain batteries and may exceed inverter limits.

If you want a simple planning target, estimate your expected watt load, multiply by the hours of use, then add a reserve. A reserve of 20 to 30 percent is practical for outdoor use because conditions change. Hot weather, poor ventilation, a brighter TV setting, more guests charging phones, or a cooler full of warm drinks can all increase energy use.

Common mistakes and troubleshooting cues

One common mistake is sizing only by battery capacity and ignoring inverter output. A station may have enough watt-hours on paper but still fail if the AC inverter cannot handle the combined load. If the TV turns off when the cooler starts, the issue may be a surge or peak load rather than total capacity.

Another mistake is assuming all coolers behave the same. A compressor cooler usually cycles and can be efficient once contents are cold. A thermoelectric cooler may draw a steady amount for the entire event. If runtime is much shorter than expected, the cooler is often the first device to investigate. Pre-chilling food and drinks at home, keeping the lid closed, and placing the cooler in shade can make a major difference.

TV problems often come from startup behavior, inverter quality, or brightness settings. If a TV flickers, shuts down, or shows power errors, check whether the station is near its AC limit, whether other AC loads can be moved to DC or USB, and whether the TV power adapter is fully seated. A pure sine wave inverter is generally preferred for sensitive electronics and audio equipment.

Speaker issues can show up as hum, static, sudden shutdowns, or unexpectedly fast battery drain. Hum may be related to AC adapters, cable routing, or shared power with other devices. Battery drain may be caused by high volume, powered subwoofers, or leaving the inverter on when only USB devices are needed.

Lighting is usually the easiest load, but it can still cause confusion when using long cords or multiple strings. If lights dim or shut off, check the power mode, total wattage, and whether the outlet being used has its own limit. USB light strings should be matched to the station’s USB output capability.

Safety basics for parking-lot power

Use the power station within its published output ratings and avoid overloading outlets. Continuous watts and surge watts are not the same. Continuous watts describe what the unit can supply steadily. Surge watts describe brief startup demand, often relevant for compressor coolers. A setup that runs comfortably below the continuous rating is usually more stable and generates less heat.

Keep the station off wet ground and protected from rain, spilled drinks, and cooler condensation. Most portable power stations are not meant to be exposed to water. If the weather turns, disconnect nonessential loads and move the unit to a dry, ventilated area. Do not place it inside a sealed cooler, under a pile of blankets, or in direct sun for hours, because heat can reduce performance and may trigger protective shutdown.

Use outdoor-rated extension cords when cords are needed, and keep walkways clear to reduce trip hazards. Do not daisy-chain multiple power strips or bury cords under heavy tailgate gear. Keep cable runs short and organized, especially around chairs, grills, vehicles, and foot traffic.

Avoid using a portable power station for improvised vehicle or building wiring. Do not open the unit, modify battery packs, bypass protections, or connect it into electrical panels. If a setup involves hardwired equipment or permanent power distribution, consult a qualified electrician. For normal tailgating, the safest approach is simple plug-in use within the station’s rated outlets.

Maintenance and storage before and after game day

Tailgating is easier when the power station is treated like essential gear, not an afterthought. Charge it before the event, verify that the screen or app shows the expected state of charge, and test the actual devices you plan to bring. A short test at home can reveal missing adapters, overloaded outlets, or a cooler that draws more than expected.

Store the station in a clean, dry place away from extreme temperatures. Long periods in a hot vehicle can age batteries faster, while very cold conditions can reduce available output and charging performance. If the unit will sit unused for weeks or months, follow the manufacturer’s storage guidance for charge level and check it periodically.

After a tailgate, wipe dust and moisture from the exterior, inspect cords and adapters, and recharge the unit before putting it away. If you used the power station heavily, let it cool in a ventilated area before charging. Keep a small kit with the needed power cords, USB cables, DC adapters, and extension cords so the next setup is not delayed by missing parts.

For battery longevity, avoid treating zero percent as a normal stopping point. It is better to plan enough capacity that the station finishes the event with a reserve. That reserve is also useful if the game runs long, traffic delays departure, or you need lighting and phone charging after the main setup is packed.

Practical takeaways and specs to look for

TaskWhen to do itWhy it helps
Fully charge the stationOne day before the tailgateConfirms usable capacity and avoids last-minute charging limits.
Test TV, cooler, speakers, and lights togetherBefore the first eventShows the real combined load and reveals outlet conflicts.
Pre-chill cooler contentsBefore packingReduces compressor runtime and extends battery life.
Pack correct cables and adaptersBefore leaving homePrevents inefficient workarounds and unused ports.
Recharge and inspect gearAfter the eventKeeps the system ready and catches damaged cords early.
Example values for illustration.

Related guides: Portable Power Station Basics: Outputs, Inputs, and What the Numbers Mean • Surge Watts vs Running Watts: How to Size a Portable Power Station • Pure Sine Wave vs Modified Sine Wave: Does It Matter for a Portable Power Station?

The best portable power station for tailgating is the one that fits your actual devices, event length, and parking-lot conditions. For most people, the priorities are enough watt-hours for the full event, enough continuous inverter output for the TV and cooler at the same time, and the right mix of AC, USB, and DC ports.

Keep the setup efficient. Use LED lighting, pre-chill the cooler, reduce TV brightness when possible, and avoid powering high-heat appliances from the same battery meant for entertainment. If runtime is uncertain, test the setup at home for one hour and use the battery percentage drop to estimate total time.

Specs to look for

  • Battery capacity: Look for several hundred watt-hours for a compact setup and around 1,000 watt-hours or more for longer TV, cooler, speaker, and lighting use; this determines practical runtime.
  • Continuous AC output: Look for enough running watts to cover all AC devices at once, often 300 to 800 watts for typical tailgates; this prevents overload shutdowns.
  • Surge watt rating: Look for headroom above the cooler’s startup demand, such as 2 times the expected running draw; this helps compressor devices start reliably.
  • Pure sine wave inverter: Look for a pure sine wave AC output for TVs, audio gear, and sensitive adapters; this can reduce compatibility problems and audio noise.
  • Outlet mix: Look for multiple AC outlets plus USB-A, USB-C PD, and 12-volt DC options; this lets you power devices efficiently without unnecessary adapters.
  • USB-C PD output: Look for 60 to 100 watts if you plan to charge tablets, laptops, or modern speakers; higher PD output can reduce the need for AC chargers.
  • Recharge speed: Look for AC recharge that can refill the unit in a few hours if you tailgate often; faster charging makes back-to-back events easier.
  • Display and load monitoring: Look for a clear screen showing watts in, watts out, percentage, and estimated runtime; this helps you manage power during the event.
  • Operating temperature range: Look for outdoor-friendly performance in warm and cool conditions; parking lots can be hotter or colder than expected.
  • Weight and handle design: Look for a size you can carry with other gear, such as compact units for short events or wheeled support for larger capacities; portability affects real use.

For a clean tailgating setup, plan the loads first, then choose capacity and outputs. A TV, speakers, cooler, and lighting can work well from one portable power station when the system has enough runtime, inverter headroom, and organized cabling.

Frequently asked questions

How long can a portable power station run a TV, speakers, cooler, and lights at a tailgate?

Runtime depends on the total watt draw, battery capacity, and how efficiently each device uses power. A small setup may last several hours, while a larger setup with a cooler and brighter TV can drain a battery much faster. The most reliable way to estimate runtime is to add the running watts of all devices and compare that to the station’s usable watt-hours.

What specs matter most when choosing a portable power station for tailgating?

The most important specs are battery capacity, continuous inverter output, surge rating, and outlet types. For a tailgate, it also helps to have a pure sine wave inverter, USB-C PD, and enough AC and DC ports for your gear. If you plan to run a cooler, make sure the unit can handle startup demand, not just average use.

What is the most common mistake people make with tailgating power setups?

A common mistake is focusing only on watt-hours and ignoring inverter limits or surge demand. That can lead to a TV shutting off when a cooler starts or when several devices run at once. Another frequent issue is underestimating how much power a cooler or high-brightness TV uses over several hours.

Is it safe to use a portable power station in a parking lot?

Yes, if you use it according to the manufacturer’s ratings and keep it dry, ventilated, and protected from damage. Avoid overloading outlets, exposing the unit to rain or spills, and running cords where people can trip. Do not modify the unit or connect it to building wiring.

Can a portable power station run a cooler all day at a tailgate?

It can, but only if the cooler type and battery capacity match the event length. Compressor coolers are usually more efficient than thermoelectric models because they cycle on and off instead of running constantly. Pre-chilling the contents and keeping the cooler in shade can significantly extend runtime.

Should I use AC, DC, or USB outputs for a tailgating setup?

Use the output type that matches the device whenever possible. DC and USB are often more efficient for lights, phones, and some coolers, while AC is needed for most TVs and some speakers. Using the most direct output available can reduce conversion losses and improve runtime.

Portable Power Stations for Camping and Van Life

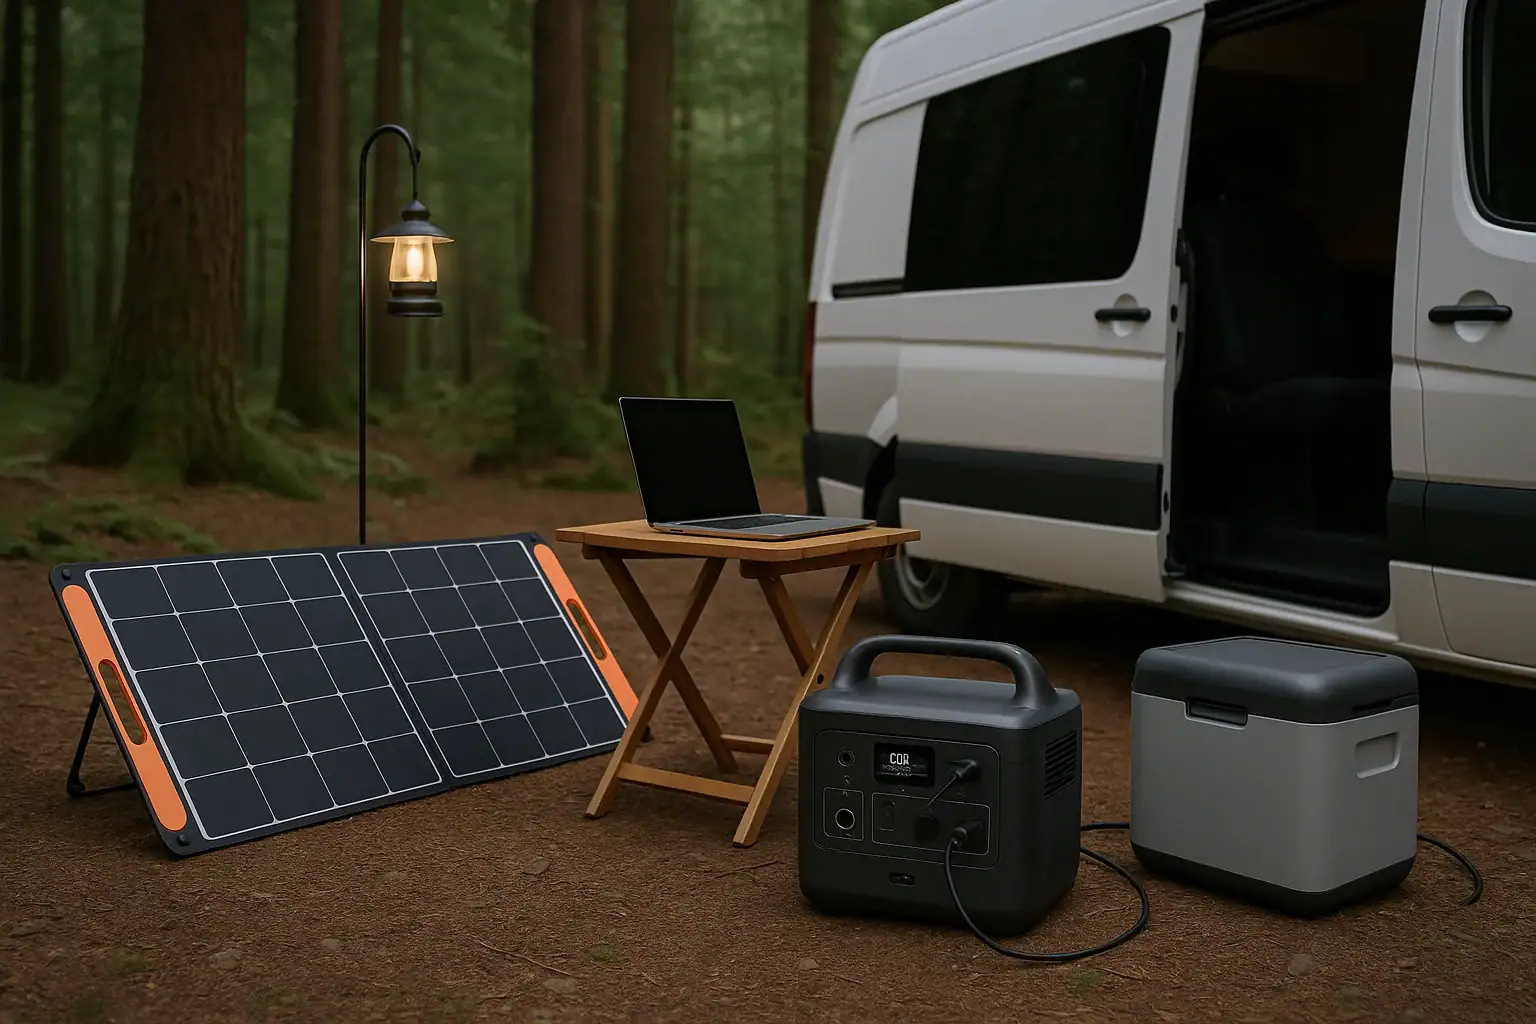
Portable power station at a campsite with camper van and solar panels

Portable power stations for camping and van life are compact battery systems that store energy and provide AC and DC power for your gear when you are off-grid. They turn stored battery capacity into usable watts through outlets, USB ports, and sometimes high-wattage DC outputs, letting you run lights, fridges, fans, laptops, and more without a noisy generator. When you understand watt-hours, surge watts, runtime estimates, and input limits, it becomes much easier to choose the right size unit and avoid running out of power in the middle of a trip.

For campers and van dwellers, a portable power station acts like a silent, rechargeable power bank for your entire setup. It can be charged from wall outlets, a vehicle 12V socket, or solar panels, then used to power devices through pure sine wave AC, USB-C PD profiles, and regulated 12V ports. The key is matching your daily energy use and peak loads to the station’s capacity and output ratings.

This guide explains what these systems are, how they work, how to size them for real-world camping and van life, what mistakes to avoid, and which specs matter most before you buy.

What Portable Power Stations Are and Why They Matter Off-Grid

A portable power station is a self-contained battery system with built-in inverters, voltage regulation, and multiple output ports designed to replace or supplement traditional fuel generators. Instead of burning fuel, it stores energy in a rechargeable battery (usually lithium-based) and converts that energy into AC and DC power on demand.

For camping and van life, this matters because it provides quiet, low-maintenance power that can be used in campgrounds, public lands, and urban stealth camping spots where generators are noisy, restricted, or inconvenient. You can charge the station during the day and have reliable power at night without idling your engine.

These systems are especially useful for:

  • Short camping trips where you want to run lights, phones, cameras, and a laptop.
  • Extended van life with a 12V fridge, fans, routers, and work electronics.
  • Hybrid setups where a portable unit supplements a van’s built-in electrical system.

Understanding what a portable power station can and cannot do helps you avoid undersizing your system, overloading outlets, or expecting it to power full residential appliances that exceed its limits.

How Portable Power Stations Work for Camping and Van Life

Portable power stations combine several components in one enclosure: a battery pack, a charge controller, an inverter, and various output ports. Together, these manage energy flow in and out of the battery and convert stored DC energy into forms your devices can use.

Battery and capacity (Wh)

The battery is rated in watt-hours (Wh), which tells you how much energy it can store. A 500 Wh station can theoretically provide 500 watts for one hour, 250 watts for two hours, and so on, though real-world runtime is slightly less due to conversion losses and inverter efficiency.

Inverter and AC output (W)

The inverter converts DC battery power into AC power for standard household-style outlets. Two main ratings matter:

  • Continuous output (W): the maximum power it can provide steadily.
  • Surge watts (peak W): a short burst for starting motors or compressors.

For camping and van life, continuous output determines whether you can run items like an electric kettle or induction cooktop, while surge watts affect start-up of devices like small compressors.

DC outputs and USB ports

DC ports include 12V car-style sockets, barrel ports, and sometimes high-current outputs for fridges or other gear. USB-A and USB-C ports provide regulated power for phones, tablets, and laptops. USB-C PD (Power Delivery) profiles can supply higher wattage (for example, 60–100 W) for modern laptops and fast charging.

Charging inputs and input limits

Portable power stations can usually be charged via:

  • AC wall outlet (fastest in many cases).
  • 12V vehicle socket while driving.
  • Solar panels through built-in or external solar charge controllers.

The input limit (in watts) controls how fast the station can recharge. If the input limit is 200 W and you connect 400 W of solar, the station will still only accept 200 W. For van life, higher input limits reduce downtime and help you recover from cloudy days.

Battery chemistry and cycle life

Most portable power stations use either lithium-ion (NMC/NCA) or lithium iron phosphate (LiFePO4) batteries. Lithium-ion typically offers higher energy density (more capacity in less weight), while LiFePO4 usually provides more cycle life and improved thermal stability. Both types require proper charge and temperature management, which the station handles automatically.

Built-in protections

Modern units include protections against overcharge, over-discharge, short circuits, and over-temperature. These help prevent damage to the battery and connected devices, which is especially important in the variable conditions of camping and van travel.

ComponentTypical RatingRole in Camping/Van Life
Battery capacity300–2,000 WhDetermines runtime for fridges, lights, and electronics.
AC continuous output300–2,000 WLimits which appliances you can run at once.
AC surge output600–4,000 WHandles start-up spikes from motors and compressors.
Solar input limit100–600 WControls how fast you can recharge from panels.
USB-C PD output30–100 WPowers and fast-charges laptops and devices.
Example values for illustration.

Real-World Camping and Van Life Power Scenarios

Understanding real-world usage helps translate specs into practical decisions about capacity, runtime, and charging strategies.

Weekend camping with basic electronics

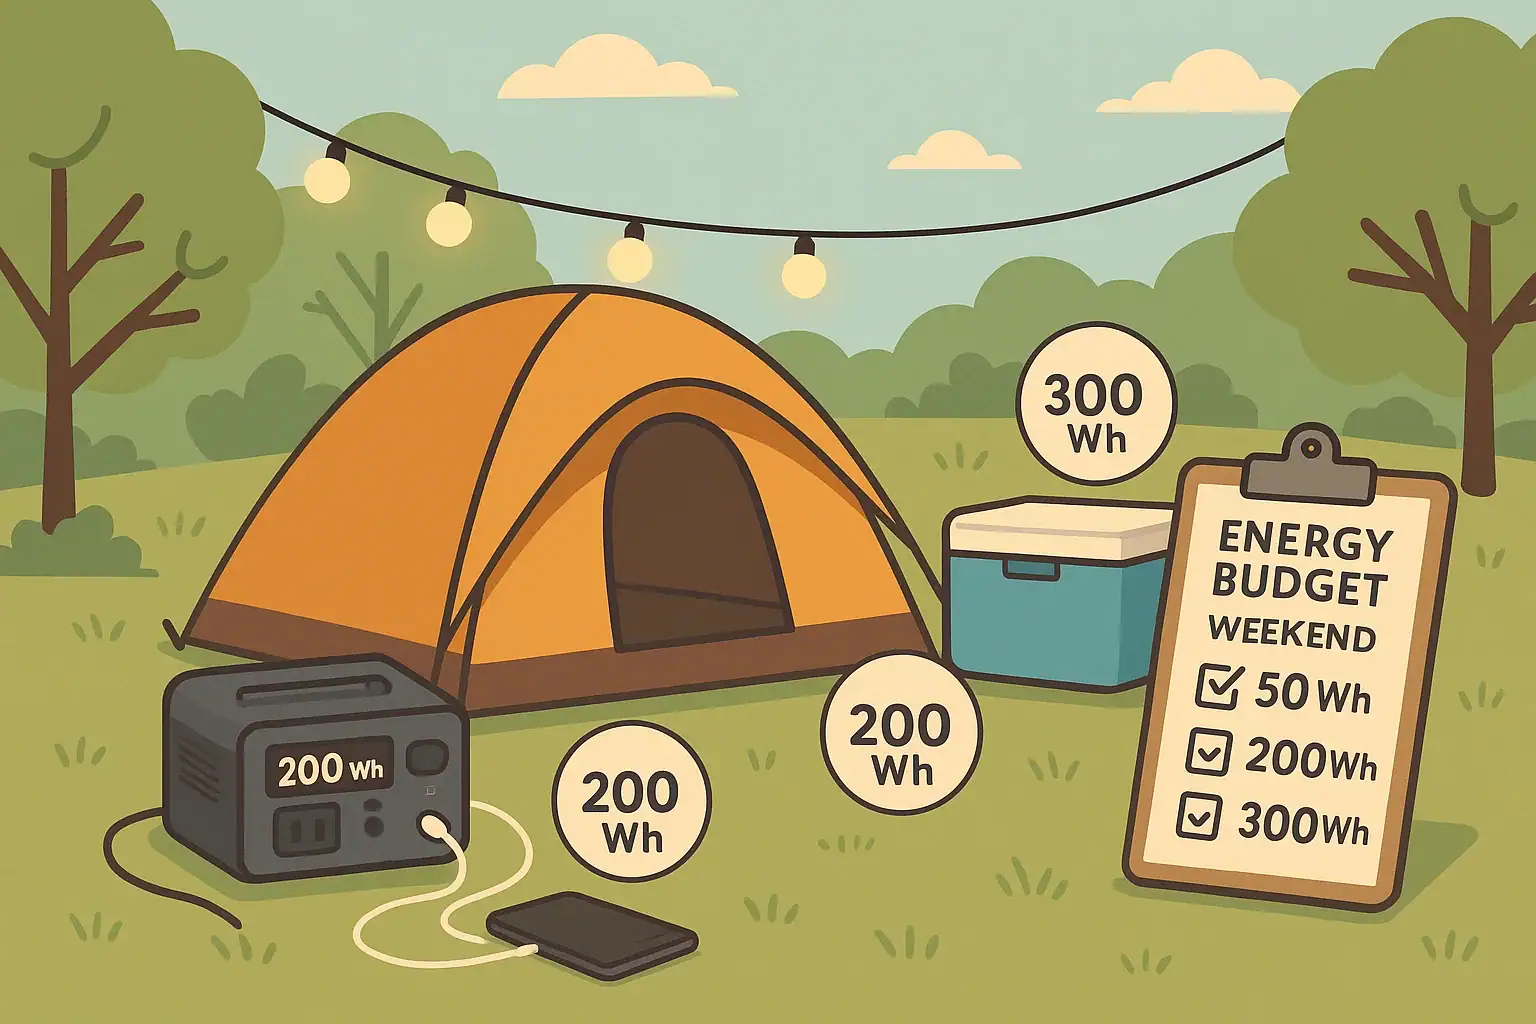
On a two- or three-night camping trip, you might power LED string lights, phones, cameras, a Bluetooth speaker, and occasionally a laptop. Daily energy use could look like this:

  • LED lights: 10 W for 4 hours = 40 Wh
  • Phone charging: 10 Wh per phone, 2 phones = 20 Wh
  • Camera batteries: 20–30 Wh
  • Laptop: 60 W for 2 hours = 120 Wh

Total daily draw might be around 200 Wh. A 500 Wh portable power station could comfortably cover this for two days without recharging, or longer with some solar input or vehicle charging.

Van life with a 12V fridge and fans

For van life, a 12V compressor fridge is often the biggest continuous load. A typical small fridge may average 30–50 W over 24 hours, depending on ambient temperature and insulation, using roughly 700–1,200 Wh per day. Add in:

  • Vent fan: 20–40 W for several hours.
  • Lights: 5–15 W in the evening.
  • Electronics: 50–150 Wh for phones, laptops, routers.

Daily consumption can easily reach 1,000–1,500 Wh. In this scenario, a 1,000 Wh station might only cover a day of use without recharging, while a larger unit paired with solar would be better suited for continuous off-grid living.

Occasional high-wattage appliances

Some campers want to run high-wattage appliances like electric kettles, induction cooktops, hair dryers, or portable heaters. These draw large amounts of power:

  • Electric kettle: 800–1,500 W
  • Induction cooktop: 800–1,800 W
  • Hair dryer: 800–1,500 W
  • Space heater: 1,000–1,500 W

Even if your power station’s inverter can handle the wattage, these devices quickly drain capacity. For example, a 1,000 W heater running for one hour uses about 1,000 Wh, nearly the entire capacity of a 1,000 Wh station. Many van dwellers instead reserve high-draw tasks for shore power or use alternative cooking and heating methods.

Hybrid setups with solar and alternator charging

In van life, a common strategy is to charge the portable power station from both solar panels and the vehicle alternator. For example:

  • Roof-mounted solar: 200–400 W, providing 600–1,600 Wh per sunny day depending on conditions.
  • Alternator via 12V socket: 60–120 W while driving.

This combination can keep a medium-size station topped up, especially if your daily use is aligned with your charge input. Matching your solar array and driving habits to your average consumption is critical for sustained off-grid living.

Common Mistakes, Limits, and Troubleshooting Cues

Portable power stations are straightforward to use, but several recurring mistakes and misunderstandings can lead to poor performance or unexpected shutdowns.

Undersizing capacity and overestimating runtime

One of the most common mistakes is choosing a unit with too little capacity for your actual loads. People often assume that a few hundred watt-hours will last for days, then are surprised when a fridge or fan drains it quickly. To avoid this, estimate your daily watt-hour usage and look for a station with at least 1.5–2 times that amount, especially if you cannot recharge fully every day.

Ignoring continuous vs surge watts

Another frequent issue is focusing on surge watts instead of continuous output. If a station lists 1,000 W surge but only 500 W continuous, it cannot run a 700 W appliance for more than an instant. If your device causes the station to shut down or beep and cut power, check whether its running wattage exceeds the continuous rating.

Overloading DC or USB ports

Even when the AC inverter is under its limit, individual DC ports and USB outputs also have their own maximum ratings. Plugging too many devices into a single port cluster can cause those ports to turn off or the unit to display an overload warning. If this happens, unplug some devices, power-cycle the DC or USB section, and spread loads across different ports.

Slow charging and input limit confusion

Users sometimes expect faster charging than the input limit allows, especially when adding more solar panels. If your station is only accepting, for example, 150–200 W even though you connected 300 W of panels, it is likely capped by its internal charge controller. Check the stated input wattage limit and design your solar array around that value rather than the panel rating alone.

High or low temperatures can cause the station to reduce output or shut down to protect the battery. Symptoms include:

  • Fans running at high speed and reduced output power.
  • Error icons or temperature warnings on the display.
  • Refusal to charge or discharge until cooled or warmed.

Storing or operating the unit in direct sun, near heaters, or in freezing conditions can trigger these protections. Move it to a shaded, ventilated area and allow time for temperature to normalize.

When to seek professional help

If your power station repeatedly shuts down under light loads, shows error codes you cannot clear, or physically swells, leaks, or smells unusual, stop using it. Do not open the unit or attempt internal repairs. Instead, contact the manufacturer or a qualified technician familiar with battery systems for guidance.

Safety Basics for Using Portable Power Stations Outdoors

Portable power stations are generally safer and cleaner than fuel generators, but they still store significant energy and must be used responsibly, especially in confined spaces like vans and tents.

Ventilation and heat management

These units generate heat when charging and discharging. Place them in a location with airflow around the vents, avoid covering them with bedding or gear, and keep them away from direct sun when possible. In a van, avoid placing the station in a fully sealed compartment without ventilation.

Moisture and dust protection

Most portable power stations are not fully waterproof. Keep them off wet ground, away from splashes, and protected from rain. If camping in humid or dusty environments, store the unit in a dry, elevated spot and avoid operating it in standing water, mud, or blowing sand.

Safe cable routing and trip hazards

At a campsite, AC cords and DC cables can become trip hazards or get pinched in doors. Route cables along edges, secure them where possible, and avoid running cords where vehicles or people are likely to cross. Damaged cables can overheat or short, so replace frayed cords instead of taping over them.

Proper load selection

Only connect devices that are compatible with the station’s voltage and wattage ratings. Avoid plugging in high-heat devices like large space heaters or hot plates unless your unit is specifically sized for them. Do not daisy-chain power strips into power strips, and avoid plugging another power station or large battery charger into the AC outlet unless the manufacturer explicitly allows it.

Safe use in vans and enclosed spaces

Unlike fuel generators, portable power stations do not emit exhaust, so they can be used inside vans and RVs with reasonable ventilation. However, avoid placing them where they could block exits, sit under bedding, or be crushed by shifting cargo. Secure the unit so it cannot slide or tip during driving.

High-level electrical safety

Do not attempt to hardwire a portable power station directly into a home or van AC electrical system without appropriate transfer equipment and expertise. If you want to integrate a portable unit with an existing electrical panel or complex van electrical system, consult a qualified electrician or professional van upfitter to design a safe solution.

Safety AreaGood PracticeRisk Reduced
VentilationKeep vents clear and avoid enclosed boxes.Overheating and thermal shutdown.
MoistureElevate off wet ground, protect from rain.Short circuits and corrosion.
Cable managementSecure cords, avoid pinch points.Trips, damaged insulation, shorts.
Load selectionStay within rated watts and voltages.Overload, shutdowns, potential damage.
Example values for illustration.

Related guides: Portable Power Station Buying Guide • How to Choose the Right Size Portable Power Station • Can You Charge a Portable Power Station with Solar Panels?

Maintaining and Storing a Portable Power Station for Travel

Proper maintenance and storage habits extend the life of your portable power station and keep it ready for trips.

Regular usage and cycling

Lithium batteries perform best when used periodically rather than left fully charged or fully empty for long periods. If you only camp a few times a year, plan to cycle the station every couple of months by discharging it partially and recharging it. This helps keep the battery management system active and the cells balanced.

Optimal state of charge for storage

For long-term storage between camping seasons, many manufacturers recommend storing the battery at a partial state of charge rather than 0% or 100%. A range around 40–60% is commonly suggested. Check the display, charge or discharge to roughly mid-level, then store the unit.

Temperature considerations in vans and storage spaces

Extreme heat and cold both accelerate battery wear. In van life, it is common for interior temperatures to rise significantly in the sun. Whenever possible, park in shade, use ventilation or window covers, and avoid leaving the power station in direct sunlight on the dashboard or near heaters. In cold climates, avoid charging the battery when it is below freezing; allow it to warm up inside the vehicle first.

Keeping ports, fans, and surfaces clean

Dust, sand, and pet hair can clog cooling fans and ports over time. Periodically inspect the intake and exhaust vents and gently clean them with a soft brush or compressed air, taking care not to force debris inside. Wipe the exterior with a dry or slightly damp cloth, avoiding harsh cleaners or solvents.

Monitoring health indicators

Many units display battery health, cycle count, or error codes. Pay attention to any changes in runtime, unusual noises, or repeated warnings. A noticeable drop in capacity over time is normal, but sudden, severe changes may warrant contacting the manufacturer or a professional.

Transport and mounting

When transporting your portable power station in a van or vehicle, secure it to prevent movement during braking or rough roads. Use straps, brackets, or dedicated storage compartments to keep it from tipping or sliding. Avoid stacking heavy gear on top of the unit to protect the case and ports.

Practical Takeaways and Specs to Look For

For camping and van life, the best portable power station is the one that reliably supports your specific loads, charging habits, and travel style. Weekend campers may prioritize light weight and simple USB/AC outputs, while full-time van dwellers often focus on larger capacity, robust solar input, and long cycle life.

When planning your setup, start by listing all the devices you want to power, their wattage, and how many hours per day you expect to use them. Convert that into a daily watt-hour estimate, then compare it to the station’s capacity and your expected solar or driving-based recharging. Remember that cloudy weather, shade, and seasonal changes can significantly affect solar production, so build in a buffer.

Also consider future needs. If you might add a 12V fridge, more work electronics, or additional lighting, it can be more cost-effective to choose a slightly larger unit now instead of upgrading later.

Specs to look for

  • Battery capacity (Wh): For weekend camping, 300–700 Wh is often sufficient; for van life with a fridge, 1,000–2,000 Wh or more is typically more comfortable. Higher capacity extends runtime between charges.
  • AC continuous output (W): Match this to your highest expected simultaneous load. For light use, 300–500 W may be enough; for small appliances or cooktops, 1,000–1,500 W is often more appropriate.
  • Surge watts (peak W): Look for at least 1.5–2 times the continuous rating if you plan to run devices with motors or compressors. Adequate surge capacity helps avoid nuisance shutdowns at start-up.
  • Solar input limit (W): For regular off-grid use, 200–400 W of solar input capacity provides more reliable daily recharging. Higher input limits shorten recovery time after cloudy days.
  • USB-C PD output (W): If you charge modern laptops or tablets, aim for at least one USB-C PD port in the 60–100 W range to support fast, efficient charging without using the inverter.
  • 12V output type and regulation: Regulated 12V outputs help keep fridges and sensitive DC gear stable, especially as the battery discharges. Check that the current rating supports your devices.
  • Battery chemistry and cycle life: Compare estimated cycle life (for example, 500–3,000 cycles to a certain percentage of original capacity). Longer cycle life is valuable for daily van life use.
  • Weight and form factor: For car camping, weights under 20–30 lb are easier to move. In van builds, consider dimensions and handle placement for secure mounting and access.
  • Display and monitoring: A clear screen showing input/output watts, remaining runtime, and state of charge makes daily management easier and helps you fine-tune your energy use.
  • Noise level (fans): If you plan to sleep near the unit, quieter cooling fans and adjustable charge rates can make nighttime operation more comfortable.

By matching these specs to your actual camping or van life routine, you can choose a portable power station that delivers quiet, dependable power wherever you park.

Frequently asked questions

Which specs and features matter most when choosing a portable power station for camping or van life?

Key specs include battery capacity (Wh) for runtime, continuous AC output (W) for simultaneous loads, and surge watts for motor start-ups. Also check solar input limits, USB-C PD output for fast laptop charging, battery chemistry/cycle life, and weight/form factor for portability. These together determine how the unit matches your devices and charging habits.

What is a common mistake people make when estimating how long a station will last?

Many people underestimate their total daily watt-hour usage and ignore inverter/conversion losses and surge events. Always calculate the combined Wh of all devices, add a safety buffer (about 1.5–2x), and factor in real-world inefficiencies to avoid running out of power unexpectedly.

Is it safe to use a portable power station inside a van or tent?

Portable power stations are generally safer than fuel generators because they do not emit exhaust, so they can be used inside vans and tents with reasonable ventilation. Still, place them where vents are clear, secure them against movement, and avoid covering them or placing them under bedding to prevent overheating. Follow the manufacturer’s safety guidelines and stop use if you notice swelling, leaks, or unusual smells.

How long will a portable power station typically run a 12V fridge?

Runtime depends on the fridge’s average draw; a small compressor fridge often averages 30–50 W, which translates to roughly 700–1,200 Wh per day. A 1,000 Wh station might therefore cover about one day of fridge use without recharging, and running the fridge from a regulated 12V output is more efficient than using the inverter. Always check your fridge’s spec sheet and add margin for warmer ambient temperatures and door openings.

Can I recharge a portable power station with roof solar panels and while driving at the same time?

Some stations support simultaneous charging from multiple inputs, but many have a combined input limit that caps total charging power. Check the unit’s stated input limits and supported input combinations before wiring panels and alternator sources. When configured correctly, solar plus alternator charging can significantly reduce downtime between uses.

How should I store and maintain the battery when I’m not traveling?

For long-term storage, keep the battery at a partial state of charge (commonly around 40–60%) and avoid leaving it fully charged or fully depleted. Cycle the unit every couple of months, store it in a cool, dry place away from extreme temperatures, and periodically check the charge level to maintain battery health. Regularly clean vents and ports to prevent dust buildup.

Off-Grid Cooking With Electricity: What’s Practical and What Isn’t

Off-grid electric cooking setup with a portable power station and induction cooktop

Off-grid cooking with electricity is practical for low and medium-power appliances, but full electric stoves and ovens usually demand more watts and watt-hours than a typical portable power setup can deliver. The key is matching your portable power station’s capacity, inverter watts, surge watts, and input limit to the real power draw and runtime you need for cooking.

People search terms like “can a power station run an induction cooktop,” “electric stove wattage,” “runtime calculator,” and “off-grid kitchen power” because they want clear limits, not guesses. Once you understand wattage, cooking time, and battery capacity, you can decide which devices are realistic and which will drain your system too fast.

This guide explains how electric cooking off-grid actually works, what’s efficient, what usually isn’t, and which specs matter when you’re planning a battery-based cooking setup in a van, cabin, RV, or emergency kit.

What Off-Grid Electric Cooking Really Means and Why It Matters

Off-grid electric cooking means preparing food using electricity from batteries, solar, or generators without relying on a wired utility grid. In practice, most people use a portable power station, solar panels, and sometimes a backup fuel generator. The portable power station’s inverter converts DC battery power to AC power for plug-in cooking appliances.

This matters because cooking is one of the highest energy uses in any household. A typical electric stove burner or oven can easily draw 1,000–2,000 watts or more, and that load might run for 20–60 minutes at a time. For a portable power station, that can drain a battery pack surprisingly fast.

Understanding what’s practical off-grid helps you:

  • Choose cooking methods that match your battery capacity and inverter rating.
  • Avoid tripping overload protection or shutting down your power station mid-meal.
  • Size your solar and battery system realistically for daily meal prep.
  • Decide when to use electric cooking versus propane, butane, or other fuels.

Instead of asking “Can I run X appliance?” it’s more useful to ask “How long can I run this appliance, and what trade-offs does it create for the rest of my power needs?”

Key Power Concepts for Off-Grid Electric Cooking

To know what’s realistic, you need a few core concepts: watts, watt-hours, inverter capacity, surge watts, and duty cycle. These terms directly affect whether your portable power station can handle a specific cooking device.

Watts and Watt-Hours

Watts (W) measure power at a specific moment. A 1,000 W induction burner uses 1,000 watts while it’s running at full power.

Watt-hours (Wh) measure energy over time. A 1,000 Wh battery can, in theory, power a 1,000 W device for about one hour (ignoring losses). In real life, inverter and conversion losses usually reduce usable energy by 10–20%.

Basic estimate:

Runtime (hours) ≈ Battery capacity (Wh) ÷ Appliance draw (W)

Example: 1,200 Wh battery ÷ 800 W cooker ≈ 1.5 hours of continuous full-power use.

Inverter Continuous and Surge Watts

The inverter rating on a portable power station sets the upper limit for what you can plug in.

  • Continuous watts: The maximum power the inverter can supply steadily, such as 1,000 W or 2,000 W.
  • Surge watts: A short burst the inverter can handle for startup spikes, often 1.5–2x the continuous rating.

Some cooking devices, especially those with motors or compressors (like some electric grills with fans), may need a brief surge to start. Purely resistive heaters (many hot plates, kettles) usually draw near their rated watts without a big surge.

Duty Cycle and Temperature Control

Many electric cooking appliances cycle on and off rather than running at full power continuously. This is the duty cycle. A 1,000 W cooktop might average 500–700 W over time if it cycles to maintain a set temperature.

That means actual energy use can be lower than a simple “max watts × total time” estimate, but you should always plan using the worst-case (max watt) draw to avoid overloading your inverter.

Input Limit and Recharging

The input limit is how fast your power station can recharge from solar, wall, or a vehicle. For cooking, this matters because you’re often drawing a lot of energy in a short time.

  • If you cook for 30–60 minutes at high power, you’ll want enough solar or generator input to replace that energy before the next meal.
  • A low input limit means you can cook electrically, but you may not be able to sustain that routine every day without running out of stored energy.

AC vs. DC Cooking Loads

Some cooking-related loads (like 12 V fridges or low-watt kettles) can run directly from DC, which is more efficient than converting to AC. However, most high-wattage cooking tools are AC-only and must use the inverter, which adds conversion losses and stresses the system more.

Cooking deviceTypical power draw (W)Notes
Small induction burner (single zone)800–1,500Highly efficient, needs compatible cookware
Electric hot plate800–1,500Simple resistive load, slow to heat and cool
Electric kettle800–1,500Short runtime, very practical for boiling water
Compact toaster oven1,000–1,500Heats air and metal, moderate efficiency
Full-size electric oven2,000–3,500Generally impractical for small power stations
Example values for illustration.

Practical Examples: What Electric Cooking Works Off-Grid and What Doesn’t

Once you understand watts and watt-hours, you can evaluate specific cooking methods. Some are well-suited to portable power stations; others are only realistic with large, permanent battery banks or generator support.

What’s Typically Practical

  • Electric kettles: Boiling water is one of the most practical electric cooking tasks. A 1,000 W kettle might run for 3–6 minutes to boil water for coffee, tea, or instant meals. Even a modest battery can handle a few boils per day.
  • Small single-burner induction cooktops: At 600–1,200 W, these are efficient because they transfer heat directly to the pot. Short cooking tasks like stir-fries, eggs, or pasta are feasible, especially if you keep power below max and limit total cook time.
  • Low-watt rice cookers: Many compact rice cookers use 300–700 W and run for 20–40 minutes. They’re energy-efficient for grains and one-pot meals, making them a favorite for battery-based setups.
  • Slow cookers at low settings: Some slow cookers draw 150–250 W on low. They run for many hours, so total energy use can still be high, but the low power draw is gentle on the inverter. This works best with a large battery and steady solar input.
  • Small air fryers or toaster ovens (short sessions): Quick 10–20 minute runs at 800–1,200 W can be viable if you plan your energy budget and don’t run them back-to-back.

What’s Usually Impractical for Portable Power Stations

  • Full-size electric ranges and ovens: These often require 2,000–3,500 W or more and may need 240 V circuits. A typical portable power station cannot safely or efficiently run them for more than a very short time, if at all.
  • Multiple high-watt burners at once: Running two or three 1,000+ W burners simultaneously can overload the inverter or drain the battery extremely fast. Off-grid setups usually rely on one high-watt appliance at a time.
  • Long baking sessions: Baking at 1,000–1,500 W for an hour or more can consume most of a mid-size battery’s capacity in one go. This is better suited to large, fixed systems or generator support.

Balancing Cooking With Other Loads

In off-grid life, cooking is only one part of your energy use. You may also be powering refrigeration, lighting, laptops, fans, or pumps. A realistic plan considers:

  • How many watt-hours per day you can harvest (solar, generator, vehicle charging).
  • How many watt-hours your non-cooking loads require.
  • How much “room” is left for cooking without draining your battery too deeply.

Many people end up using a hybrid approach: electric for quick, high-efficiency tasks (like boiling water or quick frying) and gas or other fuels for long, high-heat cooking.

Common Mistakes and Troubleshooting When Cooking Off-Grid With Electricity

Even with a capable portable power station, it’s easy to run into overloads, short runtimes, or inconsistent performance. Most problems trace back to a few predictable mistakes.

Underestimating Total Energy Use

A frequent issue is focusing only on watts and ignoring time. For example, a 1,000 W hot plate might seem manageable, but if you run it for 45 minutes twice a day, that’s 1,500 Wh per day just for that one burner—more than many portable stations can reliably supply and recharge daily.

Troubleshooting cue: If your battery empties faster than expected, track how long each cooking device runs, then multiply by its watt rating to estimate daily watt-hours.

Overloading the Inverter

Plugging in a 1,500 W hot plate and a 1,200 W air fryer at the same time into a 1,500 W inverter is a recipe for overload. The power station may shut down or throw an error.

Troubleshooting cue: If your power station turns off when you start cooking, check the combined watt draw on its display. Keep total load under about 80–90% of the inverter’s continuous rating to avoid nuisance trips.

Ignoring Startup Surges

Some appliances briefly pull more power at startup than their label suggests. While many cooking appliances are resistive and don’t surge much, those with motors, fans, or compressors can.

Troubleshooting cue: If an appliance never starts and the station flashes overload immediately, the startup surge may exceed the surge watt rating, even if the running watts are within limits.

Running the Battery Too Low

Regularly draining a battery to near 0% to finish cooking can shorten its lifespan and leave you without power for essentials.

Troubleshooting cue: If your state of charge is often below 10–20% after meals, re-evaluate your cooking methods, reduce power settings, or increase your storage and charging capacity.

Not Accounting for Inverter Losses

Inverter and conversion losses mean you never get the full rated watt-hours out of a battery when using AC cooking appliances. Planning as if you have 10–20% less than the label capacity gives more realistic expectations.

Troubleshooting cue: If your calculated runtime is consistently longer than real-world results, add a 15–20% buffer in your math to account for losses and inefficiencies.

Safety Basics for Electric Cooking Off-Grid

Cooking with electricity off-grid may feel safer than open flames, but it still involves high currents, hot surfaces, and confined spaces. A few high-level safety practices can reduce risk.

Electrical Safety and Load Management

  • Stay within ratings: Never exceed your portable power station’s continuous or surge watt ratings. Repeated overloads can stress components and cause shutdowns.
  • Use appropriate cords: Avoid thin, damaged, or coiled extension cords that can overheat under high loads. Use short, heavy-gauge cords rated for more than the maximum current you expect.
  • Avoid daisy-chaining: Plug high-watt appliances directly into the power station’s AC outlets instead of stacking power strips or adapters.

Heat, Ventilation, and Fire Risk

  • Stable surfaces: Place hot plates, induction cookers, and toaster ovens on stable, heat-resistant surfaces away from flammable materials like curtains, paper towels, and bedding.
  • Ventilation: Even without combustion, cooking generates steam, oil vapor, and heat. In vans, RVs, and cabins, use windows, fans, or vents to reduce condensation and overheating.
  • Supervision: Avoid leaving electric cooking devices unattended, especially in small spaces or near combustible materials.

Moisture and Device Protection

  • Keep electronics dry: Position the power station away from sinks, splashes, and steam. Moisture can damage outlets and electronics.
  • Allow cooling: Inverters and batteries generate heat under load. Ensure vents are unobstructed and give the unit time to cool after heavy cooking sessions.

When to Consult a Professional

If you are integrating a large battery bank, inverter, or generator into a cabin or RV electrical system, consult a licensed electrician or qualified RV technician. They can ensure wiring, breakers, and grounding are appropriate for high cooking loads without creating shock or fire hazards.

Safety areaKey concernHigh-level best practice
Electrical loadOverloading inverter or cordsKeep total watts below 80–90% of ratings
HeatBurns and fire riskUse stable, heat-resistant surfaces and keep clearances
VentilationOverheating and moistureVentilate small spaces during and after cooking
PlacementWater and steam exposureKeep power station away from sinks and splashes
Example values for illustration.

Related guides: Portable Power Station Buying Guide • Powering a Coffee Maker, Kettle, or Induction Cooktop: What Works and Why • How to Estimate Runtime for Any Device: A Simple Wh Formula + 5 Worked Examples

Practical Takeaways and Key Specs to Look For in an Off-Grid Cooking Setup

Off-grid electric cooking is most successful when you design your meals around your energy system, not the other way around. Focus on short, efficient tasks—boiling water, quick pan cooking, compact toaster or air fryer sessions—and avoid long, high-power baking or multiple burners at once unless you have a large, well-designed battery and charging system.

Think in terms of daily energy budget: how many watt-hours you can store and replenish, and how much you are willing to allocate to cooking versus refrigeration, lighting, and electronics. Many people find a hybrid approach works best: electric for convenience and precision, and non-electric fuels for long or high-heat cooking.

Specs to look for

  • Battery capacity (Wh) – Aim for enough capacity to cover your highest-demand meal plus other loads, often 800–2,000 Wh for light to moderate cooking. More capacity gives longer runtimes and flexibility.
  • Inverter continuous watts – Choose an inverter that comfortably exceeds your highest single cooking load, typically 1.3–1.5x your biggest appliance wattage. This prevents overloads when devices cycle or spike.
  • Surge watt rating – Look for surge capacity at least 1.5–2x the continuous rating if you plan to run appliances with motors or fans. This helps ensure reliable startup without tripping protection.
  • AC output efficiency – Systems with efficient inverters waste less energy as heat. Higher efficiency (often 85–90%+ under typical loads) translates into longer actual runtimes for the same battery size.
  • Solar and AC input limit (W) – Higher input limits (for example, 300–800 W or more) let you recharge quickly between meals, especially important if you cook daily or multiple times per day.
  • Number and type of AC outlets – Multiple grounded outlets make it easier to plug in different cooking tools without unsafe adapters. Ensure each outlet can handle the current of your typical appliances.
  • Display and monitoring – A clear display showing real-time watts, state of charge, and estimated runtime helps you avoid overloads and manage your cooking sessions more precisely.
  • Thermal management and fan noise – Good cooling design helps the inverter handle sustained cooking loads without derating or shutting down. Quiet, effective fans are important in small living spaces.
  • Cycle life and depth-of-discharge tolerance – A battery chemistry and design that tolerates frequent deep discharges (within the manufacturer’s guidelines) is valuable if you regularly use a large share of capacity for cooking.

By matching these specs to your actual cooking habits—how often you cook, what you cook, and where your energy comes from—you can build an off-grid electric kitchen that is both practical and sustainable over the long term.

Frequently asked questions

Which specs and features matter most when choosing a power station for off grid electric cooking?

Focus on battery capacity (Wh) for runtime, inverter continuous and surge watt ratings for what you can run, and the solar/AC input limit for how quickly you can recharge. Also consider inverter efficiency, outlet types, and thermal management to ensure reliable performance under cooking loads.

Can a portable power station run an induction cooktop, and how long will it last?

Many single-zone induction cooktops draw 600–1,500 W and can run from a capable power station if the inverter supports the continuous and surge watts. Runtime depends on battery Wh and duty cycle; estimate runtime by dividing battery Wh by the cooktop draw and include a 10–20% buffer for conversion losses.

What common mistake causes short runtimes or shutdowns when cooking off-grid?

People often underestimate total energy use by ignoring cook time and inverter losses, or they try to run multiple high-watt appliances at once. Check combined watt draw, account for runtime, and avoid exceeding roughly 80–90% of the inverter’s continuous rating to prevent unexpected shutdowns.

How can I safely manage heat and electrical load when cooking in a van or RV?

Keep appliances on stable, heat-resistant surfaces, provide ventilation to remove steam and heat, and keep the power station away from splashes. Stay within inverter and cord ratings, supervise cooking, and consult a professional for fixed wiring or high-load installations.

Is a hybrid approach (electric plus gas) a practical way to cook off-grid?

Yes; a hybrid approach uses electric for short, efficient tasks like boiling water or quick frying and gas or other fuels for long, high-heat cooking. This balances convenience and energy limitations while reducing daily battery demand.

How do I estimate how long a specific cooking appliance will run on my battery?

Divide your usable battery capacity in Wh by the appliance’s watt draw to get a basic runtime estimate, then subtract 10–20% for inverter/conversion losses. Track real-world duty cycles (appliance on/off behavior) to refine the estimate for typical cooking tasks.

Emergency Preparedness: Building a Home Backup Plan Around a Power Station

Home emergency backup setup with portable power station and supplies

Building a home emergency backup plan around a portable power station means matching its capacity, output, and runtime to your critical needs so you can ride out blackouts safely and comfortably. When you understand watt-hours, surge watts, input limits, and realistic runtime, you can decide what to power, for how long, and how to recharge during extended outages.

Instead of guessing, you’ll calculate the loads for essentials like refrigerators, routers, medical devices, and lighting, then choose a backup strategy that fits your budget and risk level. A well-planned setup turns a power station from a camping gadget into a core part of your home emergency kit.

This guide walks through how portable power stations work, how to size and configure them, common mistakes to avoid, and the key specs to focus on before you buy. The goal is a clear, practical blueprint you can adapt to your home, not just a list of features.

Understanding a Home Backup Plan Built Around a Power Station

A home backup plan built around a portable power station is a structured approach to keeping your most important devices running when the grid goes down, without relying on a permanently installed generator. Instead of powering your entire house, you prioritize a short list of essentials and design your setup around those loads.

At the center is a rechargeable battery unit that converts stored energy into usable AC and DC power. Around it, you build a plan that covers four main questions: what you need to power, how long you need it to run (runtime), how you will recharge the power station, and how you will use it safely in an emergency.

This approach matters because it lets you replace guesswork with numbers. By understanding watt-hours (Wh), continuous watts, surge watts, and input limits, you can realistically estimate how many hours of backup you’ll get for things like refrigerators, modems, and medical devices. It also helps you decide whether one power station is enough, or if you should combine it with other options like fuel generators, solar panels, or simple battery-powered lights.

For many households, a portable power station–based plan offers several advantages:

  • Low maintenance: No fuel to rotate or carburetors to maintain.
  • Indoor-friendly: No exhaust, so it can be operated safely indoors when used correctly.
  • Scalable: You can start small for basic communication and lighting, then expand later.
  • Quiet operation: Minimal noise compared with fuel generators, which matters in dense neighborhoods or at night.

Understanding these basics is the first step toward a realistic, reliable emergency backup strategy instead of just hoping your devices will last on their own batteries.

How Portable Power Stations Work in an Emergency Backup Setup

To build a solid emergency plan, you need to understand the key concepts behind how portable power stations operate. At a high level, they store energy in a battery (measured in watt-hours) and convert it into AC and DC outputs your devices can use.

Battery capacity and runtime

The battery’s energy storage is usually expressed in watt-hours (Wh). This tells you, in simple terms, how much work the battery can do. To estimate runtime, you compare the battery’s watt-hours to the total watts your devices consume.

For example, a 1,000 Wh power station running a 100 W load might theoretically last about 10 hours (1,000 Wh ÷ 100 W). In practice, you should assume less due to conversion losses and inefficiencies, especially at higher loads. Planning with a safety margin (for instance, using 70–80% of the rated capacity) leads to more realistic expectations.

Continuous watts vs. surge watts

The AC inverter inside the power station has two important ratings:

  • Continuous watts: The amount of power it can supply steadily (for example, 1,000 W).
  • Surge watts: The short burst it can handle for motor startup or inrush current (for example, 1,500–2,000 W for a few seconds).

Devices like refrigerators, well pumps, and some power tools draw a brief surge when they start. Your power station must handle both the surge and the ongoing running watts, or it will shut down or fail to start the device. For emergency backup, knowing the startup behavior of your key appliances is crucial.

Input limits and recharge options

The input limit defines how quickly you can recharge the power station from wall outlets, solar panels, or a vehicle. During extended outages, input limits become just as important as capacity, because they determine how many times per day you can refill the battery.

Typical recharge sources include:

  • AC wall charging (when available): Fastest and simplest for topping up before a storm or between rolling blackouts.
  • Solar charging: Slower and weather-dependent, but can extend autonomy in long outages.
  • Vehicle charging: Useful as a backup, but generally low power and relatively slow.

Matching your solar input (panel wattage) and your power station’s maximum solar input rating helps you avoid bottlenecks and disappointment when the sun is your only source.

Outputs: AC, DC, and USB

Most power stations offer multiple output types:

  • AC outlets: For appliances and chargers that plug into standard wall sockets.
  • 12 V DC ports: For some fridges, pumps, or automotive accessories.
  • USB-A and USB-C (including PD profiles): For phones, tablets, and laptops.

In an emergency, using DC and USB outputs where possible is more efficient than running everything through the AC inverter, which wastes some energy as heat. Prioritizing native DC devices (like 12 V fridges or USB lights) can stretch your runtime.

System-level planning

When you combine all these concepts, you get a system-level view: how much energy you have, what loads you can support, how long you can run them, and how quickly you can refuel your battery. That system view is what turns a standalone power station into a true home backup solution.

Key power station parameters and how they affect an emergency backup plan. Example values for illustration.
ParameterTypical ExampleImpact on Backup Plan
Battery capacity1,000–2,000 WhDetermines total runtime for your prioritized devices.
Continuous AC output800–1,500 WLimits how many high-draw devices you can run at once.
Surge output1.5x–2x continuousAffects ability to start compressors and motor loads.
Max AC input300–800 WControls how quickly you can recharge from grid or generator.
Max solar input200–600 WDetermines how much you can rely on sun for long outages.
USB-C PD output60–100 WSupports direct laptop and device charging without adapters.

Real-World Examples of a Power-Station-Based Emergency Plan

Translating specs into real-life scenarios makes it easier to see what a home backup plan can actually do. Here are a few common use cases and how a portable power station fits in.

Example 1: Short urban outage (8–24 hours)

In a city apartment, the priority during a typical 8–24 hour outage is communication, lighting, and keeping food safe as long as possible. A mid-sized power station might be assigned to:

  • Internet router and modem (15–25 W)
  • One or two LED lamps (10–20 W total)
  • Phone and laptop charging (20–60 W intermittently)
  • Brief refrigerator runs (80–150 W running, higher surge)

Instead of running the refrigerator continuously, you might power it for 15–20 minutes every few hours to maintain temperature, while keeping the door closed as much as possible. This “duty cycling” approach extends runtime and keeps total load manageable.

Example 2: Suburban storm with multi-day risk

In a suburban home where storms can knock out power for several days, the plan might revolve around a larger power station plus some solar input. Priorities could include:

  • Refrigerator or small chest freezer
  • Internet equipment and phones
  • Medical devices (such as CPAP machines, if compatible)
  • Essential lighting and small fans

Here, you might:

  1. Use the power station heavily on day one while monitoring remaining watt-hours.
  2. Recharge during daylight with solar panels to recover part of the used capacity.
  3. Use load shedding: turning off non-essential devices at night or when battery levels are low.

If the outage extends, you can supplement with other options like battery-powered lanterns or a small fuel generator used during the day to recharge the power station, then shut down at night for quiet operation indoors.

Example 3: Rural home with well pump and medical needs

In a rural setting, a well pump or critical medical equipment may be the deciding factor. Some well pumps have high surge requirements that exceed many portable power stations’ capabilities. In that case, your plan might split into two tiers:

  • Tier 1: Critical medical devices and communication equipment powered by the power station.
  • Tier 2: High-surge loads (like the well pump) powered only when a fuel generator is running, or left offline if you have adequate stored water.

This kind of plan recognizes the limits of portable power stations while still using them effectively for quiet, indoor-safe backup of sensitive electronics and lower-power essentials.

Example 4: Apartment building with limited space

For residents in small spaces, storage and noise restrictions rule out larger generators. A compact power station paired with a few efficient devices can still cover basics:

  • USB-powered LED string lights instead of traditional lamps.
  • Low-wattage DC fan instead of larger AC units.
  • Battery-powered radio for information.
  • Careful use of laptop and phone charging during the day.

By designing your emergency kit around low-power devices, even a smaller power station can provide meaningful support through several days of intermittent use.

Common Planning Mistakes and Troubleshooting Cues

Many people buy a portable power station and assume it will “just work” in an emergency, only to discover limitations at the worst possible time. Avoiding a few common mistakes can greatly improve your backup plan.

Mistake 1: Ignoring actual power draw

Underestimating the watts your devices use is one of the biggest pitfalls. Nameplate ratings are often higher than real-world consumption, but some devices, especially those with heating elements or motors, can spike unexpectedly.

Better approach: Use a simple plug-in power meter during normal times to measure real usage for your refrigerator, modem, and other essentials. Record typical and peak values in a notebook or digital file.

Mistake 2: Forgetting surge watts

Even if your refrigerator’s running watts are within the power station’s continuous rating, it may still fail to start if the surge rating is too low. This often shows up as the power station shutting down or displaying an overload error when the compressor tries to start.

Troubleshooting cue: If a device won’t start but smaller loads work fine, suspect surge requirements. Consider running that device alone on the power station to see if it can start without other loads active. If not, it may simply be beyond your unit’s capability.

Mistake 3: Overloading outlets and ports

Plugging too many devices into the AC outlets or drawing near-maximum power from multiple ports simultaneously can trigger thermal or overload protection.

Troubleshooting cue: If the power station shuts off under heavy use, check the display for overload messages, reduce the number of connected devices, and try again. Group high-draw devices separately from low-draw ones.

Mistake 4: Assuming instant full recharge from solar

Many users expect solar panels to refill a power station in a few hours, only to find that real-world conditions (clouds, angle, temperature) slow everything down.

Better approach: Estimate solar harvest conservatively. For example, a 200 W panel might average 100–140 W over the course of the day. Plan your loads so they do not exceed what you can reasonably replenish over 24 hours if you expect a multi-day outage.

Mistake 5: Not testing the system before an emergency

Waiting until a storm hits to discover that a critical device’s plug doesn’t fit, or that it draws too much power, is avoidable.

Better approach: Run a “blackout drill” for a few hours on a weekend. Power your planned devices from the power station only, track battery percentage and runtime, and adjust your plan based on what you learn.

Mistake 6: Draining to zero regularly

Repeatedly running the battery to absolute zero can shorten its lifespan or trigger protection modes that require special steps to reset.

Troubleshooting cue: If the unit will not power on after a deep discharge, connect it to a charger for an extended period and consult the manual. In your plan, aim to recharge before the battery hits very low levels whenever possible.

Safety Fundamentals for Using Power Stations in Emergencies

Portable power stations are generally safer and easier to use than fuel generators, but they still store significant energy and must be handled responsibly, especially under stress during emergencies.

Safe placement and ventilation

Although they do not emit exhaust, power stations can generate heat when charging or under heavy load. Place them on a stable, dry, non-flammable surface with some space around them for airflow. Avoid covering vents or stacking items on top.

Keep them away from direct heat sources, open flames, and areas where water could pool or leak, such as directly under windows or near sump pits.

Electrical safety and extension cords

Use properly rated extension cords and power strips if you need to reach devices in other rooms. Avoid daisy-chaining multiple power strips or running cords under rugs where heat can build up or cords can be damaged.

Never attempt to backfeed a home’s electrical system by plugging the power station into wall outlets. This is dangerous for both you and utility workers and can damage equipment. If you want to integrate backup power into your home wiring, consult a licensed electrician about appropriate hardware and code-compliant options.

Battery and charging safety

Follow the manufacturer’s guidelines for charging, including acceptable temperature ranges. Do not charge or operate the power station in areas that are extremely hot, extremely cold, or exposed to direct rain or snow.

If you notice swelling, unusual smells, smoke, or excessive heat, disconnect all loads and chargers if it is safe to do so, move away from the unit, and seek professional guidance. Do not attempt to open the enclosure or repair internal components yourself.

Child and pet safety

In an emergency, homes can become crowded and chaotic. Position the power station where children and pets cannot easily tamper with outlets, cords, or buttons. Use outlet covers or cord organizers if needed to reduce tripping hazards and accidental unplugging.

Device compatibility and grounding

Some sensitive medical or electronic devices may have specific requirements for grounding or waveform quality. Before relying on a power station for critical equipment, verify compatibility in advance under non-emergency conditions. If there is any doubt, consult the device’s documentation or a qualified professional.

Fire preparedness

As part of your overall emergency plan, keep an appropriate fire extinguisher accessible and know how to use it. While power stations are designed with multiple safety protections, no system is completely risk-free when dealing with high energy storage and electrical loads.

Recommended safety-focused practices for operating a portable power station at home. Example values for illustration.
Safety AreaGood PracticeReason
PlacementAt least several inches clearance around ventsPrevents overheating and extends component life.
EnvironmentTypical indoor room temperatureSupports safe charging and discharging.
Cord useHeavy-duty, grounded extension cordsReduces risk of overheating and shock.
SupervisionRegular checks during high-load useAllows early detection of abnormal heat or noise.
Children/petsOut of reach, cords securedPrevents tampering and tripping hazards.

Related guides: Portable Power Station Buying Guide • Portable Power Station Terminology Explained • Input Limits (Volts/Amps/Watts) Explained

Putting It All Together: Practical Steps and Key Specs to Prioritize

Designing a home emergency backup plan around a portable power station is about aligning your expectations, your loads, and your equipment. You do not need to power everything to make a big difference in comfort and safety during an outage. Instead, focus on a small, clearly defined set of essentials and build a plan that you have tested in advance.

Practical planning steps

  • List your critical devices: Refrigeration, communication, lighting, medical equipment, and any must-have electronics.
  • Measure or estimate power use: Note both running watts and any known surges, plus how many hours per day each device needs to run.
  • Choose a target runtime: Decide whether you are planning for 8–12 hours, 24 hours, or multiple days of coverage for those loads.
  • Match capacity and output: Select a power station size and inverter rating that can handle your combined loads with some margin.
  • Plan recharge options: Decide how you will refill the battery (grid, solar, vehicle, or generator) and estimate realistic daily energy input.
  • Build supporting kits: Add low-power lighting, USB fans, and spare cables to stretch your stored energy further.
  • Run practice drills: Simulate outages to verify runtimes, refine your priorities, and train family members on the setup.

Over time, you can expand your system with additional batteries, more efficient appliances, or complementary backup options as your budget and risk tolerance allow.

Specs to look for

  • Battery capacity (Wh): Look for enough watt-hours to cover at least one full day of your essential loads (for many homes, 500–2,000 Wh). More capacity means longer runtime but higher cost and weight.
  • Continuous AC output (W): Choose a rating that exceeds your expected simultaneous loads by 20–30% (commonly 600–1,500 W for home backup) so the inverter is not constantly at its limit.
  • Surge power rating: Aim for an inverter that can handle 1.5–2 times its continuous rating for a few seconds to start refrigerators and similar loads without tripping.
  • AC and solar input limits (W): Higher input limits (for example, 300–800 W AC and 200–600 W solar) allow faster recharging between outages or during daytime, which is crucial for multi-day events.
  • USB-C PD output (W): Ports capable of 60–100 W support direct laptop charging and fast phone charging, reducing the need for extra adapters and improving efficiency.
  • Number and type of outlets: Multiple AC outlets plus a mix of DC and USB ports let you connect several devices without overloading a single port or relying on many power strips.
  • Display and monitoring: A clear screen showing input, output, and remaining capacity (in percentage and estimated hours) makes it easier to manage loads during an emergency.
  • Battery chemistry and cycle life: Look for batteries rated for hundreds to several thousand cycles; this indicates how well the unit will handle repeated use in frequent outage areas.
  • Operating temperature range: Check that the unit can charge and discharge safely in the typical temperatures of your home, garage, or storage area.
  • Weight and portability: Consider whether you may need to move the unit between rooms or evacuate with it; moderate weight and handles or wheels can be important in real emergencies.

By focusing on these practical steps and key specifications, you can turn a portable power station into a reliable, well-understood backbone of your home emergency preparedness plan.

Frequently asked questions

Which specs and features should I prioritize when choosing a home backup power station?

Prioritize battery capacity (watt-hours) to meet your target runtime, continuous AC output to handle simultaneous loads, and surge power rating to start motors and compressors. Also check AC and solar input limits, the number and type of outlets (including USB-C PD), and monitoring features to track remaining capacity and inputs. Consider operating temperature range and cycle life for long-term reliability.

How can I avoid underestimating the power my devices actually draw?

Use a plug-in power meter to measure actual running and peak (startup) watts for key devices and record those values. Account for inverter/conversion losses by planning with a safety margin (for example using 70–80% of rated watt-hours) and include duty-cycling for appliances that cycle on and off. Run a short blackout drill to validate your estimates under real conditions.

Can I safely operate a portable power station indoors during an outage?

Yes—portable power stations are designed for indoor use since they don’t produce combustion exhaust, but they still generate heat and must be placed on a stable, dry, well-ventilated surface. Avoid extreme temperatures, water exposure, covering vents, and keep units out of reach of children and pets. Follow the manufacturer’s safety guidelines and monitor the unit during heavy use.

How long will a power station typically run a refrigerator?

Runtime depends on the refrigerator’s running watts and the power station’s watt-hours; estimate by dividing available Wh by the fridge’s running watts, then reduce for conversion losses (use a conservative efficiency factor). Because refrigerators cycle, duty-cycling (running it intermittently) can significantly extend usable time, but you must also account for the compressor’s startup surge. Measure or look up your fridge’s typical and peak draws for a more accurate plan.

Can I rely on solar panels to fully recharge a power station during extended outages?

Solar can meaningfully extend autonomy, but real-world harvest depends on panel wattage, weather, panel orientation, and the station’s max solar input. Expect average output to be lower than panel nameplate ratings (for example a 200 W panel often averages 100–140 W over the day) and plan conservatively. For multi-day outages, combine solar with load shedding or other recharge sources for greater resilience.

Do I need a licensed electrician or special equipment to connect a power station to my home?

For point-of-use powering of devices, no electrician is required, but you must never backfeed the grid by plugging a power station into a wall outlet. If you want to integrate backup power into your home wiring or supply select circuits, use a transfer switch or other code-compliant hardware and hire a licensed electrician to perform the installation. Proper integration protects utility workers and prevents equipment damage.

Powering a 12V Fridge Efficiently: DC Options and Best Practices

12V fridge powered by a portable power station through DC connection

To power a 12V fridge efficiently, run it from a DC source sized to its average watt draw and daily amp-hour needs, and avoid unnecessary AC inverter losses. Matching your fridge’s power consumption with the right battery capacity, DC output, and cable setup is the key to longer runtime and reliable cooling.

Whether you call it a 12V cooler, compressor fridge, camping fridge, or portable refrigerator, the core questions are the same: how many watts does it use, how many amp hours will it drain, and what runtime can you expect from a portable power station or battery? Understanding DC vs AC efficiency, surge watts, duty cycle, and voltage drop helps you plan trips without warm food or dead batteries.

This guide explains how 12V fridges work on DC power, how to size your portable power station, and what settings and habits improve efficiency. It also highlights common mistakes, basic safety, and the exact specs to look for when choosing DC power options for a 12V refrigerator.

Understanding 12V Fridge Power Needs and Why Efficiency Matters

A 12V fridge is designed to run directly from low-voltage DC power, typically the same 12V system used in vehicles, RVs, boats, and many portable power stations. Unlike traditional household refrigerators that expect 120V AC, a 12V fridge can connect directly to a DC outlet, making it ideal for off-grid and mobile use.

Efficiency matters because your available energy is limited by battery capacity. Every watt your fridge wastes shortens runtime and may force you to ration power or shut it off. Using DC power directly, minimizing inverter losses, and understanding your fridge’s real power draw can significantly extend how long it runs between charges.

Most 12V fridges use a compressor that cycles on and off to maintain temperature. Instead of running continuously at a high wattage, they draw more power while the compressor is on and very little while it is off. This on/off pattern is called the duty cycle, and it is critical when estimating daily energy consumption and runtime from a portable power station or battery bank.

In practice, knowing the difference between peak watts (when the compressor starts), running watts (while it is cooling), and average daily watt-hours helps you choose the right DC power source. An efficient setup lets you keep food safe, reduce generator use, and rely more confidently on solar or stored battery energy.

How DC Powering of a 12V Fridge Works

When you power a 12V fridge from DC, the fridge’s compressor and control electronics are supplied directly from a low-voltage source, such as a vehicle socket, a dedicated 12V battery, or the DC output of a portable power station. This avoids converting DC to AC and back again, which typically wastes energy as heat in an inverter.

Most 12V fridges specify their consumption in amps at 12V (for example, 4A at 12V) or in watts (for example, 48W). To understand energy use over time, you convert between these units:

  • Watts (W) = Volts (V) × Amps (A)
  • Amp-hours (Ah) = Amps (A) × Hours (h)
  • Watt-hours (Wh) = Watts (W) × Hours (h)

Because the compressor cycles, the fridge’s average current draw is lower than its running current. For example, a fridge that pulls 5A while running might only average 1.5–2.5A over 24 hours, depending on ambient temperature, set temperature, and how often you open the lid.

Portable power stations typically publish their capacity in watt-hours (Wh). To estimate runtime, you divide usable watt-hours by the fridge’s daily or hourly watt-hour consumption. You also consider efficiency losses in the DC circuitry and any voltage drop in long or thin cables, which can cause the fridge to see lower voltage than the power source provides.

Many 12V fridges include a low-voltage cut-off feature to protect the battery from over-discharge. When the battery drops below a set voltage, the fridge shuts off. This is helpful for battery health but can surprise users who expect longer runtime; understanding this interaction is part of designing an efficient DC power setup.

Parameter Typical 12V Fridge Value What It Means
Running power 35–60 W Power draw while compressor is actively cooling.
Average daily use 200–600 Wh/day Depends on size, insulation, ambient heat, and set temperature.
Current draw 3–5 A at 12 V Instantaneous draw when the compressor is on.
Duty cycle 20–50% Percentage of time the compressor runs during normal use.
Low-voltage cut-off 10.4–11.4 V Voltage where fridge shuts off to protect the battery.
Example values for illustration.

Real-World Examples of Powering a 12V Fridge from DC Sources

Translating specs into real-world runtime helps you plan trips and choose a portable power solution that fits your needs. The following examples show how different capacities and fridge loads interact in typical scenarios.

Example 1: Weekend Trip with a Compact 12V Fridge

Imagine a small 12V fridge with an average consumption of 30W over time (including compressor cycling). Over 24 hours, it uses about 720Wh (30W × 24h). If you pair this with a portable power station rated at 1000Wh, you might expect about 1.3 days of runtime (1000Wh ÷ 720Wh/day).

However, you need to account for real-world factors: the power station might only deliver 85–90% of its rated capacity due to conversion and internal losses, and you may also be charging phones or lights. In practice, you might see closer to 0.9–1.1 days of fridge runtime alone, or a single weekend if you supplement with some solar charging or run the fridge at a moderate temperature setting.

Example 2: Larger Fridge with a Mid-Size Power Station

Consider a larger dual-zone 12V fridge that averages 45W. Over 24 hours, that is about 1080Wh. If your portable power station has a usable capacity of 1500Wh, and you primarily run the fridge, a rough runtime estimate would be 1500Wh ÷ 1080Wh/day ≈ 1.4 days.

In cooler weather, with a higher set temperature or less frequent opening, the duty cycle may drop, reducing average consumption to 30–35W. In that case, your 1500Wh power station could potentially power the fridge for 2 days or slightly more, especially if you avoid unnecessary AC loads and rely solely on the DC output.

Example 3: Vehicle DC Outlet vs Dedicated DC Output

Some users run a 12V fridge from a vehicle cigarette lighter while driving, then switch to a portable power station when parked. If the vehicle’s outlet is only powered with the ignition on, the fridge will lose power whenever the engine is off. In contrast, a portable power station with a regulated 12V DC output can supply stable power regardless of engine status.

In this mixed setup, the fridge draws from the alternator during driving and from stored battery energy when parked. This can significantly extend total runtime without large batteries, provided you manage temperature settings and minimize door openings during hot conditions.

Common Mistakes and Troubleshooting When Running a 12V Fridge on DC

Many issues with 12V fridges powered from portable power stations or batteries stem from mismatched expectations or small configuration errors rather than equipment failure. Recognizing common pitfalls helps you troubleshoot quickly and avoid wasting energy.

Relying on AC Instead of DC

One of the biggest efficiency losses occurs when users plug a 12V fridge into the AC outlet of a portable power station using an AC adapter. This forces the power station to invert DC to AC, while the fridge’s adapter then converts AC back to DC. Each conversion step wastes power as heat. Whenever possible, use the dedicated 12V DC output and a suitable DC cable instead of the AC inverter.

Underestimating Average Power Use

Another frequent mistake is assuming the fridge’s rated running watts reflect its average consumption. If the compressor draws 50W while running but only runs 25% of the time, the average is closer to 12–15W. Conversely, in hot conditions or when set to very low temperatures, the duty cycle can climb, pushing average use much higher than expected. If your power station seems to drain faster than your calculations, check ambient temperature, ventilation, and thermostat settings.

Voltage Drop and Thin Cables

Long or undersized DC cables can cause noticeable voltage drop, especially at higher currents. The fridge might see 10.8–11V even when the power station outputs 12.5V. This can trigger low-voltage cut-out earlier than expected, shortening runtime. Using shorter, heavier-gauge DC cables and avoiding unnecessary extensions helps maintain stable voltage at the fridge.

Misinterpreting Low-Voltage Shut-Off

When a fridge shuts down on low-voltage protection, users sometimes think the fridge or power station is defective. In reality, the fridge is protecting the battery from deep discharge. If this happens often, it may indicate that your battery capacity is too small, the fridge settings are too aggressive, or other loads are drawing power at the same time.

Ignoring Standby and Background Loads

Leaving the inverter on, charging multiple devices, or running fans and lights from the same power station can significantly reduce the energy available for the fridge. Even if each load is small, they add up over 24 hours. When runtime is critical, prioritize the fridge and turn off nonessential AC outputs and idle devices.

Safety Basics for DC Powering of 12V Fridges

Running a 12V fridge from a portable power station or battery is generally safe when you follow basic electrical and thermal guidelines. Although the voltages are relatively low, poor practices can still lead to overheating, damaged wiring, or battery stress.

First, ensure that the DC output you use is rated for the fridge’s current draw with some margin. If a fridge can draw up to 6A at startup, a 10A-rated DC socket or port is a safer choice than one rated just at 6A. Overloading a socket or cable can cause excess heat at connectors, especially in confined spaces.

Second, keep ventilation in mind. Both the fridge and the portable power station generate some heat while operating. Crowding them into tight compartments without airflow can raise internal temperatures, reducing efficiency and potentially triggering thermal protection. Leave space around vents and avoid covering cooling fans.

Third, use cables with appropriate insulation and gauge for the current and length. Avoid damaged or improvised connectors. If you are unsure about cable sizing for longer runs in a vehicle or RV, consult a qualified electrician or technician familiar with low-voltage DC systems.

Finally, treat batteries with respect. Do not bypass built-in protections, defeat low-voltage cut-offs, or modify internal wiring of power stations or batteries. If your setup requires more complex wiring, such as multiple batteries or distribution panels, seek professional advice to ensure proper fusing and safe installation.

Maintaining Your 12V Fridge and Power Source for Long-Term Efficiency

Efficiency is not just about initial setup; it also depends on how well you maintain both the fridge and the power source over time. Simple habits can preserve capacity, reduce energy use, and extend the service life of your gear.

For the fridge itself, keep the condenser and ventilation areas clear of dust and obstructions. Blocked airflow forces the compressor to work harder and run longer, increasing power draw. Periodically clean seals around the lid or door to ensure they close tightly, preventing cold air leaks that drive up energy consumption.

Packing strategy also matters. A well-organized fridge with minimal empty air space tends to hold temperature more consistently. Pre-chilling food and drinks before loading reduces the initial cooling load. Avoid frequent or prolonged door openings, especially in hot environments, as each opening lets in warm air that the compressor must remove later.

For portable power stations and batteries, follow recommended storage practices. Store them in a cool, dry place when not in use, and avoid leaving them fully discharged for long periods. Many battery chemistries prefer being stored partially charged rather than at 0% or 100% for months. Check charge levels periodically and top up as needed to keep them within a healthy range.

When charging from solar, match panel size and expected sunlight to your daily fridge consumption. A panel or array that can replace a large portion of the fridge’s daily watt-hours helps maintain battery state of charge and supports longer off-grid stays. Keep solar panels clean and positioned for good exposure to maximize output.

Component Maintenance Habit Efficiency Impact
Fridge interior Defrost and wipe down periodically. Improves cooling performance and reduces compressor runtime.
Door/lid seals Inspect and clean to ensure tight closure. Prevents cold air leaks and unnecessary cycling.
Ventilation grills Keep free of dust and obstructions. Maintains airflow and avoids overheating.
Battery or power station Store partially charged in a cool, dry place. Helps preserve usable capacity over time.
Solar panels Clean surfaces and orient toward sun. Maximizes daily energy harvest for the fridge.
Example values for illustration.

Related guides: AC vs DC Power: How to Maximize Efficiency and Runtime • Surge Watts vs Running Watts: How to Size a Portable Power Station • How to Estimate Runtime for Any Device: A Simple Wh Formula + 5 Worked Examples • Portable Power Station Basics: Outputs, Inputs, and What the Numbers Mean

Practical Takeaways and Key Specs to Look For When Powering a 12V Fridge

Efficiently powering a 12V fridge with DC sources comes down to three main ideas: know your fridge’s real energy use, size your portable power station or battery accordingly, and avoid unnecessary conversion losses and poor cabling. When you align these factors, you can keep food cold for days with predictable runtime and less stress about power.

Use DC outputs wherever possible, and reserve AC for devices that truly need it. Pay attention to ambient temperature, ventilation, and thermostat settings, as they strongly influence duty cycle and daily watt-hour consumption. Combine good packing habits and minimal door openings with sensible maintenance to keep energy use stable over time.

Specs to look for

  • Fridge average consumption (Wh/day) – Look for realistic daily use figures (for example, 200–600Wh/day); this drives how large your battery or power station must be.
  • Running power and surge watts – Check running watts (typically 35–60W) and any startup surge; ensures your DC port or power station output can handle peak draw.
  • Battery or power station capacity (Wh) – Aim for at least 1.5–3 times your expected daily fridge use; provides a buffer for hot weather and other small loads.
  • DC output rating (volts and amps) – Confirm a regulated 12–13V output with sufficient current (for example, 10A or higher); supports stable compressor operation without nuisance shut-offs.
  • Efficiency of DC vs AC outputs – Prefer direct 12V DC ports over AC inverters; reduces conversion losses and extends runtime from the same stored energy.
  • Low-voltage protection settings – Look for adjustable or clearly specified cut-off levels; helps balance battery protection with maximum usable runtime.
  • Cable gauge and length – Choose thicker, shorter DC cables rated for at least 1.5–2× expected current; minimizes voltage drop and unwanted low-voltage trips.
  • Solar input capability – Check supported input watts and voltage ranges (for example, 100–400W solar); determines how quickly you can replenish energy used by the fridge.
  • Operating temperature range – Ensure the fridge can run efficiently in the temperatures you expect; wide operating ranges support reliable cooling in hot or cold environments.

By focusing on these specs and best practices, you can design a DC-powered 12V fridge setup that is both efficient and predictable, whether you are camping for a weekend or living off-grid for extended periods.

Frequently asked questions

Which specs and features should I prioritize when selecting a DC power source for a 12V fridge?

Prioritize realistic average consumption (Wh/day), running and surge watts, battery capacity in Wh, and a regulated 12V DC output rated for the fridge’s peak current. Also consider low-voltage cut-off settings, cable gauge/length, and any solar input capability to replenish used energy.

Why is running a 12V fridge through an AC inverter often a bad idea?

Using an AC inverter forces DC→AC conversion and then the fridge converts AC back to DC, which wastes energy in two conversion steps and shortens runtime. Whenever possible, use a dedicated 12V DC output to avoid inverter losses and extend battery life.

How can I estimate how long my 12V fridge will run on a portable power station?

Estimate runtime by dividing the power station’s usable watt-hours by the fridge’s average watt-hour consumption (or Wh/day). Account for conversion losses, additional loads, ambient temperature, and potential low-voltage cut-off to get a realistic runtime.

What basic safety practices should I follow when powering a 12V fridge from batteries or power stations?

Use properly rated cables and connectors with correct fusing, ensure the DC output can handle startup and running current, provide ventilation for both fridge and power source, and do not bypass built-in battery protections. For complex installations, seek professional advice to ensure safe wiring and component selection.

How much does cable gauge and length affect performance?

Thin or long cables increase voltage drop, which can reduce voltage at the fridge and trigger low-voltage shut-offs earlier than expected. Use shorter, heavier-gauge cables rated above your expected current to minimize drop and maintain stable operation.

What routine maintenance helps keep a 12V fridge operating efficiently?

Keep vents and condenser areas clean, inspect and clean door/lid seals, pre-chill items before loading, and avoid frequent door openings to reduce compressor workload. For batteries and power stations, store at recommended charge levels and keep solar panels clean and well-oriented.

RV Basics: Using a Power Station for 12V Loads and House Power

RV using a portable power station for 12V loads and house power at a campsite

Using a portable power station for RV 12V loads and light “house power” is usually straightforward, but runtime, inverter limits, and 12V output ratings decide what actually works. Once you understand watt-hours, surge watts, DC vs AC efficiency, and input limits, you can match your RV gear to what a power station can safely supply.

This guide explains how to run 12V lights, fans, fridges, and basic outlets from a power station without killing the battery early or tripping protections. You will see how 12V ports differ from the AC inverter, how to estimate runtime, why some RV appliances overload the system, and which specs really matter for camping, boondocking, or backup use. The goal is to help you plan a simple, reliable setup that keeps your RV comfortable without guesswork.

Understanding RV Power Stations, 12V Loads, and House Power

A portable power station is a self-contained battery system with built-in inverter, DC outputs, and charging electronics. For RV use, it can act as a compact “house battery” that powers both 12V loads (direct DC) and basic “house power” through its AC outlets or RV shore-power cord.

In a typical RV, there are two sides of the electrical system:

  • 12V DC system: Lights, fans, water pump, vent fans, USB chargers, some fridges, and control boards.
  • 120V AC system: Wall outlets, microwave, air conditioner, electric water heater element, and some residential fridges.

A power station can supply both, but not in the same way. The 12V ports power DC loads directly, while the built-in inverter creates 120V AC for outlets or the RV shore-power inlet. This matters because:

  • Inverter output is limited by continuous watts and surge watts.
  • 12V ports have their own amp limits and sometimes lower total power than the inverter.
  • Every watt-hour (Wh) drawn from the battery is reduced by conversion losses, especially when going from DC to AC.

Understanding these limits is the foundation for deciding which RV loads to run and for how long.

How a Portable Power Station Powers 12V Loads and RV House Circuits

Inside a portable power station, the battery stores energy in watt-hours (Wh). The system then converts that stored DC energy into usable outputs:

  • 12V DC outputs: Often a cigarette-lighter style port and sometimes 5.5 mm barrel or Anderson-style ports. These supply DC power directly from the battery through a DC-DC converter.
  • USB/USB-C ports: Provide 5V (and sometimes higher PD profiles) for phones, tablets, and laptops.
  • AC inverter outputs: Convert DC battery power to 120V AC for standard plugs or an RV shore-power cord.

For RV use, there are two main ways to connect:

  • Direct 12V connection: Plug 12V appliances (fans, compressor fridge, lights) into the power station’s DC ports. This is usually more efficient than running the same loads through the inverter.
  • AC “house power” connection: Plug the RV’s shore-power cord into the power station’s AC outlet via a suitable adapter, then turn off or manage large loads (A/C, electric water heater, big microwave) so you don’t overload the inverter.

Key concepts that control what you can run:

  • Battery capacity (Wh): How much energy you have. Runtime ≈ Wh ÷ load watts ÷ efficiency factor.
  • Inverter continuous watts: Maximum sustained AC power. Your simultaneous AC loads must stay under this.
  • Inverter surge watts: Short bursts for motor starts (fridge compressor, pump). Loads that exceed surge can trip the inverter.
  • 12V output current limit (amps): Total amps allowed across all DC ports. Exceeding this trips DC output protections.
  • Charging input limit (watts): How fast you can recharge from shore power, generator, or solar.

When you plug the RV’s shore cord into the power station, the RV’s internal 120V panel sees it like a small pedestal. The difference is that the “pedestal” now has strict watt limits and a finite battery behind it.

Basic comparison of RV 12V vs AC house power from a portable power station. Example values for illustration.
Aspect12V DC Loads120V AC House Loads
Typical useLights, fans, fridge, pumpOutlets, TV, small microwave
Conversion lossesLower (DC-DC)Higher (DC-AC inverter)
Power limit typeAmp limit on 12V portsInverter continuous & surge watts
Efficiency at low loadsUsually betterOften worse at very small loads
Best forLong runtimes on essentialsShort-term higher-power use

Practical RV Scenarios: 12V Loads and Light House Power

Seeing real-world RV examples makes it easier to plan your setup and avoid overloading the power station.

Running 12V RV Essentials Directly

Many RVers use the power station purely as a 12V battery bank:

  • 12V compressor fridge: A small DC fridge may average 30–50W over time, even if it peaks higher when the compressor starts.
  • LED lights: A few interior LED fixtures might total 10–25W.
  • Vent fans or small 12V fans: Often 5–30W each depending on speed.
  • Water pump: Often 60–100W, but only runs in short bursts.

For a 600Wh power station, a 40W average 12V fridge plus 20W of lights and fans (60W total) might give a rough runtime of:

Runtime ≈ 600Wh ÷ 60W ÷ 0.9 ≈ 11 hours (assuming ~90% DC efficiency).

Using a Power Station as a Mini Shore Power Source

Another common approach is to plug the RV’s shore-power cord into the power station’s AC outlet. In this mode, the power station feeds the RV’s 120V panel, and the RV’s converter may try to charge the RV house battery.

Typical light “house power” loads include:

  • TV and streaming device (40–120W)
  • Laptop chargers (30–90W each)
  • Small microwave (600–1000W while running)
  • Coffee maker (600–900W while brewing)
  • Low-power electric kettle (600–900W)

On a 1000W continuous inverter, you might run:

  • TV (80W) + a laptop (60W) + some lights (40W) = ~180W comfortably.
  • A small microwave at 800W alone, but not with other big loads at the same time.

Large loads like rooftop air conditioners (often 1200–1800W running with higher startup) or electric water heaters can easily exceed the inverter’s continuous or surge rating and drain the battery very quickly.

Hybrid Use: DC for Efficiency, AC for Convenience

Many RV owners combine both methods:

  • Run critical, long-duration loads (12V fridge, fans, lights) directly from DC ports for better efficiency and longer runtime.
  • Use the AC inverter sparingly for short, high-power tasks (microwave, coffee, induction cooktop) when needed.

This hybrid approach reduces wasted energy in the inverter, stretches runtime, and keeps you under the power station’s output and surge limits.

Common Mistakes and Troubleshooting When Powering an RV

Most issues with using a power station for RV 12V and house power come down to overloads, hidden parasitic loads, or misunderstandings about how the RV’s own systems behave.

Overloading the Inverter

Symptom: AC output shuts off, beeps, or shows an overload warning.

Likely causes:

  • Starting a high-surge load (A/C, large fridge compressor, big pump).
  • Running multiple high-watt devices at once (microwave + coffee maker + outlets).
  • Underrated continuous watt rating compared to total RV demand.

What to check:

  • Add up the watts of everything plugged into AC, including what the RV converter is drawing.
  • Disable or unplug large AC loads in the RV breaker panel (A/C, electric water heater) so they cannot start unexpectedly.

12V Ports Shutting Down

Symptom: 12V cigarette-lighter or DC ports turn off or show an error.

Likely causes:

  • Total 12V current draw exceeds the port’s amp rating.
  • Short circuit or faulty cable on a 12V appliance.
  • Voltage sag from a nearly depleted battery causing a low-voltage cutoff.

What to check:

  • Sum the amps of your 12V loads (amps = watts ÷ 12).
  • Try each 12V load individually to find a problematic device.
  • Confirm the power station’s DC output limit and stay below it with a safety margin.

RV Converter Wasting Power or Fighting the Power Station

Symptom: The power station drains faster than expected when the RV shore cord is plugged in, even with few visible loads.

Likely causes:

  • The RV converter/charger is trying to charge the RV battery from the power station.
  • Parasitic AC and DC loads inside the RV (detectors, control boards, standby devices).

What to check:

  • Turn off the RV’s converter/charger circuit at the breaker panel if you are not intentionally charging the RV battery from the power station.
  • Identify and switch off non-essential AC circuits while on battery power.

Unexpectedly Short Runtime

Symptom: Battery percentage drops faster than predicted, or the unit shuts down earlier than expected.

Likely causes:

  • Using AC for loads that could be powered by DC, losing energy in conversion.
  • Underestimating average watts (e.g., a cycling fridge or fan draws more than its “low” spec suggests).
  • Cold temperatures reducing effective battery capacity.

What to check:

  • Monitor real-time watt draw on the power station’s display.
  • Shift long-running loads to DC ports where possible.
  • Adjust expectations for runtime in very hot or cold conditions.

Charging Confusion: Solar, Vehicle, and Shore Power

Symptom: Power station charges slowly or not at all from solar, vehicle 12V, or campground power.

Likely causes:

  • Solar panel voltage or connector not compatible with the power station’s input specs.
  • Vehicle 12V outlet limited to low amps, especially when the engine is off.
  • Input limit reached because the station is already charging from another source.

What to check:

  • Confirm the allowable input voltage and wattage for the power station.
  • Use appropriately sized solar panels and correct polarity.
  • Do not exceed the maximum combined input rating when using multiple charging methods.

Safety Basics for Using Power Stations in RVs

Portable power stations simplify RV power, but they still store significant energy. Proper use protects you, your RV wiring, and the equipment itself.

Respect Output Limits and Breaker Ratings

Always treat the power station’s ratings as hard limits:

  • Stay under the continuous watt rating for AC loads, leaving headroom for surges.
  • Keep 12V loads under the stated amp limit for each port and for the total DC output.
  • Use the RV’s own breakers to disable large loads that the power station cannot support.

Do not attempt to wire the power station directly into an RV’s main AC distribution in a way that bypasses breakers or safety devices. For any permanent or semi-permanent wiring changes, consult a qualified RV electrician.

Ventilation and Heat Management

Power stations and inverters generate heat under load and while charging:

  • Place the unit where air can circulate around vents and fans.
  • Avoid enclosed compartments without airflow, especially near flammable materials.
  • Keep it out of direct, intense sun when possible, particularly in hot climates.

High internal temperatures can trigger thermal protection, reduce output, or shorten battery life over time.

Moisture, Dust, and Vibration

Most portable power stations are not designed for heavy moisture or dust exposure:

  • Keep the unit dry; do not use it in standing water, heavy rain, or where it can be splashed.
  • Avoid dusty or sandy environments that can clog cooling vents.
  • Secure the power station during travel to minimize vibration and impacts.

If you must use it outdoors, provide basic shelter while maintaining airflow.

Cable and Connector Safety

Undersized or damaged cables can overheat and become a fire risk:

  • Use appropriately rated extension cords and adapters for the inverter’s output.
  • Inspect 12V cables for frayed insulation, loose plugs, or melted connectors.
  • Avoid running cords under rugs or through pinched doorways where heat can build up.

Do not modify plugs, defeat ground pins, or use makeshift adapters. If you are unsure about a particular connection into the RV, seek guidance from a qualified professional.

Battery Chemistry Considerations

Many modern power stations use lithium-based chemistries. Follow the manufacturer’s guidance for:

  • Safe operating temperature range.
  • Charging practices and compatible chargers.
  • Storage state of charge and conditions.

Never attempt to open the power station or modify its internal battery pack. Internal repairs and advanced diagnostics should be left to qualified service personnel.

Maintenance and Storage for RV Power Station Reliability

Basic care extends the life and reliability of a portable power station, especially when it is central to your RV’s 12V and house power setup.

Regular Use and Cycling

Power stations generally prefer periodic use over sitting completely idle:

  • Cycle the battery occasionally by discharging and recharging within normal operating ranges.
  • Avoid frequently running to 0% or leaving at 100% for long periods unless the manufacturer specifically recommends it.

Moderate cycling helps keep the battery management system active and calibrated.

State of Charge for Storage

For longer storage between trips:

  • Store at a moderate state of charge (often around 40–60%) unless otherwise specified.
  • Check and top up the charge every few months to prevent deep discharge.

Extremely low or high state of charge during long storage can reduce long-term capacity.

Temperature and Storage Environment

Where you store the power station matters:

  • Keep it in a cool, dry place out of direct sunlight.
  • Avoid leaving it in a closed RV or vehicle in extreme heat for long periods.
  • Protect it from freezing temperatures when not in use.

Both high heat and deep cold can stress the battery and electronics if sustained.

Inspecting Ports, Cables, and Connectors

Before each trip, give the system a quick check:

  • Inspect AC outlets and 12V ports for debris, corrosion, or looseness.
  • Test key loads (fridge, fans, lights) to confirm they power up as expected.
  • Check cables for signs of wear, cuts, or overheating.

Finding issues while parked at home is easier than troubleshooting at a remote campsite.

Charging Practices Between Trips

How you recharge between outings affects convenience and battery health:

  • Use the recommended charger and avoid exceeding input limits with combined sources.
  • If using solar in storage, ensure the charging profile and voltage remain within the power station’s specs.
  • Do not leave the unit on a high-amperage charger indefinitely unless designed for that use.
Maintenance and storage practices that support reliable RV use of a portable power station. Example values for illustration.
PracticeSuggested ApproachWhy It Helps
Storage charge levelAround 40–60% chargeReduces long-term battery stress
Check intervalEvery 2–3 monthsCatches slow self-discharge early
Storage temperatureCool, dry, above freezingProtects battery chemistry and electronics
Pre-trip testRun key 12V and AC loads brieflyConfirms functionality before travel
Cable inspectionLook for damage or overheating marksPrevents failures and hot spots

Related guides: Portable Power Stations for RV and Motorhomes • AC vs DC Power: How to Maximize Efficiency and Runtime • Surge Watts vs Running Watts: How to Size a Portable Power Station

Key Takeaways and Specs to Look For in an RV Power Station

Using a portable power station for RV 12V loads and light house power works best when you design around its limits instead of treating it like an unlimited pedestal. Direct 12V connections are more efficient for long-running essentials, while the inverter is ideal for short bursts of higher-wattage AC loads. Managing which RV circuits are active, understanding your typical watt draw, and planning your charging strategy will determine how comfortable and independent you can be off-grid.

Before relying on a power station as your RV’s primary or backup source, estimate your daily energy use, consider seasonal temperature impacts, and test your setup in a low-risk environment (like your driveway) to confirm runtimes and behavior. Combined with sensible safety practices and basic maintenance, this approach gives you predictable power for boondocking, travel days, and campground outages.

Specs to look for

  • Battery capacity (Wh): Look for enough watt-hours to cover at least your typical overnight use (for many RV setups, 500–1500Wh). More capacity means longer runtime for 12V fridges, fans, and lights.
  • Inverter continuous and surge watts: Choose continuous watts above your expected simultaneous AC load (often 600–2000W for RV use) with a higher surge rating to handle motor starts from fridges or pumps.
  • 12V DC output rating (amps and watts): Ensure the total 12V output (for example, 10–30A) can comfortably run your fridge, fans, and pump together without tripping protections.
  • Number and type of DC ports: Multiple 12V and USB/USB-C ports reduce the need for splitters and adapters and let you power several RV devices efficiently at once.
  • Charging input power (AC and solar): Higher input limits (for example, 200–800W combined) allow faster recharging from shore power, generator, or solar between uses.
  • Inverter efficiency and idle draw: Lower standby consumption and good efficiency at moderate loads help stretch battery runtime, especially when running only a few AC devices.
  • Display and monitoring: A clear screen or app that shows real-time watts in/out, state of charge, and estimated runtime makes it easier to manage loads in an RV.
  • Operating temperature range: A wide, realistic range helps maintain performance in hot summer RV interiors and cool shoulder seasons without frequent shutdowns.
  • Cycle life and warranty terms: Higher rated charge cycles at a given depth of discharge indicate better long-term value if you use the power station heavily for camping or full-time RVing.

Frequently asked questions

Which specs and features matter most when using a power station for RV 12V loads and house power?

Key specs are battery capacity (Wh) for runtime, inverter continuous and surge watts for AC loads and motor starts, and the 12V DC output amp rating for direct DC devices. Also check charging input limits, port types and counts, inverter efficiency/idle draw, operating temperature range, and cycle life for long-term reliability.

What common mistakes shorten a power station’s runtime or cause unexpected shutdowns in an RV?

Common mistakes include running AC loads that could be powered by DC (adding conversion losses), leaving the RV converter on so it draws charging power, and exceeding inverter or 12V port limits. Cold temperatures and underestimating cycling/heavy-start loads (like compressor surges) also reduce effective runtime or trigger shutdowns.

What safety precautions should I take when using a power station in my RV?

Respect the unit’s output limits, use proper cables and breakers, provide ventilation to avoid overheating, and keep the unit dry and secured during travel. Do not bypass RV safety devices or modify internal wiring; consult a qualified electrician for permanent installations.

Can I plug my RV shore-power cord into a portable power station to run the RV’s 120V panel?

Yes, you can feed the RV panel from a power station’s AC outlet, but treat it like a limited pedestal with finite wattage and surge capacity. Disable large circuits and the converter if necessary, and ensure the station’s continuous and surge ratings cover the loads you plan to run.

How can I maximize runtime for a fridge and lights while boondocking?

Run long-duration loads like the fridge and lights on the power station’s DC outputs when possible, minimize AC usage, and reduce fridge cycling by keeping it shaded and properly packed. Choosing a larger Wh capacity and adding solar charging between cycles will also extend time off-grid.

What’s the best way to charge a power station while on the road or at a campsite?

Use shore power or a generator up to the unit’s AC input limit, and supplement with solar panels sized and connected per the station’s input specs. Don’t exceed combined input wattage when mixing sources, and use correct connectors and cable ratings to avoid losses and safety issues.

Camping Power Planning: A Simple Energy Budget for a Weekend

Weekend camping setup with portable power station and devices showing an energy budget plan

A simple weekend camping power plan starts with adding up how many watt-hours your gear will use, then matching that to a portable power station with enough capacity, output watts, and charging options. Once you understand basic terms like watt-hours, surge watts, runtime, and input limit, you can quickly tell if your setup will last two or three nights off-grid.

This guide shows how to make an easy energy budget for a weekend, so you are not guessing at battery percentage or wondering why your devices shut off early. You will learn how to estimate power draw, convert watts to watt-hours, and size a camping battery or solar generator for phones, lights, a fridge, or a CPAP. No advanced math, no brands—just clear steps and example numbers you can copy for your own trip.

Understanding a Weekend Camping Power Budget and Why It Matters

For camping, a power budget is a simple estimate of how much energy your devices will use over your trip, usually measured in watt-hours (Wh). It is like a spending plan for electricity: instead of dollars, you are spending stored energy from a portable power station or battery pack.

Watt-hours tell you how long a battery can run your gear. If you know your devices use about 500 Wh over a weekend, you can look for a power station with a usable capacity that meets or exceeds that number. This is more reliable than guessing based on amp-hours (Ah) or just looking at battery percentage bars.

Planning a camping power budget matters because:

  • It prevents running out of power early. You know in advance if your battery can handle a second or third night.
  • It helps you choose the right size power station. You avoid overspending on a huge unit or buying one that is too small.
  • It clarifies what you can realistically run. For example, whether a mini-fridge plus lights and phone charging is practical.
  • It guides your charging strategy. You can decide if you need solar input, vehicle charging, or just a full charge before leaving.

Instead of treating your camping battery like a mystery box, a basic energy budget turns it into a predictable resource you can manage confidently all weekend.

Key Power Concepts for Weekend Camping: Watts, Watt-Hours, and Runtime

To build a simple weekend energy budget, you only need a few key concepts: watts (W), watt-hours (Wh), runtime, and efficiency. Once you understand these, you can quickly estimate how long your portable power station will keep your camping gear running.

Watts (W): how fast power is used

Watts measure the rate of power use. A 10 W LED lantern uses power slowly; a 300 W mini-fridge uses power much faster. Device labels, user manuals, or power adapters usually list watts. If you only see volts (V) and amps (A), multiply them: V × A ≈ W.

Watt-hours (Wh): total energy over time

Watt-hours measure how much energy is used or stored. A 500 Wh battery can, in theory, power a 50 W device for about 10 hours (500 ÷ 50 = 10). Portable power stations are usually rated in Wh, which makes them easy to compare.

Runtime: how long your gear can run

To estimate runtime, you divide usable battery capacity by the load:

Runtime (hours) ≈ Usable Wh ÷ Device Watts

Usable Wh is slightly less than the rated capacity because of inverter and conversion losses. A rough rule is to assume 80–90% of the listed watt-hours for AC loads.

Continuous watts vs. surge watts

Portable power stations list two important output limits:

  • Continuous output (W): The maximum power they can supply steadily (for example, 300 W).
  • Surge or peak output (W): A higher short-term limit to handle startup spikes from devices like compressor fridges or small pumps.

If your device’s running watts exceed the continuous rating, it will not run. If its startup surge exceeds the surge rating, it may trip protection or shut off at startup.

Input limit and recharge time

The input limit tells you how many watts the power station can accept from wall charging, solar panels, or vehicle charging. Higher input means faster recharging, which is important if you plan to top up during the day with solar or from your car.

Putting it together for a weekend

For a weekend camping trip, you combine these ideas: estimate each device’s daily Wh use, multiply by the number of days, then compare the total to your portable power station’s usable capacity and recharge options.

Concept What It Means Example Value
Device power (W) How fast a device uses power LED lantern: 10 W
Battery capacity (Wh) Total stored energy Portable power station: 500 Wh
Continuous output (W) Max steady power the unit can supply AC inverter: 300 W
Surge output (W) Short spike for startup loads AC inverter surge: 600 W
Input limit (W) Max charging power accepted Solar/AC charging: 100–200 W
Key power terms for planning a camping energy budget. Example values for illustration.

Real-World Weekend Camping Energy Budget Examples

To make camping power planning concrete, it helps to walk through a few realistic weekend scenarios. These examples assume two nights away, arriving Friday evening and leaving Sunday, with about 36–40 hours of actual use.

Example 1: Minimalist weekend (lights and phones only)

This setup is common for tent camping with basic comfort and safety lighting.

  • 2 smartphones: About 10 Wh per full charge × 2 phones × 2 charges each ≈ 40 Wh.
  • 1 tablet or e-reader: Around 15 Wh per charge × 1–2 charges ≈ 15–30 Wh.
  • LED lantern: 8 W × 4 hours per night × 2 nights = 64 Wh.
  • String lights: 5 W × 5 hours per night × 2 nights = 50 Wh.

Estimated total for the weekend: roughly 170–190 Wh.

A small portable power station with around 250–300 Wh of usable capacity comfortably handles this, even accounting for inverter losses and a bit of extra use.

Example 2: Family camping with cooler and devices

This scenario adds a small 12 V compressor cooler or low-power mini-fridge.

  • Compressor cooler: A typical draw might average 40 W when cycling. Over 24 hours, that is roughly 40 W × 12 hours of active run time ≈ 480 Wh per day (duty cycle varies with temperature and insulation).
  • Phones and tablets: 4 phones × 2 charges each at 10 Wh = 80 Wh; 1 tablet at 20 Wh × 2 charges = 40 Wh.
  • LED lighting: 20 W total (lanterns and strips) × 4 hours per night × 2 nights = 160 Wh.

Estimated total for the weekend: cooler about 900–1,000 Wh plus devices and lights around 280 Wh, for roughly 1,200–1,300 Wh.

In this case, a mid-sized power station around 1,000–1,500 Wh usable capacity is more appropriate, especially if you do not plan to recharge with solar or from your vehicle.

Example 3: CPAP user plus basic camp power

Many campers use a CPAP machine overnight and want to keep lights and phones powered too.

  • CPAP machine (DC mode, no heated hose/humidifier): Often averages 30–50 W. For 8 hours per night × 2 nights, that is about 480–800 Wh.
  • Phones and a small fan: 2–3 phones at 10 Wh each × 2 charges ≈ 40–60 Wh; USB fan at 5 W × 4 hours per night × 2 nights = 40 Wh.
  • LED lighting: 10–15 W × 4 hours per night × 2 nights ≈ 80–120 Wh.

Estimated total for the weekend: roughly 600–1,000 Wh depending on the CPAP’s actual draw.

A power station with around 800–1,200 Wh usable capacity is a common target for this type of trip, especially if the CPAP will be the primary load.

How to adapt these examples to your own trip

To use these examples for your own weekend:

  1. List your actual devices and look up their watt ratings.
  2. Estimate daily hours of use for each device.
  3. Calculate daily Wh (watts × hours), then multiply by the number of days.
  4. Add a 20–30% buffer for unexpected use, cold weather, or inverter losses.

This quick process gives you a realistic weekend energy budget that matches how you actually camp.

Common Camping Power Planning Mistakes and How to Spot Problems Early

Many campers either overshoot or undershoot their power needs. Understanding common mistakes helps you troubleshoot issues before they ruin your weekend.

Mistake 1: Confusing watt-hours with amp-hours

Some batteries list only amp-hours (Ah), which can be misleading without voltage. A 20 Ah battery at 12 V has about 240 Wh (20 × 12), not 20 Wh. When comparing to your devices, always convert to watt-hours so everything is in the same unit.

Mistake 2: Ignoring inverter losses

Using AC outlets on a portable power station is convenient, but the inverter wastes some energy as heat. If you ignore this, your runtime estimate will be too optimistic. As a rule of thumb, assume you only get about 80–90% of the rated Wh for AC loads. USB and DC outputs are usually more efficient.

Mistake 3: Underestimating fridge and cooler usage

Portable fridges and coolers do not draw their rated watts all the time, but they cycle on and off. Hot weather, frequent opening, and poor ventilation can increase their duty cycle dramatically. A cooler that averages 20–30 W in mild conditions might average double that in direct sun. If your portable power station seems to drain faster than expected, this is often the culprit.

Mistake 4: Overloading the continuous or surge rating

Plugging in a device that exceeds the power station’s continuous output or surge rating can cause shutdowns or error codes. Signs include the AC output turning off immediately when a device starts, beeping alarms, or warning lights. Check your devices’ watt ratings and keep total load under the continuous limit, with some margin for startup spikes.

Mistake 5: Forgetting about recharging options

Some campers assume they will “just recharge with solar” but bring panels too small for their actual use or ignore the input limit on the power station. If your input limit is 100 W and you bring 200 W of panels, you still only charge at 100 W. Cloud cover, shading, and short winter days further reduce real-world solar input.

Early warning signs your weekend budget is off

  • Battery drops faster than expected during the first evening.
  • Fans, fridges, or CPAP machines cause the inverter to click off or alarm.
  • Solar or vehicle charging barely moves the battery percentage during the day.
  • You find yourself turning off lights or unplugging devices to “save” power.

If you see these signs on day one, reduce non-essential loads, switch more devices to DC or USB where possible, and prioritize recharging during peak sunlight or while driving.

Safety Basics for Using Portable Power on Camping Trips

Even small portable power stations and camping batteries store significant energy. Using them safely keeps your trip trouble-free and protects your gear.

Ventilation and placement

  • Place the power station on a stable, dry surface away from standing water and direct rain.
  • Avoid covering the unit with blankets, clothing, or sleeping bags. Most units rely on airflow for cooling.
  • Keep vents and fans unobstructed to prevent overheating and automatic shutdowns.

Temperature awareness

  • Avoid leaving batteries in direct sun inside a closed vehicle or tent, where temperatures can rise quickly.
  • In cold weather, keep the unit above freezing when possible, as low temperatures can temporarily reduce capacity and charging performance.

Cable and connection safety

  • Use cables rated for the current your devices draw, especially for 12 V DC and high-wattage AC loads.
  • Do not daisy-chain multiple power strips or extension cords from a small power station.
  • Avoid running cords where people walk or where they can snag and pull the power station off a table.

Charging safety

  • Use only compatible chargers and follow the manufacturer’s input limits for AC, DC, and solar charging.
  • Do not attempt to modify charging cables, bypass built-in protections, or connect directly to vehicle or RV wiring without proper equipment.
  • If you are unsure about integrating a portable power station with an RV electrical system, consult a qualified electrician or RV technician.

General battery precautions

  • Do not open the power station or battery enclosure; internal components are not user-serviceable.
  • Keep units away from open flames, campfires, and high-heat cooking areas.
  • If you notice swelling, unusual smells, smoke, or excessive heat, disconnect loads, move the unit to a safe, open area if it is safe to do so, and stop using it.

Following these basic practices makes it much less likely that a power issue will interrupt your camping weekend.

Maintaining and Storing Your Camping Power Setup Between Trips

Good maintenance and storage habits help your portable power station deliver reliable runtime every camping season and extend its overall lifespan.

Regular use and partial cycling

  • Use the power station periodically, even between camping trips, to keep the battery active.
  • Avoid fully discharging the battery whenever possible; stopping around 10–20% remaining is gentler on most chemistries.
  • Recharge to a comfortable level after each trip so it is ready for the next outing.

Storage state of charge

  • For long-term storage (several months), many batteries prefer being stored around 40–60% charge rather than 100% or 0%.
  • Check the charge level every few months and top up if it drops significantly.

Environment and handling

  • Store your power station in a cool, dry place away from direct sunlight and moisture.
  • Avoid dropping, crushing, or stacking heavy items on top of the unit.
  • Keep dust and debris away from vents and ports; gently clean with a dry cloth as needed.

Monitoring performance over time

  • Pay attention if your camping runtime noticeably decreases with the same loads; this can indicate normal battery aging.
  • Test your setup at home before longer trips, especially if you rely on critical devices like a CPAP machine.
  • Keep notes on approximate runtimes and charging times; this personal data is more useful than generic estimates.

With basic care, a portable power station can remain a dependable part of your camping kit for years, making your weekend energy budgeting more predictable.

Maintenance Task Recommended Frequency Purpose
Top-up charge check Every 2–3 months Prevents deep discharge during storage
Full test run with camping loads Before each season Verifies runtime and identifies weak spots
Visual inspection of cables and ports Before each trip Catches damaged cords or loose connections
Cleaning vents and exterior As needed Maintains airflow and cooling performance
Simple maintenance habits to keep camping power stations reliable. Example values for illustration.

Related guides: Portable Power Station Buying Guide • Surge Watts vs Running Watts: How to Size a Portable Power Station • Portable Power Stations for CPAP and Medical Devices: What to Look For • How Many Solar Watts Do You Need to Fully Recharge in One Day?

Practical Weekend Power Planning Tips and Specs to Look For

When you combine a simple energy budget with the right portable power station specs, weekend camping power becomes predictable instead of stressful. The process boils down to three steps: estimate your loads, choose enough usable watt-hours, and match your charging options to how and where you camp.

For a typical two-night trip:

  • Minimal setups (lights and phones) often fall under 200–300 Wh.
  • Family setups with a cooler and multiple devices often land around 800–1,500 Wh.
  • CPAP-focused setups usually need 600–1,200 Wh depending on settings and temperature.

Add a buffer of about 20–30% above your calculated needs to account for weather, inverter losses, and unplanned use. If you plan to recharge with solar or your vehicle, factor in realistic daily input based on your panel size, input limit, and daylight hours.

Specs to look for

  • Battery capacity (Wh): Look for 300–500 Wh for minimalist weekends, 800–1,500 Wh for fridges or CPAP. This directly sets your potential runtime.
  • Continuous AC output (W): Aim for at least 200–300 W for basic lights and electronics, 500–1,000 W if you plan to run fridges or multiple devices. Ensures your loads do not overload the inverter.
  • Surge or peak output (W): Choose a unit with surge roughly 1.5–2× your highest startup load. Helps handle compressor fridges and motors without tripping protection.
  • Input limit and charging options: For solar, 100–300 W input is typical for weekend use; vehicle and AC charging should refill your battery within 4–8 hours. This affects how quickly you can recover from a low state of charge.
  • Number and type of ports: Multiple USB-A and USB-C ports plus at least one or two AC outlets and a 12 V socket make it easier to power several devices without adapters.
  • Display and monitoring: A clear screen showing watts in/out, remaining percentage, and estimated runtime helps you manage your energy budget in real time.
  • Weight and form factor: For car camping, 10–30 lb units are common; choose a size you can comfortably move between home, vehicle, and campsite.
  • Operating temperature range: Check that the unit is rated for the temperatures you expect when camping, especially in hot summers or cold shoulder seasons.
  • Battery chemistry and cycle life: Higher cycle life ratings are useful if you camp frequently or use the unit for other purposes year-round.

By matching these specs to a realistic weekend energy budget, you can choose and use a portable power solution that keeps your campsite running smoothly from Friday night to Sunday afternoon.

Frequently asked questions

What specs and features matter most when choosing a portable power station for a weekend camping trip?

Battery capacity in watt-hours (Wh) and the continuous and surge watt ratings are the core specs, since they determine how long and what you can run. Also consider the input limit and charging options, the number and types of ports, weight and form factor, operating temperature range, and whether the unit provides clear monitoring of watts in/out and remaining charge.

How can confusing watt-hours and amp-hours lead to a planning mistake?

Watt-hours measure stored energy while amp-hours depend on voltage; comparing Ah without converting can make a battery look much larger or smaller than it really is. Always convert Ah to Wh using Wh = Ah × V so you compare capacities on the same basis and avoid underestimating your needs.

Is it safe to use a portable power station inside a tent or vehicle overnight?

Using a power station in a tent or vehicle is generally acceptable if the unit is placed on a stable, ventilated surface away from flammable materials and direct heat. Avoid covering vents, keep the unit out of confined hot spots, follow the manufacturer’s safety guidance, and do not leave a unit showing signs of damage or overheating unattended.

Can I rely on solar panels alone to recharge my power station during a weekend?

Solar can often top up a battery during a weekend, but real-world factors like panel size, the power station’s input limit, shading, cloud cover, and daylight hours determine how much energy you actually get. Match panel output to the unit’s input limit and plan conservatively; don’t assume ideal conditions will fully recharge your battery every day.

Why does my power station shut off when a fridge or CPAP starts, and what can I do?

Startup surges can exceed a unit’s surge rating or the combined load can exceed the continuous output, which triggers protective shutdowns. Check the continuous and surge watt ratings, reduce simultaneous loads during startup, and consider a unit with higher surge capacity or staggered device starts to avoid tripping protections.

How much extra buffer should I add to my energy budget to avoid running out of power?

Adding a buffer of about 20–30% above your calculated needs is a common practice to cover inverter losses, weather impacts, and unexpected use. Increase the buffer further if conditions are colder, if you have inefficient loads, or if you rely solely on intermittent solar charging.