Dual Input Explained: Can You Combine Wall + Solar Charging Safely?

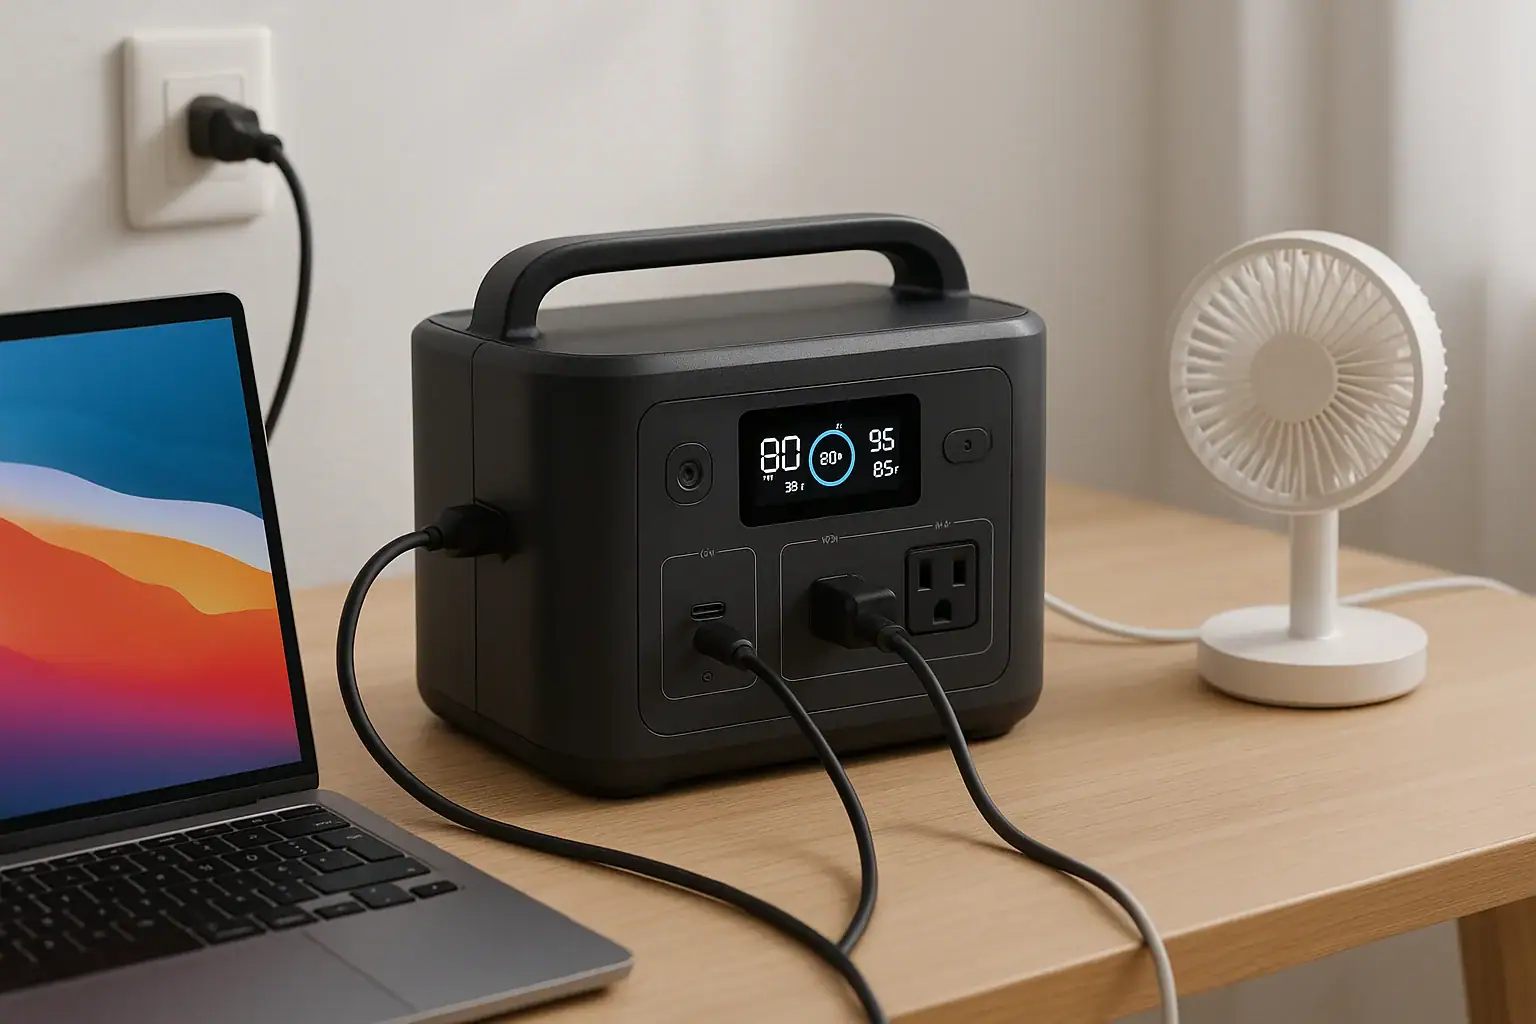
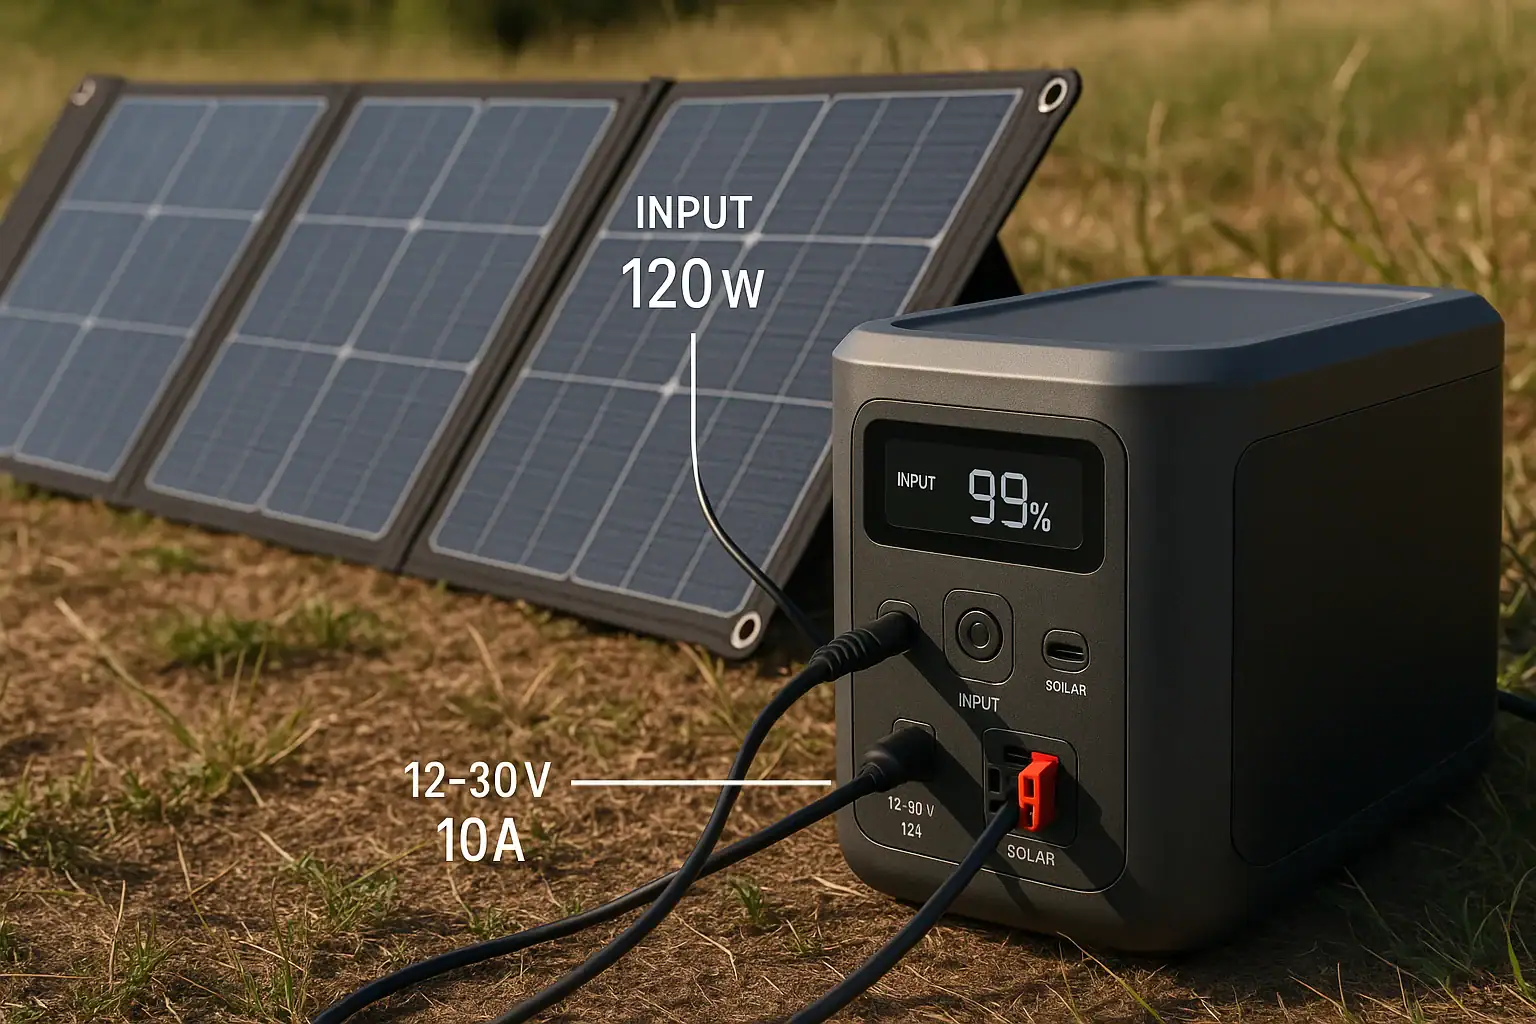
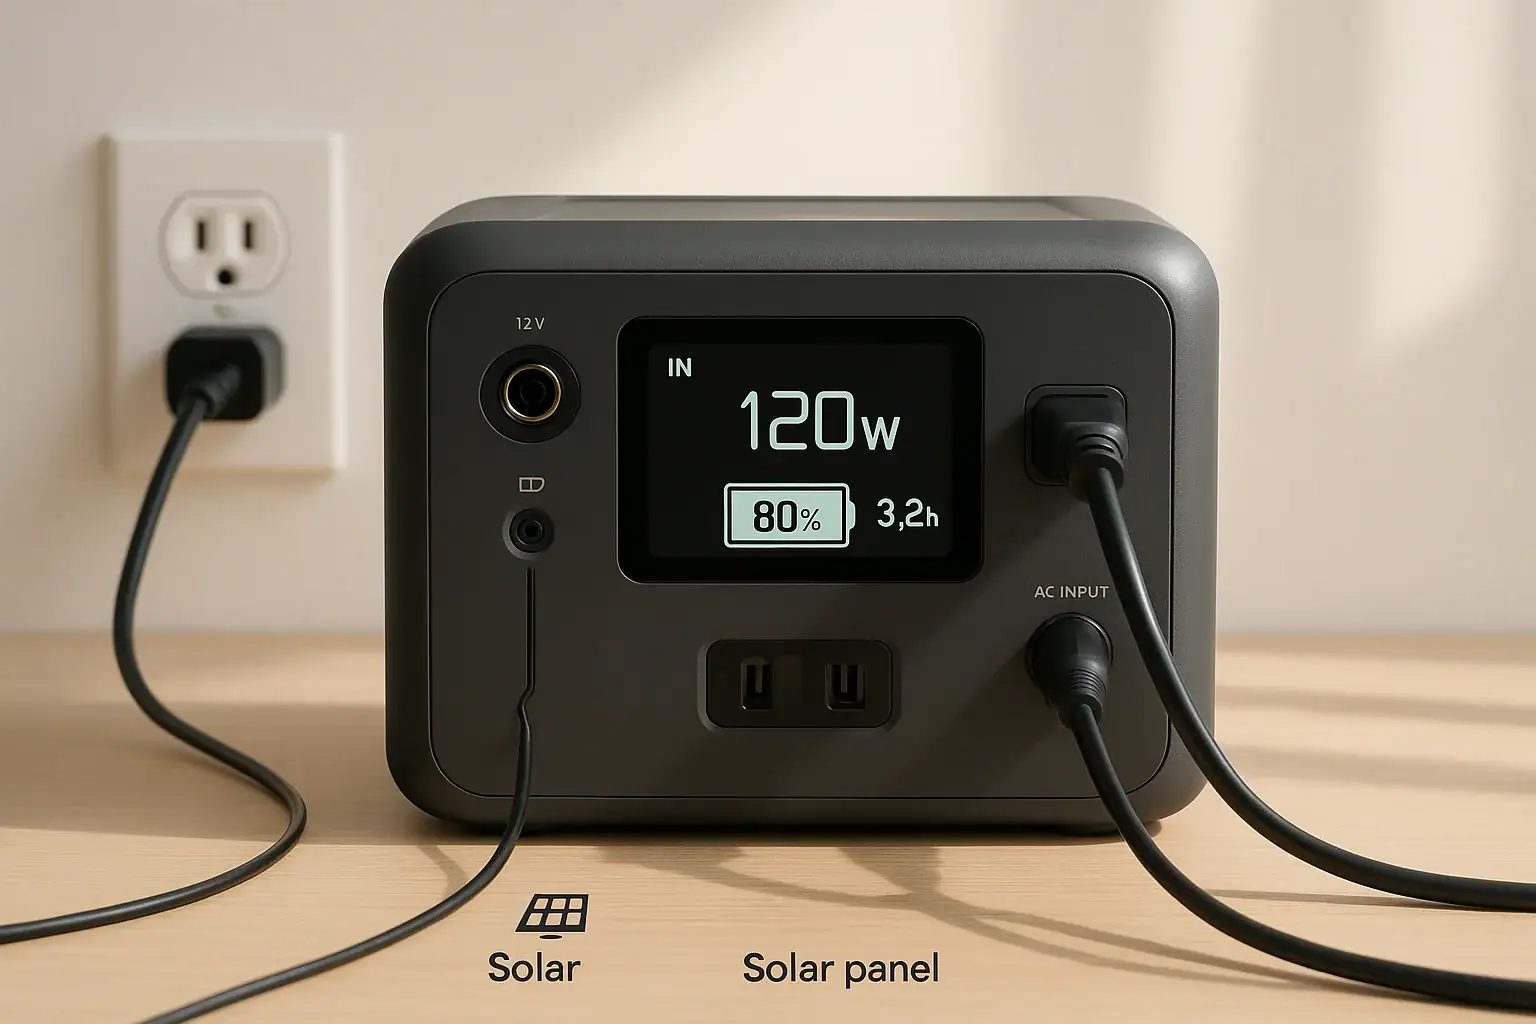
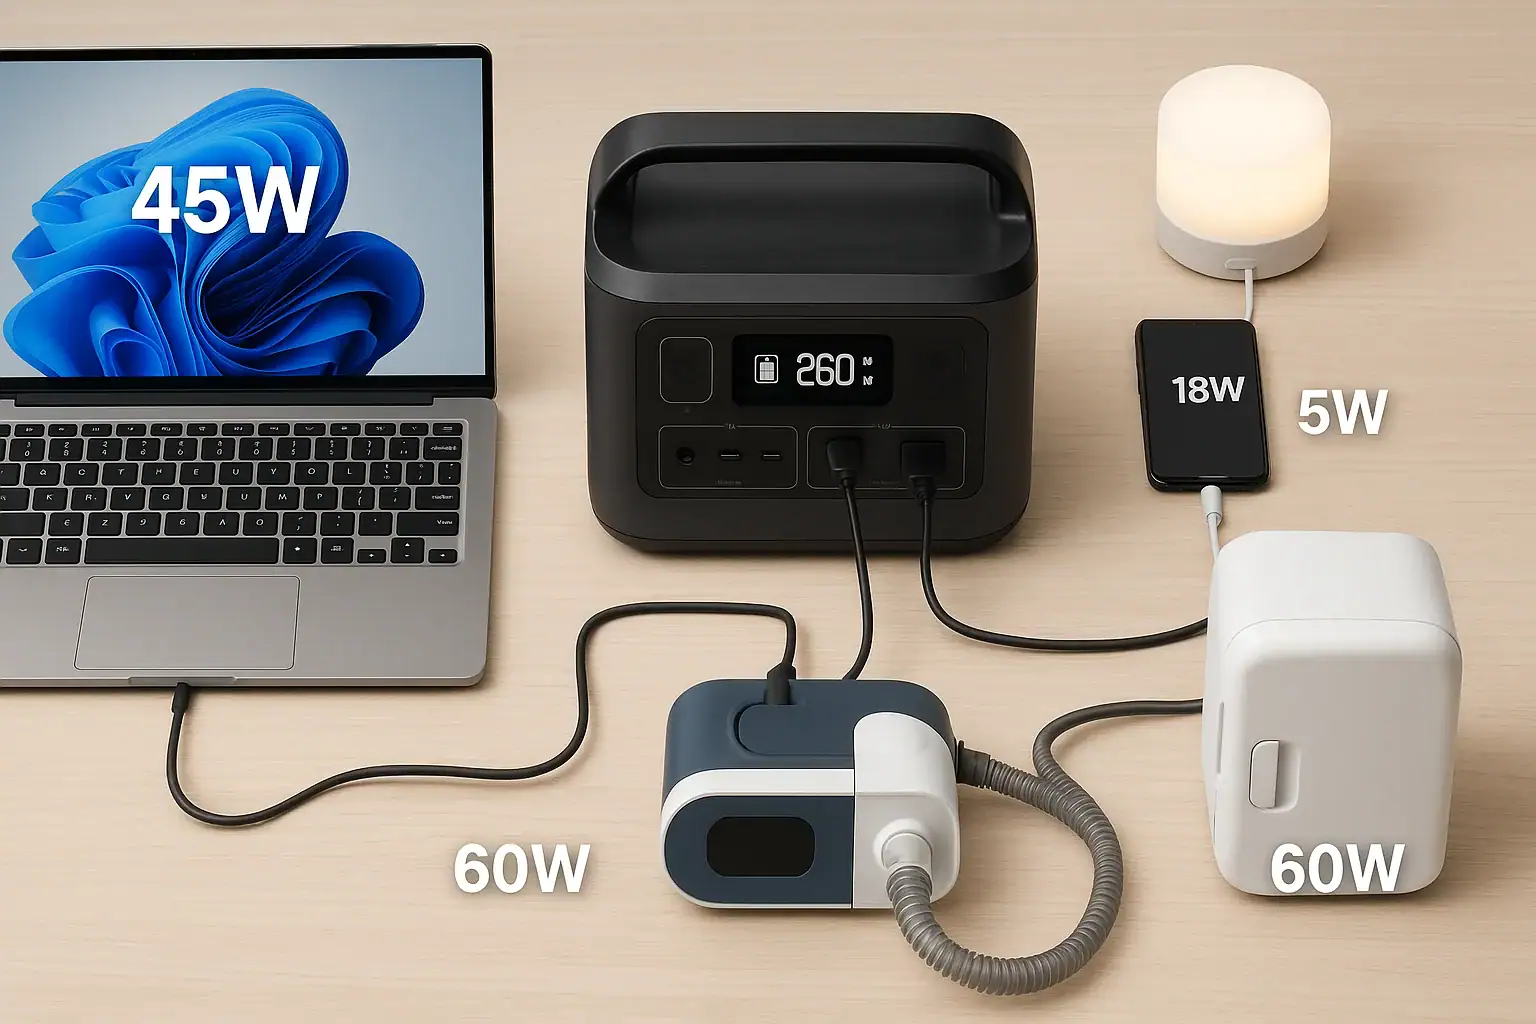
Diagram of a portable power station using both wall and solar charging inputs.

You can usually combine wall and solar charging on a portable power station safely only if the manufacturer explicitly supports dual input and the total charging watts stay within the unit’s input limit. Mixing inputs without checking specs can overload the charger, trigger protection circuits, or shorten battery life.

People search this topic when they want faster charging, wonder about “pass-through” or “dual input” modes, or worry about damaging a battery with too many input watts. Terms like input limit, charge controller, MPPT, surge watts, and state of charge often appear in manuals but are not clearly explained.

This guide breaks down how dual input charging really works, why some models accept wall plus solar at the same time and others do not, and what to check on the spec sheet before plugging in. You will learn practical wattage examples, common mistakes, and the key features that matter if you plan to use combined charging regularly.

What Dual Input Charging Means and Why It Matters

In the context of portable power stations, dual input charging means using two separate charging sources at the same time, most commonly a wall outlet (AC adapter) plus solar panels (DC input). The power station’s internal electronics decide how much power to accept from each source and how fast to charge the battery.

Dual input matters for three main reasons: charging speed, flexibility, and battery health. Combining wall and solar can significantly reduce charge time if the unit is designed to accept the extra watts. It also lets you top up from solar while on grid power, or keep charging at a decent rate when one source is weak (for example, cloudy solar conditions plus a low-watt wall outlet).

However, not every portable power station supports true dual input. Some units have multiple ports but share a single internal charge controller with a fixed input wattage limit. In those cases, plugging in wall and solar together may not increase charging speed and can sometimes cause the unit to shut down the extra input or throw an error.

Understanding what dual input really means on your model helps you avoid overloading the system, misreading the display, or assuming that more cables always equal faster charging. It is ultimately about how much safe charging power the internal hardware is designed to handle, not just how many ports are visible on the outside.

How Combining Wall and Solar Charging Actually Works

Inside a portable power station, incoming power flows through one or more charge controllers that regulate voltage, current, and total input watts before energy reaches the battery pack. When you connect both wall and solar, you are effectively asking the system to blend two sources into a single safe charging profile.

The wall charger (or built-in AC charger) typically provides a stable DC output at a fixed voltage and current, such as 24 V at 10 A (about 240 W). Solar input is more variable and usually passes through an MPPT or PWM controller that tracks panel voltage and limits current to a safe level. If the unit supports dual input, the firmware coordinates these controllers so the combined watts do not exceed the maximum charging power.

In many designs, the power station assigns priority to one input. For example, it might take as much as possible from the wall charger first, then add solar until the total hits the input limit. In others, it may cap each input at a certain level or dynamically adjust based on solar conditions and battery state of charge.

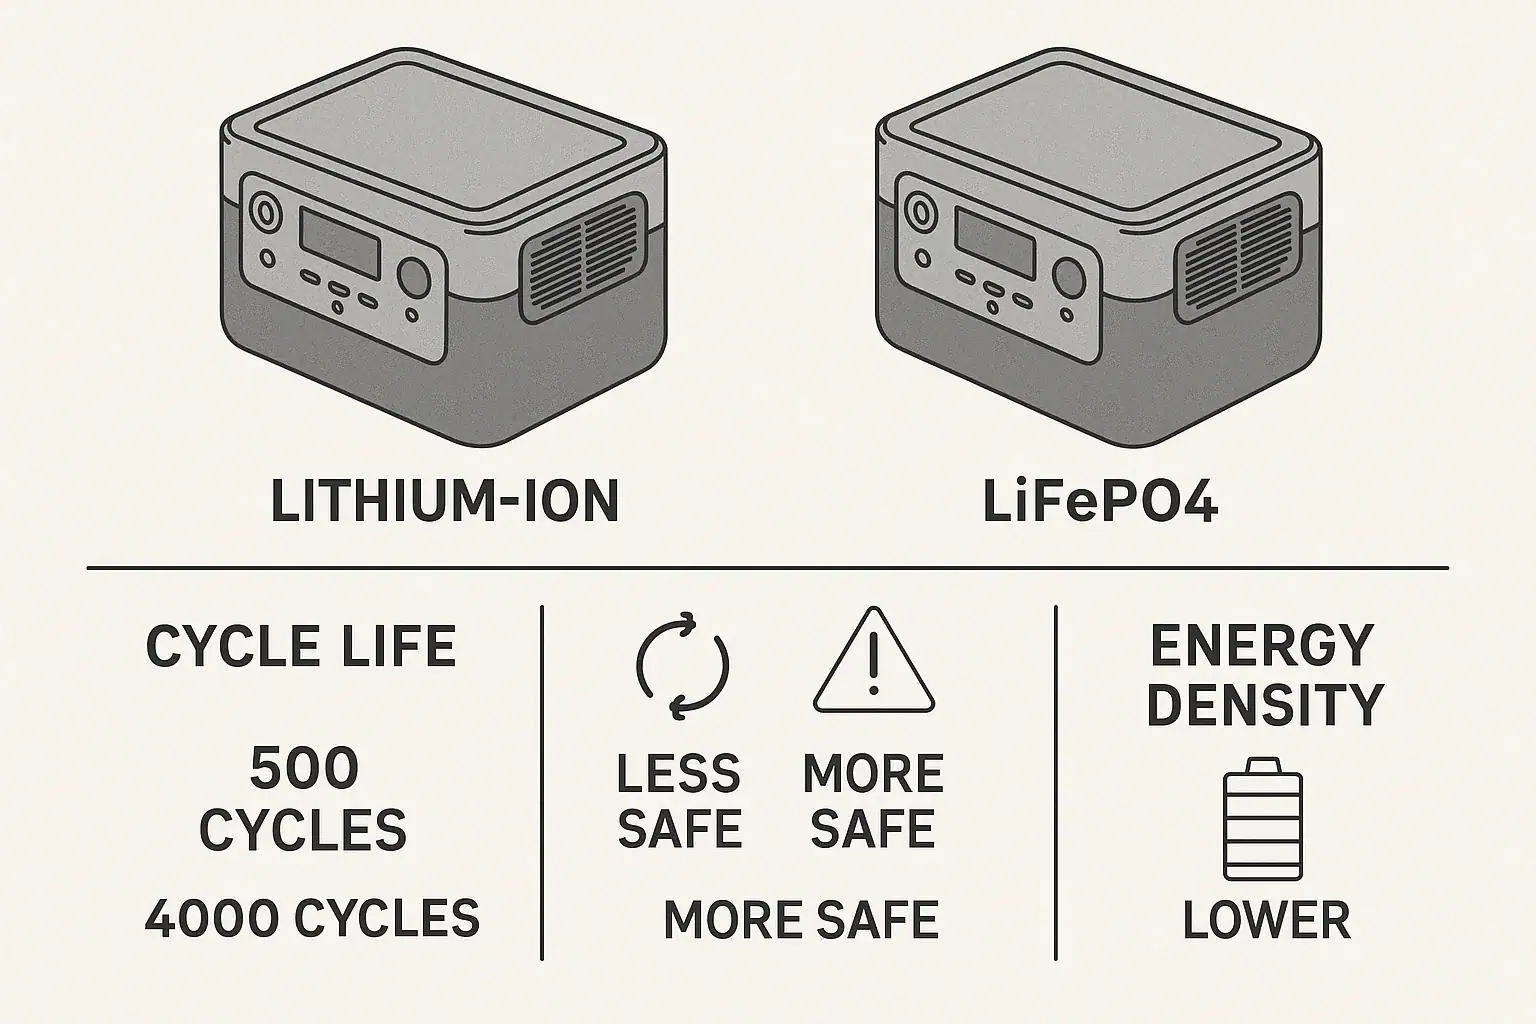
Battery chemistry also influences how dual input behaves. Lithium iron phosphate (LiFePO4) and NMC lithium-ion packs both require a constant-current/constant-voltage (CC/CV) charging profile, but they may have different recommended charge rates (often expressed as a C-rate, like 0.5C). The internal battery management system (BMS) ensures that, regardless of how many sources you connect, the battery is not charged faster than its safe limit.

Because of these internal limits, plugging in a 500 W wall charger and 400 W of solar does not guarantee 900 W of charging. If the unit’s max input is 600 W, it may cap the total at that level, automatically throttling one or both sources. The display will usually show the net input watts, which is the best way to confirm what is really happening.

Input typeTypical voltageTypical power rangeRole in dual input
Wall (AC adapter)About 20–60 V DC output100–800 WProvides stable, predictable charging power.
Solar (PV panels)About 12–60 V DC (open-circuit)50–600 WVariable power; depends on sunlight and panel angle.
Car / DC socket12–24 V DC60–180 WOften used as a secondary or backup input.
USB-C PD input5–20 V DC30–140 WSometimes can be combined with another DC or AC input.
Overview of common charging inputs and their role in dual input charging. Example values for illustration.

Real-World Dual Input Scenarios and What to Expect

To understand whether combining wall and solar will help in your situation, it helps to walk through realistic wattage and capacity examples. These are simplified scenarios, but they mirror what you will see on many portable power stations.

Imagine a 1,000 Wh power station with a maximum input of 500 W. If you use only the included wall charger rated at 300 W, a full charge from empty would take roughly 3.5–4 hours, allowing for efficiency losses and tapering at high state of charge. If you add solar panels that can deliver up to 250 W in good sun, the unit could theoretically accept the full 300 W from the wall plus up to 200 W from solar before hitting its 500 W limit. In practice, you might see 450–480 W total, cutting charge time closer to 2.5–3 hours.

Now consider a larger 2,000 Wh unit rated for 1,200 W max input. If you connect a 600 W AC charger and 600 W of solar (under ideal conditions), the station could accept nearly the full 1,200 W, bringing it from 0% to 80% in around 1.5–2 hours. The last 20% typically slows down as the BMS reduces current to protect the battery, so total time may be closer to 2.5 hours.

There are also cases where dual input does not speed things up. Some power stations share a single 300 W charge controller across both the wall and solar ports. When you plug in both, the unit might cap total input at 300 W and simply juggle which source it uses more heavily. You might see the display hover around 280–300 W whether or not solar is connected, especially if the wall charger alone already hits the limit.

Weather can also change the picture. If your solar panels are rated at 200 W but clouds reduce them to 60–80 W, adding that to a 300 W wall charger still helps, but the improvement is modest. Instead of 300 W, you might see 360–380 W. Over a full charge cycle, that could save 30–45 minutes, which might or might not matter depending on your use case.

Finally, some models allow combining DC sources, such as solar plus USB-C PD input, while AC plus solar is not supported. In that case, you might run a 200 W solar array and a 100 W USB-C PD charger together to reach 300 W total, even though the AC adapter cannot be used at the same time. The key is always to check which combinations are officially supported and verify actual input watts on the display.

Common Dual Input Mistakes and Troubleshooting Signs

Many dual input problems come from assuming that more cables automatically equal more charging power. When users do not understand the input limit or how ports share a controller, they can misinterpret warnings or think something is broken when it is not.

One frequent mistake is exceeding the recommended solar voltage or wattage while also using the wall charger. For example, connecting a large solar array that already pushes the input close to its limit, then plugging in the wall charger, can cause the unit to shut off the solar input, show an overvoltage or overcurrent error, or reduce both sources to a lower combined level.

Another issue is using non-matching or third-party adapters that are not designed to work together. An aftermarket AC adapter with higher voltage than specified, combined with solar panels wired in series, may stress the charge controller and trigger safety cutoffs. Even if the unit does not fail immediately, running it outside its intended charging profile can shorten battery lifespan.

Users also often overlook firmware behaviors. Some power stations are programmed to prioritize battery longevity over absolute speed. When the state of charge passes a certain threshold (for example, 80–90%), the system may automatically reduce input watts, regardless of how many sources are connected. This is normal and not a sign that dual input has stopped working.

Signs that your dual input setup is not working properly include the total input watts not increasing when you add a second source (and the manual says it should), repeated error icons on the display when both inputs are connected, the fan running at full speed followed by an abrupt drop in input watts, or the unit getting noticeably hotter than usual near the charge ports.

If you see these symptoms, first disconnect one input and confirm the unit charges correctly from a single source. Then test each combination separately (wall only, solar only, wall plus solar) while watching the input wattage and any warning indicators. If the behavior does not match the manual’s description or the input ratings on the label, it is safer to revert to single-source charging and contact the manufacturer for clarification.

Safety Basics for Combining Wall and Solar Charging

Safe dual input charging comes down to staying within the designed electrical limits and respecting how the power station manages its own protections. The most important number to know is the maximum total input power, usually expressed in watts. This value often assumes all active inputs combined, not per port.

Never exceed the specified input voltage range on any port, especially the solar or DC input. Solar panels wired in series can easily push voltage above what the charge controller can tolerate, even if the combined wattage seems modest. When in doubt, use series/parallel configurations that keep open-circuit voltage comfortably below the stated maximum.

Use only compatible connectors and adapters that match the polarity and voltage expectations of the device. For wall charging, stick to the supplied adapter or one that explicitly matches the voltage, current, and polarity requirements. For solar, follow the manufacturer’s guidance on panel wattage, wiring, and whether a separate charge controller is allowed or prohibited.

Thermal management is another key safety factor. Dual input charging typically produces more heat than single-source charging because the charge controller and BMS are working harder. Make sure the power station has adequate ventilation, keep it out of direct intense sun while charging, and avoid covering the vents. If the unit becomes uncomfortably hot to the touch, reduce input power or disconnect one source and let it cool.

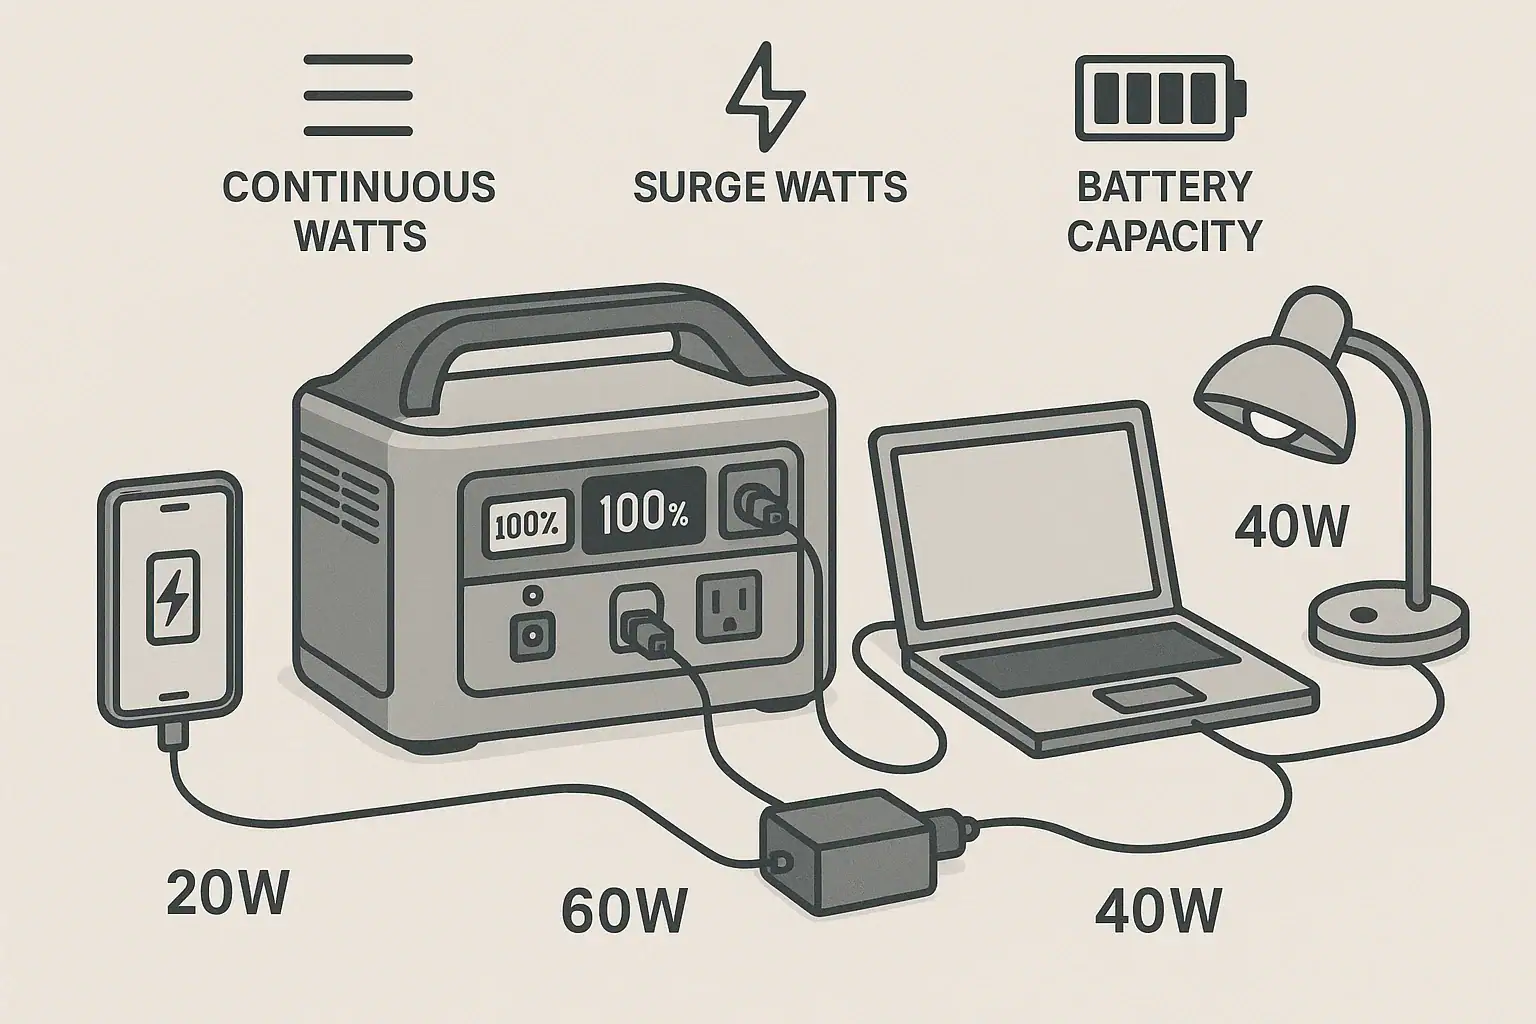
Finally, remember that dual input does not change the safe use of the AC and DC output ports. Do not assume that faster charging means you can safely run larger loads indefinitely. Always consider both the continuous output rating and the surge watts rating when powering devices, and avoid daisy-chaining power strips or improvised wiring. For any connection to a building’s electrical system or transfer switch, consult a qualified electrician and follow local codes.

Charging Habits, Storage, and Long-Term Battery Health

How you use dual input over months and years has a direct impact on battery longevity. Even if the power station supports very high input wattage, running it at maximum charge rate every single cycle can add stress, especially in hot environments. Moderating charge speed when you are not in a rush is one of the simplest ways to extend battery life.

Whenever possible, avoid frequently charging from 0% to 100% at full speed. Many users find a sweet spot by charging between roughly 20% and 80% when daily usage allows. If your power station offers an adjustable input limit, consider setting it to a moderate level (for example, 50–70% of the maximum) for routine use and reserving full-speed dual input for emergencies or time-critical situations.

Temperature is another major factor. Charging at high input watts while the unit is already warm from heavy discharge can push internal temperatures higher, prompting the BMS to throttle charging or, in extreme cases, shut down. Letting the power station cool for a short period before initiating dual input charging can reduce thermal cycling stress on both the battery and electronics.

For storage, aim to keep the battery at a partial state of charge, often around 40–60%, and in a cool, dry place. Avoid leaving the unit plugged into wall power and solar simultaneously for weeks on end unless the manual explicitly supports float charging or UPS-style operation. Long-term trickle charging at high voltage can contribute to gradual capacity loss.

Periodically inspect your charging cables, connectors, and solar wiring. Loose connections or partially damaged cables can generate heat and resistance, especially when carrying higher currents from combined inputs. Replace any components that show discoloration, cracking, or intermittent behavior during charging.

PracticeRecommended approachEffect on battery life
Charge rateUse moderate watts for everyday charging; reserve max input for urgency.Reduces stress and slows capacity fade over time.
Charge windowOperate mostly between about 20–80% state of charge when practical.Helps maintain cycle life versus constant 0–100% cycles.
TemperatureCharge in a cool, shaded area; avoid hot car interiors.Prevents overheating and BMS throttling.
StorageStore around mid-charge, in a dry, moderate-temperature location.Minimizes long-term voltage and thermal stress.
Cable careInspect and replace worn or damaged charging leads.Improves efficiency and reduces risk of hot spots.
Key charging and storage habits that support long-term battery health. Example values for illustration.

Related guides: Solar Panel Series vs Parallel: Which Is Better for Charging a Power Station?Overpaneling Explained: Can You Connect Bigger Solar Panels Than the Input Limit?How to Read Solar Panel Specs for Power Stations: Voc, Vmp, Imp, and Why It Matters

Practical Takeaways and Buying Checklist for Dual Input Charging

When used within the designed limits, combining wall and solar charging can safely cut charge times and add flexibility to how you use a portable power station. The key is to treat dual input as a feature that must be explicitly supported and properly configured, not as a default capability of any unit with multiple ports.

Before relying on dual input in critical situations, test your setup under controlled conditions. Start with single-source charging, then add the second input while watching the display for total input watts, temperatures, and any warning indicators. If the real-world behavior matches the manual and stays within the published input ratings, you can be confident that your configuration is safe and effective.

Specs to look for

  • Maximum input wattage (AC + DC) – Look for a clearly stated combined input limit (for example, 400–1,200 W). This tells you how much benefit you can expect from dual input and helps avoid overloading.
  • Supported input combinations – Check whether the unit officially allows AC plus solar, solar plus USB-C, or only one source at a time. This matters because some models cap total input regardless of how many ports you use.
  • Solar input voltage and watt range – Look for a safe voltage window (for example, 12–60 V) and a recommended wattage (150–800 W). Matching panels to this range ensures efficient MPPT operation and reduces error conditions.
  • Charge controller type (MPPT vs. PWM) – MPPT controllers generally handle variable solar conditions better and can extract more watts from panels. This is important if you plan to rely heavily on solar as part of dual input.
  • Battery chemistry and cycle life rating – Specs like LiFePO4 with 2,000–4,000 cycles or NMC with 800–1,500 cycles indicate how well the battery tolerates frequent fast charging. This matters if you plan to use high-watt dual input often.
  • Adjustable input power or charge modes – Some units let you limit input watts or choose an “eco” or “silent” mode. This helps balance charge speed, fan noise, and battery longevity when you do not need maximum power.
  • Thermal and safety protections – Look for overvoltage, overcurrent, overtemperature, and short-circuit protections. Robust protections are crucial when combining multiple inputs that can vary in voltage and current.
  • Display detail and monitoring – A clear screen showing real-time input watts, battery percentage, and error icons makes it easier to verify that dual input is working as intended and to troubleshoot problems.
  • DC and USB-C PD input capabilities – If you plan to supplement wall or solar with USB-C or car charging, check the maximum PD wattage (for example, 60–140 W) and whether it can be used simultaneously with other inputs.

By focusing on these specifications and understanding how dual input charging is managed internally, you can safely take advantage of faster, more flexible charging without compromising the long-term health of your portable power station.

Frequently asked questions

Which specs and features should I check before attempting dual input wall and solar charging?

Check the combined maximum input wattage, supported input combinations (for example AC+solar or solar+USB-C), the solar input voltage range, charge controller type (MPPT vs PWM), and built-in thermal and electrical protections. A clear display and an adjustable input limit are also helpful to verify real-world behavior and avoid overloading the unit.

What is a common mistake that can damage the charger or battery when combining wall and solar?

Assuming more cables or higher-rated panels always increase charge speed is common; exceeding the device’s voltage or combined wattage limits or using mismatched adapters can trigger protections or stress the BMS. Always confirm port ratings and use manufacturer-approved wiring to avoid damage.

What high-level safety precautions should I follow when using wall and solar inputs together?

Stay within the specified voltage and combined wattage limits, verify correct connector polarity, and ensure adequate ventilation to prevent overheating. If you see error icons, excessive heat, or unusual behavior, disconnect one input and consult the manual or manufacturer.

How can I tell whether my power station is actually blending wall and solar power?

Watch the unit’s real-time input wattage on the display when both sources are connected; if blending occurs the net input should increase compared to a single source. If the displayed watts do not rise, check supported combinations in the manual and test each source separately to isolate the issue.

Can frequent dual input charging shorten battery lifespan?

Regularly charging at maximum input can increase thermal and electrochemical stress and accelerate capacity loss over many cycles. To extend battery life, use moderate charge rates for routine cycles, avoid constant 0–100% fast charging, and keep the unit cool while charging.

Is it safe to leave wall and solar connected for long periods (float or UPS-style operation)?

Only do so if the manual explicitly supports float charging or continuous UPS operation; otherwise long-term simultaneous connection can cause gradual voltage or thermal stress. For storage, follow manufacturer guidance—typically store at a partial state of charge and disconnect external inputs.

Can You Charge a Portable Power Station From USB-C PD? Limits, Adapters, and Gotchas

Portable power station charging from a USB-C PD charger showing power and port labels

You can charge many portable power stations from USB-C PD, but only if the station supports USB-C input and the PD wattage meets its requirements. The real limits come from the power station’s input rating, the USB-C PD profile, and any adapters in between. Understanding these details helps you avoid painfully slow charging, error messages, or no charging at all.

People often search for terms like USB-C PD input limit, PD profile compatibility, DC input watts, charge time, and pass-through charging when they run into problems. This guide explains how USB-C Power Delivery interacts with portable power stations, what adapters actually do, and the common gotchas that cause confusion. By the end, you’ll know how to match ports, voltage, and wattage so you can safely use USB-C PD chargers, laptop bricks, and multi-port GaN chargers to top up your power station when you’re at home, traveling, or off-grid.

USB-C PD Charging for Portable Power Stations: What It Means and Why It Matters

USB-C Power Delivery (PD) is a fast-charging standard that lets devices negotiate voltage and current over a USB-C cable. When a portable power station supports USB-C PD input, it can use a USB-C PD charger (such as a laptop or high-wattage phone charger) as a power source instead of or in addition to its dedicated AC adapter or DC input.

This matters because USB-C PD charging affects how flexible, fast, and convenient your portable power station is to recharge. In some setups, USB-C PD is the primary way to charge; in others, it is a backup or supplemental input to extend runtime or reduce downtime between uses.

Key reasons USB-C PD input is important for portable power stations include:

  • Charging flexibility: You can recharge from common USB-C PD chargers instead of carrying a proprietary brick everywhere.
  • Travel convenience: High-wattage USB-C laptop chargers can sometimes charge both your laptop and your power station (though not at the same time on the same port).
  • Redundancy: If you misplace the included AC adapter, a compatible USB-C PD charger can serve as a backup.
  • Modular setups: USB-C PD can be combined with other inputs on some models, increasing total input watts for faster charging.

However, not all portable power stations support USB-C input, and those that do often have strict input limits. Understanding these limits and how USB-C PD actually works is crucial before you rely on it as your main charging method.

How USB-C Power Delivery Works With Portable Power Station Inputs

USB-C PD is more than just a connector shape. It is a communication protocol where the charger (source) and the device (sink) negotiate a power contract. That contract defines the voltage and maximum current the charger will provide.

For portable power stations, several concepts determine whether USB-C PD charging will work and how fast it will be:

PD power profiles and voltage steps

USB-C PD chargers offer power in specific combinations of voltage and current, often called profiles. Common PD voltages include 5 V, 9 V, 12 V, 15 V, and 20 V. The maximum wattage is voltage multiplied by current (for example, 20 V × 3 A = 60 W).

A USB-C PD charger might advertise 65 W, 100 W, or 140 W, but the actual power delivered depends on the profile the device accepts. Many portable power stations that support USB-C PD input are designed to use higher-voltage profiles (often 20 V) to achieve reasonable charging speeds.

Power station USB-C input ratings

On the power station, the USB-C input port usually has a label such as:

  • USB-C PD 60 W (input)
  • USB-C PD 100 W (input/output)
  • USB-C 5 V/9 V/12 V/15 V/20 V, up to 3 A

This rating is the maximum the power station will accept over USB-C. Even if you plug in a 100 W PD charger, a 60 W-rated input will cap at 60 W.

For many users, the confusion comes from mixing up the charger’s maximum rating with the power station’s input limit. The lower of the two always wins.

Negotiation between charger and power station

When you connect a USB-C PD charger to a compatible power station:

  • The charger advertises its available PD profiles (for example, 5 V/3 A, 9 V/3 A, 15 V/3 A, 20 V/5 A).
  • The power station requests a profile it supports, up to its own max input rating.
  • If both sides agree, charging begins at that voltage and current.

If the power station does not support PD or cannot recognize the charger’s profiles, it may fall back to 5 V charging (very slow) or refuse to charge at all.

Dual-role USB-C ports

Some portable power stations use the same USB-C port for both input and output. In that case, the port may behave as:

  • Output: When connected to phones, tablets, or laptops.
  • Input: When connected to a PD charger that can act as a power source.

The power station’s firmware decides which role to take based on what it detects on the other end. Not every dual-role port supports input; reading the port label or manual is essential.

Adapters and USB-C to DC cables

Some users attempt to charge power stations that only have DC barrel or other DC inputs using USB-C to DC cables or adapters. These cables usually include a small PD trigger circuit that tells the USB-C charger to output a specific voltage (for example, 20 V), then route that power to a DC barrel plug.

This can work if the power station’s DC input is designed for that voltage and wattage, but it introduces additional compatibility and safety concerns, which we will cover later.

USB-C PD charger ratingCommon PD voltage profilesMax possible wattsTypical power station USB-C input behavior
45 W5 V, 9 V, 15 V45 WMay charge slowly; often limited to 30–45 W input.
60–65 W5 V, 9 V, 15 V, 20 V60–65 WGood match for 45–60 W USB-C inputs; moderate charge times.
100 W5 V, 9 V, 15 V, 20 V (up to 5 A)100 WUseful for stations with 60–100 W USB-C inputs; capped at station’s limit.
140 WUp to 28 V on some chargers140 WOnly partly usable; many power stations accept up to 20 V profiles.
Example values for illustration.

Real-World USB-C PD Charging Scenarios for Portable Power Stations

Understanding theory is helpful, but most people just want to know what happens in common setups. Here are realistic use cases and what to expect.

Charging a small power station with a laptop USB-C charger

Consider a compact portable power station with a 250 Wh battery and a USB-C PD input rated at 60 W. You plug in a 65 W USB-C laptop charger that supports 20 V/3.25 A.

  • The station negotiates a 20 V profile and draws up to 60 W.
  • Ignoring conversion losses, a 250 Wh battery would take roughly 4–5 hours to charge from empty at 60 W.
  • In practice, charging slows near full, so total time might be slightly longer.

This is a reasonable setup for everyday use, desk backup power, or travel.

Using a phone charger on a larger portable power station

Now imagine a mid-size power station with a 700 Wh battery and a USB-C PD input that supports up to 100 W. You only have a 30 W phone charger.

  • The charger likely offers 5 V/3 A and 9 V/3 A profiles.
  • The station may accept 9 V/3 A (27 W), leading to very slow charging.
  • At around 30 W, a 700 Wh battery could take well over 24 hours to charge from empty.

The result: it may work, but the charge time is so long that it is impractical for most users.

Combining USB-C PD with another input

Some portable power stations support simultaneous charging from multiple inputs, such as:

  • AC adapter + USB-C PD
  • Solar input + USB-C PD

For example, a unit might allow 200 W from its AC adapter plus 60 W from USB-C, for a total of 260 W. This can significantly reduce charge time for larger batteries, as long as the manufacturer explicitly supports combined input.

However, not all models allow this. Some limit total input or prioritize one source over another, automatically throttling USB-C when AC is connected.

USB-C to DC barrel adapters on non-USB-C power stations

Suppose you have a power station with a DC input rated 12–30 V, max 100 W, and no USB-C input. You buy a USB-C PD to DC barrel cable that triggers 20 V output from a 100 W PD charger.

  • If the DC input accepts 20 V and up to 100 W, the station may charge normally.
  • If the station expects a different voltage (for example, 24 V), it may charge slowly or not at all.
  • The adapter’s trigger circuit must match the power station’s acceptable input range.

This setup can work, but it is less predictable than using a native USB-C PD input and requires careful attention to voltage limits.

Charging while powering devices (pass-through)

Many users want to know if they can charge the power station from USB-C PD while running devices from its AC or DC outputs. This is often called pass-through charging.

Behavior varies by model:

  • Some power stations allow pass-through but may reduce battery lifespan if used constantly in this mode.
  • Others disable certain outputs while charging or limit total output power.
  • In some designs, USB-C PD input is available only when the station is in a specific mode or when AC input is not in use.

Always check how the station manages input versus output power, especially if you plan to use it as a semi-permanent UPS-style backup.

Common USB-C PD Charging Mistakes, Gotchas, and Troubleshooting Tips

Many USB-C PD charging problems with portable power stations come down to mismatched expectations or small details. Here are frequent issues and how to interpret them.

“It’s plugged in, but it won’t charge”

If the power station does not start charging when connected to a USB-C PD charger:

  • Check if the port is input-capable: Some USB-C ports are output-only for charging phones and laptops.
  • Verify PD support: Basic USB-C chargers without PD may only provide 5 V; some stations require a PD handshake to accept input.
  • Inspect the cable: Not all USB-C cables support high-wattage PD; try a known good, e-marked cable rated for 60–100 W.
  • Try another charger: Some low-cost or older PD chargers have limited profiles that do not match the station’s requirements.

“Charging is way slower than expected”

Slow charging usually traces back to one of these factors:

  • Input limit on the station: A 100 W charger on a 45 W USB-C input will still only deliver about 45 W.
  • Charger profile limitations: If the charger cannot provide 20 V, the station may be stuck at a lower voltage and wattage.
  • High battery state of charge: Many power stations reduce input current as they approach full to protect the battery.
  • Temperature throttling: If the station is hot or in direct sun, it may limit charge power.

“It starts charging, then stops or disconnects repeatedly”

Intermittent charging can be caused by:

  • Weak cable connections: Loose or worn connectors can cause brief interruptions that reset the PD negotiation.
  • Overcurrent protection on the charger: If the station tries to draw more than the charger’s safe limit, the charger may shut down and restart.
  • Adapter incompatibility: Some USB-C to DC adapters trigger a voltage that the station cannot handle reliably, causing it to drop in and out.

In many cases, testing with a different cable and a higher-quality PD charger resolves these symptoms.

Misreading labels and marketing terms

Marketing language can be confusing. Watch out for:

  • “USB-C fast charge” without PD: This may refer to proprietary phone standards, not USB-C PD input for the power station.
  • “100 W output” on the station: This might describe USB-C output capability, not input.
  • “PD support” on chargers: Not all PD chargers support the full range of voltages; some are optimized for phones rather than larger devices.

When to suspect a hardware fault

If you have verified that:

  • The station’s USB-C port is rated for PD input,
  • You are using a certified high-wattage PD charger and cable, and
  • Other devices charge correctly from the same charger,

but the power station still refuses to charge or behaves erratically, the port or internal charging circuitry may be faulty. In that situation, professional service or manufacturer support is usually required.

Safety Basics When Charging Portable Power Stations From USB-C PD

Charging a portable power station from USB-C PD is generally safe when you stay within the rated input limits and use compatible equipment. Still, it involves high currents and potentially high voltages, so basic precautions matter.

Stay within rated voltage and wattage

Whether using a native USB-C PD input or an adapter into a DC port, never exceed the power station’s stated input ratings. Higher wattage does not always mean faster or better if the device is not designed for it.

  • Match or stay below the max input wattage: If the station’s USB-C input is 60 W, a 60–100 W PD charger is fine, but the station will cap at 60 W.
  • Respect DC input voltage ranges: When using USB-C to DC adapters, ensure the triggered PD voltage fits within the station’s DC input voltage range.

Use quality chargers and cables

Reliable USB-C PD charging depends on the charger and cable:

  • Choose certified PD chargers: Low-quality chargers may mis-negotiate power levels or lack proper protections.
  • Use e-marked cables for higher wattages: For 60–100 W PD, use cables rated for the intended current.
  • Avoid damaged cables: Frayed or bent connectors can overheat or fail under load.

Heat management and placement

Both the power station and the USB-C charger generate heat while charging:

  • Provide ventilation: Keep vents clear and avoid covering the power station or charger with fabric or other materials.
  • Avoid direct sun and enclosed spaces: High temperatures can trigger thermal throttling or shutoffs.
  • Monitor during first-time setups: When you try a new charger or adapter, check for unusual warmth, smells, or noises.

Do not modify ports or open the power station

Altering USB-C ports, bypassing protective circuits, or opening the power station to change wiring can create serious fire and shock risks. Internal charging electronics are designed as a system; modifying one part can defeat safety features.

If you suspect a hardware defect or damaged port, work with the manufacturer or a qualified technician instead of attempting internal repairs yourself.

Know when to involve an electrician

While USB-C PD charging itself does not require an electrician, integrating a portable power station into a home electrical system does. If you plan to connect a power station to household circuits, consult a licensed electrician and use appropriate transfer equipment instead of improvised cables or backfeeding methods.

Maintenance and Storage Practices for Reliable USB-C PD Charging

Good maintenance and storage habits help keep both your portable power station and your USB-C charging gear working reliably over time.

Care for USB-C ports and connectors

Physical wear and contamination are common causes of USB-C charging problems:

  • Keep ports clean: Dust and debris can interfere with the small USB-C contacts; periodically inspect and gently blow out ports if needed.
  • Avoid strain on cables: Heavy cables hanging off the port can loosen connectors over time; support them where possible.
  • Insert and remove straight: Twisting or forcing connectors can damage internal contacts.

Store chargers and cables properly

To prolong the life of your USB-C PD chargers and cables:

  • Coil cables loosely: Tight bends near the connectors increase the risk of breakage.
  • Protect chargers from moisture: Store them in dry, cool locations when not in use.
  • Label high-wattage chargers: Mark which chargers are 60 W, 100 W, etc., so you can quickly select the right one for your power station.

Battery care and partial charging

Portable power stations use lithium-based batteries that benefit from moderate usage patterns:

  • Avoid leaving at 0% or 100% for long periods: For long-term storage, many manufacturers recommend around 30–60% charge.
  • Top up periodically: If stored for months, recharge briefly every few months to prevent deep discharge.
  • Use moderate charge power when possible: Constantly pushing maximum input wattage can increase heat; using a slightly lower-wattage PD charger for routine top-ups may be gentler on the system.

Environmental storage conditions

Where you store the power station and its USB-C charging accessories matters:

  • Temperature: Avoid storing in very hot or freezing environments, such as vehicles in extreme weather.
  • Humidity: Keep equipment dry to prevent corrosion on connectors and internal components.
  • Physical protection: Use padded cases or shelves to prevent drops or crushing forces on ports and housings.
ItemRecommended storage practiceWhy it matters for USB-C PD charging
Portable power stationStore at 30–60% charge in a cool, dry place.Helps maintain battery health and stable charging behavior.
USB-C PD chargersKeep away from moisture and high heat.Reduces risk of failure or unsafe operation under load.
USB-C cablesCoil loosely, avoid sharp bends near ends.Prevents internal conductor breaks that cause intermittent charging.
Adapters (USB-C to DC)Label voltage and compatible devices.Reduces risk of using mismatched voltages with power station inputs.
Example values for illustration.

Related guides: USB-C Power Delivery (PD) Explained for Portable Power StationsCan You Use a Higher-Watt Charger Than Rated? Understanding Input HeadroomUSB-C PD 3.1 (240W) on Portable Power Stations: What It Changes and Who Needs It

Practical Takeaways and USB-C PD Charging Specs to Look For

Charging a portable power station from USB-C PD is often possible and can be very convenient, but it depends on the station’s design and input ratings. If the power station has a dedicated USB-C PD input, matching it with a high-quality PD charger and cable is usually straightforward. When working through adapters or DC inputs, you must pay closer attention to voltage ranges and watt limits.

In everyday use, USB-C PD is best viewed as one of several charging options. For small to mid-size power stations, it can be the primary method. For larger units, it may serve as a backup or supplemental source alongside AC or solar inputs. Reliability and safety come from respecting input specs, using quality gear, and avoiding improvised modifications.

Specs to look for

  • USB-C PD input wattage rating: Look for clear input specs such as 45–100 W PD; higher input watts reduce charge time, especially on 300–800 Wh stations.
  • Supported PD voltage profiles: Check that the station accepts 20 V PD input; 20 V profiles allow more power transfer than 5–15 V, improving charging speed.
  • Dual-role USB-C port (input/output): Confirm whether USB-C is input-only, output-only, or both; dual-role ports increase flexibility but require clear labeling.
  • Maximum total charging input (all ports combined): Note the combined AC + DC + USB-C input limit (for example, 200–400 W) to understand best-case charge times.
  • DC input voltage range: For use with USB-C to DC adapters, look for a wide DC input range such as 12–28 V; this makes matching PD-triggered voltages easier.
  • Pass-through charging capability: Check whether the station supports powering devices while charging and if there are any output limits in that mode.
  • Battery capacity (Wh): Match capacity with realistic PD input; for example, a 60 W PD input is practical up to a few hundred watt-hours but slow for multi-kilowatt-hour units.
  • Thermal management and protections: Look for mentions of overvoltage, overcurrent, and temperature protections; these help keep USB-C PD charging safe under varying conditions.
  • Cable and charger compatibility notes: Documentation that lists recommended PD wattages and cable ratings can save troubleshooting time and ensure consistent performance.

By focusing on these specifications and understanding how USB-C PD negotiates power, you can confidently decide when and how to charge a portable power station from USB-C PD, avoid common pitfalls, and build a charging setup that fits your daily use and backup power needs.

Frequently asked questions

Which specifications and features should I check before trying to charge a power station from USB-C PD?

Check the power station’s USB-C PD input wattage and the supported PD voltage profiles (20 V support is important for higher charging rates). Also confirm whether the USB-C port is input-capable or dual-role, the combined maximum input from all ports, and use an e‑marked cable and a charger that meets or exceeds the station’s rated input.

Why does my power station charge much slower than the charger’s rated wattage?

The station’s own USB-C input rating (not the charger’s maximum) limits how much power it will accept, so a 100 W charger can be capped at 60 W by the station. Other causes include the charger not offering the higher-voltage PD profile the station needs, an underspecified cable, thermal throttling, or the station reducing charge current near full.

Can I safely use a USB-C to DC adapter to charge a power station that lacks a USB-C input?

It can work if the adapter triggers a PD voltage within the power station’s DC input range and can supply sufficient wattage, but compatibility is less predictable than a native USB-C input. Verify the station’s DC voltage and wattage specs, use a quality adapter that explicitly matches those values, and avoid ad hoc solutions that may bypass protections.

What safety precautions should I follow when charging a portable power station from USB-C PD?

Stay within the station’s rated voltage and wattage, use certified PD chargers and e‑marked cables, provide adequate ventilation to avoid overheating, and do not modify ports or internal circuitry. For any integration with household wiring or high-power setups, consult a licensed electrician.

How can I tell whether a USB-C port on my power station supports PD input or is output-only?

Check the port labeling and the user manual for terms like “PD input,” an input wattage value, or “input/output”; these indicate PD input capability. If documentation is unclear, testing with a known PD charger can confirm behavior, but stop and consult the manual if the station does not negotiate PD or shows errors.

What should I try if USB-C PD charging starts and stops intermittently?

Intermittent charging is often caused by a faulty or non‑e‑marked cable, a charger that trips overcurrent protection, or an adapter that mis‑triggers the PD profile. Try a different high‑quality e‑marked cable and a known-good PD charger; if the issue persists, the port or internal charging circuitry may be defective and require professional service.

Solar Extension Cables and Voltage Drop: When Cable Length Starts to Matter

Portable power station connected to solar panels with long solar extension cables showing voltage drop along the cable

Solar extension cables start to matter when their length and thickness cause enough voltage drop that your portable power station charges slower or stops charging altogether. Long cable runs, undersized wire gauge, and low solar input voltage all work together to create power loss, wasted watts, and confusing charging behavior.

Users often search for terms like “solar cable length limit,” “voltage drop calculator,” “wire gauge for 12V solar,” “portable power station solar input,” or “why my panels only show half watts.” All of these issues usually trace back to resistance in the cables between your solar panel and your power station. Understanding how voltage drop works helps you choose the right cable gauge, length, and connectors so you can get closer to the rated watts from your panels in real-world conditions.

When Solar Extension Cable Length Actually Matters

Solar extension cables are the wires that connect your portable solar panels to your portable power station or solar generator input. They let you put panels in the sun while keeping your power station in the shade, inside a tent, or in a vehicle. The longer these cables are, the more electrical resistance they add to the circuit.

Voltage drop is the reduction in voltage that occurs as electricity flows through a cable with resistance. In solar setups, this means the voltage at the power station input is lower than the voltage at the panel terminals. If the drop is small, you barely notice it. If it is large, your portable power station may charge slowly, fall out of its maximum power point tracking (MPPT) range, or not recognize the solar input at all.

This matters most for portable systems because they often use relatively low-voltage solar inputs (commonly 12–48 V) and modest panel wattages. Even a few volts of loss can represent a big percentage of the total, cutting your effective charging watts by 10–30% or more. When you stretch panels far from your campsite or vehicle with long extension cables, voltage drop becomes a key design constraint instead of a minor detail.

Knowing when cable length starts to matter helps you decide whether you need thicker wire (lower AWG number), higher-voltage panel configurations, shorter runs, or a different layout to keep your system efficient and reliable.

How Voltage Drop Works in Solar Extension Cables

Voltage drop in solar extension cables comes from basic electrical principles: every real-world wire has resistance, and resistance causes a voltage loss when current flows. The main factors are cable length, wire gauge (AWG), current (amps), and system voltage.

1. Cable length

Resistance increases with length. Doubling the length of a cable roughly doubles its resistance, which doubles the voltage drop at the same current. In solar, you must consider the full round-trip distance: from panel to power station and back through the return conductor. A 30 ft extension is effectively 60 ft of conductor.

2. Wire gauge (AWG)

American Wire Gauge (AWG) numbers decrease as the wire gets thicker. Thicker wire (lower AWG number, like 10 AWG) has less resistance per foot than thinner wire (higher AWG number, like 16 AWG). For the same length and current, 10 AWG will have much less voltage drop than 16 AWG.

3. Current (amps)

Voltage drop (V) is proportional to current (I). Higher current means more drop for the same cable. Solar panel current depends on panel wattage and operating voltage. For example, a 200 W panel at 20 V outputs about 10 A, while a 200 W array at 40 V outputs about 5 A. Higher-voltage strings move the same power with less current and less voltage drop.

4. System voltage (percentage drop)

What really matters is percentage drop, not just volts lost. A 1.5 V drop on a 12 V system is over 12%, but on a 48 V system it is only about 3%. Portable power stations with higher-voltage solar inputs are more tolerant of long cables because the same absolute voltage drop represents a smaller fraction of the total.

In practice, many users aim to keep voltage drop under about 3–5% between the solar panel and the power station input for efficient charging. Beyond that, you may see noticeably reduced watts or problems staying in the MPPT input window.

Panel PowerApprox. VoltageApprox. CurrentTypical Use Case
100 W18–21 V4.5–6 ASmall portable panel, short cable runs
200 W18–21 V9–11 ATwo 100 W panels in parallel
200 W36–42 V4.5–6 ATwo 100 W panels in series
400 W36–42 V9–11 AFour 100 W panels, series-parallel
Example values for illustration.

MPPT Inputs and Voltage Drop Sensitivity

Most modern portable power stations use MPPT (maximum power point tracking) charge controllers on their solar inputs. These controllers expect solar voltage to stay within a certain operating window, such as 12–60 V or 20–55 V, depending on the model.

When voltage drop pulls the actual voltage at the input below the minimum threshold, the MPPT either derates the power or stops tracking entirely. Similarly, if the cable resistance is high, changes in sunlight can cause the operating point to jump around more, leading to unstable or reduced charging.

Because MPPT controllers constantly adjust to find the best combination of voltage and current, they will “see” the cable resistance as part of the panel behavior. Excessive resistance makes the controller think the panel has worse performance than it really does, so it settles on a lower power point than the panel could deliver with a better cable.

Real-World Examples of Cable Length and Voltage Drop

Translating theory into real-world behavior helps you decide when to upgrade cables or reconfigure your solar setup. Here are illustrative scenarios that mirror common portable power station use cases.

Example 1: Single 100 W panel with a long, thin cable

Imagine a 100 W folding panel rated around 18 V at maximum power, producing about 5.5 A in full sun. You use a 50 ft extension cable made from 16 AWG wire to reach from the sunny area to your shaded campsite.

At this length and gauge, voltage drop can easily reach several volts. If you lose, for example, 2 V out of 18 V, that is over 11% loss. Your portable power station might only see 85–90 W at best, and on hazy days the effective power could drop even further as the MPPT struggles with the extra resistance.

Example 2: Two 100 W panels in parallel on a long run

Now consider two 100 W panels wired in parallel, still around 18–20 V but now up to 10–11 A. You keep the same 50 ft, 16 AWG extension. Current has roughly doubled, so voltage drop doubles too. If you were losing 2 V before, you might now lose 4 V or more in bright sun.

Dropping from 20 V at the panels to 16 V at the power station is a 20% reduction. The controller may still charge, but your effective wattage could fall from 200 W potential to 150 W or less, even in perfect sunlight.

Example 3: Two 100 W panels in series with a thicker cable

Instead, suppose you wire the same two 100 W panels in series, giving around 36–40 V at about 5–6 A. You also upgrade to a 10 AWG extension cable of the same 50 ft length.

The current is now about half of the parallel case, and the wire is thicker with lower resistance per foot. Voltage drop might shrink to something like 1–1.5 V. Losing 1.5 V out of 38 V is only about 4%. Your portable power station might see 190+ W at the input, much closer to the panels’ rating under good sun.

Example 4: Very long runs in low-voltage systems

If you run a 12 V nominal panel (or low-voltage array) through 75–100 ft of thin cable, the voltage drop can be large enough that the power station’s solar input never reaches its minimum operating voltage. In this case, the unit may show “no input,” flicker between charging and not charging, or cap out at very low watts even in midday sun.

These examples show that cable length starts to matter once you combine low voltage, high current, and long runs. For portable systems, that often means anything beyond about 25–30 ft of cable deserves a closer look at wire gauge and panel configuration.

Common Mistakes and Troubleshooting Voltage Drop Issues

Many solar charging problems that look like “bad panels” or “faulty power station” are actually wiring and voltage drop issues. Recognizing the symptoms can save time and frustration.

Mistake 1: Using very thin, generic extension wire

Household extension cords or cheap, thin DC cables are often 16–18 AWG or smaller. When used for solar runs of 30–50 ft at 8–12 A, they introduce significant resistance. Symptoms include lower-than-expected watts, cables that feel warm to the touch, or voltage readings that drop sharply when connected.

Mistake 2: Extending on the low-voltage side of the system only

Some users run long cables from the panels to the power station while keeping the panels in a low-voltage parallel configuration. This maximizes current and therefore voltage drop. In many cases, it is better to wire panels in series (within the power station’s voltage limits) to increase voltage and decrease current over the long run.

Mistake 3: Ignoring connector contact resistance

Each extra connector pair adds a little resistance. Loose, corroded, or low-quality connectors add more. A chain of multiple adapters, splitters, and extensions can create enough added resistance and heat that voltage drop and power loss become noticeable, even if the cable gauge seems adequate on paper.

Mistake 4: Misreading wattage on cloudy or hot days

Solar panels rarely produce their full rated watts except under ideal test conditions. On a hot roof or in hazy conditions, 60–80% of rated output is common even with perfect wiring. Users sometimes blame cables for low output when the main cause is reduced irradiance or high panel temperature. However, if you see a further 10–20% drop when you add the extension cable, voltage drop may be contributing.

Troubleshooting cues

  • If the power station reads normal watts with a short factory cable but drops significantly with the extension, suspect voltage drop.
  • If cables or connectors feel unusually warm under load, current is high for the gauge and length.
  • If the solar input flickers on and off when clouds pass or devices turn on, the voltage may be hovering near the MPPT minimum due to cable losses.
  • If a multimeter shows much lower voltage at the power station end of the cable than at the panel, especially under load, the cable is too long, too thin, or both.

In these cases, shortening the run, using a thicker gauge, or reconfiguring panels in series often restores stable, higher charging power.

Safety Basics for Long Solar Cable Runs

While portable solar systems are generally low-risk compared to household AC wiring, long extension cables still deserve basic safety attention. Voltage drop and heat are linked: excessive current in undersized wires causes temperature rise, which can damage insulation and connectors over time.

Match wire gauge to current and length

Choose cable with an appropriate AWG rating for the maximum current you expect and the total run length. Thicker wire not only reduces voltage drop but also runs cooler. Avoid pushing thin cable near its ampacity limit for long periods in hot environments or direct sun.

Use cables rated for outdoor and solar use

Outdoor-rated insulation resists UV, moisture, and abrasion better than generic indoor cable. Purpose-built solar cable is typically double-insulated and more rugged. This reduces the risk of cracks, shorts, or exposed conductors over time, especially when cables are dragged across rough surfaces or pinched in doors or windows.

Protect connections from strain and damage

Long cable runs are prone to being tripped over, tugged, or snagged. Strain on connectors can loosen contacts, increasing resistance and heat. Use gentle bends, avoid tight kinks, and support cables where they cross walkways or sharp edges. Do not pull on cables to move panels or the power station.

Avoid DIY modifications without proper knowledge

Cutting, splicing, or re-terminating solar cables without the right tools and techniques can create poor connections, reversed polarity, or exposed conductors. If you need custom lengths or unusual configurations, consider pre-made cables from reputable sources or consult a qualified electrician for guidance.

Respect system voltage and series configurations

When wiring panels in series to reduce current and voltage drop, always verify that the combined open-circuit voltage stays below your portable power station’s maximum input rating. Exceeding this limit can damage the input circuitry. If you are unsure, seek advice from a knowledgeable professional and follow the device’s documentation.

Maintaining and Storing Solar Extension Cables

Good maintenance practices help your solar extension cables stay flexible, safe, and low-resistance over years of use with portable power stations. Poorly stored or neglected cables are more likely to develop damage that increases voltage drop or creates safety issues.

Inspect regularly for wear and corrosion

Before and after trips, look along the entire length of each cable for cuts, abrasions, flattened spots, or exposed conductors. Check connectors for discoloration, pitting, or greenish corrosion. Any visible damage or corrosion increases resistance and can lead to hot spots under load.

Keep connectors clean and dry

Moisture, dust, and grit inside connectors interfere with good contact. When not in use, cap connectors if possible and store cables in a dry place. If connectors get dirty, gently clean them with a soft brush or cloth and allow them to dry completely before reconnecting.

Coil cables loosely to avoid kinks

Sharp bends and tight kinks can break conductor strands inside the insulation, increasing resistance at those points. Coil cables into large, relaxed loops and avoid wrapping them tightly around small objects. Do not tie knots in cables or force them into cramped storage spaces.

Avoid prolonged exposure to harsh conditions

Leaving cables permanently in direct sun, standing water, or areas with heavy foot traffic accelerates wear. For portable setups, it is usually best to deploy cables only when needed and store them when not in use. This preserves insulation, reduces tripping hazards, and keeps connectors from corroding.

Label lengths and gauges

If you own multiple cables with different lengths and gauges, label them clearly. Knowing which cable is 25 ft of 10 AWG versus 50 ft of 14 AWG makes it easier to choose the right one for a given solar setup and avoid unintentional voltage drop from using the wrong cable.

PracticeBenefitHow It Helps Voltage Drop
Regular inspectionCatches damage earlyPrevents hidden high-resistance spots
Clean connectorsReliable contactReduces extra contact resistance
Proper coilingLonger cable lifeAvoids internal strand breakage
Dry storageLess corrosionMaintains low-resistance connections
Example values for illustration.

Related guides: Why Won’t It Charge From Solar? A Troubleshooting ChecklistSolar Safety Basics: Cables, Heat, and Preventing Connector MeltHow to Read Solar Panel Specs for Power Stations: Voc, Vmp, Imp, and Why It Matters

Practical Takeaways and Specs to Look For

For portable power station users, the main takeaway is that solar extension cables are not just simple accessories. Their length, gauge, and quality directly affect how many watts actually reach your battery. Once runs exceed roughly 25–30 ft, especially at 12–24 V and 8–12 A, cable selection can easily make a 10–30% difference in charging performance.

To keep voltage drop under control, think in terms of both absolute voltage loss and percentage loss. Use thicker wire for longer runs, consider series panel wiring within your power station’s safe voltage range, and minimize unnecessary connectors and adapters. Pay attention to heat, visible wear, and unstable charging behavior as cues that your cables may be undersized or degraded.

When planning or upgrading your solar cabling, it helps to have a simple rule of thumb: for every increase in cable length or current, compensate with a lower AWG (thicker wire) or higher system voltage. This mindset keeps your portable system efficient without needing complex calculations in the field.

Specs to look for

  • Wire gauge (AWG) – Look for 10–12 AWG for 20–50 ft runs at 8–12 A; thicker (lower AWG) for higher currents or longer distances. Thicker wire reduces resistance and voltage drop.
  • Cable length – Aim to keep individual runs under 25–30 ft when using 14–16 AWG; longer runs should use thicker wire. Shorter, properly sized cables keep losses in the 3–5% range.
  • Voltage rating – Select cable rated comfortably above your array’s open-circuit voltage (for example, 600 V DC rating for typical portable setups). Adequate voltage rating ensures insulation safety margin.
  • Current rating (amps) – Choose cables with continuous amp ratings at least 25–50% higher than your expected solar current (e.g., 15–20 A rating for 10–12 A use). Extra headroom keeps cables cooler and more efficient.
  • Insulation type and outdoor rating – Look for UV-resistant, outdoor or solar-rated insulation. Durable jackets resist cracking and water ingress, preserving low resistance over time.
  • Connector type and quality – Use connectors compatible with your panels and power station that lock securely and have firm contact. Solid connectors minimize contact resistance and intermittent drops in power.
  • Operating temperature range – Prefer cables rated for both high heat and cold (for example, -40°F to 194°F). Stable performance across temperatures helps maintain consistent resistance and flexibility.
  • Flexibility and strand count – Fine-stranded, flexible cable is easier to coil and less prone to internal damage from repeated bending. This helps avoid hidden high-resistance spots that increase voltage drop.
  • Markings and polarity identification – Clear positive/negative markings and printed gauge/ratings reduce hookup errors. Correct polarity and known specs help maintain safe, efficient solar connections.

By paying attention to these specifications and understanding how voltage drop behaves, you can design solar cable runs that let your portable power station make the most of every watt your panels produce, even when the best sun is far from where you want to set up camp.

Frequently asked questions

What cable specs and features matter most to reduce voltage drop?

Key specs are wire gauge (lower AWG for thicker wire), total run length (round-trip), and the cable’s current rating. Also look for a high DC voltage rating, UV- and weather-resistant insulation, and quality connectors with low contact resistance. Together these reduce resistance, heat, and the chance of power loss over time.

How long can extension cables be before voltage drop becomes a real problem?

There is no single cutoff, but for low-voltage portable systems you should scrutinize runs beyond about 25–30 ft, especially at 12–24 V and currents around 8–12 A. The acceptable length depends on your AWG, system voltage, and current; higher-voltage or thicker cables tolerate much longer runs. If you see a greater than ~3–5% voltage drop, consider upgrading the cable or reconfiguring panels.

Is wiring panels in parallel for a long run a common mistake?

Yes—running panels in parallel keeps voltage low and current high, which increases voltage drop over long cables. When possible and within device limits, series wiring raises voltage and cuts current, reducing losses on long runs. Always verify the combined open-circuit voltage stays below your input’s maximum rating.

How can I tell if voltage drop is the reason my power station is charging poorly?

Compare input readings using the short factory cable versus the long extension: a notable drop in watts with the extension suggests voltage drop. Other signs include warm cables/connectors, the solar input flickering near clouds, and a multimeter showing much lower voltage at the device under load than at the panel. Those cues point to excessive resistance in the run or connections.

Are long solar cable runs a safety risk and how should I mitigate that?

Yes—undersized cables carrying high current can heat up, degrading insulation and increasing fire risk over time. Mitigate this by choosing appropriate AWG for the expected current and length, using outdoor-rated insulation, providing strain relief on connectors, and avoiding long runs with thin or damaged cables. Regular inspection and not exceeding cable ampacity help keep runs safe.

Can cheap household extension cords be used for solar extension runs?

Household extension cords are often too thin, not UV-rated, and lack proper DC connectors, which makes them a poor choice for solar runs. They can introduce significant voltage drop and may overheat under continuous DC loads. Use purpose‑built solar or heavy-duty outdoor-rated cable sized for your current and run length instead.

Solar Charging in Shade: Why Power Collapses and What You Can Do

Portable power station with solar panels partially in shade showing reduced charging power

Solar charging often collapses in shade because even small shadows can choke the current flow through a solar panel string and drop the watt input to your portable power station. Partial shading, low irradiance, and the panel’s internal wiring all combine to slash real charging watts compared with the rated output.

Whether you call it solar drop-off, low PV input, unstable DC charging, or poor solar runtime, the cause is usually the same: shaded cells and mismatched voltage. This affects how fast your portable power station refills, how long you can run devices, and whether the unit will even start charging at all. Understanding how shade interacts with panel specs like series vs. parallel wiring, bypass diodes, and MPPT input limits helps you fix most issues without replacing gear.

This guide explains why power collapses under clouds and trees, how solar charging works with portable power stations, and practical ways to get stable wattage even when you cannot avoid some shade.

Why Shade Destroys Solar Charging Power for Portable Stations

For portable power stations, shade matters because solar panels behave more like strings of Christmas lights than independent tiles. When one section is shaded, current through that entire section drops, and your power station sees much less usable wattage at its DC or PV input port.

Solar panels are made of many small cells wired mainly in series. Current through a series string is limited by the weakest (most shaded) cell group. Even if 90% of the panel is in full sun, the remaining 10% in shade can throttle the whole string. This is why users often see their solar input plunge from, say, 180 W down to 20–40 W the moment a tree branch shadow crosses the panel.

Portable power stations add another layer: the built-in charge controller. If the voltage coming from your solar array drops below the minimum PV input range, the controller may shut off charging completely or hunt around, causing the input watts to flicker or collapse to zero. Shade is often the trigger that pushes the system below those thresholds.

Understanding this behavior is essential for realistic expectations about charging time, runtime, and system sizing when you rely on solar in campsites, RVs, cabins, or emergency backup situations.

How Solar Charging Works and Why Shade Causes Power Collapse

Solar charging for portable power stations is a chain: sunlight hits the panel, the panel produces DC power, and the power station’s solar or DC input converts that into battery charge. Shade interferes with every step, especially the panel’s voltage-current relationship and the charge controller’s operating window.

1. Solar cell basics

Each solar cell generates a small voltage when light hits it. Cells are wired in series to increase voltage, and in parallel to increase current. Most portable panels have several series strings, sometimes with bypass diodes that allow current to “skip” around shaded sections.

In series, current is limited by the weakest cell group. When shade hits a few cells, those cells produce much less current and can even act like resistors. Without bypass diodes, this drags down the entire string.

2. I-V curve and maximum power point

Every panel has an I-V (current-voltage) curve and a single maximum power point (MPP) in full sun. In shade, the curve changes, often creating multiple local peaks. A good MPPT (maximum power point tracking) controller tries to find the best point, but under partial shading the curve can be distorted, making tracking less efficient and causing unstable watt readings.

3. Role of the power station’s charge controller

Portable power stations use either PWM or MPPT controllers on their solar/DC input:

  • PWM controllers are simpler and cheaper but require panel voltage closely matched to battery voltage. Shade quickly reduces effective current, and any extra panel voltage is mostly wasted.
  • MPPT controllers adjust to the panel’s operating point, converting higher panel voltage into more charging amps. They cope better with non-ideal conditions, but still need minimum input voltage and power to work.

If shade pulls your array voltage below the controller’s minimum PV input (for example, below 12–18 V for some small systems or below a higher threshold for larger ones), the controller may stop charging entirely.

4. Series vs. parallel panel wiring

How panels are combined heavily influences shade behavior:

  • Series wiring increases voltage. Great for long cable runs and MPPT efficiency, but a single shaded panel can limit current for the entire string.
  • Parallel wiring keeps voltage similar to a single panel but increases current. Shade on one panel affects mainly that panel; the others continue to contribute near full power.

Portable setups often use folding panels internally wired in series, which is why a narrow strip of shade can drop the whole panel’s output dramatically.

5. Temperature and low sun angle

Even without hard shade, low sun angle, haze, or overcast conditions reduce irradiance. That pushes the panel away from its rated operating point, lowering both voltage and current. The result is much lower watt input to your power station than the nameplate rating suggests.

Condition Panel rated power Typical real output What the power station sees
Full sun, good angle 200 W 150–180 W Stable, near-max input
Light overcast 200 W 50–100 W Reduced but steady input
Partial shade on 25% of cells 200 W 10–70 W Fluctuating or low input
Heavy shade on one panel in series 2 × 200 W 0–40 W May drop below charge threshold
Example values for illustration.

Real-World Shade Scenarios and Their Impact on Portable Power

In practice, users encounter shade in many forms, from tree branches to nearby buildings. Each scenario affects solar charging performance differently.

1. Tree branches and moving shadows at a campsite

Imagine a 200 W folding panel feeding a mid-sized portable power station. In full sun at midday, you might see 140–170 W input. As the sun moves, a thin tree branch casts a line of shade across the middle of the panel. Despite most of the surface still being bright, the input can collapse to 20–50 W or even bounce between 0 and 60 W as the controller struggles to lock onto a stable operating point.

Because the shading moves, the wattage display on the power station may constantly fluctuate, making it hard to estimate charge time or runtime for your devices.

2. Balcony or backyard with partial building shade

In urban settings, panels may get full sun only for a few hours, then partial shade from railings, walls, or neighboring structures. If two panels are wired in series and one spends half the day partially shaded, the combined output during those hours can be a fraction of what you expect. Even when the visible shade seems minor, the internal cell strings might be affected in ways that drastically reduce current.

3. RV roof with vents and rails casting shadows

Roof-mounted panels on vans or RVs are often interrupted by vents, antennae, or roof racks. Small, hard shadows that track across the same cell strings can repeatedly force bypass diodes to engage and disengage. This leads to step-like drops in power and a jittery input reading on the power station, especially if the panels are in series.

4. Winter low-angle sun and nearby trees

In winter, the sun stays low. Even without leaves, tree trunks and branches can cast long shadows. The panels also operate colder, which can increase voltage but does not compensate for the reduced irradiance and partial shading. Users often report that their “200 W” solar kit barely manages 40–80 W on a clear winter afternoon with intermittent tree shade.

5. Window or behind-glass setups

Some users place folding panels behind glass or under a skylight. The glass reduces intensity and may reflect part of the spectrum. Any frame shadows or window dividers further fragment the light. The result is a seemingly bright panel that, in practice, delivers very low amps to the power station, causing extremely slow charging or frequent drops below the minimum input threshold.

Common Shading Mistakes and How to Troubleshoot Low Solar Input

When solar input collapses, many people assume the panel or power station is defective. Often, the real issue is shade or suboptimal setup. Recognizing common mistakes helps you troubleshoot quickly.

1. Ignoring small, sharp shadows

Thin shadows from branches, wires, or railings can cut through key cell strings. Because you see mostly sunlit surface, it is easy to underestimate their impact. If your watt input suddenly drops, look for narrow shadows across the panel’s short dimension where cell strings run.

Troubleshooting cue: If moving the panel a few inches or rotating it slightly restores most of the power, the culprit was a small shadow on a critical area.

2. Series-connecting panels in a shady location

Series wiring is efficient in full sun but unforgiving in shade. One panel in dappled light can drag the whole string down.

Troubleshooting cue: If you disconnect the shaded panel and the remaining panel suddenly delivers more stable watts, consider using parallel wiring (within your power station’s voltage and current limits) or repositioning the shaded panel.

3. Overestimating rated watts vs. real watts

Panel ratings assume ideal test conditions. In real life, angle, temperature, and shade usually cut output by 25–50% even before major shadows appear.

Troubleshooting cue: If your 200 W panel only gives 80–120 W in good sun and 20–60 W with light shade, that is often normal, not a failure.

4. Not matching panel voltage to power station input

If the combined panel voltage in shade falls below the minimum PV input of your power station, the controller may not start charging at all.

Troubleshooting cue: Check the power station’s solar/DC input voltage range and ensure your panel configuration (series or parallel) keeps voltage safely within that range even in less-than-ideal light.

5. Using long, thin cables

Long runs of undersized cable add voltage drop, especially at higher currents. In marginal light, that extra drop can push the input below the controller’s threshold.

Troubleshooting cue: If moving the power station closer to the panels or using thicker, shorter cables improves input watts, cable loss was part of the problem.

6. Relying on auto-tracking when conditions are marginal

Some power stations periodically scan for the maximum power point. Under constantly changing shade, this can make the input reading appear unstable.

Troubleshooting cue: Watch the input for several minutes rather than a few seconds. If the average power seems reasonable over time, the system is likely working as designed.

Safety Basics When Dealing With Shaded Solar Panels and Portable Stations

While shade mostly affects performance rather than safety, there are still important precautions when setting up and adjusting solar panels around a portable power station.

1. Avoid hot spots from severe partial shading

When a small area of a panel is heavily shaded while the rest is in strong sun, the shaded cells can become hot spots. Modern panels use bypass diodes to reduce this risk, but it is still wise to avoid situations where a dark, concentrated shadow sits on one corner for hours.

2. Handle connectors with care

Always make and break solar connections with dry hands and stable footing. Disconnect panels from the power station before rearranging wiring (such as switching between series and parallel, if your system allows it). Avoid yanking on cables or forcing mismatched connectors.

3. Respect voltage limits

Do not exceed the maximum PV or DC input voltage listed for your portable power station. Series-connecting too many panels, especially in cold weather when open-circuit voltage rises, can damage the input circuitry. If in doubt, configure for a lower voltage rather than pushing limits.

4. Keep panels stable and secure

To chase sun and avoid shade, users sometimes prop panels at odd angles or on unstable surfaces. High winds or accidental bumps can cause panels to fall, crack, or damage cables and connectors. Use stable stands or mounts and secure panels against gusts when possible.

5. Avoid DIY internal modifications

Do not open the power station or solar panels to modify wiring, bypass protections, or add unapproved components. Internal work on battery packs or high-voltage sections should be left to qualified technicians. For integrating solar into building wiring, consult a licensed electrician instead of back-feeding through outlets or improvising connections.

6. Protect against water and heat

Portable panels may be weather-resistant, but power stations usually are not. Keep the unit dry and shaded from direct sun to avoid overheating. Do not place the power station under the panel where any condensation or rain runoff may drip onto it.

Risk area Typical issue Safe practice
Panel positioning Panels tipping over in wind Use stable stands, anchor when possible
Electrical limits Exceeding max PV voltage Stay within rated input range
Connections Arcing from loose plugs Fully seat connectors, keep dry
Environment Overheating power station Operate in shade with good airflow
Example values for illustration.

Related guides: How to Read Solar Panel Specs for Power StationsShading and Angle: How Placement Changes Solar Charging SpeedHow Many Solar Watts Do You Need to Fully Recharge in One Day?

Maintaining Solar Performance in Shady Environments

Even if you cannot avoid shade entirely, you can maintain more consistent solar performance with good habits and simple adjustments.

1. Optimize panel placement and angle

Reposition panels a few times per day to follow the moving sun and avoid emerging shadows from trees or buildings. A moderate tilt toward the sun generally performs better than panels lying flat, especially in winter or at higher latitudes.

2. Use modular panel layouts

Instead of one large panel, several smaller panels give you flexibility. You can place some in the best sun and accept that others will be partially shaded. When wired appropriately, this can preserve more total wattage than having one large panel half in shade.

3. Keep panels clean

Dirt, pollen, bird droppings, and dust act like a permanent light filter. In combination with shade, they further reduce output. Wipe panels gently with a soft cloth and clean water as needed. Avoid abrasive materials that can scratch the surface.

4. Monitor input over time, not just instant snapshots

Solar input naturally fluctuates with passing clouds and moving shadows. Instead of fixating on a single watt reading, check how much energy (watt-hours) your power station reports over a full day. This gives a better sense of whether your system is meeting your needs.

5. Plan energy use around solar availability

Whenever possible, schedule high-draw tasks (like charging laptops or running small appliances) during periods of strong sun. This allows the solar input to support the load while still recharging the battery, instead of draining the battery alone during shaded hours.

6. Store gear properly when not in use

When storing panels, keep them dry, cool, and protected from physical damage. For the power station, follow the manufacturer’s storage charge level recommendations (often around 30–60%) and recharge periodically if stored long term. Proper storage maintains both panel efficiency and battery health, which together determine how forgiving your system will be in less-than-ideal solar conditions.

Practical Takeaways and Key Specs to Look For in Shady Solar Setups

Shade will always reduce solar performance, but it does not have to ruin your portable power setup. The most effective strategies are to minimize sharp, partial shadows, choose flexible panel configurations, and pair them with a power station whose solar input specs match your conditions.

In practice, this means:

  • Placing panels where they see the longest uninterrupted sun path.
  • Avoiding series connections in heavily shaded locations unless necessary for voltage.
  • Using MPPT-equipped power stations when you rely heavily on solar.
  • Monitoring real-world watt-hours instead of focusing only on panel ratings.

Specs to look for

  • Solar input wattage rating – Look for a solar input rating that is at least 1.3–2× your typical panel array (for example, 300–600 W input for a 200–300 W panel setup). This ensures the power station can accept full power in good sun and gives headroom if you upgrade panels.
  • MPPT vs. PWM charge controller – Prefer an MPPT-based solar input, especially if you expect partial shade or longer cable runs. MPPT can recover 10–30% more energy in non-ideal conditions compared with basic PWM control.
  • PV input voltage range – Check that the minimum and maximum PV voltage work with your planned series or parallel panel configuration (for example, 12–60 V or 12–100 V). A wider range makes it easier to keep charging even when shade lowers panel voltage.
  • Maximum solar input current – Ensure the maximum input amps support your panel array in parallel (for example, 10–20 A). If current limits are too low, the power station will clip power on bright days, wasting potential energy.
  • Display and monitoring features – Look for a clear watt input readout and, ideally, accumulated watt-hours from solar. This makes troubleshooting shade issues and optimizing panel placement much easier.
  • Supported connector types and adapters – Check that the solar input supports common DC connectors and that safe adapters are readily available. This simplifies using multiple panels or reconfiguring between series and parallel without improvised wiring.
  • Operating temperature range – A wider operating range (for example, 14–104°F or better) helps the power station function reliably in hot sun and cool mornings when panel voltage can spike. Stable operation reduces unexpected shutdowns during marginal conditions.
  • Battery capacity vs. expected solar harvest – Match battery size (in watt-hours) to realistic daily solar input in your climate. For example, a 500–1000 Wh station with 200–300 W of panels can often refill over a sunny day, even with some shade, while much larger batteries may remain undercharged.

By aligning these specs with how and where you use solar, you can keep your portable power station charging reliably, even when shade is part of the picture.

Frequently asked questions

What solar input specs and features matter most for reliable charging when panels are partially shaded?

Prioritize an MPPT charge controller, a wide PV input voltage range, and sufficient maximum input current (amps) and wattage to accept your array. Bypass diodes on panels and clear monitoring (watt and watt-hour readouts) also help diagnose and recover energy under partial shade. These features together improve efficiency and tolerance to non-ideal light.

How can I tell whether a small shadow is causing the charging collapse or if my equipment is faulty?

Move or rotate the panel a few inches and watch the input watts; if power returns, a narrow shadow or panel orientation caused the drop. Also test the panel in known full sun and inspect cables and connectors for damage; persistent low output in full sun suggests hardware issues rather than shading.

Are there safety concerns when using solar panels in partial shade?

Partial shade can create hot spots on cells, so avoid leaving concentrated dark shadows on small panel areas for long periods. In addition, follow electrical safety: keep connectors dry, respect PV voltage limits, and avoid DIY internal modifications to panels or power stations.

Will wiring panels in parallel help if one of my panels is frequently shaded?

Yes, parallel wiring limits the impact of one shaded panel because each panel contributes current independently at the same voltage. However, ensure your power station can accept the higher current and use appropriate connectors and cable sizing to avoid losses or exceeding input limits.

How much charging performance should I expect in light shade or overcast conditions?

Light overcast typically reduces real output to around 25–50% of rated power, while small partial shadows can cut output much more dramatically depending on which cell strings are affected. Measure daily watt-hours rather than relying on nameplate ratings to set realistic expectations.

What common setup mistakes cause low solar input even when panels appear sunlit?

Frequent mistakes include series-connecting panels in a shaded location, using long undersized cables, not matching panel voltage to the controller’s input range, and neglecting small sharp shadows or dirt. Checking wiring configuration, cable size, and cleaning or repositioning panels typically resolves most of these issues.

Can You Mix Different Solar Panels on One Power Station? A Safe Matching Checklist

Portable power station connected to different solar panels with labeled specs

You can sometimes mix different solar panels on one portable power station, but only if their combined voltage, current, and wattage stay within the input limits of the solar port. Ignoring those limits risks reduced charging, shutdowns, or even damage. Understanding open-circuit voltage, series vs. parallel wiring, and maximum solar input watts is essential before you plug in a mixed solar array.

People search this because they want more charging watts, faster recharge time, or to reuse older panels with a new power station. Terms like solar input rating, VOC, MPPT range, and max amps all matter when deciding whether different solar panels can safely share one input. This guide explains what is compatible, what is not, and how to read the specs so you can build a safe, efficient setup.

By the end, you will know how to avoid over-voltage, why mismatched wattages waste potential power, and which specs to check before you buy panels or a new portable power station.

1. What “mixing solar panels on one power station” really means

When people ask if they can mix different solar panels on one power station, they are usually talking about connecting panels with different wattages, voltages, or brands into a single solar input port. In practical terms, you might have a 100 W panel and a 200 W panel and want to use both together to charge one portable power station faster.

Mixing panels matters because the power station’s solar input has hard electrical limits: maximum input watts, maximum input voltage (often listed as VOC or “open-circuit voltage” limit), and maximum input current (amps). Your panel combination must fit inside that “box” of limits, or the power station will either throttle, shut down, or potentially be damaged.

Most modern portable power stations include MPPT (maximum power point tracking) controllers designed to optimize solar charging. However, MPPT does not fix fundamental mismatches between solar panels. If the panels’ electrical characteristics are too different, the stronger panel is dragged down to the weaker one’s operating point, wasting potential power. In worse cases, the combined voltage or current can exceed the safe range.

So, “mixing” is not just about wattage labels on the front of the panels. It is about how their voltage and current ratings interact with each other and with the power station’s solar input specs.

2. Key electrical concepts before you mix solar panels

To safely combine different solar panels on one portable power station, you need to understand a few core specs that appear on both the panel label and the power station manual. These determine whether a mixed array is compatible or risky.

Open-circuit voltage (VOC) is the voltage of a panel when it is not connected to a load. It is the highest voltage the panel will present to the power station. The power station will list a maximum input VOC or maximum PV voltage. The sum of VOCs in series must always stay below this limit, even in cold weather when VOC rises.

Operating voltage (VMP) and operating current (IMP) describe where the panel produces its rated watts under standard conditions. An MPPT controller tries to run the array near this point. When you mix panels, the MPPT has to choose a single operating point, usually compromising the performance of the stronger panel.

Series vs. parallel wiring is another key concept. In series, voltages add and current stays roughly the same. In parallel, currents add and voltage stays roughly the same. Mixing panels of different voltage or current ratings behaves differently in each configuration.

Maximum input watts and amps on the power station define how much solar power it can safely accept. Going far above the wattage rating does not usually “force” more power in; the controller simply clips the output. But exceeding voltage or current limits can trigger protection or damage components.

Connector type and polarity also matter. Many portable power stations use standard solar connectors or barrel-type DC jacks. Adapters and Y-cables can combine panels, but they do not change the underlying electrical rules. Polarity must always be correct; reverse polarity can instantly trip protection or cause failure.

Solar specWhat it meansWhy it matters when mixing
VOC (V)Voltage with no loadSeries VOC total must stay below input limit
VMP (V)Voltage at max powerDifferent VMP panels limit each other’s performance
IMP (A)Current at max powerParallel current total must stay below amp limit
Rated watts (W)Power under test conditionsGuides expected charge speed, but not compatibility alone
Max input watts (W)Power station solar ceilingAbove this, extra panel power is mostly wasted
Example values for illustration.

3. Practical examples of mixing solar panels on one power station

Concrete scenarios help clarify when mixing solar panels is reasonable and when it becomes problematic. These examples assume a typical portable power station with a single MPPT solar input.

Example 1: Two similar 100 W panels in parallel

Suppose you have two 100 W panels with nearly identical VOC and VMP ratings. You connect them in parallel using a Y-connector, and the power station’s solar input supports the combined current and total wattage. This is a relatively safe and efficient setup. The MPPT sees roughly the same voltage from each panel, and their currents add. Mixing is minimal because the panels are similar.

Example 2: 100 W and 200 W panel in parallel

Now consider one 100 W panel and one 200 W panel with similar voltage ratings. In parallel, the voltage is shared, but the 200 W panel can deliver more current. The MPPT will still operate at a single voltage, which both panels can accept. The 200 W panel will not be used to its full potential if the input current or wattage limit is lower than the combined output, but the setup can still work safely if you stay under those limits.

This is a common real-world case: using a new, larger panel alongside an older, smaller one. The main downside is underutilization of the larger panel, not usually a safety hazard if specs are respected.

Example 3: Mismatched voltage panels in series

Imagine you have a 12 V-class panel (VMP around 18 V) and a 24 V-class panel (VMP around 36 V) and you wire them in series. The total VOC may approach or exceed the power station’s maximum PV voltage. Even if you stay under the limit, the MPPT must choose one current for the entire string, so the lower-current panel effectively throttles the higher-current one. Performance is poor, and the margin to the voltage limit may be small, especially in cold conditions.

Example 4: Exceeding the VOC limit with multiple panels

Suppose your power station’s solar input allows up to 50 V VOC, and you connect three 22 V VOC panels in series. The total VOC is 66 V, well above the limit. Even if the power station initially accepts some power, the risk of over-voltage is high and could damage the input circuitry. This is an example where mixing (or even using identical panels) in the wrong configuration is unsafe.

These scenarios show that the question is not just “Can I mix?” but “How are the panels wired, and do their combined specs stay inside the power station’s safe charging window?”

4. Common mistakes when mixing solar panels and warning signs

Many issues with mixed solar panels on a portable power station come from misunderstanding labels or assuming that any panels can be combined as long as connectors fit. Recognizing these mistakes and their troubleshooting cues can prevent damage and frustration.

Mistake 1: Ignoring voltage limits
Users may look only at wattage and forget VOC. Wiring too many panels in series, or mixing higher-voltage and lower-voltage panels without checking the total VOC, can exceed the power station’s maximum PV voltage. Warning signs include immediate input shutdown, error codes, or the solar icon not appearing even in full sun.

Mistake 2: Exceeding current ratings in parallel
When panels are wired in parallel, currents add. If the combined current exceeds the power station’s amp limit, internal protection may trip. Symptoms include fluctuating input watts, the fan running hard with low charge rate, or the unit repeatedly connecting and disconnecting the solar input.

Mistake 3: Mixing very different voltage panels
Connecting a low-voltage panel with a high-voltage panel in parallel often leads to the higher-voltage panel being pulled down to the lower voltage, wasting power. The system may appear to “work” but delivers far less than expected. The main cue is that the measured input watts are much lower than the sum of the panels’ ratings, even in ideal sun.

Mistake 4: Using long, undersized cables and adapters
Extra adapters, thin extension cables, and long runs add resistance, causing voltage drop and heat. With mixed panels, this can worsen mismatch problems and cause the power station to drop below its MPPT operating range. Clues include warm connectors, lower-than-expected voltage at the power station, and improved performance when shortening cables.

Mistake 5: Assuming MPPT can “fix” any mismatch
MPPT can optimize within a given array’s characteristics, but it cannot change the fact that a series string shares current or a parallel array shares voltage. If panel specs are too different, some portion of the array will always be underutilized. The symptom is a plateau in input watts that never approaches the theoretical combined rating, even under strong sun and cool temperatures.

When troubleshooting, always return to the basics: measure or calculate total VOC and current, compare to the power station’s limits, and simplify the setup by testing one panel at a time before reintroducing mixed combinations.

5. Safety fundamentals when combining solar panels on a power station

Safety should guide every decision when mixing solar panels on a portable power station. While these systems are low-voltage compared to household wiring, they can still deliver dangerous currents, cause arcing, or damage electronics if misused.

Respect voltage and current limits
The most important safety rule is to stay below the power station’s published maximum PV voltage and current. Over-voltage can punch through protective components, while over-current can overheat connectors and internal traces. Use panel nameplate data and worst-case conditions (such as cold weather increasing VOC) to maintain a margin of safety.

Use proper connectors and polarity
Always match positive to positive and negative to negative when combining panels and connecting to the power station. Reversed polarity can cause immediate faults. Use connectors and adapters designed for DC solar use; avoid improvised or damaged plugs that can loosen and arc.

Avoid ad-hoc rewiring or internal modifications
Do not open the portable power station, bypass internal protections, or modify its solar input ports. These devices are engineered with specific charge controllers and safety circuits. If your desired solar array exceeds the built-in limits, consider a different configuration or consult a qualified electrician for a higher-capacity system separate from the portable unit.

Protect from short circuits and water
Ensure that connectors are fully seated and not exposed to standing water. When panels are mixed with multiple Y-connectors, the number of junctions increases, raising the chance of accidental shorts. Keep connections off the ground when possible and avoid coiling excess cable tightly in direct sun, which can trap heat.

Monitor temperature and behavior
Check the power station and cable connections during the first few hours of running a mixed-panel setup. Excessive heat at connectors, a strong electrical smell, or repeated input shutdowns are signs that the configuration may be stressing the system. Power down and reassess your wiring and panel mix if you observe these issues.

If you are unsure about the electrical implications of your planned array, it is wise to consult a qualified electrician or solar professional, especially for larger or semi-permanent installations.

6. Maintenance and storage tips for mixed solar panel setups

Once you have a safe configuration for mixing solar panels on your portable power station, good maintenance and storage practices help preserve performance and reduce risk over time.

Inspect connectors and cables regularly
Mixed arrays often use extra adapters, splitters, and extension cables. Periodically check all connectors for signs of discoloration, cracking, looseness, or corrosion. Replace damaged components promptly. A single weak connector in a mixed setup can limit the entire array or become a hot spot.

Clean panel surfaces for consistent performance
Dust, pollen, and grime affect each panel differently. In a mixed array, a dirty panel can drag down overall performance, especially in series wiring. Clean glass surfaces gently with water and a soft cloth, avoiding abrasive cleaners. Aim for consistent cleanliness across all panels.

Label panels and cables
When you mix different wattages or voltage classes, labeling helps you remember which panels should or should not be wired together. Simple labels indicating VOC, VMP, and watts can save time and prevent accidental misconfigurations when setting up in a hurry.

Store panels and the power station properly
When not in use, store portable panels in a dry, cool place, protected from impact and bending. Keep the power station within its recommended storage temperature range and maintain its battery at a partial charge if it will sit unused for months. Extreme heat or cold can affect both solar panel output and battery health.

Recheck specs when you add or replace panels
As you upgrade or replace panels over time, re-evaluate the total VOC, current, and wattage of your mixed array. Do not assume that a new panel with a similar wattage rating has the same voltage characteristics as an older one. Compare nameplate data before plugging it into your existing setup.

Test one change at a time
When modifying a mixed array—adding a panel, changing series/parallel wiring, or using a new adapter—test the system in stages. Begin with a single panel, confirm normal operation, then add the next component. This stepwise approach makes it easier to identify which change causes any new issue.

Maintenance taskHow oftenBenefit for mixed arrays
Connector inspectionEvery 1–3 monthsPrevents overheating and intermittent faults
Panel cleaningAs needed, often seasonallyKeeps output consistent across different panels
Label updatesWhen adding/replacing panelsReduces wiring mistakes in the field
Storage checkBefore long-term storageProtects panels and battery from environmental damage
Example values for illustration.

Related guides: Solar Panel Series vs. Parallel: Which Is Better for Charging a Power Station?Overpaneling Explained: Can You Connect Bigger Solar Panels Than the Input Limit?Why Won’t It Charge From Solar? A Troubleshooting Checklist

7. Practical takeaways and a safe matching checklist

Mixing different solar panels on one portable power station is possible, but only when you treat the power station’s solar input specs as hard boundaries and understand how panel voltages and currents combine. Similar panels with close voltage ratings are easiest to mix, especially in parallel, while large differences in voltage or aggressive series wiring are where problems most often appear.

Before you connect anything, gather the key numbers: each panel’s VOC, VMP, IMP, and wattage, plus the power station’s maximum PV voltage, maximum solar input watts, and maximum input current. Use these to verify that your combined array stays inside the safe window and that you are not relying on MPPT to solve fundamental mismatches.

Specs to look for

  • Maximum PV voltage (VOC limit) – Look for a clear solar input voltage range, such as 12–50 V. Ensures your series-connected panels’ total VOC stays safely below the limit.
  • Maximum solar input watts – Typical portable units list values like 100–800 W. Tells you how much panel wattage is realistically useful before the controller clips excess power.
  • Maximum input current (amps) – Often in the 8–20 A range for DC solar ports. Critical when wiring panels in parallel so the combined current does not overrun the controller.
  • Supported wiring configuration – Some power stations specify series-only, parallel-only, or a preferred range (for example, 2× panels in series). Guides how you combine mixed panels for best MPPT performance.
  • MPPT operating voltage range – Look for a working range, such as 18–30 V or 18–60 V. Your array’s VMP should fall inside this window for efficient charging, especially when mixing panels.
  • Connector type and cable gauge – Check for compatible solar connectors and recommended wire size (for example, 12–16 AWG). Proper connectors and adequate wire thickness reduce voltage drop and heat in mixed setups.
  • Over-voltage and over-current protection – Look for built-in protections listed in the manual. These safeguards help prevent damage if a mixed array briefly exceeds ideal limits.
  • Environmental ratings – Ingress protection (such as IP ratings) and operating temperature ranges matter if your mixed panels and power station will be used outdoors regularly.

By prioritizing these specs and taking a conservative approach to series voltage and parallel current, you can safely use mixed solar panels to get more from your portable power station without compromising safety or reliability.

Frequently asked questions

Which panel and power station specs matter most when mixing different solar panels?

Key specs are panel VOC, VMP, and IMP plus the power station’s maximum PV voltage, maximum input watts, and maximum input current. Also check the MPPT operating voltage range and connector type; these determine whether the combined array will operate safely and efficiently.

What is the most common mistake people make when combining different solar panels?

The most common mistake is focusing only on wattage and ignoring VOC and combined current limits, which can lead to over-voltage or tripped protections. Users also often wire panels incorrectly (series vs. parallel) without recalculating totals under worst-case conditions.

Is it safe to mix different solar panels on one power station?

Yes, mixing can be safe if the total VOC, combined current, and total watts stay within the power station’s published limits and connectors/polarity are correct. If those limits are exceeded or wiring is incorrect, the setup can cause shutdowns or damage.

Can I mix panels with different wattages and still get efficient charging?

You can mix different wattages, but efficiency may drop because the MPPT will find a single operating point for the array and the stronger panel can be dragged down by the weaker one. Parallel setups with similar voltages tend to waste less potential power than mismatched series strings.

How do series and parallel wiring affect mixed panel performance?

In series, voltages add and current stays the same, so mismatched currents force the string to the lowest panel’s current. In parallel, voltages stay the same and currents add, so mismatched voltages can pull higher-voltage panels down; both configurations require checking totals against the station’s limits.

How should I test a mixed setup before relying on it regularly?

Measure each panel’s VOC and VMP, verify the combined totals against the station’s specs, then test one panel at a time before connecting all panels. Monitor input watts, connector temperature, and any error codes during the first hours of operation.

How to Read Solar Panel Specs for Power Stations: Voc, Vmp, Imp, and Why It Matters

Diagram of solar panel and portable power station with Voc, Vmp, and Imp labeled

Most charging problems between solar panels and portable power stations come down to mismatched specs like Voc, Vmp, Imp, and maximum input limits. If you understand these numbers, you can size your solar array correctly, avoid errors, and get the fastest realistic charge times.

When you look at a solar panel label, you’ll see terms like open-circuit voltage, operating voltage, current at maximum power, and rated watts. These directly affect how many panels you can connect, what cables or adapters you can use, and whether your power station’s MPPT input can handle the array safely. Learning how to read these specs helps you avoid undercharging, overvoltage faults, and wasted runtime.

This guide breaks down each spec in plain language, shows real-world examples, and ends with a practical checklist of what to look for when pairing solar panels with a portable power station.

Understanding Solar Panel Specs for Portable Power Stations

Solar panel spec labels can look like alphabet soup, but each value has a clear meaning and a direct impact on how well a portable power station charges. The most important specs for matching panels to a power station are Voc, Vmp, Imp, Isc, and rated power in watts.

Voc (open-circuit voltage) is the maximum voltage the panel can produce with no load connected. It matters because your power station’s solar input has a maximum voltage rating; if your array’s Voc is higher than that limit, you risk input faults or damage.

Vmp (voltage at maximum power) is the voltage when the panel is operating at its most efficient point under standard test conditions. Your power station’s MPPT controller will try to run the panel near Vmp to get the best charging power.

Imp (current at maximum power) is the current delivered at that optimum point. Together, Vmp and Imp define the panel’s usable wattage: Pmax = Vmp × Imp. Isc (short-circuit current) is the maximum current when the panel’s output is shorted; it’s important for cable and connector current ratings.

All of these specs must fit within your power station’s solar input window, which typically lists a voltage range (for example, 12–60 V DC) and a maximum input wattage or current. Reading and comparing these values is the foundation of safe, efficient solar charging.

How Voc, Vmp, and Imp Work Together with Your Power Station

To understand how solar panel specs interact with a portable power station, it helps to look at how a panel behaves electrically. A solar panel does not produce a fixed voltage and current; instead, its output changes with sunlight, temperature, and the load applied by the MPPT controller inside the power station.

Voc and input voltage limits: Voc is measured with no load, in bright sun, at standard test conditions. It represents the highest voltage the panel can reach. When panels are wired in series, their Voc values add together. Your power station’s solar input will specify a maximum voltage (for example, 50 V or 100 V). The sum of all panel Voc values in series must stay below this limit, with some margin for cold-weather increases, because panels produce higher voltage at lower temperatures.

Vmp and charging efficiency: Vmp is the voltage where the panel delivers its rated power. An MPPT controller constantly adjusts the load to keep the panel operating near Vmp. If the combined Vmp of your array is too low, the power station may not start charging or may charge inefficiently. If it’s within the input range and reasonably above the station’s battery voltage, the controller can harvest power effectively.

Imp and current limits: Imp tells you the current at maximum power. When panels are wired in parallel, their currents add. Your power station may have a maximum input current (for example, 10 A or 15 A). The combined Imp of parallel strings should stay at or below this limit, or the controller will simply clip the extra power, wasting potential charging capacity.

Rated watts vs. real watts: The panel’s watt rating (Pmax) is calculated as Vmp × Imp under ideal lab conditions. In real use, you will usually see 60–80% of that rating due to temperature, angle, and atmospheric conditions. Your power station’s maximum solar input wattage should be compared to the realistic output of your array, not just the nameplate ratings.

When you align Voc with the voltage limit, Vmp with the MPPT operating range, and Imp with the current limit, you get a safe, compatible setup that can approach the power station’s maximum solar charging rate.

Spec What It Means Typical Use in Matching to a Power Station
Voc Panel voltage with no load Ensure series Voc stays below max input voltage
Vmp Voltage at maximum power Check that array Vmp is within MPPT operating range
Imp Current at maximum power Keep parallel Imp within max input current
Isc Short-circuit current Size cables and connectors for safe current capacity
Pmax Rated panel power in watts Compare to power station’s max solar input watts
Example values for illustration.

Practical Examples of Matching Solar Panels to Power Stations

Seeing actual numbers makes it easier to understand how Voc, Vmp, and Imp affect a portable power station setup. The following scenarios are simplified but realistic, assuming full sun and standard test conditions.

Example 1: Single folding panel to a compact power station

Imagine a 100 W folding panel labeled: Voc 22 V, Vmp 18 V, Imp 5.6 A, Isc 6.0 A. Your compact power station lists a solar input range of 12–28 V and a maximum of 100 W. In this case, the panel’s Voc (22 V) is below the 28 V limit, and Vmp (18 V) is comfortably inside the 12–28 V range. Imp (5.6 A) is well within typical input current limits. This is a straightforward, compatible match. In good conditions, you might see 60–80 W going into the station.

Example 2: Two panels in series to reach a higher voltage input

Now consider two 100 W panels with Voc 22 V, Vmp 18 V, Imp 5.6 A. A mid-size power station lists a solar input of 18–60 V and 200 W max. If you wire the panels in series, Voc becomes 44 V (22 + 22) and Vmp becomes 36 V (18 + 18), while Imp stays 5.6 A. Voc is below the 60 V limit, and Vmp is well within the operating window, so the setup is safe and efficient. The array’s rated power is 200 W, matching the station’s maximum input. In real use, you might see 130–170 W.

Example 3: Parallel wiring and current limits

Suppose a power station accepts 12–30 V and a maximum input current of 10 A. You have two 100 W panels: Voc 22 V, Vmp 18 V, Imp 5.6 A each. In parallel, Voc and Vmp stay the same (22 V and 18 V), but Imp adds to about 11.2 A. This exceeds the 10 A input rating. The power station will typically limit current to 10 A, capping usable power around 180 W instead of the full 200 W. It is still safe if connectors and cables are rated appropriately, but you gain less than you might expect from the second panel.

Example 4: Cold weather and Voc margin

Consider a larger setup: three 120 W rigid panels, each Voc 21 V, Vmp 17.5 V, Imp 6.9 A, wired in series to a power station with a 60 V maximum solar input. The series Voc is 63 V (21 × 3), already above the 60 V limit even before considering cold-temperature increases, which can raise Voc by 10–20%. This configuration risks overvoltage faults. The safer approach would be two in series (42 V Voc) or reconfiguring with parallel strings, as long as current limits are respected.

These examples show why you cannot rely only on panel watt ratings. You need to check how Voc, Vmp, and Imp combine in series or parallel and compare them carefully to your power station’s input specs.

Common Mistakes When Reading Solar Specs (and What They Look Like)

Many solar charging issues with portable power stations can be traced to a few recurring misunderstandings about panel specs and input ratings. Recognizing these patterns can help you diagnose problems quickly.

Confusing Voc with Vmp: A frequent mistake is assuming the panel will operate at Voc. In reality, the MPPT controller pulls the voltage down to around Vmp under load. If you design a system based on Voc instead of Vmp, you may overestimate charging watts or misjudge whether the array’s operating voltage fits the input range.

Ignoring series Voc limits: Users sometimes add panels in series to increase voltage without adding up their Voc values. Symptoms of exceeding the power station’s maximum input voltage include immediate error codes, the solar icon not appearing, or the unit refusing to start charging in bright sun. In severe cases, overvoltage can damage the input circuitry.

Overlooking current limits in parallel: Adding panels in parallel increases available current. If the combined Imp exceeds the power station’s input current rating, the controller will simply cap the current. The system may work, but you will not see the expected increase in charging speed. This often shows up as “stuck” input wattage that does not rise when an extra panel is connected.

Expecting full rated watts all day: Panel watt ratings are based on ideal lab conditions. In real life, shading, panel angle, heat, and atmospheric conditions reduce output. Users often think something is wrong when a 200 W array only delivers 120–160 W in good sun. This is normal behavior, not necessarily a fault.

Not matching connectors and polarity: Even when Voc, Vmp, and Imp are correct, mismatched connectors or reversed polarity will stop charging. Typical signs include zero watt input, no charging icon, and no error code. Verifying polarity with a multimeter and using properly rated adapters can resolve many of these issues.

Using very low-voltage panels: Some small panels have Vmp values close to the battery voltage inside the power station. If Vmp is too low or outside the listed input range, the MPPT controller may not track properly, resulting in intermittent or no charging.

When troubleshooting, compare the array’s calculated Voc, Vmp, and Imp against the power station’s input range and limits, then check physical connections and shading before assuming the unit is faulty.

Safety Basics When Pairing Solar Panels with Power Stations

Working with solar panels and portable power stations involves DC voltages and currents that can be hazardous if mismanaged. While these systems are designed to be user-friendly, understanding a few safety principles around Voc, Vmp, and Imp helps prevent accidents and equipment damage.

Respect maximum input voltage: Never exceed the power station’s specified maximum solar input voltage. High Voc strings, especially in series and in cold weather, can surpass this limit. Overvoltage can stress or destroy input components even if the system appears to work at first.

Use appropriately rated cables and connectors: Imp and Isc values guide cable sizing. Cables, connectors, and adapters should be rated for at least the panel’s Isc and the array’s maximum current in parallel configurations. Undersized wiring can overheat under sustained load.

Avoid short circuits: Isc is measured under controlled conditions; deliberately shorting panels in the field is not recommended. When connecting or disconnecting panels, avoid touching bare conductors together. Work with the power station turned off or the solar input disabled when possible.

Do not bypass built-in protections: Portable power stations include protections for overvoltage, overcurrent, and reverse polarity. Do not attempt to bypass these safeguards or modify the internal battery or charge controller. If your solar configuration repeatedly triggers protection, adjust the array instead of trying to defeat the safety features.

Be cautious with series strings: Series wiring raises voltage, which increases shock risk and the potential for arcing when connecting or disconnecting under load. Make connections securely, avoid working with wet hands, and keep connectors clean and fully seated.

Consult a qualified electrician for complex setups: If you plan to integrate a portable power station into a larger DC system or combine multiple arrays, seek advice from a qualified electrician or solar professional. Do not attempt to wire solar inputs directly into home electrical panels or modify fixed wiring without proper expertise.

Following these high-level safety practices, along with careful attention to published specs, keeps your solar-power-station system reliable and reduces the risk of damage or injury.

Care, Storage, and Maintaining Solar Performance Over Time

While solar panel specs like Voc, Vmp, and Imp are fixed by design, real-world performance can drift over time due to dirt, damage, and poor storage. Good maintenance habits help your panels stay closer to their rated output and maintain consistent charging behavior with your portable power station.

Keep panel surfaces clean: Dust, pollen, bird droppings, and grime reduce the effective sunlight reaching the cells, lowering Imp and overall wattage. Periodic gentle cleaning with water and a soft cloth or sponge can restore lost performance. Avoid abrasive cleaners that could scratch the surface.

Protect connectors from corrosion: The stability of Voc and Vmp readings at the power station depends on solid, low-resistance connections. Moisture and dirt in connectors can cause voltage drop and intermittent charging. Keep connectors dry, use dust caps when available, and inspect for discoloration or pitting.

Avoid sharp bends and cable strain: Repeatedly bending cables near connectors can lead to internal breaks, causing fluctuating Imp or no output. Coil cables loosely, secure them to reduce strain, and avoid pinching them under panel frames or stands.

Store folding panels properly: For portable, folding panels, store them dry, away from extreme heat, and folded as designed. Prolonged exposure to moisture or heat can degrade encapsulation materials and backing, slowly reducing the panel’s ability to reach its rated Vmp and Imp.

Monitor performance over time: Occasionally note the wattage your power station reports from a known panel or array in similar sun conditions. If you see a gradual, unexplained decline beyond normal day-to-day variation, inspect for shading, dirt, loose connections, or physical damage.

Protect against impact and flexing: Cracked cells or damaged glass can change how current flows through the panel, sometimes leading to hot spots or reduced Imp. Handle panels carefully, do not stand or place heavy objects on them, and secure them against wind.

By maintaining the physical condition of your panels and connections, you help ensure that the voltage and current they deliver remain as close as possible to the specs you used when matching them to your portable power station.

Maintenance Task Effect on Specs in Practice How Often
Cleaning panel surface Improves usable Imp and wattage output Every few weeks in dusty areas
Inspecting connectors Reduces voltage drop affecting Vmp at the input Every few months or before long trips
Checking cables for damage Prevents intermittent current loss and faults Periodically and after rough transport
Verifying mounting and support Helps maintain consistent orientation and output Seasonally or after storms
Example values for illustration.

Related guides: Solar Panel Series vs Parallel: Which Is Better for Charging a Power Station?Why Won’t It Charge From Solar? A Troubleshooting ChecklistOverpaneling Explained: Can You Connect Bigger Solar Panels Than the Input Limit?

Key Takeaways and a Specs Checklist for Solar-Powered Stations

Reading solar panel specs for a portable power station is mainly about matching three things: voltage limits (Voc and Vmp), current limits (Imp and Isc), and power capacity (watts). When these align with the station’s published input range, you get safe, efficient charging without guesswork.

Start by identifying your power station’s solar input voltage window and maximum wattage or current. Then examine your panel label for Voc, Vmp, Imp, and Pmax. Decide whether to wire panels in series, parallel, or a combination, and calculate the resulting Voc, Vmp, and Imp. Always leave margin for cold-weather Voc increases and real-world losses that reduce wattage below the nameplate rating.

Specs to look for

  • Power station solar input voltage range – Look for a clear DC range (for example, 12–30 V or 18–60 V); it defines the acceptable Vmp window and helps you decide series vs. parallel wiring.
  • Power station maximum solar input watts – Values like 100–400 W are common; aim for total panel wattage slightly above this to account for real-world losses while staying within limits.
  • Panel Voc (open-circuit voltage) – Typical portable panels are around 20–24 V; ensure the sum of series Voc stays comfortably below the station’s maximum voltage, especially in cold climates.
  • Panel Vmp (voltage at maximum power) – Often 16–20 V for 12 V-class panels; make sure the combined Vmp of your array falls within the station’s input range for effective MPPT tracking.
  • Panel Imp (current at maximum power) – Values like 5–10 A per panel are common; when wiring in parallel, keep the total Imp at or below the station’s maximum input current to avoid clipping.
  • Panel Pmax (rated watts) – Check 60–200 W per portable panel; use Pmax to estimate realistic charge times, remembering you may see only 60–80% of this in typical conditions.
  • Connector type and cable rating – Confirm connector style and that cables are rated for the array’s maximum current and voltage to maintain safe, low-loss connections.
  • Operating temperature range – Look for a broad range (for example, –10°C to 65°C); colder temps can raise Voc, so this spec helps you plan safe voltage margins.
  • Power station charge controller type – MPPT inputs generally perform better than simple DC inputs; knowing this helps you set realistic expectations for how well Vmp will be tracked.

Using this checklist whenever you combine solar panels with a portable power station ensures that Voc, Vmp, Imp, and wattage all work together for reliable, efficient off-grid power.

Frequently asked questions

Which solar panel specs and power station features matter most when pairing panels with a portable power station?

Key panel specs are Voc, Vmp, Imp, Isc, and Pmax because they determine voltage, current, and wattage behavior. On the power station side, the important features are the allowable solar input voltage range, maximum input watts or current, and whether the input uses an MPPT controller for efficient tracking.

What is a common mistake people make when reading solar panel specifications?

A frequent error is confusing Voc with Vmp and designing systems around Voc or nameplate watts instead of the operating Vmp and realistic output. That can lead to overvoltage in series strings or current clipping in parallel arrays, resulting in reduced or blocked charging.

How can I stay safe when connecting solar panels to a portable power station?

Follow basic safety: never exceed the station’s maximum input voltage, use cables and connectors rated for the array’s current, and avoid connecting or disconnecting live DC circuits when possible. Also do not bypass built-in protections and consult a qualified electrician for complex or high-voltage setups.

Can I mix series and parallel wiring to increase power, and what should I watch for?

Yes, combining series and parallel can help reach the right voltage and current, but you must ensure the series string Voc stays below the station’s max voltage and that the parallel current stays within input limits. Match panel electrical characteristics and use proper connectors and fusing to avoid imbalance and safety issues.

Why won’t my power station charge even when panels are in bright sun?

Common causes include the array Voc exceeding the station’s limit (triggering protection), the array Vmp being below the station’s MPPT tracking window, shading or dirty panels reducing output, or connector/polarity issues. Check voltages, connections, and the station’s input status indicators to diagnose the problem.

How does cold weather affect solar panel voltage and how much margin should I allow?

Panel Voc increases as temperature drops because cell voltage rises in cold conditions; typical cold-weather increases are in the range of 5–20% depending on the panel’s temperature coefficient. Allow a safety margin by checking the panel’s Voc temperature coefficient and keeping series Voc well below the power station’s maximum input voltage.

Can a Portable Power Station Run a Dehumidifier? What to Check and Expect

Portable power station running a home dehumidifier in a basement

Yes, a portable power station can run a dehumidifier, but only if its inverter output, surge watts, and battery capacity match the dehumidifier’s power draw. The main limits are continuous watt rating, startup surge, and expected runtime on a single charge.

Before you plug in, you need to check the dehumidifier’s wattage or amperage, the power station’s AC output limit, and the battery’s watt-hours. These details determine whether it will start reliably, how long it will run, and whether you risk overload shutdowns. Understanding surge watts, duty cycle, and efficiency losses will help you set realistic expectations for backup power, off-grid use, or humidity control during outages.

This guide walks through what to look at on both devices, how to estimate runtime, common issues like tripping overload protection, and the safety and maintenance basics to keep both your portable power station and dehumidifier working reliably.

Can a Portable Power Station Run a Dehumidifier and Why It Matters

A portable power station can usually run a small or mid-size dehumidifier, but not every combination will work. The match depends on three core factors: the dehumidifier’s power requirements, the power station’s inverter output (continuous and surge), and the battery capacity measured in watt-hours (Wh).

Most home dehumidifiers are designed for standard wall outlets, drawing anywhere from about 200 watts for compact units to 700 watts or more for large, high-capacity models. They also use a compressor or fan motor that needs a brief surge of power at startup. Portable power stations, in contrast, have a defined maximum AC output and a finite battery that drains faster as the load increases.

This matters for several reasons:

  • Outage planning: If you rely on a dehumidifier to control moisture in a basement or crawlspace, you need to know whether a power station can keep it running during blackouts.
  • Mold and moisture control: In damp climates, even a few days without humidity control can lead to mold growth, musty odors, and damage to stored items.
  • Off-grid and RV use: For cabins, RVs, or boats, matching your dehumidifier to your portable power station is key to avoiding drained batteries and tripped protection circuits.

Thinking in terms of watts and watt-hours instead of just “size” or “capacity” helps you answer a precise question: not just can your portable power station run a dehumidifier, but for how long and under what conditions.

Key Power Concepts: How Dehumidifiers and Portable Power Stations Match Up

To understand compatibility, you need a few basic power concepts and how they apply to both the dehumidifier and the portable power station.

Dehumidifier power ratings

Most dehumidifiers list one or more of the following on their labels or manuals:

  • Watts (W): The power the unit consumes while running. Typical home units range from about 200 W to 700 W.
  • Amps (A): The current draw. You can convert to watts using W = V × A. On a 120 V circuit, a 3 A unit uses roughly 360 W.
  • Voltage (V): In North America, standard plug-in dehumidifiers are usually 120 V AC.

Many compressor-based dehumidifiers also have a startup surge, sometimes 2–3 times higher than their running watts, as the compressor motor kicks on.

Portable power station output ratings

Portable power stations include built-in inverters that convert DC battery power to AC power. Key specs include:

  • Continuous AC output (W): The maximum wattage the power station can supply steadily. Your dehumidifier’s running watts must stay below this rating.
  • Surge or peak watts: A higher short-term rating that covers motor/compressor startup. Ideally, this should be at least 2–3 times the dehumidifier’s running watts for reliable starts.
  • AC voltage and waveform: Most home dehumidifiers expect 120 V pure sine wave AC. Many modern power stations provide this, but it is worth confirming in the specs.

Battery capacity and runtime

Portable power station batteries are rated in watt-hours (Wh). This number indicates how much energy the battery can store. To estimate runtime:

Estimated runtime (hours) ≈ Battery capacity (Wh) × Efficiency ÷ Load (W)

Because of inverter losses and other inefficiencies, a realistic efficiency factor is often around 0.8 (80%), though it varies by device and load.

For example, if you have a 1,000 Wh power station and a dehumidifier that draws 300 W while running:

  • Effective capacity ≈ 1,000 Wh × 0.8 = 800 Wh
  • Runtime ≈ 800 Wh ÷ 300 W ≈ 2.6 hours of active run time

Because dehumidifiers cycle on and off based on humidity (their duty cycle), the actual elapsed time may be longer. If it runs only half the time, your total elapsed time could be closer to 5 hours.

Duty cycle and humidity setpoints

Dehumidifiers do not usually run at full power continuously. Instead, they turn on when humidity rises above a setpoint and off when it drops below. In a very damp basement, the duty cycle may be high (70–90%). In a mildly humid room, it may be much lower (20–40%).

This cycling is why two homes with the same dehumidifier and power station can see very different runtimes. Ambient temperature, room size, and how leaky the space is to outside air all influence how often the compressor needs to run.

Device Typical Rating What It Means
Small dehumidifier 200–300 W running Often suitable for mid-size portable power stations
Medium dehumidifier 300–500 W running Needs higher continuous output and surge capacity
Large dehumidifier 500–800 W running Best paired with larger, higher-output power stations
Portable power station 500–2,000 W AC output Must exceed dehumidifier running watts and startup surge
Battery capacity 300–2,000+ Wh Higher Wh provides longer dehumidifier runtime
Example values for illustration.

Putting it together

To decide if your portable power station can run your dehumidifier, you need to confirm:

  • The dehumidifier’s running watts are below the station’s continuous AC output.
  • The station’s surge watts comfortably cover compressor startup.
  • The station’s battery capacity offers enough runtime for your needs, given how humid the space is.

Real-World Examples of Running a Dehumidifier on a Portable Power Station

Looking at a few realistic scenarios can help you understand what to expect in terms of compatibility and runtime.

Example 1: Small dehumidifier in a bedroom

Suppose you have a compact 25-pint dehumidifier rated at 220 W running, with an estimated startup surge around 400–500 W. You pair it with a portable power station rated for 600 W continuous output, 1,000 W surge, and 600 Wh of battery capacity.

  • Compatibility: The dehumidifier’s 220 W is well under the 600 W continuous rating, and the 1,000 W surge rating can easily handle startup.
  • Runtime: Effective capacity ≈ 600 Wh × 0.8 = 480 Wh. Runtime ≈ 480 ÷ 220 ≈ 2.2 hours of active run time.
  • Real-world use: If the unit cycles about 50% of the time in a moderately humid bedroom, you might see around 4–5 hours of total elapsed time before the battery is depleted.

Example 2: Medium dehumidifier in a basement

Now consider a 40–50 pint dehumidifier rated at 420 W running, with an estimated 900–1,200 W startup surge. You use a 1,000 Wh portable power station rated for 800 W continuous, 1,600 W surge.

  • Compatibility: The 420 W running draw fits within the 800 W continuous limit, and the 1,600 W surge capacity should cover compressor startup.
  • Runtime: Effective capacity ≈ 1,000 Wh × 0.8 = 800 Wh. Runtime ≈ 800 ÷ 420 ≈ 1.9 hours of active run time.
  • Real-world use: In a damp basement where the dehumidifier runs perhaps 70% of the time, you might see around 2.5–3 hours of total elapsed time.

Example 3: Large dehumidifier and undersized power station

Imagine a large 70-pint dehumidifier rated at 650 W running, with a 1,400–1,800 W startup surge. You try to run it on a 500 W continuous, 1,000 W surge portable power station with 800 Wh capacity.

  • Compatibility: The 650 W running draw already exceeds the 500 W continuous rating. Even if it briefly starts, the power station is likely to shut down or display overload errors.
  • Startup: The surge requirement can exceed 1,400 W, which is well above the 1,000 W surge rating. The unit may never start properly.
  • Outcome: In this case, the answer is effectively “no” — the portable power station is undersized for this dehumidifier.

Example 4: Partial-day humidity control during an outage

Suppose you only need to keep humidity in check during the most humid part of the day. You have a 300 W dehumidifier and a 1,500 Wh power station rated for 1,000 W continuous, 2,000 W surge.

  • Runtime: Effective capacity ≈ 1,500 Wh × 0.8 = 1,200 Wh. Runtime ≈ 1,200 ÷ 300 = 4 hours of active run time.
  • Strategy: You might run the dehumidifier for a few hours mid-day when humidity peaks, then switch it off to conserve battery. This can be enough to prevent the space from becoming excessively damp, even if you cannot run it around the clock.

These examples show that the same portable power station can be a good match for one dehumidifier and a poor match for another. The key is always to compare wattage, surge, and battery capacity to your specific humidity control needs.

Common Mistakes and Troubleshooting When Powering a Dehumidifier

When pairing a portable power station with a dehumidifier, several recurring mistakes lead to short runtimes, overloads, or failure to start. Recognizing these issues can help you troubleshoot quickly.

Mistake 1: Ignoring startup surge

Many people only look at the dehumidifier’s running watts and assume that if it is below the power station’s continuous rating, everything will work. In reality, the compressor may need 2–3 times that power for a second or two at startup.

Symptoms:

  • The dehumidifier clicks or hums but does not start.
  • The portable power station beeps, shows an overload message, or shuts off when the compressor tries to engage.

What to check: Confirm the power station’s surge rating and compare it to typical startup demands for similar-sized dehumidifiers. If your surge rating is marginal, the combination may be unreliable.

Mistake 2: Underestimating runtime needs

Another common issue is assuming a dehumidifier can run “all day” on a portable power station simply because the battery capacity seems large. High continuous loads drain batteries quickly.

Symptoms:

  • Battery depletes in a few hours instead of lasting through the day.
  • You must frequently recharge the power station, reducing its practicality during extended outages.

What to check: Use the runtime equation (capacity × efficiency ÷ watts) and factor in duty cycle. In very humid spaces, plan for a high duty cycle and shorter total runtime.

Mistake 3: Overloading with multiple devices

Plugging additional loads into the same portable power station — such as fans, lights, or a small fridge — can push total wattage over the continuous rating.

Symptoms:

  • Power station shuts off when multiple devices run together.
  • Display shows wattage close to or above the maximum output rating.

What to check: Add up the running watts of all connected devices. Keep the total comfortably below the continuous rating, and consider leaving headroom for surge events.

Mistake 4: Using long, undersized extension cords

Very long or thin extension cords can cause voltage drop and additional resistance, which may affect motor startup.

Symptoms:

  • Dehumidifier struggles to start or runs hot.
  • Cord feels warm to the touch under load.

What to check: Use a reasonably short, appropriately rated extension cord if you must use one, and avoid coiling cords tightly under load.

Mistake 5: Running in extreme temperatures

Both portable power stations and dehumidifiers have recommended operating temperature ranges. Very cold or hot conditions can affect performance, battery capacity, and compressor operation.

Symptoms:

  • Reduced runtime compared to expectations.
  • Dehumidifier freezing up or shutting off unexpectedly.

What to check: Ensure the space is within the operating temperature ranges listed in the manuals. Cold basements, in particular, can reduce both battery output and dehumidifier efficiency.

Safety Basics When Running a Dehumidifier on a Portable Power Station

Using a portable power station is generally safer and simpler than using fuel-powered generators, but you still need to follow basic electrical and operational safety practices.

Avoid overloading the inverter

Consistently running a power station near or above its rated output can trigger protective shutdowns and stress components over time.

  • Keep the dehumidifier’s running watts and any additional loads below the continuous rating.
  • Account for startup surges and leave some headroom rather than sizing right at the limit.

Use appropriate outlets and cords

Plug the dehumidifier into the power station’s AC outlet as you would a normal wall outlet.

  • Avoid daisy-chaining power strips or running multiple high-draw appliances from one outlet.
  • If an extension cord is necessary, use one rated for at least the dehumidifier’s current draw and keep it as short as practical.

Keep equipment dry and ventilated

Dehumidifiers often sit in damp locations, but portable power stations should be kept away from standing water and excessive moisture.

  • Place the power station on a stable, dry surface above floor level if the area is prone to minor flooding.
  • Ensure the power station has adequate ventilation around its vents to avoid overheating.

Do not modify wiring or bypass protections

Portable power stations and dehumidifiers include built-in protections for a reason. Avoid opening the cases, altering cords, or attempting to hard-wire the power station into household circuits.

  • If you need whole-home backup or complex wiring, consult a licensed electrician.
  • Rely on the power station’s standard AC outlets and follow manufacturer guidelines.

Monitor for heat and unusual behavior

During extended use, periodically check both devices.

  • Stop using the setup if you notice unusual smells, excessive heat, or intermittent shutdowns.
  • Allow the power station to cool if its fans run constantly or its case feels hot.

Battery charging safety

When recharging the portable power station, follow recommended charging methods and environments.

  • Avoid covering the unit while charging.
  • Charge in a dry, well-ventilated area within the suggested temperature range.
Safety Area Key Practice Why It Matters
Load management Stay below continuous and surge ratings Prevents overload shutdowns and component stress
Placement Keep power station dry and elevated Reduces risk in damp basements or utility rooms
Cabling Use properly rated cords Minimizes overheating and voltage drop
Ventilation Leave space around vents Helps maintain safe operating temperatures
Monitoring Check for heat, smells, shutdowns Early warning for potential problems
Example values for illustration.

Related guides: Portable Power Station Buying GuidePortable Power Station Terminology ExplainedHow to Estimate Runtime for Any Device: A Simple Wh Formula + 5 Worked Examples

Maintenance and Storage Tips for Reliable Operation

To get consistent performance when running a dehumidifier from a portable power station, both devices need basic care and proper storage.

Maintaining the dehumidifier

  • Clean the air filter: A clogged filter forces the fan and compressor to work harder, increasing power draw and shortening runtime. Check and clean or replace the filter according to the manufacturer’s schedule.
  • Keep coils and vents clear: Dust and debris on the coils or intake/exhaust vents can reduce efficiency. Gently vacuum or wipe accessible areas while the unit is unplugged.
  • Manage drainage: Ensure that the bucket or drain hose is positioned correctly to avoid leaks near the power station. Spills and standing water increase risk around electrical equipment.
  • Check for icing: In cooler spaces, coils can ice up, causing the compressor to cycle inefficiently. If you see ice, allow the unit to defrost and review temperature and airflow conditions.

Maintaining the portable power station

  • Periodic charging: Lithium-based batteries generally last longer if they are not stored completely full or empty for long periods. Many manufacturers recommend storing around a partial charge and topping up every few months.
  • Firmware and settings: Some portable power stations allow firmware updates or configuration of eco modes and output settings. Keeping these up to date can improve efficiency and compatibility.
  • Keep ports clean: Dust or moisture in AC outlets and DC ports can cause poor connections. Inspect and gently clean if necessary while the unit is off.

Storage conditions

  • Temperature: Store both the power station and dehumidifier in a dry, moderate-temperature environment when not in use. Extreme heat or cold can degrade batteries and plastic components.
  • Humidity: Ironically, long-term storage in very damp areas can damage electronics. If your basement is very humid, consider storing the power station in a drier part of the home when it is not actively in use.
  • Physical protection: Avoid stacking heavy items on top of the power station or its cords. Keep the dehumidifier upright to protect internal components.

Testing before outages

Do not wait for a storm or extended outage to find out whether your setup works.

  • Periodically test the dehumidifier on the portable power station under normal conditions.
  • Observe startup behavior, wattage draw, and approximate runtime so you can plan realistically when you need backup power.

Practical Takeaways and Specs to Look For

Running a dehumidifier on a portable power station is entirely feasible, but it requires matching the right appliance to the right power source and setting realistic expectations for runtime. Small and medium dehumidifiers are generally better candidates than large, high-draw units, especially if your power station has modest output and battery capacity.

Think in terms of energy and load: wattage for compatibility, watt-hours for runtime, and duty cycle for how your specific space behaves. Pay attention to surge requirements, avoid overloading with extra devices, and use safe placement and cabling practices, particularly in damp basements or crawlspaces.

Specs to look for

  • Continuous AC output (W): Look for a rating at least 25–50% higher than your dehumidifier’s running watts (for example, 600–800 W output for a 400 W unit) so it can run comfortably without constant overload risk.
  • Surge/peak watt rating: Choose a power station with surge capacity roughly 2–3 times the dehumidifier’s running watts (for example, 1,200–1,500 W surge for a 500 W unit) to handle compressor startup reliably.
  • Battery capacity (Wh): For meaningful runtime, look for at least 500–1,000 Wh for small units and 1,000–2,000 Wh or more for medium units; higher Wh directly translates into longer dehumidifier operation between charges.
  • AC waveform and voltage: Prefer pure sine wave 120 V AC output, which closely mimics household power and is better suited for compressor motors and electronics inside dehumidifiers.
  • Inverter efficiency: Higher efficiency (often around 80–90%) means more of the stored energy becomes usable runtime; this can add noticeable extra operating time over the life of the system.
  • Display and monitoring: A clear wattage and remaining-time display helps you see real-time load and adjust usage, preventing unexpected shutdowns and allowing better planning during outages.
  • Operating temperature range: Check that the power station’s recommended operating range matches the environment where you will run the dehumidifier, especially in cool basements or warm utility rooms.
  • AC outlet count and rating: Ensure there are enough outlets and that each is rated for the dehumidifier’s current draw, leaving room for low-wattage accessories like a small fan or light if needed.
  • Recharge options and speed: Faster AC charging or solar input capability can be useful if you need to run the dehumidifier day after day during extended outages or off-grid stays.

By comparing these specs with your dehumidifier’s label and your humidity control needs, you can determine whether a portable power station will be a practical and reliable way to keep your space dry when grid power is unavailable.

Frequently asked questions

What specifications and features should I check when pairing a portable power station with a dehumidifier?

Check the power station’s continuous AC output, surge/peak watt rating, battery capacity in watt-hours, AC waveform (prefer pure sine wave), and inverter efficiency. Also confirm outlet ratings and the unit’s operating temperature range to ensure reliable starts and expected runtime.

How do I calculate how long a portable power station will run a dehumidifier?

Estimate runtime using (battery Wh × efficiency) ÷ running watts, then factor in the dehumidifier’s duty cycle since it cycles on and off. Typical efficiency assumptions are around 0.8–0.9; adjusting for duty cycle gives elapsed time rather than just active runtime.

Why won’t my dehumidifier start when plugged into a portable power station?

Often the power station lacks sufficient surge capacity to handle the compressor’s startup current, causing the inverter to click or shut down. Voltage drop from an undersized or long extension cord and protective overload features can also prevent startup.

Is it safe to place a portable power station in a damp basement while running a dehumidifier?

Keep the power station on a dry, elevated surface with adequate ventilation and away from standing water or dripping hoses; moisture exposure increases risk to battery and electronics. Follow the manufacturer’s recommended operating ranges and avoid covering vents or placing the unit in direct contact with damp surfaces.

Can I run other appliances at the same time as my dehumidifier on the same power station?

Yes, if the combined running watts stay comfortably below the station’s continuous rating and you leave headroom for surge events; add the wattage of all connected devices to verify. Running multiple high-draw appliances together will shorten runtime and can trigger overload protections.

Will cold temperatures affect battery life and the dehumidifier’s performance?

Cold temperatures reduce battery capacity and can cause dehumidifier coils to ice up, which decreases effectiveness and may increase runtime. Check both devices’ recommended temperature ranges and avoid operating them outside those limits when possible.

Electric Blanket on a Power Station: Realistic Runtime and Safety Notes

Portable power station running an electric blanket beside a bed

Most electric blankets can safely run on a compatible portable power station, but actual runtime is often much shorter than people expect and depends on wattage, battery capacity, and inverter efficiency. Understanding power draw, surge watts, and realistic runtime helps you avoid mid‑night shutdowns and overheating risks.

People search for terms like electric blanket runtime, Wh calculator, inverter limits, low‑power mode, and continuous output because they want to know if their power station can handle overnight heating. This guide explains how the setup works, how to estimate hours of use, and which safety notes matter most when you plug a heated throw or blanket into a battery-powered unit at home.

Below you will find clear explanations, example calculations, common overheating and shutdown causes, and a checklist of specs to look for when matching an electric blanket to a portable power station.

Using an Electric Blanket on a Power Station: What It Means and Why It Matters

Running an electric blanket on a portable power station simply means using stored battery energy to power a resistive heating device through the station’s AC outlet or DC output. Instead of plugging into a wall receptacle, you are plugging into a battery-backed inverter.

This matters for two main reasons: energy limits and safety limits. A home outlet can deliver power continuously as long as the grid is active. A power station, by contrast, has a fixed battery capacity (in watt-hours) and an inverter with a maximum continuous watt rating. Your blanket’s power draw (watts) and the time you run it directly drain that stored energy.

For home use—such as staying warm during outages, sleeping in a cool room without turning up the central heat, or heating a single bed in a shared house—knowing realistic runtime prevents disappointment and potential misuse. If the blanket demands more watts than the inverter can supply, the power station may shut down. If the blanket runs for too long on a nearly depleted battery, voltage can sag, again causing automatic shutdown.

On the safety side, a portable power station adds electronic protections (overload, short circuit, over-temperature), but you still need to respect the blanket’s own safety instructions. Using the wrong mode, covering the controller, or bunching the blanket too tightly can increase fire risk even if the power station itself is operating within spec.

Key Power Concepts: Watts, Watt-Hours, and How Runtime Is Determined

To understand how long an electric blanket can run on a power station, you need three basic numbers: blanket wattage, battery capacity, and inverter efficiency. Together, they explain why some people get only a few hours of runtime while others manage most of the night.

Blanket wattage (W) is the power draw. Many full-size electric blankets use roughly 60–120 W on a medium setting, while smaller throws may be in the 40–80 W range. Dual-zone blankets can draw more when both sides are on high. The label on the controller or tag usually lists a maximum watt rating or amperage at a given voltage.

Battery capacity (Wh) on the power station tells you how much energy is stored. A unit rated around 300 Wh has roughly enough energy to run a 100 W load for about 3 hours in ideal conditions. Larger home-focused stations may be 700–2000 Wh or more, extending runtime significantly.

Inverter efficiency describes how much energy is lost converting DC battery power to AC for your blanket. Typical efficiencies are around 80–90%. That loss means you cannot just divide Wh by blanket watts; you must also account for the overhead of the inverter and any idle consumption.

A simple runtime estimate is:

Estimated runtime (hours) ≈ (Battery Wh × 0.8 to 0.9) ÷ Blanket watts

For example, a 500 Wh power station with 85% efficiency powering a 70 W blanket would be: (500 × 0.85) ÷ 70 ≈ 6.1 hours. Real-world results may be lower due to cycling between heat levels, ambient temperature, and how the blanket’s thermostat behaves.

Two more concepts matter:

  • Continuous vs. surge watts: Electric blankets are resistive loads and typically do not have large startup surges like compressors, but the inverter’s continuous rating must still exceed the blanket’s maximum wattage.
  • Low-power cutoffs: Some power stations shut off automatically when load is very low. If your blanket’s controller cycles down or idles at low power, it may trigger these cutoffs, causing unexpected shutdown.

Understanding these basics lets you predict whether your power station can handle overnight heating or only a few hours of comfort before recharge.

Battery capacity (Wh)Blanket power (W)Efficiency factorEstimated runtime (hours)
300 Wh60 W0.85≈ 4.3 hours
500 Wh80 W0.85≈ 5.3 hours
1000 Wh100 W0.85≈ 8.5 hours
1500 Wh120 W0.85≈ 10.6 hours
Estimated electric blanket runtime on a portable power station. Example values for illustration.

How Controller Settings Affect Power Draw

Electric blankets rarely pull their full rated wattage continuously. Most use internal thermostats or pulse-width modulation to cycle power on and off and keep a set temperature. Higher settings keep the heating elements energized more often, increasing average watt draw and reducing runtime.

Using a lower heat setting, preheating the bed before sleep, and then switching to a maintenance level can significantly extend runtime. For instance, a 100 W blanket that averages only 50 W over the night due to cycling may effectively double the runtime compared with a constant 100 W draw.

However, do not assume the average draw is always half or less; it depends on room temperature, bedding insulation, and how often you adjust the control. The safest approach is to treat the label wattage as a worst-case number and calculate runtime from there, then expect a modest improvement in practice.

Realistic Runtime Examples for Home Use

Putting numbers into context helps set realistic expectations for using an electric blanket on a power station at home. Below are illustrative scenarios using common blanket wattages and portable power station sizes.

Scenario 1: Small throw blanket on a compact power station

Imagine a 50 W heated throw and a 300 Wh power station. Applying the earlier formula with 85% efficiency:

  • Usable energy ≈ 300 Wh × 0.85 = 255 Wh
  • Runtime ≈ 255 Wh ÷ 50 W = 5.1 hours

In a cool but not freezing room, the controller may cycle, so you might see around 5–6 hours of warmth. This is usually enough for an evening on the couch, but not a full night’s sleep.

Scenario 2: Full-size blanket overnight on a mid-size station

Consider a 90 W queen-size blanket and a 700 Wh power station:

  • Usable energy ≈ 700 Wh × 0.85 = 595 Wh
  • Runtime ≈ 595 Wh ÷ 90 W ≈ 6.6 hours

If you preheat the bed on high for 30–60 minutes and then drop to a low or medium setting, the average draw might fall to 50–70 W. In that case, you might achieve 7–9 hours, but you should not plan on more than a single night without recharging.

Scenario 3: Dual-zone blanket with both sides on

A dual-zone blanket might be rated at 2 × 70 W (140 W total). With a 1000 Wh power station:

  • Usable energy ≈ 1000 Wh × 0.85 = 850 Wh
  • Runtime ≈ 850 Wh ÷ 140 W ≈ 6.1 hours

That is often enough for the coldest part of the night, but if both users run high settings continuously, the power station may shut off before morning. Using separate low or medium settings, or staggering usage, can stretch runtime closer to an 8-hour window.

Scenario 4: Power-saving strategy during outages

During a home power outage, many people want to conserve battery capacity. One approach is to preheat the bed for 30–45 minutes, then turn off the blanket for part of the night, relying on insulation from blankets and comforters. In this case, a 500–700 Wh unit can potentially provide multiple nights of partial use instead of a single full night on constant heat.

Real-world runtime is also influenced by ambient temperature. In very cold rooms, the controller may stay on more frequently to maintain temperature, increasing average watt draw. In milder conditions, it cycles less, effectively extending the usable hours even beyond simple calculations.

Common Mistakes, Short Runtime, and Troubleshooting Clues

Many users are surprised when their electric blanket drains a power station faster than expected or causes it to shut down unexpectedly. Most issues fall into a few repeatable patterns.

1. Overestimating battery capacity

People often divide battery Wh by blanket watts without considering inverter efficiency or reserve margins. This leads to optimistic runtime estimates. If your 500 Wh station seems to last only 4 hours instead of the 6–7 you expected, efficiency losses and higher-than-assumed average watt draw are likely responsible.

2. Ignoring controller and idle draw

Controllers and displays consume power even when the blanket is not heating at full strength. Some power stations also have their own idle draw to keep the inverter active. Over long periods, these small loads add up, especially on smaller-capacity units.

3. Using incompatible outputs

Most electric blankets are designed for AC mains voltage. Plugging them into a low-voltage DC port or a USB output using improvised adapters can cause malfunction or overcurrent. Always match the blanket’s voltage and plug type to the appropriate AC outlet on the power station, unless the blanket is specifically designed for DC use.

4. Overloading the inverter

While a single blanket rarely exceeds a few hundred watts, combining multiple heating devices—such as a blanket plus a space heater—can exceed the inverter’s continuous rating. Symptoms include immediate shutdown, overload error messages, or repeated restart attempts.

5. Low-load auto shutoff

Some power stations turn off AC output when they detect very low load for a certain period. If your blanket’s controller cycles down to a very small draw, the station may interpret this as “no load” and shut off. If you notice the blanket turning cold even though the battery gauge still shows plenty of charge, check whether a low-load timeout feature is active and whether it can be disabled.

6. Overheating or hot spots

Users sometimes fold or bunch the blanket to concentrate warmth, but this can create hot spots and trigger the blanket’s internal safety cutoff or the power station’s overcurrent protection. If you feel unusually hot areas, smell anything odd, or see discoloration, disconnect immediately and inspect the blanket per the manufacturer’s instructions.

When troubleshooting, look for indicators on the power station’s display: output watts, error codes, battery percentage, and whether AC output is enabled. These clues often point directly to either an overload, an under-voltage shutdown, or an auto-off feature rather than a defective blanket.

Safety Basics When Powering an Electric Blanket from a Portable Station

Using an electric blanket on a portable power station can be safe when you understand and respect the limits of both devices. The goal is to stay warm without creating fire hazards or stressing the battery system.

Follow the blanket’s safety instructions

Electric blankets typically include warnings about folding, tucking, and covering. These apply regardless of the power source. Keep the blanket flat and avoid placing heavy items on top that could trap heat. Do not use pins, clips, or anything that might damage heating wires.

Use the correct outlet and rated voltage

Only plug the blanket into an outlet that matches its voltage and plug type. If the blanket is designed for standard household AC, use the AC output of the power station. Avoid adapters that change voltage unless they are specifically rated and appropriate for the load.

Monitor for excessive heat

Check the blanket and controller periodically, especially during the first few uses with a power station. The blanket should feel warm but not scorching, and the controller should not become uncomfortably hot. If anything feels abnormal, turn everything off and inspect.

Keep ventilation around the power station

Portable power stations contain batteries and inverters that may generate heat under continuous load. Place the unit on a stable, dry surface with good airflow. Do not cover it with bedding, clothing, or curtains. Obstructed vents can lead to thermal shutdown or, in extreme cases, damage.

Avoid extension cords and daisy-chaining

Using long, thin, or coiled extension cords can introduce additional resistance and heat. When possible, plug the blanket directly into the power station or use a short, properly rated extension cord laid out flat. Never daisy-chain multiple power strips or adapters.

Do not leave damaged blankets in service

If the blanket shows signs of wear—exposed wires, frayed fabric, broken controllers—retire it. A portable power station’s protections cannot compensate for a compromised heating element or damaged insulation.

Supervise vulnerable users

For children, older adults, or anyone who may not sense overheating or move away from hot areas, extra supervision is important. Consider using lower heat settings and timers to reduce the risk of prolonged exposure.

Maintaining Your Power Station and Blanket for Reliable Home Use

Good maintenance practices extend both runtime performance and safety when pairing an electric blanket with a portable power station at home.

For the portable power station:

  • Keep the battery within recommended charge ranges: Avoid leaving the battery at 0% or 100% for long periods. For long-term storage, many units perform best around 40–60% state of charge.
  • Store in a cool, dry place: High temperatures accelerate battery aging. Do not leave the power station in hot attics, near heaters, or in direct sun.
  • Exercise the battery periodically: If you only use the station during rare outages, run a moderate load like an electric blanket for a few hours every few months, then recharge. This helps keep the battery management system active and healthy.
  • Keep vents and fans clear: Dust and lint can accumulate in vents, especially in bedrooms. Gently clean around intake and exhaust areas to maintain cooling performance.
  • Use appropriate charging sources: Stick to charging methods and voltages specified by the manufacturer. Avoid improvised chargers that could overvoltage or stress the battery.

For the electric blanket:

  • Inspect before seasonal use: Before winter, check the blanket for kinks, worn spots, or damaged cords. Run it briefly on a low setting and feel for even heating.
  • Follow cleaning instructions: Many blankets allow gentle machine washing after disconnecting the controller, but harsh washing or drying can damage internal wires. Always follow the care label.
  • Avoid tight folding and sharp bends: When storing, roll or loosely fold the blanket to avoid sharp creases that strain heating elements.
  • Use timers where appropriate: Built-in or external timers can limit runtime and reduce wear on both the blanket and the power station by avoiding unnecessary all-night operation.

Combining these habits helps ensure that, when you do need warmth from battery power—whether during an outage or for targeted heating—you get predictable performance and minimize the risk of sudden failure.

ItemMaintenance actionSuggested frequency
Power station batteryCharge to 40–60% for storageBefore off-season storage
Power station operationRun a moderate load (e.g., blanket) then rechargeEvery 3–6 months
Electric blanket fabric and wiringInspect for damage or hot spotsAt the start of each heating season
Blanket cleaningWash per care label, dry fullyAs needed, usually 1–2 times per season
Basic maintenance routine for a power station and electric blanket. Example values for illustration.

Related guides: Portable Power Station Buying GuideHow to Estimate Runtime for Any Device: A Simple Wh Formula + 5 Worked ExamplesIndoor Use Safety: Ventilation, Heat, and Fire-Prevention Basics

Practical Takeaways and Specs to Look For When Pairing an Electric Blanket with a Power Station

Using an electric blanket on a portable power station at home is practical when you align blanket wattage, battery capacity, and safety practices. For short evening use, even small stations can provide several hours of comfort. For full-night heating or multi-night outages, you need larger capacity, conservative settings, and good energy management.

Start by confirming the blanket’s wattage and ensuring it is well below the power station’s continuous AC output rating. Estimate runtime using battery Wh and an efficiency factor, then plan for a bit less in real-world use. Use lower heat settings, preheat strategically, and avoid combining multiple high-draw heaters on the same small power station.

Safety-wise, treat the blanket as you would on grid power: keep it flat, undamaged, and properly supervised. Keep the power station ventilated and avoid covering it with bedding. Maintain both devices seasonally so they are ready when needed.

Specs to look for

  • Battery capacity (Wh) – Look for enough capacity to cover your target hours: for example, 500–1000 Wh for 4–8 hours with a 60–100 W blanket. More Wh means longer runtime between charges.
  • AC inverter continuous output (W) – Choose an inverter with at least 1.5–2× your blanket’s maximum wattage (e.g., 200–300 W for a 100 W blanket) to avoid overloads and allow for additional small devices.
  • Inverter efficiency and idle draw – Higher efficiency (around 85–90%) and low idle consumption improve runtime. This matters most on smaller stations where every watt-hour counts.
  • AC output voltage and waveform – A pure sine wave AC output at standard household voltage helps ensure compatible, stable operation with modern electronic controllers.
  • Low-load auto shutoff behavior – Check whether the power station can keep AC on with low loads or allows disabling auto-off. This prevents blankets that cycle to low power from triggering unwanted shutdown.
  • Battery chemistry and cycle life – Chemistries with higher cycle ratings (e.g., thousands of cycles) hold up better to repeated seasonal use for heating, preserving capacity over time.
  • Thermal management and ventilation – Built-in fans and clear venting help the station handle continuous loads like blankets without overheating or derating.
  • Display and monitoring features – A clear screen showing real-time watts, remaining percentage, and estimated runtime helps you manage energy and avoid unexpected cutoffs in the middle of the night.
  • Built-in protections – Overload, short-circuit, over-temperature, and low-voltage protections add a layer of safety when running resistive heating devices for extended periods.

By checking these specs and applying the runtime concepts above, you can confidently match an electric blanket to a suitable portable power station for comfortable, controlled home heating when grid power is limited or when you simply want targeted warmth.

Frequently asked questions

Which power station specs and features matter most when running an electric blanket?

Prioritize battery capacity (Wh) for runtime, the inverter’s continuous output rating (W) so it comfortably exceeds the blanket’s maximum draw, and inverter efficiency/idle draw to reduce losses. Also check low-load auto-off behavior, ventilation/thermal management, waveform (pure sine preferred), and built-in protections like over-temperature and overload. A clear display that shows real-time watts and remaining runtime is helpful for management.

What common mistakes cause shorter-than-expected runtime?

Frequent errors include dividing battery Wh by blanket watts without accounting for inverter efficiency, ignoring controller cycling and idle draw, and combining multiple high-draw devices on one inverter. Using the wrong output type or triggering low-load auto-shutoff by running at very low average power also shortens usable time.

Is it safe to run an electric blanket on a power station overnight?

It can be safe if the power station and blanket are compatible and you follow safety practices: keep the blanket flat and undamaged, use the correct AC outlet, provide ventilation for the station, and monitor for excessive heat. Avoid damaged blankets, do not cover the power station, and supervise vulnerable users or use timers to reduce continuous operation.

How can I extend runtime without buying a larger power station?

Preheat the bed briefly on a higher setting then lower to a maintenance level, use additional insulating bedding, set timers, and avoid running other loads simultaneously. Choosing lower blanket settings and improving room insulation are simple ways to reduce average draw and stretch battery life.

Will running an electric blanket damage the power station’s battery over time?

Regular use consumes charge cycles like any load, so frequent deep discharges can reduce long-term battery capacity depending on chemistry and cycle life. Maintaining moderate charge ranges, avoiding repeated full discharges, and storing the unit in recommended conditions helps preserve battery health.

How do I tell if my power station will shut off due to low-load auto-off when using a blanket?

Check the user manual or settings for low-load auto-off thresholds and whether that feature can be disabled. You can also observe the station while the blanket cycles: if AC output turns off when the blanket is in a low-power state, the station’s low-load timeout is likely active and may require a workaround or a unit with a lower cutoff.

Portable Power Station for a Garage Door Opener and Gate: What Actually Matters

Portable power station powering a garage door opener and driveway gate in a home garage

A portable power station can run a typical garage door opener or gate motor if it can handle the startup surge watts and has enough watt-hours for the runtime you need. The key is matching inverter output, surge capacity, and battery size to your opener’s power draw and duty cycle.

When people search how to power a garage door with a battery backup, they are usually trying to solve a power outage problem, estimate runtime, or understand why an inverter trips on startup. Terms like continuous watts, peak surge, motor inrush current, amp draw, and watt-hour capacity all decide whether your setup actually works in real life.

This guide explains how portable power stations interact with garage door openers and automatic gates, how to estimate runtime, why some units shut down under load, and what specs really matter so you can choose and use one safely and effectively.

What It Means to Power a Garage Door Opener or Gate with a Portable Power Station

Using a portable power station for a garage door opener or gate means supplying AC power from a battery-based inverter instead of the utility grid. The power station converts stored DC energy in its battery into 120 V AC (in most North American homes) through an inverter, then feeds that to the opener or gate controller through a standard outlet.

This matters because garage door openers and gate motors are not simple constant loads. They are motor-driven devices with a short, high-current inrush at startup and a lower running draw while moving. That behavior stresses the inverter differently than, for example, a laptop charger or LED light.

To get a useful, reliable setup, three things have to line up:

  • Electrical compatibility: Voltage, plug type, and waveform must match what the opener expects.
  • Power capacity: The power station must handle both the surge watts at startup and the continuous watts while running.
  • Energy capacity: The battery must have enough watt-hours (Wh) to open or close the door or gate as many times as you need during an outage.

When those elements are balanced, a portable power station can act like a flexible, reusable backup battery for your access points, letting you get vehicles in and out even when the grid is down.

Key Power Concepts: Watts, Surge, and Runtime for Doors and Gates

To match a portable power station to a garage door opener or gate, you need to understand a few basic electrical concepts and how they apply to motor loads.

Continuous watts vs. surge watts

Continuous watts (or rated watts) describe how much power the inverter can supply steadily. Garage door openers often list a horsepower rating, but the actual electrical draw in watts is usually much lower than people assume.

Surge watts (or peak watts) describe how much short-term power the inverter can deliver for a brief period, usually a few seconds. Motorized devices like openers draw a high inrush current when they start moving. That spike can be 2–3 times the running watts, sometimes more for older or poorly lubricated systems.

If the surge exceeds the portable power station’s limit, the inverter may shut down, alarm, or fail to start the motor at all.

Estimating power draw from horsepower and amps

Many garage door openers are labeled in horsepower (HP). A rough conversion is:

Watts ≈ HP × 746 ÷ efficiency

But nameplate current (amps) is usually a better guide. For a 120 V system:

Watts ≈ Volts × Amps

So an opener nameplate of 4 A at 120 V suggests around 480 W running draw, with perhaps 800–1,000 W peak on startup. Gate motors may list similar or slightly higher current, depending on gate size and mechanism.

Watt-hours and how many cycles you get

Watt-hours (Wh) describe stored energy. If a power station is rated at 500 Wh and your opener uses 500 W while moving, you might think you only get one hour of continuous motion. But doors and gates run only for seconds per cycle.

For example, if a garage door uses 500 W for 15 seconds to open and 15 seconds to close, that is 30 seconds of runtime:

  • Power: 500 W
  • Time: 0.5 minutes (30 seconds) = 0.0083 hours
  • Energy per open+close: 500 W × 0.0083 h ≈ 4.2 Wh

Even a modest power station can theoretically operate many cycles before its battery is depleted. Real-world results are lower due to inverter losses and battery management limits, but the concept holds: access devices are intermittent loads, not continuous drains.

Waveform and compatibility

Most modern openers and gate controls expect a pure sine wave AC supply, similar to the grid. Some inexpensive inverters output a modified sine wave, which can cause:

  • Extra heat in motors
  • Hum or buzzing noises
  • Possible malfunction of sensitive electronics or safety sensors

For reliability and to protect electronics, a pure sine wave output is strongly preferred for garage and gate use.

Duty cycle and thermal limits

Portable power stations have internal limits on how long they can run near their maximum wattage before overheating. Similarly, garage door and gate motors are designed for intermittent duty. Repeated cycling under backup power can push both the inverter and the motor toward thermal limits, triggering shutdowns or protective pauses.

Example values for illustration.
DeviceTypical Running WattsEstimated Surge WattsNotes
Single-car garage door opener300–600 W600–1,200 WShort runs, 10–20 seconds per move
Double-car garage door opener400–800 W800–1,600 WHeavier load, more surge margin needed
Residential swing gate motor200–500 W400–1,000 WVaries with gate weight and wind
Residential sliding gate motor250–600 W500–1,200 WLonger travel distance can increase runtime
Small control electronics only5–30 WSame as runningKeypads, sensors, logic boards

How Portable Power Stations Actually Run Doors and Gates

In practice, using a portable power station for a garage door opener or gate is about managing short bursts of relatively high power, not long continuous loads.

Startup: the critical moment

The most demanding part of the cycle is the instant when the motor starts moving the door or gate. At this moment:

  • Inrush current spikes, drawing surge watts from the inverter.
  • The inverter must maintain voltage without sagging below the opener’s minimum operating threshold.
  • Any additional loads on the same power station (lights, chargers) add to the total draw.

If the inverter cannot supply enough surge, one of three things usually happens:

  • The opener hums but does not move, then times out.
  • The power station alarms or shuts down immediately.
  • The lights dim and the opener trips its internal protection.

Once the door or gate is moving, power draw typically stabilizes at the running watt level, which is easier for most portable units to handle.

Short duty cycle and energy use

Each open or close cycle is short, often 10–30 seconds. That means total energy per cycle is low, but the power draw during that short time is relatively high. Portable power stations are well suited to this pattern because:

  • They can deliver high power for short bursts without overheating.
  • Battery impact per cycle is small, preserving capacity for many operations.
  • The inverter can rest between cycles, allowing internal components to cool.

This is why a compact power station with adequate surge capacity can still provide dozens of door or gate operations on a single charge.

Gate specifics: travel length and resistance

Gates behave a bit differently from garage doors:

  • Sliding gates may run longer per cycle because they travel farther.
  • Swing gates may face variable wind resistance, increasing load.
  • Hinges, rollers, and tracks in poor condition raise current draw.

All of these factors affect how a portable power station sees the load. A gate that moves freely will draw near its rated running watts; one that binds or fights wind may approach surge levels for longer, stressing the inverter and reducing the number of cycles per charge.

Control electronics vs. motor load

Many gate systems and some garage doors have separate low-wattage electronics that stay on continuously: keypads, safety sensors, logic boards, and wireless receivers. These typically draw very little power, but:

  • They add a constant background load if left connected for hours.
  • They may be more sensitive to poor waveform or voltage dips than the motor itself.

In some cases, you may choose to power only the opener when needed, rather than leaving the entire system energized from the portable power station for long periods.

Real-World Scenarios: Matching Power Stations to Doors and Gates

Translating specs into real-world behavior helps you choose a power station size and understand expectations during an outage.

Scenario 1: Single-car garage, occasional emergency use

Consider a single-car garage door opener with a running draw around 400 W and a surge requirement near 800–1,000 W. A portable power station with:

  • Continuous output of at least 600–800 W
  • Surge capability around 1,200–1,600 W
  • Battery capacity of 300–500 Wh

could typically handle several dozen open/close cycles on a full charge. In an outage, you might only need to open the door once to get the car out and close it once for security, using a very small fraction of the battery.

Scenario 2: Double garage door and driveway gate on one unit

Now imagine a double-car garage door opener and a residential sliding gate, both reasonably efficient. If you try to power both from the same compact power station and run them close together in time, you might see:

  • Combined running draw near 700–1,000 W
  • Overlapping surge demands that exceed the inverter’s peak rating
  • Voltage dips that confuse control boards or trip safety sensors

In this case, you would either need a larger power station with higher surge capacity or a strategy to run only one motorized device at a time, allowing the inverter to recover between operations.

Scenario 3: Older, stiff door with high startup resistance

An older garage door with worn rollers or poor lubrication can draw much higher current at startup. On grid power, this may go unnoticed, but on a portable power station you might see:

  • Frequent inverter shutdowns exactly at the moment of startup
  • Door stopping mid-travel as friction increases load
  • Noticeable difference in performance between warm and cold weather

Here, mechanical maintenance (lubricating rollers, adjusting springs, ensuring tracks are aligned) can significantly reduce the electrical load, making the door easier to power from a modest portable unit.

Scenario 4: Gate used frequently during a prolonged outage

A residential gate that opens and closes many times per day will draw more total energy than a garage door used only a few times. In a multi-day outage, a mid-sized power station might be sufficient for:

  • Dozens of gate cycles over several days, if you minimize other loads
  • Even more cycles if you partially recharge during the day from solar or a vehicle outlet

But if the gate is in heavy use, you may need to prioritize which vehicles use the gate and consider manual override options to conserve battery capacity.

Common Mistakes and Troubleshooting When a Power Station Will Not Run the Opener

When a portable power station fails to run a garage door opener or gate, the cause is often predictable once you know what to look for.

Mistake 1: Ignoring surge watts

Choosing a power station based only on continuous watts and battery capacity is a common error. Symptoms include:

  • Inverter beeps and shuts off the instant you press the opener button.
  • The opener light comes on, but the motor does not move.
  • The power station display shows a brief spike in watts before cutting out.

In these cases, the running watts may be within limits, but the surge rating is too low for motor startup.

Mistake 2: Overloading with extra devices

Plugging lights, chargers, or other tools into the same power station can push the total draw over the limit during door or gate operation. Troubleshooting cues:

  • Systems work fine when nothing else is plugged in.
  • Failures happen only when multiple loads are active at once.
  • Reducing background loads restores reliable operation.

For access devices, it is often best to keep the power station dedicated to the opener or gate during motion.

Mistake 3: Underestimating extension cord losses

Long, thin extension cords can cause voltage drop, especially with motor loads. Signs include:

  • Door or gate starts moving slowly and then stalls.
  • Power station works fine when placed closer with a shorter cord.
  • Warm extension cord under load, indicating high resistance.

Using a shorter, appropriately rated extension cord can reduce these issues and improve startup performance.

Mistake 4: Misreading labels and HP ratings

People often assume that a “1/2 HP” or “3/4 HP” opener must draw hundreds or thousands of watts continuously. In reality, modern openers can be quite efficient, and the HP label does not directly equal electrical demand. Better approaches include:

  • Checking the opener’s nameplate for amperage at 120 V.
  • Using a plug-in power meter on grid power to measure actual running watts.
  • Adding a 2–3x safety margin for surge when sizing the power station.

Mistake 5: Expecting continuous operation

Garage door and gate motors are not meant to run continuously. If you attempt many back-to-back cycles on backup power, you may see:

  • Thermal shutdowns in the opener motor.
  • Inverter temperature warnings or fan running at high speed.
  • Noticeable drop in available power as the battery voltage sags.

Allowing rest periods between cycles protects both the power station and the motor.

Safety Basics When Powering Doors and Gates from a Portable Unit

Using a portable power station with access equipment is generally safer than improvised generator setups, but there are still important safety practices to follow.

Avoid backfeeding the home electrical system

A portable power station should not be plugged into household wiring in a way that backfeeds the panel or circuits. Backfeeding can endanger utility workers and damage equipment. Instead:

  • Plug the opener or gate control directly into the power station’s outlet or a properly rated extension cord.
  • Leave permanent wiring and transfer equipment to a qualified electrician if you need whole-circuit backup solutions.

Respect load limits and thermal protections

Do not bypass or defeat any protective features on the power station or opener. If the unit shuts down or shows an over-temperature warning:

  • Allow it to cool before trying again.
  • Reduce the number of consecutive cycles.
  • Check for mechanical binding that may be increasing load.

Overriding protections can lead to premature failure or, in extreme cases, fire risk.

Maintain clear travel paths and safety sensors

During outages, it can be tempting to rush. Still:

  • Ensure the door or gate path is clear before operating on backup power.
  • Confirm that safety sensors and auto-reverse features are functioning.
  • Avoid standing in the path of moving equipment while testing on a new power source.

Even under backup power, the same mechanical hazards exist.

Use appropriate cords and dry locations

Place the portable power station in a dry, ventilated area away from standing water. When using extension cords:

  • Choose cords rated for outdoor use if used outside.
  • Keep connections off the ground where possible.
  • Avoid running cords under doors in ways that could pinch or damage insulation.

Moisture and damaged insulation increase shock and fire risks.

Plan for manual override

Every powered door or gate should have a manual release or mechanical override. Even with a portable power station available, you should:

  • Know where the manual release is and how to use it.
  • Practice operating the door or gate manually in daylight before an emergency.
  • Use backup power as a convenience, not the only access plan.

Maintenance and Storage: Keeping Your Backup Ready

For a portable power station to reliably run your garage door or gate when needed, both the power station and the mechanical systems must be maintained.

Maintaining the portable power station

Key practices include:

  • Regular charging: Recharge the unit every few months if it is not used, or as recommended by the manufacturer, to prevent deep discharge damage.
  • Moderate storage temperatures: Store in a cool, dry place away from direct sunlight and extreme temperatures to preserve battery health.
  • Occasional test runs: Periodically connect the opener or gate and perform a test cycle to confirm compatibility and function.

These routines help ensure the power station delivers its rated wattage and runtime when the grid goes down.

Maintaining garage doors and gates to reduce load

Mechanical maintenance directly affects electrical demand. To keep loads manageable:

  • Lubricate rollers, hinges, and tracks periodically with appropriate lubricants.
  • Check spring tension and balance for garage doors; a properly balanced door should lift with modest force when disconnected from the opener.
  • Inspect gate hinges, rollers, and tracks for rust, misalignment, or debris.

A smooth, well-maintained system draws less current, making it easier for a portable power station to start and run the motor.

Battery health and long-term capacity

Over years of use, all batteries lose some capacity. To slow this process in your portable power station:

  • Avoid storing it fully discharged for long periods.
  • Do not leave it at maximum charge in very hot environments.
  • Use it periodically rather than letting it sit idle for years.

As capacity declines, you may still have enough power for several door or gate cycles, but total runtime for other loads will shrink.

Documenting your setup

It helps to keep simple notes near the power station, such as:

  • Which outlet or cord to use for the garage door or gate.
  • Approximate number of cycles you can expect on a full charge.
  • Any special steps, such as unplugging other loads before operating the door.

Clear documentation makes it easier for all household members to use the system safely during an outage.

Example values for illustration.
ItemRecommended PracticeTypical Interval
Recharge portable power stationTop up to around 50–80% if stored; full charge before stormsEvery 1–3 months if unused
Test run garage door on power stationPerform at least one open and close cycleEvery 3–6 months
Lubricate garage door moving partsUse suitable lubricant on rollers, hinges, and tracksEvery 6–12 months
Inspect gate hinges and tracksCheck for rust, binding, and debris; clean as neededEvery 6–12 months
Review manual override procedurePractice disengaging and reengaging opener or gateAnnually

Related guides: Inverter Efficiency Explained: Why Your Runtime Is Shorter Than ExpectedExtension Cords and Power Strips: Safe Practices With Portable Power StationsWhy Does AC Output Stop Under Load? Common Causes and Fixes

Practical Takeaways and Key Specs to Look For

Using a portable power station for a garage door opener or gate is mainly about handling motor surge and having enough stored energy for the number of cycles you care about. Most residential openers draw modest running watts, so even mid-sized units can provide many operations, but only if surge capacity, waveform quality, and mechanical condition are all in your favor.

For most homes, the practical approach is to size the power station so it can comfortably start the largest motorized access device you have, then treat each open or close as a short, high-power event rather than a continuous drain. Regular testing and basic mechanical maintenance will reveal problems in advance, not during a storm or outage.

Specs to look for

  • Continuous AC output (W): Look for at least 1.5–2 times your opener’s measured running watts (often 600–1,000 W for typical setups). This ensures the inverter is not operating at its limit during motion.
  • Surge/peak output (W): Aim for 2–3 times the opener’s running watts (often 1,000–2,000 W). Higher surge headroom helps the motor start reliably, especially for older or heavier doors and gates.
  • Battery capacity (Wh): For occasional emergency use, 300–700 Wh is often enough; for frequent gate use or multi-day outages, 700–1,500 Wh provides more cycles and flexibility.
  • Waveform type: Prefer a pure sine wave inverter. It better mimics grid power, reduces motor noise and heat, and improves compatibility with safety sensors and control electronics.
  • AC outlet rating and count: Ensure at least one 120 V outlet rated to the unit’s full continuous wattage. Multiple outlets are useful, but avoid overloading by running several high-draw devices at once.
  • Display and monitoring: A clear wattage and battery percentage display helps you see startup spikes, monitor runtime impact per cycle, and adjust usage during outages.
  • Recharge options and speed: Look for flexible input methods (wall, vehicle, solar) and reasonable recharge times (for example, 3–8 hours from wall). Faster, flexible charging makes it easier to recover between storms or long outages.
  • Operating temperature range: Check that the unit is rated for the temperatures typical in your garage or gate area. Cold can temporarily reduce capacity; heat can trigger thermal limits sooner.
  • Portability and placement: Consider weight and handle design so you can safely move the unit near the opener or gate, minimizing extension cord length and voltage drop.

By focusing on these practical specs and aligning them with your specific door and gate loads, you can choose a portable power station that works reliably when you need it most, without overspending on capacity you will never use.

Frequently asked questions

Which specs and features matter most when choosing a portable power station for a garage door opener and gate?

Look for adequate continuous AC output, a high surge/peak rating, and sufficient battery capacity in watt-hours for the number of cycles you want. A pure sine wave inverter, correctly rated AC outlets, effective thermal protections, and convenient recharge options (wall, vehicle, or solar) are also important for reliable operation.

What common mistake causes a power station to fail at motor startup?

Ignoring surge watts is a frequent error: an inverter with enough continuous watts can still be unable to deliver the short inrush current motors need to start. Running other loads at the same time or using thin, long extension cords can make the problem worse.

Is it safe to plug a portable power station into household wiring or backfeed the electrical panel?

No. Backfeeding household wiring can endanger utility workers and damage equipment. Always plug the opener or gate control directly into the power station or consult a qualified electrician to install an approved transfer mechanism for whole-circuit backup.

How many open/close cycles can I expect from a typical 500 Wh unit?

Because each cycle often uses only a few watt-hours (commonly 4–10 Wh for many garage doors), a 500 Wh battery can theoretically provide dozens to hundreds of cycles. Real-world counts are lower due to inverter losses, higher startup energy on older or binding doors, and any background loads the unit must support.

Will a modified sine wave inverter harm my garage door opener or gate electronics?

Modified sine wave outputs can cause increased motor heat, humming, or erratic behavior in sensitive control electronics and sensors. For best compatibility and to reduce risk of malfunction, a pure sine wave inverter is recommended.

The opener hums but won’t move when powered by the station—what should I check?

First verify the power station’s surge capability and remove any other plugged-in loads. Next try a shorter, heavier-gauge extension cord and check the door or gate for mechanical binding or low battery in the opener. If problems persist, perform mechanical maintenance or test with a higher-surge unit.

Backup Power for Security Cameras and Wi-Fi: Sizing a 24/7 Setup

Portable power station backing up home Wi-Fi router and security cameras

To keep security cameras and Wi-Fi running 24/7 during outages, you must match your portable power station’s wattage and battery capacity to the combined load and desired runtime. That means calculating watts, watt-hours, and expected backup time before you buy or set anything up.

People often search for how to size backup power, why their cameras shut off early, or how to get longer runtime from a battery backup. Terms like continuous watts, surge watts, runtime, battery capacity, inverter efficiency, and pass-through charging all affect how long your home network and cameras stay online. When you understand these basics, you can design a backup system that quietly keeps your Wi-Fi, NVR, and smart cameras working while the rest of the house is dark.

This guide explains what backup power for security cameras and Wi-Fi really means, how it works with portable power stations, what runtimes to expect, and which specs matter most for a reliable 24/7 setup.

What “24/7 Backup Power” for Cameras and Wi-Fi Really Means

For a home, having 24/7 backup power for security cameras and Wi-Fi means your monitoring and internet gear keep running continuously, even when the grid drops, without you having to rush around plugging and unplugging devices.

In practice, this usually means:

  • Your modem, router, and any mesh Wi-Fi nodes stay powered.
  • Your security cameras, NVR/DVR, and any PoE switch or hubs stay on.
  • The backup source (often a portable power station) can supply enough watts and watt-hours to cover the load for the length of an outage you care about.

For many homeowners, the goal is not truly unlimited runtime, but enough backup hours to ride through typical outages: maybe 4–8 hours for short cuts, or 12–24 hours for storms and planned maintenance.

Why this matters:

  • Continuous surveillance: Cameras stop recording when power drops, creating blind spots.
  • Remote access: Without Wi-Fi and internet, you cannot view live feeds or get alerts on your phone.
  • Alarm integrations: Smart locks, sensors, and cloud-based alarms often depend on your home network.

A well-sized backup system protects not just video recording, but the entire chain: power → network → cameras → cloud/app access.

Key Power Concepts: Watts, Watt-Hours, and Runtime

To size backup power for security cameras and Wi-Fi, you only need a few core concepts: watts, watt-hours, and runtime. Understanding these will let you estimate how long a portable power station can keep your system online.

Watts: How much power your gear draws

Watts (W) measure how much power a device uses at any moment.

  • A typical modem/router combo: about 8–20 W.
  • A mesh Wi-Fi node: around 5–15 W.
  • A single Wi-Fi camera: about 3–8 W.
  • A PoE camera via NVR or switch: often 5–12 W per camera.
  • An NVR/DVR: roughly 10–30 W, depending on drives and channels.

Add up the watts of all devices you want to back up. This gives your continuous load. Your portable power station’s AC output rating (continuous watts) must be higher than this total.

Watt-hours: How much energy your battery stores

Watt-hours (Wh) measure energy capacity. A 500 Wh battery can, in theory, run a 50 W load for 10 hours (500 ÷ 50 = 10). In reality, inverter losses and other inefficiencies reduce usable capacity by 10–20% or more.

Approximate usable capacity:

  • Multiply the rated Wh by about 0.8–0.9 for AC loads.

Example: A 600 Wh portable power station with 85% efficiency gives around 510 Wh usable (600 × 0.85).

Runtime: How long your system can stay online

Estimated runtime (hours) is:

Runtime ≈ Usable Wh ÷ Total load (W)

Example: 510 Wh usable and a 40 W combined load (router + NVR + 4 cameras):

Runtime ≈ 510 ÷ 40 ≈ 12.75 hours.

This is an estimate; real-world runtimes vary with temperature, battery age, and how steady your load is.

Continuous vs. surge watts

Some devices briefly draw more power when starting up. This is usually minor for networking gear, but can matter for NVRs with multiple drives or other electronics on the same power station.

  • Continuous watts: What the power station can supply indefinitely.
  • Surge watts: Short bursts (seconds) allowed for startup spikes.

For a camera and Wi-Fi setup, continuous watts are usually the main concern, but having some surge headroom helps avoid nuisance shutdowns.

DeviceTypical Power Draw (W)Notes
Modem + Router10–25Varies with Wi-Fi radios and traffic
Mesh Node5–15Each node adds to total load
Wi-Fi Camera3–8Higher if with pan/tilt or IR on
PoE Camera5–12Power drawn via PoE switch or NVR
NVR/DVR10–30More drives and channels use more watts
PoE Switch10–60+Depends on number of powered ports
Example values for illustration.

Real-World Backup Scenarios for Home Cameras and Wi-Fi

Once you know watts and watt-hours, you can model realistic backup scenarios. Here are common home setups and what they might need from a portable power station.

Scenario 1: Basic Wi-Fi and a few cloud cameras

Many homes rely on Wi-Fi cameras that record to the cloud and a phone app. The minimum you must back up is your modem and router.

  • Modem + router: ~15 W
  • 3 Wi-Fi cameras (each with its own power adapter): ~5 W × 3 = 15 W
  • Total load: ~30 W

With a portable power station offering about 400 Wh usable:

  • Runtime ≈ 400 ÷ 30 ≈ 13 hours.

This is often enough for overnight outages. If your cameras can fall back to local recording on microSD but still need Wi-Fi for notifications, this setup keeps both storage and alerts active.

Scenario 2: NVR system with PoE cameras

A wired system with PoE cameras usually has a higher, but still modest, power draw.

  • Modem + router: ~15 W
  • NVR with hard drive: ~20 W
  • 4 PoE cameras at 8 W each: ~32 W
  • Total load: ~67 W (round to 70 W for margin)

With about 700 Wh usable:

  • Runtime ≈ 700 ÷ 70 ≈ 10 hours.

For longer outages, you could:

  • Power only the NVR and the most critical cameras.
  • Disable nonessential features (like continuous IR on some cameras) if possible to cut watts.

Scenario 3: Mixed system with mesh Wi-Fi

Large homes may run a modem, main router, and multiple mesh nodes, plus a mix of Wi-Fi and PoE cameras.

  • Modem + main router: ~20 W
  • 2 mesh nodes: ~10 W each = 20 W
  • 4 Wi-Fi cameras: ~5 W each = 20 W
  • 4 PoE cameras via switch: ~8 W each = 32 W
  • PoE switch overhead: ~15 W
  • Total load: ~107 W (round to 110 W)

With about 900 Wh usable:

  • Runtime ≈ 900 ÷ 110 ≈ 8.2 hours.

To stretch runtime, you could power only critical mesh nodes or temporarily shut down nonessential cameras during long outages.

Scenario 4: Prioritizing Wi-Fi over cameras

In some cases, you might choose to keep Wi-Fi and internet online for phones and laptops, while allowing some cameras to go offline. This can be a strategic choice when battery capacity is limited.

  • Modem + router only: ~15–20 W
  • Portable power with 500 Wh usable:
  • Runtime ≈ 500 ÷ 20 ≈ 25 hours.

This approach maximizes communication and remote access, while you selectively power only the most important cameras.

Scenario 5: Adding solar for extended outages

For areas with frequent or long outages, pairing a portable power station with solar panels can extend runtime.

  • Daily camera + Wi-Fi consumption: for a 60 W continuous load, about 1,440 Wh per day (60 × 24).
  • Solar input: a 200 W panel in good sun might average 600–800 Wh per day.

In this case, solar can meaningfully extend backup time but may not fully support a true 24/7 load unless you reduce power use or add more panels and capacity. The key is matching realistic solar charging to your average daily consumption.

Common Sizing Mistakes and Troubleshooting Short Runtime

Many homeowners find that their portable power station does not keep cameras and Wi-Fi running as long as expected. This almost always comes down to a few predictable issues.

Mistake 1: Underestimating total load

People often guess power draw from labels or online specs, which may list only typical or idle watts. Real-world usage can be higher.

  • Multiple mesh nodes, extenders, and hubs quietly add up.
  • PoE cameras draw more power at night when IR LEDs are on.
  • NVRs and switches may use more under heavy network traffic.

Troubleshooting cue: If runtime is much shorter than your math predicted, measure actual consumption with a plug-in watt meter on your normal AC outlet before sizing your backup.

Mistake 2: Ignoring inverter and conversion losses

Portable power stations convert battery DC to AC, and you may also convert back to DC with power bricks. Each step loses energy.

  • Assuming 100% of rated Wh is available leads to optimistic runtimes.
  • High loads relative to battery size can increase losses.

Troubleshooting cue: Use 70–90% of rated capacity in calculations, depending on quality and age. If a 500 Wh unit powers a 50 W load for only 7 hours, that is 350 Wh usable (70%). Rework your sizing with that number.

Mistake 3: Not accounting for 24/7 duty cycle

Security gear runs continuously. Some people size backup as if it were for occasional laptop charging, not constant load.

  • Even a small 40–60 W load adds up over 24 hours.
  • Short outages may be fine; long ones drain batteries quickly.

Troubleshooting cue: Convert your continuous watts into daily watt-hours (W × 24) and compare to your battery and any charging sources. If daily use exceeds daily charging, your system will eventually run down.

Mistake 4: Powering unnecessary devices

During a blackout, every extra device on the backup cuts runtime.

  • Smart speakers, TVs, and chargers may be plugged into the same power strip.
  • Nonessential IoT hubs can quietly consume watts.

Troubleshooting cue: During outages, plug only essential devices into the portable power station: modem, router, NVR, PoE switch, and critical cameras.

Mistake 5: Battery age and temperature

Batteries lose capacity over time and perform differently with temperature swings.

  • Older batteries may deliver significantly less than their original Wh rating.
  • Very cold or very hot environments reduce effective capacity.

Troubleshooting cue: If a system that once met your runtime requirements no longer does, consider battery aging and storage conditions. You may need to derate your expectations or upgrade capacity.

Mistake 6: No pass-through or improper charging

If you expect the portable power station to sit between the wall and your gear, staying charged and instantly taking over during an outage, you need suitable pass-through behavior.

  • Some units support powering loads while charging; others do not recommend it or limit output.
  • Input limits from the wall or solar may be too low to keep up with load plus recharging.

Troubleshooting cue: Check whether your model supports safe pass-through operation and what its input limit is. If the input is lower than your continuous load, the battery will slowly drain even when plugged in.

Safety Basics for Backing Up Home Network and Cameras

Backing up security cameras and Wi-Fi with a portable power station is generally straightforward, but you should still follow some basic safety practices.

Use appropriate outlets and cords

Portable power stations typically provide standard AC outlets and DC outputs. For a home camera and Wi-Fi setup:

  • Use grounded power strips rated for the load if you need more outlets.
  • Avoid daisy-chaining multiple power strips or extension cords.
  • Do not exceed the continuous watt rating of the power station.

Keep cords tidy and away from foot traffic to avoid tripping hazards and accidental unplugging.

Avoid DIY panel connections

Do not attempt to wire a portable power station directly into your home’s electrical panel, circuits, or outlets. This can be dangerous and may violate electrical codes.

  • If you want whole-circuit backup, consult a licensed electrician.
  • Use the power station only as a standalone source with its own outlets.

Ventilation and placement

Place the power station in a location that is:

  • Dry and protected from water or condensation.
  • Well-ventilated, not covered by cloth or boxes.
  • Out of direct intense sunlight and away from heat sources.

This helps prevent overheating and extends battery life.

Respect battery chemistry limitations

Different portable power stations use different chemistries, commonly lithium-ion or lithium iron phosphate. Regardless of type:

  • Do not open the unit or attempt to modify the battery.
  • Do not use if the case is swollen, cracked, or damaged.
  • Avoid charging or operating outside the manufacturer’s recommended temperature range.

Grounding and surge protection

For sensitive networking gear and NVRs:

  • Consider using a quality surge protector between the power station and your devices.
  • Do not defeat grounding pins on plugs or adapters.

While portable power stations often have built-in protections, an extra layer can help shield your equipment from unexpected surges when returning to grid power.

Label and communicate

If multiple people in your home may interact with the backup system:

  • Label which outlets and strips are backed up.
  • Explain which devices should stay connected during outages.
  • Show how to check battery level and safely turn the power station on and off.
Safety AreaGood PracticeWhy It Matters
Cord ManagementUse rated strips, avoid daisy-chainsReduces fire and trip hazards
Electrical PanelLeave to licensed electriciansPrevents backfeed and code issues
PlacementDry, ventilated, away from heatHelps avoid overheating and damage
Battery HandlingDo not open or modify unitsLimits risk of shock or fire
Surge ProtectionUse surge strips for sensitive gearProtects routers and NVRs
Example values for illustration.

Putting It All Together: Practical Sizing Steps and Key Specs

Designing reliable backup power for security cameras and Wi-Fi comes down to a few practical steps: measure your load, decide how many hours of runtime you need, and choose a portable power station with suitable capacity and output.

A simple workflow is:

  1. List every device you want to keep online (modem, router, mesh nodes, NVR, PoE switch, cameras).
  2. Measure or estimate each device’s watts, then add them for a total continuous load.
  3. Multiply that load by your target runtime to get required watt-hours (W × hours).
  4. Adjust for efficiency by dividing by about 0.8–0.9 to find a realistic battery size.
  5. Confirm the power station’s continuous watt rating exceeds your total load with some margin.

You can also plan for tiers of backup: always-on devices (modem, router, main NVR) and optional devices (extra mesh nodes, noncritical cameras) that you can unplug during extended outages to stretch runtime.

Specs to look for

  • Battery capacity (Wh): Look for enough watt-hours to cover your load for at least 1.5–2× your typical outage length. For example, 400–800 Wh for modest systems, more for large PoE setups. This directly sets potential runtime.
  • AC continuous output (W): Choose a rating comfortably above your total camera + Wi-Fi load, often 100–300 W for home networking gear. Extra headroom reduces stress and avoids overload shutdowns.
  • Inverter efficiency: Seek units that specify high efficiency (around 85–90% or better on AC). Higher efficiency means more usable energy and longer runtime from the same rated capacity.
  • Pass-through capability: Look for support to power devices while charging from the wall, with clear guidance from the manufacturer. This allows seamless switchover during outages and keeps the battery topped off.
  • Number and type of outlets: Ensure enough AC sockets and possibly DC outputs for your modem, router, NVR, and PoE switch. Adequate outlets reduce the need for extra strips and simplify wiring.
  • Input charging power (W): Check how fast the unit can recharge from AC or solar, such as 100–300 W. Higher input power shortens recovery time between outages and helps sustain longer events with solar.
  • Battery cycle life: Look for higher cycle ratings if you expect frequent use (hundreds to thousands of cycles). Better cycle life keeps capacity closer to original over years of service.
  • Low-noise operation: Consider fan noise levels and cooling behavior. Quiet operation is important if the power station sits near living or sleeping areas.
  • Display and monitoring: A clear screen showing watts in/out and remaining runtime helps you manage loads during an outage and make informed decisions about which devices to keep powered.
  • Operating temperature range: Check that the unit’s recommended range matches where you plan to store and use it, especially in garages, basements, or unconditioned spaces, to maintain performance and safety.

By matching these specs to the real-world power needs of your cameras and Wi-Fi, you can build a backup setup that stays online when it matters most, with predictable runtime and room to grow.

Frequently asked questions

Which specs and features should I prioritize when choosing backup power for security cameras and Wi‑Fi?

Prioritize battery capacity (Wh) to meet your desired runtime, and an AC continuous output (W) that exceeds your total load with margin. Also check inverter efficiency, pass-through behavior, input charging power, outlet types/count, and battery cycle life. These combine to determine usable energy, runtime, and how the unit performs during and after outages.

Why does my backup system run out of power faster than my calculations predicted?

Common causes are underestimating the total continuous load, inverter and conversion losses, reduced capacity from battery age or temperature, and devices drawing more at startup or with IR/night modes on. Measure real-world draw with a watt meter and apply an efficiency derate (typically 70–90%) when recalculating runtime.

What safety precautions should I take when using a portable power station for network and camera backup?

Use properly rated grounded cords and power strips, keep the unit in a dry, ventilated location, and avoid DIY connections to home panels. Do not open or modify the battery, follow operating temperature limits, and consider additional surge protection for sensitive networking equipment.

Can a single portable power station reliably power PoE cameras and a PoE switch?

Yes, but you must confirm the PoE switch’s total power budget and the combined continuous watt draw fit within the power station’s AC output rating and usable Wh. Account for the switch overhead, camera peak draws, and any startup surges when choosing capacity and continuous watt ratings.

How can I estimate how long my router and cameras will run on a given battery?

Sum the continuous watts for all devices, calculate usable Wh (battery Wh × ~0.8–0.9 for AC), then divide usable Wh by total load (Runtime ≈ usable Wh ÷ load). For greater accuracy, measure actual device draw with a plug-in watt meter and include inverter losses in the calculation.

Is adding solar a practical way to maintain near‑24/7 uptime for cameras and Wi‑Fi?

Solar can extend runtime and recharge batteries during extended outages, but practicality depends on matching daily solar energy to your 24‑hour consumption and having enough battery buffer. A modest panel may partially offset use, but sustaining true 24/7 uptime usually requires multiple panels, adequate charging input, and sufficient battery capacity.